

Page 1
Installation Instructions and Care
Eventually, you may want to replace this light fitting
When your light fitting comes to the end of its life or you choose to update or upgrade it by
replacing it, please do not dispose of it with your normal household waste, please recycle where
facilities exist. When you need to dispose of this fitting, check with your retailer or local authority
for suitable options. New regulations require the recycling of Waste from Electrical and Electronic
Equipment (European “WEEE Directive” effective August 2005—UK WEEE Regulations effective 2nd
January 2007). Environment Agency Registered Producer: WEE/GA0248QZ
If you experience problems...
If your light is defective or develops a fault, please return it to the place where you bought it. You can call our
Helpline for advice. The Helpline will gladly give advice on any aspect of any Eterna Lighting product but may not
be able to give specific instructions regarding individual installations.
If in doubt, consult a qualified electrician.
Help Line
Tel: 01933 673 144
Fax: 01933 678 083
Email: sales@eterna-lighting.co.uk
For all other information visit our website www.eterna-lighting.co.uk
SAFETY AND INSTALLATION
INSTRUCTIONS
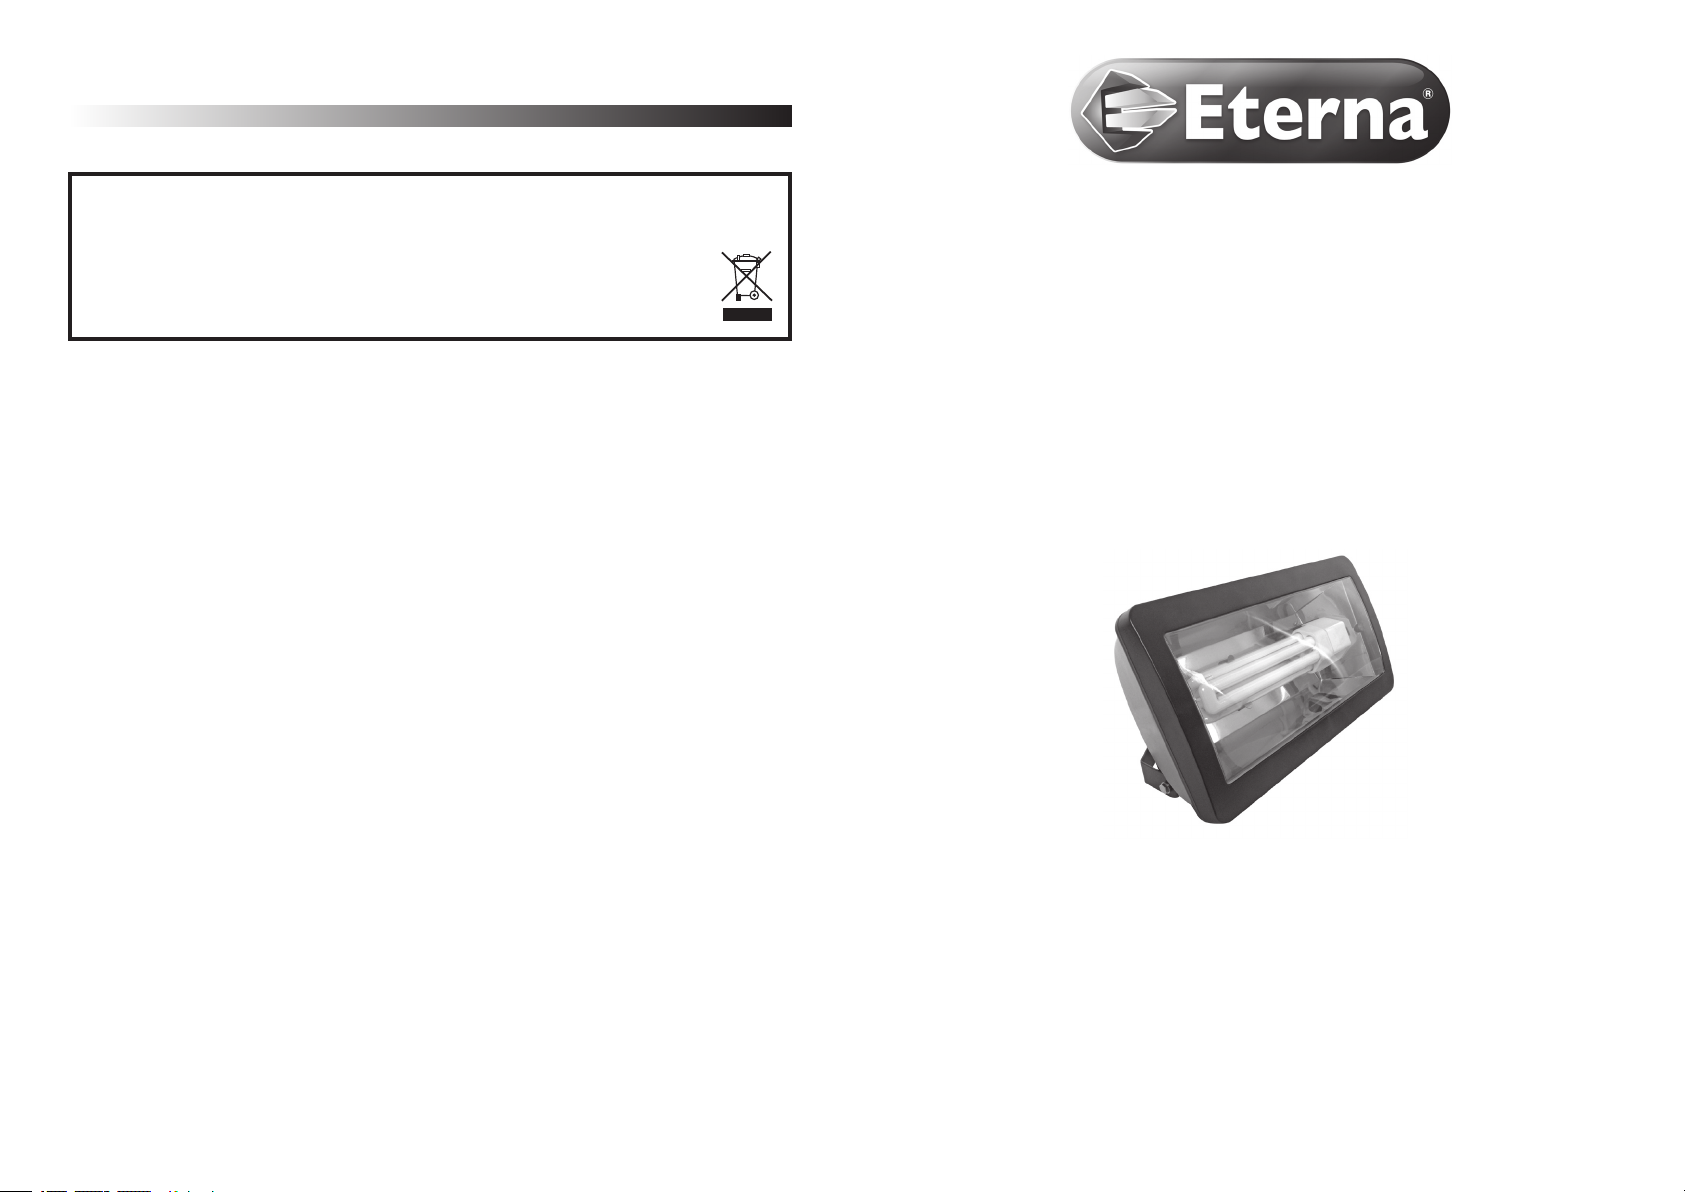
Models: FL157B / FL157BPC
57W Fluorescent Floodlight with Photocell (optional)
Issue 090625-1PA
IMPORTANT! Please read these instructions before installing your new fitting.
Please retain for future reference.
Pack Contents:
Floodlight x 1
57W Fluorescent Lamp x 1
Page 2
General Information and Safety Instructions
Installation Instructions and Care
Read this first
Check the pack and make sure you have all of the
parts listed on the front of this booklet. If not, contact
the outlet where you bought this product.
This product contains glass, care must be taken when
assembling, fitting or handling to prevent personal
injury or damage to the product.
This light fitting must be installed by a competent
person in accordance with the Building Regulations
making reference to the current edition of the IEE
Wiring Regulations (BS7671). The Building Regulations
may be obtained from HMSO or viewed and
downloaded from www.communities.gov.uk following
the link for Building Regulations.
As the buyer, installer and/or user of this product it is
your own responsibility to ensure that this fitting is fit
for the purpose for which you have intended it. Eterna
Lighting cannot accept any liability for loss, damage or
premature failure resulting from inappropriate use.
If in any doubt, consult a qualified electrician.
The lamps (bulbs/tubes) supplied with this fitting are
consumable parts and therefore may be outside of any
warranty offered.
Switch off the mains before commencing installation
and remove the appropriate circuit fuse.
When working at heights, please use a suitable
platform.
Disconnect the fitting from the electrical supply before
flash or high voltage testing.
Suitable for indoor and outdoor use.
FL157BPC - Do not install under eaves or in a location
of frequent shadow that will prevent the light from
switching on when required. Do not install near other
sources of bright light that will prevent the light from
switching on when the ambient light level falls.
This product is suitable for installation on surfaces
with normal flammability e.g. wood, plasterboard, and
masonry. It is not suitable for use on highly flammable
surfaces (e.g. polystyrene, textiles).
Before making fixing hole(s), check that there are no
obstructions hidden beneath the mounting surface
such as pipes or cables.
The chosen location of your new fitting should allow
for the product to be securely mounted and safely
connected to the mains supply (lighting circuit).
When choosing the location for your new fitting,
ensure that the fixings will be anchored in a solid
surface e.g. concrete, brick or a joist - do not fix directly
onto panelling, cladding, plasterboard etc.
If the location of your new fitting requires the provision
of a new electrical supply, the supply must conform
with the requirements of the Building Regulations
making reference to the current edition of the IEE
Wiring Regulations (BS7671).
This product is designed for permanent connection to
fixed wiring: this should be either a suitable lighting
circuit (protected with a 5 or 6 Amp MCB or fuse) or a
fused spur (with a 3 Amp fuse) via a fused connection
unit. If the connection to your fitting is to be made
in a humid or wet location, the connections must
be contained within an approved, ingress protected,
water-proof connection box (not supplied).
We recommend that the supply incorporates a switch
for ease of operation.
Make connections to the electrical supply in
accordance with the following code:
Live - Brown or Red
Neutral - Blue or Black
Earth - Green and Yellow
When making connections, ensure that the terminals
are tightened securely and that no strands of wire
protrude. Check that the terminals are tightened onto
the bared conductors and not onto any insulation.
Wrap loose terminal blocks well with insulating tape.
This product must be connected to Earth.
IMPORTANT— Always switch off at the mains before
changing the lamp.
If the external flexible cable of this luminaire is
damaged it shall be exclusively replaced by repair or
service agent or similar qualified person.
You are advised at every stage of your installation to
double-check any electrical connections you have
made. After you have completed your installation there
are electrical tests that should be carried out: these
tests are specified in the Wiring Regulations (BS7671)
referred to in the Building Regulations.
If in doubt, consult a qualified electrician.
Installation
1. Choose the location for your new floodlight giving
consideration to all of the conditions listed.
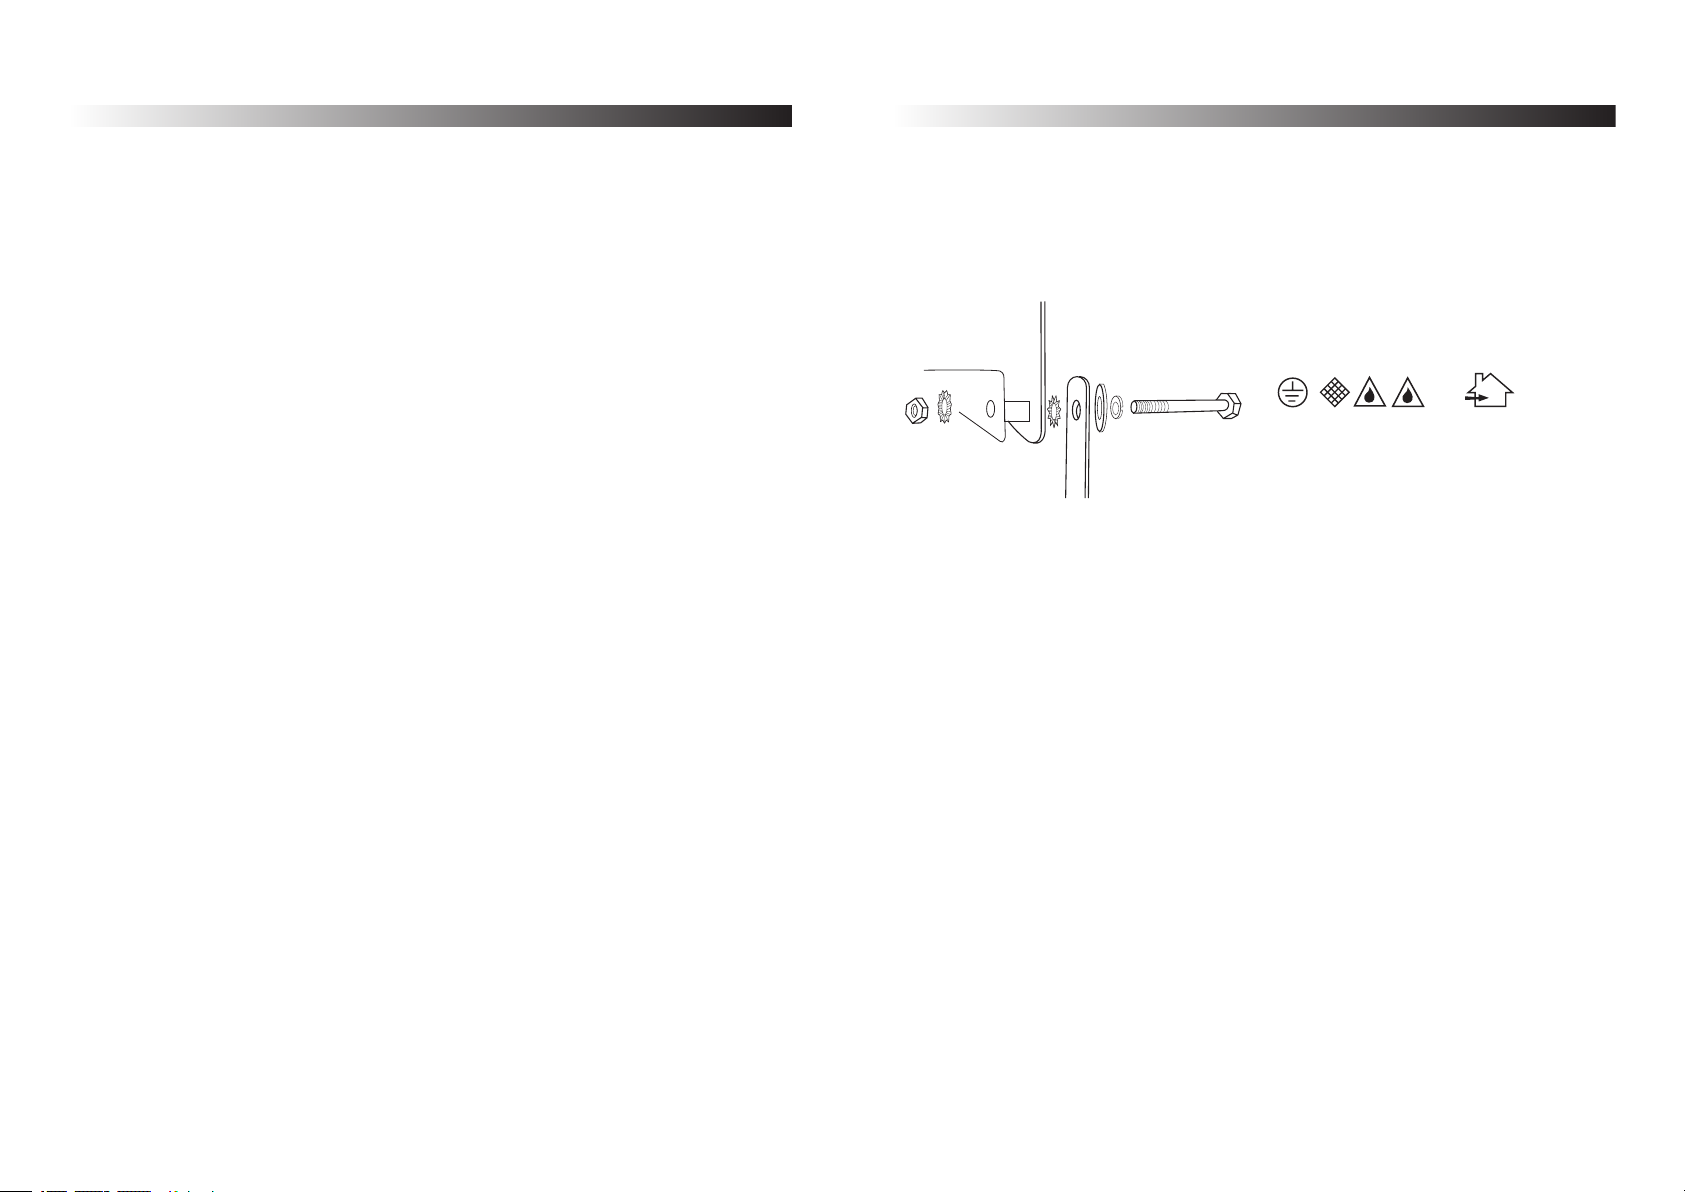
2. Undo the nuts and bolts that hold the fixing strap
onto the fitting noting the order and position of the
various washers.
3. Using the fixing strap as a template, mark the
position for the fixing holes on your mounting
surface.
4. Prepare your mounting surface as appropriate for
your chosen fixings (not supplied). Use a spirit level
to ensure the fitting will be level.
5. Secure the fixing strap in place.
6. Attach the fitting onto the fixing strap using the
fixings removed earlier, adjust the angle of your
floodlight to give the desired spread of light.
7. Tighten the nuts to lock your floodlight into
position.
8. Make your connections to your mains supply as
described in the “Read this first” section.
9. Using a wide flat bladed screwdriver, lever the trim
off the front of the floodlight.
10. Using a cross-headed screwdriver, undo the screws
that secure the diffuser and lift off.
11. Fit the fluorescent lamp: Note the position of the
lamp pins and push the lamp into the lampholder
so that the pins engage in the holes in the socket.
Make sure the lamp is pressed fully into position.
12. Replace the diffuser and tighten making sure that
the waterproof gasket is correctly positioned and
compressed.
13. Press the trim back onto the front of the fitting
making sure the slots used for removal are at the
bottom.
14. Restore the power and switch on.
15. FL157B: The fitting should light when switched on.
FL157BPC: The fitting will light when the power
has been restored and the ambient light level falls
below the preset threshold (not adjustable).
Safety Markings
IP65
Cleaning
Disconnect the power and clean the exterior only of
this fitting with a moist (not wet) cloth.
Do not use any chemical or abrasive cleaners.
Lamp Replacement
1. Switch off the electricity at the mains.
2. Using a wide flat bladed screwdriver, lever off the
trim from the front of the fitting.
3. Using a cross-headed screwdriver, loosen the
screws and lift off the diffuser.
4. Remove the lamp by pulling directly to the side.
5. Press a new lamp into position noting the position
of the lamp pins and holes in the lampholder.
6. Push the lamp firmly to ensure that it is correctly
engaged in the lampholder.
7. Replace the diffuser and secure in position making
sure that the gasket is correctly positioned and
compressed.
8. Press the trim back onto the fitting making sure
that the slots used for removal are at the bottom.
9. Restore the power and switch on.
Replacement Lamp Type
Wattage: 57W
Type: GX24q-5 triple turn T 4pin CFL 6400K
 Loading...