

Eterna EXITBOXM Series, EXITBOX 318M Safety And Installation Manual

Cleaning:
> Clean this light fitting only with a soft dry cloth
> Do not use any chemical or abrasive cleaners.
Lamp replacement:
> Switch off the electricity at the mains.
> Remove the diffuser.
> Twist and withdraw the tube.
> Insert new tube.
> Restore the power and perform operation check.
> Replace diffuser.
Replacement lamp type:
Wattage: 8 W
Type: T5 fluorescent tube
Battery replacement:
If after routine operation check, the lamp does not
remain lit for the three hour period, a new battery
pack may be required.
1) Switch off the electricity at the mains.
2) Allow batteries to fully discharge then reconnect
to supply and allow to charge for 24 hours.
3) Test again for 3 hours, if light does not remain lit
change the battery pack as follows:
4) To replace the battery pack, it is necessary to
disconnect the fitting from the mains supply and
remove the fitting from it’s installation—see
installation instructions inside.
5) Remove the diffuser.
6) Unplug the battery lead from the circuit board.
7) Remove the two screws that secure the battery
pack in place from the rear of the fitting and lift
the battery pack away from the case.
8) Write current date on the new battery pack.
9) Secure the new battery pack in place.
10)Plug battery pack into circuit board.
11)Re-fit the exit light back into position—see
installation instructions inside.
12)Replace diffuser and end panel.
13)Restore power and allow to charge for 24 hours.
14)Perform full operation check and update test
record.
Replacement battery type:
2.4V Ni-Cad
7030-0621
Eventually, you may want to replace this light fitting:
When your light fitting and or battery pack come to the end of their life or you choose to
update or upgrade the fitting by replacing it, please do not dispose of it with your normal
household waste, please recycle where facilities exist. When you need to dispose of this
fitting, check with your retailer or local authority for suitable options. New regulations will
encourage the recycling of Waste from Electrical and Electronic Equipment ( European
“WEEE Directive” effective August 2005 ).
If you experience problems:
If your light is defective or develops a fault, please return it to the place where you bought it. You can call our
Helpline for advice. The Helpline will gladly give advice on any aspect of any Eterna Lighting product but may
not be able to give specific instructions regarding individual installations.
If in doubt, consult a qualified electrician.
Help line:
Tel: 01933 673 144 Fax: 01933 678 083 Email: sales@eterna-lighting.co.uk
For answers to frequently asked questions ( FAQs ) and other information visit our web-site
www.eterna-lighting.co.uk
Maintained emergency
exit light 8W
convertible to non-maintained by removing link
Model(s)
EXITBOXM ( EXITBOX 318M )
Specification:
Power 8W
Continuous illumination >3 hours
Battery 2.4V 4.5Ah
Recharge time ~20 hours
Over-discharge protection Yes
PLEASE READ THESE INSTRUCTIONS BEFORE
INSTALLING YOUR NEW FITTING
- -
PLEASE RETAIN FOR FUTURE REFERENCE
Read this first:
> This light fitting must be installed in
accordance with the Building Regulations.
These may be obtained from HMSO or viewed
and downloaded from www.odpm.gov.uk
following the link for Building Regulations.
> Switch off the mains before commencing
installation and remove the appropriate circuit
fuse.
> Do not connect to a circuit which also has
inductive loads connected as spikes generated
switching inductive loads may damage
electronic components within your light fitting..
> Suitable for indoor use only.
> This product is suitable for installation on
flammable surfaces ( indicated by the "F" in a
triangle )
> Before making fixing hole(s), check that there
are no obstructions hidden beneath the
mounting surface such as pipes or cables.
> The chosen location of your new fitting should
allow for the product to be securely mounted
( e.g. to a joist ) and safely connected to the
mains supply ( lighting circuit ).
> Ensure that the fitting will be accessible after
installation for maintenance.
> If the location of your new fitting requires the
provision of a new electrical supply, the supply
must conform with the requirements of the
Building Regulations.
> Make connections to the electrical supply in
accordance with the following code:
Live - Brown or Red
Neutral - Blue or Black
Earth - Green and Yellow
> This product must be connected to Earth.
> You are advised at every stage of your
installation to double-check any electrical
connections you have made. After you have
completed your installation there are electrical
tests that should be carried out: these tests are
specified in the Wiring Regulations ( BS7671 )
referred to in the Building Regulations. If in
doubt, consult a qualified electrician.
Installation:
1) Undo the screws at the right hand end of the
fitting and lift off.
2) Slide out the front panel.
3) Remove the plastic plug from one of the cable
entry holes.
4) Using the fitting as a template, mark the position
of the fixing holes on your mounting surface.
5) Make fixing holes and fit plugs as appropriate.
6) Secure the fitting to the mounting surface using
suitable fixings ( not supplied ).
7) Thread the supply cable through the entry point
and into the fitting.
8) Make connections to the mains supply
according to the wiring colour code above.
Normally, the supply will be taken from the
lighting circuit and the permanent live connected
to the live terminal in the fitting.
9) Write the current date on the battery pack.
10)Connect the battery pack to the circuit board.
11) To operate the fitting in non-maintained mode,
remove the link from the terminals “SW”.
12) If the lamp is to be switched, remove the link
from between the terminals marked “SW” and
connect cables to and from your switch.
13) Restore the power supply. The LED should light
to indicate correct charging. If the link “SW” has
been left in place, the fitting should also light. If
you have connected a switch across the
terminals “SW”, test the operation of your
switch.
14) Slide the front panel back into position and
secure the retaining plate back in position using
the two screws.
Operation checks:
Periodic testing should be carried out monthly by simulating
a failure of supply, causing the fitting to be energised from
it’s battery. Interruption of the supply should be carried out
by the operation of a local keyswitch or other isolation
device. During this period all fittings should be examined
visually to ensure that they are functioning correctly. At the
end of the test period the supply shall be restored and all
indicator lamps or devices checked to ensure that the normal
supply has been restored.
The duration of the simulated failure shall be:-
Each month:
Isolate the power supply and check the light remains
illuminated for at least 45 minutes. Endorse the test
record form supplied.
Every six months:
Isolate the power supply and check that the light is
still illuminated after 1 hour. Endorse the test record
form.
Once each year:
Isolate the power supply and check that the light is
still illuminated after 3 hours. Endorse the test record
form.
Please keep this instruction booklet and test
record in a safe place. A fire officer or other
authorised person may want to see your record
of inspection and testing.
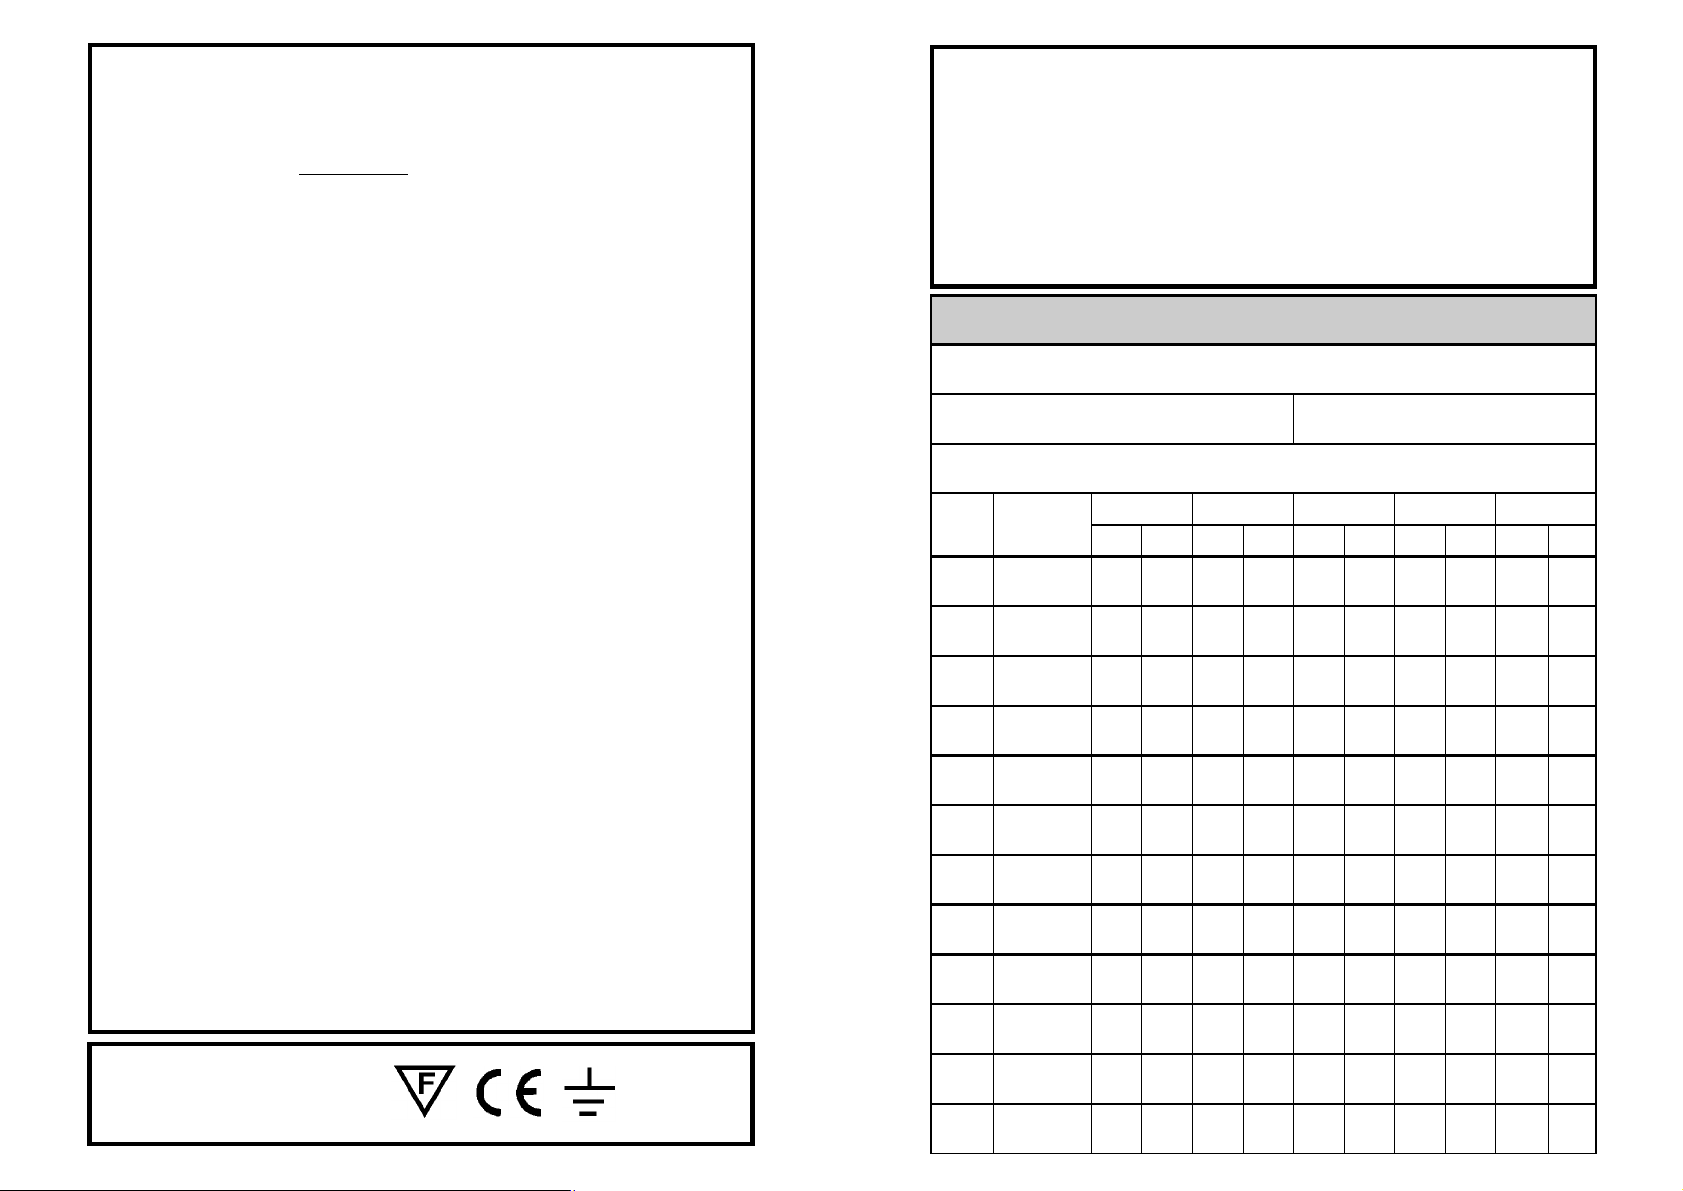
Installation, maintenance and operation check record
Location:
Installation date: Installation test duration:
Installed by:
Month
1 Short
2 “
3 “
4 “
5 “
6
7 Short
8 “
9 “
10 “
Test
1 hour
endurance
20______ 20______ 20______ 20______ 20______
Sign Date Sign Date Sign Date Sign Date Sign Date
Safety markings:
11 “
12
EXI TBOX M Ma int aine d e merg ency ex it l ight 050 414P A
3 hour
endurance
 Loading...