

Eterna B1100BK Installation Instructions Manual
Issue 2013
Model:
B1100BK
Low Energy Louvred Bollard 1100mm
These instructions are provided as a guideline to assist you.
PLEASE READ THESE INSTRUCTIONS BEFORE INSTALLATION
AND RETAIN FOR FUTURE REFERENCE
Pack contents:
1 x Fitting
1 x E27 lamp
3 x Base bolts
3 x Base screws
3 x Washers
6 x Head screws
1 x Plastic mounting
surface ring
FOR PRODUCT ADVICE:
• T: 01933 673 144
• F: 01933 678 083
• E: sales@eterna-lighting.co.uk
Visit our website:
www.eterna-lighting.co.uk
INSTALLATION INSTRUCTIONS
A guide for qualied electricians
EVENTUALLY, YOU MAY WANT TO
REPLACE THIS PRODUCT:
Regulations require the recycling of Waste from
Electrical and Electronic Equipment (European
“WEEE Direc tive” eective August 20 05—UK
WEEE Regulation s eective 2nd January 20 07).
Environment Agenc y Registered Producer : WEE/
GA0248Q Z.
WHEN YOUR PR ODUCT COMES TO TH E END OF
ITS LIFE OR YO U CHOOSE TO REPLACE I T, PLEA SE
RECYCLE IT W HERE FACILITIES E XIST DO NOT
DISPOSE WITH HOUSEHOLD WASTE.
CLEANING:
Disconnect t he power and clean the exte rior only of
this tting wit h a moist (not wet) cloth.
Do not use any chemic al or abrasive cleaners.
IF YOU EXPERIENCE PROBLEMS:
If you believe your p roduct is defective, p lease return
it to the place where yo u bought it. Our Technical
Team will gladly advise on any Eterna Lighting
product, bu t may not be able to give specic
instructions regarding individual installations.
For breakage inf ormation visit:
www.eterna-lighting.co.uk
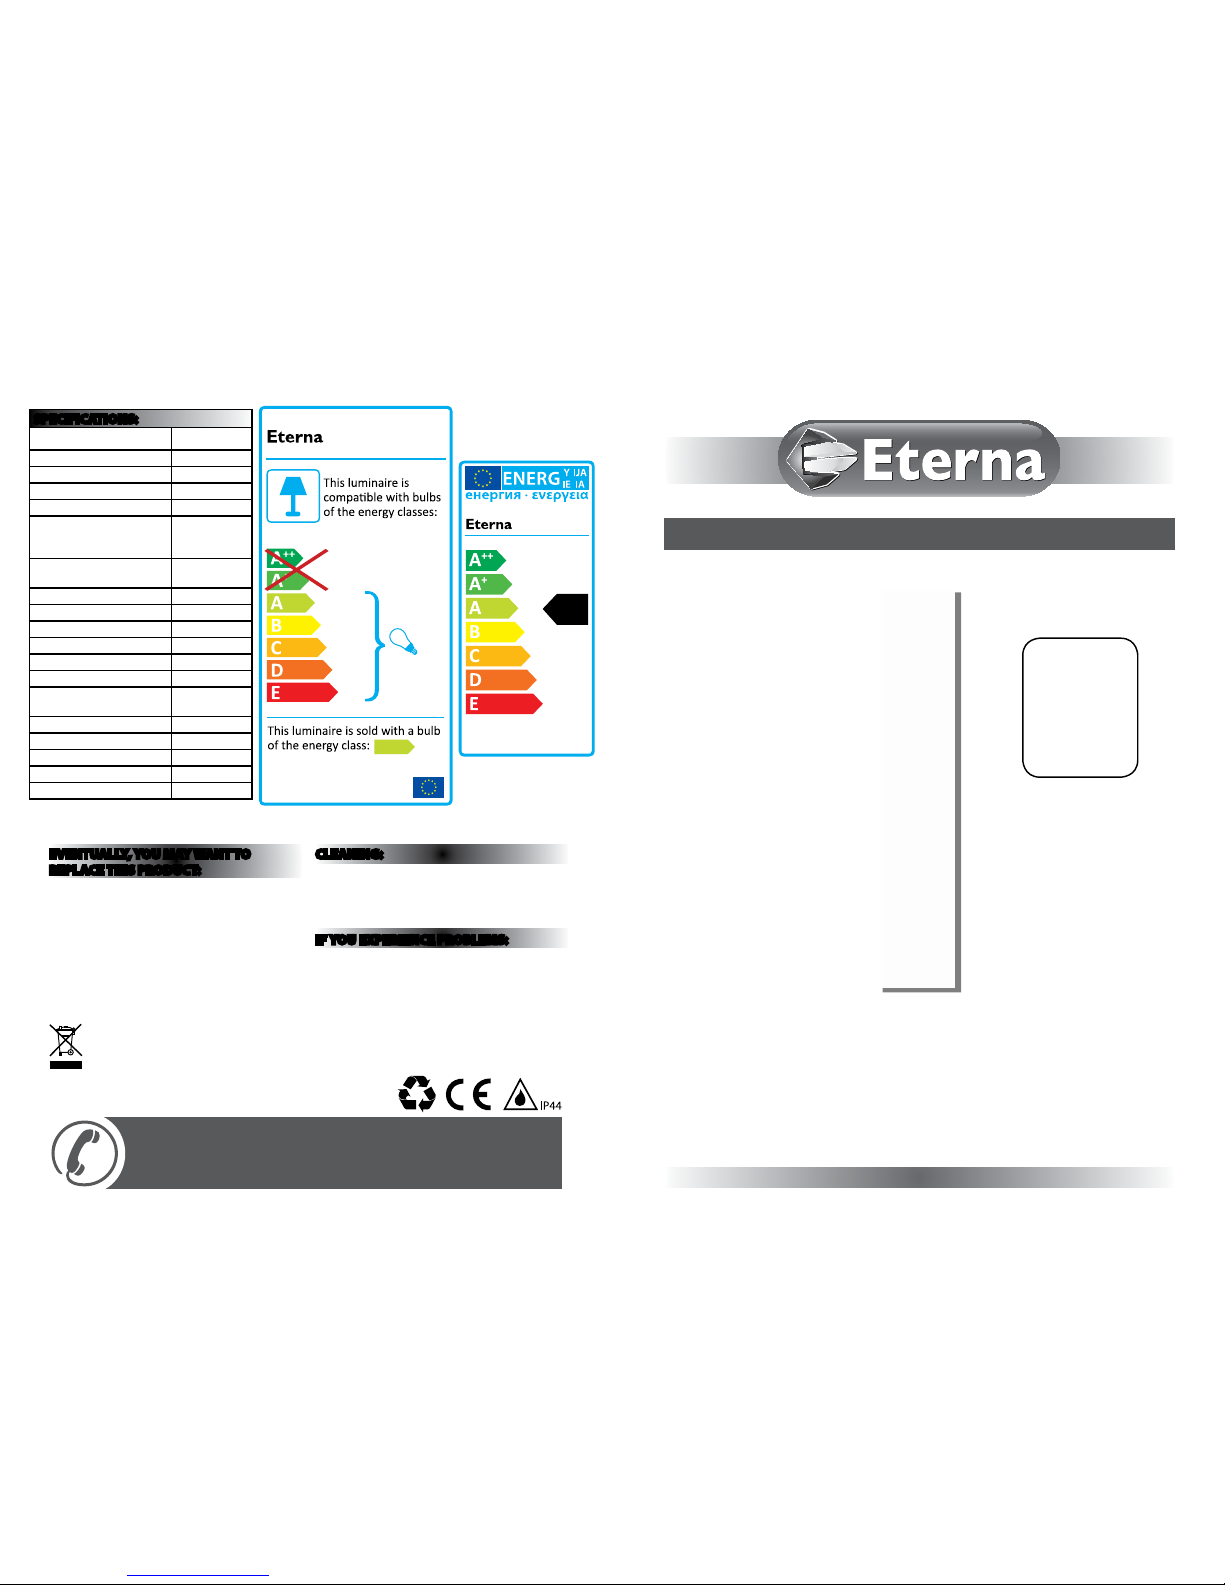
MODELNO.
A
++
XXX kWh/1000h
20
B1100BK
A
SPECIFICATIONS:
Nominal useful luminous ux
1250 lm
Rated Wattage 20W
Rated luminous ux 1250 lm
Nominal life time of the lamp 8,000 hrs
Colour temperature 3500K
Number of switching cycles
before premature lamp
failure
8,000
Warm-up time up to 60 % of
the full light output
<10s
Dimmable No
Lamp dimensions mm 164 x 48mm
Nominal beam angle >120°
Rated power 20W
Rated lamp lifetime 8,000
Lamp power factor ≥0.55s
Lumen maintenance factor at
end of nominal life
80%
Starting time 0.2s
Colour rendering 84%
Rated beam angle >120°
Cap Type E27
Mercury Content ≤2.5mg
874/2012
A
MODELNO.
B1100BK
READ THIS FIRST:
Check the pack and m ake sure you have all of the
parts liste d on the front of this bookle t. If not,
contact the outlet where you bought this product.
This produc t contains glass, care must be take n when
assembling, t ting or handling to prevent per sonal
injury or damag e to the product.
This produ ct must be install ed by a competent
person in accordance with the current building
and IEE wiring regulations.
As the buyer, install er and/or user of this product it
is your own responsi bility to ensure that this tt ing
is t for the purpo se for which you have intended
it. Eterna Lightin g cannot accept any liability fo r
loss, damage or premature failure resulting from
inappropriate use.
This product is designed and constructed according
to the principles o f the appropriate British Stan dard
and is intended fo r normal domestic ser vice only
not suitable fo r commercial use and is not classed a s
vandal proof.
The lifetime of co mpact uorescent lamps an d
ballasts are ne gatively aected by incr eased
switching i.e. wh ere a PIR is being used to control the
tting.
Switch o the mains be fore commencing installati on
and remove the appro priate circuit fuse or lock o
MCB.
The lamp supplie d with this tting is a consumabl e
part and ther efore may be outside of any warr anty
oered.
This unit is suitable for outdoor use and requires
to be protec ted by a 30mA RCD.
This produc t is designed for permanent co nnection
to xed wiring: this m ust be a suitable circuit
(protected w ith the appropriate MCB or fuse).
Before makin g xing hole(s), check that there are no
obstructi ons hidden beneath the mount ing surface
such as pipes or cab les.
Make sure that the xi ngs are strong enough to
support the w eight of the tting and hold it r igidly.
The chosen loc ation of your tting should a llow for
the product to b e securely mounted and anch ored to
a solid surfa ce e.g. concrete, brick.
This produc t must be connected to ear th
termination.
Make connecti ons to the electrical supp ly in
accordance with the f ollowing code:
Live – Brown or Red
Neutral – Blue or B lack
Earth – Gree n and Yellow
When making con nections ensure that the ter minals
are tightened se curely and that no strands of wi re
protrude. Chec k that the terminals are tightene d
onto the bared cond uctors and not onto any
insulation.
This produc t is not intended to be used by childr en
and persons wi th sensory, physical and/or ment al
impairments th at would prevent them from using i t
saf ely.
IMPORTANT: Always switch o the mains supply
before changing the lamp,.
You are advised at ever y stage of your installatio n to
double-check any electrical connections you have
made. After you h ave completed your installatio n
there are elec trical tests that should b e carried out,
these tests are sp ecied in the current IEE wir ing and
building regulations.
INSTALLATION:
Suitable for outdoors (IP44).
Switch o the mains be fore commencing installati on
and remove the appro priate circuit fuse or lock o
MCB.
IMPORTANT: This produc t is class 1 It must be
connected to ea rth.
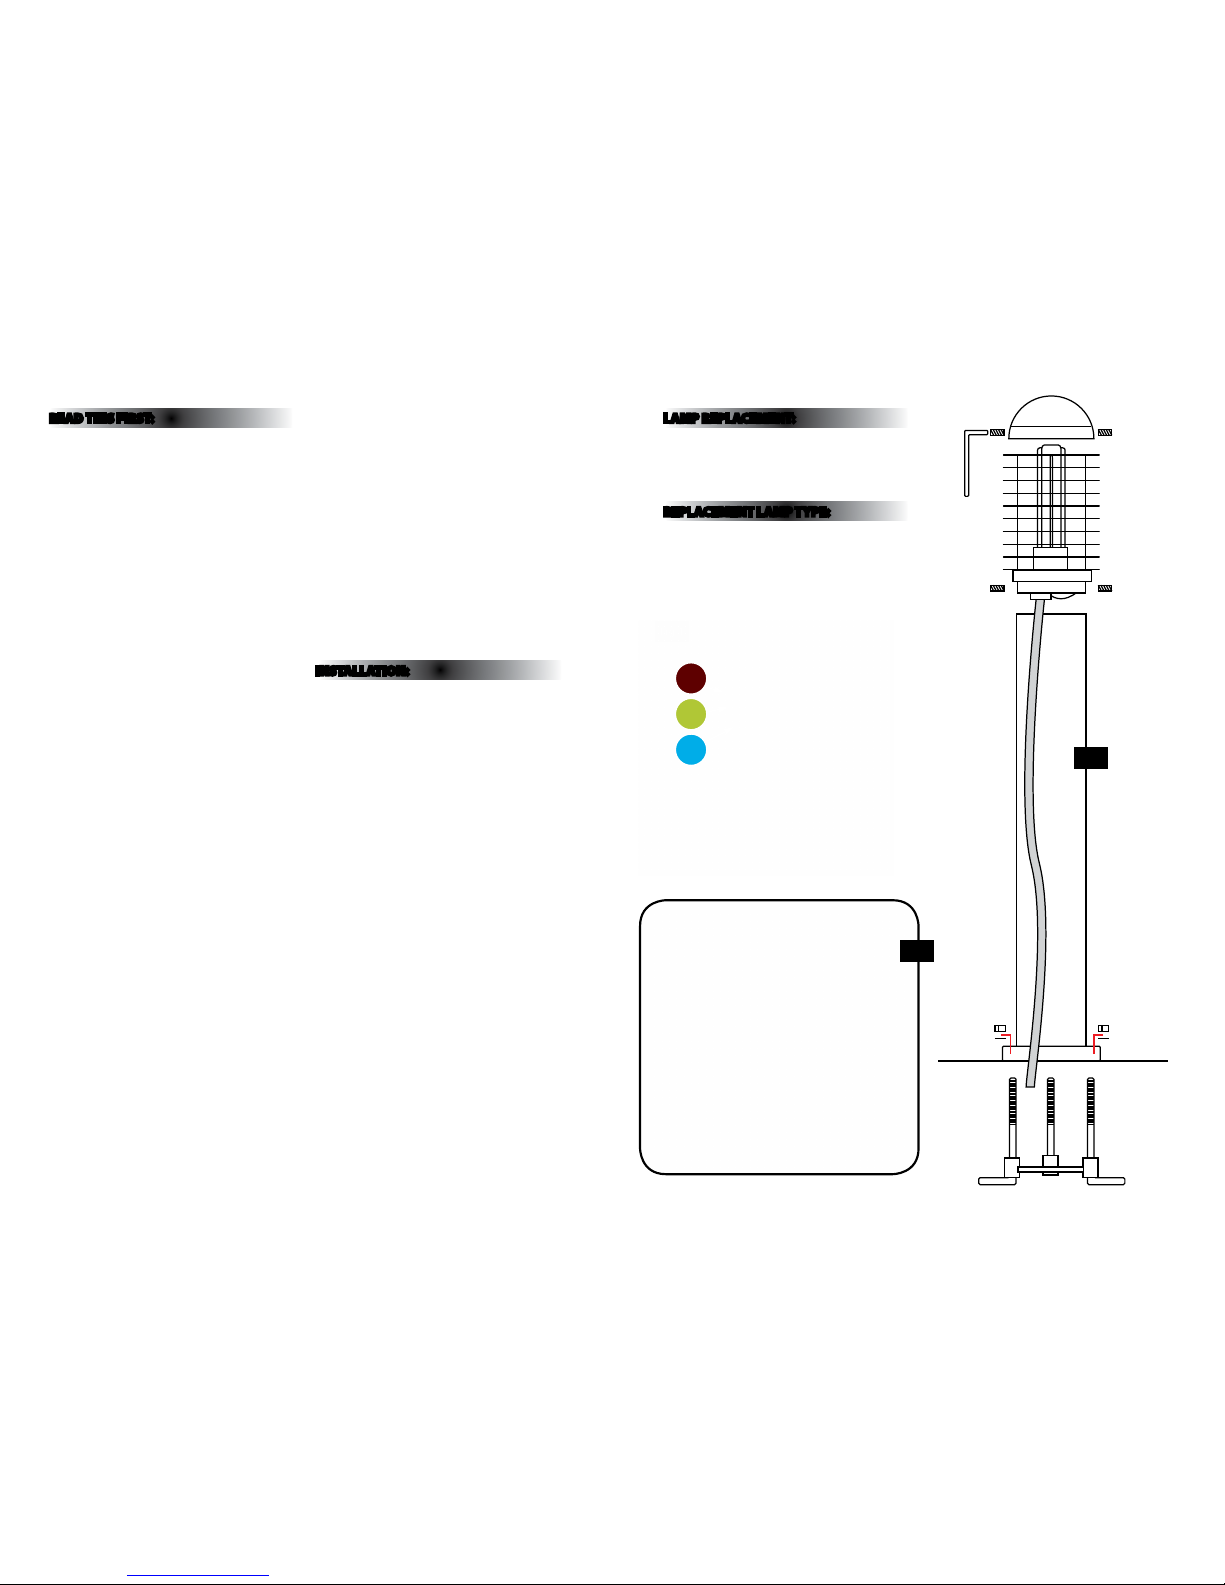
01) Remove the louvered head wit h the cap intact.
02) Prepare xing sur face.
03) Fixing holes must cle ar any obstructions withi n
the mounting sur face (eg cables of gas and water
pipe s).
04) Feed the incomin g mains cable (1M rubber 3
core-not supplied) through the anged bottom
of the tting.
05) Connect the inco ming mains supply as follows:
Incoming EARTH (green /yellow) to ear th
terminal with gre en and yellow wire attache d.
Incoming LIVE (brown/red to live termin al with
brown wire attached.
Incoming NEUTRAL (blue/black) to Neutral
terminal with blu e wire attached.
06) Remove the cap and t a s uitable ES 27 energy
saving lamp (included).
07) Replace the cap onto t he louvered head.
08) Secure the hea d to the tting.
09) Restore power an d switch on.
Fig 1
Fig 3
L
E
N
Unscrew here rst
before attaching
head to tting
LAMP REPLACEMENT:
Switch o the elec tricity at the mains.
Remove the dius er etc.
Remove and replace lamp.
REPLACEMENT LAMP TYPE:
Fitting requi res 1 x 20W ES triple turn CFLi 3500K
(included) or energy saving alternative.
Fitting is rated a t 100W max.
Fig 2
 Loading...