

Etec EXSS1042 Installation Manual
ETEC EXSS1042
• Forward / backward tilt range:
+5 to -15 degrees
• Left to right swivel range: 180 degrees
• Extension range: 2.7” to 8.6”
• Easy installation
• Supports most 10” - 42” Flat Panel TVs
• Maximum weight capacity: 55 lbs.
For technical assistance or troubleshooting please call
1-855-994-3832 or visit www.sibrandssupport.com
This product Wall Mount frame is intended for use only with an apparatus which has a maximum weight of 55 lbs. See apparatus
instructions. Using with an apparatus heavier than the maximum weight indicated may result in instability and cause possible
injury
READ THIS FIRST Read this entire manual! Do not attempt to install this product if you do not understand the instructions.
Contact a qualified mount installer if you have any doubts about a safe and secure mount installation, or if you are not sure what
specific wall materials you are attaching this mount to. Check all the parts carefully to make sure there are no missing or
damaged parts. Improper installation may result in damage to your TV, property, and personal injury.

Wall plate
1
TV plate
2
x1
A x2
Long Bolt
C
D
E
F
G
H
I
J 4 M8x35mm bolts
4
4
4
M4x12mm bolts
M5x12mm bolts
M6x12mm bolts
M8x25mm bolts
M4x30mm bolts
M5x30mm bolts
M6x35mm bolts
B x2
Concrete Anchor
K
L
M
N
O
P
Q
R
4
4
4
8
4
4
4
M5/M6 spacers
M8 spacers
10mm spacers
2.5mm spacers
M4/M5 washers
M6 washers
M8 washers
Allen Wrench1
S 1 Bubble Level
Step 1. Separate the TV Plate & Wall Plate
1. Use the Allen wrench (R) to remove the two M6x12 Bolts and separate the Wall Plate (1) and
TV Plate (2) into two pieces as shown in Fig 1.
1
2
Fig. 1
R
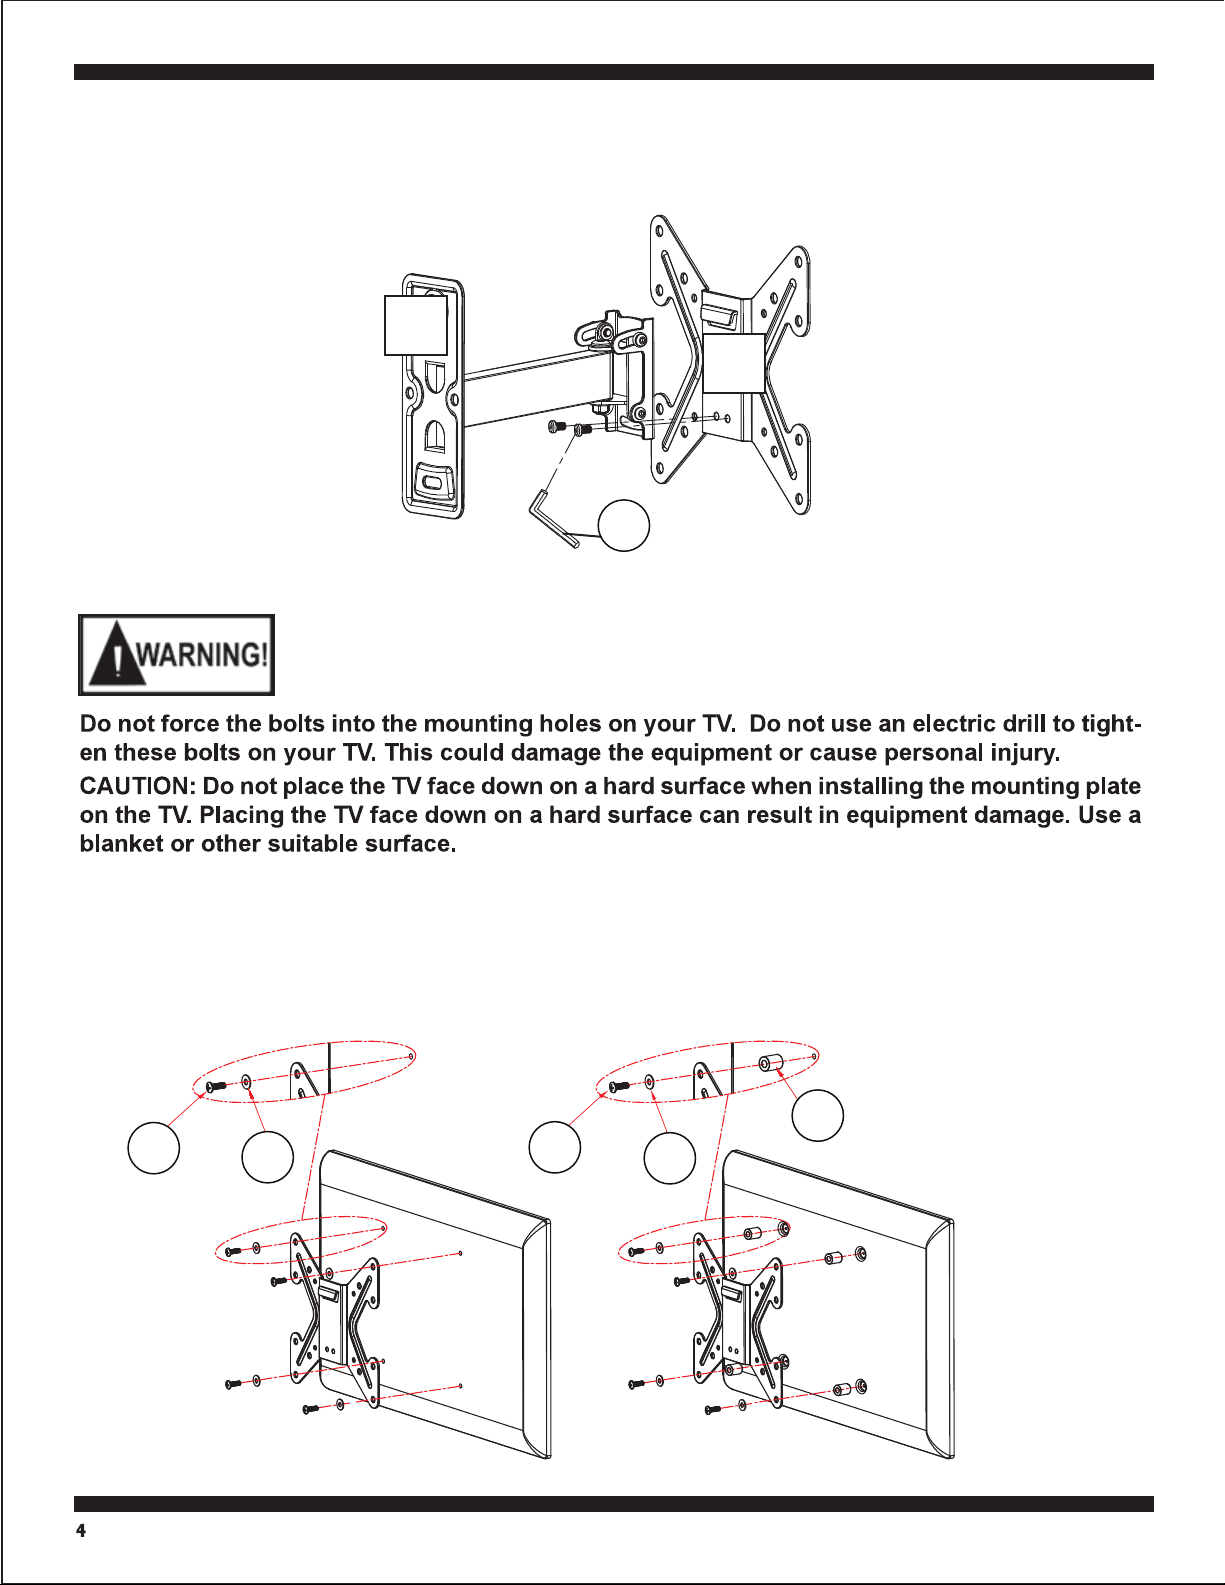
Step 2. Install the TV plate on the television.
Use the selected bolts (C-J) and the washers (O-Q) to install the TV Plate (2) to the rear of the TV
as shown below in Fig. 2A. Tighten securely using the Allen wrench (R). Do not overtighten.
If the back of the TV is not flat, or if the bolts are too long, it may be necessary to use Spacers (K-N)
as shown in the Fig. 2B. Multiple Spacers can be used to reach the proper length.
C-F
Fig. 2A
O-Q
G-J
K-N
O-Q
Fig. 2B
 Loading...