

Page 1
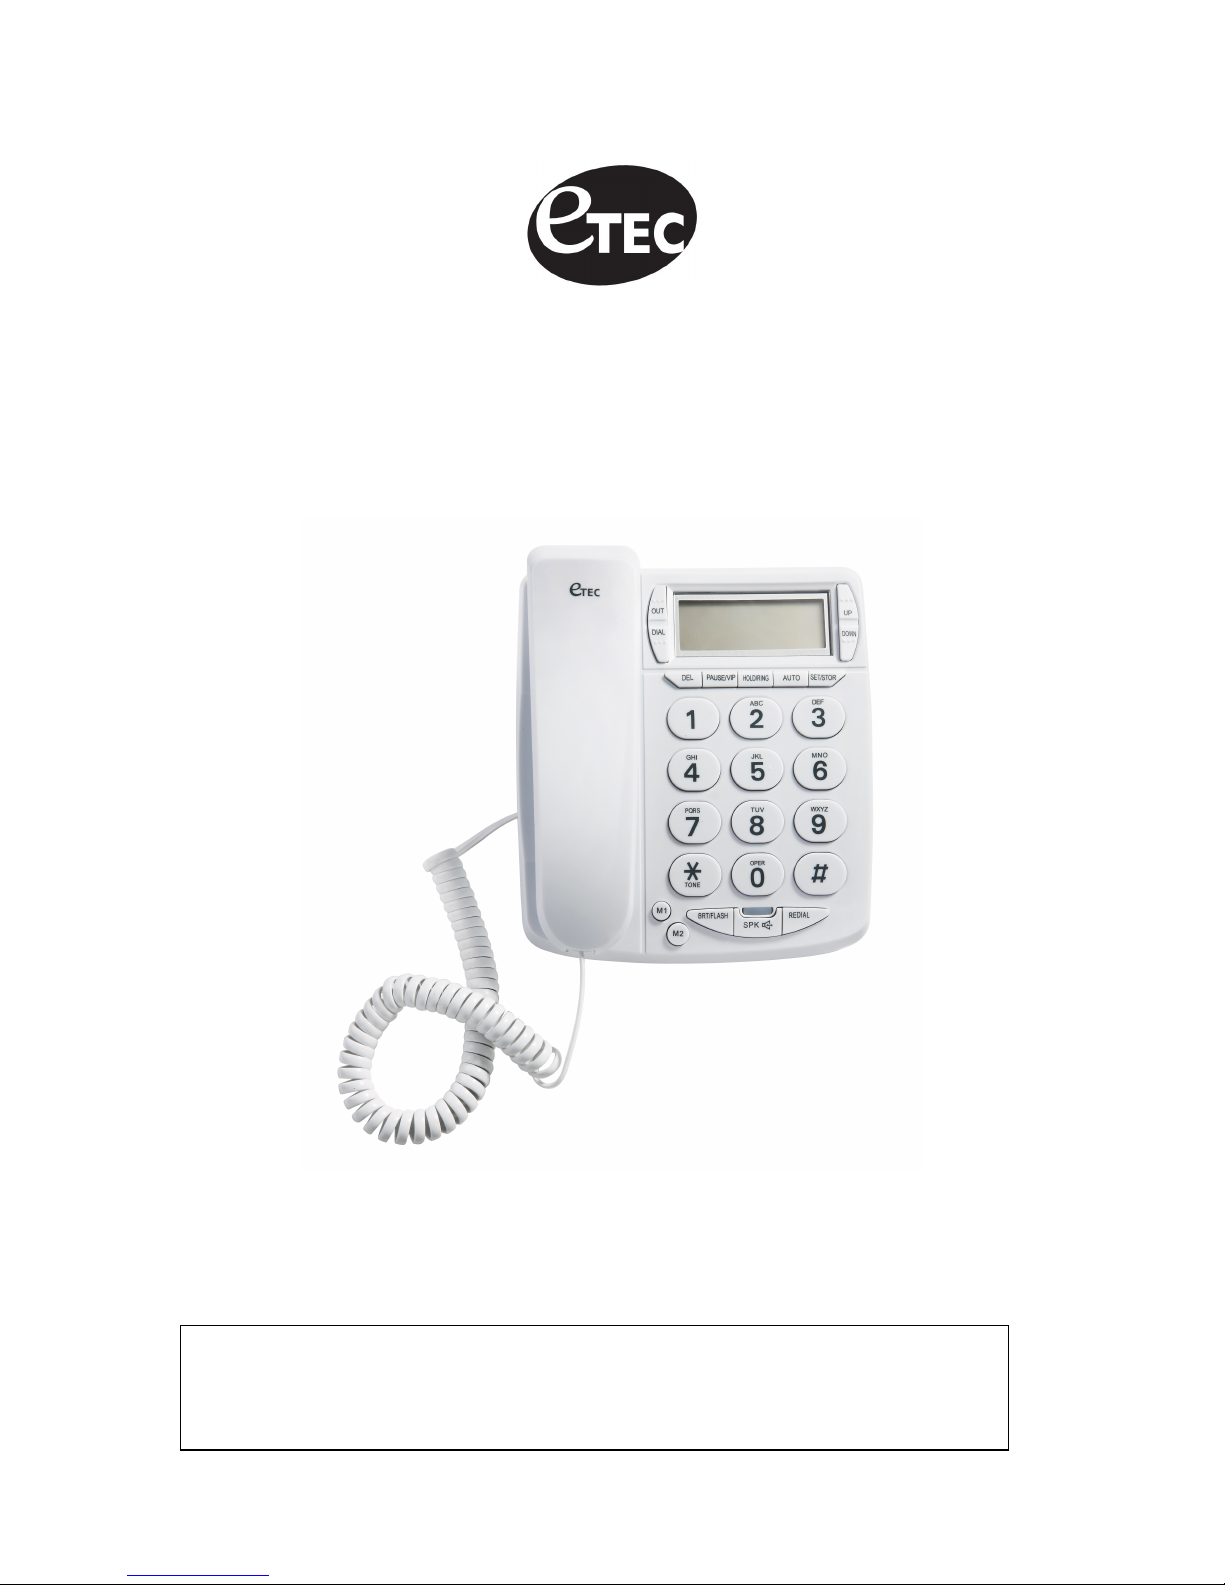
LARGE BUTTON PHONE
WITH CALLER ID
Model: EPH2010
PLEASE READ THIS USER MANUAL COMPLETELY BEFORE
OPERATING THIS UNIT AND RETAIN THIS BOOKLET FOR
FUTURE REFERENCE.
Page 2

Using the Setup Mode
With the phone on the hook, press the [SET] button to enter the Setup Mode. The LCD will
display “SET | DATE” on the first screen of the Setup Mode. Use the [UP]/[DOWN] buttons to
change between the different setting options and the LCD will display the corresponding
setting items. Press the [SET] button again to enter one specific setting item. Use the
[UP]/[DOWN] buttons to change the specific setting items you wish to change. When finished
changing the settings press the [DEL] button to exit the Setup Mode.
Date/Time Setting
When the LCD display shows “SET | DATE”, press the [SET] button to confirm. The LCD
display will begin by flashing the Year. Press the [UP]/[DOWN] buttons to change the Year
number then press the [SET] button to confirm. The LCD will now enter the Month Setting.
Press the [UP]/[DOWN] buttons to change the Month number then press the [SET] button to
confirm. The LCD will now enter the Date/Hour/Minute Setting. Press the [UP]/[DOWN]
buttons to change the Date/Hour/Minute settings respectively pressing the [SET] button each
time to confirm the correct number.
Local Area Code Setting
When the LCD display shows “SET 2 CODE”, press the [SET] button to confirm. The LCD will
then display “CODE *****”. Press the [SET] button to enter the Area Code setting, the first “*”
will begin to flash (if the Area Code was previously set, the LCD will display the previously-set
area code numbers, and the first number of the area code will flash). Press the [UP]/[DOWN]
buttons to enter the correct number for the first number of your area code, then press the
[SET] button to confirm. Repeat this process to enter the rest of the area code numbers.
Dial Out Setting
Use this setting if you need to dial a specific number (ex: 9) to make an outside call. When
the LCD display shows “SET 3 PCODE”, press the [SET] button to enter the Dial Out setting,
The LCD will then display “CODE **”. The first “*” will begin to flash (if the Dial Out Code was
previously set, the LCD will display the previously-set Dial Out numbers, and the first number
will flash). Press the [UP]/[DOWN] buttons to enter the correct number for the first number of
your Dial Out Code, then press the [SET] button to confirm. Repeat this process to enter the
rest of the Dial Out Code numbers.
Caller ID
When receiving a new call, the phone will automatically detects and displays the Caller ID,
the date, the time, and records this information in the Caller ID memory.
Reviewing the Caller ID History for Incoming Calls
With the phone on the hook, press the [UP]/[DOWN] buttons to review the number, date and
time of the incoming Call History.
Redial a Previous Incoming Call
Page 3

After finding the incoming call in the Caller ID History, press the [DIAL] button to auto dial the
selected number.
Reviewing the Caller ID History for Outgoing Calls
With the phone on the hook press the [OUT] button to begin reviewing the outgoing call list.
Use the [UP]/[DOWN] buttons to review the phone numbers and times of the recent outgoing
calls.
Deleting a Call from the Caller ID History
If you wish to delete a call from the Caller ID History, simply locate the Call information in the
Call history and then press the [DEL] button.
Using the Memory Functions
Storing a Number in the One-Touch Memory
• Step 1: With the phone on the hook, enter the phone number you wish to store in the
One-Touch Memory
• Step 2: Press the [SET] button
• Step 3: Press either the [M1] or [M2] button to store the phone number to the desired
memory button.
Calling a Number from the One-Touch Memory
• Step 1: Pick up the phone or press the [SPEAKER] to make a call
• Step 2: Press the desired memory button [M1] or [M2] where you have previously
programmed the phone number you wish to call. The phone will automatically begin
the call.
Storing a Number in the Two-Touch Memory
• Step 1: With the phone on the hook, enter the phone number you wish to store in the
Two-Touch Memory
• Step 2: Press the [SET] button
• Step 3: Press the number [0-9] button you wish to use to store the phone number to the
desired Two-Touch Memory.
Calling a Number from the Two-Touch Memory
• Step 1: Pick up the phone or press the [SPEAKER] button to make a call
• Step 2: Press the [AUTO] button
• Step 3: Press the desired number button [0-9] where you have previously
programmed the phone number you wish to call. The phone will automatically begin
the call.
Page 4

LIMITED 90-DAY WARRANTY
We warrant this product to be free from defects in material and workmanship under normal use
for a ninety-day period from the original date of purchase from an authorized ETEC dealer.
Should you be missing any of the included accessories or other components (screws, pieces,
etc.), please contact the Customer Support Center to secure a replacement. It is not necessary to
bring the unit back to the store. When calling, please reference the parts list found in the
Instruction Manual to help us accurately identify the missing parts and promptly provide
replacements.
We will replace the unit free of charge should it become defective under this warranty, providing
you, the original purchaser, have your original dated sales receipt.
To obtain warranty service or replacement within the ninety-day warranty period, please return
the product with all parts and accessories along with your original dated store receipt to the
original place of purchase and the unit will be exchanged at no charge. It is not necessary to
contact the manufacturer for warranty replacement.
For technical support, visit our website www.sibrandssupport.com or call the ETEC Technical
Support Center for technical assistance or troubleshooting at 1-855-994-3832, Monday to
Saturday, 10:00AM to 7:00PM EST.
This warranty applies only under conditions of normal use. Our products are not intended for
outdoor use.
There are no consumer serviceable parts contained in this product and any attempt by the owner
to service or repair the unit will immediately void all warranty coverage.
This warranty does not cover any product which has been subject to damage due to an act of
nature, misuse, neglect, accident, abuse, commercial use, or modification of, or to, any part of the
product. Damage to any external media such as DVD & CD discs, and/or USB or other memory
devices are not covered nor is the cost incurred in shipping the unit for warranty repair or
exchange. Under no circumstances shall ETEC be liable for any loss (direct, indirect, incidental,
foreseen, unforeseen, special or consequential) or for any damage arising out of, or in connection
with, the use of this product.
UNDER NO CIRCUMSTANCES WILL ETEC BE LIABLE FOR ANY INCIDENTAL OR
CONSEQUENTIAL DAMAGES.
This warranty does not cover re-manufactured, refurbished, or repaired units, or any products
sold 'As Is'.
This warranty is valid only to the original purchaser of the Product in the United States and
Canada and grants specific legal rights.
 Loading...