

Etec DVD2658 Instruction Manual
DVD2658
DVD PLAYER
INSTRUCTION MANUAL
1-11

IMPORTANT NOTICE
QUICK GUIDE FOR HDMI FUNCTION
1. Please check to see if your TV set has a HDMI video input.
2. If your TV set has a HDMI video input then connect the
DVD player to the TV set using an HDMI cable (not included).
Switch on the DVD player and TV set. The DVD Player
output will automatically be adjusted from the default video
output of 480p/576p to a higher-resolution setting to match
that of your TV screen, 720P, 1080i, or 1080p. The TV screen
will now show the "eTEC" logo. Press the HDMI button on
the remote control of the DVD player and you can change the
high-resolution setting of the DVD player to, 720p, 1080i, or
1080p. Once the high-resolution setting of the DVD player
changed, the high-resolution setting on the TV screen image
is automatically changed.
3. If your TV set does not have a HDMI video input, that is no
problem, simply connect the DVD player to your TV set using
a; A/V, S-Video, or Y/Cb/Cr cable.

TABLE OF CONTENTS
IMPORTANT NOTICE
Front and Back Panels. ............................................................................1
Front Panel.............................................................................................1
Back Panel..............................................................................................1
Remote Control... .................................................................................. 2
Operating the Remote Control................................................................. 3
Functions............................................................................................ 4-7
System Setup...................................................................................... 8-9
MP3 Function ...................................................................................... 10
JPEG Function...................................................................................... 10
Troubleshooting ...................................................................................11
POWER
DVD2658
4 5 6
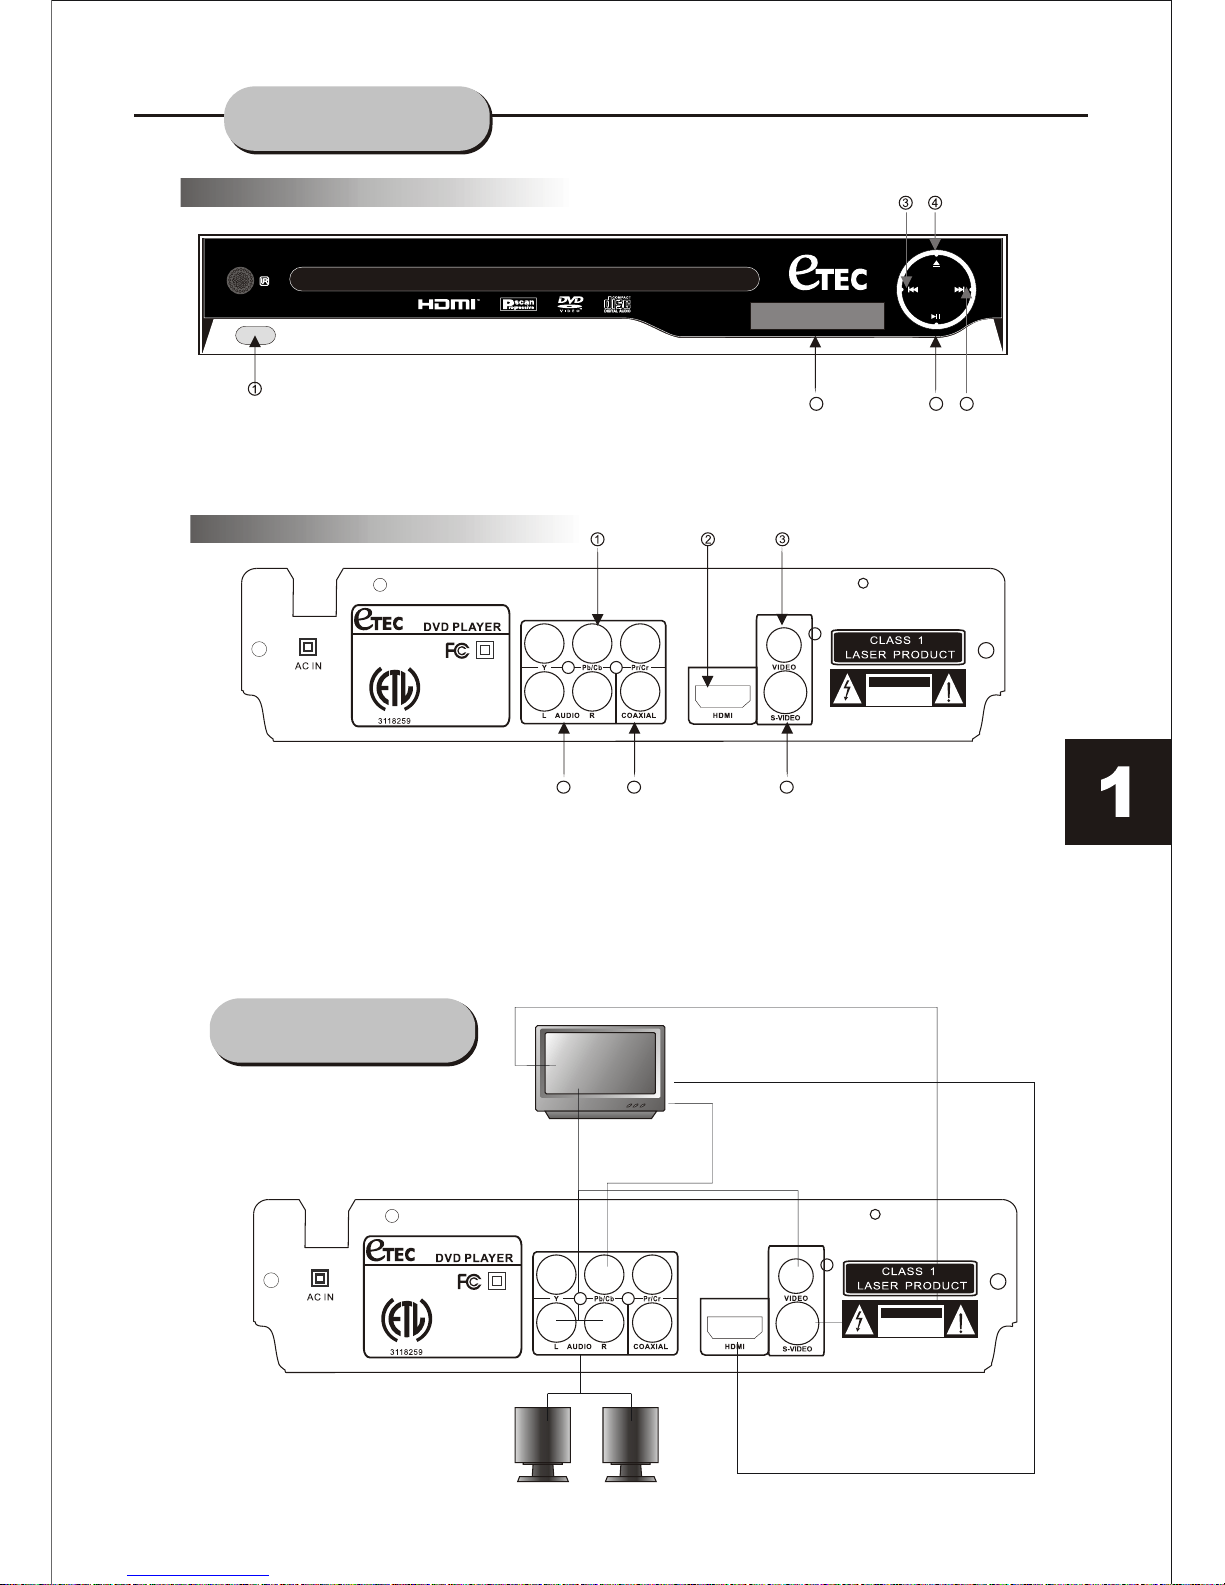
1. Y, Pb/Cb, and Pr/Cr output.
2. HDMI Connector.
3. VIDEO output.
4. AUDIO output.
Use to connect both right and left channels.
5. COAXIAL output.
6. S-VIDEO output.
1. POWER 4. OPEN/CLOSE
2. LED DISPLAY 5. PLAY/PAUSE
3. PREV 6. NEXT
CONNECTION
HDMI CABLE
AV CABLE
S-VIDEO CABLE
Y,Pb/Cb, Pr/Cr CABLE
Back Panel Functions
2 65
FRONT AND
BACK PANELS
Front Panel Functions
RISK OF ELECTRIC SHOCK
DO NOT OPEN
RISK OF ELECTRIC SHOCK
DO NOT OPEN
CAUTION
E
R
T
T
E
N
K
I
CONFORMS TO
ANSI/UL STD 60065
CM
C C
USUS
L
I
D
S
T
E
CERTIFIED TO
CAN/CSA STD
C22.2 No. 60065
MODEL: DVD2658
AC 120V ~60Hz
20W
RISK OF ELECTRIC SHOCK
DO NOT OPEN
RISK OF ELECTRIC SHOCK
DO NOT OPEN
CAUTION
E
R
T
T
E
N
K
I
CONFORMS TO
ANSI/UL STD 60065
CM
C C
USUS
L
I
D
S
T
E
CERTIFIED TO
CAN/CSA STD
C22.2 No. 60065
MODEL: DVD2658
AC 120V ~60Hz
20W
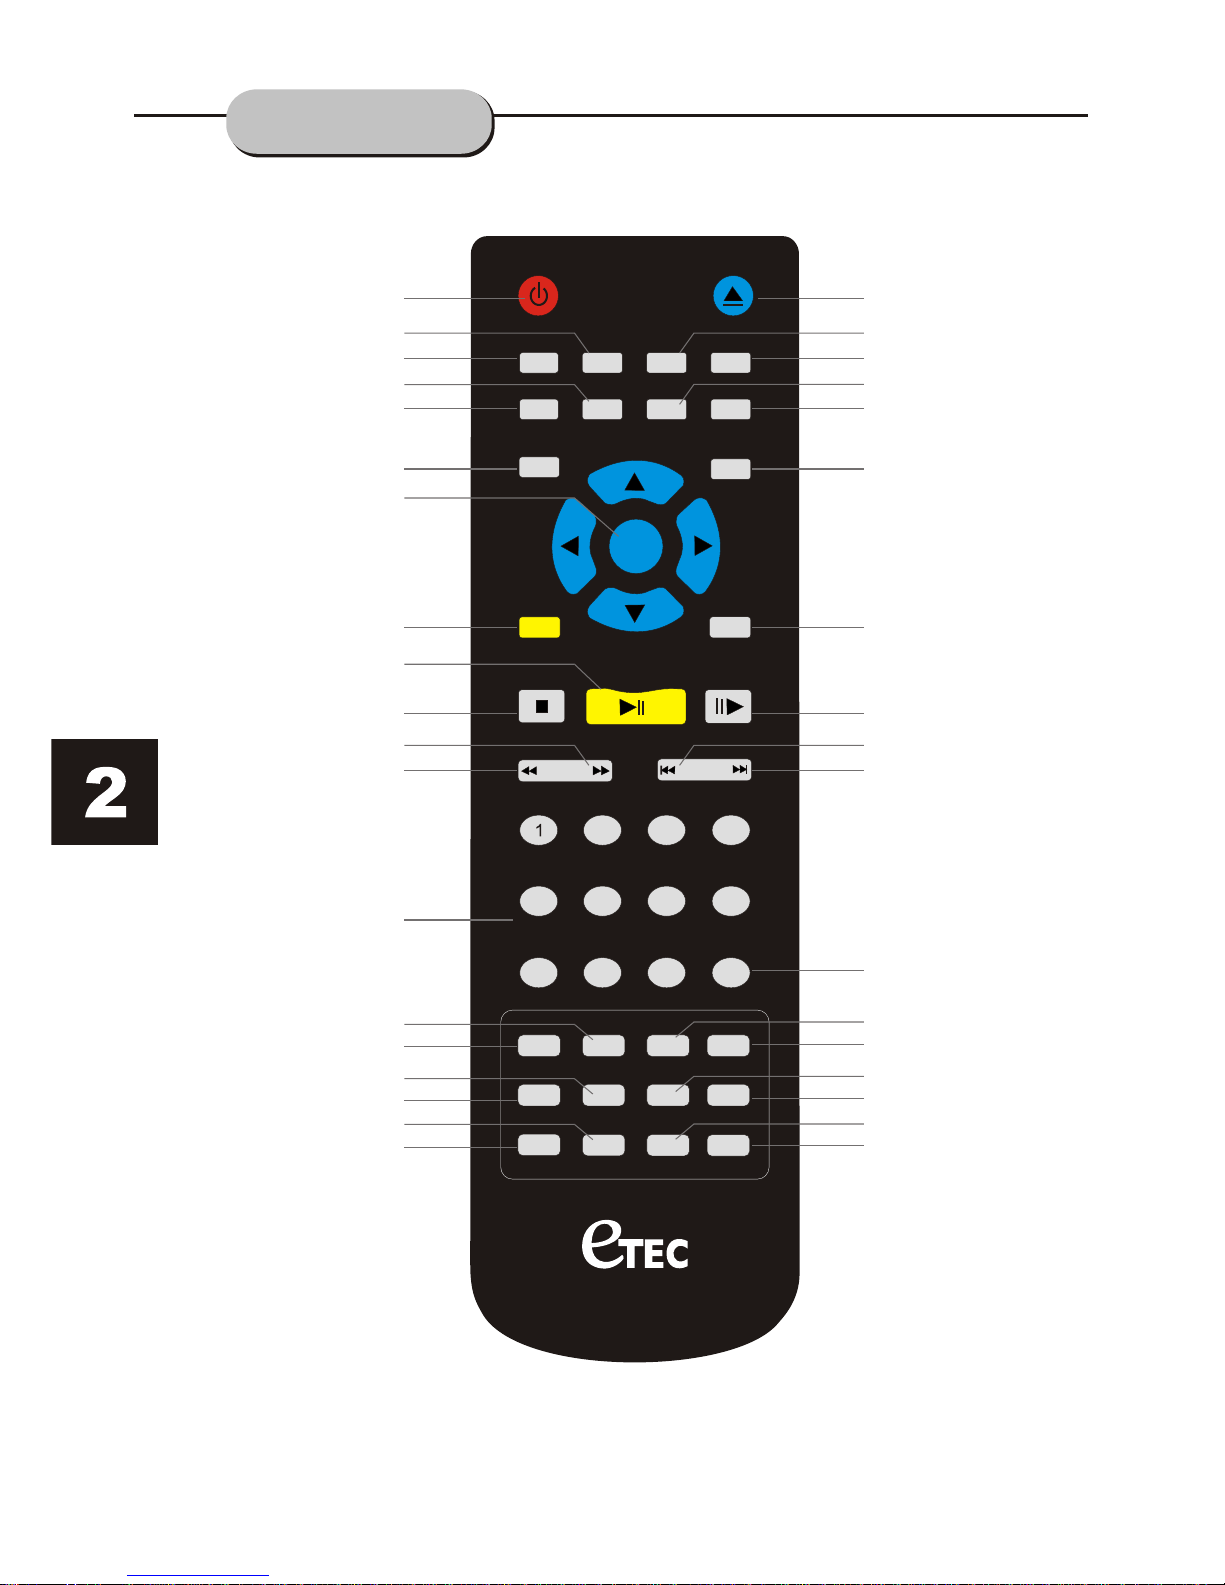
POWER OPEN/CLOSE
SUBTITLE
ANGLE
LANGUAGE
DISPLAY
PBC
TITLE
RESUME
MUTE
VOL- VOL+
ENTER
MENU
SETUP
STOP PLAY/PAUSE STEP
REV FW D PREV NEXT
2
3
4
5
6
7
8
9 10+0
TIME
PROG CLEAR ZOOM HDMI
RETURN REPEAT A-B RESET
SLOW IS/PSAUDIO-L AUDIO-R
DVD2658
NUMBER BUTTONS [13]
FWD(Forward) [11]
REV(Reverse) [12]
[28] PREV(Previous)
PROG(Program) [15]
[36] IS/PS
(Interlace Scan/
Progressive Scan)
[33] A-B(Repeat A-B)
VOL-(Volume Down) [6]
[25] VOL+(Volume Up)
AUDIO-R(RIGHT)[18]
AUDIO-L(LEFT) [19]
POWER [1]
ANGLE [2]
SUBTITLE [3]
TITLE [4]
ENTER [7]
PLAY/PAUSE [9]
STOP [10]
CLEAR [14]
RETURN [17]
REPEAT [16]
[20] OPEN/CLOSE
[21] LANGUAGE
[22] DISPLAY
[23] RESUME
[24] MUTE
[26] SETUP
[27] STEP
[29] NEXT
[30] TIME
[31] ZOOM
[34] RESET
[35] SLOW
[32] HDMI
PBC(Playback Control) [5]
MENU [8]
REMOTE
CONTROL
 Loading...