

Page 1
USER MANUAL
DVD H OME THE ATER S YST EM
DVA 60 8
To assu re the pr oduct t o work in b est sta tus,
Ple ase rea d the use r s manua l caref ully be fore op erati on
and k eep it we ll for fu ture us e
单色印刷
4
3
xxxxxxxxxxxxxxxxxxxxxxxxxxxx
xxxxxxxx
xxxxxx
1
DVA608 说明书
版次 : 1.0
页次 :
65
B
1 2
A
B
C
1 2 5 6
D
美之尊科技有限公司
设计 :
审核 :
料号 :
图号 :
名称 :
材质:
结构 :
修改区域 描述
日期
担当
涂覆 :
D
C
3 4
A
WIC-DVA608-030S
面纸为 128g 铜版纸,内页 80g 书写纸
核准 :
业务 :
POWER
Page 2
SAFETY INFORMATION
TO RE DU CE TH E RI SK OF F IR E AND E LEC TR IC SH OCK, DO N OT EXPO SE T HIS UNI T TO
RAI N OR MOIS TURE.
CAUTION : To reduce the
risk of fire and electric shock,
do not remove the cover (or
The lightning flash with arrowhead symbol,
within an equilateral triangle, is intended to
alert the user to the presence of uninsulated
"dangerous voltage" within product's enclosure
that may be of sufficient magnitude to constitute
a risk of electric shock.
The exclamation point within an equilateral
triangle is intended to alert the user to the
presence of important operation and servicing
instructions in the literature accompanying the
appliance.
WARNING: TO REDUCE THE RISK OF FIRE OR
ELECTRIC SHOCK, DO NOT EXPOSE THIS
APPLIANCE TO RAIN OR MOISTURE.
CAUTION: TO PREVENT ELECTRIC SHOCK,
MATCH WIDE BLADE OF PLUG TO WIDE SLOT,
FULLY INSERT.
8. Do not place near flame sources, such as candles,
on the appliance.
9. Do not locate the appliance or cord near heat sources
such as radiators, heaters, air ducts or direct sunlight.
10. Do not block any of the ventilation openings. Ensure
that vents are not covered by newspapers, tablecloths,
curtains, etc. Do not install in a tight-fitting cabinet.
11. Do not insert or allow foreign objects to enter any
grille openings.
12. Do not run the cord under carpeting. Instead, arrange
the cord away from traffic areas where it will not become
a trip hazard.
13. To disconnect the appliance, turn the appliance off,
switch off the power outlet and remove the plug from the
power outlet.
14. Do not misuse the cord. Never carry the appliance by
the cord or pull to disconnect it from the outlet. Instead,
grasp the plug and pull to disconnect.
15. Do not operate the appliance if it has a damaged cord
or plug; after the appliance malfunctions; or has been
dropped or damaged in any way. Consult an authorised
service facility or similarly qualified person for examination.
16. Use of controls or adjustments, or performance of
procedures other than those specified herein, may result
in hazardous radiation exposure.
Caution:
back) of the unit. Refer servicing only to qualified
service personnel.
IMPORTANT SAFEGUARDS
In addition to the careful attention devoted to quality
standards in the manufacture of your video product,
safety is a major factor in the design of every instrument.
However, safety is your responsibility, too. This sheet
lists important information that will help to assure your
enjoyment and proper use of the video product and
accessory equipment. Please read them carefully
before operation and using your video product.
Installation
Read all instructions carefully, even if you are familiar
with the appliance.
1. This appliance is not intended for use by children or
infirm persons without supervision.
2. Children should be prevented from playing with the
appliance.
3. This appliance should be placed on a dry, level surface
before it is operated.
4. INDOOR USE ONLY ?this appliance is not intended for
outdoor use.
5. Do not expose this appliance to rain or moisture. Do
not immerse the appliance in water or any other liquid.
6. Do not place items filled with liquids, such as vases, on
the appliance. Do not expose the appliance to dripping or
splashing liquids.
7. This appliance is not intended for use in bathrooms,
laundry areas or similar moist locations. Never locate this
appliance in the immediate surroundings of, or where it
may fall into, a bath, basin, washtub, shower or swimming
pool.
-1-
Installation Warnings
Ventilation, Slots and openings in the case are
provided for ventilation to ensure reliable operation
of the video product and to protect it from overheating.
These openings must not the blocked or covered. The
openings should never be blocked by placing the
product on a bed, sofa, rug, or heat register. This
product should not be placed in a built-in installation
such as a bookcase or rack, unless proper ventilation
is provided or the video product manufacturer
instructions have been followed.
Outdoor Antenna Grounding , If an outside antenna
or cable system is connected to the video product,
be sure the antenna or cable system is grounded
so as to provide some protection against voltage
surges and builtup static charges. ANSI/NFPA
No. 70-1984 provides information with respect to
proper grounding of the mast and supporting
structure, grounding of the lead-in wire to an
antenna-discharge unit, connection to grounding
electrodes, and requirements for the grounding
electrode.
Power Lines An outside antenna system should
not be located in the vicinity of overhead power
lines, other electric light or power circuits, or where
it can fall into such power lines or circuits. When
installing an outside antenna system, extreme care
should be taken to keep from touching or approaching
such power lines or circuits, as contact with them
might be fatal. Installing an outdoor antenna can
be hazardous and should be left to a professional
antenna installer.
Lightning For added protection for this product
during a lightning storm, or when it is left unattended
and unused for long periods of time, unplug it from
the wall outlet and disconnect the antenna or cable
system. This will prevent damage to the video
product due to lightning and power line surges.
If the supply cord is damaged, it must be replaced
by the manufacturer or its service agent, or a similarly
qualified person, in order to avoid a hazard. This
product has not been designed for any uses other
than those specified in this booklet.
Laser Safety
This compact disc player is classified as a CLASS 1
LASER PRODUCT.
Only qualified service personnel should remove the
cover or attempt to service this device due to
possible eye injury.
Invisible laser radiation when open and interlock
failed or defeated.
Avoid direct exposure to beam.
Save These Instructions
This product incorporates copyright protection
technology that is protected by method claims of
certain U.S. patents and other intellectual property
rights owned by Macrovision Corporation and other
rights owners. Use of this copyright protection
technology must be authorized by Macrovision
Corporation, and is intended for home and other
limited viewing uses only unless otherwise
authorized by Macrovision Corporation. Reverse
engineering or disassembly is prohibited.
Compulsory Warnings
SAFETY INFORMATION
-2-
Do not open, do not attempt to repair, disassemble or
modify this appliance.
Dangerous high voltages exist. This appliance is only to be
serviced by a qualified person. There are no
user-serviceable parts inside.
Do not look at laser pick-up directly.
Do not touch the lens.
Page 3
Video outputs
The p layer i s equip ped wit h the fol lowin g video o utput p orts:
The T V Syste m Setti ng is def aulte d to the NT SC sett ing
ESSENTIAL SETUP
-3-
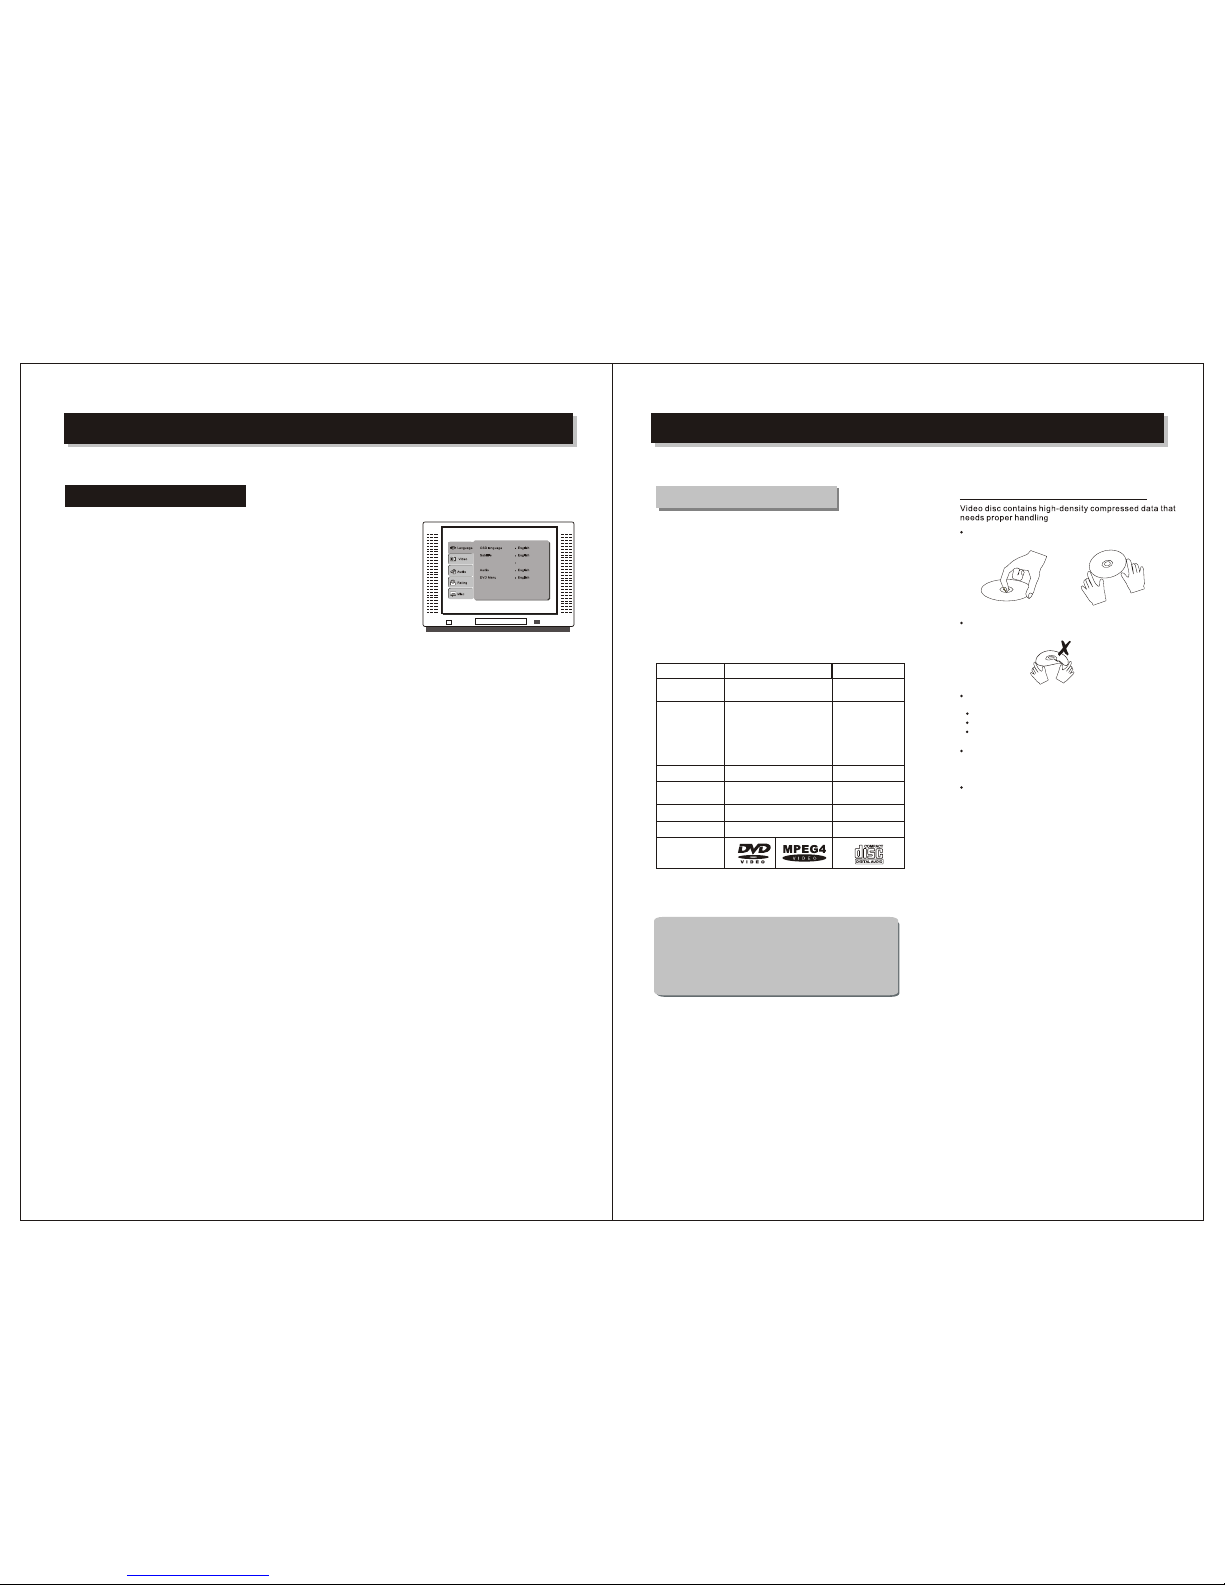
Clean the disc surface with a soft, dry cleaning cloth.
Wipe the disc surface gently , radically , from center
Toward the outer Edge.
Direct sunlight
Heat or exhaust from a heating device.
Extreme humidity
Store discs in cabinet vertically , in dry condition.
Prevent exposure to:
Care of disc
Hold the disc with fingers. Hold the disc's outer edge
and/or the center spindle hole. Do not touch the disc
surface.
Do not bend or press the disc. Do NOT expose the disc
to direct sunlight or heating sources.
.
Do not applythinner, alcohol chemical solvent, or sprays
when cleaning. Such cleaning fluids will permanently
damage the disc surface.
Some features contained in this DVD player are related to the DVD disc's
software.
Some features cannot be performed if the disc does not support the feature,
or requires special settings.
REMARK
DVD (Digital Versatile Disc) is a digital video medium under
the MPEG II format, featuring a variety of revolutionary
entertainment capabilities. The MPEG II video compression
technology provides capacity for an excellent picture of
minimum 500 lines resolution on screen, up to 8 language
soundtracks, up to 9 views from different camera angles and
up to 32 language subtitles (provided the DVD disc itself
supports these features).
About DVD
Sing le-la yer / Sin gle sid e
4.7G B = 2 hr
Sing le-la yer / Dou ble sid es
8.5G B = 4 hr
Doub le-la yers / Si ngle si de
9.4G B = 4.5 hr
Doub le-la yers / Do uble si des
17GB = 8 h r
Dis c infor matio n
Dis c types
Sub -titl es
Sou nd trac ks
Sym bol
500 l ines up
Hor izont al
Res oluti on
12c m / 8cm
Dis c size
12c m / 8cm
Cap acity
Rec ordin g
Met hod
Dig ital / MP EG II
DVD CD
Dig ital
650 MB=74 min
32
8 1
-
-
INTRODUCTION
-4-
DivX Subtit le Western Eur opean
Com ponen t, Comp osite , P-Sca n and S-V ideo
Com posit e and S-V ideo ou tputs a re alwa ys acti ve and do
not n eed to be s et.
Page 4
Remote control
Some features contained in this DVD player are
related to theDVD Disc's software.
Some features cannot be performed if the disc does
not support the feature, or requires special settings.
Check the features printed on the disc's packing or
follow the instructions of the Disc's on screen menu.
REMARK
Some features of the player can only be performed
by the remote control.
Some features described in this owner's manual are
related to the Disc's encoding.
Some features may not be available, if the disc
encoding does not support the feature.
INTRODUCTION
1) POWER
2) OPEN/CLOSE
3)
4) MUTE
5) DISPLAY
6) SLOW
7)
8) REPEAT
9)
10) ZOOM
11) PROGRAM
12)
13)
SEARCH
14) MOVE UP
15) SOURCE
16) SETUP
17) ENTER
18) MOVE LEFT
19) MOVE RIGHT
20)
21) PROLOGIC
22) STOP/BAND
23) MOVE DOWN
24) PLAY/PAUSE
25) SELECT
26) NEXT
28)
29) VOLUME +
PREVIOUS
30)
VOLUME -
31)
32) LANGUAGE
33) ANGLE
34) TITLE
35) RETURN
36) P/N
37)
27)
38)
39)
-5-
Loading batteries to the remote control
● Remove the battery compartment cover.
Make sure that the batteries have been inserted
in the correct polarities matching to the symbols
+, - marked in the battery compartment. Close
the battery compartment cover.
When replacing batteries, replace both batteries.
Do not mix new and used batteries operating
together, otherwise, the operation lifetime will
be much shorter than normal.
Remove the batteries if the unit will not be used
for a prolonged period of time.
The remote control transmits a directional
infrared beam.Be sure to aim the remote
control directly at the infrared sensor of the
unit during operation.
If the sensor has been covered or there is a
large object between the remote control and
the sensor, the sensor will not respond.
The sensor may not able to receive the
remote signal when it is exposed to direct
sunlight or a strong artificial light (fluorescent
or strobe light). In this case, change the
direction of the light or reposition the unit to
avoid direct lighting.
● Load two AAA batteries into the
battery compartment.
●
●
●
INTRODUCTION
30 30
Within a pprox imate ly
6 meter (2 0 feet)
-6-
RESET
1
3
2
4
5
6
8
9
13
14
1110
12
16
19
21
15
18
20
17
23
25
27
22
24
26
29
28
31
30
33
32
35
34
37
36
39
38
7
NUMBER 10+
0-9NUMBER
REPEAT A-B
BACKWARD/SCAN-
FORWARD/SCAN+
STEP/P-SCAN
MENU /PBC
L/R/ST
SUBTITLE
Notes
The remote control transmits a directional infrared beam. Be sure to aim
the remote control directly at the infrared sensor during operation. When
the sensor is covered or there is a large object between the remote control
and the sensor, the sensor cannot receive signals. The sensor may not be able
to receive remote control signals properly when it is exposed to direct sunlight or
strong artificial light. In this case, re-position the direction of the unit to avoid
direct light.
POWER
"
A
A
A
"
1
.
5
V
x
2
BE ENVIRONMENTALLY FRIENDLY
Disp ose of al l batte ries pr operl y
Page 5
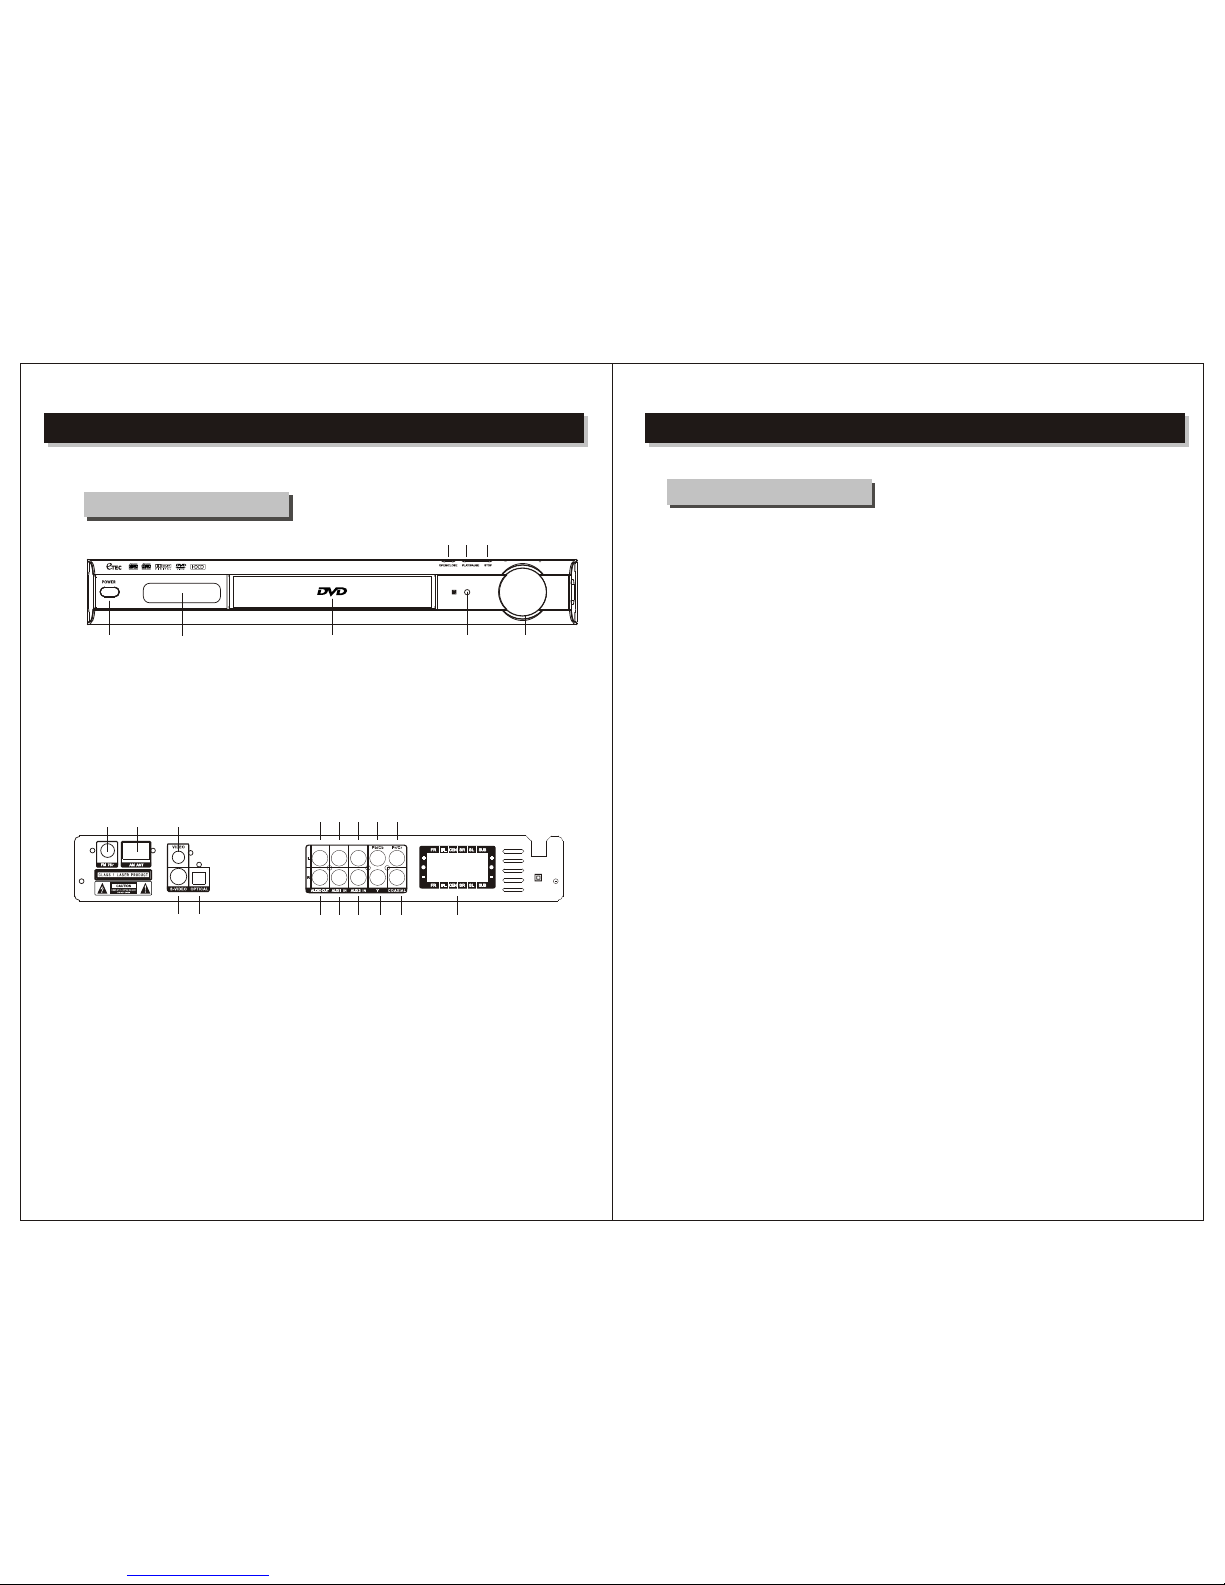
INTRODUCTION
About the player
1) POWER
2) LED DISPLAY
3) OPEN/CLOSE
4) PLAY/PAUSE
① ②
③ ④ ⑤
⑥⑦⑧
5)
6)
7)
STOP
VOLUME
INFRARED RECEIVER
8)
18.
19.
20.
Digital signal coaxial output
10. AM ANTENNA
11. VIDEO OUT
S-VIDEO outpu
Digital signal OPTICAL output
AUX 1 Right INPUT
AUX 2 Right INPUT
12.
13.
14.
15.
16.
17.
9. FM ANTENNA
22. Pb/Cb output
23. Pr/Cr output
24. 5.1 channel speaker output
21.
13
12
11
14
19
18
23
16
17
9 1 0
15
20 2 1 2 2
FRONT PANEL
BACK PANEL
-7-
AUDIO Right OUT
INTRODUCTION
About DVD receiver
-8-
24
AC 120V 60HZ
Y - output
AUX 1 Left INPUT
AUDIO Left OUT
AUX 2 Left INPUT
VOLUME
1. Compatible wit h: DVD, CD, M P3, CD-R/RW, DVD+R/RW,JPEG.
2. Audi o Out put : 5.1 ch ann el amplifier outp ut: 8 40w att s total pow er.
3. Multiple op tio ns for Vide o output: Comp osi te, C omponent, P- Sca n, an d
S-Vi deo .
4. Compatible wit h NTSC syst em
5. Volu me of each ch ann el can be adj ust ed separately in Pr o-L ogi c setting .
6. Thi s unit cont ain s a DIGITAL-PLL, AM/FM Tun er wh ich will pl ay in Surround
Sound or 2- Spe ake r Ster eo. The rad io st ati ons can be searched au tom ati cal ly
or man ual ly. You can also ent er th e memory nu mbe r for ea ch st ati on, then yo u
can ch oos e the stati on ac cor din g to the m emo ry number for easy ope rat ion .
7. Unique Pro- log ic so lution ci rcu it ca n deliver eith er 5. 1 Channel
Surround Sou nd or 2 ch ann el stereo for CD /MP 3 and
non - 5.1 channel encoded
DVDs.
DVD /CD DRA WER
Page 6

Preparations
Accessories
1. Remote controller 2. Audio/Video cable 3. User's manual
(check whether be fully equipped after open the box)
System connection
1. When making connection between this unit and other components, be sure all
units have the power-off.
2. Audio/Video cables are connected according to the different color identification.
Yellow to video terminal
White to audio terminal L
Red to audio terminal R
5.1 CHANN EL CO NN EC TI ON
5.1 Channel Audio Output has two cable lines output:
1) Connect the audio wires to the audio output interface.
2) Connect the satellite, Center channel, Subwoofer speakers according to the indication on the 5.1 channel outputs.
Scheme of connection
INTRODUCTION
-9-
TUNE INSTRUCTION
INTRODUCTION
-10 -
MP3
CEN TE R
SUBWOO FER
MAIN BOX
DVD RECE IVER
REAR PANE L
FR O N T L E F T
FR O N T R I G H T
RE A R R I G H T
RE A R L E F T
TVTV
AC 120V 60HZ
1 .Ent er Tuner mo de
Pres s SOURC E butt on. . Sel ect th e Tuner mo de.
2. Auto se arch
Unde r the FM mode, aut osea rch fo r FM stat ions , unde r the AM mode , auto sear ch for AM
stat ions .
Pres s the sea rch bu tton an d the pla yer wi ll aut omat ical ly sea rch al l broad cast ing st atio ns.
When a ra dio sta tio n chann el is fou nd by th e tuner, th e stat ion wi ll broa dcast for 3 sec onds ,
and the n sear ch the ne xt sta tion . After th e searc h is comp let ed, Tune r will au to sav e all
stat ions an d retu rn bac k to firs t stat ion fou nd. Du ring t he sear ch pro cess , you can p ress the
Stop bu tton t o end the s earc h. The pla yer ca n save up t o 20-FM s tati on s and 20 - AM statio ns.
Save d stati ons wi ll not be l ost whe n the un it is tur ned off .
3. Sear ch for a single s tatio n
Pres s SCAN + butto n, and th e tune r will se arch f rom th e curre nt sta tion f requ ency to t he nex t
high er stat ion fr eque ncy. Whe n sear chin g for a station in t his mod e, the tuner on ly goe s to the
next st atio n and st ops unt il ano ther S CAN cho ice is enter ed. Pre ss SCA N- but ton to se arch i n
the opp osit e dire ctio n.
4.Sk ip,selec t stat ion by numbe r, setup st atio n
Pres s NEXT button , playe r will s kip fro m curr ent st atio n up to next s tati on. Pr ess PRE b utto n
to skip t o the nex t lowe r stati on. Pr ess NU MBER bu tton s (mem ory in put number ) to skip to t he
sele cted st ati on in the tu ner me mory
5. Pro -Log ic
The Pro -Log ic, 5. 1CH aud io out put wi ll alwa ys be th e defau lt set ting w hen you l oad a CD/ MP3
disc . You can turn th e Pro- Logi c funct ion OF F to rece ive re gula r 2-Ch anne l Ster eo.
The def ault Pr o-L ogic se tting of DVD pl ayer i s OFF, and can be tu rne d ON by pres sing
Pro- Logi c butt on.
Mak e sure th ey fit sn ugly fo r the bes t signa l.
Page 7

CD Player is defaulted to 5.1 Channel Surround Sound setting. For normal 2 speaker stereo push
Page 8

The ti tle of a DV D is in the f irst tr ack of a
DVD di sc. Som e DVD dis cs will r efuse t he
"TIT LE func tion.
FUNCTION BUTTONS
Play / Pause/ Stop
Press PLAY/PAUSE button
To play the Disc
Then Press PLAY/PAUSE button again
to pause the disc.
Press the third time to resume normal playback.
Press STOP button
a) Press Once :
b) Press Twice :
1
2
3
STOP memorizes the interrupt position.
( May resume with Play button )
To stop completely
(Will NOT resume with Play button)
Open /Close disctray
To open and close the disc tray:
PressOPEN/CLOSE button on the remote
Power ON / OFF
Press POWER button on front panel
(Always switch off the player after use)
Skip Forward / Backward
Press to skip forward (chapters)
Press to skip backward (chapters)
1
2
Player will not advance or reverse during
"WARNING" section of any disc.
Search Forward / Backward
Player will not advance or reverse during
"WARNING" section of any Disc.
Press to Search forward
Repeat pressing the button to change search speed
Press to search backward
Repeat pressing the Button to change search speed
Press PLA Y/PAUSE button
to resume normal playback
1
2
3
2 4 8 16
2 4 8 16
Slow Forward
Press to play slow forward motion
Repeat pressing the Button to change slow forward speed
Press PLA Y/PAUSE button
to resume normal playback
1
2
1
2
/
1
4
/
1
6
/
1
8
/
Note: This function is only available with DVD not for
CD/MP3
Select an item in menu
press SETUP button
to enter SETUP menu
Press CURSOR button
to move between function items.
Press ENTER button
To confirm a selection
Press SETUP button
To exit main menu
1
2
4
In the disc menu or setup menu
3
Disc TItle /Menu
Press MENU button
return to the DVD disc Menu.
Press TITLE Button
return to the DVD disc Title.
1
2
Disc menu is a DVD disc feature, allowing
Users to select functions on screen.
Disc MENU
Disc TITLE
-13 -
FUNCTION BUTTONS
Multi-Angle
If a DVD disc contains Multi-Angle feature, viewing angles
may be selected:
A DVD disc may contain
up to 9 selectable viewing angles.
P/ N switch
The player is equipped with PAL and NTSC broadcast system output.
Press STOP button
to stop the player operation
1
In STOP mode
2
Press P/N button
to switch the player between NTSC and PAL system
1
During in playback, repeat pressing
ANGLE button
to select the desired viewing angle
Status will be displayed on screen.
Multi-Audio Soundtrack
If a DVD disc contains Multi-Audio Soundtrack feature,
Audio Language can be selected:
During in playback, repeat pressing LANGUAGE
button
to select the desired audio language.
Playback status will be displayed on screen.
1
A DVD disc may contain up to 8 audio language selections.
NOTE
In most cases, an Audio Soundtrack selection will be displayed
on a DVD disc start up menu.
Press CURSOR Button to select and ENTER button to confirm.
Press SELECT to select channel
1
Press volume“ + ”“- ”to adjust
the volume level.
2
P-SCAN
1
Pre ss[ST OP] Key
2
Pre ss STEP /P-SC AN
you c an sele ct Prog ressi ve scan m ode out ,
Rep eat ste p , for sel ectin g norma l
pla yback
1
2
-14 -
Volume control
Turn t he unit p ower, ON o r OFF
STOP h as 2-mo des of op erati on:
LANGUAGE
Page 9

Page 10

L/R/ST
When play CD disc, press L/R/ST Key to select
left vocal, Right vocal ,Mix vocal or Stereo vocal
FUNCTION BUTTONS
Program to play a DVD, CD and MP3 disc in a set sequence, Press the "STOP" button..
Program setting
NOTE
Some DVD discs do not allow
programming.
Single track disc cannot be
DVD program menu
1
LOAD A DVD DISC.
Press the PROG button,
the DVD program menu will appear.
2
3
2
4
Use numeric keys on remote to input the title number and the Chapter number,
Repeat step until programming is completed.
Press PROG button to exit this program menu.
Highlight "Play Program", to start the program.
Highlight "Clear “, to clear all input.
Press ENTER button to confirm.
5
Press PROG button to cancel the program.
programmed.
Return
1
-17 -
Press DISPLAY button, and On Screen Display (OSD)
Indicator will be displayed at the upper part of the TV
Screen showing the disc information and operation status.
ON SCREEN DISPLA Y
-18 -
In PBC mode,P ress RETURN Key to go back to the menu, this wi ll cance l the PBC mode ,
and the RETUR N key will be invalid
LOAD A CD/MP3 DISC.
1
CD and Mp3 play back menu will appear immediately once you put
your CD/MP3 disc in the player.
2
3
4
Press the RIGHT button to move to the playback menu.
Press the RIGHT button to move to the tracks and select the
tracks you want to hear and press ENTER button
Press the DOWN button to scroll down to hightlight “Edit Mode”
and press ENTER.
5
Go back to playback menu and scroll down and highlight
“ADD TO PROGRAM” and press ENTER
6
Scroll up and highlight “PROGRAM VIEW” and press ENTER
so you can view the program tracks.
7
Press PLAY to start playing.
8
Turn unit off to clear program.
Whe n a differ ent dis c is load ed (DVD , CD or MP3 ),
The O SD indi cator w ill rem ain on sc reen un til the O SD
but ton is pr essed t o turn it o ff.
The O SD indi cator i s a user fr iendl y inter face
des igned f or disp layin g the sta tus of di sc play back.
2-t imes
3-t imes
4-t imes
Pre ss the OS D butto n 5-tim esto di splay a s follo ws:
Page 11

MP3 mode
ON SCREEN DISPLAY
-19 -
SETUP
Hig hligh t the des ired it em and pr ess ENT ER butt on,
Hig hligh t the des ired it em,
Pre ss ENTE R butto n to conf irm.
Pre ss SETU P button t o save th e setti ng and qu it.
Vide o
Ent er this m enu to se tup the v ideo se tting s
Pre ss SETU P button
Hig hligh t "Video ",
Pre ss ENTE R Vide o sub men u appea rs. ,
Hig hligh t the des ired it em and pr ess ENT ER butt on,
Hig hligh t the des ired it em,
Pre ss ENTE R butto n to conf irm.
Pre ss SETU P button t o save th e setti ng and qu it.
Lan guage
Ent er this m enu to se tup the l angua ge in
OSD d ispla y, DVD disc s ubtit le, DVD d isc aud io
and D VD disc s tart me nu.
Pre ss SETU P button
Hig hligh t "Lang uage" ,
Pre ss ENTE R, Lang uage su b menu ap pears .
Hig hligh t the des ired ma in dire ctory i tems
Pre ss ENTE R butto n to open t he sub me nu.
Vario us feat ures of t he play er can be a djust ed in
the S ETUP men u:
Pre ss SETU P button a nd the me nu appe ars.
-20 -
DivX Subtit le Western Eur opean
JPE G Previ ew
DivX Subtit le Western Eur opean
DivX Subtit le Western Eur opean
TV screen
The a spect r atio of t he pict ure pro vided b y the
DVD p layer c an be set ting th e featu res
ava ilabl eon the TV i n use.
through
Playin g track file inform ation
You may view the information of the MP3 dis c file
added when creat ed, i.e. artist, song name and
date etc., Those inf ormation of the playing track
will be display at the lowe r part of the screen.
Page 12

SETUP MENU
(Press SETUP button)
16:9 Wide Scr
When you connect
to a wide screen TV,
this setting will allow
the original aspect
ratio will be display
full screen.
NOT E
Depending on the DVD
disc format, e.g. 2.35:1,
the wide screen setting
may still having black
margins above and
below the picture.
Enter this menu to setup the digital audio output format for
Different signal types. The selectable output formats are
PCM or Raw.
Press SETUP button
Highlight "Audio",
Press ENTER , Audio sub menu appears.
TV System
TV System menu is to change up the broadcast system:
AUTO
NTSC
PAL
Audio (digital audio)
Auto switch from NTSC to PAL system according
to the disc, if not, the default system is NTSC
NTSC TV system
PAL TV system
Highlight the desired item and press ENTER button,
Highlight the desired
Press ENTER
Press SETUP
item,
button to confirm.
button to save the setting and quit.
If the digital output is set in"RAW"mode.there wil Be no analog output for
DTS bitstreaml
NOTE:
Highlight "Rating",
Repeatedly pressing ENTER button
to change the setting:
1. Kid Safe
2. G
3. PG
4. PG_13
5. PG_R
6. R
7. NC_17
8. Adult
Highlight "Password" selection,
Press ENTER button to lock.
Press SETUP butto n to save the setting and quit.
Enter this menu to setup the rating level of the player.
The player will require a password
to play any
disc with
rating level higher than the setting.
Highlight "Password" selection,
Press ENTER
input the 4 digits password,
button. The rating lock release.
Rating
Press SETUP
Highlight "Rating",
Press ENTER
button
button, Rating sub menu appears.
TROUBLE SHOOTING
Should your DVD player develop a problem, please check below before
requesting service:
Symptom Check and Action
No Power
Check if the power cord has been properly connected to the power outlet.
Check if the main power has been switched on.
Does not play
No disc, load a disc.
Disc has been loaded upside down. Place the disc with the label side up.
Disc's region code does not match to the player.
Disc is not correct type for player.
Disc is damaged or dirty, clean the disc or try another disc.
Moisture may be condensed inside the player. Remove the disc and
leave the unit power on for one or two hours.
No Picture
Check if the TV set has power on, use TV remote to select A/V signal for
DVD rather than broadcast.
Check if the system connection is proper and secure.
Check if the connection cables are damaged.
Clean the disc.
Picture
noise / distorted
The disc is dirty or damaged. Clean the disc or try another disc.
Reset the color system of the player or the TV set.
Try to direct the player to the TV set instead of via other components,
such as a VCR.
Picture not full
screen
Select the screen format from the player's SETUP MENU,
see " SETUP MENU " of this manual.
Select the screen format from DVD disc menu.
Malfunction
Should the player develop a malfunction, unplug the player for
30 minutes. After 30 minutes, turn the power to the player ON and the restore
function should reset the player.
No sound
Press the remote control L/R/ST button and
re-select the audio setting on the remote.
Bass Manag ement
Front Spea kers
Center Spe aker
Surround S peake rs
Subwoofe r
Test Tones
Center Spk r Delay
Surr Spkr De lay
Digital Ou tput
:On
: small
: Small
: small
: present
: off
: No Delay
: No Delay
: All
-21 - -22 -
Page 13

240W + 75W X 5 (P.M.P.O.) , 30W + 15W X 5 (RMS)
Page 14

We wa rrant this p roduct to be fre e from defec ts i n material a nd workmans hip
under normal use for a 90-day period after pur chase. We wi ll repair or repl ace
the unit free of charge should it be come defect ive under this warra nty,
providing you su bmit pro of of p urchase (sale s slip) along with th e unit an d
During the initial 90 day period after original purchase, we will service or
exchange, at no charge. To obtain warr anty servi ce or replacement withi n
the duration of the 90-day warranty, return the product freigh t prepai d to
Please enclo se a copy of the sales receipt with the date of purcha se and
provide a detailed descrip tion of the problem. Failure to encl ose required
information will result in dela y of your shipmen t. Please allow 4-6 weeks
This warranty does not cover any pro duct, wh ich has been subject to
damage du e to an act of Nature, misuse, neg lect, accident, abuse ,
commercial use, or modification of, or to, any part o f the pro duct,
including the antenna. Dama ge to e xternal devices such as speakers
and ot her memor y devic es are not covered nor is the cost incurred in
shippin g the unit for warranty repa ir. Under no circumst ances s hall
eTEC USA, be liable fo r any loss (direct, indire ct, incidental, forese en,
unforeseen, special or conse quential) or for any damage aris ing out
This warranty does not cover re-manuf actured units , or product sold 'As I s'.
This warra nty is valid on ly in the United States and grants speci fic le gal rights.
LIMI TE D 90 D AY WARRANTY
eTEC USA
823 Old Settlers Trail
Suite 100
Hopkins, Minnesota 55343
UNDER NO CIR CUMSTANCES WILL ET EC US A BE LIABLE FOR ANY IN
CIDEN TAL OR CO NSEQUEN TIAL DAMAG ES .
all access ories.
the addres s below.
for produc t service or re placeme nt.
of, or in co nnection with , the use of this produc t.
-25 -
WARRANTY
 Loading...