

Page 1
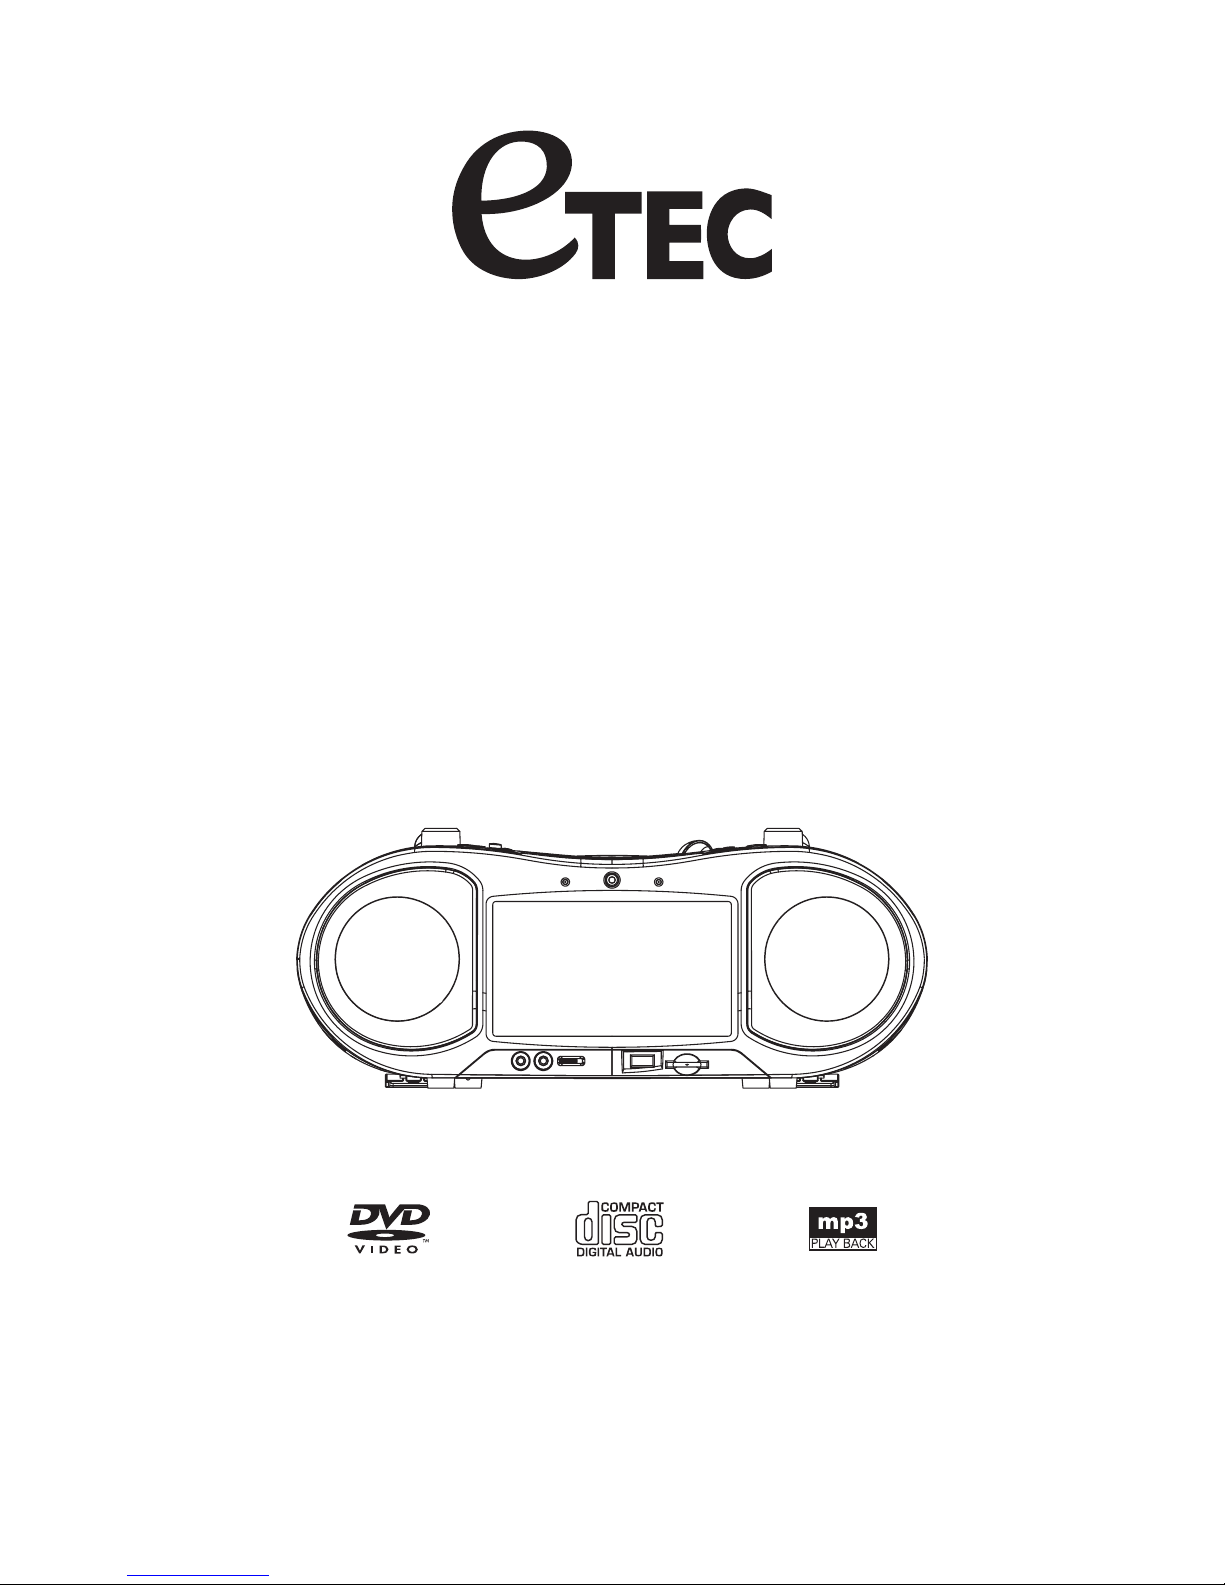
MODEL: BDV7186
Before attempting to connect, operate or adjust this player, please read these instructions completely.
And then put this manual in a safe place for future reference.
7" DVD BOOMBOX
WITH CD/AM/FM STEREO
AND REMOTE
USER MANUAL
Page 2
1
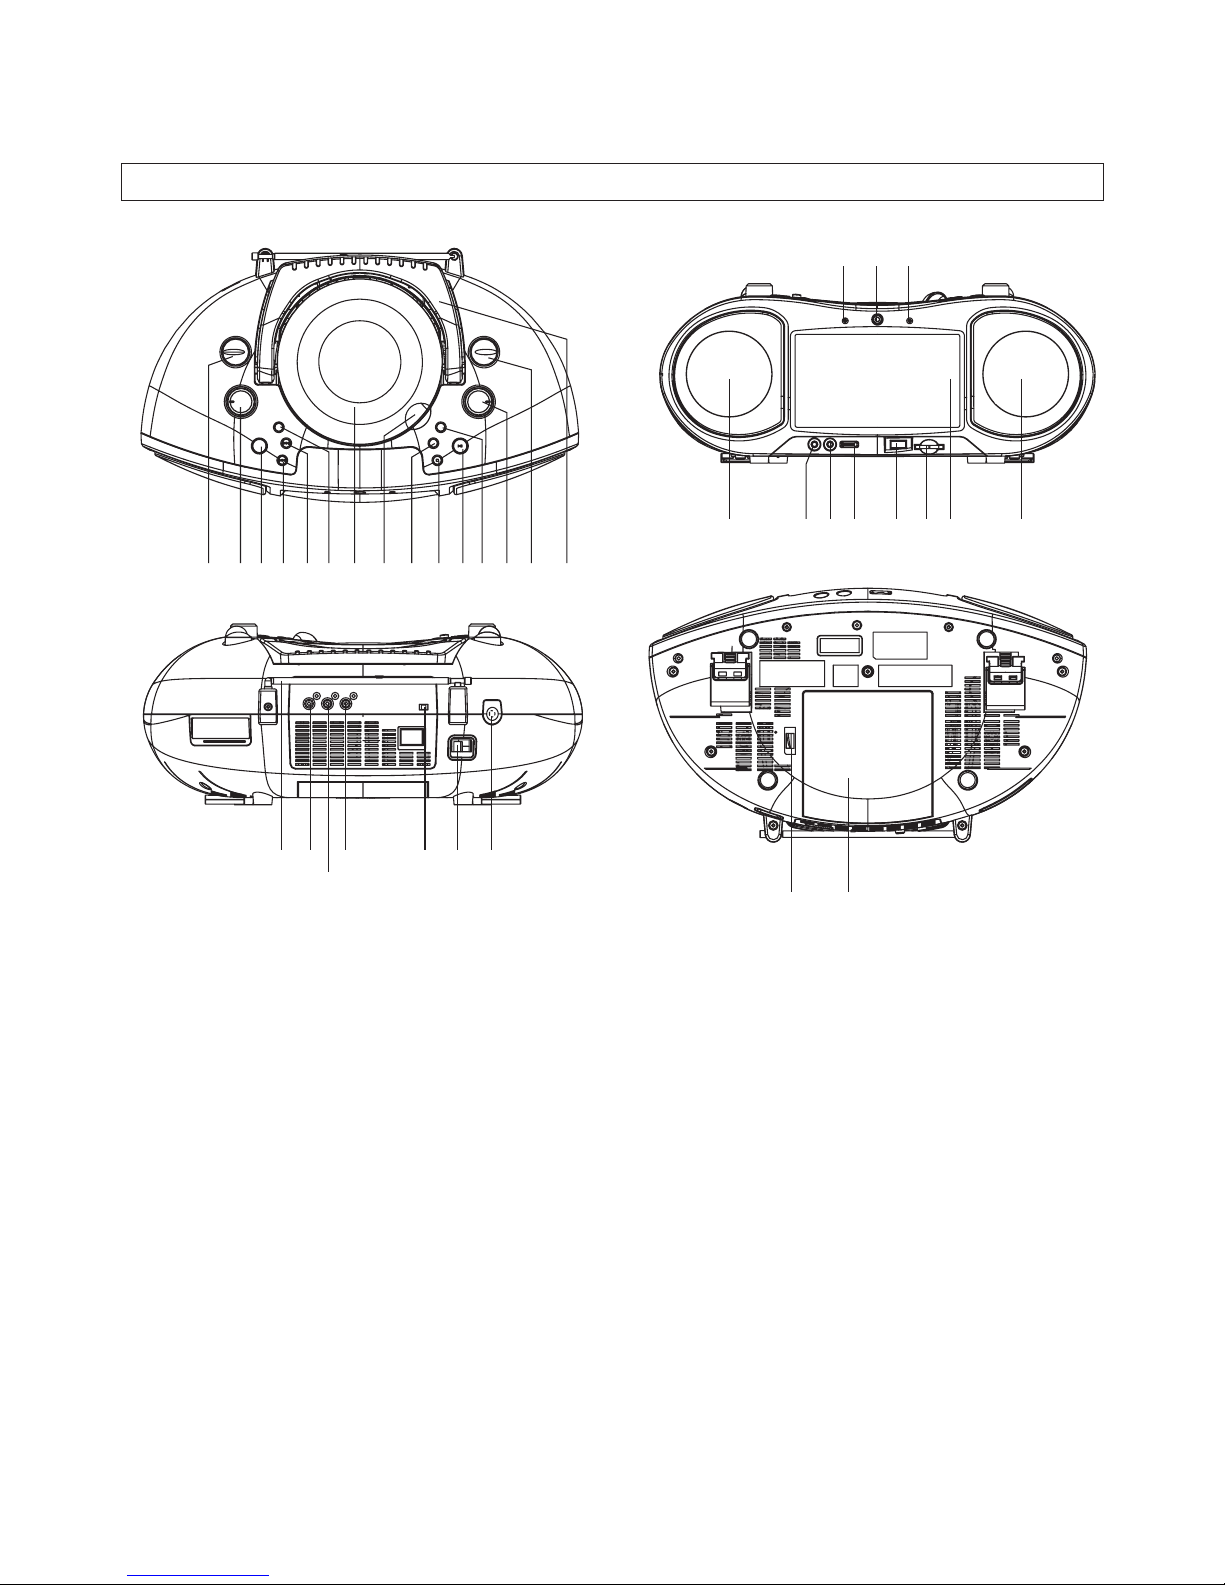
Illustration of the Controls/Jacks On the Main Unit
Main unit
1. FUNCTION CONTROL
2. BAND CONTROL
3. VOLUME CONTROL
4. TUNING CONTROL
5. MODE BUTTON
6. FAST FORWARD BUTTON
7.
8.
9.
10. BASS BOOST BUTTON
11. CD DOOR
12. CD DOOR OPEN TAB
13. FAST REVERSE BUTTON
14. STOP BUTTON
15. SPEAKERS
16. MICROPHONE INPUT
17.
18. USB 2.0 PORT
19. LCD DISPLAY
20. HANDLE
21. POWER INDICATOR
22. REMOTE SENSOR
23. FM STEREO SIGNAL INDICATOR
24.
25.
26. AUDIO OUTPUT-RIGHT JACK
27. AC SOCKET
28. HEAD
29.
30.
31. DISPLAY ON / OFF SWITCH
32.
33. SD / MMC CARD SLOT
34. 3.5mm AUX-IN JACK
PREVIOUS BUTTON
PLAY / PAUSE BUTTON
NEXT BUTTON
MICROPHONE LEVEL
TELESCOPIC ANTENNA
VIDEO OUTPUT JACK
PHONES JACK
BATTERY COMPARTMENT
AC VOLTAGE SELECTOR (FOR DUAL VOLTAGE
VERSION AND AT BOTTOM OF UNIT )(OPTIONAL)
AUDIO OUTPUT-LEFT JACK
15 16
17
18 19
23
15
2221
1
3
5
7910
11 121314
86
4
2
20
24
25
26
27
28
2930
31
32
34 33
Page 3

2
Basic connection
It is recommended to be connected to a multi-system TV.
Ensure that this player and other equipment to be connected
to the unit are in the standby or off mode and disconnect
the AC power cords before commencing connection.
Do not block ventilation holes of any piece of the equipment
and arrange them so that air can circulate freely.
Read through the instructions before connecting other
equipment.
Ensure that you observe the color coding when connecting
audio, video cables.
When playing a DVD, be sure the LCD display switch is in
the ON position or no picture will be seen.
During DVD play, the TV volume may be at a lower level
than during TV broadcasts, etc. If this is the case, adjust the
volume to the desired level.
If the DVD / CD player is connected to the TV through a
video cassette recorder, the picture may not be viewed
normally on some DVDs. If this is the case, do not connect
the player via the VCR.
Important
Note:
Connecting to a TV set
To power outlet
AC power cord
1. DISPLAY button
2. TITLE button
3. PREV & F.REV button
4. NEXT & F.FWD button
5. NAVIGATION buttons
6. NUMERIC buttons
7. ANGLE button
8. PROGRAM button
9. MUTE button
10. SETUP button
11. MENU button
12. STOP button
13. SLOW button
14. OK (PLAY / PAUSE) button
15. SUBTITLE button
16. AUDIO button
17. SEARCH button
18. REPEAT button
19. ZOOM button
20. CLEAR button
Remote control unit
DISPLAY
TITLE
MENU
SETUP
MUTE
SLOW
OK
SUBTITLE
AUDIO
SEARCH
REPEAT
ANGLE ZOOM
12
3
4
5
6
789
0
1
2
3
4
5
6
7
820
19
18
17
16
15
14
13
12
11
10
9
PLAY/PAUSE
STOP
PROGRAM CLEAR
To video input connector (yellow)
To audio input connectors (red, white)
Video/audio cable
RL
CONNECTING MICROPHONE
AND HEADPHONE
Connect one Microphone to MIC jack.
1 Connect the Microphone.
2 Adjust the MIC Volume to proper level that you
want.
3 Connect one headphone to phone jack.
21
3
Ü The AC plug is used as disconnect device, the disconnect
device shall remain readily operable.
Ü The apparatus shall not be exposed to dripping or splashing
and no objects filled with liquids, such as vases, shall be
placed on the apparatus.
Page 4

3
REPEAT BUTTON
Press REPEAT button during play, it will repeat play one
chapter / title or repeat all(for DVD disc), or repeat play a track
or all tracks (for CD), or repeat the the specified points (A-B).
1. Press PROGRAM during playback to display the program
menu.
2. Select location(s) to be memorized via navigation buttons and
then enter desired Titles / Chapters numbers via numeric
buttons.
Note: Inputting leading zero is not necessary.
Example: Track 3, press "3"
Track 12,press"1" and then "2"
Track 21, press"2" and then"1"
SEARCH FOR PREFERRED SCENE
1. Press SEARCH button during play and highlight the item to
be played (Title, Chapter, or Chapter time)by navigation
buttons
2. Input the desired number or time via the numeric buttons.
3. Press OK button to confirm and the playback from the
located scene starts.
4. To exit search menu, press SEARCH button directly.
PROGRAM PLAY(UP TO 16 MEMORIES)
3. Tostart programmed playback, select PLAYon the menu;
pressing PROGRAM button again toexit programming.
4. To clear programmed items, select the items and then press
CLEAR button on the menu. To clear all items, select the
<CLEAR> on the menu, and then press OK button on remote
control.
5. You can also cancel program mode by clearing all the items
in the program menu.
ZOOM PLAY
NOTE: When no soundtrack languages are recorded,
pressing this button will not work.
Press the ZOOM key continuously to zoom in the picture by 2,
3, and 4 times, zoom out by 1/2, 1/3, 1/4 normal size.
Press this key once more when the picture is at 1/4 size to
return to the normal size display.
Scroll to view the enlarged picture using Navigation buttons.
When the player is in operation, press DISPLAY button
continuously on the remote control, the screen will
display parts of information(current disc type, title number,
chapter number, playtime, audio language, audio type, subtitle
language and multi angle, etc) in a sequence.
It is possible to change the audio soundtrack language to a
different language from the one selected at the initial settings
(This operation works only with discs on which multiple audio
soundtrack languages are recorded).
Press AUDIO button during DVD disc play, the sound track
language changes with the current sound track number
shown on the TV screen.
Press ANGLE button during playback to display the number of
angles being played and then select a desired angle to view the
scene.
Note: only the DVDs shot with multi-angle scenes have this
function.
Press SUBTITLE button during playback, the subtitle language
shown on the screen will change as a response to each press;
When the desired language appears, release the button to view
the subtitle in that language.
Note: this function only works on the DVDs recorded with multilanguage subtitles.
During playback, press MENU button to return to main menu
(DVD).
TITLE button: Play the title (DVD)
Load the MP3 / MPEG 4 disc onto the disc tray and the TV
screen will show all its folders after a few seconds.
2. Select the folder you want by the navigation buttons and then
press OK button to confirm.
3. The files in this folder are displayed and select your favorable
song via navigation buttons and press OK button to start
playback.
Press NEXT and PREV button to select track directly.
Press REPEAT button change play mode.
REPEAT 1- repeat one file.
REPEAT DIR- repeat all tracks in the current album
REPEAT ALL- repeat all tracks in current disc.
REPEAT OFF-cancel repeat modes.
ON SCREEN DISPLAY INFORMATION
CHANGING AUDIO SOUNDTRACK LANGUAGE(DVD)
MULTI-ANGLE VIEWING (DVD ONLY)
CHANGING SUBTITLE LANGUAGE (DVD ONLY)
PLAYING A MP3 AUDIO OR MPEG4 VIDEO DISC
1.
4.
5.
KODAK PICTURE CD / JPEG CD PLAYBACK
Slide show of Kodak Picture CD after being loaded begins
automatically;
Folders of JPEG picture CD after being loaded are displayed on
the TV screen; use the navigation buttons to select the desired
folder and then press OK button to confirm.
The files in this folder are displayed and you can select your
favorite pictures using the up / down navigation buttons and
press OK button to start playback.
Preview of the picture will be displayed while you scroll across
the file names.
OPERATIONS
PREPARATION
Power on the TV set and select video input mode.
Power on the audio system which is connected to the player.
Press NEXT SKIP or PREV SKIP button once during play to
skip a chapter (DVD) or a track (CD) ahead or backwards.
During playback, press and hold the F. FWD button or F. REV
button several times to scan the disc forward or backward at
2X, 4X, 8X, 20X normal speed.
Press PLAY button to resume normal play.
Press STOP button during playback to stop playback; the
player activates its resume function when STOP is pressed in
STOP mode; press PLAY button again, playback resumes at
the point it stopped previously; open the disc tray or press the
STOP button one more time to clear the resume function.
GET STARTED
ADJUSTING THE VOLUME
SKIP AHEAD OR BACK
1. Turn on the player and switch the FUNCTION CONTROL to
DVD/CD/AUX position.
2. Lift open the disc tray.
3. Place a disc onto the disc tray.
4. Press the cover closedand playback starts automatically.
5. When a menu screen appears on the TV, move the navigation
buttons or press the numeric buttons to select a preferred track
number,then press OK button to startplayback.
Manually turn the VOLUME control to increase or decrease the
volume.
Press SLOW button on the remote control during playback, the
disc will be played at 1/ 2 normal speed at first, each time this
button is pressed, the play speed becomes slower (down to
1/7 normal speed.)
Press PLAY button, normal play will resume.
RAPID ADVANCE / REVERSE
STOP PLAYBACK
SLOW-MOTION PLAY (DVD)
Page 5

4
INITIAL SETTINGS
Initial settings page is for you to make your preferred settings
up for your player. Once the initial settings are done they are
retained in the internal memory of the player until otherwise
modified.
1. Press SETUP button.
2. Use the navigation buttons to select the menu item you want
to modify, press OK button to confirm.
3. Sub-menu settings will be displayed on the screen.
4. Use the navigation buttons to make these change, press OK
to confirm.
5. Use navigation buttons to switch to another menu selection
on the main setting page.
6. Press SETUP button to exit.
COMMON PROCEDURES FOR INITIAL SETTINGS
KODAK PICTURE CD / JPEG CD OPERATIONS
1. PLAY MODES
SKIP TO NEXT / PREVIOUS PICTURE
PICTURE ROTATIONS
PICTURE FLIPS
PICTURE ZOOM IN / OUT
SLIDE SHOW TRANSITION MODES
Press REPEAT button during play to change the play modes.
REPEAT 1- repeat one file
REPEAT DIR- repeat all pictures in the current album
REPEAT ALL- repeat all pictures in current disc.
REPEAT OFF- cancel repeat modes.
During playback, press STOP to enter preview mode.
Press NEXT button to skip to the next picture or PREV
button to the previous picture.
If no key is pressed for a few seconds, it will skip to next
picture automatically.
Press RIGHT and LEFT navigation buttons to rotate the picture
Clockwise and anti-clockwise respectively.
Press UP navigation button to flip the picture vertically.
Press DOWN navigation button to flip the picture horizontally
Press ZOOM button continuously ,the picture zooms in by 2, 3,
4 times or zooms out by 1/2, 1/3, 1/4 the original size.
Press this button once more when the picture getting 1/4 size
to return to the normal play.
If the picture is enlarged, you may use the navigation buttons to
view blocked parts of the picture.
During slide show playback, press the PROGRAM button to
cycle through to select one of the following modes to play.
WIPE TOP
WIPE BOTTOM
WIPE LEFT
WIPE RIGHT
DIAGONAL WIPE LEFT TOP
DIAGONAL WIPE RIGHT TOP
DIAGONAL WIPE LEFT BOTTOM
DIAGONAL WIPE RIGHT BOTTOM
EXTEND FROM CENTER H
EXTEND FROM CENTER V
COMPRESS TO CENTER H
COMPRESS TO CENTER V
WINDOW H
WINDOW V
WIPE FROM EDGE TO CENTER
RANDOM
NONE
2.
3.
4.
5.
6.
1. SYSTEM SETUP
EXTERNAL MEMORY MEDIA OPERATION (USB/MMC)
Prepare the player for External Memory media operation
NOTE:
OR
Insert a USB data traveller into the USB port and slide the
FUNCTION to the DVD position;
Press MODE button on the main unit continuously until the
player enters USB mode;
An icon of READING shows in the LCD and after the USB is
successfully detected and read, the track number as a total
shows in the LCD;
Press PLAY / PAUSE button to begin playback from track
Number 1.
The player can successfully play the music files with
USB 1.0 and USB 2.0 storage device.
Insert an SD/MMC card into the card slot ;
Press MODE button on the main unit continuously until the
player enters SD/MMC mode.
COLOR AND BRIGHTNESS ADJUSTMENT(FOR THE LCD
SCREEN)
Press MODE button once on the main unit to switch the
function between USB/CARD and DVD, press and hold MODE
button to adjust the color intensity ,brightness and contrast
respectively and use skip buttons to adjust.
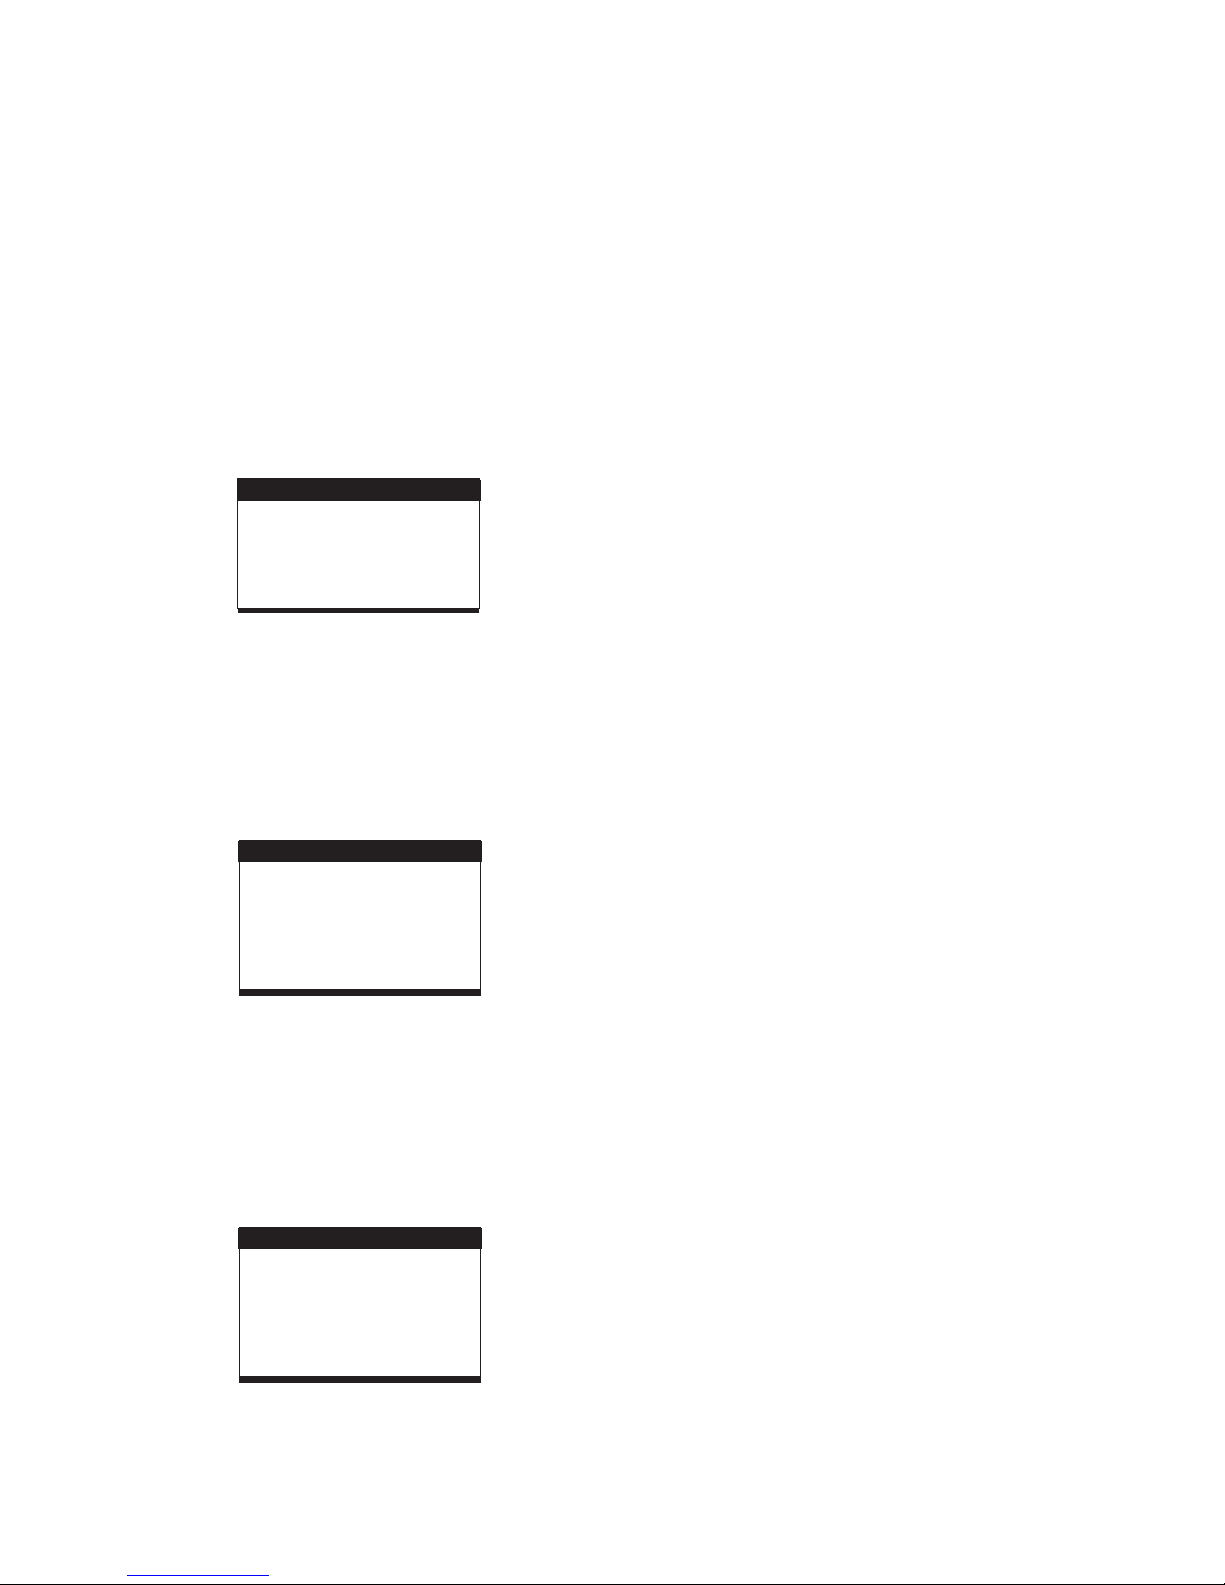
SYSTEM SETUPSYSTEM SETUP
TV SYSTEM
DEFAULT
EXIT SETUP
TV TYPE
PASSWORD
RATING
LCD MODE
1.1 TV SYSTEM
NTSC / PAL/ AUTO
1.2 LCD MODE
1.3 TV TYPE-
4:3PS :
4:3LB :
16:9 :
1.4 PASSWORD
- it is used to select the TV mode.
Options:
Please select this option as per your TV set.
- It is used to select the LCD MODE.
Options: 4:3 or 16:9
it is used to select the TV scan mode, please set
as per your TV set.
Options: Normal Pan & scan mode
Normal Letter box mode
16:9 wide screen mode
- input password to unlock the system. The
steps are as follows:
1.4.1 Enter SYSTEM SETUP, select the PASSWORD item by
scrolling the down navigation button, and then press the
right navigation button to select the input box.
Page 6
5
RADIO OPERATION
1. Turn the FUNCTION CONTROL to the RADIO position,
.
2. Select the desired band withthe BAND switch.
the
POWER Indicator willlight up
4. The built-in AM antenna and external FM TELESCOPIC
ANTENNAare directional.
5. Adjust the volume level to a comfortable listening level.
6. To turn off the radio, turn the FUNCTION switch to OFF
position.
NOTES:
NOTE: When external headphones / earphones are connected,
the sound to the unit'smain speakers willbe muted.
TO PLAY THE RADIO
STEREO HEADPHONE JACK
Astereo headphone jack has been provided on theback of the unit
so that you can listen to the unit without disturbing others. To use
this jack, plug in the headphones / earphones (not included) and
adjust the VOLUME control toa comfortable listening level.
3. Tune to the desired station by rotating the TUNING control
(Move the control back and forth until you get the strongest
clearest sound).
When receiving an FM broadcast, fully extend the
TELESCOPIC ANTENNA and position for the best
reception.
For AM broadcasts, rotate the whole set until the best
reception is heard.
If a particular FM (STEREO) station is weak, or you hear
too much background noise, try moving the position of
the band selector switch to the FM (MONO) position. This
can often result in a much clearer reception.
When the band selector switch is set to FM STEREO and
a stereo broadcast is being received, the FM STEREO
indicator on the top of the unit will be lit.
=
=
=
=
2. LANGUAGE SETUP
LANGUAGE SETUPLANGUAGE SETUP
OSD LANGUAGE
AUDIO LANG
SUBTITLE LANG
MENU LANG
EXIT SETUP
2.1 OSD LANGUAGE - It is used to select different On Screen
Display language for different user.
2.2 AUDIO LANG -
2.3 SUBTITLE LANG-
2.4 MENU LANG -
select preferred audio language.(DVD only,
need disc software support)
Select preferred subtitle language.
(DVD only, need disc software support)
Select preferred disc menu language.
(DVD only, need disc software support)
SPEAKER SETUPSPEAKER SETUP
DOWNMIX
EXIT SETUP
3. VIDEO SETUP
VIDEO SETUPVIDEO SETUP
BRIGHTNESS
CONTRAST
HUE
SATURATION
EXIT SETUP
3.1 BRIGHTNESS-- to set the brightness for the display.
Options: 0/2/4/6/8/10/12
Options:
3.2 CONTRAST-- to set the contrast effect for display.
3.3 HUE-- to set the color impression for display.
3.4 SATURATION-- to set the saturation level for display.
0/2/4/6/8/10/12
Options: -6/-4/-2/0/+2/+4/+6
Options: 0/2/4/6/8/10/12
4. SPEAKER SETUP
4.1 DOWNMIX
Options: Left / Right mix mode
Select this option if you don't have a 5.1
channels amplifier.
LT/RTSTEREO-
1.4.2 Input user's password"0000" to unlock it, in this case,
select the input box again to change the password by
inputting another new four numeric numbers and then press
SELECT button to confirm. When the password is changed,
you need to input the new one to unlock the system.
1.4.3 If you forget your own password, use the master
password "8200" to unlock it.
: If wrong password was input in unlock status, the
system will lock.
Set the rating of this player. If you want to change
the rating of parental lock, please input the password to
unlock first.
Options: 1 KID SAFE/2G/3PG/4PG13/5PG-R/ 6R /
7 NC-17 / 8 ADULT
Reset to factory settings.
Options: RESTORE
NOTE
1.5 RATING -
1.6 DEFAULT -
Page 7
6
TROUBLESHOOTING
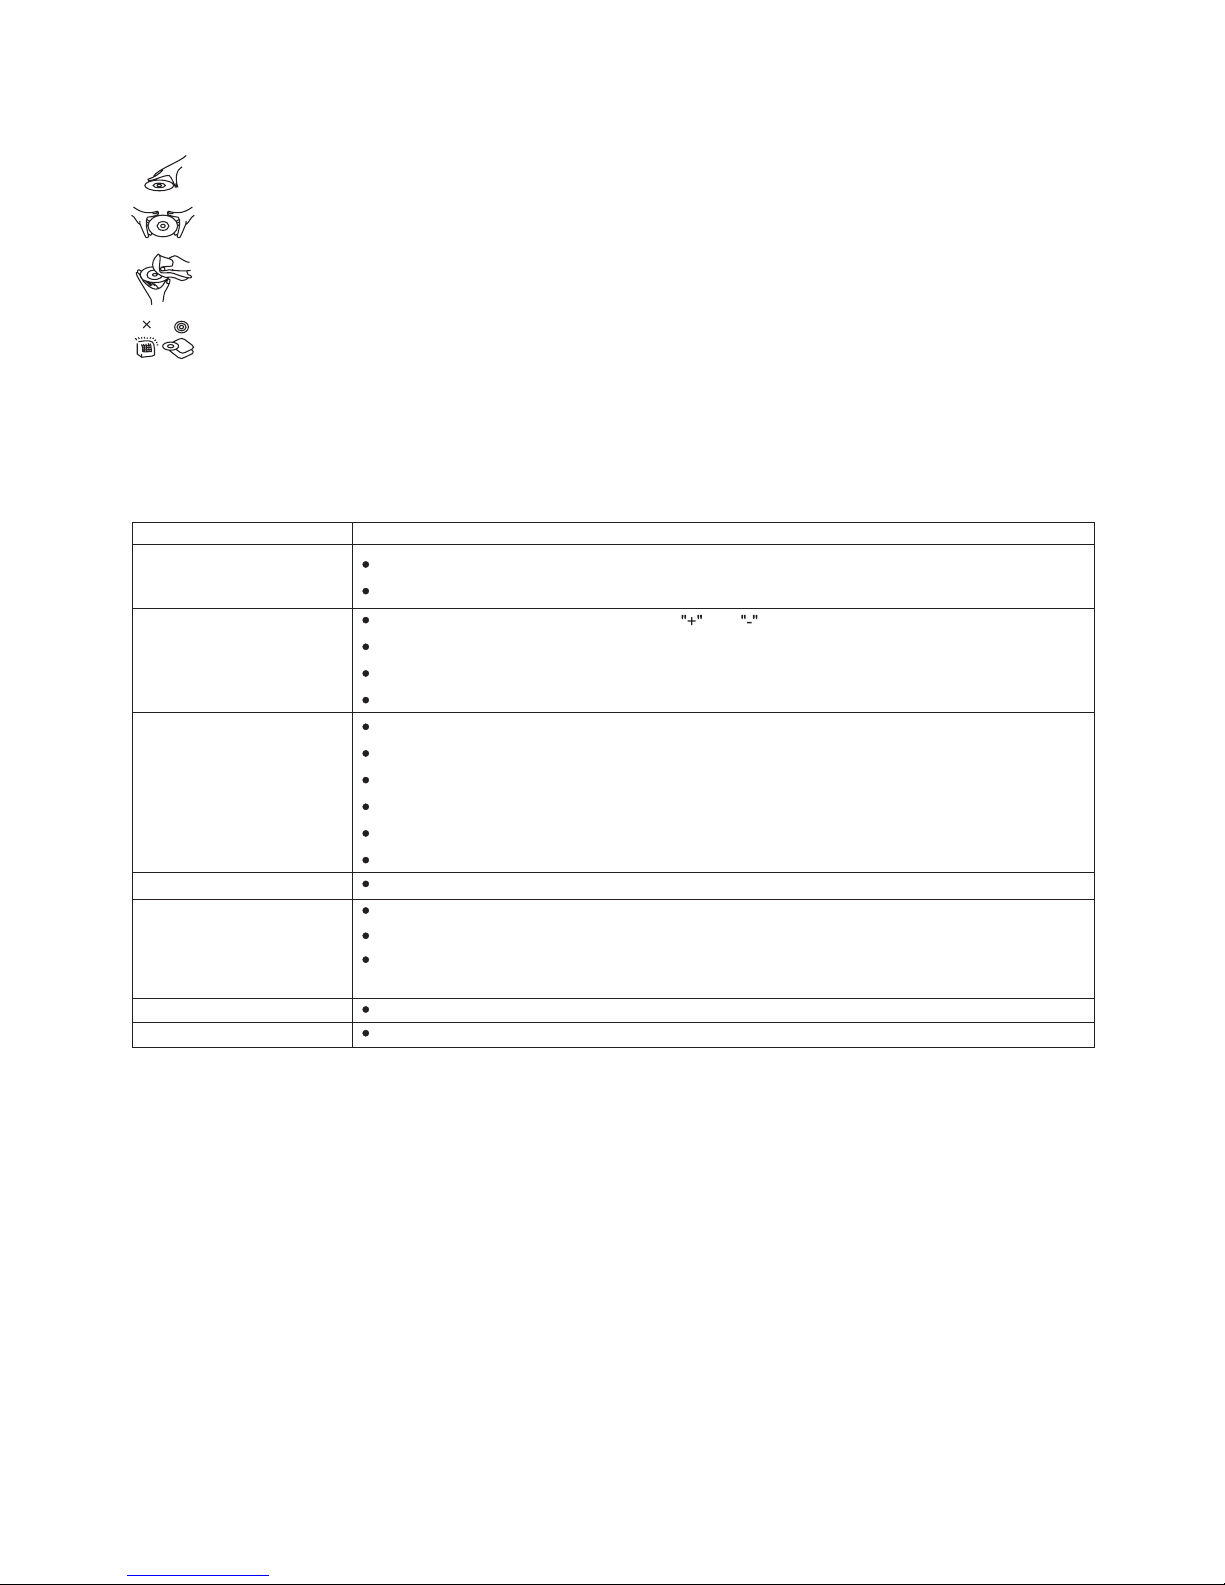
Hold the disc by the edge so the surface will not be soiled with finger prints. Finger prints, dirt and scratches can
cause skipping and distortion.
Do not write on the label side with a ball-point pen or other writing utensils.
Do not apply benzene, thinner, and liquid that prevents against static electricity.
Be careful not to drop or bend the disc.
Install only one disc on the disc tray.
Do not try to close the disc tray when the disc is not installed properly.
Be sure to store the disc in it's case when not in use.
DISC HANDLING PRECAUTIONS
If your DVD player does not seem to be functioning properly, check the items below before you contact an authorized service center
Symptom Check
Make sure the AC cord is securely plugged into an AC outlet.
Turn the power off and then back on.
Check that the battery is inserted in the
and direction properly.
The battery may be flat. Replace it with a new one.
Check that the signal transmission is directed at the remote control sensor on the DVD player.
Remove the obstacle between the remote controller and remote control sensor.
Check that the A/V cables are securely connected.
Check that the disc is a DVD (region number 1 or all), DVD-RW or AUDIO CD.
Do not use a disc that has scratches or dirt.
Check that the label-side of the disc is facing up.
The pick-up lens of the DVD player may be dirty. Contact the service center for lens cleaning.
Check that the TV channel is set to VIDEO or AV if viewing with a TV.
Power does not turn on or
suddenly turns off.
Remote control won't work
No picture or sound
Check that the LCD display is turned on.
Check that the display panel is open. If it is closed, audio will not be output to the speakers.
Check the volume setting. If set to zero, turn up volume level.
Check that the headphones are plugged into the PHONES socket.
Speakers cannot be used with the headphones.
Check that the battery is properly installed and AC Adapter is properly connected.
Use a disc without scratches or dents.
No picture
No sound
No picture and sound
Distorted video or sound
Page 8

ETEC LIMITED 90-DAY WARRANTY
We warrant this product to be free from defects in material and workmanship under normal
use for a 90-day period after purchase. We will repair or replace the unit free of charge
should it become defective under this warranty, providing you submit proof of purchase (sales
slip) along with the unit and all accessories.
During the initial 90-day period after original purchase, we will service or exchange, at no
charge. To obtain warranty service or replacement within the duration of the 90-day warranty,
return the product freight prepaid to the address below.
ETEC USA
823 Old Settlers Trail
Suite 100
Hopkins, Minnesota 55343
Please enclose a copy of the sales receipt with the date of purchase and provide a detailed
description of the problem. Failure to enclose required information will result in delay of your
shipment. Please allow 4-6 weeks for product service or replacement.
This warranty does not cover any product, which has been subject to damage due to an act
of nature, misuse, neglect, accident, abuse, commercial use, or modification of, or to, any
part of the product, including the antenna. Damage to external devices such as speakers and
other memory devices are not covered nor is the cost incurred in shipping the unit for
warranty repair. Under no circumstances shall ETEC USA, be liable for any loss (direct,
indirect, incidental, foreseen, unforeseen, special or consequential) or for any damage arising
out of, or in connection with, the use of this product.
UNDER NO CIRCUMSTANCES WILL ETEC USA BE LIABLE FOR ANY INCIDENTAL OR
CONSEQUENTIAL DAMAGES.
This warranty does not cover re-manufactured units, or product sold ‘As Is’.
This warranty is valid only in the United States and grants specific legal rights.
 Loading...