

Etco IP-Mini Instruction Manual

www.etco.com
Old Values, New Ideas
Instruction Manual
IP-Mini Rear Feed Applicator

Thank you for purchasing
an ETCO product!
At ETCO we believe that old values and customer service
should still be the rule.
The mergers of today seem to have created companies that
operate as if their needs supersede those of the customers. At
ETCO no one will put you into voicemail unless you request it.
At ETCO you will not be put on hold for more then 15 seconds
without us checking back with you. At ETCO we won’t take an
order unless we can guarantee on time delivery and exact conformance to your requirements. At ETCO all managers are
accessible and will call you back.
The founders of ETCO had very basic values based on integrity.
Today we still live by those values. Please feel free to call us if
you have a question;
I promise you a human will answer.
David Dunn
Chairman

ETCO Incorporated, Tel: 401-467-2400 Fax: 401-467-9230 Web: www.etco.com
Instruction
Manual
ETCO IP-Mini
Rear Feed
Applicator
INSTALL AND SET-UP INSTRUCTIONS
CRIMP INSPECTION AND MEASUREMENT
MAINTENANCE SCHEDULES
TROUBLESHOOTING GUIDES
ASSEMBLY DRAWING and BILL OF MATERIALS
See pocket on the inside back cover of this manual.
TO CONTACT ETCO TECHNICAL SUPPORT.
TEL: 401-467-2400
FAX: 401-467-9230
EMAIL: applicator@etco.com
WEB: www.etco.com
Hours 8 am – 5 pm, Monday – Friday, Eastern US Time Zone
ETCO IP Mini Rear Feed Rev. 2
2
4
3
1
4
5
1

ALWAYS REMEMBER TO REPLACE
BOTH PRESS SAFETY GUARD AND
APPLICATOR SAFETY GUARD
BEFORE OPERATING PRESS.
(NOTE: THIS ALSO ACTIVATES
SAFETY INTERLOCK SYSTEM.)
ETCO Incorporated, Tel: 401-467-2400 Fax: 401-467-9230 Web: www.etco.com
11
SECTION 1
INSTALL AND SET-UP INSTRUCTIONS
ETCO IP MINI REAR FEED APPLICATOR – page 1
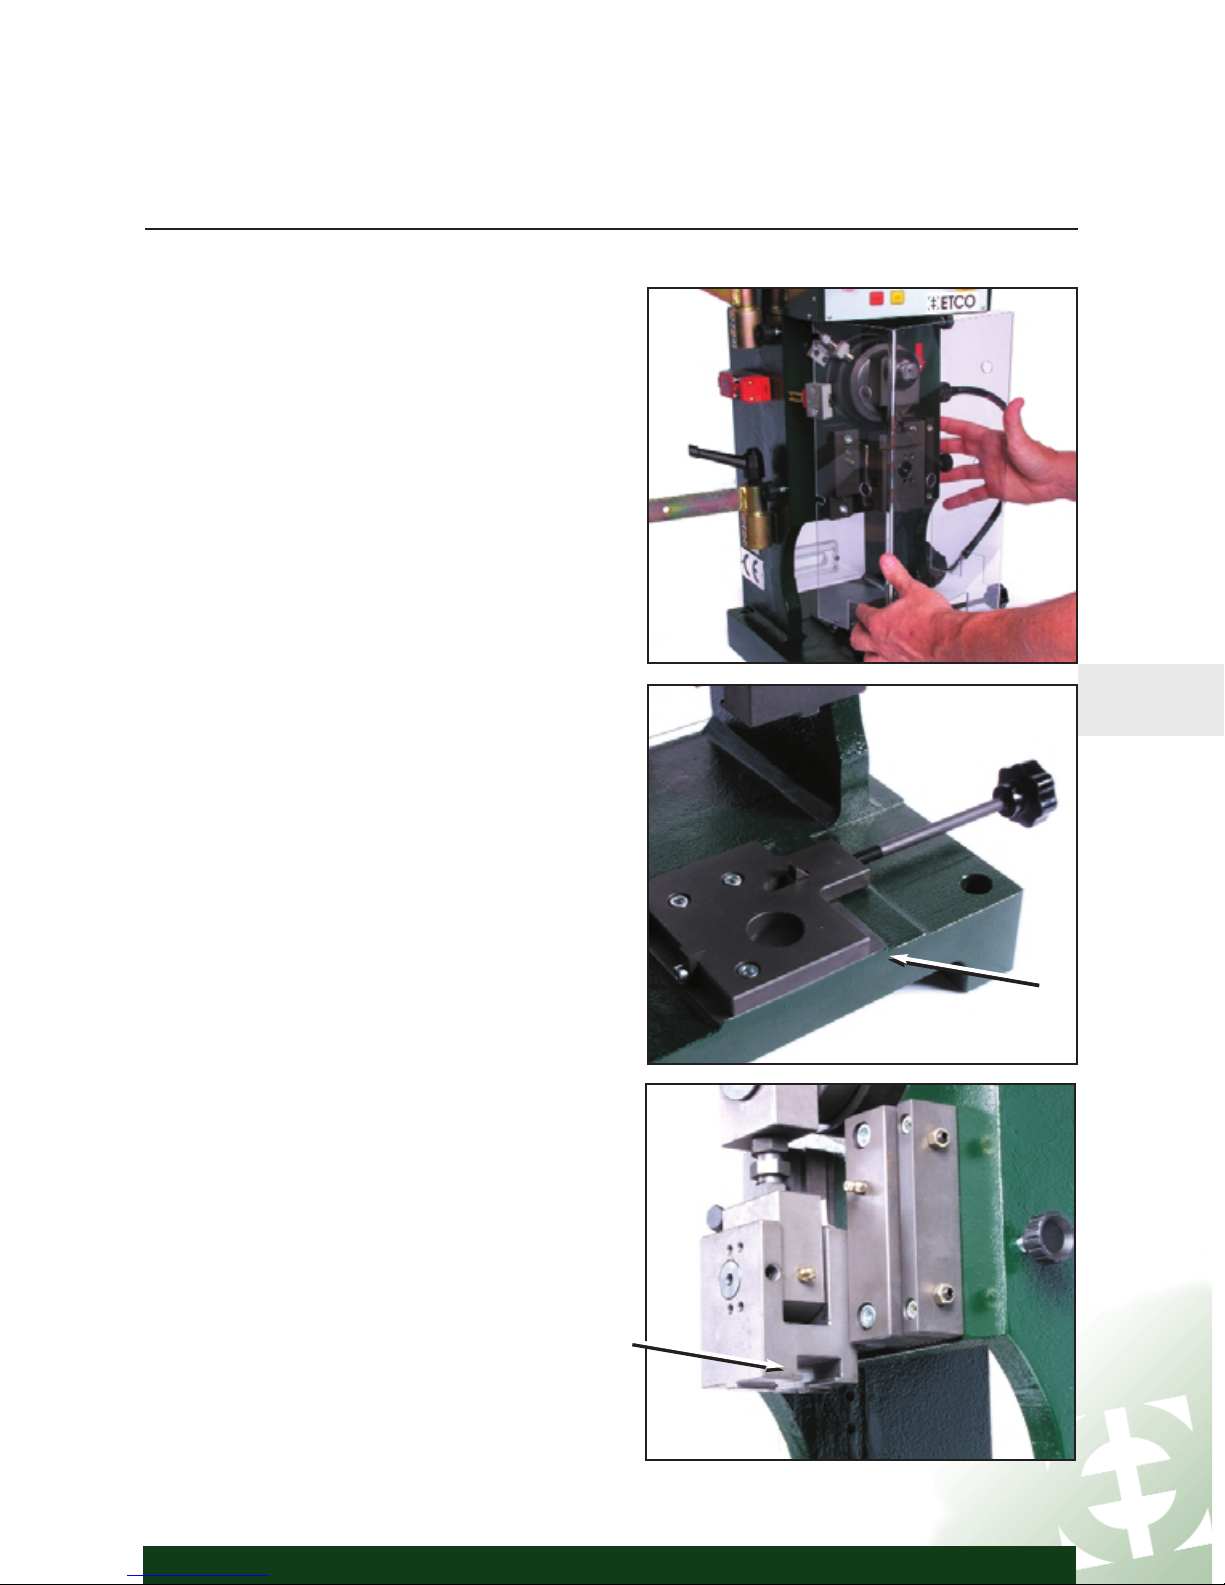
BEFORE INSTALLING APPLICATOR
1 Remove press Safety Guard.
Clean base plate on press.
2 Be sure press has Mini Die
Adapter Base Plate connected.
3 Be sure press has T-Slot
Connector installed.
Note: Contact
ETCO if Base Plate
or
T- Slot Connector are not
installed on your press.
ETCO Incorporated, Tel: 401-467-2400 Fax: 401-467-9230 Web: www.etco.com
SECTION 1
UNPACK, INSTALL AND SET-UP INSTRUCTIONS
ETCO IP MINI REAR FEED APPLICATOR – page 2
1
BEFORE INSTALLING APPLICATOR
CONTINUED
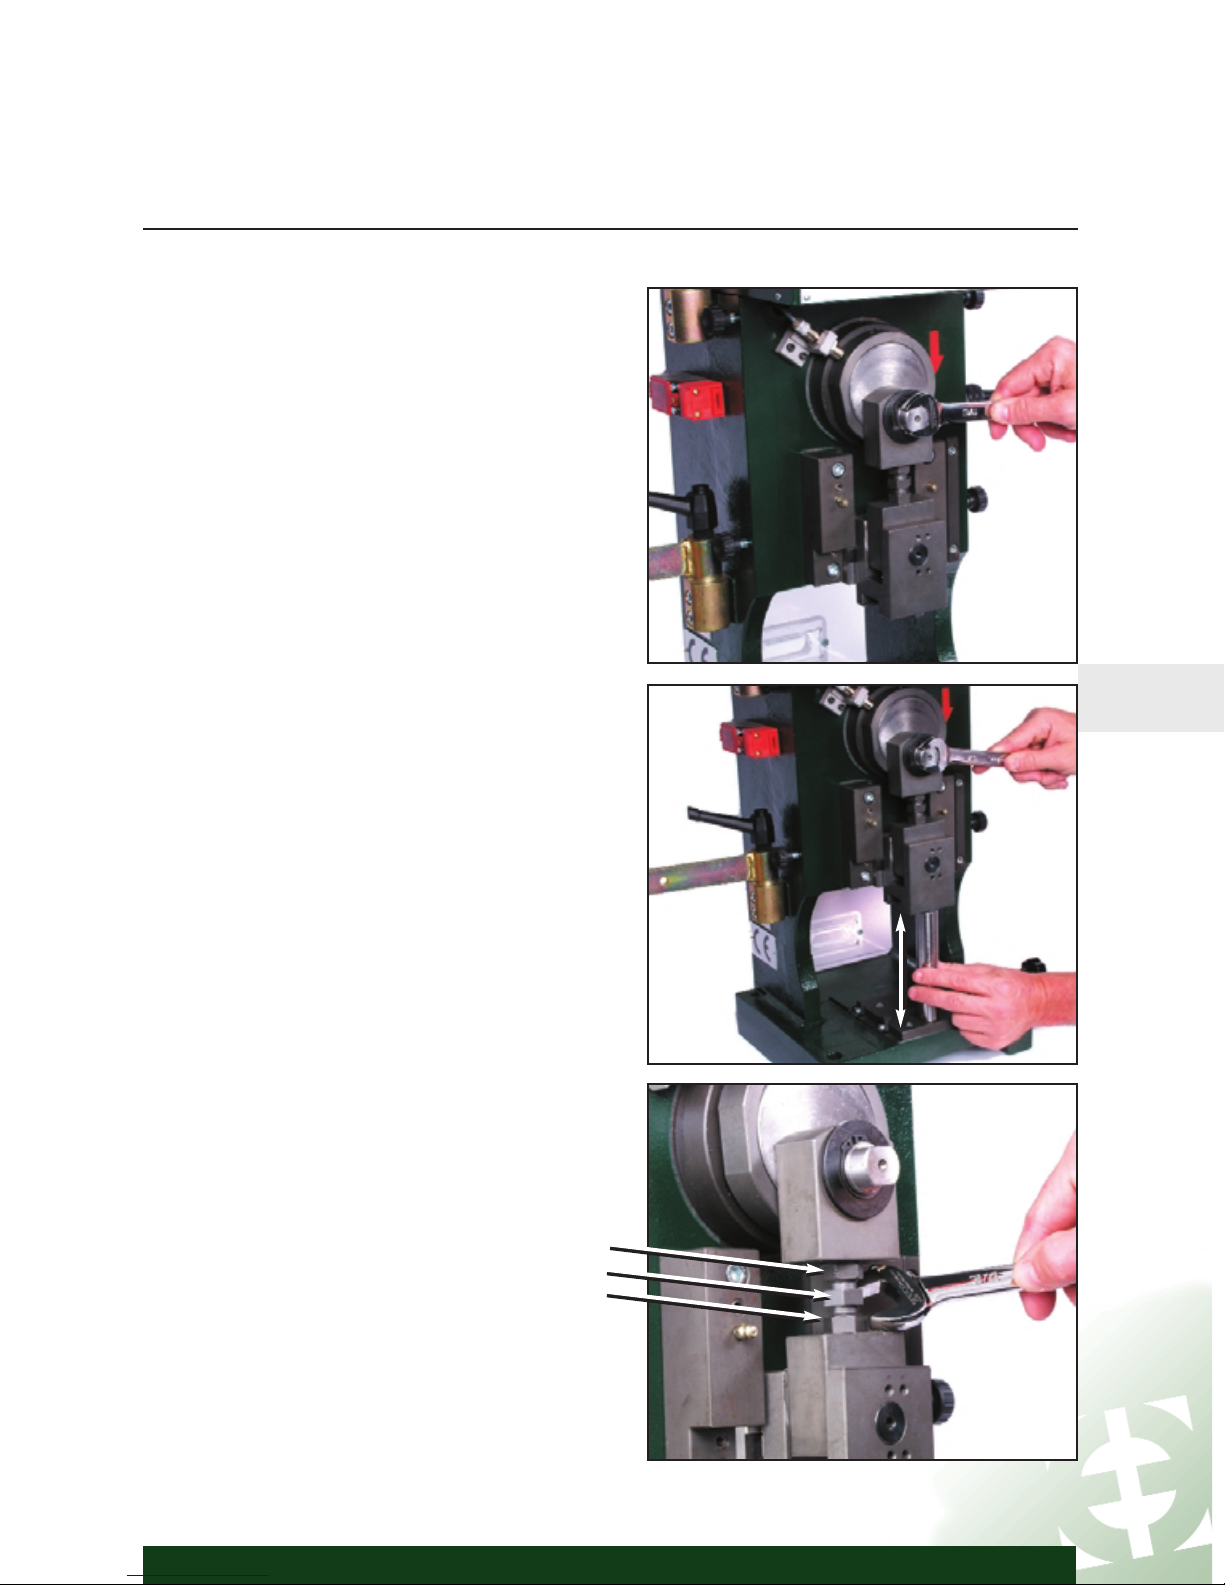
4 Using wrench on crankshaft
end, rotate crankshaft clockwise
to bottom dead center.
5 Measure shut height from
surface of Mini Die Adapter
Base Plate to pads on T-Slot
Connector. Shut height should
measure
5.346”.
6 If necessary, adjust shut height
by loosening the TWO locking
nuts (a, c) and rotating the ram
adjustment bolt (b) until proper
dimension is achieved.
Retighten the TWO locking
nuts.
Note: Turning ram adjustment bolt
(b) to the right will lower, and
turning it to the left will raise,
the shut height.
a
b
c
ETCO Incorporated, Tel: 401-467-2400 Fax: 401-467-9230 Web: www.etco.com
SECTION 1
INSTALL AND SET-UP INSTRUCTIONS
ETCO IP MINI REAR FEED APPLICATOR – page 3
INSTALL APPLICATOR
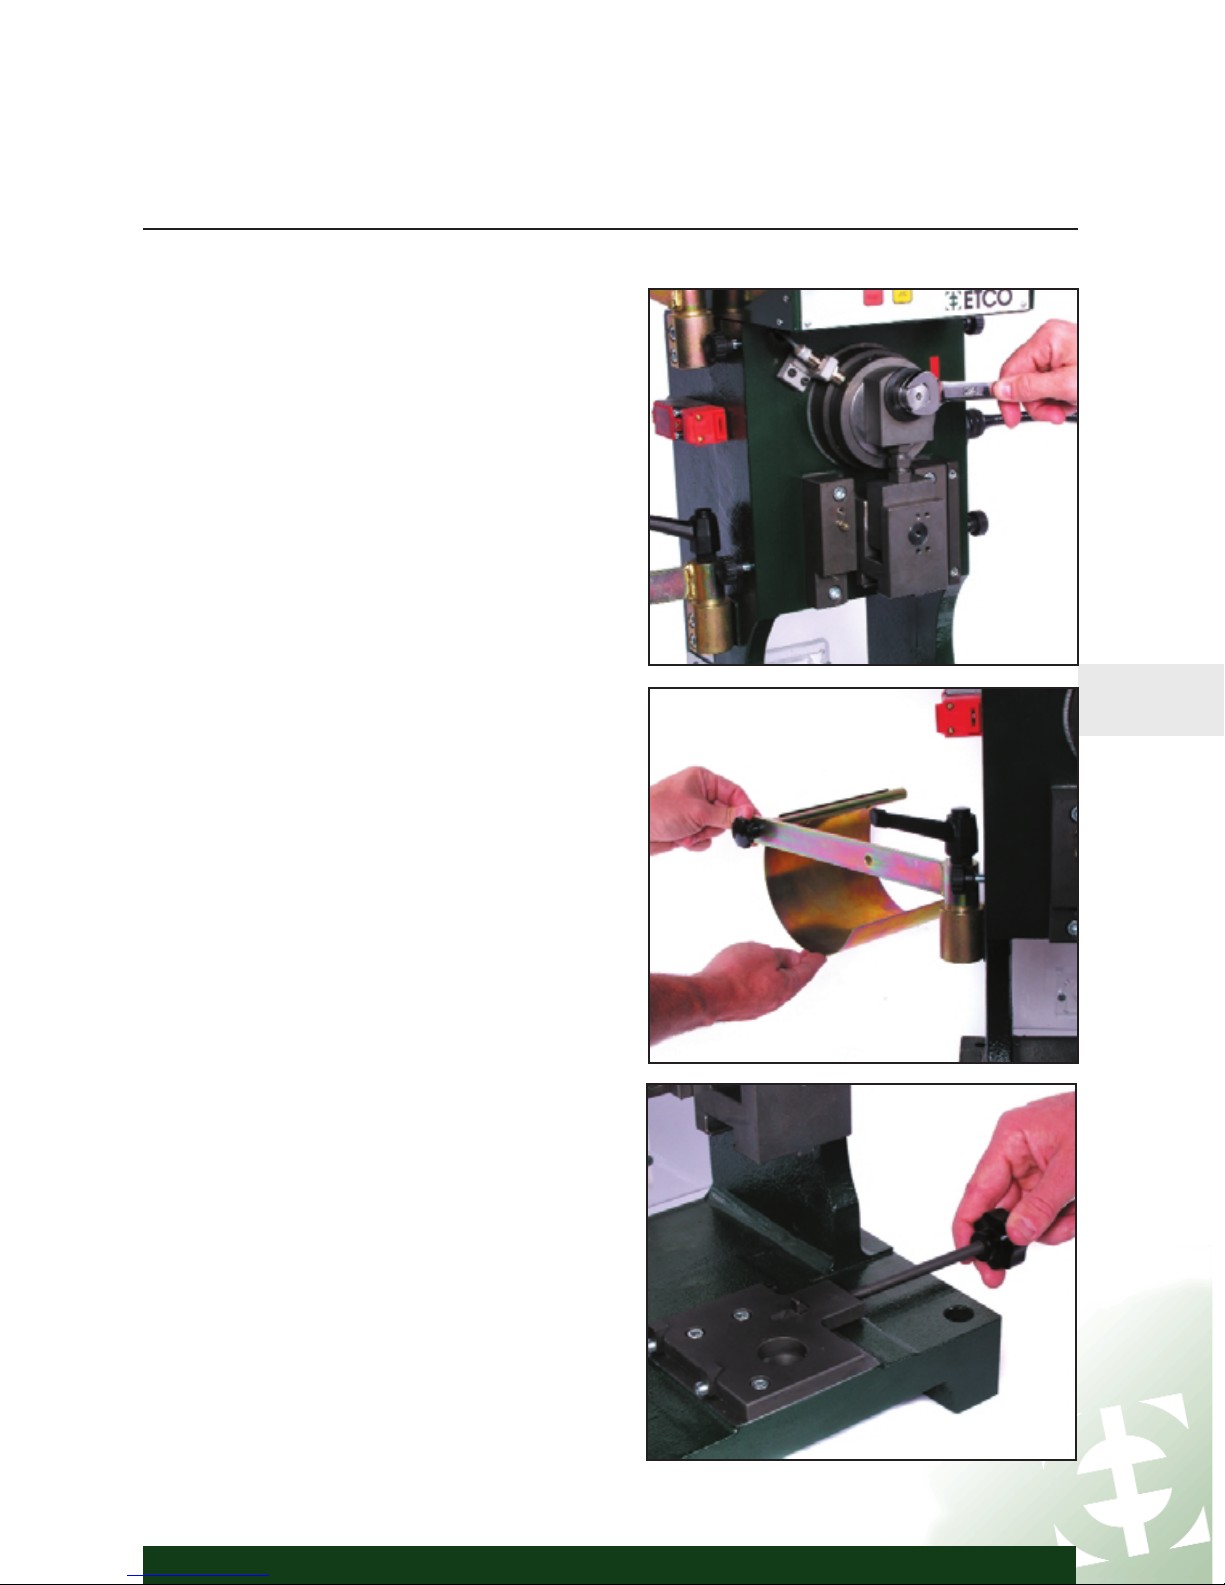
7 Using wrench on crankshaft
end, rotate crankshaft clockwise
to top dead center.
8 Adjust position of Reel Arm
and Stock Chute.
9 Loosen Clamp Knob by
rotating counterclockwise.
1

ETCO Incorporated, Tel: 401-467-2400 Fax: 401-467-9230 Web: www.etco.com
11
INSTALL APPLICATOR CONTINUED
10 Remove applicator Safety Guard.
11 Slide Mounting Post on
Applicator into T-Slot from
left side of press.
12 With Mounting Post fully engaged
into T-Slot, pull Applicator body
down until Applicator Base Plate
is flat against Mini Die Adapter
Base Plate
SECTION 1
INSTALL AND SET-UP INSTRUCTIONS
ETCO IP MINI REAR FEED APPLICATOR – page 4
ETCO Incorporated, Tel: 401-467-2400 Fax: 401-467-9230 Web: www.etco.com
1
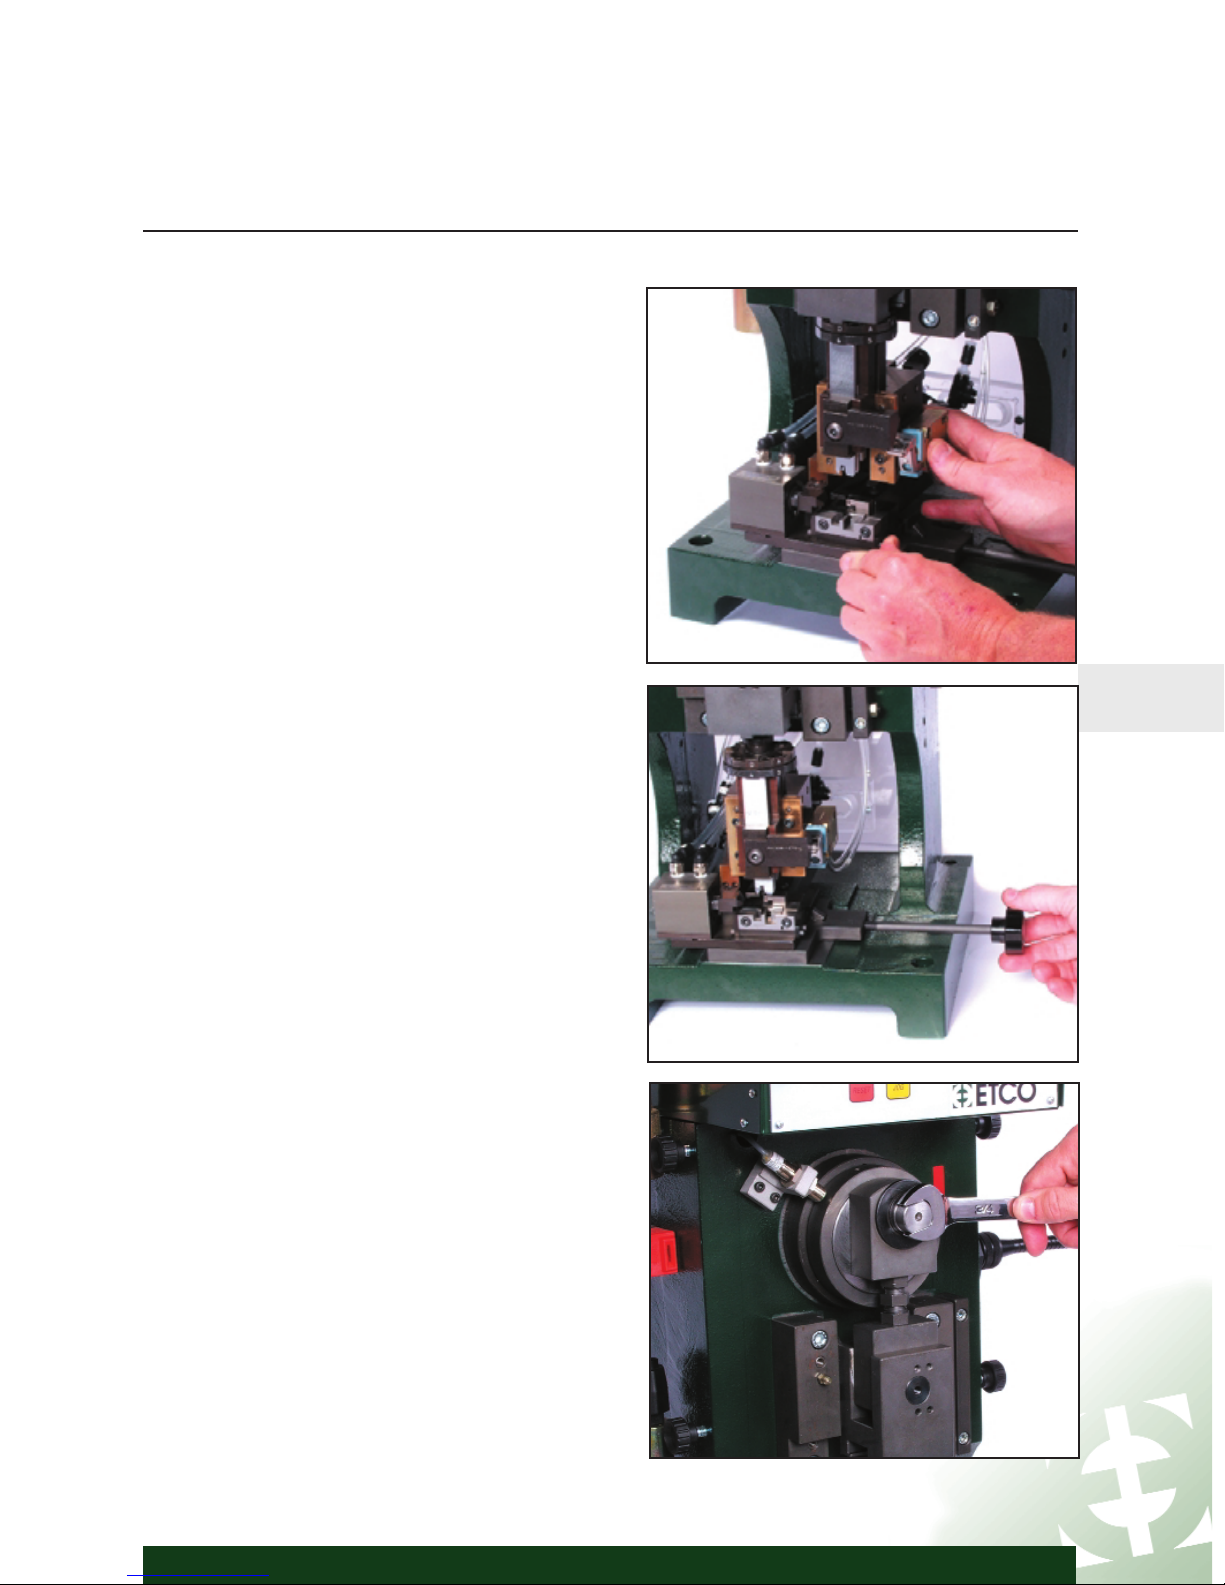
INSTALL APPLICATOR CONTINUED
13 Slide Applicator left until
Applicator Base Plate is
fully engaged in clamps.
14 Tighten right clamp by rotating
knob clockwise.
15 Using wrench on crankshaft,
cycle over by hand, one complete
revolution.
SECTION 1
INSTALL AND SET-UP INSTRUCTIONS
ETCO IP MINI REAR FEED APPLICATOR – page 5
 Loading...