

Page 1
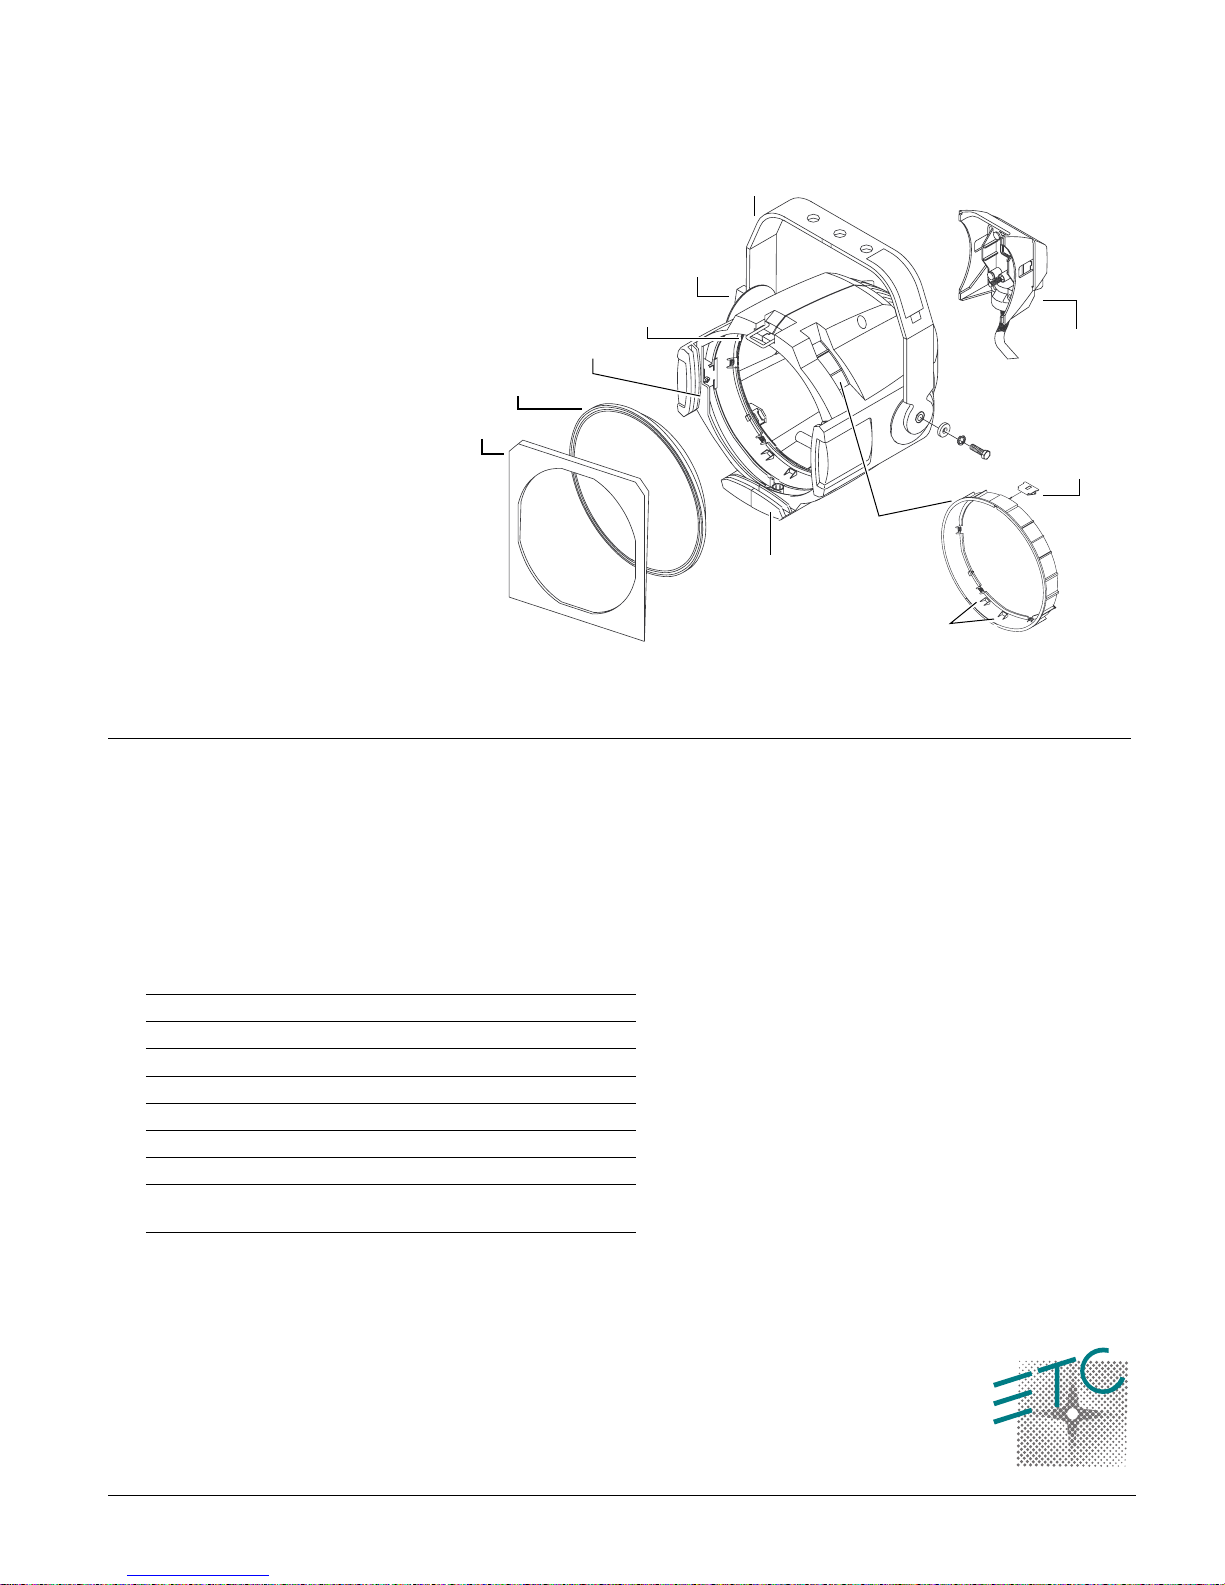
Source Four PAR
Yoke
Yoke locking knob
Retaining clip
Lens catcher
Lens
Color frame
Lens rotation ring
Color frame holder
Lamp
housing
Spring clip
Source Four PAR
Please note the following safety warnings before use:
mount the Source Four PAR on or near combustible surfaces.
Do not
•
•
• Always hang the Source Four PAR with the color frame retaining clip in the locked
operate the Source Four PAR without a lens installed.
Do not
position.
Accessories
Color frame 7.5 in. sq./6.7 in. inside diameter) 407CF
Safety cable (31 in.) 400SC
C-clamp 400CC
Very Narrow Spot lens 400-VNSP
Narrow Spot lens 400-NSP
Medium Flood lens 400-MFL
Wide Flood lens 400-WFL
Set of four Source Four PAR lenses
(VNSP, NSP, MFL, WFL)
400LS4
Tabs
Source Four PAR • 1
Page 2
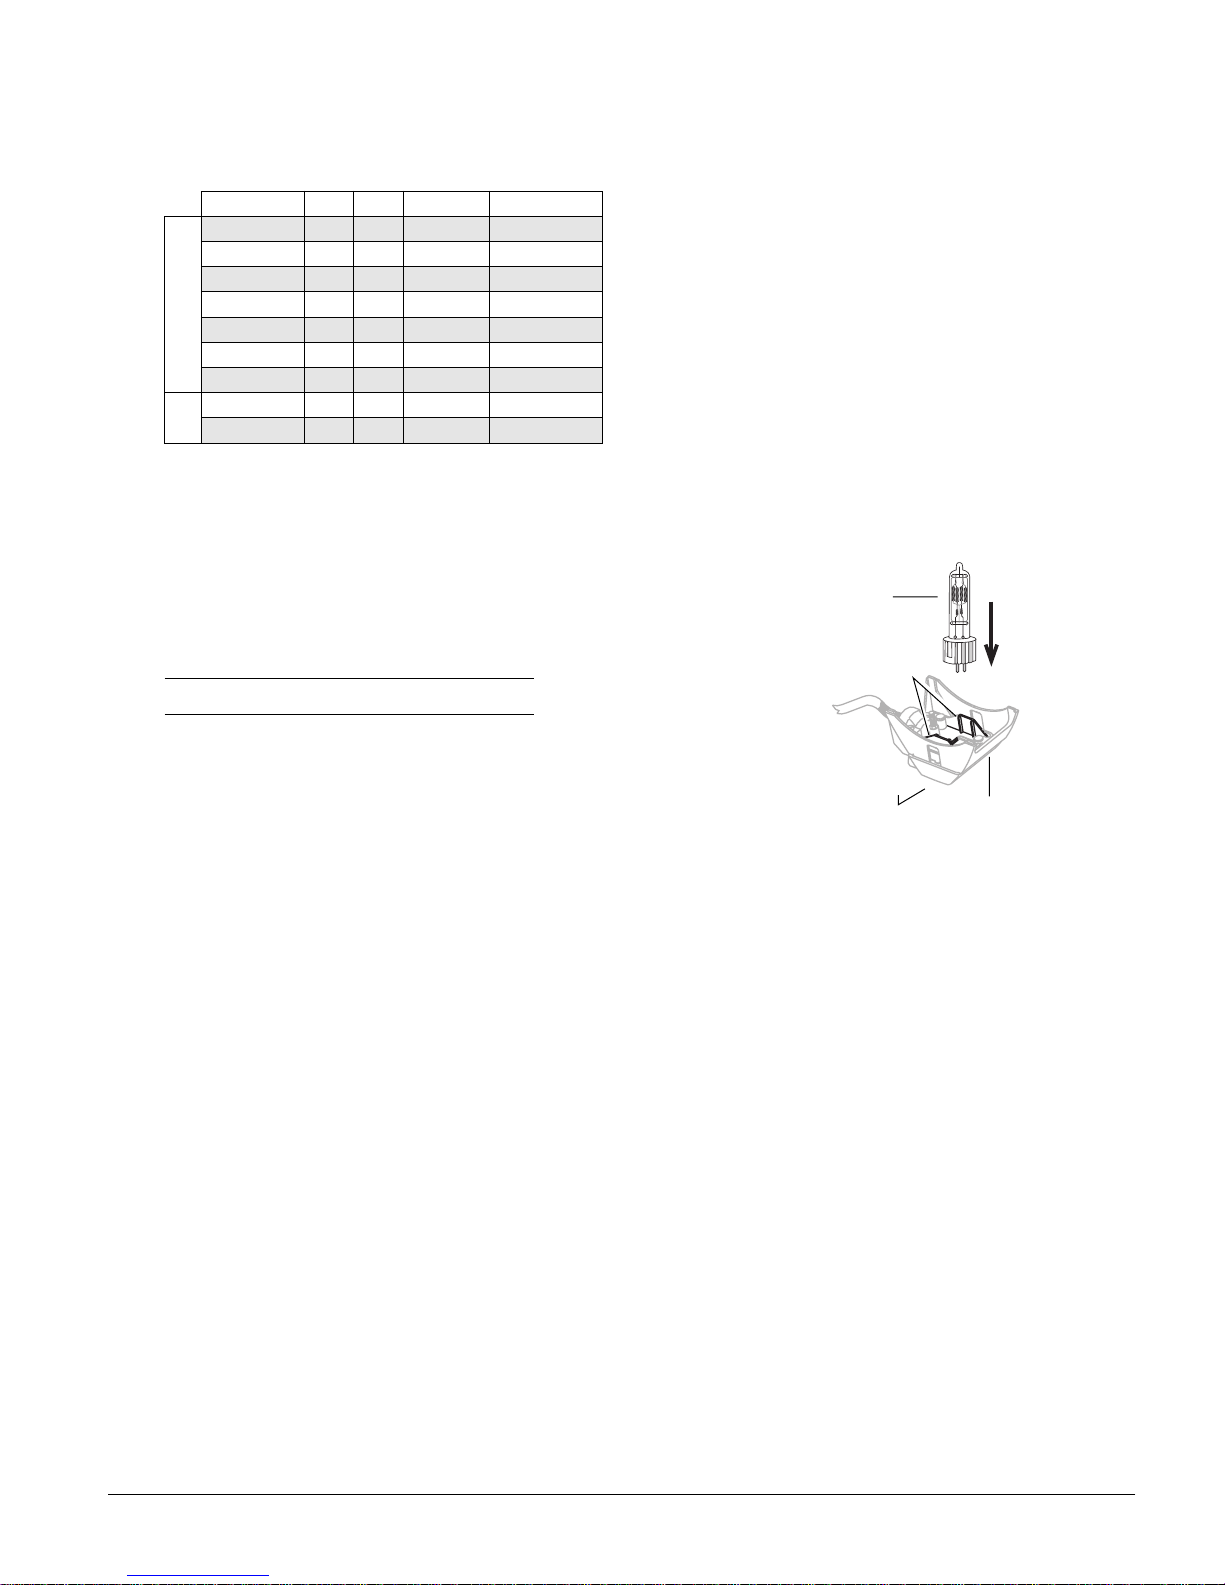
Figure 1
HPL lamp
Lamp brackets
Knurled bolt
Lamp housing
HPL lamps
Use the HPL lamp only in Source Four and Source Four PAR fixtures manufactured
and sold by Electronic Theatre Controls, Inc.
Do not
use lamps other than the HPL in
Source Four PAR fixtures.
Lamp code Watts Volts Color temp Ave rated life
HPL 375/115
HPL 375/115X 375 115 3,050ºK 1,000 hour
HPL 550/77 550 77 3,250ºK 300 hour
HPL 550/77X 550 77 3,050ºK 2,000 hour
American
HPL 575/115 575 11 5 3,250ºK 300 hour
HPL 575/115X 575 115 3,050ºK 2,000 hour
HPL 575/120 575 120 3,250ºK 300 hour
HPL 575/230 575 230 3,200ºK 400 hour
HPL 575/240 575 240 3,200ºK 400 hour
Euro.
375 115 3,250ºK 300 hour
Installing the HPL lamp
Always replace the lamp if it becomes damaged or deformed.
Verify that the HPL lamp you use is suitable for the voltage at your facility. 115, 120,
230, and 240 volt HPL lamps are available.
Caution!
cause premature lamp failure.
1.
Disconnect the unit from power before installing the lamp.
Operating lamps above their rated voltage reduces lamp life and can
WARNING!
2.
Loosen the knurled bolt on the back of the lamp housing and pull the housing
Let lamp cool before changing.
straight out from the back of the fixture.
3.
Remove the HPL lamp from its box, holding it by the base.
Note:
To avoid premature lamp failure, do not touch the lamp glass with your fingers. If you touch the lamp during installation, clean it carefully with rubbing alcohol and a clean, lint-free cloth before operation.
4.
Line up the flat sides of the lamp base with the brackets on either side of the
socket (
5.
Push down on the lamp base until the lamp is firmly seated. Make sure that the
Figure 1
).
lamp is fully seated, with the bottom of the lamp heat sink flush to the lamp
housing casting.
Caution!
Improperly installed lamps cause premature lamp failure and socket
problems.
6.
To reinstall the lamp housing, center it on the reflector and the bolt hole, then
tighten the knurled bolt to secure the lamp housing in place.
2 • Source Four PAR
Page 3
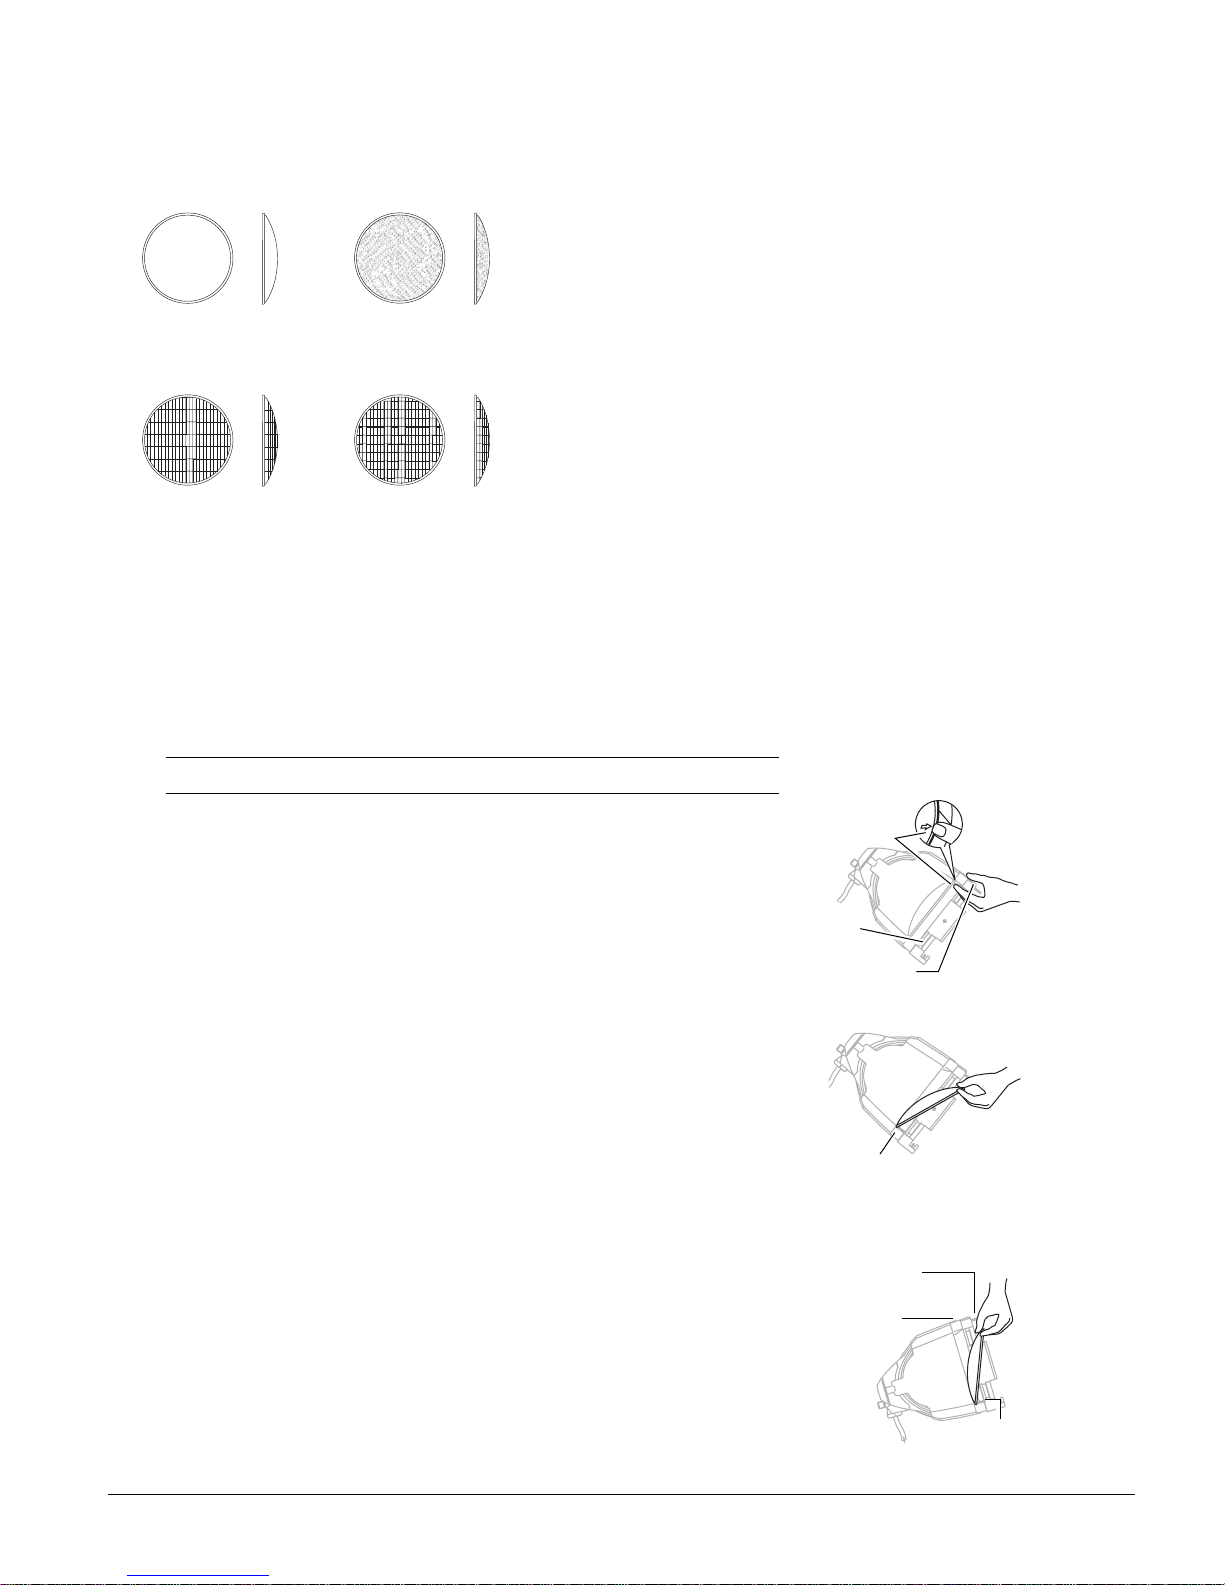
Figure 2
Spring clip
Tab
Retaining clip
Figure 3
Lens
catcher
Figure 4
Spring clip
Retaining clip
Tab
Lens identification
Lenses for the Source Four PAR come in four versions. The type or beam spread can
be identified by the lens texture.
VNSP
Very narrow spot
Clear glass
15° Round beam shape
MFL
Medium flood
Fewer facets, sized 6 x 22mm
21° x 34° Oblong beam shape
NSP
Narrow spot
Stipple glass (slight diffuse texture)
19° Round beam shape
WFL
Wide flood
Many facets, sized 6 x 12mm
30° x 51° Oblong beam shape
Changing Source Four PAR lenses
Change lenses if they become cracked or badly scratched.
Caution!
Removing a lens
WARNING!
Never operate the Source Four PAR without a lens in place.
Unplug the fixture before attempting to remove or install a lens.
Source Four PAR lenses get hot while the unit is in operation. Let the fixture cool
1.
before handling the lens.
2.
Place the fixture on a flat, stable work surface.
Do not
install or remove lenses
with the unit hanging.
3.
Position the lens rotation ring with the spring clip at the top of the unit, directly
below the retaining clip.
4.
Tilt the front of the fixture down at least 45 degrees.
5.
Press the spring clip with your finger to release the lens (
6.
Allow the lens to drop forward from under the clip.
When the lens drops, remove your finger, allowing the lens to slide forward until
7.
it rests on the lens catchers (
8.
Carefully remove the lens from the fixture.
Figure 3
).
Figure 2
).
Installing a lens
1.
Position the fixture with the front of the unit (the lens side) facing you, and tilted
slightly (
Position the lens rotation ring with the spring clip at the top of the fixture, directly
2.
below the retaining clip.
3.
Hold the lens by the edge, and position it so the convex side faces the back of
the fixture (
Note:
4.
From the top of the fixture, slide the lens behind the lens catchers and position
its base behind the tabs on the bottom of the lens rotation ring.
5.
Gently push the top of the lens inward until it snaps behind the spring clip.
Figure 2
).
Figure 4
).
Installing the lens with the convex side out will not impair the optics, but it
will make removing the lens difficult.
Source Four PAR • 3
Page 4
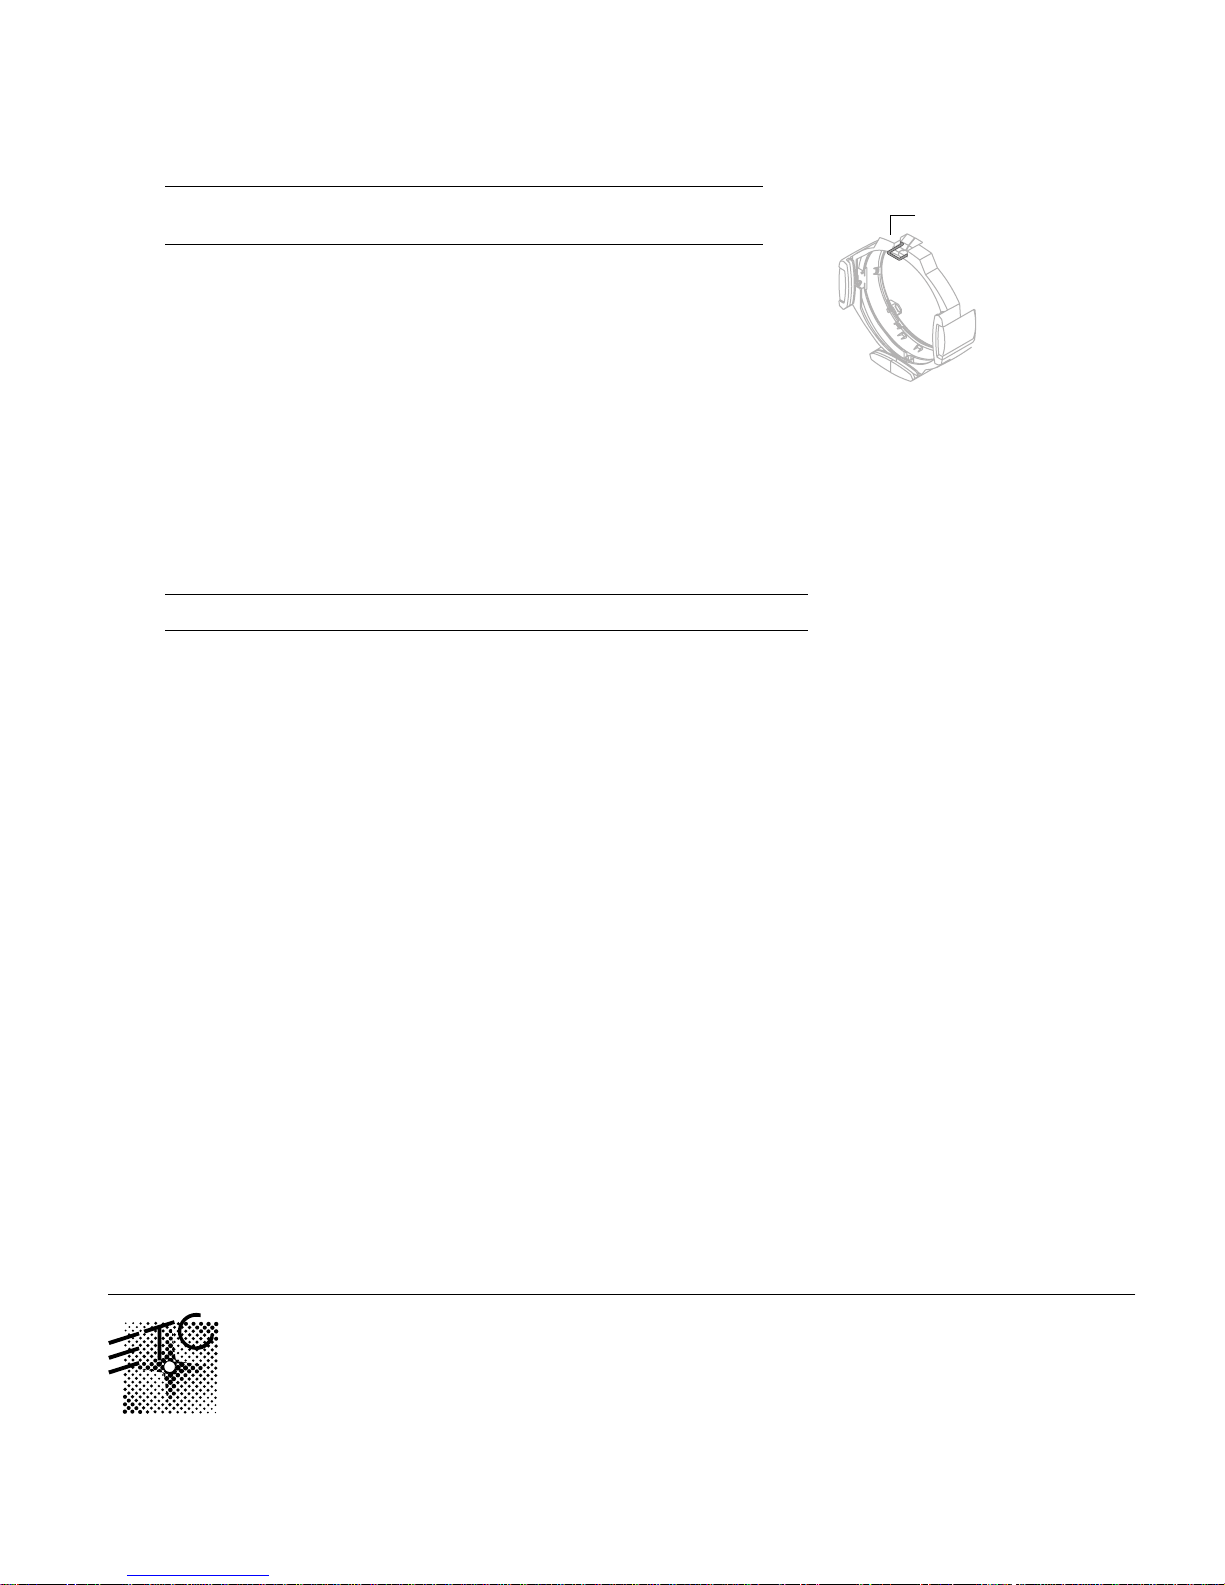
Figure 5
Retaining clip in
the locked position
Color frame retaining clip
The color frame holder is equipped with a spring-loaded retaining clip that prevents
color frames and accessories from falling out.
WARNING!
Hang the Source Four PAR with the color frame retaining clip
in the locked position.
Release the retaining clip by pushing it sideways. The ret aining clip opens.
1.
2.
Insert the color frame.
3.
Press the retaining clip down until it locks.
Note:
Use only color frames or top hats with 6.7-inch inside diameter.
Cleaning the reflector
ETC offers the following recommendations when cleaning and inspecting lenses
and reflectors:
use glass and window cleaners on the reflector. Chemicals in these cleaners
Do not
will harm the reflective coating.
Do not
use paper towels or harsh materials to wipe the reflector. These materials
can scratch the surface of the reflector.
WARNING!
1.
Remove the lens so you can access the reflector from the front of the fixture.
See
2.
Remove dust with a blast of oil free air, or wipe with a clean, soft, lint-free cotton
cloth. If this is sufficient to remove dust, go to step 5. Otherwise, continue to
step 3.
3.
Dampen a clean, soft, lint-free cotton cloth with a mild, soapy water solution and
gently wipe the reflector.
Remove any soapy water residue with a clean, soft, lint-free cotton cloth
4.
dampened with water.
5.
Reinstall a lens before using the fixture.
Unplug the fixture before attempting to clean reflector.
Removing a lens
on page 3.
Electronic Theatre Controls
North America 3030 Laura Lane • Middleton, Wisconsin 53562 • USA • Tel: (+1) 608 831 4116 • Fax: (+1) 608 836 1736
Europe 5 Victoria Industrial Estate • Victoria Road • London W3 6UU • Tel: (+44) 181 896 1000 • Fax: (+44) 181 896 2000
Asia Room 605-606 • Tower III • Enterprise Square • 9 Sheung Yuet Road • Kowloon Bay • Hong Kong • Tel: (+852) 2799 1220 • Fax: (+852) 2799 9325
World Wide Web: http://www.etcconnect.com • Email: [email protected]
Specifications subject to change. Source Four PAR is protected by US patent numbers 5,268,613.
US and International Patents Pending. 7061M1001.
Copyright 1998
Revised 11/98.
 Loading...