

ETC Desire D40, Desire D40XT, Desire D60 Quick Manual
ETC Desire Quick Guide
D40, D40XT, D60
Desire D40, D40XT, D60 Quick Guide Page 1 of 6 Electronic Theatre Controls, Inc.
Corporate Headquarters
3031 Pleasant View Road, P.O. Box 620979, Middleton, Wisconsin 53562-0979 USA Tel +608 831 4116 Fax +608 836 1736
London, UK
Unit 26-28, Victoria Industrial Estate, Victoria Road, London W3 6UU, UK Tel +44 (0)20 8896 1000 Fax +44 (0)20 8896 2000
Rome, IT
Via Pieve Torina, 48, 00156 Rome, Italy Tel +39 (06) 32 111 683 Fax +44 (0) 20 8752 8486
Holzkirchen, DE
Ohmstrasse 3, 83607 Holzkirchen, Germany Tel +49 (80 24) 47 00-0 Fax +49 (80 24) 47 00-3 00
Hong Kong Rm 1801, 18/F, Tower 1 Phase 1, Enterprise Square, 9 Sheung Yuet Road, Kowloon Bay, Kowloon, Hong Kong Tel +852 2799 1220 Fax +852 2799 9325
Service:
(Americas) service@etcconnect.com
(UK) service@etceurope.com (DE) techserv-hoki@etcconnect.com
(Asia) service@etcasia.com
Web:
www.etcconnect.com
Copyright © 2011 ETC. All Rights Reserved. Product information and specifications subject to change.
7410M1300-1.1.0 Rev A Released August 2011 ETC intends this document to be provided in its entirety.
Overview
For complete information and step-by-step instructions, see Desire Series by ETC D40, D40XT, D60
User Manual.
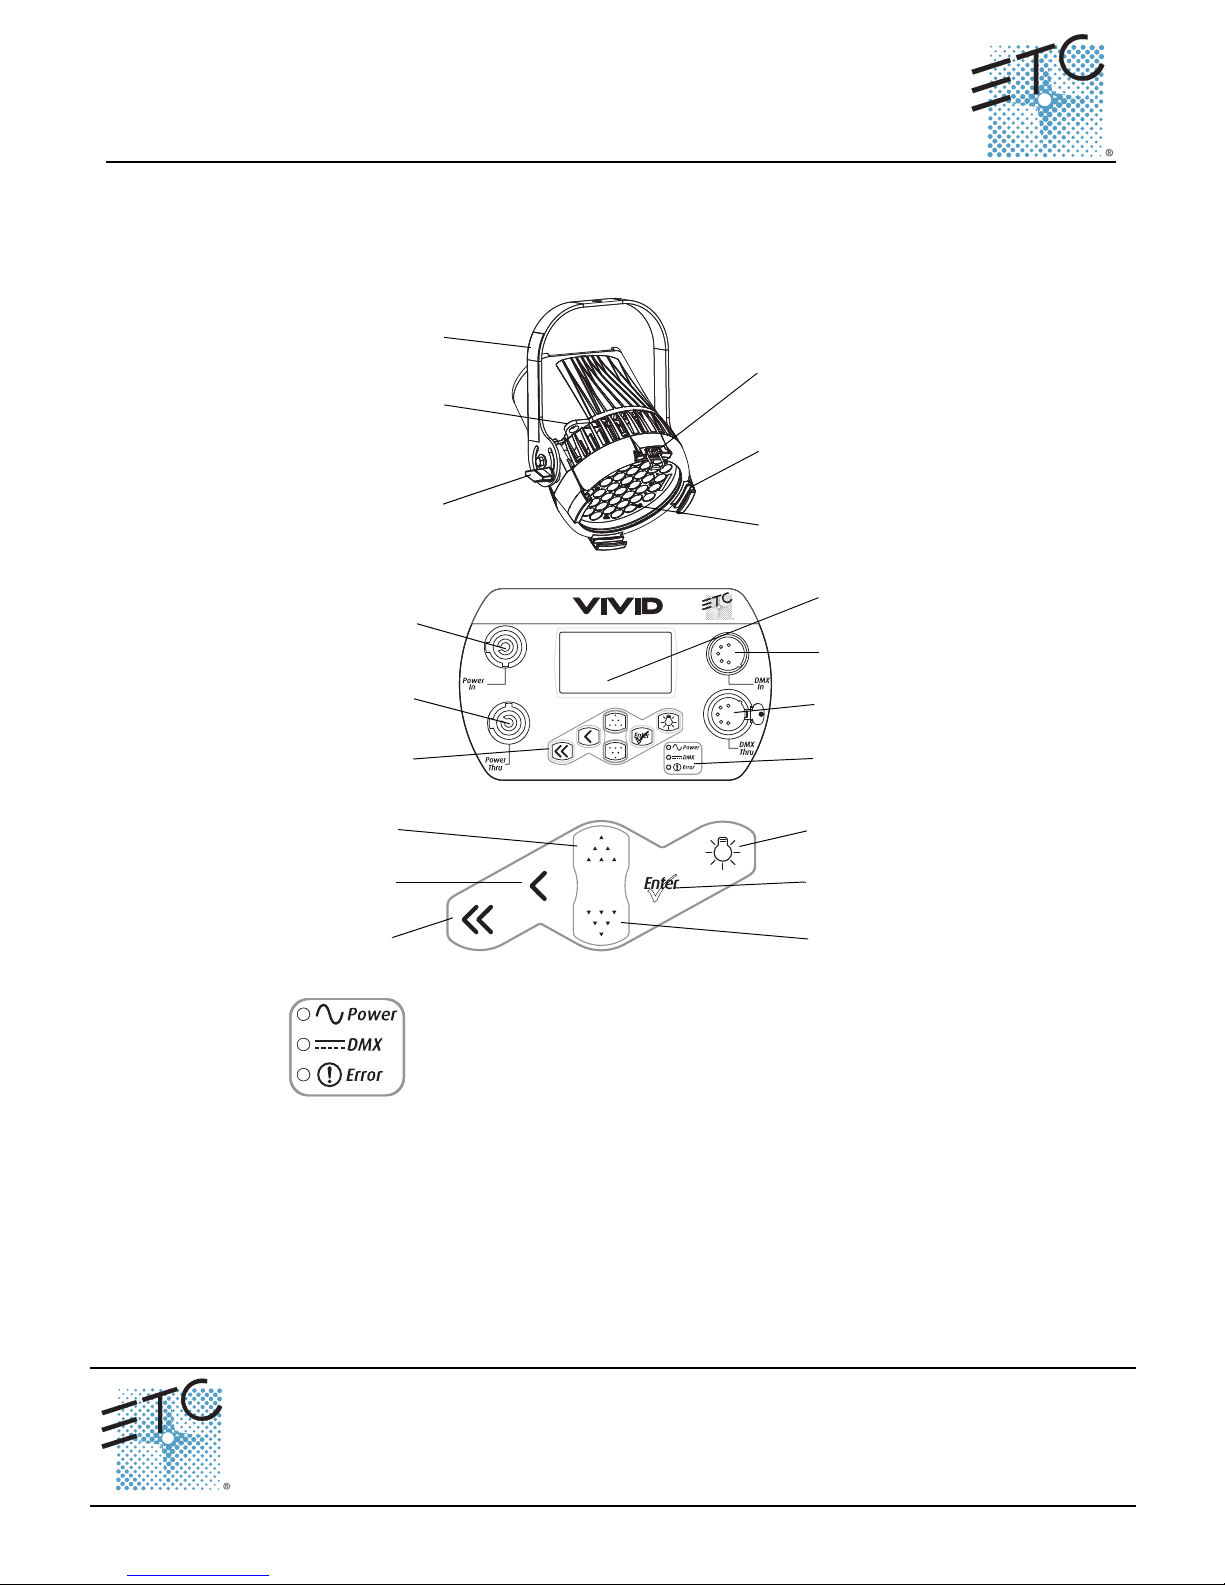
LED array
Accessory
holder
Yoke
Accessory
retainer
Yoke
locking knob
Safety cable
loop
PUSH
Power In
Power Thru
Keypad
LCD
DMX In
DMX Thru
Status
indicators
Light Bulb
Home
Back
Up
Enter
Down
Power – Indicates AC power is On.
DMX – Indicates control signal is Active.
Error – Indicates data error, high temperature, or other unusual status.
ETC Desire Quick Guide
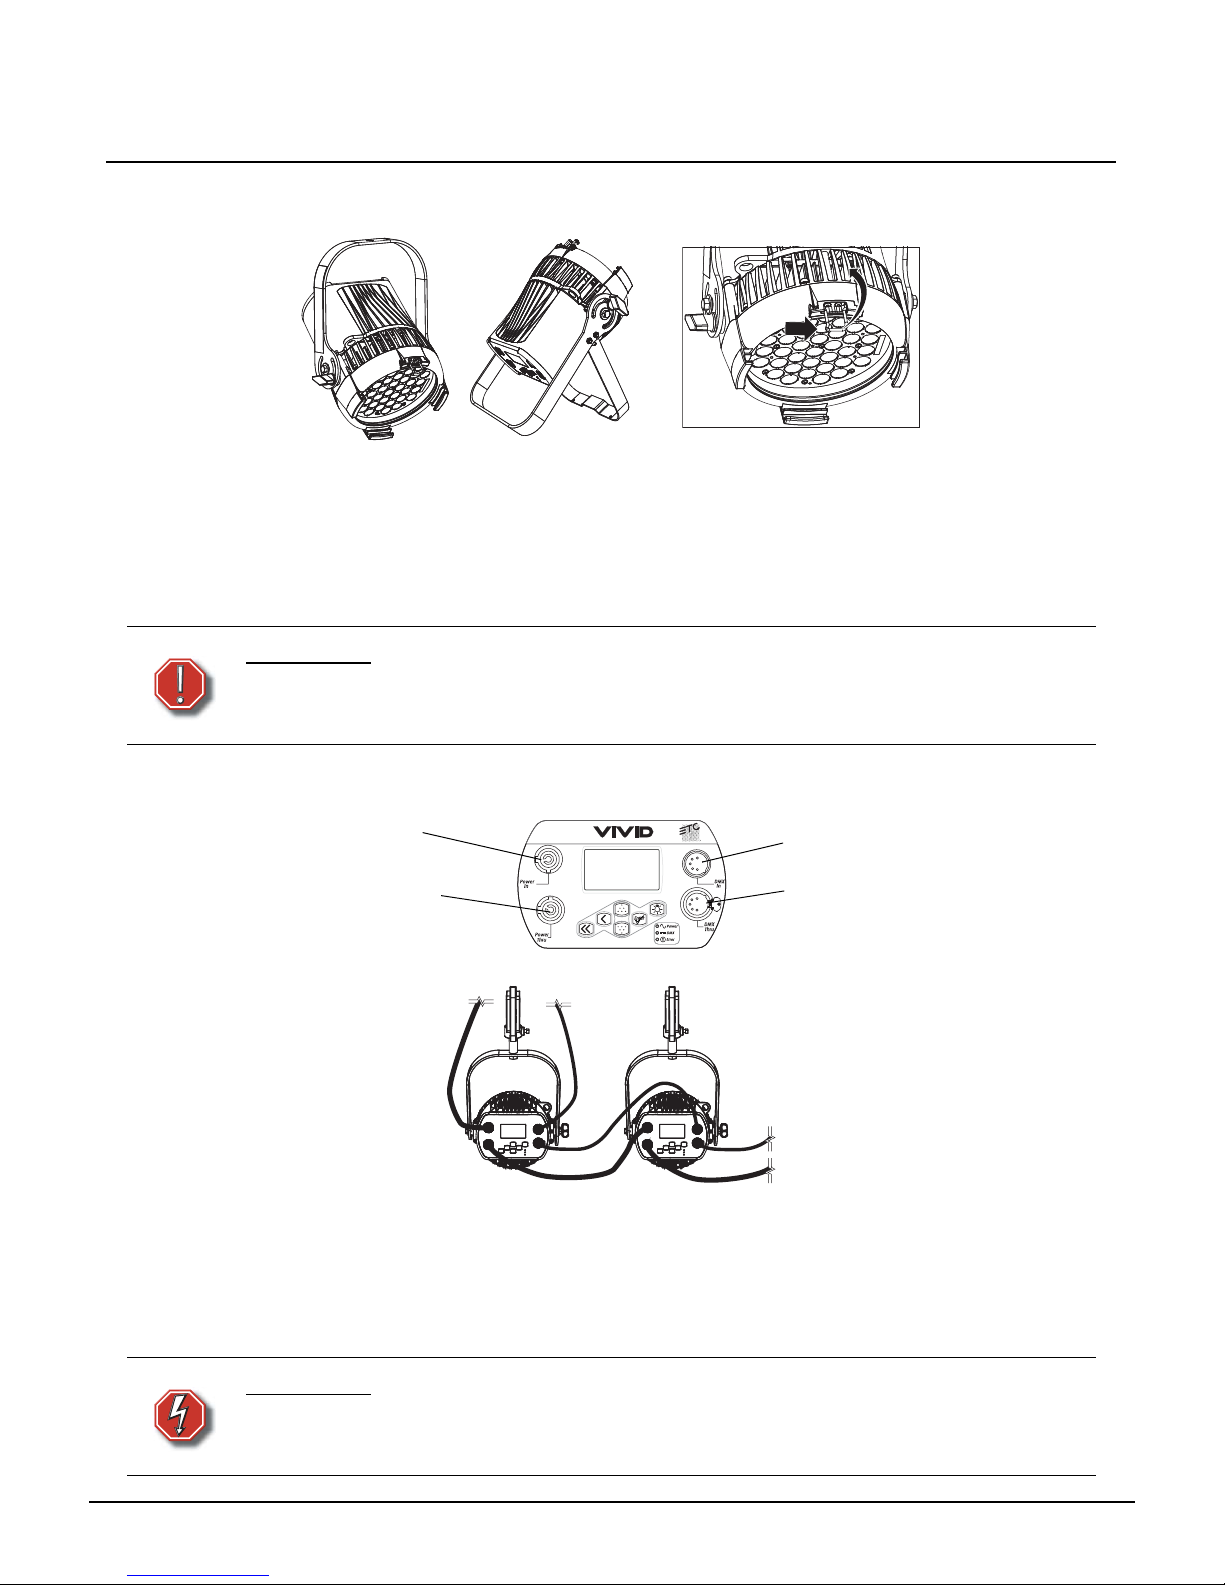
Install
Desire D40, D40XT, D60 Quick Guide Page 2 of 6 Electronic Theatre Controls, Inc.
Install
Step 1: Hang or mount the fixture.
Step 2: Attach safety cable.
Step 3: Insert secondary lens with smooth side out.
Step 4: Insert additional accessories (top hat, egg crate, etc.).
Connect
Step 1: Attach power cable to Power In.
Step 2: Attach 5-pin XLR cable to DMX In (if using external control).
Step 3: Connect power cable to AC power.
Step 4: Plug XLR cable (if using) into data source.
Step 5: Link additional fixtures via Power Thru and DMX Thru connectors.
WARNING:
Use only hardware rated for total weight of fixture and accessories.
The safety cable (or other approved safety device) must be securely
attached to the safety cable loop before loosening the clamp.
WARNING:
No more than 10 D40 or D40XT or 7 D60 fixtures per circuit (non-dimming,
100 to 240 VAC, 50/60 Hz, 15 Amps or less)
Disconnect Power and DMX before all cleaning and maintenance.
With yoke
Accessory holder and clip
With floor stand
PUSH
Power In
Power Thru
DMX In
DMX Thru
 Loading...