

Page 1

Operating instructions
ESYSTA® BT Pen
Page 2

ESYSTA
®
BT Pen, example with adapter B and holder A/B
Threaded rod
Cartridge stamp
Needle side of the cartridge
Pen body
Adapter
Holder
Insulin cartridge
Cap
Page 3

lESYSTA
®
BT Pen (insulin pen)
lHolder A/B
lHolder C
lMarkers for colour identication
lCase
lOperating instructions
Contents of the retail packaging:
Only use the ESYSTA® BT Pen if the retail packaging is undamaged.
Any stated brand names and trade marks are the property of the respective owners.
Issue date: 01 August 2016 / V 01.00
205-40-006-02-a
Page 4

4
1. Introduction 6
2. Correct use 7
2.1 ESYSTA® BT Pen 7
2.2 ESYSTA® Adapter (disposable adapter) 7
2.3 Data transfer 8
2.4 Information for doctors and medical sta 8
3. Information on safe use 9
3.1 Risks associated with its use 12
4. General information 13
5. Components of your ESYSTA® BT Pen 14
6. Commissioning your ESYSTA® BT Pen 15
6.1 Choosing the correct ESYSTA® Adapter 16
6.2 Choosing the holder 17
6.3 Inserting the insulin cartridge 18
6.4 Marker 19
6.5 Attaching the needle 21
6.6 Switching on the ESYSTA® BT Pen 21
6.7 ESYSTA® BT Pen pre-set venting 23
6.8 Marking and carrying out additional venting 23
6.9 Setting the units for subcutaneous injections 24
6.10 Injection procedure 26
6.11 Completing the injection process 28
6.12 Cancelling the setting process 29
6.13 Temperature sensor 30
Contents
Page 5

5
7. Changing the insulin cartridge 31
7.1 Continuing with the same insulin manufacturer 31
7.2 Changing the insulin manufacturer 32
7.3 Important safety information about changing the cartridge 32
8. Changing the battery 33
9. Enabling and disabling data transfer 35
9.1 Enabling the Pen-smartphone connection (“bonding”) 35
9.2 Disabling the Pen-smartphone connection (cancelling "bonding”) 37
9.3 Data memory 38
10. Display and error messages 39
11. Guarantee 43
12. Period of use 44
13. Technical data 45
14. FAQs 46
15. List of compatible insulin preparations 50
16. List of compatible needles 52
17. Index 53
Manufacturer's contact details 56
Page 6

6
1. Introduction
Your ESYSTA® BT Pen is a device for injecting insulin. As a component of
the tele-diabetological ESYSTA
®
product system, it automatically saves
all of the insulin quantities injected, along with the associated time.
This data is transferred in encrypted form via Bluetooth® radio technology1 to
your ESYSTA® App. The ESYSTA® App can be found in the corresponding App
portals. The transfer of data to the ESYSTA® Portal is also supported.
With the ESYSTA® BT Pen, you can use all common insulin cartridges from
various manufacturers. So you can continue to use the insulin preparation you
have previously been prescribed.
To integrate other devices that we supply into the innovative ESYSTA® product
system, visit our website:
www.emperra.com
Thank you for trusting our ESYSTA® devices. As you will see, the ESYSTA®
BT Pen will make your treatment easier.
1
The Bluetooth word mark and logo are the property of Bluetooth SIG, Inc. These brands are used by Emperra under licence.
Page 7

7
2. Correct use
2.1 ESYSTA® BT Pen
The ESYSTA® BT Pen is a medical product. For the treatment of
diabetes mellitus by trained patients or trained carers, it is used to manually
inject insulin preparations from 3 ml insulin cartridges2 (100 IU/ml). Up to 60
IUs can be injected through human strength. You can set your insulin dose in
whole units. An ESYSTA® BT Pen is only intended for treating one patient.
2.2 ESYSTA® Adapter (disposable adapter)
The ESYSTA® Adapter is an accessory (a consumable) required for operating
the ESYSTA® BT Pen, in order to be able to use insulins from dierent
manufacturers. There are three dierent designs.
The ESYSTA
®
Adapter is a disposable item. A new ESYSTA
®
Adapter
must be used with each new insulin cartridge. Information on selecting
the right ESYSTA® Adapters for your insulin preparation can be found in
Chapter 7.
2
Also referred to as a cartridge or ampoule.
Page 8

8
2.3 Data transfer
The ESYSTA® BT Pen can transfer the injected quantities of insulin together
with the date and time of the injection to the ESYSTA® App via a conventional
smartphone using Bluetooth® radio technology.
You also have the option of registering with the ESYSTA® Portal at
www.esysta.com. On the Portal, you can allow your doctor to view your
treatment data. For optimal use of the system, we recommend that you agree
your treatment with your doctor or practice.
2.4 Information for doctors and medical sta
The operation of the ESYSTA® BT Pens does not essentially dier from that of
other insulin pens. There are additional functions and operating steps. If you
instruct patients in the use of the ESYSTA® BT Pen, or use it on patients, you
should be comprehensively familiarised in advance with both the operation
and these operating instructions in order to avoid making errors in use. Should
you have any questions, please contact us (see p. 56).
Page 9

9
3. Information on safe use
Before using the ESYSTA® BT Pen, you must always receive training
from your doctor, pharmacist or diabetes adviser.
Before using your ESYSTA® BT Pen, please read all of these operating
instructions carefully and follow the instructions exactly. Not following
the instructions may lead to injecting a dose of insulin that is too high or too
low.
If you need help, please contact your doctor, pharmacist, diabetes
adviser or Emperra GmbH.
Before each use, check your ESYSTA® BT Pen for damage. In the case
of damage such as cracks or breaks, or if the display or parts of the
display are not functioning, do not use the ESYSTA® BT Pen.
Always handle your ESYSTA® BT Pen with care. Strong vibrations
may damage the device. The ESYSTA® BT Pen must not be used
improperly or opened using force, as this will damage the device and the
guarantee will be rendered invalid.
Page 10

10
Always set the number of units correctly. The dose is increased by exactly
one unit for each click when the dosing button is turned clockwise. The
dose is increased by exactly one unit for each click when the dosing button is
turned anti-clockwise. Do not use the ESYSTA® BT Pen if the units displayed dier
from the number of units identied through the clicking and locking mechanism.
In this case, contact Emperra GmbH, your doctor, pharmacist or diabetes
adviser.
Also do not use the ESYSTA® BT Pen if you cannot see anything on the
display or if the display appears faulty.
You must be able to clearly feel and hear the "click" when setting the
dose in order to use the ESYSTA® BT Pen.
Always be prepared in case of loss or damage to your ESYSTA® BT
Pen. We recommend always keeping an additional insulin-injecting
device to hand for the relevant insulin.
The ESYSTA® BT Pen is not licensed for use by blind or visually-
impaired people. You must be able to clearly recognise the display as
well as dierent marker colours.
Page 11

11
In the case of impairment that prevent the safe use of the ESYSTA® BT
Pens, a trained assistant should be consulted.
Observe the temperatures for storage and use. For example, please
consider the fact that temperatures of over 70° C may occur in cars in
the summer. Please also note Chapter 6.13 (Temperature sensor).
Protect your ESYSTA® BT Pen against dirt, moisture and the penetration
of other foreign matter. Only transport and store your ESYSTA® BT Pen
with the cap on, and keep it in a safe place where it cannot be confused with
other things.
On the ESYSTA® Adapter is a scale intended for use in estimating the
amount of insulin remaining in the cartridge. This scale must not be
used for measuring the dose of insulin.
Keep your ESYSTA® BT Pen, your insulin cartridges and injection
needles out of reach of unauthorised persons - and children in particular.
There are magnets in your ESYSTA® BT Pen. If you have a heart
pacemaker, please consult your cardiologist to have conrmed in writing
that it is safe for you to use the ESYSTA® BT Pen before using the ESYSTA®
BT Pen.
There are magnets in your ESYSTA® BT Pen. It should not be stored
together with magnetic cards, for example.
Page 12

12
3.1 Risks associated with use
Find out about the risks and side eects of your insulin preparation.
In spite of all of the safety precautions, there are residual risks from the use of
the ESYSTA® BT Pen.
lInfections may occur if the injection needles are used more than once.
lUnprotected injection needles can cause injuries and transmit
diseases. Third parties - particularly children - can be injured or
even killed by the needles and the insulin contained within them.
.
lToo much or too little insulin can be injected through incorrect operation.
Under-dosing through too little insulin being injected will lead to
hyperglycaemia (high blood sugar), which may nally render the patient
unconscious and is often associated with complications. Over-dosing by
injecting too much insulin causes hypoglycaemia (low blood sugar), which
can quickly become a critical condition.
lIn order to prevent incorrect doses, the ESYSTA® BT Pen must be suciently
vented before each use and particularly after each change of cartridge; see
also Chapters 6.7 and 6.8.
Page 13

13
4. General information
The CE mark on a medical device states that the product meets the provisions
of the EU Directive on Medical Products 93/42/EEC. The ESYSTA® BT Pen
insulin injection device meets the requirements of dosing accuracy under ISO
11608-1: Pen injectors for medical use – Part 1: Pen injectors – Requirements
and test procedures. As part of the tele-medical ESYSTA® product system, the
ESYSTA® BT Pen is equipped with a wireless interface for data. The ESYSTA®
BT Pen meets the fundamental requirements of Directive 1999/5/EC for wireless
installations and telecommunication transmission facilities.
The ESYSTA® BT Pen has been tested for electromagnetic compatibility in
accordance with EN 60601-1-2 Medical electrical equipment Part 1-2: General
requirements for basic safety and essential performance - Collateral standard:
Electromagnetic compatibility - Requirements and tests.
You can set your insulin dose in whole units. The ESYSTA® BT Pen has a
memory that saves all your doses, along with the date and time. The memory
capacity is approx. 1,000 data records.
In combination with the ESYSTA
®
App, the data is transferred to a Bluetooth®-
enabled smartphone.
Page 14

14
5. Components of your ESYSTA® BT Pen
Battery compartment
with serial number
Cap
Holder Markers
Cap Unlocking the dosing button
("Pen switched on")
Dosing button pressed in
("Pen switched o")
Display
Page 15

15
6. Commissioning your ESYSTA
®
Pen
Before rst use, carefully pull out the lm of the battery compartment that is
visible from the outside.
Your ESYSTA® BT Pen must be equipped with an insulin cartridge, a matching
adapter, the appropriate holder and a needle. Please mark all of your ESYSTA®
BT Pens with a coloured marker. The dierent colours should help you to
distinguish your dierent insulins, even in the ESYSTA® App.
Note:
Only use the ESYSTA® BT Pen with the insulin cartridges stated by Emperra
GmbH and make sure that you use the correct ESYSTA® Adapter. If your
insulin preparation is not stated in Chapter 15, please contact Emperra GmbH
directly. Contact details can be found at the end of these operating instructions.
Note:
Before each injection of insulin, please check that the holder is straight and
securely locked into the retainer. Otherwise there is a risk of incorrect dosage.
If an insulin cartridge leaks and liquid enters the device, the ESYSTA® BT Pen
may no longer be used.
The button is spring loaded. Please keep away from delicate areas of
the body, such as the eyes!
Page 16

16
6.1 Selecting the right ESYSTA® Adapters
Depending on the manufacturer, insulins are available in cartridges of various
sizes. Your ESYSTA® BT Pen can be used with all of the 3 ml cartridges (100
IU/ml) named in Chapter 15, if you use the appropriate ESYSTA® Adapter.
Select it from the table below.
In order to always guarantee optimal dosing accuracy, the ESYSTA® Adapters
are designed to be disposable products. Always change the ESYSTA® Adapter
every time you change the insulin cartridge.
Tampering with the ESYSTA® Adapter may have fatal consequences and
is strictly forbidden!
Suitable for 3 ml insulin cartridges
(100 IU/ml) from
Lilly®, Berlin-Chemie
®
and B.Braun
®
Sano-Aventis
®
Novo Nordisk
®
Cartridge adapter type
and colour
A
B
C
Holder
Holder A/B
BU
Holder A/B
Holder C
Page 17

17
6.2 Choosing the correct holder
Your ESYSTA® BT Pen is delivered with two dierent holders.
Holder Type A/B is for use with insulin cartridges made by the manufacturers
Lilly®, Berlin-Chemie®, B.Braun® and Sano-Aventis®. In addition to being
labelled "A/B", this holder can be distinguished by its screw thread.
Holder Type C is for use with insulin cartridges made by Novo Nordisk®. In
addition to being labelled "C", you can recognise this holder by its lack of a
screw thread, as the insulin cartridges of Novo Nordisk® have their own screw
thread.
Holder A/B Holder C
Page 18
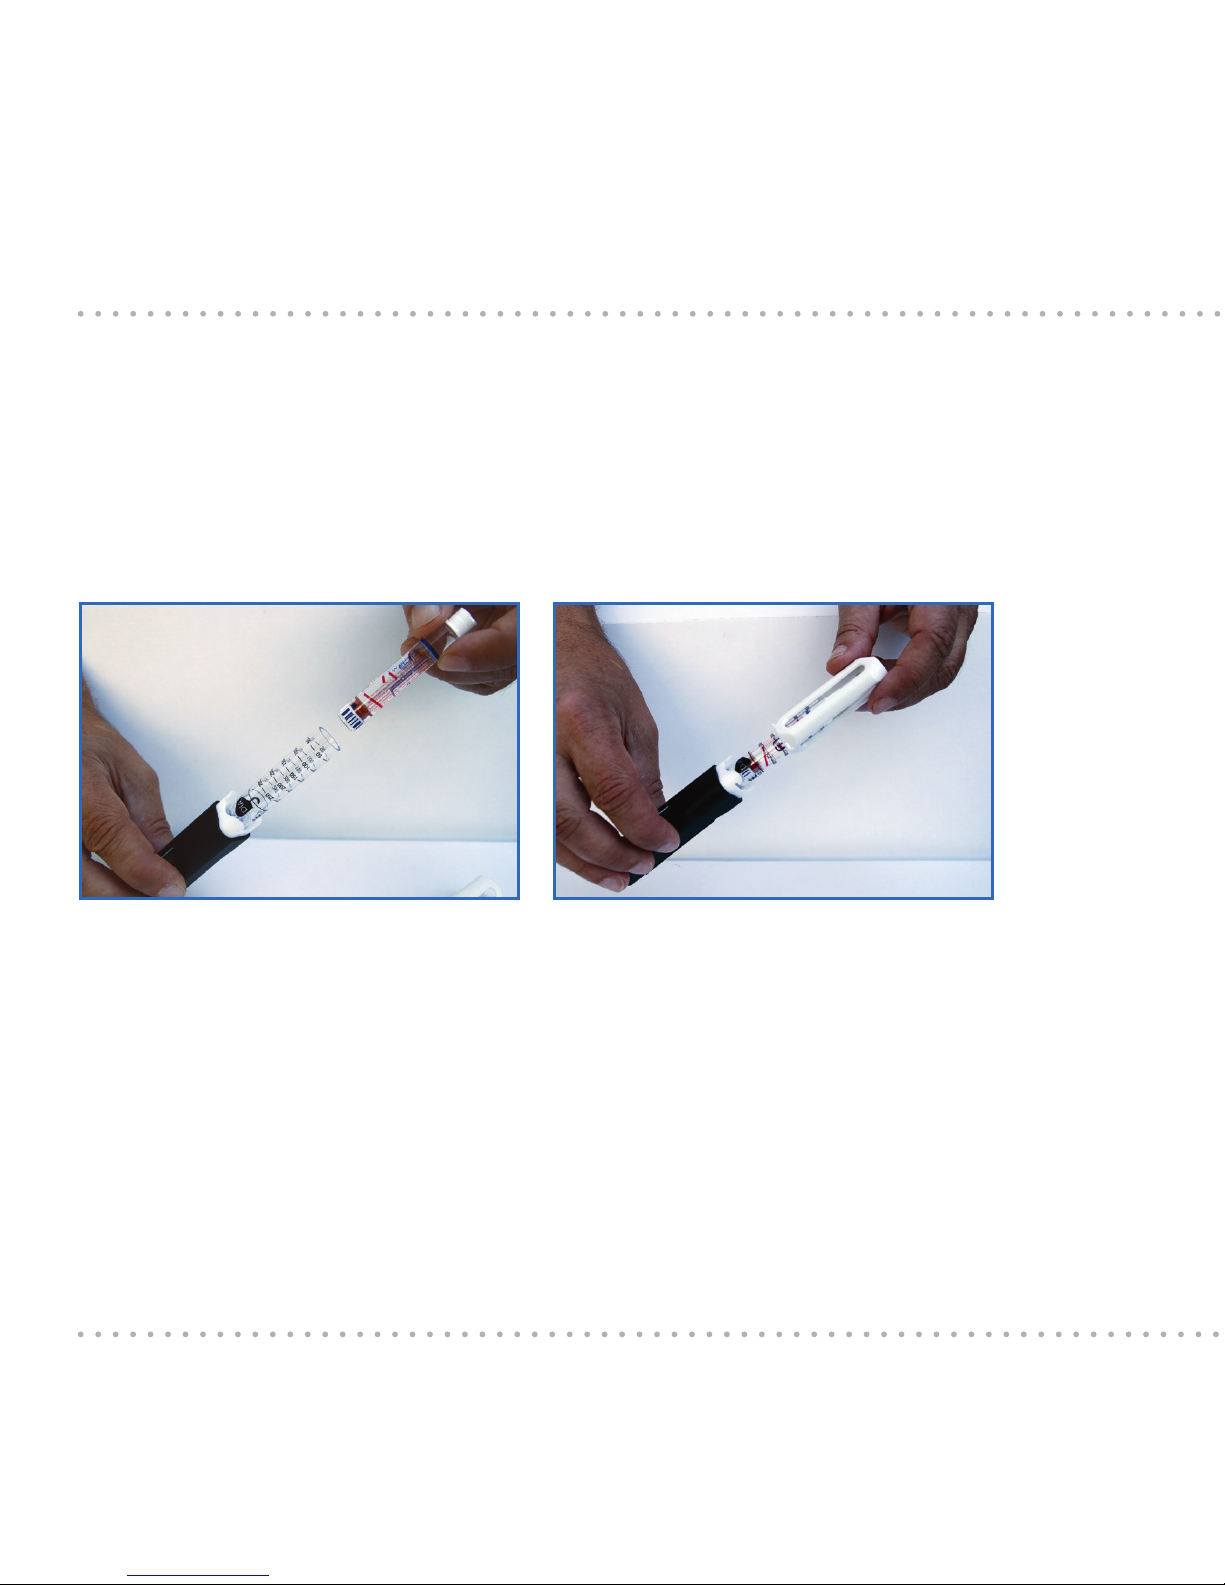
18
6.3 Inserting the insulin cartridge
First, pull o the cap and then twist o the holder. The insulin cartridge is
inserted with the dosing button unlocked (see Chapter 5). When the dosing
button is pushed in, you can unlock it by pressing it in, like a ball-point pen.
Insert the correctly selected ESYSTA® Adapter into the pen body with the
threaded rod at the front. Then slide the insulin cartridge with the stamp
at the front into the ESYSTA® Adapter. The needle side of the insulin
cartridge now protrudes out of the open side of the ESYSTA® Adapter.
Then slide the holder over the ESYSTA® Adapter lled with the insulin cartridge
and assemble it by pushing and twisting until it locks into place.
Pushing the insulin cartridge into the
ESYSTA® Adapter
Assembling the holder
Page 19

19
6.4 Marker
If you regularly use more than one insulin preparation, we recommend that you
use an additional ESYSTA® BT Pens for each additional insulin preparation. In
order to be able to distinguish ESYSTA® BT Pens containing dierent insulins,
identify these ESYSTA® BT Pens by using the coloured markers provided. The
markers are inserted into the recess on the pen body. It is important that you
can recognise the dierent colours beyond all doubt.
To remove an existing marker, use a pointed object and insert it between the
marker and the black frame. Then carefully pry the marker out from the frame.
Markers
Page 20

20
Note:
Every time before you use your ESYSTA® BT Pen, please check the inserted
insulin cartridge to ensure that you are using the correct insulin preparation
type. Do not rely solely on the marker!
Page 21

21
6.5 Attaching the needle
Align the needle onto the thread of the holder (or, in the case of insulin cartridges
made by the company Novo Nordisk® onto the thread of the insulin cartridge)
and screw the needle tight. To do this, hold the pen rmly by the holder so
that it does not come loose from the pen body. Always check that the needle
is rmly seated to be sure that the inner side of the needle has suciently
penetrated the insulin cartridge cap and that the insulin can thus ow freely
through the needle. You can rst remove the outer and then - if present - the
inner protective cap on the needle.
Note:
Regarding the handling of needles, please also follow the instructions for use
of the respective manufacturer.
6.6 Switching on the ESYSTA® BT Pen
To switch on ESYSTA® BT Pen, press on the dosing button as you would a
ball-point pen, so that the dosing button pops out.
If the dosing button is to be unlocked when the display is switched o
("stand-by mode" after a long period of disuse with the dosing button unlocked),
push it in and unlock it again.
Page 22

22
Once the ESYSTA® BT Pen is switched on, a display test initially appears.
The following display appears:
This display test is for your security. Check whether all of the segments
to be displayed here are present. If individual segments of the
display are not working or if the display is blank, you may not use
the ESYSTA
®
BT Pen. In this case, please contact Emperra GmbH.
After approx. 2 seconds, the ESYSTA® BT Pen indicates how many hours
have passed since the last injection of insulin and how many units you injected.
On the left are displayed the time (smaller gures) with the unit "H" for hours,
and on the right the insulin units "IU". Please be aware that the time display
rounds to whole hours.
Up to half an hour is displayed as "0H", half an hour to one and a half hours is
displayed as "1H", etc. If the last injection of insulin was more than 99.5 hours
ago, the display shows "- -".
On rst commissioning and on rst use after changing the battery, the hours
are displayed as "- -". For the last dose of insulin, “0 IU” is displayed in this
case.
Page 23

23
6.7 Venting specied by the ESYSTA® BT Pen
If the display shows “Pr” (“priming”), the ESYSTA® BT Pen requires venting,
e.g. after inserting a new insulin cartridge, in order to remove any air contained
in the insulin cartridge and to ll the injection needle with insulin.
To do this, unlock the dosing button and set at least 2 units (2 ratchet positions)
by turning the dosing button in the direction of the arrow (the display shows
"Pr” in the left-hand section and in the right-hand section the display will ash
with the venting dose set). Hold the ESYSTA® BT Pen with the needle pointing
upwards so that the air can collect at the needle. Then push the dosing button
in until it locks into place. The display now goes out and the units set are
saved as venting units. If no insulin visibly emerges from the tip of the needle
after this venting procedure (irrespective of the insulin preparation and the ll
level of the insulin cartridge), you will need to carry out further venting until the
insulin preparation emerges from the needle. These venting procedures will
be shown in the ESYSTA® Portal as venting only if you proceed according to
Chapter 6.8.
6.8 Marking and carrying out additional venting
To carry out further venting and to have this identied as such in
the ESYSTA® Portal, unlock the dosing button again so that the
ESYSTA® BT Pen is switched on (see Chapter 5). Now set one ratchet
position (1 IU) by turning the dosing button in the direction of the arrow without pushing the dosing button in - and then turn it against the direction
Page 24

24
of the arrow back to zero (0 IU). The display now sows “Pr” in the left-hand
section. Set the required number of venting units by turning the button in the
direction of the arrow. Hold the ESYSTA® BT Pen with the needle pointing
upwards so that the air can collect at the needle. Now press the dosing
button in fully until it locks into place. Once the dosing button has been
pushed in, the display will go out. Insulin will now emerge from the needle.
If this does not happen, you must repeat this procedure until insulin emerges
from the tip of the needle. All units are marked and saved as venting units.
Unlocking the dosing button again prepares the ESYSTA® BT Pen for a
subcutaneous dosage of insulin, as described below.
6.9 Setting the units for subcutaneous injections
Once the ESYSTA® BT Pen is suciently vented and you have switched it on
by unlocking the dosing button (see Chapter 5), you can now set the insulin
units. You can set the required dose of insulin by turning the dosing button
clockwise in steps of one unit (1 IU). A maximum of 60 IUs is possible as a
single dose. On each increase of the dose by one unit, you will hear a "click"
and at the same time feel a ratcheting action and see the dose indicated on the
display increase by exactly one unit.
Page 25

25
Note:
Only use the ESYSTA® BT Pen for injection if you receive the following
responses:
lDisplay of the set units
lAudible click for each unit set
lRatcheting action felt for each unit set
If you inadvertently set too high a dose, you can correct (reduce) this by
turning the dosing button against the direction of the arrow.
It is not possible to set a dose that is greater than the quantity of insulin present
in the cartridge. For technical reasons, a small residual amount of insulin will
always remain in the cartridge. If the insulin cartridge contains less insulin
than the required dose, you will only be able to inject an incomplete dose.
Once you switch on your ESYSTA® BT Pen again after inserting a new insulin
cartridge, it will display the amount of insulin last injected. You can use this
information for calculating the follow-up dose of insulin to be injected. This
avoids unnecessary disposal of the remaining insulin and saves money.
If you have a clear sense of resistance when turning the dosing button,
never try to forcefully twist the dosing button beyond this stopping point.
Otherwise your ESYSTA® BT Pen may be damaged. This stopping point signals
Page 26

26
that the maximum dose of insulin that can be used with the existing cartridge
has been reached and prevents a higher dose of insulin being set.
Note:
Each time you change the insulin cartridge, you must vent suciently (see
Chapter 6.7 and 6.8). Then select the remaining dose that is required (see
Chapter 6.9) and proceed according to these operating instructions.
To protect the batteries, the ESYSTA® BT Pen switches o automatically after
three minutes without any activity. To switch the ESYSTA® BT Pen back on
again, you must rst push in the dosing button. Insulin may emerge under
certain circumstances. When you next switch on, the ESYSTA
®
BT Pen will
request venting (see also Chapter 6.7).
To preserve the life of the battery for as long as possible, you should
always store your ESYSTA® BT Pen with the dosing button pushed in and
the ESYSTA® Adapter inserted.
6.10 Injection process
Before each injection, check that the ESYSTA® BT Pen contains the correct
insulin preparation. Tilt the ESYSTA® BT Pen back and forth to suciently
mix the liquid in the cartridge and carry out a visual inspection on the insulin
preparation (see also the instruction leaet for the insulin preparation). Stick
the needle through the skin in a suitable position. Slowly press the dosing
button until it reaches the stop and locks into place. A counter on the lefthand section of the display counts down in seconds from 8 to 1. Please leave
Page 27

27
the needle in the skin for this length of time and only withdraw from the skin
once the countdown is complete. In this way, you can guarantee that the set
insulin dose has been injected completely. Then, for ve seconds, the display
indicates the dose administered and then goes out.
Note:
The ESYSTA® BT Pen is equipped with a mechanism that guarantees that the
insulin emerges evenly during the injection procedure. However, pushing the
dosing button too fast may lead to the insulin being injected too quickly. This
may lead to an alteration in the cells (hardening or lumps in the fatty tissue,
also called lipodystrophy or lipohypertrophy). Please press slowly until the
dosing button locks into place.
You should also systematically change your injection sites.
The dosing button is equipped with a strong spring to guarantee complete and
correct administration of the insulin. If the dosing button is not pressed in far
enough, this may lead to the dosing button not locking into place during the
injection, and popping back out again.
In this case, you must leave the needle in the skin and press the dosing button
in again – without twisting it – until it locks completely into place. Even if this
happens several times or the ESYSTA
®
BT Pen displays "3 Er" (see Chapter
10), only the previously set dose of insulin will be injected in total. The injection
process is only completed correctly once the dosing button locks and you have
held the needle in the skin for at least 8 seconds.
Page 28

28
If you inadvertently pull the ESYSTA® BT Pen out of the skin before the dosing
button has locked into place, stick the needle back into the skin – without
twisting the dosing button. Inject the remaining quantity by completely
pushing in the dosing button until it locks into place. If you suspect that the
set dose has not been fully injected, please do not inject any additional units,
but instead check your blood-sugar values after a suitable period of time.
The next application of insulin should only occur after a sucient length of
time and with the knowledge of the current blood-sugar value, so that you can
be sure that you are not injecting too much insulin and thereby triggering a
dangerous state of hypoglycaemia.
6.11 Completing the injection
Once you have injected the insulin, remove the disposable needle by carefully
placing the outer cover over the needle and then screwing the needle o, using
the protective cover. Dispose of the needle along with the outer cover, in order
to prevent injuries. For proper handling and disposal of needles, please also
follow the instructions for use of the respective manufacturer. To avoid the risk
of painful infections, use each needle only once. After each injection of insulin,
put the cap on the ESYSTA® BT Pen and store it in the case provided, in order
to prevent damage and contamination.
Page 29

29
6.12 Cancelling the setting process
Even if you have already set the units, you can cancel this setting procedure
without wasting insulin. Reset the ESYSTA® BT Pen back to zero by turning the
dosing button against the direction of the arrow and then pushing in the dosing
button. Please proceed as in Chapter 6.11.
Note:
Do not turn the dosing button of the ESYSTA® BT Pen into the negative
range! (This may happen by turning the dosing button beyond zero against the
direction of the arrow.) However, if this does happen, carefully turn clockwise
again until units are again displayed. Check the ESYSTA® Adapter and cartridge
for damage, and make sure that you carry out the correct venting procedure
and function test (see Chapters 6.7 and 6.8).
Page 30

30
6.13 Temperature sensor
The ESYSTA® BT Pen is equipped with a temperature sensor that regularly
measures the ambient temperature and indicates the results on the display.
Extreme ambient temperatures can reduce the eectiveness of the insulin or
even render it ineective.
If the temperature range above 40 °C is exceeded, the message “Ht” (“High
temperature") appears in the display. If the temperature falls below around
2 °C, the message “Lt” (“Low temperature") appears in the display. In these
instances, it should be assumed that the insulin will no longer have an adequate
eect. We therefore recommend switching to a new insulin cartridge that has
been stored in the temperature range specied by the insulin manufacturer.
An injection can still be carried out by adjusting the selected dose. When the
selected insulin units are set, the warning message disappears and reappears
next time the pen is switched on. When the insulin cartridge is changed,
including a new adapter, the temperature warning display is reset.
Note:
Please note that the temperature sensor has a certain tolerance range and the
values stated above are only guideline gures. Please also regularly check the
storage and usage temperatures for your insulin with the insulin manufacturer.
Information from the temperature sensor is also transferred to the ESYSTA®
App and the ESYSTA® Portal.
Page 31

31
7. Changing the insulin cartridge
If you change the insulin cartridge, check whether you are staying with the
insulin preparation you previously used or if you are changing to another
insulin preparation. Both cases are described below.
Note:
Insulin cartridges are changed and inserted with the dosing button unlocked
(see Chapter 5). Please also always note the relevant designation of the insulin
type in the ESYSTA® App. You may need to modify it if necessary.
7.1 Continuing with the same insulin manufacturer
First, pull o the cap. To change the cartridge, remove the needle if this has
not yet been done. Remove the holder by twisting anti-clockwise. Remove the
used ESYSTA® Adapter with the insulin cartridge and dispose of them both.
Take a new ESYSTA® Adapter for the new insulin cartridge of the same type
and assemble them both as described in Chapter 6.3.
Page 32

32
7.2 Changing the insulin manufacturer
If you are changing the type of insulin preparation, then in addition to the steps
described in Chapter 7.1, you must select the correct holder and the correct
ESYSTA® Adapter (see Chapters 6.1 and 6.2). Never make changes to the
holder or ESYSTA® Adapter.
Change the details of the insulin in the ESYSTA® App and if necessary in the
ESYSTA® Portal.
7.3 Important safety information about changing the cartridge
After changing the insulin cartridge, you must carry out a venting
procedure. You may frequently have to carry out several venting
procedures after changing the cartridge (see Chapters 6.7 and 7.8).
You must use a new suitable ESYSTA® Adapter with each new insulin
cartridge!
Even if your last insulin cartridge was not completely emptied, because
your doctor changed your treatment, for example, a new ESYSTA®
Adapter must also be used with the new insulin cartridge.
Page 33

33
8. Battery change
Your ESYSTA® Pen is powered by three CR 1225 format batteries (button
cells).
With proper use, depending on the behaviour of the user, these batteries
guarantee a sucient energy supply for up to six months.
Note:
The life of the batteries may be reduced by environmental inuences (e.g.
serious temperature uctuations) and by being stored when switched on
(unlocked dosing button).
The batteries are not rechargeable. Do not burn batteries. Dispose of old
batteries correctly - never in your domestic waste. Battery collection points can
be found in all shops that sell batteries. Only open the battery compartment
to change the batteries, as otherwise foreign bodies may possibly penetrate
the open battery compartment, which may negatively aect the function of the
ESYSTA® BT Pen. If the battery voltage is low, then "bL" (battery low) will be
displayed when you switch on the ESYSTA® BT Pen. You should now replace
the batteries within the next few days.
When selecting batteries, please make sure that they are safe against explosion
accidents. This can best be found out from the battery manufacturer.
Page 34

34
To change the batteries, open the battery compartment by pulling it out like
a drawer. To maintain child safety, quite a lot of strength is required. Always
remove all three batteries and replace them with new batteries of type CR
1225.
Observe polarity! The positive pole of all three batteries must point upwards.
Incorrectly inserted batteries may damage the device. Once all three batteries
are correctly inserted, push the battery compartment back in completely.
Then check the function of the ESYSTA® BT Pen by venting as described in
Chapter 6.7.
Note:
We advise changing the batteries near your smartphone with the ESYSTA®
App and with Bluetooth® transfer switched on and then importing the data,
so that your ESYSTA® BT Pens can be optimally time-synchronised with the
ESYSTA® App.
Battery compartment
Page 35

35
9. Enabling and disabling data transfer
9.1 Enabling the Pen-smartphone connection (“bonding”)
The data captured from the ESYSTA® BT Pen is transferred automatically via
Bluetooth® radio technology to your Bluetooth®-enabled smartphone. To do this,
you must congure your ESYSTA® App (see Chapter 1) as follows.
Open the ESYSTA® App on your smartphone. Select the function marked "Add
device".
1. In accordance with the prompts, enter which marker colour and which
preparation you have used for the ESYSTA® BT Pen. Use the selection
options after the arrows. “Next” conrms your entries and takes you to the
next menu item.
2. Put the ESYSTA® BT Pen in transfer mode by following the instructions on
the smartphone display. “Next” takes you to the next menu item after each
command.
3. Establish a connection between the ESYSTA® BT Pen and your smartphone.
Read the explanatory notes on the smartphone display carefully and then
click “Next”. From the list that then appears in the smartphone display,
select the device that you want your smartphone to connect to. A 2-digit
code prexed by “A”, “b” and “c” then appears three times in succession
in the Pen display. This, together, creates the 6-digit security code (PIN)
which you should enter into your smartphone when prompted to do so.
Page 36

36
4. Once you have successfully bonded your devices, this will be shown in
the smartphone’s display. The ESYSTA® BT Pen display shows “bo nd”.
“Done” takes you out of conguration mode.
Your devices are now connected to each other. The Pen data can be imported
via your smartphone into the ESYSTA® App.
If you use several ESYSTA® BT Pens for your treatment and want
to integrate them into the ESYSTA® App, select the “Add device”
function again and repeat steps 1 to 4 for each individual Pen.
Note:
Ideally, you should always keep transfer mode active so that your current
treatment data is always available in the ESYSTA® App. The ESYSTA® BT Pen
can only exchange data with a smartphone. Any attempt to connect to other
devices will not work. Even if you are using the ESYSTA® App on a second
smartphone and search for the Pen, you will not nd it there. If however
you want or have to do this anyway, for example because you have a new
phone, then you must cancel the connection (“bonding”) between the previous
smartphone and the ESYSTA® BT Pen (see Chapter 9.2).
Page 37

37
9.2 Disabling the Pen-smartphone connection (cancelling "bonding”)
If you want to cancel the connection between the previous smartphone and the
ESYSTA® BT Pen (“bonding”), for example because you have changed your
smartphone, carry out the following steps on the ESYSTA® BT Pen.
Put the pen in transfer mode by pulling out the dosing button and pushing it
back in again. Then use the ESYSTA® App to establish a connection to the Pen
and enter the security code displayed.
To cancel bonding, carry out the following steps on the Pen:
1. Push the dosing button out.
2. Turn the button for 2 units and then back to 0 units.
3. Push the button in.
4. The display now shows “dE bo” (standing for “delete bond”).
5. Repeat steps 1 to 4 two more times. In the top left section of the display,
1-2 dots indicate how often this process has already been carried out.
6. Once the action has been completed for the third time, “no bo” (stating “not
bonded”) appears in the Pen display.
The Pen is now not assigned to any smartphone exclusively. It can be re-linked
with another smartphone. To do this, follow the instructions in Chapter 9.1.
Page 38

38
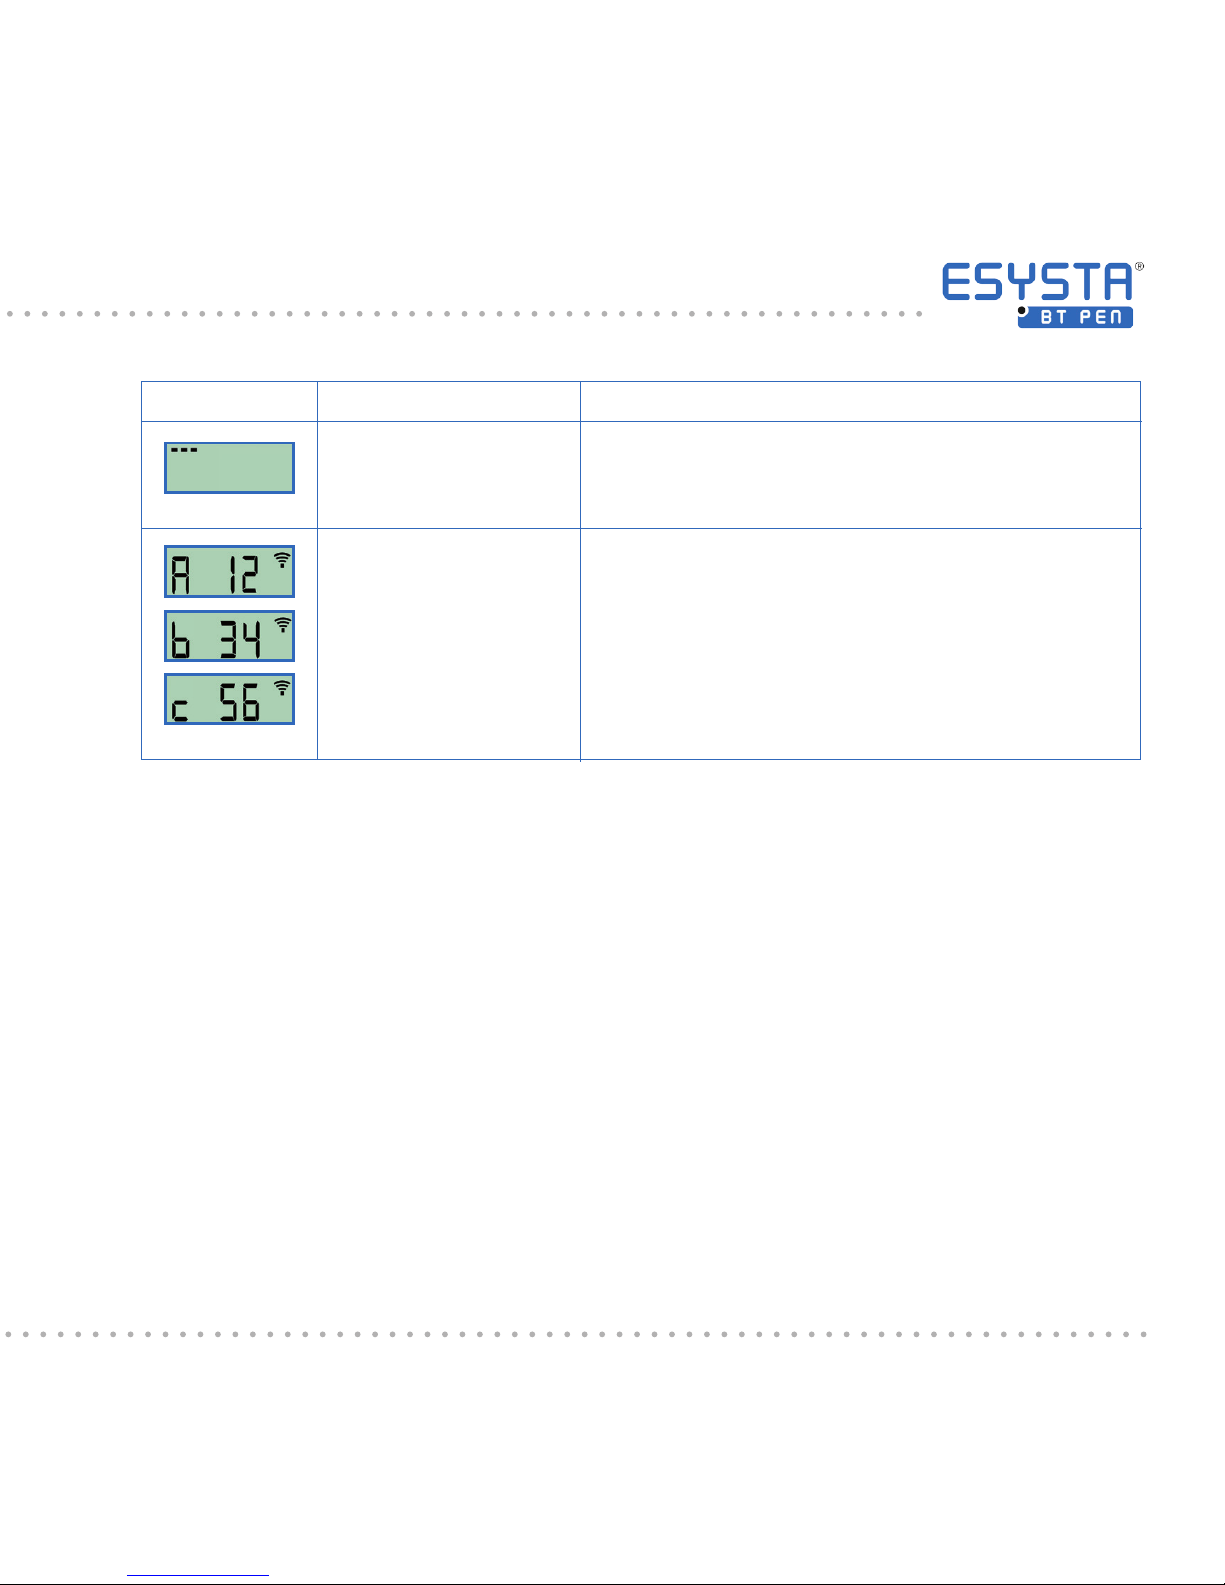
9.3 Data memory
The approximate quantity of the data to be transmitted can be seen by the
number of bars in the top section of the display:
There is no data in the memory awaiting transmission.
There is data in the memory awaiting transmission.
There are over one hundred data records in the memory that
have not yet been transferred.
There is still sucient free memory available.
There is a high number of records in the memory that have not
yet been transferred. The memory is full.
The oldest data will be overwritten by current data.
Note:
The insulin application function of the ESYSTA® BT Pen will not be aected by
a full memory.
Page 39

39
Designation
Display test
Display of the last
insulin injection
Setting the
units
Time counter for
Administration of
insulin
Administration of
insulin complete
Wireless mode
ashing
Radio mode
constant
Explanation
Please check whether all the elements of each gure
are displayed, in order to prevent errors when reading
due to partial failure of the display.
Thirty units were injected around 1 hour ago.
Currently, 17 insulin units are set.
Counts every second from 8 to 1. Leave the needle in
the skin until the countdown has completed.
Seventeen units have just been injected.
The ESYSTA® BT Pen is searching for contact with
the smartphone. Once contact is made, it sends the
saved data.
The ESYSTA® BT Pen is bonded to the smartphone
and transferring data.
Display
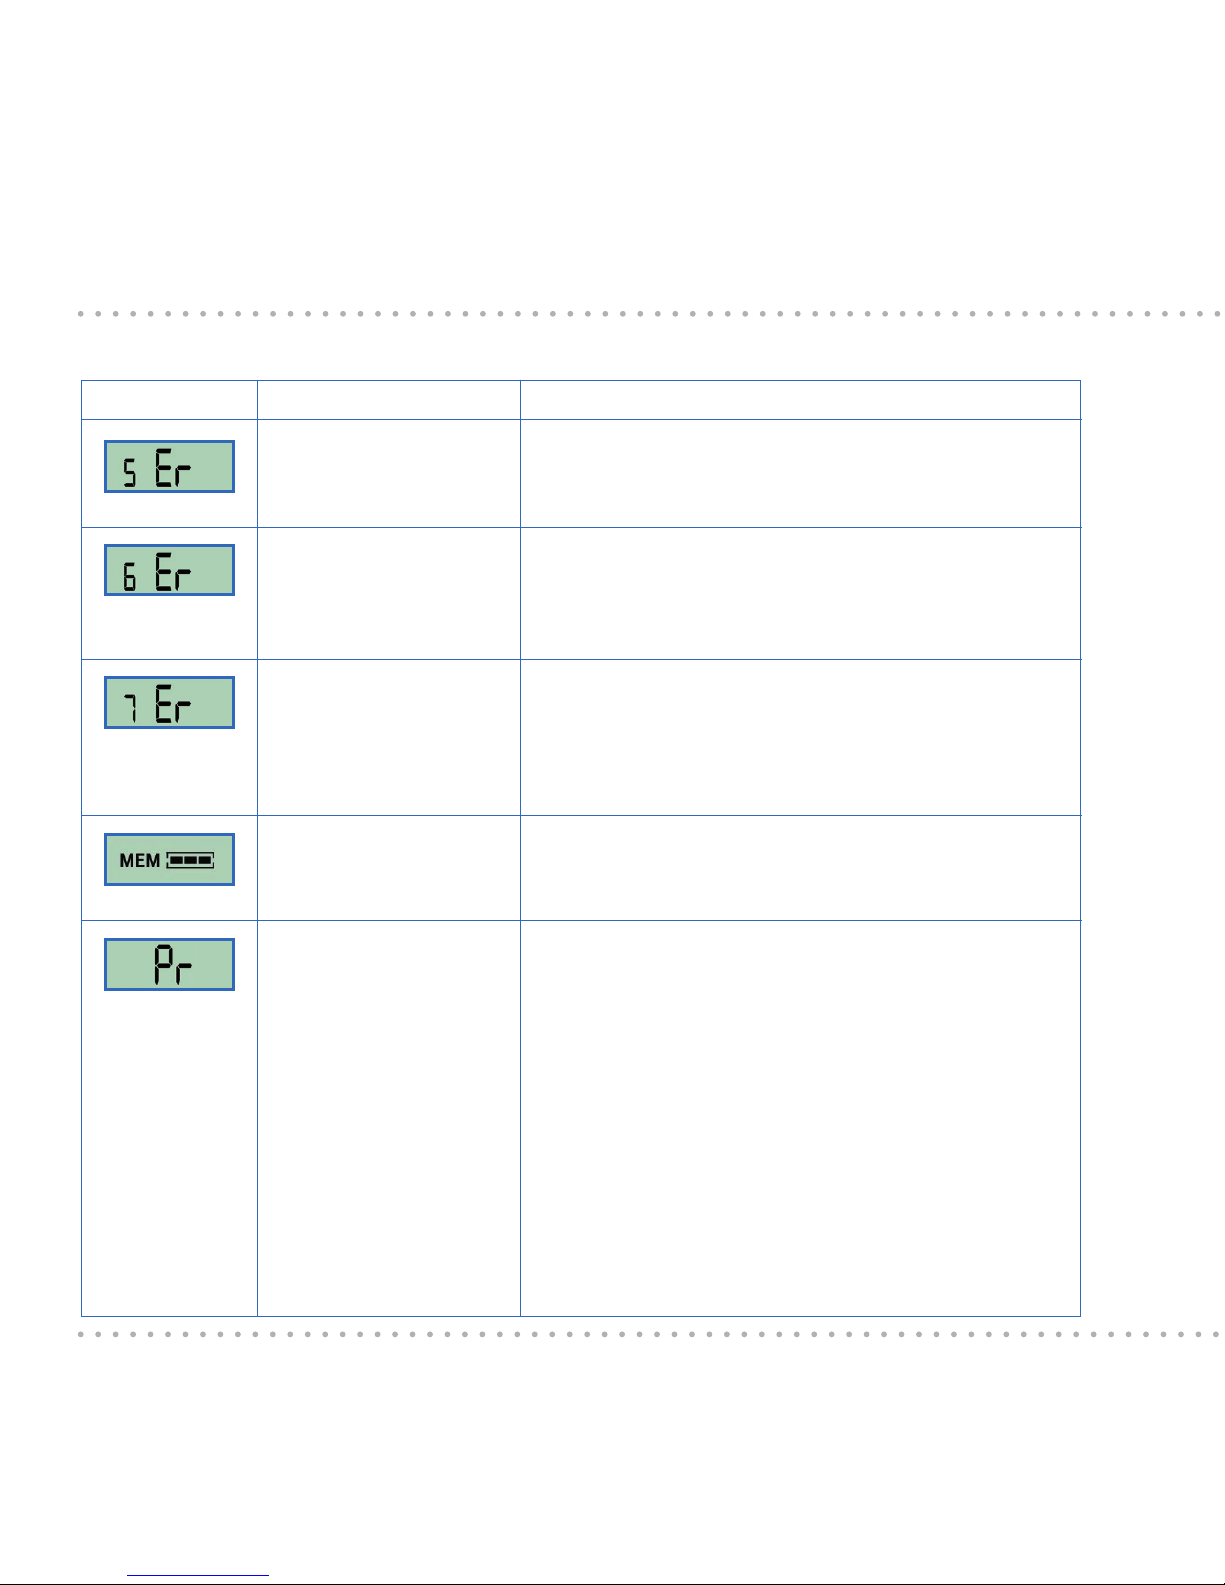
10. Display and error messages
Page 40

40
Designation
Negative
units set
More than
60 units set
Time of the last
injection cannot
be determined
The batteries
are at
Temperature
exceeded
Minimum
temperature not
met
Explanation
Caution, serious error! Turn the dosing button
clockwise until zero or a higher gure appears.
The pen is intended for injecting up to 60 units of
insulin. Turn the dosing button against the direction of
the arrow until a number appears again.
The last injection was more than 99 hours ago, or the
batteries have been changed.
Please change the batteries as soon as possible.
The temperature range > 40 °C was exceeded
(in this case, the measured maximum was 45 °C)
The temperature range < 2°C was fallen below
(in this case, the measured minimum was -6°C)
Display
Page 41
41
Display Explanation
This error may occur when the ESYSTA® BT
Pen is defective or if the dosing button has been
turned too quickly. If the ESYSTA
®
Pen displays
this error, do not use it for an injection under any
circumstances! Press the dosing button in, in order to discard the insulin amount previously set.
Once the display has switched itself o, push the
dosing button back out again and start to reset the
units again. Should this error occur repeatedly,
please contact Emperra GmbH.
For the next injection, the actual dose injected may
be lower than the dose displayed. This is why your
ESYSTA® BT Pen must be vented before the next
injection until insulin visibly emerges from the needle.
The dosing button was not pushed in all the way
or became unlocked again during the injection pro-
cess (countdown not yet nished). It is possible that
not all of the quantity set has been administered.
(see Chapter 6.10).
There is no ESYSTA® adapter in the ESYSTA® BT
Pen.
Meaning
Error with dosing
sensor
Button was pressed
with the dose set in the
negative range
Application not completed correctly
No ESYSTA®
adapter in the
ESYSTA® BT Pen
Page 42
42
Display Explanation
This message is displayed during switch-on after 24
months of use. Discontinue the use of the ESYSTA®
BT Pen from this point in time.
This message will be displayed on every operation
during the last two weeks of the period of use.
Please replace your pen promptly!
A problem has occurred with the internal data
memory. Injected doses cannot be saved and will
not be transferred to your ESYSTA® Portal. Please
contact Emperra GmbH.
The data memory is full. The insulin application
function of the pen will continue to exist. Please
transfer the data (see Chapter 9).
This display urges you to vent the pen. It is triggered
by various conditions and guarantees safe function
of the pen. Make sure that the venting procedure is
always carried out correctly until insulin emerges.
Possible triggers of this display are: Turning the
dosing button outside the readiness for operation
mode by setting the units for application, unlocking
the cartridge holder, e.g. to change the insulin
cartridge, change the batteries, marking of the
venting procedure (see also Chapters 6.7 and 6.8).
Meaning
The ESYSTA® BT Pen
has reached the end of
its useful life
The end of the life of
the Pen will be reached
in 6 weeks
Memory error
Memory full
Venting
Page 43
43
11. Guarantee
Emperra GmbH accepts no liability for problems with the
ESYSTA® BT Pen resulting from improper handling of the device.
Devices damaged in this way are excluded from the right to exchange.
Display Explanation
See Chapter 9
The three indicators appear on the display in
sequence. Together they create the 6-digit security
code which is needed to bond the ESYSTA® BT Pen
with a smartphone.
(As an example here: 123456)
Meaning
Ready to bond with a
smartphone
Security code (PIN)
Page 44

44
12. Period of use
Your ESYSTA® BT Pen is designed for a period of use of up to two years from
the date of initial use.
In the six weeks before expiry of the period of use, the
adjacent display will appear on each operation. Please
remember to get a new ESYSTA® BT Pen in good time.
After 24 months of use, the adjacent display will appear
on operation. You must not continue to use the ESYSTA
®
BT Pen from this time.
Page 45

45
13. Technical data
Insulin pen
Dimensions (with dosing button pushed in):
approx. 180 mm x 23 mm x 25 mm
Weight without insulin cartridge: 62 g
Battery
Power supply: 3 x button cells, CR 1225
Nominal voltage: 3.0 V
Nominal capacity: 50 mAh
Height: 2.5 mm ± 0.2 mm
Diameter: 12.5 mm ± 0.3 mm
Once the insulin cartridge is inserted, please follow the prescribed storage
temperature of your insulin preparation (instructions enclosed by the insulin
manufacturer).
Temperature for use: 18 °C to 28 °C Period of use: 2 years
Storage temperature without batteries and without insulin cartridge: -30 °C to 60 °C
Storage temperature without batteries and without insulin cartridge: -20 °C to 60 °C
Page 46

46
14. FAQs
Question: What does "Pr" mean on the display?
Answer: "Pr" stands for "priming.
Please read Chapters 6.7 and 6.8.
Question: Why does the ESYSTA® BT Pen show "Pr" so often?
Answer: There are various reasons for this. One possibility is incorrect handling
of the ESYSTA® BT Pen. For example, if you store the ESYSTA® BT Pen with an
unlocked dosing button, it will switch itself o after a few minutes. If you switch it
back on by pushing the dosing button in and out, the ESYSTA® BT Pen will demand
to be vented by displaying "Pr". Other possible causes include: turning the dosing
button when pushed in, unlocking the cartridge holder, such as when changing the
insulin cartridge, changing the battery, turning the unlocked dosing button to "1"
and back to "0" (see also Chapter 6.8).
Question: How can I identify venting as such?
Answer: See Chapter 6.8 for more information.
Question: Why can't I attach the holder?
Answer: The holder, adapter and insulin cartridge may possibly not suit each
other. Please make sure that you always use the holder and ESYSTA® Adapter
that suit your insulin preparation. Various manufacturers use insulin cartridges with
dierent dimensions, and you will have to select the right ESYSTA® Adapter for this.
You will nd a table in Chapter 6.1 and on the packaging of the ESYSTA® BT Pen
and ESYSTA® adapters.
Page 47

47
Question: Why are there markers with dierent colours?
Answer: If you use several ESYSTA® BT Pens for dierent insulin preparations
(e.g. basal or quick-acting insulin), you can identify these ESYSTA® BT Pens by
colour. Ensure that you use the same identication system in the ESYSTA® App.
The change of coloured marker is described in Chapter 6.4.
Question: Why is no insulin coming out of the ESYSTA® BT Pen?
Answer: You may possibly have not screwed the needle on far enough. Check
the correct position of the needle and turn it to tighten if necessary. If the needle is
blocked, replace it with a new needle in its original packaging. The ESYSTA® BT
Pen may possibly be insuciently vented (see Chapters 6.7 and/or 6.8).
Question: Why do I have to use a new ESYSTA® Adapter each time?
Answer: In order to guarantee dosing accuracy, the ESYSTA
®
Adapters are
disposable products and must be replaced with each new cartridge of insulin (see
Chapters 6.1, 6.3 and 7).
Question: Which ESYSTA® Adapter must I use?
Answer: There are suitable ESYSTA® Adapters for the dierent insulin cartridges
from various manufacturers. Various manufacturers use insulin cartridges with
dierent dimensions, and you will have to select the right ESYSTA® Adapter for
this. There is a table in Chapter 6.1 and on the packaging of the ESYSTA® BT Pen
and the ESYSTA® Adapters.
Page 48

48
Question: Why is the ESYSTA
®
BT Pen not transmitting data to my smartphone?
Answer: There may be various reasons for this.
1. Your ESYSTA® BT Pen BT Pen is not bonded with your smartphone (see
Chapter 9).
2. The Bluetooth® connection on your smartphone is disabled.
3. Your smartphone is outside the range of the ESYSTA® BT Pen (approx. 10 m).
To transfer data, insulin injections must have been already stored in the ESYSTA®
BT Pen. You can identify this in the upper section of the display. Should data
continue not to be sent, please contact Emperra GmbH.
Question: Why does the ESYSTA® BT Pen go out immediately after injecting?
Answer: The ESYSTA® BT Pen may have been in venting mode (see Chapters
6.7 and/or 6.8).
Question: How many ESYSTA® BT Pens can I use?
Answer: You can use any number of ESYSTA® BT Pens. Each ESYSTA
®
BT Pen
will be displayed in the ESYSTA
®
App along with the insulin preparation stated
during its registration. You should always use the same marker colour for one
insulin preparation (e.g. an ESYSTA® BT Pen marked in blue for your basal insulin,
and an ESYSTA® BT Pen marked in yellow for your mealtime insulin). Please also
discuss this with your doctor.
Page 49

49
Question: Why is no data being synchronised between the ESYSTA® App and the
ESYSTA® Portal?
Answer: There may be various reasons for this.
1. Data transfer on your smartphone is disabled.
2. You are in an area with inadequate GSM network coverage.
Question: What should I do if I can't switch on the ESYSTA® BT Pen?
Answer: If you have switched on the ESYSTA® BT Pen according to these operating
instructions and there is nothing on the display, please change the batteries. If this
does not help, then you should always keep a replacement injection device to
hand, and also contact Emperra GmbH directly.
Question: What should I do if parts of the display fail or are continually on display?
Answer: Do not use this ESYSTA® BT Pen under any circumstances. In this case,
you should always keep a replacement injection device to hand, and also contact
Emperra GmbH.
Page 50

50
15. List of compatible insulin preparations
Novo Nordisk
®
NovoRapid® Penll® 100 IU/ml injection solution in a cartridge
NovoMix® 30 Penll® 100 IU/ml injection suspension in a cartridge
Levemir® Penll® 100 IU/ml injection solution in a cartridge
Actrapid® Penll® 100 IU/ml injection solution in a cartridge
Actraphane® 30/-50 Penll® 100 IU/ml injection suspension in a cartridge
Protaphane® Penll® 100 IU/ml injection suspension in a cartridge
Sano-Aventis
®
Lantus® 100 IU/ml injection solution in a cartridge
Apidra® 100 IU/ml injection solution in a cartridge
Insuman® Rapid 100 IU/ml injection solution in a cartridge
Insuman® Comb 15 100 IU/ml injection suspension in a cartridge
Insuman® Comb 25 100 IU/ml injection suspension in a cartridge
Insuman® Comb 50 100 IU/ml injection suspension in a cartridge
Insuman® Basal 100 IU/ml injection suspension in a cartridge
5
In the case of insulins that are not on this list, please contact Emperra GmbH directly.
Page 51

51
Lilly
®
Huminsulin® Normal 100/ for pen 3 ml/pen injection solution
Huminsulin® Prol III for pen 3 ml/-pen injection suspension
Huminsulin® Basal (NPH) 100/-for pen 3 ml/-pen injection suspension
Humalog® 100 IU/ml injection solution/pen 100 IU/ml
Humalog® Mix 25 100 IU/ml injection suspension/-Pen
Humalog® Mix 50 100 IU/ml Injection suspension/ pen
Abasaglar® 100 IU/ml injection solution in cartridge / pen
Berlin-Chemie
®
Berlinsulin® H Normal 3 ml pen injection solution
Berlinsulin® H 30/70 3 ml pen injection suspension
Berlinsulin® H Basal 3 ml pen injection suspension
Liprolog® Mix 25 Pen 100 IU/ml injection suspension
Liprolog® Mix 50 Pen 100 IU/ml injection suspension
Liprolog® 100 IU/ml injection solution in cartridge/pen
B.Braun
®
Insulin B. Braun Rapid® 100 IU/ml
Insulin B. Braun Comb® 30/70 100 IU/ml cylinder ampoules with injection suspension
Insulin B. Braun Basal® 100 IU/ml cylinder ampoules with injection suspension
Page 52

52
16. List of compatible needles
All needles in the list below are available in various lengths. Compatibility with
the ESYSTA® BT Pen depends on the length of the needles (e.g. 8 or 10 mm).
If your product is not listed in the table below, please contact Emperra GmbH.
Manufacturer
BECTON DICKINSON GMBH
BERLIN-CHEMIE AG
YPSOMED GMBH
BERENBRINKER SERV.GMBH
NOVO NORDISK PHARMA
B.Braun
Type
BD MICRO FINE
®
BERLIFINE
®
CLICKFINE
®
OPTIFINE
®
INSUPEN Pen Nadel Eective
®
INSUPEN Pen Nadel Original
®
INSUPEN Pen Nadel Ultran
®
NOVOFINE
®
Omnican Fine
®
Page 53

53
17. Index
Adapter 7, 16, 32
App 6, 30, 35-37
Battery 33-34
Bonding 35-37
Transferring data 35-38
Display 22, 39, 43
Dosing button 10, 14, 21-29
Dosing 24-26
Venting 23
Disposal 28, 33
Error messages 39-43
Questions 46-49
Function test 22
Guarantee 43
Holder 17
Injection 26-29
Insulin 31-32,50-51
Needle 21, 52
Marker 19
Portal 6, 8, 30
Safety 9-13
Temperature sensor 30
Period of use 44
Page
Page 54

54
Page 55

55
Page 56

Address of the manufacturer:
Emperra GmbH
E-Health Technologies
Friedrich-Ebert-Strasse 33
D-14469 Potsdam
Germany
Telephone: +49(0)331 / 9793480 - 0
Fax: +49(0)331 / 9793480 - 19
E-Mail: esysta@emperra.com
Web: www.emperra.com
Hotline +49 (0)800/3673772 (0800 EMPERRA)
Mon. - Fri. 8.30 a.m. - 5 p.m.
(free of charge from German landlines)
0482
FCC Certication
FCC ID: 2AHMS-BTPEN1
This device complies with part 15 of FCC Rules. Operation is subject to the following two conditions:
(1) This device may not cause harmful interference, and
(2) this device must accept any interference received, including interference that may cause undesired operation.
 Loading...