

Eswood B42GN Equipment Manual
EQUIPMENT MANUAL
FOR
B42GN PROFESSIONAL
DISH WASHER
JUNE 2011
1

T
ABLE OF CONTENTS
1. Important: Prior to Installation 3
2. Technical Specifications 4
3. Installation 5
4. Initial Start-up Procedure 6-7
5. Washing Operation 8
6. Shutdown and Maintenance 9
7. Trouble Shooting 10 & 11
8. Drawings Spare Parts 12,13,14,15,16
9. Wiring Diagram 17
10. Spare Parts & Service 18
ESWOOD OPERATING MANUAL B42N/June 2011
2

I
MPORTANT: PRIOR TO INSTALLATION
1
Installation must be carried out according to local regulations by qualified
trade persons. Isolating switch (es), shut-off valves etc must be within
easy reach of the machine for future service and maintenance
requirements. If in doubt call ESWOOD AUSTRALIA or their
representative for further information. No responsibility will be accepted
for defects or damages by improper installation, for changes to the
product not authorised by ESWOOD AUSTRALIA, or for operation
outside the technical specifications.
ESWOOD AUSTRALIA warrants their products to be free from defects in
material and workmanship under "normal use and service". This does not
include normal wear and tear of parts. ESWOOD AUSTRALIA will repair
or replace any parts, which in ESWOOD AUSTRALIA's sole judgement
are defective in material or workmanship, in accordance with the warranty
offered.
This undertaking covers the provision of labour and parts for 12 months
from the date of delivery to the purchaser. This undertaking applies only
to state capitals. Remote areas are not covered by this commitment and
special enquires should be made. (Note: Travel time not covered by
warranty)
In no event will ESWOOD AUSTRALIA be liable for loss of facilities or
other property and such things as, but not limited to, additional labour
costs, loss of revenue or anticipated profits, and other damages of any
kind whether direct, indirect, incidental or consequential.
Labour under warranty is supplied free of charge during normal working
hours, Monday to Friday. Should warranty work be requested outside or
our normal working hours a labour charge will be applied equivalent to a
normal hour rate without out of hour’s penalty rates. (Refer to last page of
this manual for your closest branch for Warranty repair services)
Note: It is the responsibility of the owner to ensure the water feed to
Eswood Dish and Glass washers is of a quality that will not form
excessive build up of calcium and other dissolved minerals on the heating
elements. Premature failure of heating elements that exhibit this cause of
failure will not be covered under warranty, also if the filter valve is
discarded from the detergent tube warranty will be voided. PLEASE
ENSURE SUITABLE DETERGENT IS USED.
ESWOOD OPERATING MANUAL B42N/June 2011
3

T
ECHNICAL SPECIFICATIONS
2
Machine Specifications
Net Weight 50kg
Hourly Capacity 1000 glasses/items/hr.
Wash Cycle Time Hot cycle 1 min. Hot/Cold cycle 11/4 min.
Scrub cycle 3 min
Dwell/Rinse 4 seconds/15 seconds
Standard Equipment B42P: 400 x 400mm Glass/Cup Rack
Wash Pump, Tank and Element
Wash Pump 300 Watts
Wash Tank Capacity 13 Litres
Wash Tank Heater 500 Watts
Wash temperature 60OC to 65OC
Rinse Tank and Element
Rinse Tank Capacity 8 Litres
Rinse Tank Heater 2400 Watts
Rinse Temperature 82OC - 85°C
Water Consumption 3 Litres per cycle
Electrical and Water Consumption
Electrical Input 240V, 50Hz, 1 phase, 14 Amps max
Hot Water Input 65OC @ 200 kPa to 400 kPa
Hose with 3/4” B.S.P. fitting
Drain Outlet 11/2” B.S.P. gravity fed.
ESWOOD OPERATING MANUAL B42N/June 2011
4
IN RUN POSITION
I
NSTALLATION
3
1. Remove the lower panel, position the machine and level by
screwing the adjustable feet.
2. Fit a 11/2” B.S.P. waste trap to underside of tank outlet.
3. Connect the hot & cold water supply hose to 3/4” B.S.P. isolating
valves adjacent to the machine. The hot water input supply should
be at 65OC and both hot & cold water supply at 200 to 400 kPa. A
pressure reducing valve should be fitted for pressure above 400
kPa.
Do not make water or plumbing connections that will prevent
the machine from being removed from position, for the
purpose of servicing.
Note that all plumbing work is to be done in accordance with local
plumbing codes.
4. Ensure that the rotary switch is “OFF” and connect the three pin
plug lead to a 15 Amp, 240V, 50Hz, 1 phase power outlet.
Note that any electrical work is to be done in accordance with the
rating plate on the lower panel.
ESWOOD OPERATING MANUAL B42N/June 2011
5

I
NITIAL START-UP PROCEDURE
4
1. With the rotary switch “OFF” turn the hot & cold water and power
on.
2. Open the door, ensure the overflow tube is placed into the tank
drain flange and pump intake filter is located over the pump
suction hole (inside tank front) then close the door.
3. The machine is fitted with an automatic detergent injector. Place
the free end of the 10mm clear plastic tube, located under the
machine, into a 4 Litre or other suitable container of detergent.
The unit will prime itself after the initial cycles.
The injector must not run without detergent. Do not use wrong
products as they will void the warranty, and use product in
accordance with manufacturers’ recommendations.
4. Turn the rotary switch to “FILL” position (see page 7) and the
rinse cylinder will begin to fill with water. The fill light illuminates
till the cycle is complete. When the rinse cylinder is full, the
water will flow out of the rinse jets and fills the wash tank and
stop automatically.
This ensures that all air is expelled from the rinse cylinder and
that the heating elements are safely covered with water. Failure
to observe the above will cause damage to the elements
and is not covered under warranty.
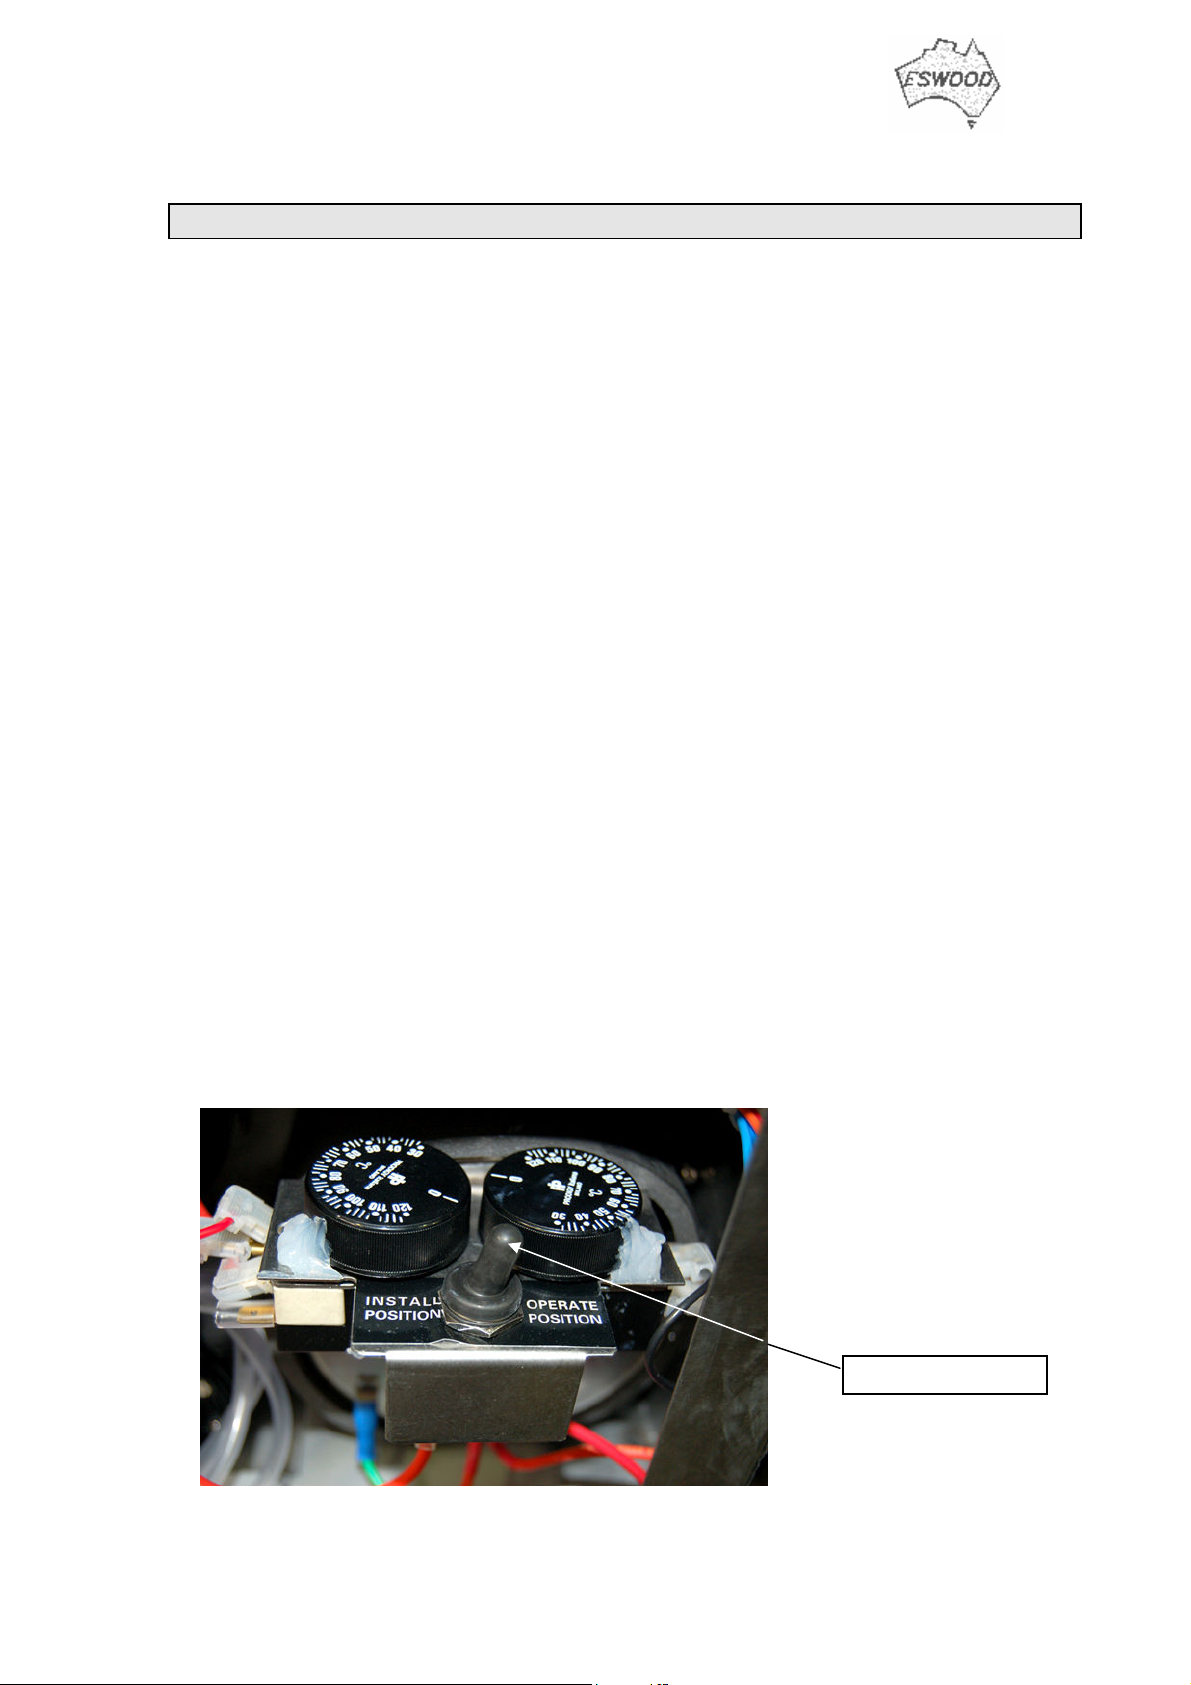
5. Open the door check that the wash tank is full. Place strainer
trays in position within the tank and close door. Turn the toggle
switch behind the lower panel (see photo, previous page) to the
“Run” position.
6
 Loading...