

Page 1
55-81011-CH – Chrome
55-81011-BN – PVD Brushed Nickel
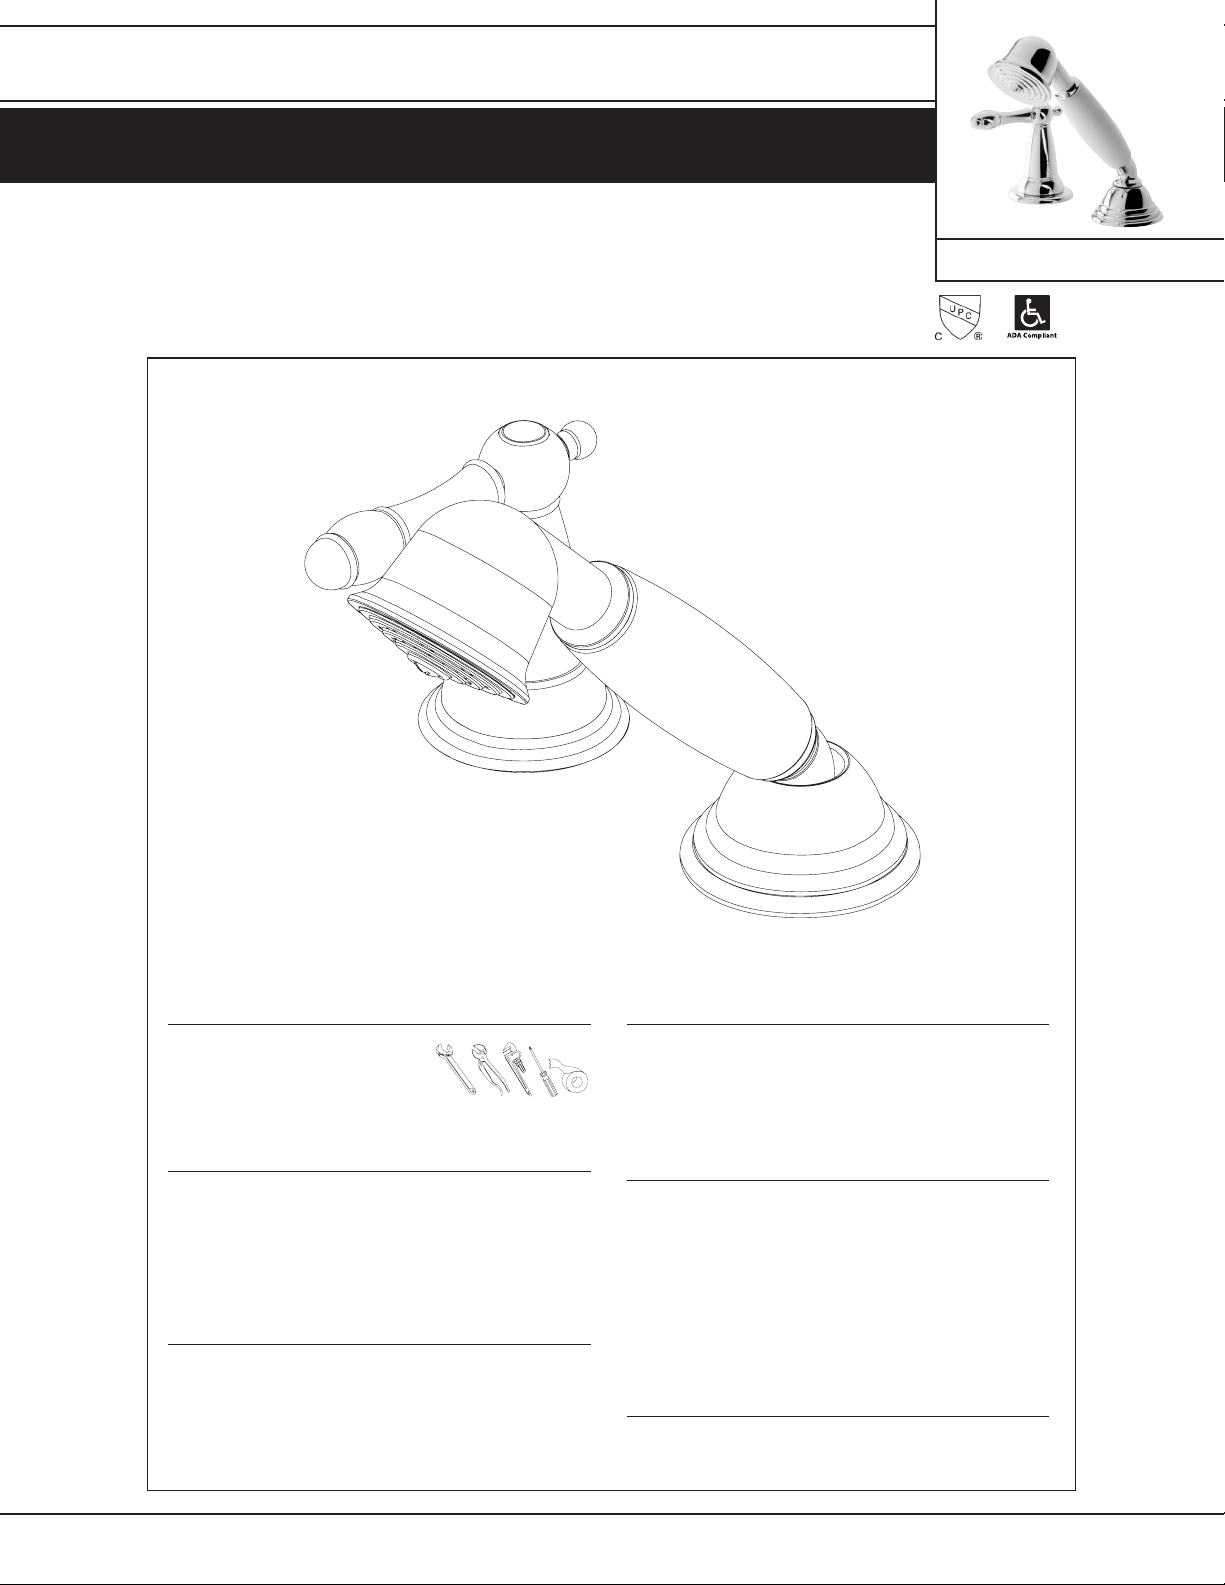
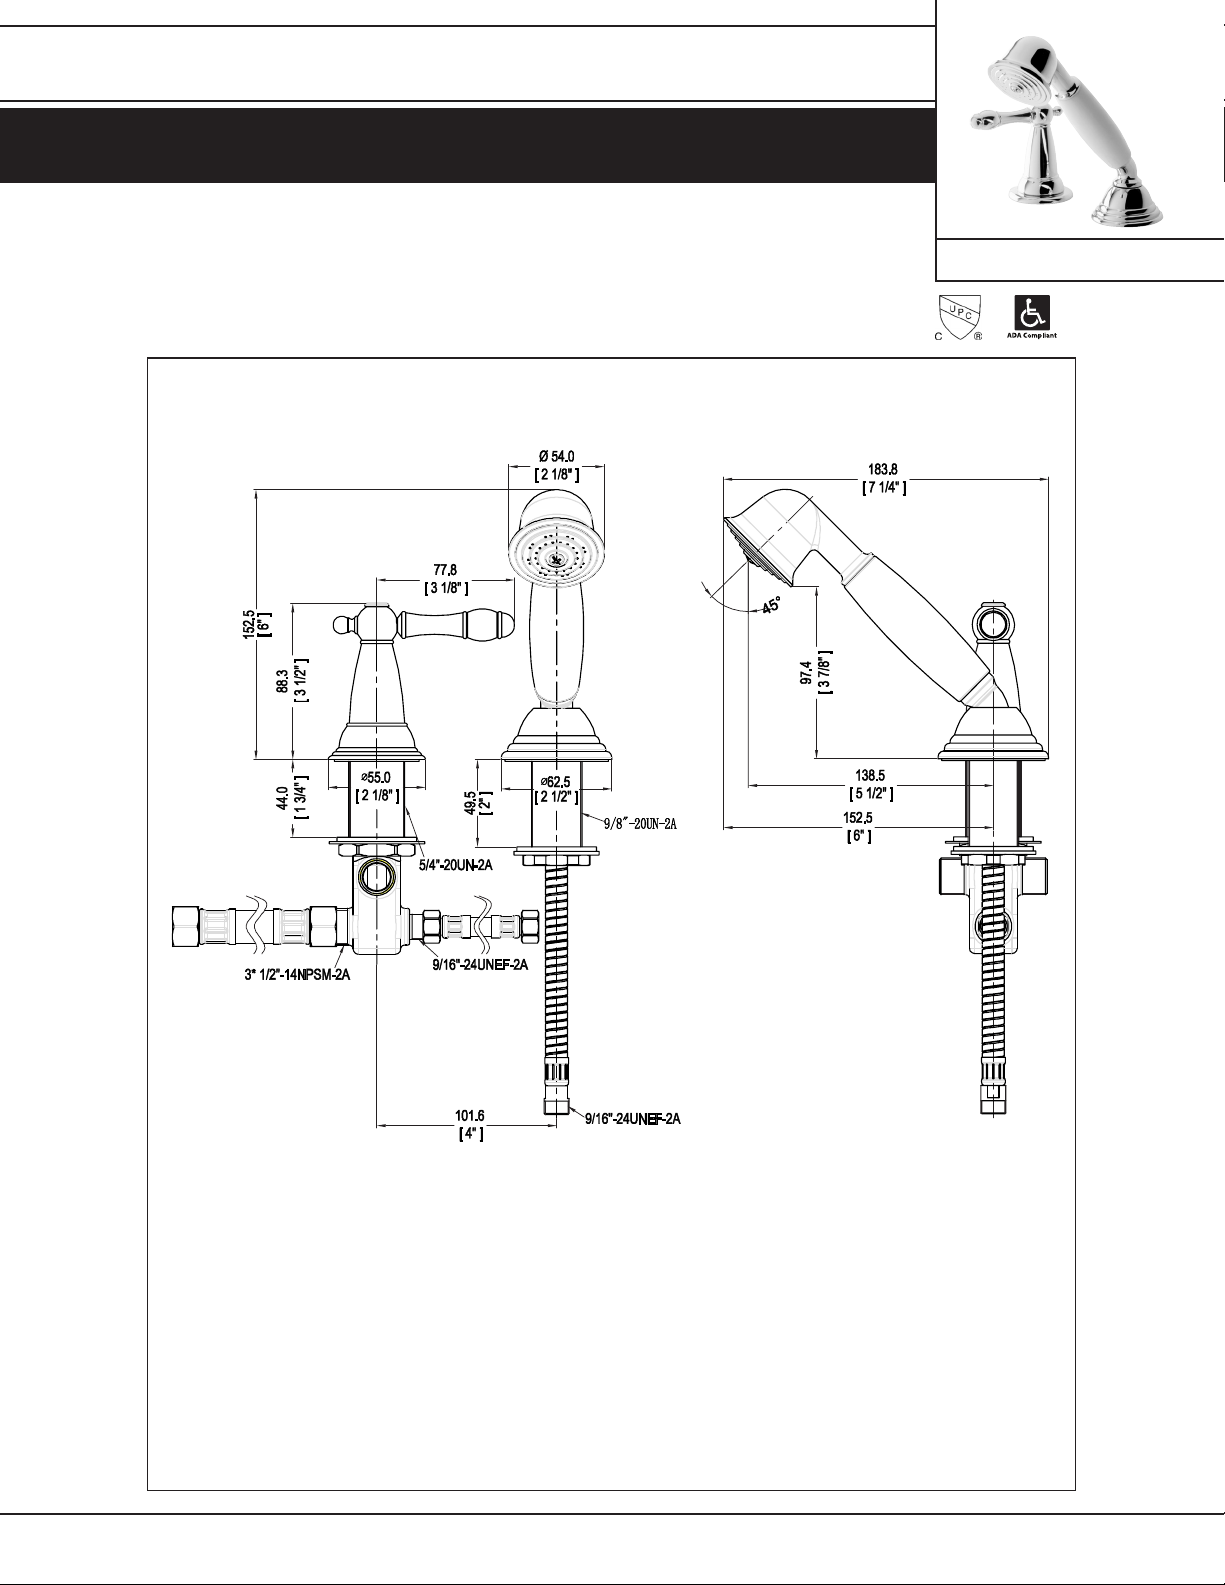
Roman Tub Hand Shower with Diverter
Certications
*Image may vary slightly from actual product
Tools Required
Adjustable Wrench
Groove Joint Pliers
Pipe Wrench
Phillips Screwdriver
Pipe Tape or pipe thread compound
Safety Tips
If you solder the joints during installation of the faucet, the seats,
cartridges, and washers must be removed before using a ame
or the warranty will be voided on these parts.
Protect your eyes with safety glasses when cutting or soldering
water supply lines.
Cover the sink drain to avoid losing parts.
Things You May Need
Installations may vary depending on how the previous faucet was
installed. Supplies necessary for the installation of your faucet are
not all included; however, they are available wherever plumbing
supplies are sold.
Maintenance
Your new hand held shower and diverter are designed for years
of trouble-free performance.
Keep it looking new by cleaning it periodically with a soft cloth.
Avoid abrasive cleaners, steel wool, and harsh chemicals as
these will dull the nish and void your warranty.
Important Points
Prior to beginning installation, turn o the hot and cold water
lines, then turn on the old faucet to release built-up pressure.
When installing your new faucet, turn the connector nuts nger
tight, then use one wrench to hold the tting and a second
wrench to tighten the nut. Connections that are too tight will
reduce the integrity of the system.
Wrap all threaded connections with PTFE pipe tape available
at your local hardware or plumbing supply store. Always wrap
in a clock-wise direction.
Contact Us
For Customer Service please call 877-319-3757, or go to
homewerksww.com.
Eective/Rev Date: Nov. 1, 2010 1
Page 2
55-81011-CH – Chrome
55-81011-BN – PVD Brushed Nickel
Roman Tub Hand Shower with Diverter
Preparation and Assembly
1 2
Certications
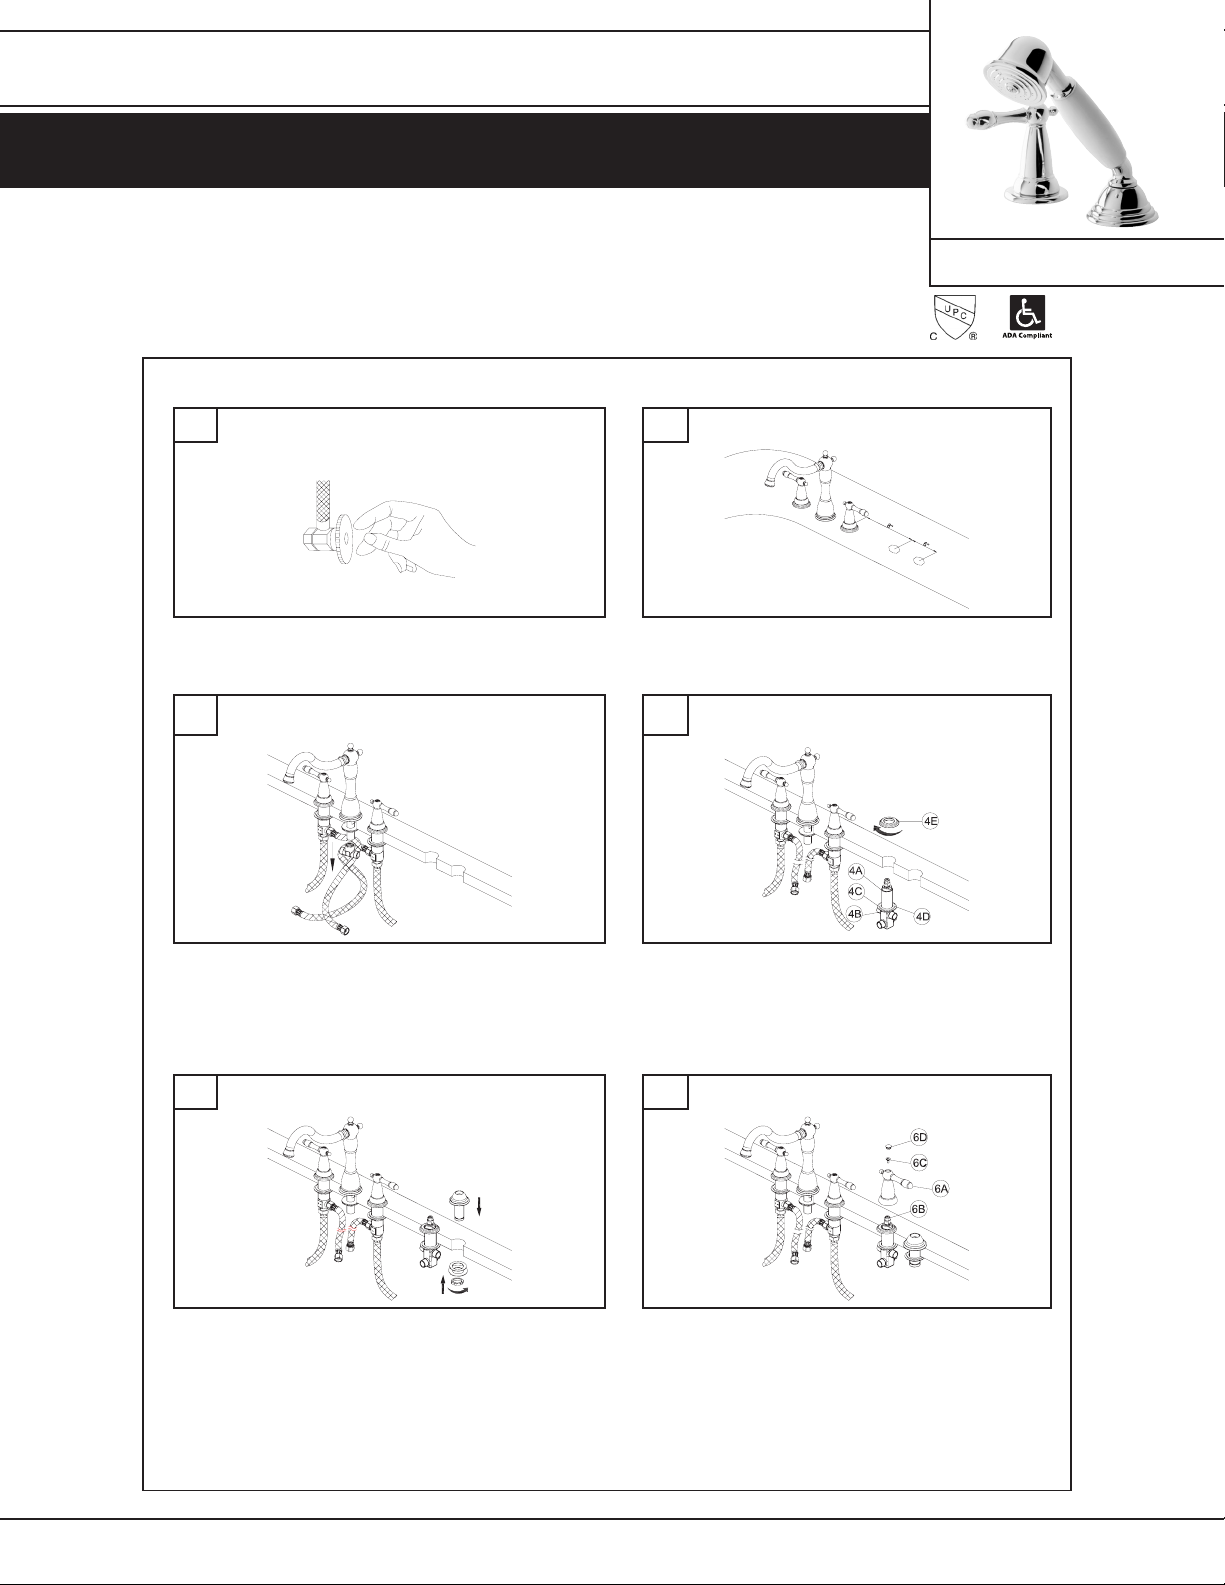
Locate water supply inlet and shut o water supply valve. Remove old
faucet. Clean and dry surface area where new faucet will be mounted.
3 4
Unscrew the water supply hose from the T-tube. Then remove the T-tube
from the bottom of the spout shank.
5 6
The prepared surface should be as follows:
Diverter: assembly hole 8" on center from valve assembly hole.
Hand held: assembly hole 6" on center from diverter hole.
Mount waterway diverter assembly.
Place mounting nut (4B), metal washer (4C) and rubber washer (4D)
onto waterway diverter (4A). From underneath the tub, insert
waterway diverter (4A) through holes on the side. From above,
thread the seat (4E) onto waterway diverter (4A). Tighten mounting
nut (4B), so that the seat sits ush on the surface of working area.
Mount hand held shower support assembly. Mount handle assembly.
Place handle (6A) onto valve stem (6B). Place screw (6C) through
the socket on the top of handle and thread until the handle is
securely tightened. Attach decorative button (6D) onto the handle
socket as shown.
Eective/Rev Date: Nov. 1, 2010 2
Page 3
55-81011-CH – Chrome
55-81011-BN – PVD Brushed Nickel
Roman Tub Hand Shower with Diverter
Preparation and Assembly cont.
5 6
Certications
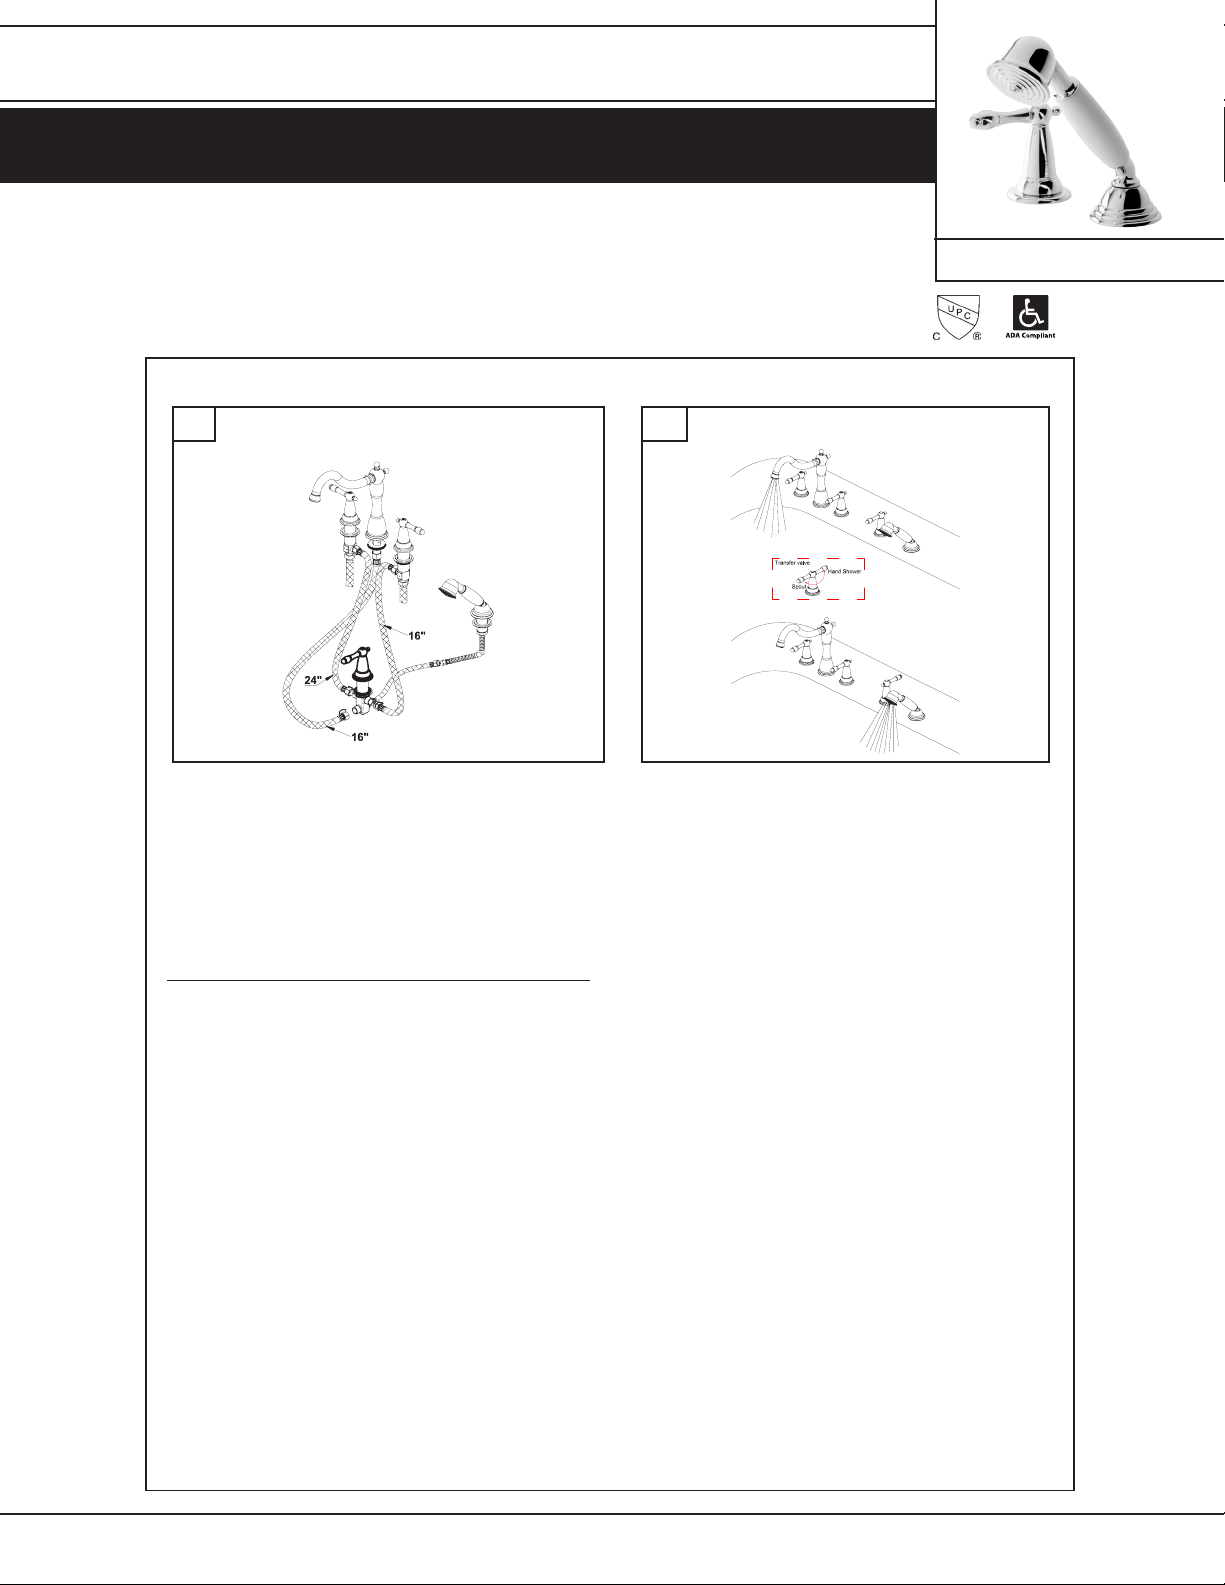
From control valves, use the lines to connect to transfer valve. Use third line
for connection of spout to transfer valve. Lastly, connect the line to transfer
valve. Connect pull-out hose to hand held shower. Insert opposite end of hose
through hand shower support. Insert hand held in holder. Connect pull-out hose
to line. Tighten connections hand tight until snug. Then use adjustable wrench
to tighten with 2-3 rotations. Be careful not to overtighten.
NOTE: Soldering requires removal of all working components to avoid damage.
Troubleshooting
PROBLEM: Water does not ow from hand held when diverter is turned
on or improper water pattern.
CAUSE: Diverter may not be correctly assembled or installed and/or
debris in line.
IMPORTANT: Be sure to allow water to run into tub while checking for
leaks. This will allow air to escape that may have developed during
installation.
ACTION:
Ensure supply stops have been turned on and water comes out of tub
spout when handles are turned on. Check to be sure diverter is correctly
assembled and installed.
Remove hand held shower from hose and turn on water to ush debris
from line.
Eective/Rev Date: Nov. 1, 2010 3
Page 4
Physical Characteristics
• Description: Roman tub hand held shower and diverter
• Decorative Victorian style handle with porcelain grip
Certications
• 5-hole installation
• Meets ASME A112.18.1/CSA B125 requirements
• Total Weight of Item: 1968.57g
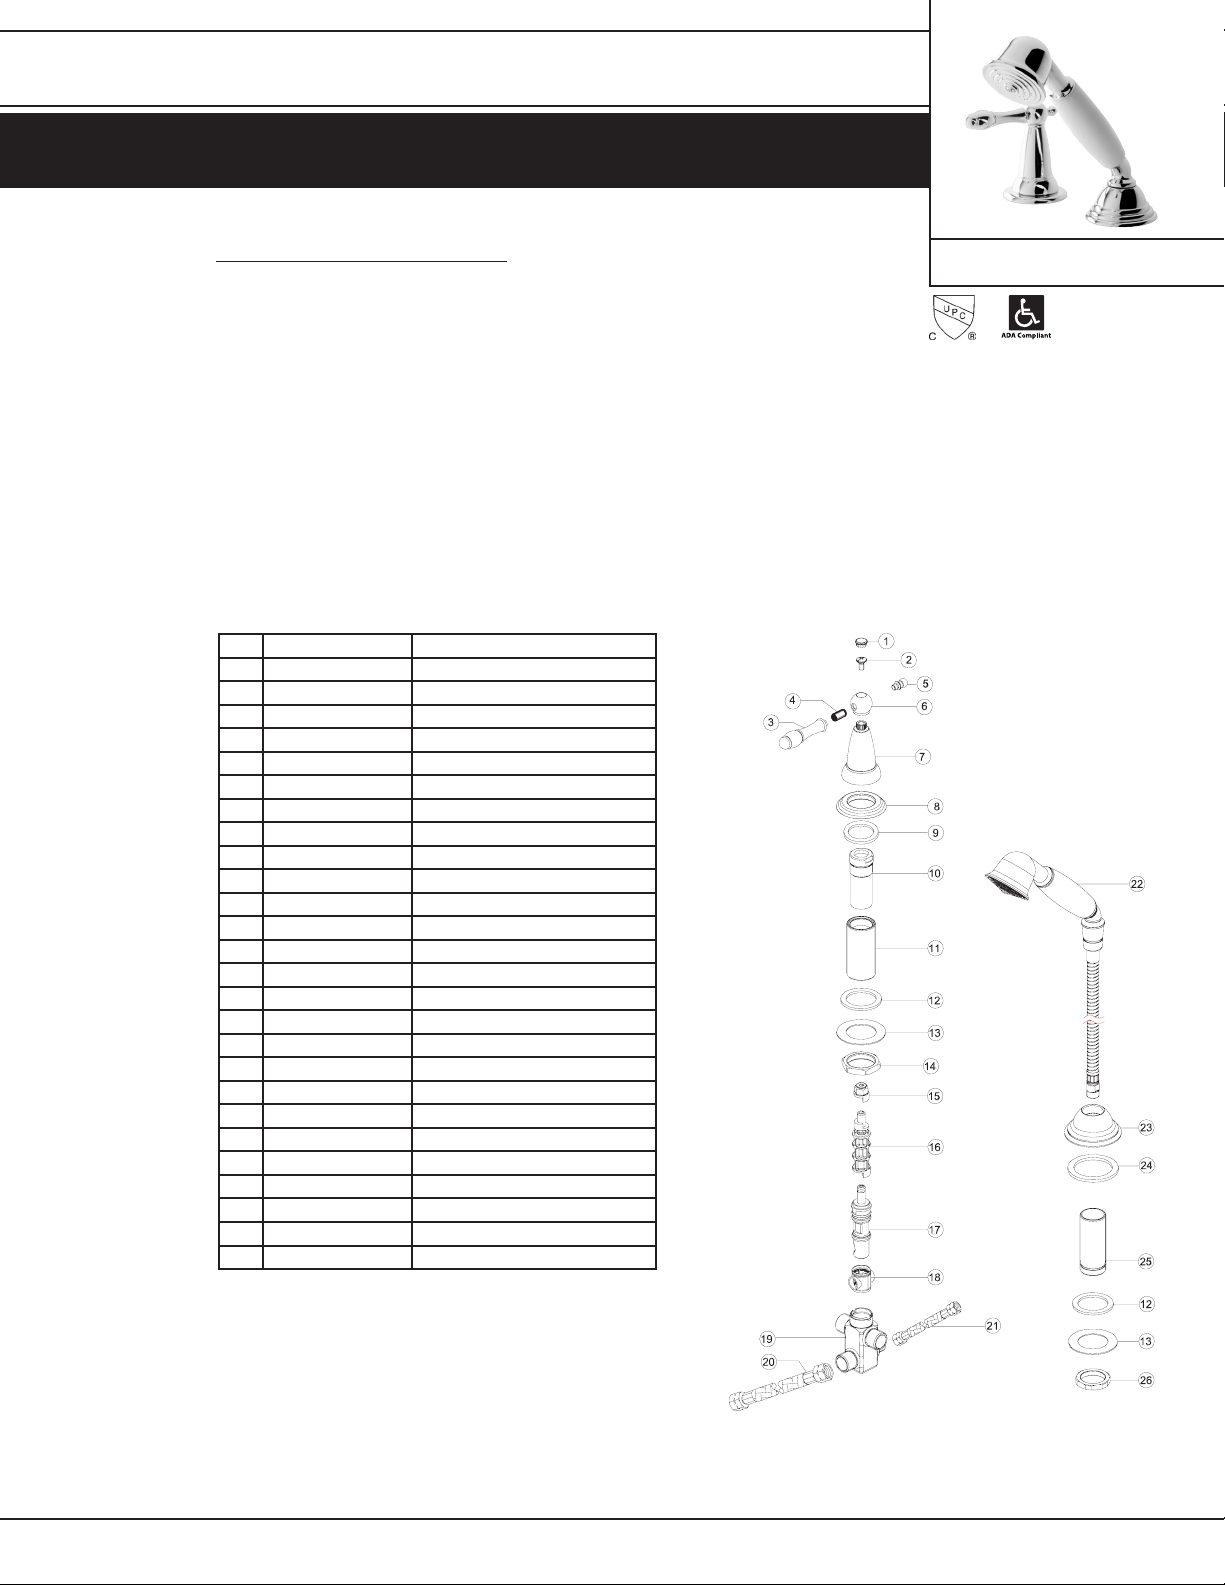
No. Part Description Material
1 Index Brass C37700
2 Screw S.S. #304
3 Handle Zinc alloy EZDA 3#
4 Bolt Steel Q235A
5 Cap Brass C37700
6 Ball Brass C37700
7 Handle seat Brass C37700
8 Flange Brass C37700
9 Flange washer EVA L-30
10 Bonnet Brass C37700
11 Long shank Brass C37700
12 Rubber washer NBR N7008F
13 Washer Steel Q235A
14 Mounting nut Steel Q235A
15 Inverter POM M90
16 Connect Nylon+ Fiberglass, PA30G
17 Diverter Brass C37700+POM M90+N7008F
18 Seal washer NBR N7008F
19 Body Brass C37700
20 Hose assembly ABS+Brass+Rubber+S.S
21 Hose assembly Plastic+Brass+Rubber+S.S
22 Hand shower Brass+PMMA+Plastic+Rubber
23 Seat Brass C37700
24 Washer EVA L-30
25 Tube Brass C37700
26 Mounting nut Steel Q235A
55-81011-CH – Chrome
55-81011-BN – PVD Brushed
Nickel
Eective/Rev Date: Nov. 1, 2010 4
Page 5
55-81011-CH – Chrome
55-81011-BN – PVD Brushed Nickel
Roman Tub Hand Shower with Diverter
Certications
Eective/Rev Date: Nov. 1, 2010 5
 Loading...