


Estiluz T3302S71 Installation Manual
BUTTON
T-3302 LED
Lámpara de techo formada por una pantalla metálica
suspendida de una varilla. Se puede cortar a la medida
deseada en el momento de la instalaci ón. Ver sión de
superficie o empotrada (driver remoto).
Suspension made of a metal head and a field cuttable stem.
Can be surface or recessed mounted (remote driver).
LE RECOMENDAMOS LEA LAS INSTRUCCIONES ANTES DE PROCEDER A LA INSTALACIÓN.
GUARDE LAS INSTRUCCIONES PARA FUTURAS REFERENCIAS.
* Asegúrese de que la corriente está desconectada antes de conectar el aparato.
* El montaje de luminarias debe ser efectuado solamente por personal técnico.
* No utilizar bombillas con potencia superior a la indicada en la etiqueta.
* Unicamente para uso en interiores.
* Para limpieza no utilizar alcohol ni disolventes
* Recomendamos la intervención de 2 personas para el montaje de la lámpara
493033021
Atención: / Warning:
No mirar directamente a los LED.
Do not look directly into any LED source
Bitte nicht direkt in die LED schauen
Ne regardez jamais les ampoules LED directement
1
T-3302 S
Ø 120 mm
Ø 4.3/4"
78.3/4”
2000 mm
3.3/8”
86 mm
Ø 140 mm
Ø 5.1/2"
WE RECOMMEND TO READ THE INSTRUCTIONS ENTIRELY BEFORE STARTING YOUR INSTALLATION.
PLEASE SAVE THESE INSTRUCTIONS SO THAT YOU CAN REFER TO THEM A LETER TIME.
* Make sure the power has been disconnected before installing the fixture.
* Lighting fixtures should be installed only by qualified personnel.
* Make sure the bulb never exceeds the maximum wattage especified on the fixture label.
* For indoor use only.
* Do not use alcohol or disolvents to clean the lamp
* For your convenience assembly by two people ist recommended. .
86 mm
3.3/8”
T-3302 R
Ø 100 mm
Ø 4"
Ø 140 mm
Ø 5.1/2"
78.3/4”
2000 mm
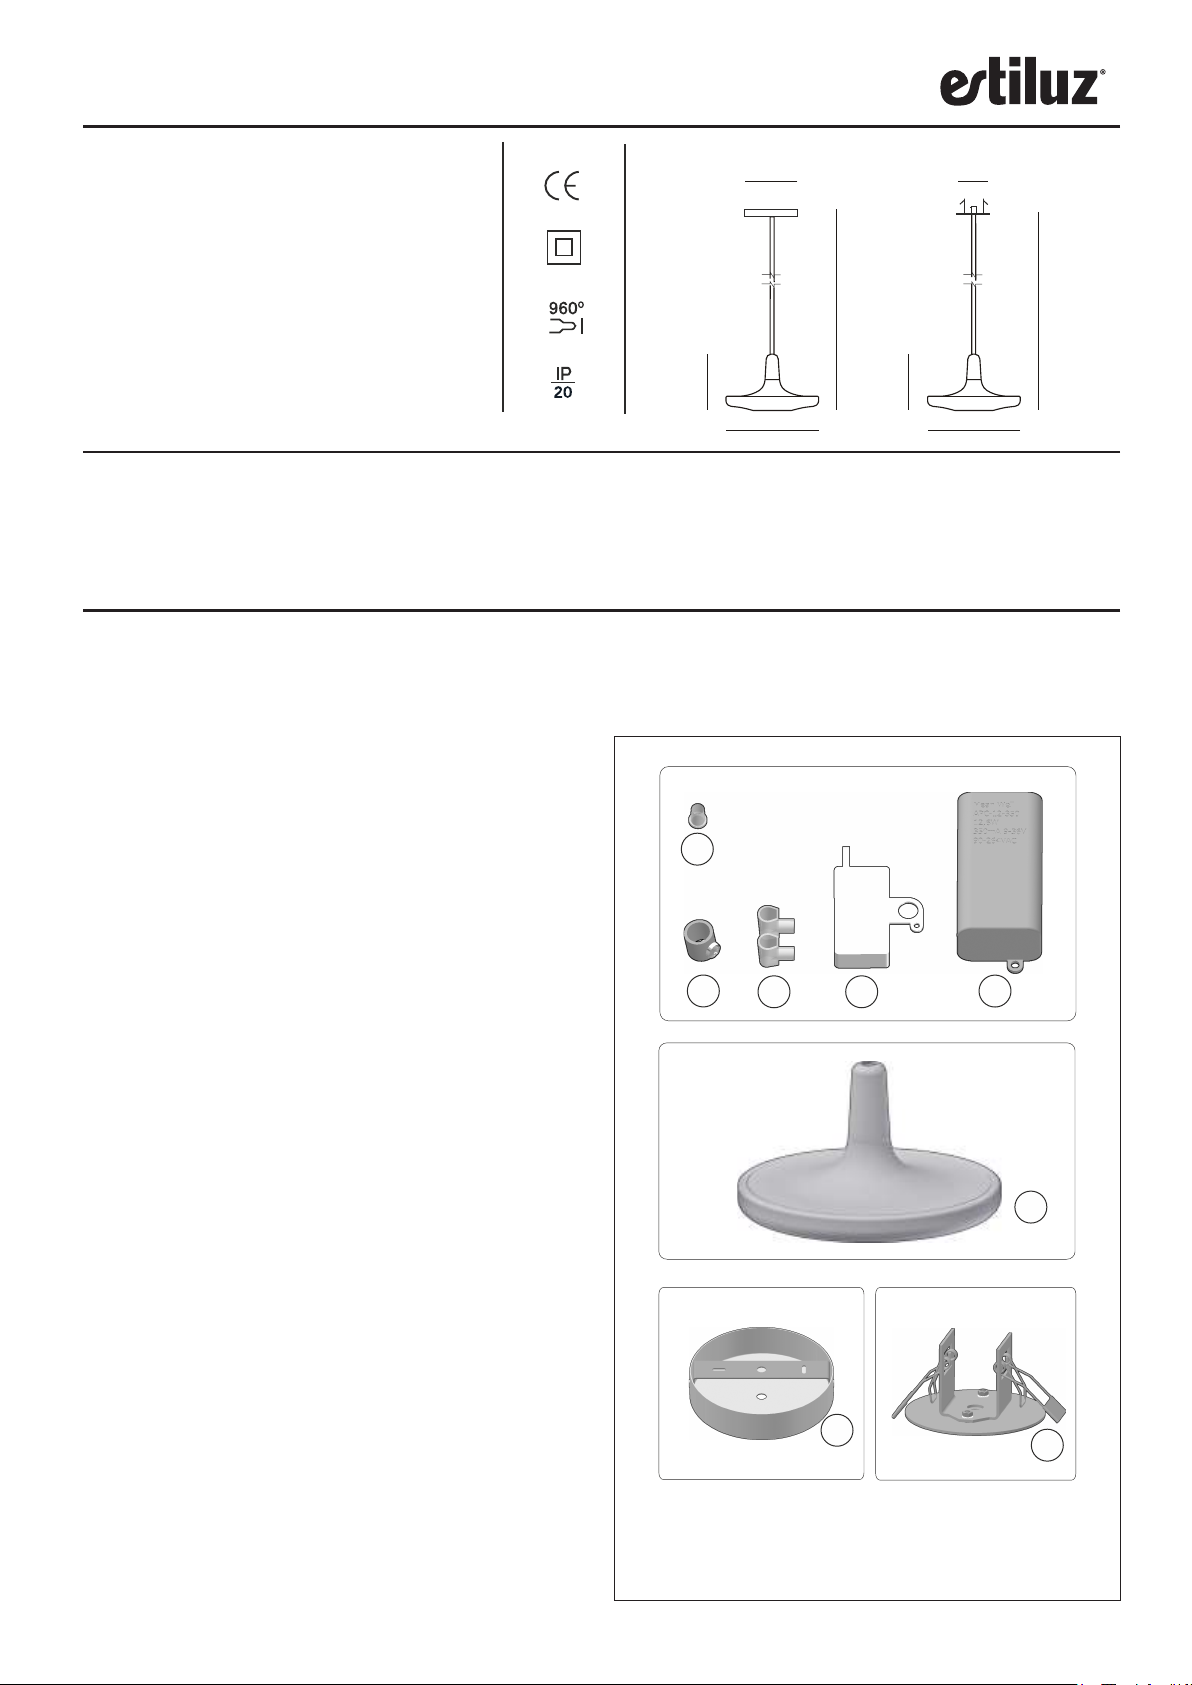
Bolsa 1
Instrucciones / Assembly instructions
1- Contenido bolsas. Figura 1.
(Piezas “B” y “C” no utilizar en USA ni Canadá)
1- The following parts are enclosed. Figure 1.
(Do not use “B” and “C” parts in USA and Canada)
E
A
Bolsa 2
Bolsa 3
B
C
D
F
Bolsa 3
G
H
Mod. Superficie (S) Mod. Empotrado (R)
Instrucciones / Assembly instructions
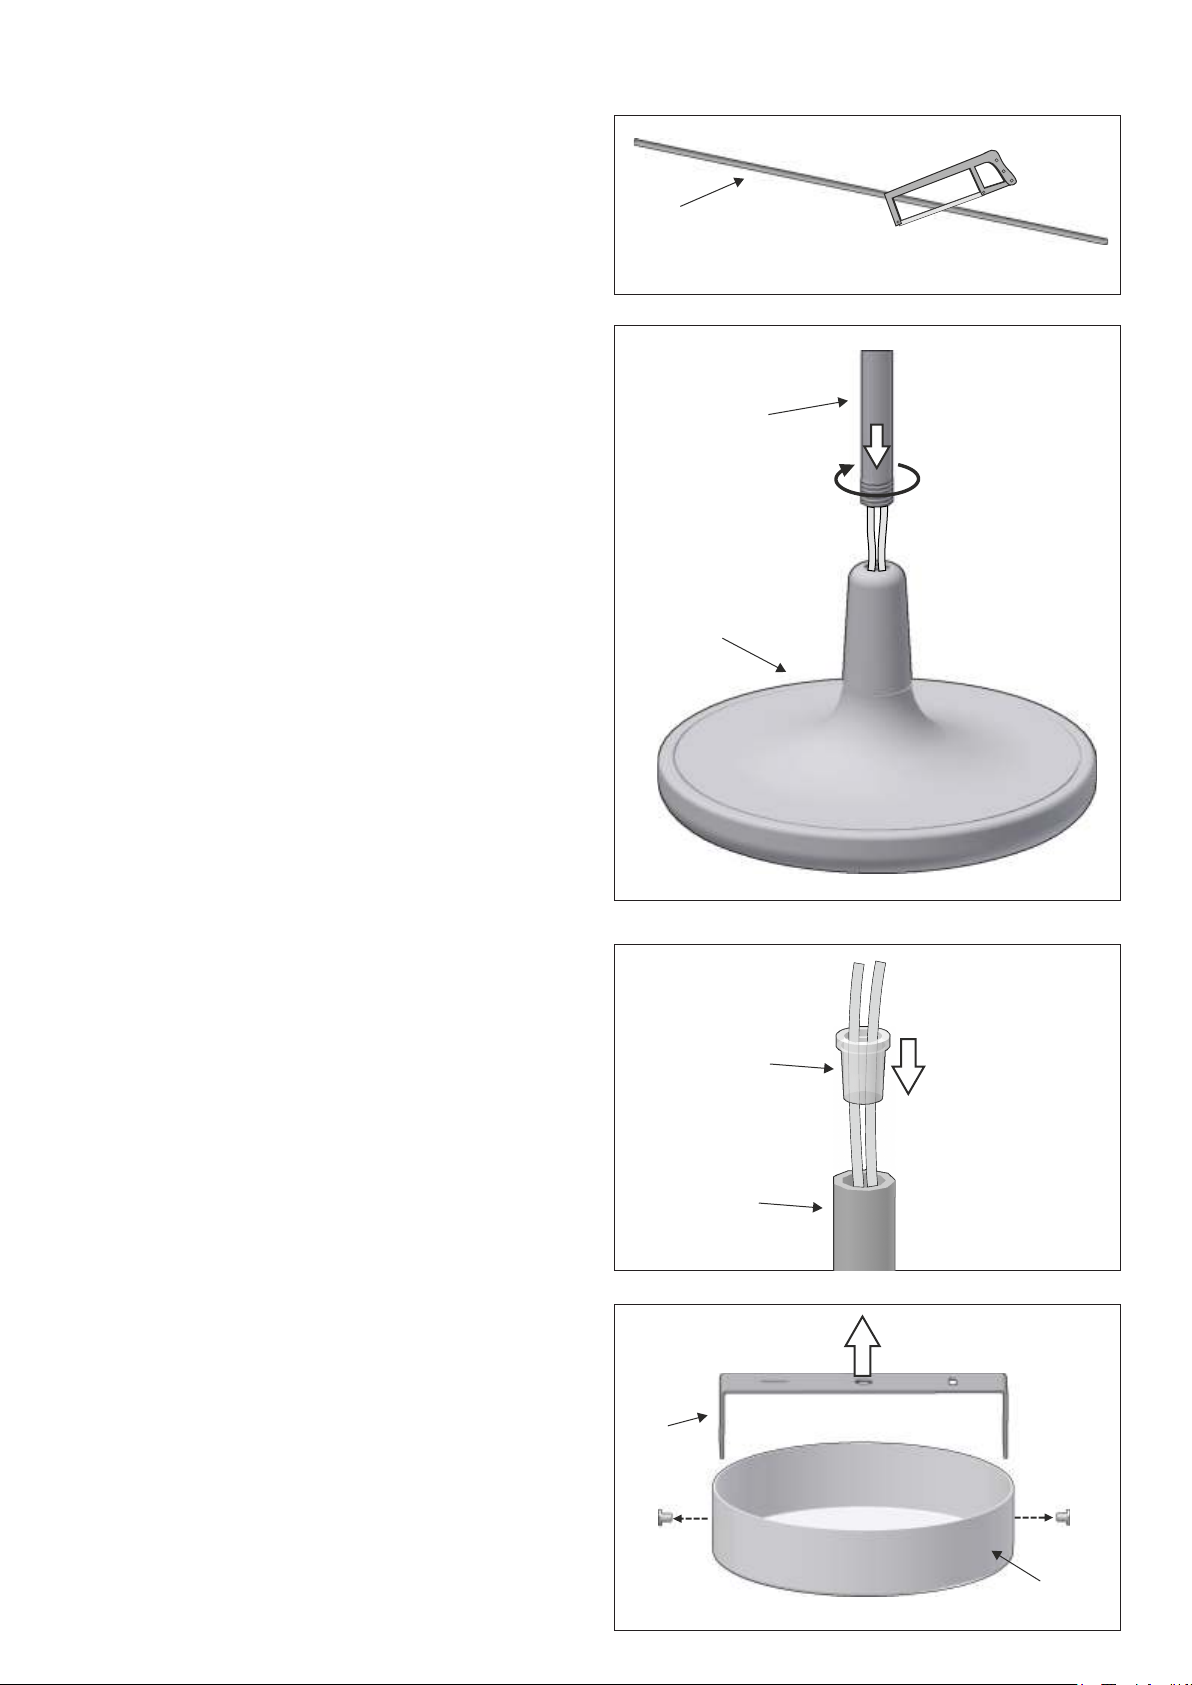
2- Si se desea se puede cortar el brazo (J) con una
sierra para metales a la longitud deseada.
Desechar la parte no roscada. Figura 2.
2- The arm (J) can be cut to the desired length
using a saw for metal cutting. Discard the nonthreaded part. Figure 2.
3- Introducir los cables procedentes de la pantalla
(F) en el brazo (J). Enroscar el brazo a la pantalla.
Figura 3.
3- Insert the wires coming from the shade (F) into
the arm (J). Screw the arm into the shade. Figure
3.
2
J
3
J
F
4- . Pasar los cables de la parte superior del brazo
(J) por el interior del casquillo de plástico (E).
Encastar el casquillo en la parte superior del brazo.
Figura 4.
4- Insert the wires through the plastic sleeve (E).
Insert the sleeve into the arm (J). Figure 4.
5- Modelo superficie. Desenroscar los tornillos
laterales (G3) del tapapared (G). Liberar la
sujeción (K). Figura 5.
5- Non-recessed model. Untighten the lateral
screws (G3) from the canopy (G). Remove the
mounting bracket (K). Figure 5.
4
5
K
G3
E
J
G3
G