


Estiluz T29552227 Assembly Guide
PLUMA
T-2955
Lámpara de techo metálica con brazo extensible. Pantalla de
metacrilato.
Metallic pendant with adjustable arm. Methacrylate shade.
LE RECOMENDAMOS LEA LAS INSTRUCCIONES ANTES DE PROCEDER A LA INSTALACIÓN.
* Asegúrese de que la corriente está desconectada antes de conectar el aparato.
* El montaje de luminarias debe ser efectuado solamente por personal técnico.
* No utilizar bombillas con potencia superior a la indicada en la etiqueta.
* Unicamente para uso en interiores.
* Para limpieza no utilizar alcohol ni disolventes
* Recomendamos la intervención de 2 personas para el montaje de la lámpara
493029551
min. 1880 mm - max. 2230 mm
min. 74” - max. 87.3/4”
185
180º
min. 32.1/2” - max. 42.1/8”
min. 825 mm - max. 1070 mm
WE RECOMMEND TO READ THE INSTRUCTIONS ENTIRELY BEFORE STARTING YOUR INSTALLATION.
PLEASE SAVE THESE INSTRUCTIONS SO THAT YOU CAN REFER TO THEM A LETER TIME.
* Make sure the power has been disconnected before installing the fixture.
* Lighting fixtures should be installed only by qualified personnel.
* Make sure the bulb never exceeds the maximum wattage especified on the fixture label.
* For indoor use only.
* Do not use alcohol or disolvents to clean the lamp
* For your convenience assembly by two people ist recommended. .
486 mm
ATENCIÓN! No tirar del brazo de la lámpara antes de su completa instalación en el techo.
WARNING! Please, do not pull the arm until the product is properly installed in the ceiling.
Instrucciones / Assembly instructions
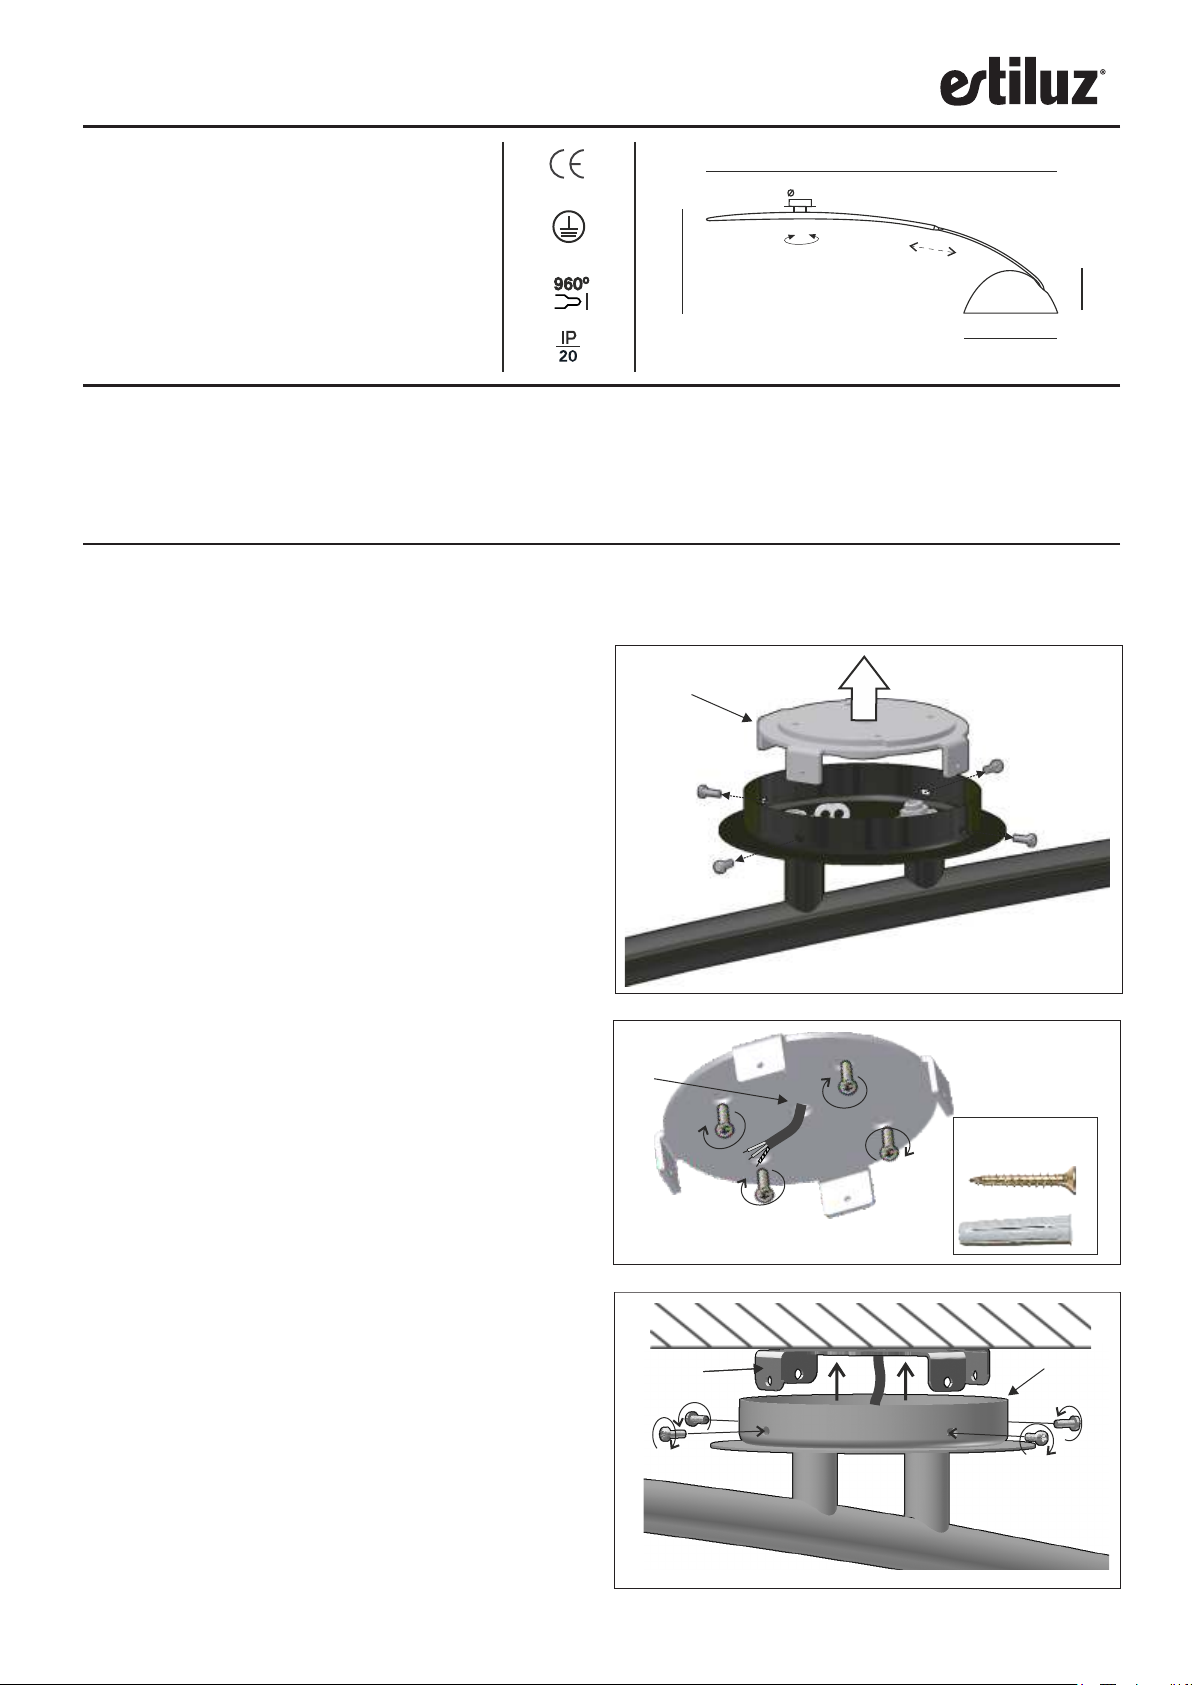
1a- Liberar la sujeción (A) desenroscando los
cuatro tornillos laterales del florón. Figura 1.
1
A
19.1/8”
220 mm
8.5/8”
1a- Remove the lateral screws to separate the
mounting bracket (A) from the canopy. Fig. 1.
1b- Girar el disco superior de la sujeción hasta que
los cuatro agujeros del disco superior queden
alineados con los del inferior.
1b- Rotate the upper disc until the four holes are
aligned with the holes of the lower disc
2- Introducir el cable de red por el agujero central
de la sujeción (A). Atornillar la sujeción al techo
con los cuatro tornillos como se indica en la
figura 2. (Utilizar taco Sx8, tornillo Ø 4.5-5 con
cabezal avellanado (B)).
2- Insert the electrical wires from the outlet box
into the mounting bracket (A) through the central
hole. Screw the mounting bracket (A) to the ceiling
utilizing the four screws. Figure 2. (Use a Sx8
anchor and a Ø 4.5-5 screw with a oval head (B)).
3- Conectar los cables eléctricos asegurándose de
c ol oc ar el c ab le d e t ie rr a en el l ug ar
correspondiente. Atornillar el florón (B) a la
sujeción (A) utilizando los cuatro tornillos
laterales retirados previamente. Figura 3.
2
3
A
A
B
B
3- Connect the electrical wires making sure the
ground wire is connected at the right place. Affix
the canopy (B) to the mounting bracket (A) using
the lateral screws removed previously in step one.
Figure 3.
Instrucciones / Assembly instructions
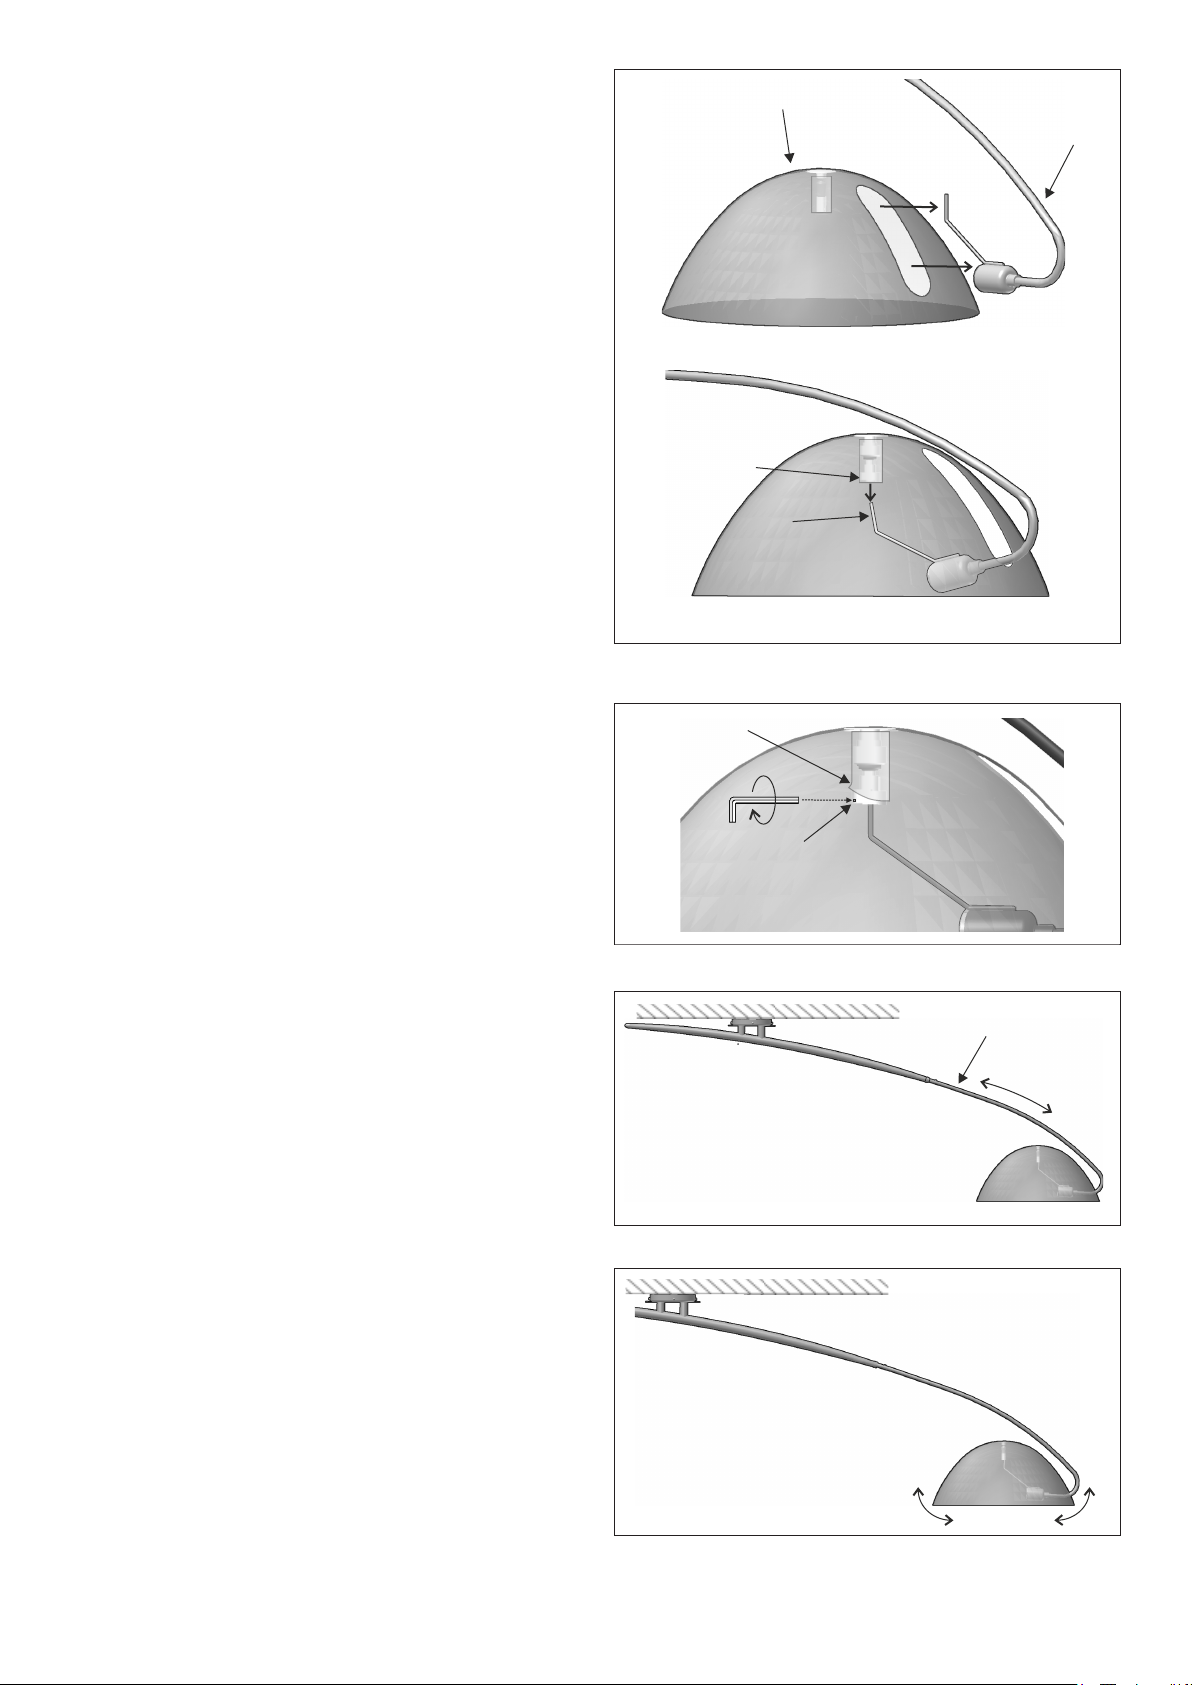
4- Insertar el brazo (C) en la pantalla (D) tal y como
se indica en la figura 4. Colocar la varilla del
portalámparas (F) en la rótula de la pantalla (E)
asegurándose su correcta posición. Figura 4.1 y
4.2.
4- Insert the arm (C) into the shade (D) as shown
in figure 4. Place the socket stick into the shade's
joint (E) making sure it seats properly. Figure 4.1
and 4.2.
5- Levantar el cilindro de silicona (G). Fijar la
pantalla enroscando el tornillo allen ubicado en el
latera l de la r ótula (E) con la llave allen
suministrada. Figura 5
5- Lift the silicone cylinder (G). Fix the shade using
the allen screw located on one side of the joint (E)
with the allen wrench provided. Figure 5.
4
4
4.1
4.2
D
C
E
F
6- Para modificar la longitud de la lámpara mover el
brazo (H)hacia adelante o hacia atrás ejerciendo al
mismo tiempo una lijera presión hacia arriba.
Figura 6.
6- To adjust the length of the pendant, move the
arm (H) back and for th pushing it slightly
upwards. Figure 6.
7- Para nivelar la pantalla basta con moverla
ligeramente hasta dejarla recta. Figura 7.
7- Level out the shade moving it slightliy until it is
completely straight. Figure 7.
G
5
E
H
6
7