

Essential Viewing TVI C300 Installation Manual

Installation Guide
Network Encoder Model TVI C300
Installation Guide
Thank you for purchasing your new TVI C300 Encoder.
The package you have received contains everything you need to set up an infrastructure to support
the Encoder, and allow you to view video streams, subject to having a camera and suitable
communications infrastructure.
This Encoder works in combination with a TVI Server to deliver video to end users and will not
operate without access to one. You will need to use TVI Manager to create an account on the
Server.
• This installation guide provides instructions for installing the TVI Encoder and connecting it to an
existing TVI Infrastructure.
• For guidance on how to setup a TVI Server please refer to the product documentation on the
Product CD that accompanies this unit or online via http://support.essential-viewing.com/support.
Installation Steps
1. Check the package contents listed in the Package Contents section
2. Install the Network Encoder
3. Configure the Network Encoder
Package Contents
• TVI C300 Encoder • Terminal Block
• Power Adapter • USB Pen Drive
• 3G Antenna • Installation Guide (this manual)
• Product CD containing software and documentation
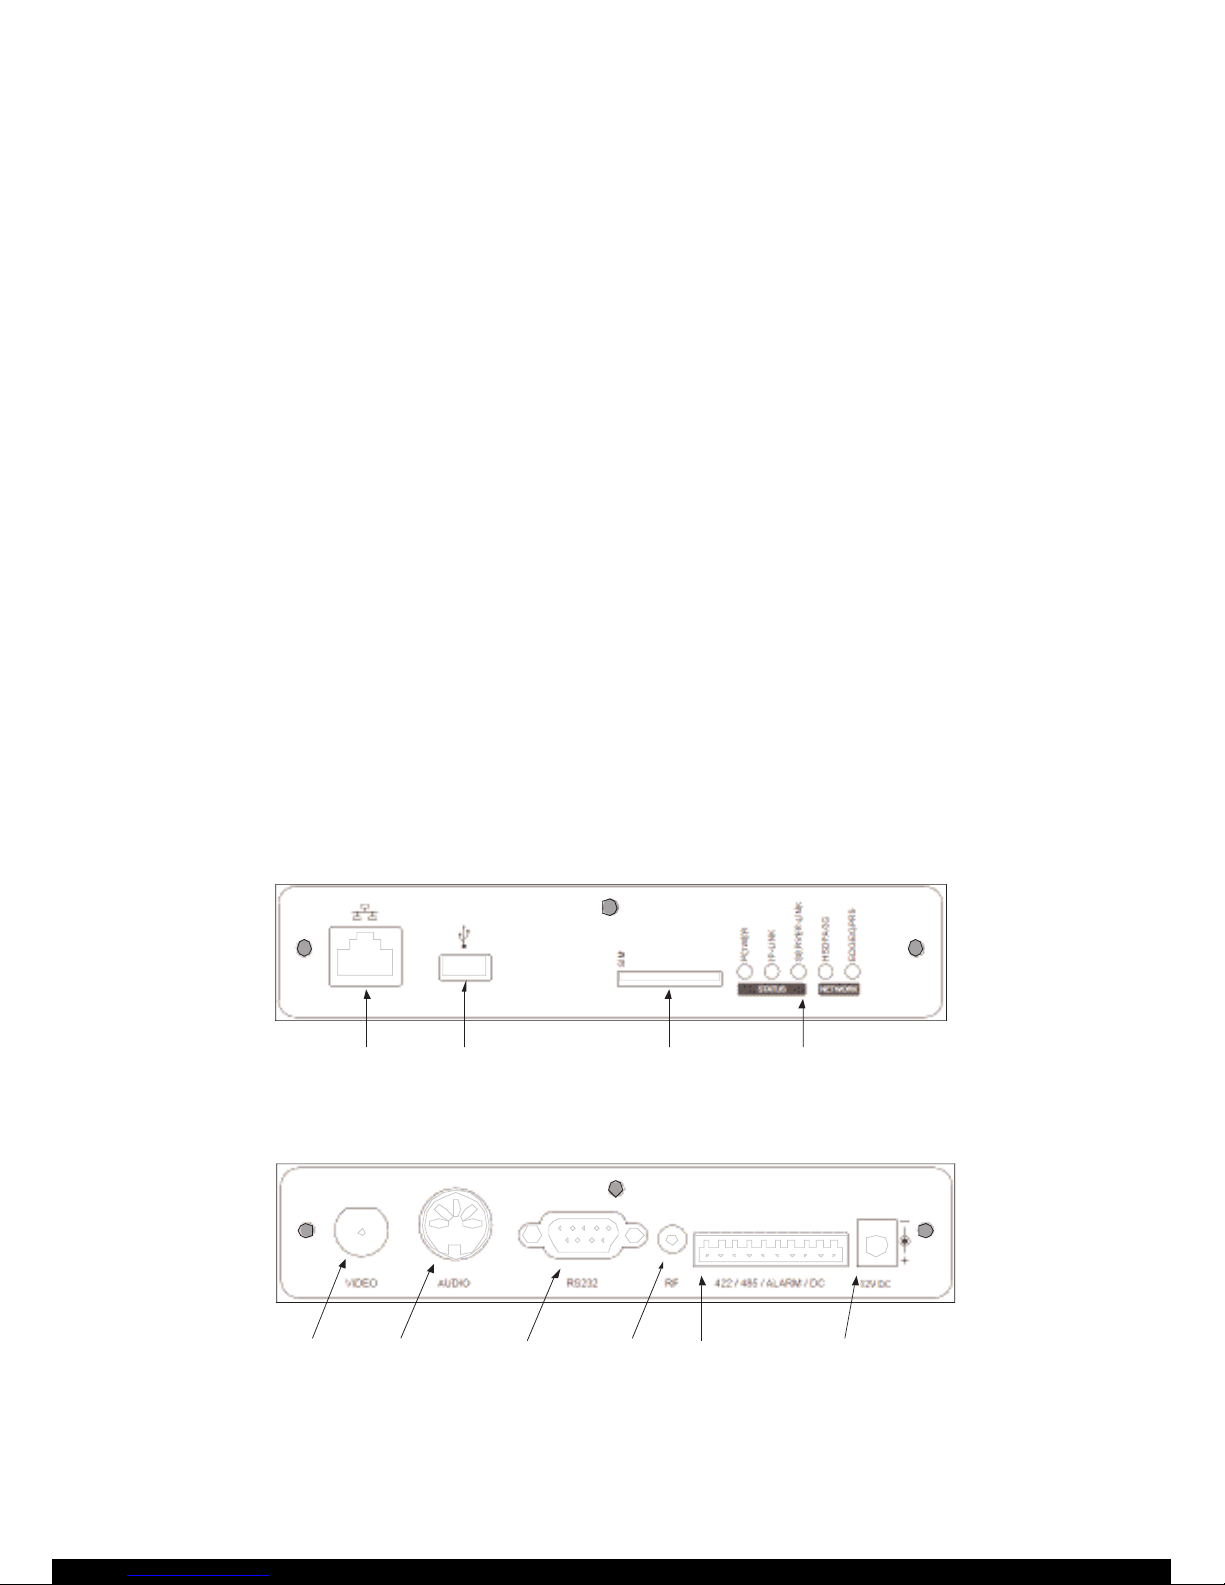
Hardware Overview
Figure 1: Front Panel
Figure 2: Rear Panel
Video In
Audio In/Out
DVR / PTZ
R S232 Po rt
Antenna
I/O Terminal Power In
Network USB 3G/GPRS SIM Slot LED Status Lights

Installing the TVI Encoder
The TVI Encoder has been designed to be used in indoor environments (or outdoor when located in
a suitable housing) and has four mounting points to secure it into position.
All deployments of a Network Encoder should ensure that the unit is not mounted:
• Within explosive zones
• Within 0.5m of a powered transmitter and/or receiver antenna
• Within the engine bay/compartment of a vehicle
• Within 1m of a vehicle fuel fill point (direct line of sight)
Connecting a Camera
1. Connect one end of a composite video cable to the ‘Video In’ connector on the Network Encoder.
2. Connect the other end of the composite video cable to the Video Out or Composite Out
connector on the camera.
3. (optional) Connect a line-level input audio source to the Audio connector on the Network encoder
using a standard DIN cable.
4. (optional) For PTZ cameras refer to the Network Encoder Connectors section for details on how to
make a cable that will allow the Encoder to steer a PTZ camera.
Connecting to a Network
Option 1: The Encoder will connect via the Network port to a LAN or to an external router
(e.g. a Satellite router):
1. Connect an RJ45 Ethernet cable (CAT5) cable to the Network connector on the Encoder.
2. Connect the other end of the cable to the network.
Option 2: The Encoder will connect via a mobile network using 3G/GPRS
1. Connect the supplied antenna to the antenna connector on the Network Encoder.
2. Insert a SIM card (not supplied) into the SIM slot on the Network Encoder.
3. Ensure that SIM is locked in the SIM slot by pushing the locking switch to the left.
Important!
• The SIM cannot be read unless the locking switch is fully in the locked position by pushing it to
the left.
• The Network Encoder is considered a heavy data usage product on mobile networks. It is
recommended that an unlimited data plan is set up with the Mobile Network Service Provider.
Configuring the TVI Encoder
This Encoder works in combination with a TVI Server to deliver video to end users and will not
operate without access to one.
For guidance on how to set up a TVI Server please refer to the product documentation
on the Product CD that accompanies this unit or online via
http://support.essential-viewing.com/support
The Encoder is configured using the USB Pen Drive supplied.
Step 1: USB Pen
Insert the USB Pen Drive into a spare USB socket on a PC running MS Windows XP/Vista.
Depending on your computer's configuration Windows may prompt you to take an Autoplay action:
• If asked select to view the files on the pen drive.
• If not asked open ‘My Computer’ from the Start Menu and navigate to the pen drive.
The Encoder configuration utility is located on the pen drive - double-click
‘ConfigureEncoder2.0.exe’ to run it. The Configure Encoder wizard will open.
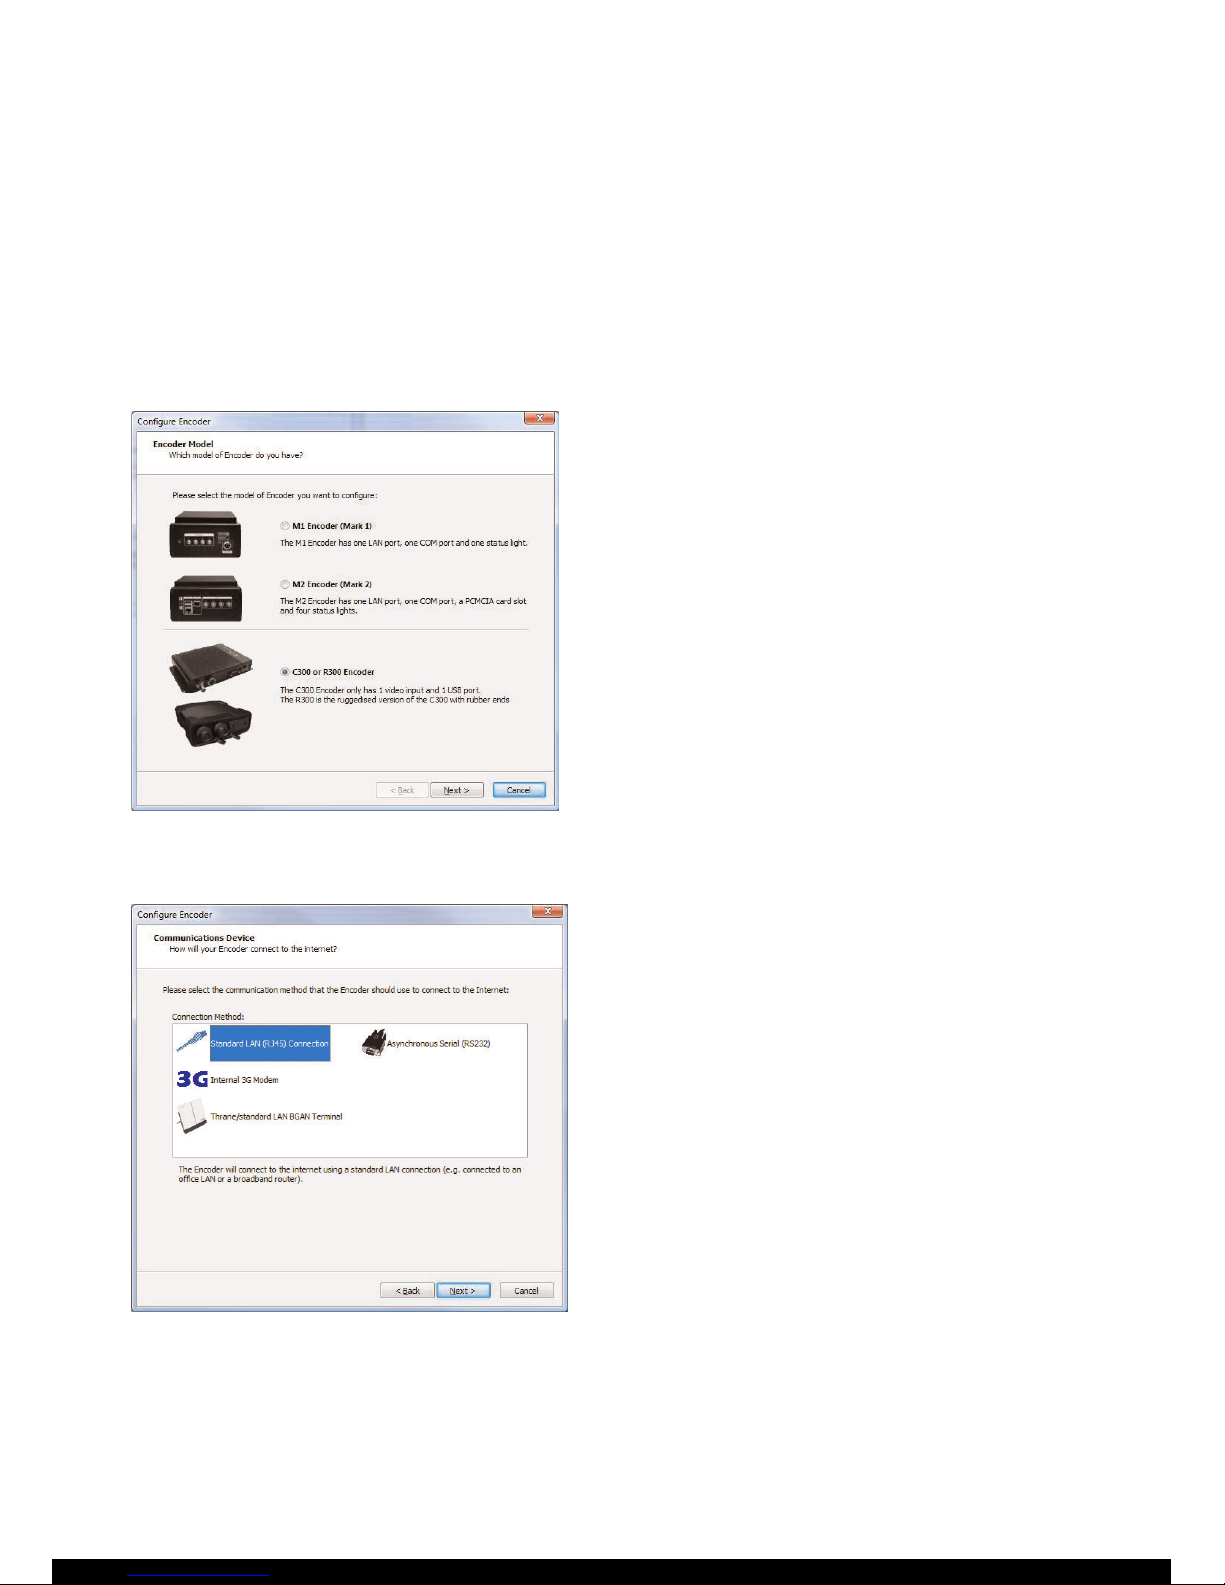
Step 2: Encoder Model Selected
Step 3: Connection Method
Select the ‘C300 Encoder’ option and then click
‘Next’.
Select the connection method that is relevant to
your purpose:
 Loading...