

Page 1

AIRTRONIC D2/D4
Operators Guide for bunk heater
Espar
Espar Products, Inc.
6435 Kestrel Road
Mississauga, Ontario
Canada L5T 1Z8
Canada (Tel): 905-670-0960
Fax: 905-670-0728
U.S. (Tel): 800-387-4800
www.espar.com
inquiries@espar.com
A Member of the Eberspächer Group of Companies
Introduction
This guide will acquaint you with the
operation of the Espar AIRTRONIC
air heater. The AIRTRONIC air
heater is a diesel-fired heater which
provides a dependable means of
compartment comfort without idling
your engine. The heater will cycle
through four temperature settings in
order to maintain the desired
temperature. While Espar heaters
are simple to operate, certain steps
should be followed to assure proper
operation.
AIRTRONIC
A. Start Up
1. Shut off the vehicle’s engine.
2. Espars’ AIRTRONIC can be
operated by a Mini-Controller, a
room thermostat or an optional 7
Day Timer (see timer instructions for the 7 Day timer).
800-668-5676
Mini-Controller
Switch the heater on by pressing the
heat button. Control desired temperature range by turning the dial clockwise to increase temperature.
Red LED comes on
Lowest setting - approx. 47°F (8.5°C)
Highest setting - approx. 97°F (36°C)
Temperature Dial
Thermostat
Turn the on-off switch to the “ON”
position. Switch the heaters’ temperature setting by adjusting the
temperature control dial to the
desired temperature range.
Lowest setting - approx. 50°F (10°C)
Mid setting - approx. 68°F (20°C)
Highest setting - approx. 86°F (30°C)
On
On OEM installs
the ‘red” &
green
red
“green”
indicator lights
light up. On after
-market installs
only the “red”
light lights up.
AIRTRONIC
“New”
3. If compartment/bunk is already
up to temperature heater will
come on and cycle to low.
There will be a 5 second delay
before the heater starts to run.
The heater is doing a “systems
check” and this is normal.
4. The blower motor starts gradually and the glow pin pre-heats the
combustion chamber (approx. 45
seconds).
5. Following the glow pin preheat,
the fuel metering pump starts
and ignition takes place.
6. Once ignition takes place the
heater’s flame sensor switch will
automatically shut the glow pin
off.
If the heater fails to ignite the
first time, it will automatically
attempt a second start. If unsuccessful, the heater will shut
down completely. If the heater
fails to ignite after second
attempt, consult the
troubleshooting manual or call
your nearest authorized Espar
dealer.
www.espar.com
P/N: 615-103-0203
B. Running
1. The heater starts in boost mode
when switched on by the
operator.
2. Once the temperature setting on
the mini-controller or thermostat
has been reached, the
AIRTRONIC will then cycle
between Boost-High-Medium-
Low to maintain the desired
comfort level.
3. If the temperature continues to
rise, even in the low heat mode
the heater will cycle off until the
temperature falls below the minicontroller or thermostat setting.
The heater will restart, when
required.
4. The heater will continue to run in
this manner until it is switched
off.
The mini-controller or thermostat
must be in the off position in
order to be sure the heater is
completely off and not cycling.
Page 2
C. Switching Off
Mini-Controll
1. Switch the heater off by pressing
the off button.
Red LED goes
off.
Off
Thermostat
Switch the heater off by turning
the on-off switch to the off
position.
Off
The ‘red” &
“green”
indicator
lights will
shut off
2. When manually switched off, the
fuel pump stops and the flame is
extinguished. The combustion
air blower continues to run for a
3 minute cool down cycle, then
the heater switchs off
completely.
D. Overheat
The heater will automatically
shut down if overheating
occurs. Be sure that the air
intake screen and the air
outlet are free from
obstruction.
If an obstruction occurred to cause
an overheat, clear obstruction and
then heater can be restarted by
manually switching the heater off
and on again.
Warning
Obstruction of the air intake, air
outlet, combustion air intake, or lack
of fuel will cause the heater to
operate improperly.
Warning
The heater must be switched
off while any fuel tank on the
vehicle is being filled. The
heater must not be operated in
garages or enclosed areas.
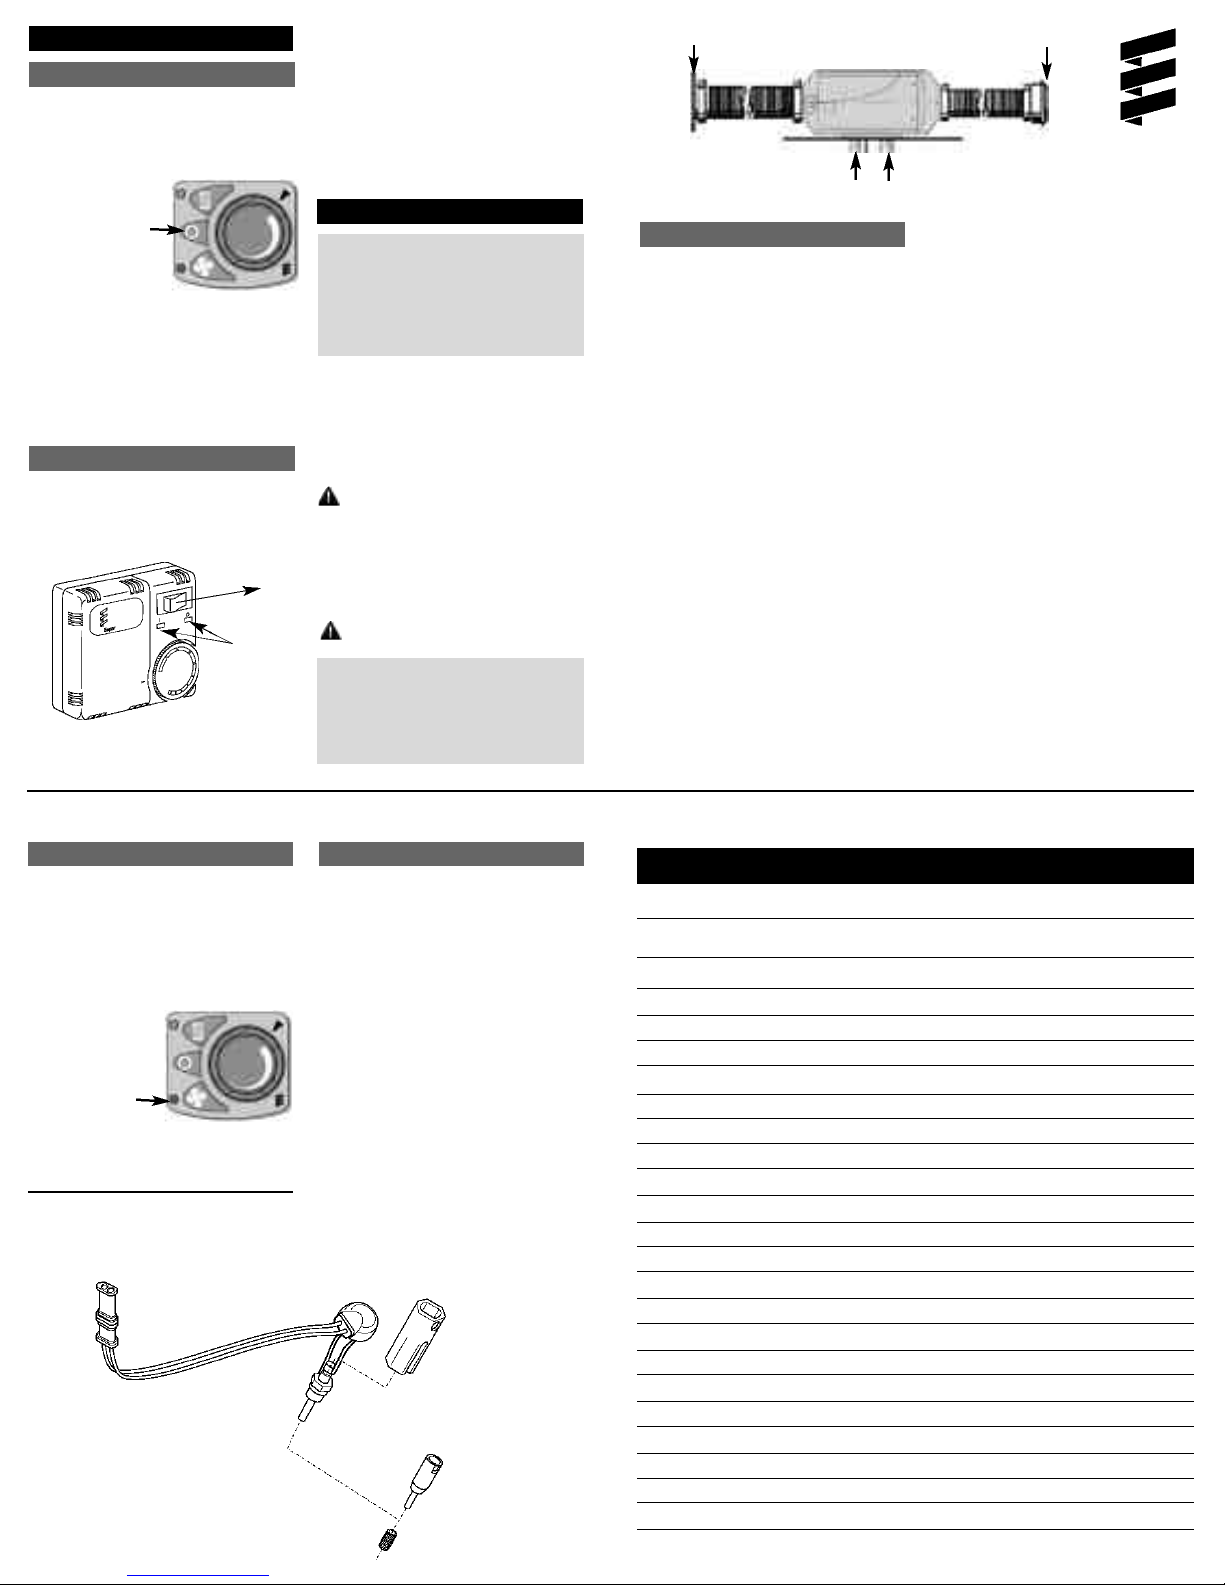
Air intake
Combustion Air Intake Exhaust outlet
Preventative Maintenance
Espar recommends that the following preventative maintenance be
performed on the heater prior to
every heating season. Additional
preventative maintenance dates may
be required depending on operating
conditions. During every preventative maintenance Espar recommends the following procedures:
1. Operate the heater for a minimum of
20 minutes each month.
2. Remove and inspect the glow pin for
carbon build up. Clean and/or
replace. See graphic 1 below
3. Clean the atomizer screen to remove
any carbon build up, making sure the
vent hole is open. Use of a nondetergent 100% volatile carburetor cleaner
and an air gun will also help in cleaning. Replace screen with insertion
tool provided with your new part. See
graphic 1 below for details and
AIRTRONIC manual for more information. Remove any loose carbon
that may be in the glow pin chamber.
Air Outlet
Espar
4. Inspect the ducting and check the air
intake screen and air outlet for blockage.
5. Inspect combustion air intake and
exhaust for blockage.
6. Run your heater and check for proper
operation during regular
preventativemaintenance throughout
the year.
7. Maintain your batteries and all electrical connections. With insufficient
electrical power the heater will not
start. Low and high voltage cutouts
will shut the heater down automatically.
8. Use fuel suitable for the climate (see
enginemanufacturers recommendations). Blending used engine oil with
diesel fuel is not recommended.
Mini-Controller - Ventilation mode:
Espar’s new mini-controller has a ventilation feature which enables the user to run
only the fan component of the heater.
This features circulates the air through
out the cabin area. To utilize this feature
press the fan button.
Fan:Off/On
Blue LED indicates the fan feature is etiher on or off.
1
Glow Pin
Atomizer Screen
Power Management Tips:
The reserve capacity of your truck batteries is limited. If excessive battery power
is consumed while the truck engine is not
running (and not charging the batteries),
you may not be able to start your truck.
The following list may give you a better
idea of the power consumption of various
12-volt DC items:
A low-voltage automatic disconnect,
split-battery system, or low-voltage alarm
may be helpful in effectively managing
your battery power. Often, the simplest
way to conserve battery power is to
ensure items that are not needed are off
(i.e. refrigerator, marker lights) when the
truck is parked.
Espar’s AIRTRONIC bunk heater is
equipped with a low voltage cut- out
system. This occurs when your batteries
voltage falls below 10.5 volts.
Glow Pin rubber boot
Glow Pin
socket wrench (comes with
new spare part)
with slot to accomodate
wires
Insertion tool,
provided with new
atomizer screen
Power Consumptions
Item (12-volt DC powered) Battery Draw (Amps)
AIRTRONIC air heater 0.67 - 2.8
Hair Dryer 12.0
Fluorescent Lantern 0.5
7-Quart Refrigerator 5.5
30-Quart Refrigerator 6.5
36-Quart Refrigerator 8.5
Coffee-Maker 13.0
Beverage Heater 7.0
Bed Warmer 3.0
Electric Blanket 5.0
Digital Alarm Clock 0.5
Car Seat Heater 7.0
Utility Light 7.0
Halogen Spot Light 4.0
Dome Lights 1.0
Fluorescent Interior Lights 0.5
Interior Light Bar 1.3
Windshield Defroster 6.0
Colour Television 3.0
VCR 2.0
Space Heater 23.0
Cabin Blower (Low) 11.5
Cabin Blower (High) 25.2
Headlights & Marker Lights 20.0
 Loading...