

Page 1
STING II
Digital Video
Recorder/Player
User’s Guide
Page 2

Table of Contents
Introduction ............................................................................................. 2
STING II Description........................................................................... 2
Package Contents............................................................................... 6
Connecting the A/V Cable.................................................................... 7
Getting Started ......................................................................................... 8
Charging the Battery........................................................................... 8
Connecting and Configuring the STING II............................................... 8
Connecting the STING II via USB.......................................................... 9
Deleting One or More Files Via the Setup Menu....................................... 9
Reformatting the Compact Flash or Microdrive........................................ 9
Recording Sessions................................................................................. 11
File Types.........................................................................................11
Recording Methods ............................................................................12
Alarm Indication................................................................................13
Setup Software ....................................................................................... 14
Accessing the Setup Software..............................................................14
Event Library ....................................................................................14
Setup ..............................................................................................17
Media Tab ........................................................................................27
System Tab ......................................................................................29
System Info Tab................................................................................32
Default Settings ................................................................................35
Updating the STING II........................................................................36
Using the Remote Control ....................................................................... 38
Using the STING II Media Center............................................................ 39
Installing the STING II Media Center ....................................................39
Accessing the STING Media Center.......................................................40
STING II Tab Options.........................................................................40
Security Options in the Media Center....................................................41
Configuration Options in the Media Center.............................................42
Remote Access........................................................................................ 45
Determining the STING II’s IP Address .................................................45
File List............................................................................................47
Capture Image..................................................................................47
WebCam (Full resolution) ...................................................................48
Upgrade Firmware .............................................................................48
Change Password ..............................................................................48
System Status ..................................................................................48
Maintenance and Troubleshooting .......................................................... 49
Page 3
Introduction
Technical Specifications.......................................................................... 50
Introduction
STING II is a wearable video/audio digital recorder capable of recording
video and audio in MPEG-2 format. Recordings are stored on Microdrive or
Compact Flash plug-in cards and can then be played back using the STING
II, downloaded from the Microdrive to a personal computer or accessed
remotely.
STING II is designed mainly for surveillance purposes by law-enforcement
and government organizations, for portable video/audio recording featuring
the highest quality available. The STING II accepts composite video input
from any video camera. It includes the ability to:
• Discreetly start and end recording sessions
• Encrypt audio/video, video only, or audio files
• Capture still images (in jpeg format)
• Trigger recording sessions based on motion detection
• Capture individual jpeg images from streaming video files
• Authenticate that recording sessions have not been edited or
tampered with, based on STING II’s automatically embedded
watermark functionality
In addition to the STING II unit, the STING II solution includes Setup
software embedded in the device, a Media Center application enabling you
to connect the STING II directly to your laptop or personal computer, and a
remote web interface that lets you view and capture images and files
remotely.
STING II Description
The STING II is a compact unit, featuring many options and connection
options, including:
Sting II User Guide 2
Page 4
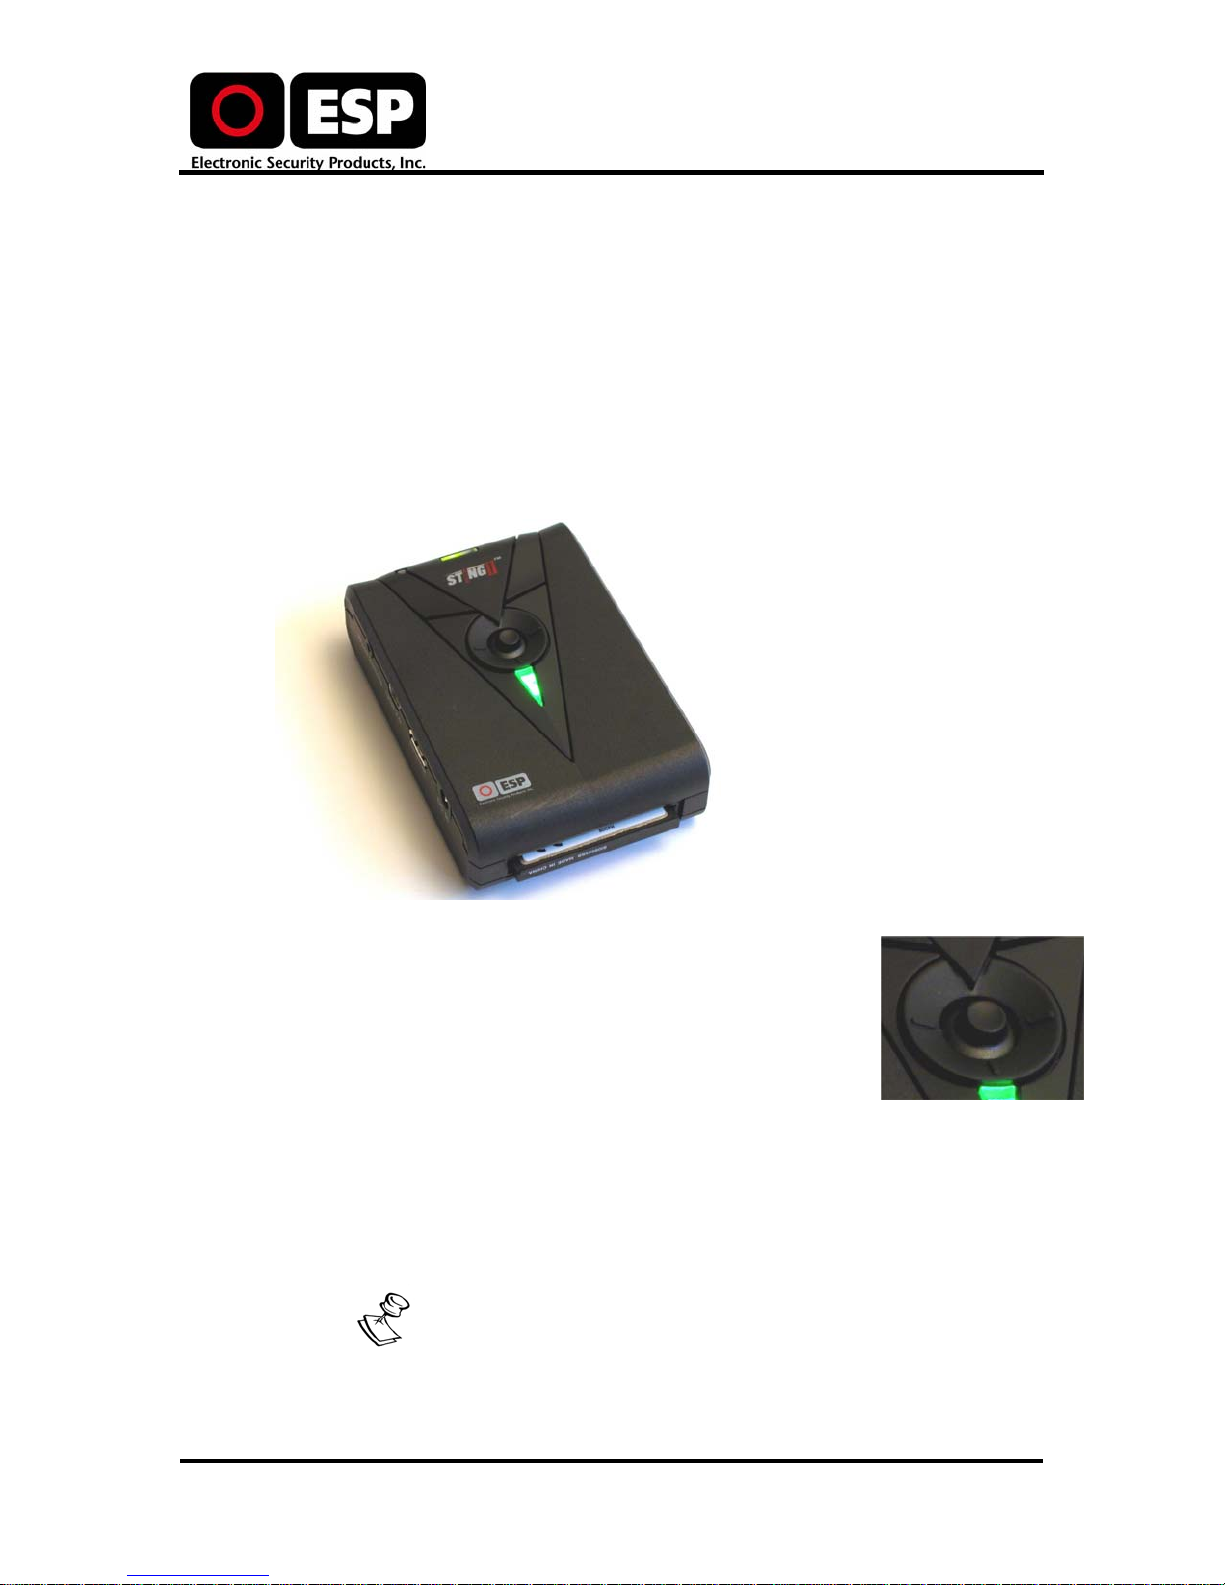
Top View
The top of the STING II unit offers:
Introduction
• Ethernet cable (with RJ-45 connection)
• USB 2.0 cable
• Monitor or TV
• Instant access to the Setup menu (see
• The ability to start and stop recording (see
12)
page
• Several LEDs that indicate the STING II status (see
Indicators
on page 5)
Setup Main Menu on page 14)
Recording Methods on
Menu Control
STING II LED
The Menu control joystick is used to access the Setup
application. Once you connect the device to the
appropriate monitor or television (see
Configuring the STING II
II on, press the center of the joystick on the top of the
STING II to access the Setup application.
• Press the center circle to the left, right, up or down to navigate
through the menu options of the Setup application.
• Use the right button to return to a previous screen.
• Use the left button to close the Setup application.
For more information, see
You can also use the remote control to access the Setup
menu. For more information, see
Control
Sting II User Guide 3
on page 8), and turn the STING
Setup Software on page 14.
on page 38.
Connecting and
Using the Remote
Page 5
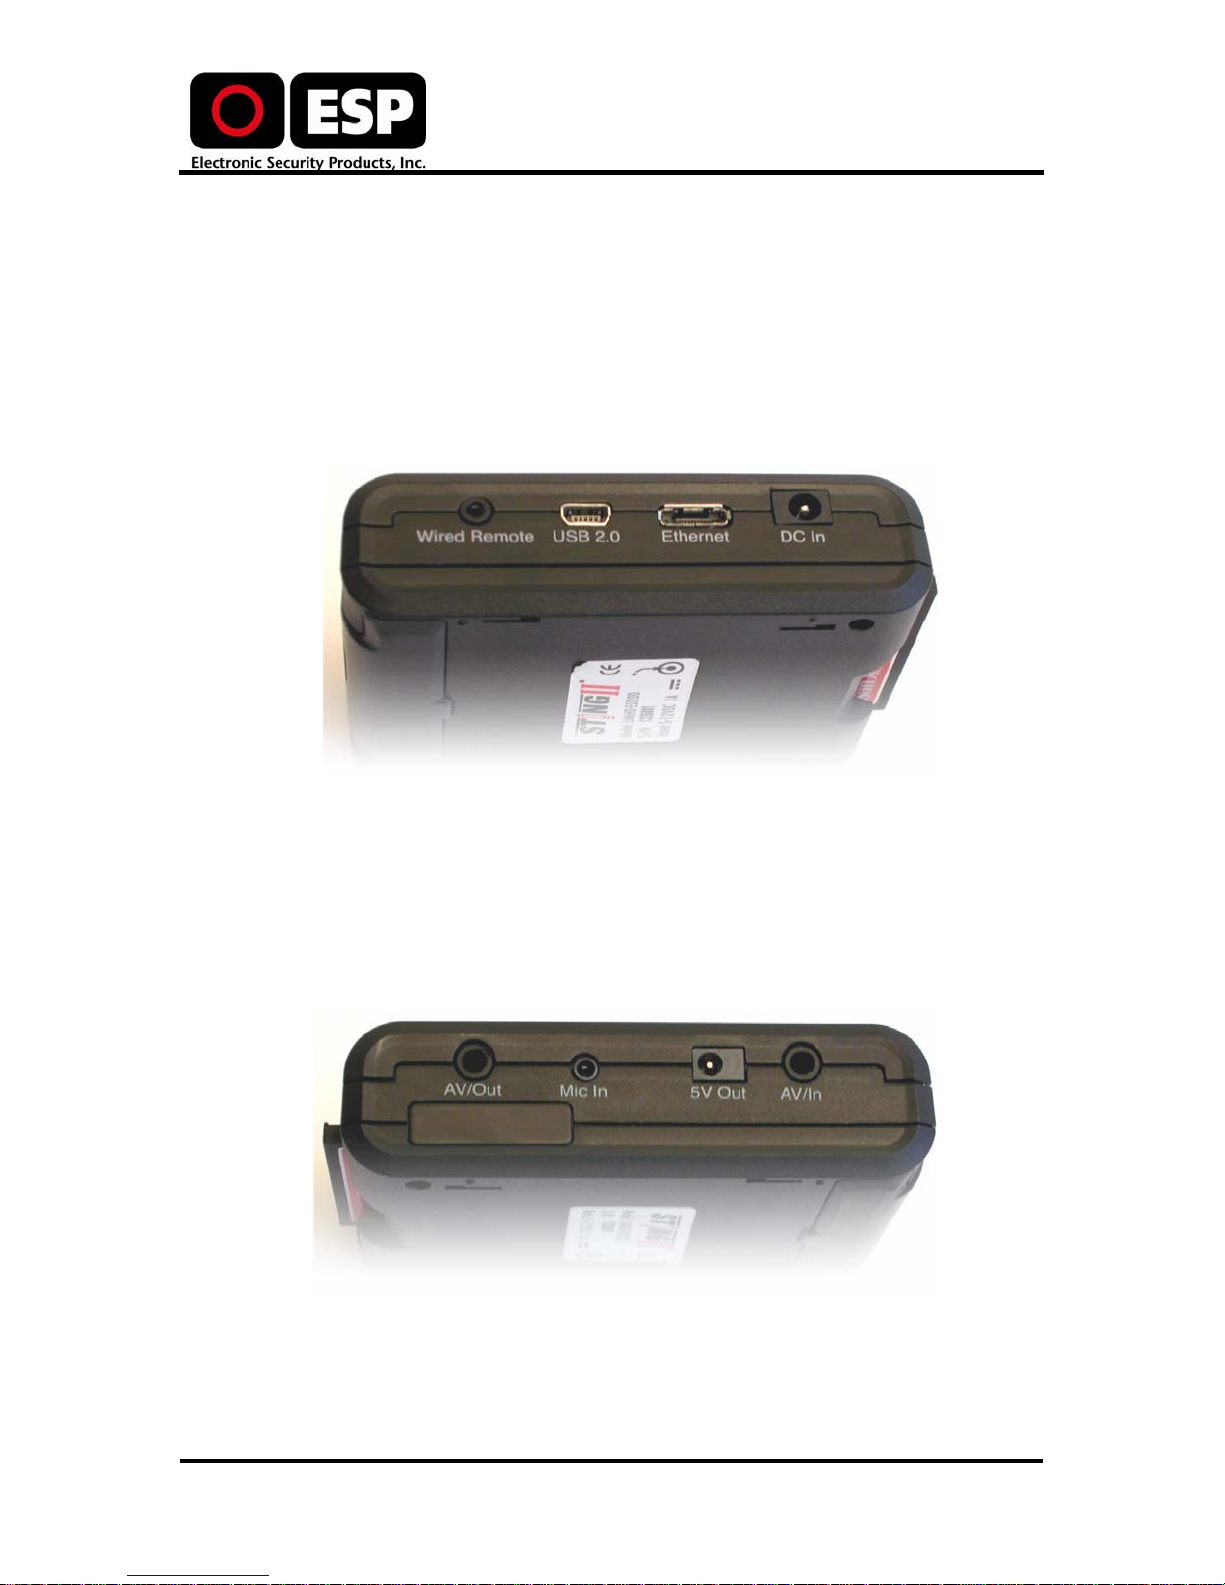
Left Side View
The left side of the STING II unit offers:
• Wired Remote
• USB 2.0
• Ethernet
• DC In
Introduction
.
Right Side View
The right side of the STING II unit offers:
• AV/Out
• Mic In
• 5V Out
• AV/In
Sting II User Guide 4
Page 6
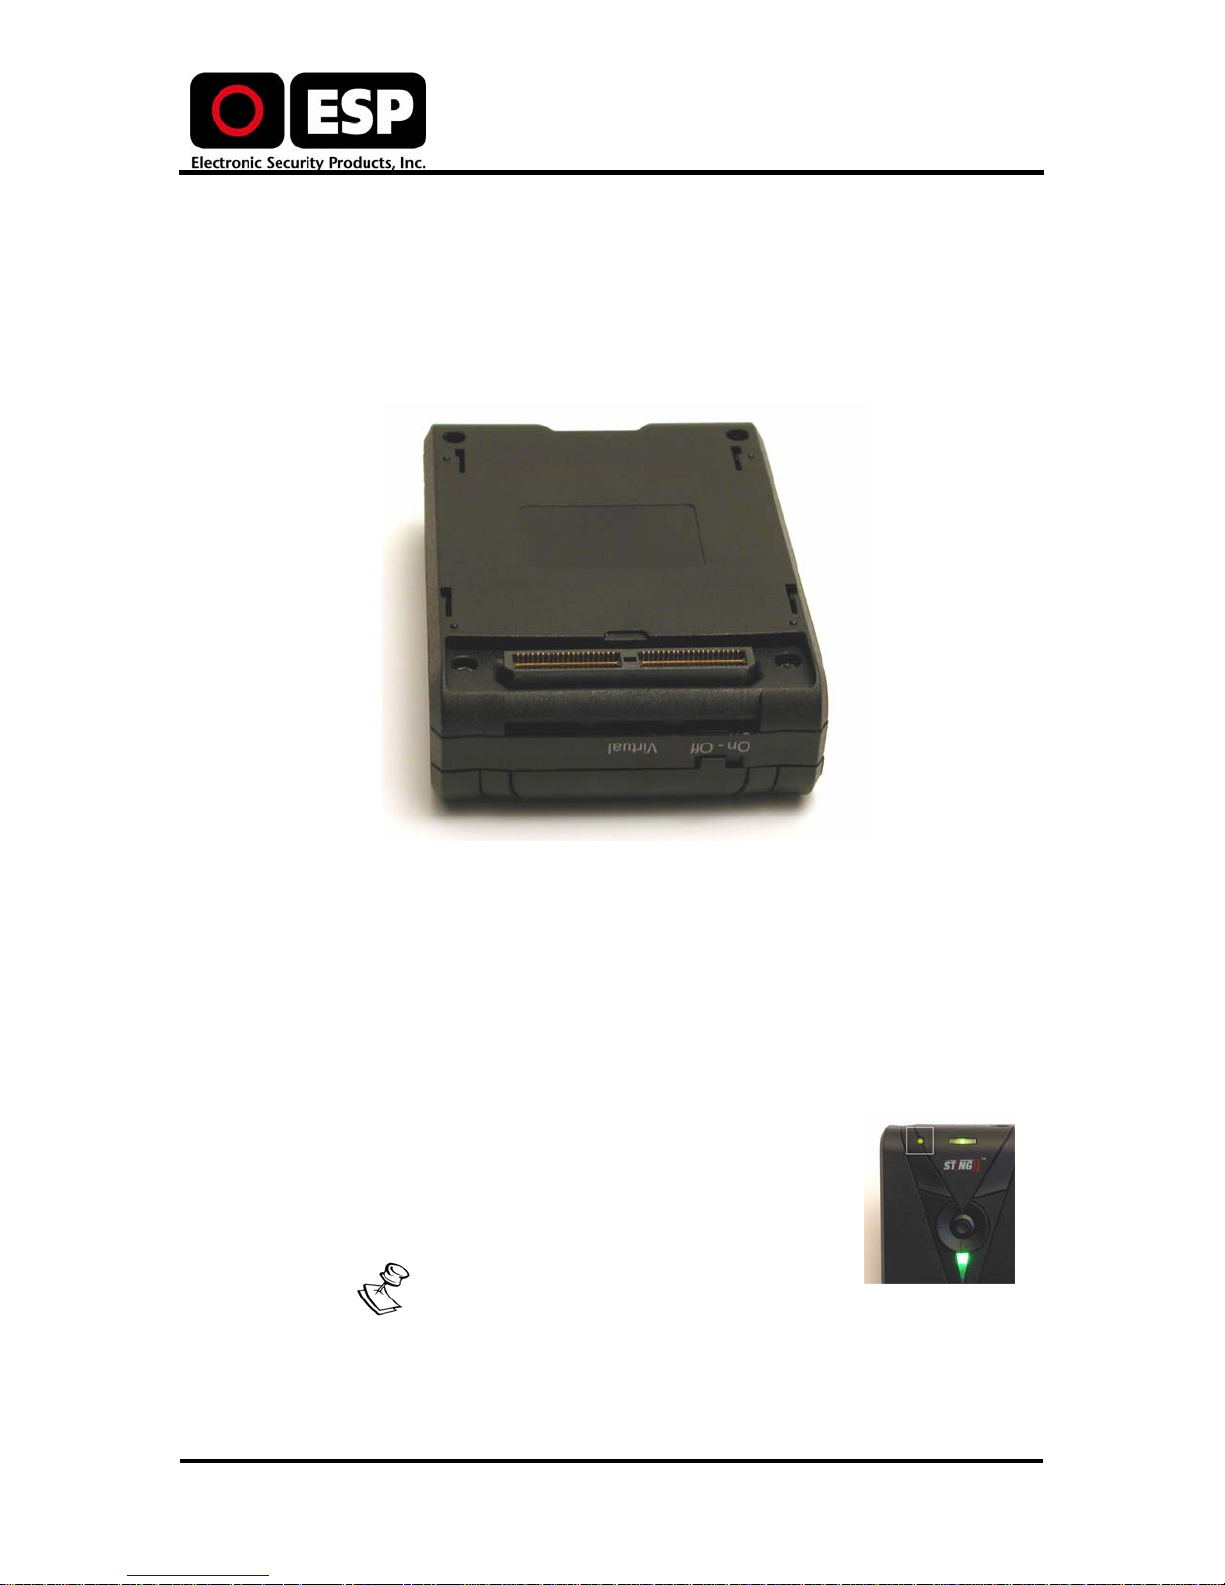
Bottom View
The bottom of the STING II unit offers access to the Virtual port, enabling
you to establish a GPRS 3G or WiFi connection to the Internet to upload
files or enable remote access to the unit. A special adapter, which can be
purchased separately, is required to make this connection .
Introduction
STING II LED Indicators
The STING II LEDs indicate the status of the unit as it is powering up. Once
the unit is operating fully, the LEDs indicate th e recording status of the
unit. While the unit is in the process of powering up, the triangle LED of the
unit will flash green.
The LEDs on the STING II device also indicate the status of the device
and/or the memory card capacity.
Charging LED
When the STING II is plugged in and charging, the
round LED on the top of the device will be green.
The Charge LED will turn off when
the device is fully charged.
However, on some occasions, when
you plug the charger into the
STING II device and the battery is
fully charged, the charge light will
remain lit.
Sting II User Guide 5
Page 7
Introduction
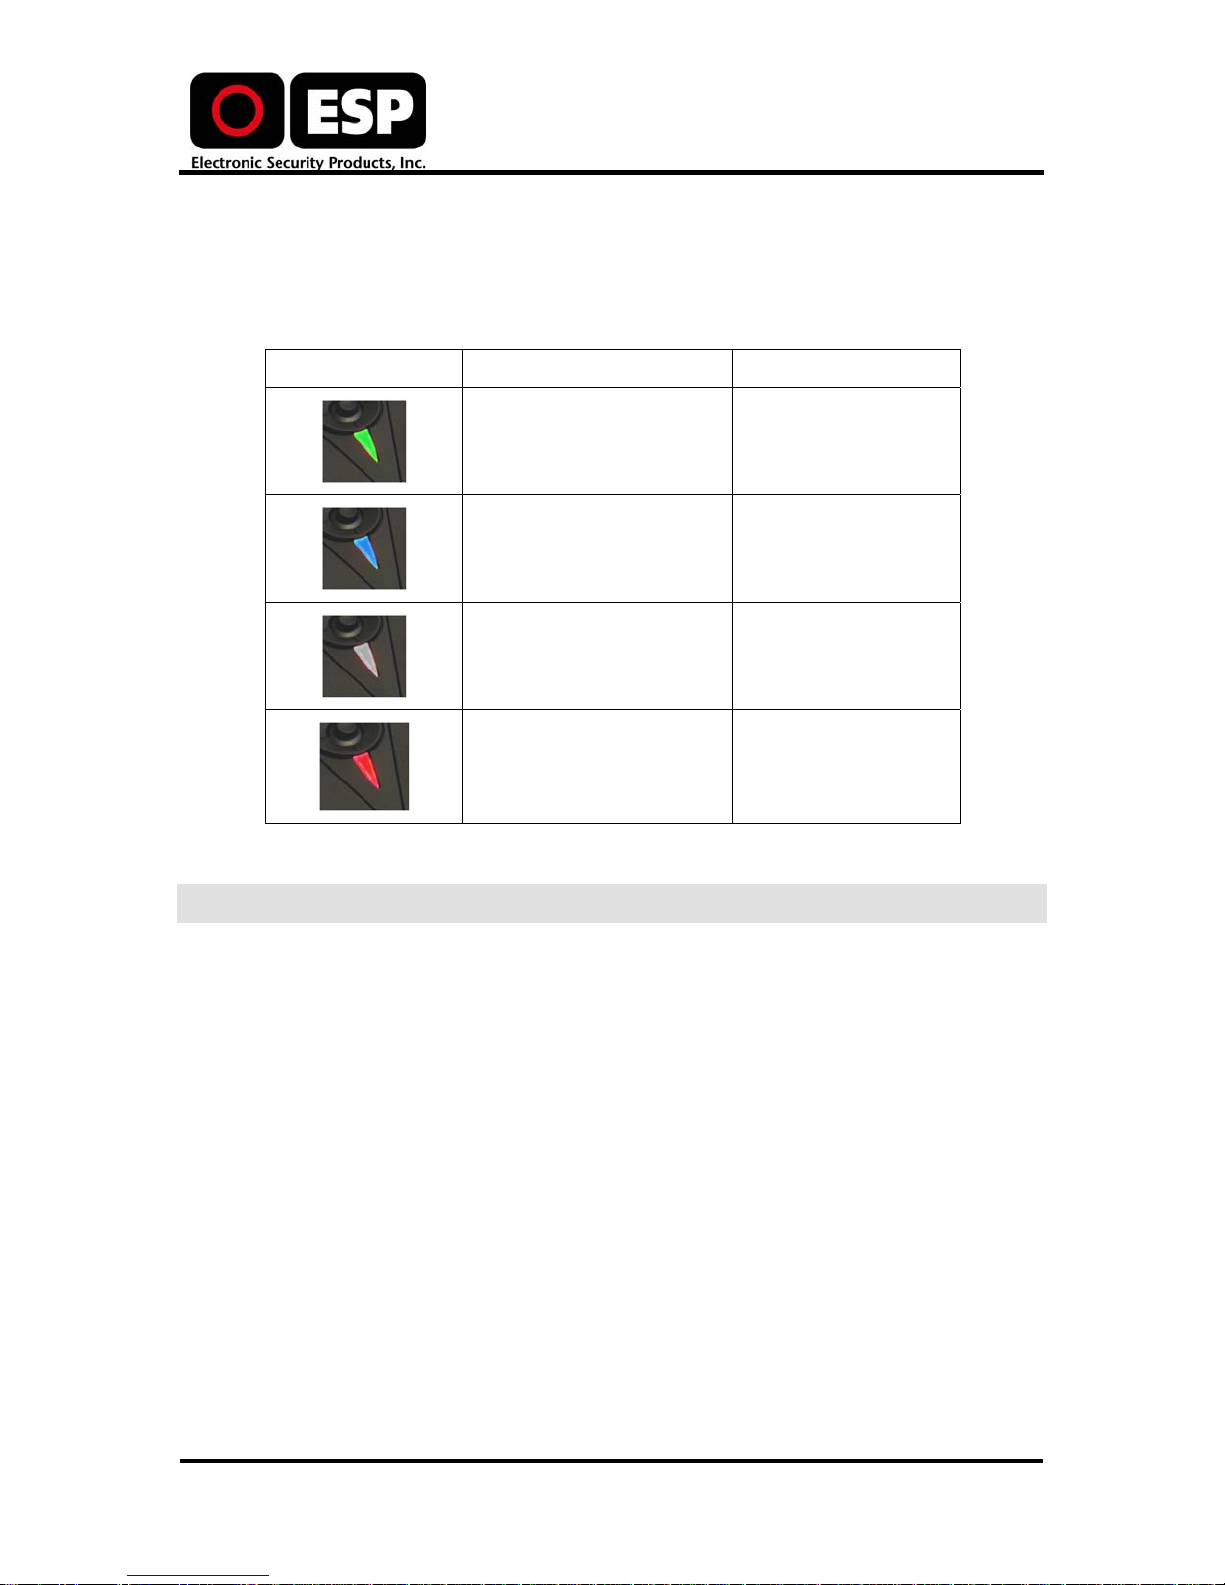
Memory Card Status
The color of the triangle LED indicates the status of the memory available
on the memory card.
LED Indicator Color Percentage Used
Green 0 – 25%
Blue 25 – 50%
White 50 – 75%
Package Contents
• STING II Digital Recorder
• 2 Audio/Video Cables
• Ethernet cable with a RJ45
• Mini USB to normal USB cable
• Vibrating remote control cable
• Infra red remote control
• USB Cable
• Universal Battery Charger
• Sting Media Center Software (Including STING II User Guide on a
CD)
• 4GB Microdrive
Red 75 – 100%
Sting II User Guide 6
Page 8

Connecting the A/V Cable
The A/V cable has two RCA-type sockets on one end, and a 3.5mm plug on
the other end, which connects to the STING II.
To connect the A/V cable to the STING II:
• Plug the 3.5mm plug into the Video In socket on the STING II. Make
sure it is plugged all the way into the center hole.
Connecting a Camera or Microphone
You can connect any video camera to the STING. If the camera operates on
5VDC, it can draw its power from the Camera Power Out socket, as long
as the current consumption does not exceed 200mA. If the camera does
not comply with these requirements, it should be powered by its own
battery.
Alternatively, you can connect an amplified microphone, or any other
device that sends out a line-level signal. An amplif ied button microphone is
sold separately.
Introduction
Sting II User Guide 7
Page 9

The STING II Digital Video Recorder allows you to record and view MPEG-2
videos. However, before you can begin working with the STING II you
should:
• Charge the battery for the first time
• Connect and configure the STING II
• Set the current date and time
• Set the configuration options in the Media Center
Charging the Battery
Before using the STING II for the first time, it is highly recommended that
you charge the battery over night. Once this initial charge has been
accomplished, you will only need to charge STING II for 4 hours each t ime
the battery gets low to ensure maximum battery power during operation.
The unit comes with a universal auto-switching AC/DC power supply with
an input range of 110 – 240 volts AC and an output voltage of 9 volts DC
Getting Started
Getting Started
To charge the battery:
1. Connect the power supply to the unit.
2. Plug the power supply into the electricity and charge the unit for
several hours (at least 8 hours during the initial ch arge).
Make sure the switch is on the Off position on the STING II.
Connecting and Configuring the STING II
STING II comes with a number of cable and connection options. Initially,
you must charge the unit (as specified above) and then set the time and
date to be used during record mode. This is done in the Setup software
application (see
You can configure the unit’s encryption password via the STING II Media
Center (see
Other settings are configured using the Setup software. The STING II
remembers the configuration settings and applies them automatically to all
recording sessions. To change the configuration settings, connect the
STING II to the Setup application.
Time Date Stamp on page 20).
Creating an Encryption Password).
Sting II User Guide 8
Page 10

Connecting the STING II via USB
You can connect the STING II via USB to your computer. This will enable
you to access the files directly via your Windows Explorer or by using the
STING II Media Center.
To connect the STING II using a USB Cable:
1. Verify that the STING II is Off.
2. Connect the USB cable to the computer and to the STING II.
3. Press the center navigation joystick and hold it down while turning
the STING II On.
4. Wait a few seconds while the LED on the STING II flashes.
5. Release the center key. You should see that your computer now
recognizes the USB connection and you can access the files on the
STING II.
To disconnect the STING II, it is important to first turn the STING II Off,
and then disconnect the USB cables from the computer and the STING II.
Getting Started
Deleting One or More Files Via the Setup Menu
You can delete one or more files via the Setup menu. However, before
deleting them, you should confirm that you h ave saved the files to a
backup location.
To delete one or more files:
1. While the Sting is connected to a television or monitor, press the
center button and release it. This will open the Setup Menu.
2. Click the Event Library option to see a list of files.
3. Select one file and click the center button again and release
immediately. This will open an options menu enabling y ou to choose
from: Play, Delete, or Delete All.
• To delete one file, click Delete.
• To select all files, click Delete All.
4. You are asked to verify your selection. Click OK to delete one or all of
the files, or Cancel to close the window without deleting any files.
Reformatting the Compact Flash or Microdrive
You can easily format the compact flash or Microdrive currently stored on
the STING II.
Note: This will permanently delete all the files currently
Sting II User Guide 9
saved on the compact flash or Microdrive disk.
Page 11

Getting Started
To delete all the files on the Compact Flash or Microdrive disk:
1. Press the center button and hold it down.
2. While still holding the center button, press the left button and hold it
down.
3. While pressing both of these, also press the right button and hold for
3 seconds. The top green LED will start blinking to indicate the STING
II is in the process of deleting the files. This may take from a few
seconds to a few moments (depending of how full the memory card
is). When the LEDs stop flashing, the files are erased and the both
LEDs will be solid green.
Alternatively, you can use one of the following options to delete the files:
• Connect the STING II via the USB cable to your computer and use
Windows Explorer to delete all the files.
• Use the STING II Media Center to delete the files (highlight the files
and select Delete Files).
Sting II User Guide 10
Page 12

The STING II provides several ways to start and stop recording audio and
video. To save power, the STING II is automatically configured to close the
video output 300 seconds (5 minutes) after beginning to record. After that
time, although the unit continues to record, it will not automatically display
what it is recording, even if connected to a television or monitor. This value
can be changed in the conf.txt file.
The settings that determine what will be recorded are determined using the
Setup or the Media Center applications. For more information, see
Software
File Types
Recording Sessions
Recording Sessions
Setup
.
Each time you start or stop recording, one of the following types of files will
be created, depending on what settings you have selected prior to initiating
the recording session).
File Extension Type of File Encryption Setting
.mpg Audio/Video Not encrypted
.mpx Audio/Video Encrypted
.m2v Video only Not encrypted
.m2x Video only Encrypted
.mp3 Audio only Not encrypted
.m3x Audio only Encrypted
.jpg Single image Not encrypted
.jpx Single image Encrypted
You can select the type of recording session in the Setup software
application (Setup > Record > Recording Mode).
This option enables you to select audio/video, video only, or MP3 audio
only. Alternatively, you can create a .jpg by:
• Pressing the Image Capture button on the remote control.
• Pressing the right button on the STING II unit’s control panel briefly
(for less than 5 seconds).
Sting II User Guide 11
Page 13

• Pressing the button on the Vibrating Remote briefly (for less than 5
seconds).
Recording Methods
Once you determine the type of file you wish to record and configure these
settings in the Setup, you only have to start and stop recording sessions
using the STING II. There are several ways to start and stop recording
sessions. These include:
• Via Vibrating Remote
• Via Infrard Remote Control
• Via the STING II unit’s control panel
• Via Motion Sensor
Via Vibrating Remote
STING II comes with a vibrating remote device that enables you to quickly
start and stop recording by simply pressing a button. The remote control is
composed of a push-button and a cable connected to a vibrating motor. It
can be used for:
Recording Sessions
• Starting and stopping the recording.
• Getting indications, by vibration, for low battery, low memory, a
disconnected video cable and any other malfunction.
The STING II unit can be concealed completely, leaving only the camera
and vibrating remote accessible to start and stop the recording session.
To start recording with the vibrating remote:
Press the button on the vibrating remote cable and hold it for 5 seconds
until the remote control begins to vibrate. The remote will vibrate for a few
seconds as an indication that the STING II is now recording. If you are
viewing the STING II, you will also notice a blinking red light on the top of
the device as a further indication that the device is recording.
To stop recording with the vibrating remote:
Press the button again and hold it for 5 seconds until it starts to vibrate.
The remote will vibrate in three short pulses, indicating that the recording
is off.
While the vibrating remote is attached to the STING II, all
buttons on the STING II are not operational. This
prevents you from accidentally starting or stopping a
recording session accidentally. Only the button on the
vibrating remote can start or stop a session while the
cable is plugged into the STING II.
To take a still picture (a single .jpg file), press the vibratin g remote button
and release immediately. Each time you press the vibrating remote button
for less than 2 seconds, another snapshot image will be taken by the
camera and stored for later viewing.
Sting II User Guide 12
Page 14

WARNING A series of vibrations indicates that the STING II
has approximately 2-5 minutes of recording time
left because the battery is low and or memory
card is full and needs to be recharged/replaced.
Via Infrared Remote Control
To start a recording session, you can use the STING II Infrared remote
control to initiate a recording session by pressing the REC button on the
top right corner of the device.
The red blinking light on the top of the STING II unit indicates that it is in
record mode. Press the Stop button (square icon on lower left corner of
black navigation panel) to stop the recording session via the remote
control.
Via the STING II Control Buttons
Press the right button to begin recording. To record video and/or audio,
hold the button down for 5 seconds. If you press the button for a shorter
period of time, STING II will capture single-frame .jpg image files.
Recording Sessions
The red blinking light on the top of the STING II unit indicates that it is in
record mode. Press the button again to stop the recording session.
Via Motion Sensor
STING II enables you to trigger recording sessions based on the detection
of a moving object. Sensors trigger the recording session to begin and will
automatically stop when no movement is detected for a predefined period
of time. The default value is 30 seconds. For more information, see
Detection
on page 23.
Alarm Indication
When the remote control cable vibrates continuously, this is an alarm. Press
the remote control button to stop the vibration.
An alarm indicates one of the following:
• The camera cable has been disconnected (lost video-sync).
• The Microdrive card has been removed or dislodged.
• The STING II has suffered a severe malfunction and cannot continue
recording.
To resume recording after an alarm indication:
1. Reconnect the camera cable and/or push the Microdrive card back in.
Motion
2. Turn the STING II off and on again using the On/Off button.
3. Press the remote control button once, and keep it pressed for about
two seconds, to start recording again.
Sting II User Guide 13
Page 15

Setup Software
The STING II contains a built-in software application th at enables you to
manage the device, view all files, view system information, an d modify
STING II recording settings and options.
The STING II software contains three main options:
• Event – enables you to access files stored on the Microdrive.
• Setup – enables you to set and modify system settings.
• System Information – enables you to set and modify system
information options such as date and time used to stamp all
recording sessions.
Accessing the Setup Software
Setup Software
You can access the Setup software either by using the STING II’s joystick
control buttons or by using the remote control. For information on how to
connect the unit, see
To access the Setup main menu from the STING II controls:
• Press the center joystick button on the unit.
To access the Setup main menu using the remote control:
• Press the Menu button.
Setup Main Menu
The main menu of the STING II Setup application contains three options:
• Event Library
• Setup
• System Info
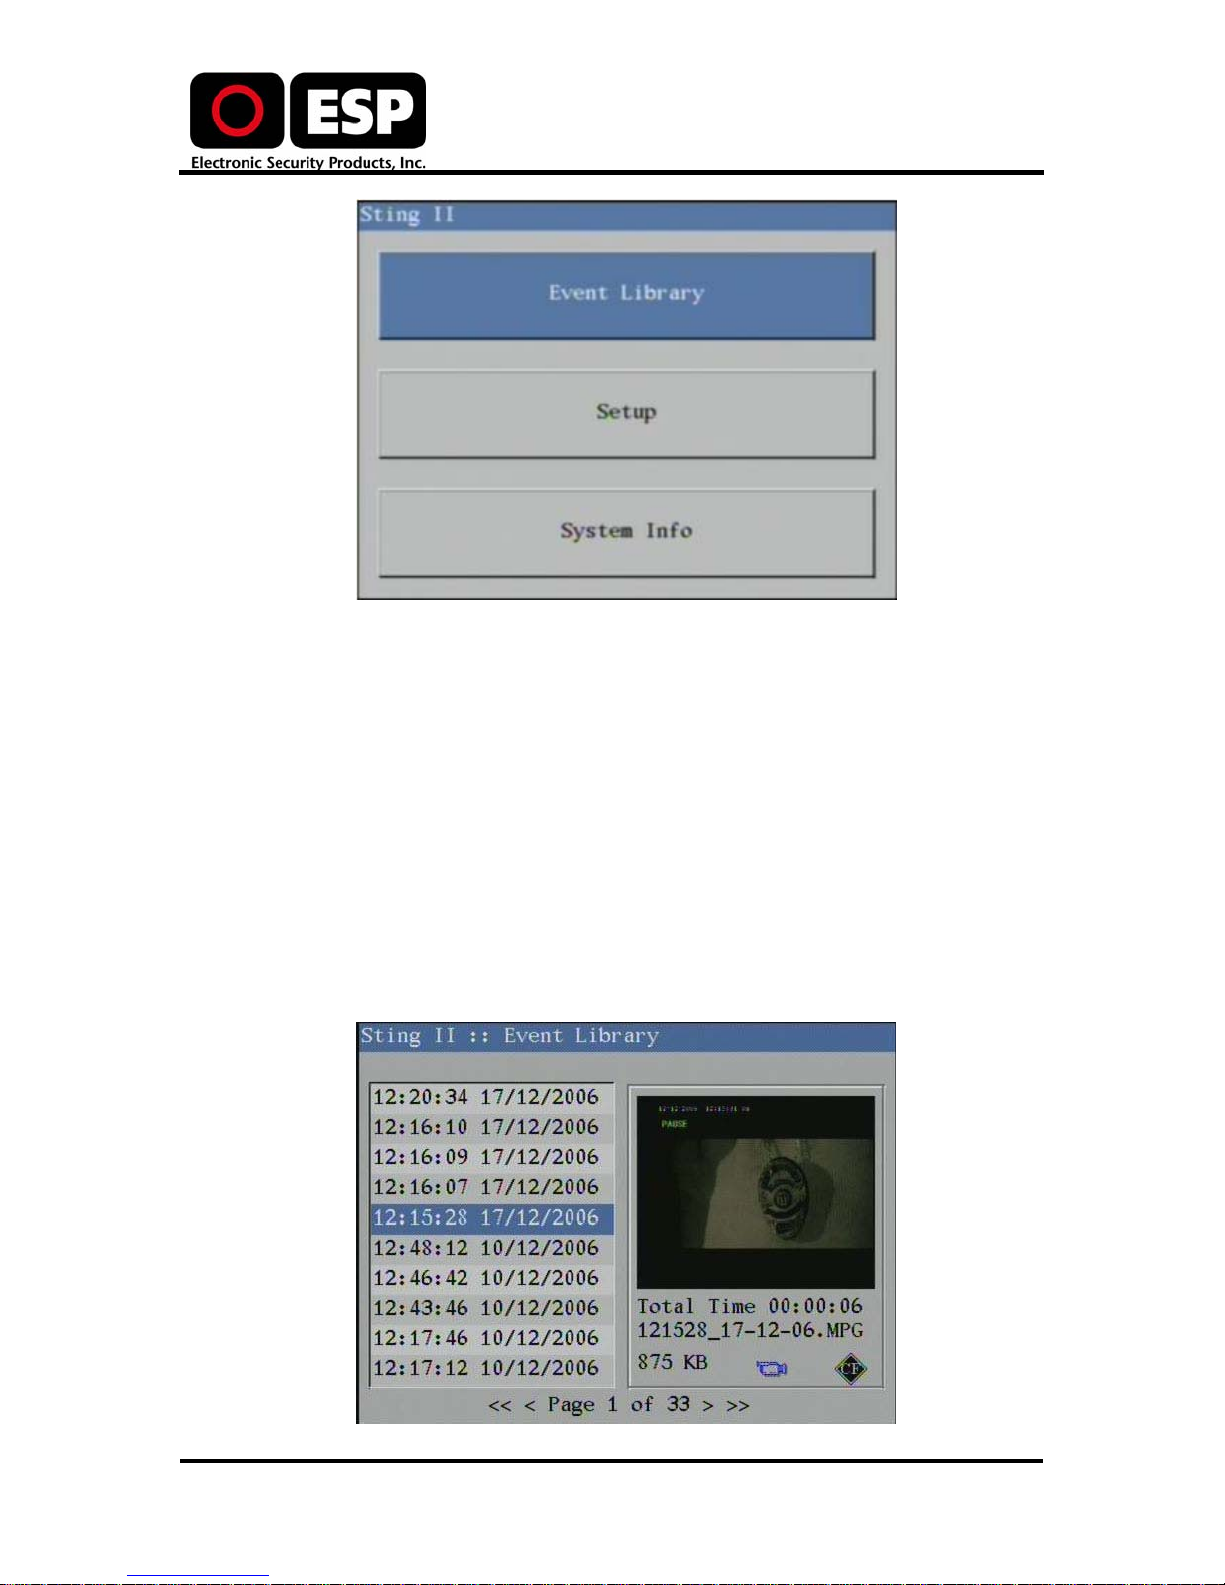
Event Library
The Event Library window contains a complete list of all files currently
saved on the Microdrive. The files are listed in date order according to the
date and time the file was recorded. Below the list of files is an in dication of
how many pages of files are listed in the Event Library, and the currently
displayed page number (for example, Page 1 of 3).
Connecting and Configuring the STING II.
Sting II User Guide 14
Page 16
Setup Software
The initial frame of the selected clip is displayed in the Preview window on
the right side of the Setup. Details of the clip, including the total amount of
time and the size of the file are displayed directly below the Preview
window. File names are automatically assigned to each file that is created
by the STING II.
Viewing Files
When viewing a .jpg file, the image itself is displayed in the Preview
window, rather than the first frame of a video clip.
To view the files in the Event Library:
1. Using the Remote Control, press the MENU key once to access the
Setup.
2. Press ENTER to open the Event Library. You will see a list of files on
the left side of the window.
Sting II User Guide 15
Page 17

Setup Software
3. Use the UP and DOWN keys on the STING II remote control to
navigate through the files on the page. To move to another page, use
the LEFT and RIGHT keys. Navigate to the file you wish to view.
Alternatively, press on the fast forward (single >) to jump a single
page, or >> to jump forward 10 pages. Press backwards (single <) to
jump a single page or << to jump back 10 pages.
You can see the first frame of the file in the display
window on the right side.
4. Click ENTER to access the Event Library menu.
5. On the menu, use the UP and DOWN keys to navigate. In this case,
select PLAY and press ENTER.
To return to the main menu, click Menu.
Deleting One or More Files
You can delete one file or all files from the Event Library.
To delete one or more files:
1. Using the Remote Control, press the MENU key once to access the
Setup software.
2. Press ENTER to open the Event Library. You will see a list of files on
the left side of the window.
3. You can use the UP and DOWN keys on the STING II remote control
to navigate through the files on the displayed page. To move to
another page, use the LEFT and RIGHT keys. Navigate to the file
you wish to verify.
4. Click ENTER to access the Event Library menu.
5. On the menu, use the UP and DOWN keys to navigate. In this case:
• Select Delete to delete the currently highlighted file.
• Select Delete All to delete all files currently stored in the
Event Library.
You will be prompted to confirm that you wish to delete one or all of the
files. Click ENTER to proceed.
Encrypted Files
STING II has the ability to encrypt files for added security. The Encryption
option ensures that only authenticated viewers can see the files. Encrypted
files can only be decrypted by the STING II Media Center.
You cannot open an encrypted file via the Setup application or in any other
graphics viewer. To view these files, you must connect the STING II to a
Sting II User Guide 16
Page 18

computer running the STING II Media Center application. For more
information, see
Setup
The Setup menu enables you to define the recording configuration of the
STING II during operation, set the time and date details (if needed), and
much more. When you select the Setup option, the Setup software displays
the following tabs:
Setup Software
Decrypting and Viewing Files on page 41.
For added security protection, all encrypted files must be
decrypted using the STING II Media Center.
• Record
• Motion
• Media
• System
Sting II User Guide 17
Page 19

Record Tab
The Record tab of the Setup software enables you to select the recording
mode, for example whether you will be recording audio and video, only
video, etc. It also enables you to determine if a time date stamp will be
used, and if so, its format, positioning and color. The cu rrent value is
displayed in red next to each option. The Record tab contains t he following
options:
• Recording Mode
• Recording Quality
• Time Lapse Interval
• Time Date
• Time Date Position
• Time Date Colour
Recording Mode
The Recording Mode option enables you to set the STING II recording
operations. Each time you activate the STING II, it will ope r ate according to
this setting until it is again modified in the Setup software. The default
value is AUDIO/VIDEO.
Setup Software
To set or change the recording mode:
1. Using the Infrared Remote Control, press the MENU key once to
access the Setup software.
2. Press DOWN to highlight the Setup option and press ENTER to
access the Setup window.
3. Use the DOWN key again to navigate to the Recording Mode option
and press ENTER. If you wish to change the recording mode, press
DOWN to select an option, then press ENTER.
Select one of the following:
Sting II User Guide 18
Page 20

Setup Software
• Time Lapse: Select this option to record a single frame
according to specific intervals. The Time Lapse Interval is set
on the Recording Mode tab as well (see
Time Lapse Interval).
below).
• Audio/Video: Select this mode to record standard
audio/visual clips.
• Video: Select this mode to record video only (no sound is
recorded).
• MP3 Audio: Select this mode to audio video only (no visual
images are recorded). If you do not have a camera connected
to the device and you do not select this option, the STING II
will not record anything.
• Low Frame Rate: Select this option to record 10 frames per
second (typical is 25-30 frames per second).
• Night A/V: Select this option to optimize the record settings
for recording at night.
Recording Quality
The Recording Quality option sets the quality level of the images or video
clips being recorded. The current value is displayed in red on the button.
The default value is Medium. The higher the quality, the more disk space
will be used to store the file.
To set or change the recording quality:
1. Using the Remote Control, press the MENU key once to access the
Setup software.
2. Press DOWN to highlight the Setup option and press ENTER to
access the Setup window.
3. Use the DOWN key again to navigate to the Recording Quality option
and then press Enter. If you wish to change the recording quality,
Sting II User Guide 19
Page 21

Setup Software
press DOWN to select an option, then press ENTER. Select one of
the following:
• Very Low
• Low
• Medium
• High
Time Lapse Interval
You can the Time Lapse option to set STING II to record a single image at
preset intervals. The default value is 10 SEC. While you set the option to
capture video in the Recording Mode, the interval itself is set in the Time
Lapse Interval option.
To set the time lapse interval:
1. Using the Remote Control, press the MENU key once to access the
Setup software.
2. Press DOWN to highlight the Setup option and press ENTER to
access the Setup window.
3. Use the DOWN key again to navigate to the Time Lapse Interval
option and then press Enter. Select one of the following:
• 1 second
• 10 seconds
• 30 seconds
• 1 minute
Time Date Stamp
You have the option of having every file (still image or video) stamped with
a Time Date stamp indicating the time or date and time of the recording.
Sting II User Guide 20
Page 22

Setup Software
The default value is DATE TIME, indicating that both the current date and
time will be stamped and visible in each file.
To set or modify the Time Stamp:
1. Using the Remote Control, press the MENU key once to access the
Setup software.
2. Press DOWN to highlight the Setup option and press ENTER to
access the Setup window.
3. Use the DOWN key again to navigate to the Time Date Stamp option
and then press Enter.
Select one of the following:
• NONE
• DATE TIME
• TIME
Time Date Stamp Position
You can select the location that the time Date stamp is displayed in the
picture of video recording using the Time Stamp Position option. The
default value is TOP LEFT.
To set or modify the Time Stamp Position:
1. Using the Remote Control, press the ENTER key once to access the
Setup software.
2. Press DOWN to highlight the Setup option and press ENTER to
access the Setup window.
3. Use the DOWN key again to navigate to the Time Stamp Position
option and then press Enter. Select one of the following:
• Top left
• Top right
Sting II User Guide 21
Page 23

Setup Software
• Bottom left
• Bottom right
Time Date Stamp Colour
You can set the color that the time stamp appears on the image or video.
The default value is Transparent White.
To set or modify the Time Date Stamp Colour:
1. Using the Remote Control, press the MENU key once to access the
2. Press DOWN to highlight the Setup option and press ENTER to
3. Use the DOWN key again to navigate to the Time Stamp Colour
4. Press ENTER to apply your selection.
Motion Tab
STING II can be activated automatically when motion is detected in the
recording area. You can set the noise, size and speed sensitivity to filter out
insignificant data.
When enabled, the STING II will record for 30 seconds following any
movement within the target area (according to the sensitivit y settings
specified in the configuration).
Setup software.
access the Setup window.
option and then press Enter. Use the DOWN key to navigate to the
preferred option:
• Opaque
• Transparent White
• Transparent Black
The current value is displayed in red next to each option. The Motion tab
contains the following options:
Sting II User Guide 22
Page 24

Setup Software
• Motion Detection
• Noise Sensitivity
• Size
• Speed Sensitivity
Motion Detection
There are three options related to the Motion Detection capabilities of the
STING II:
Option Description
Off Motion Detection is not activated. The unit will
only begin recording when activated manually.
Display Motion detection is activated on this display. A
red grid indicates where motion has been
detected.
Trigger Motion detection is activated each time
movement is detected in the designated area
and a recording session is triggered. If no
movement is detected in the area under
observation for 30 seconds, the unit will stop
recording until movement is again detected.
By default, the STING II’s Motion Detection is set to off, meaning that the
unit is not triggered to record based on motion.
Sting II User Guide 23
Page 25

Setup Software
To set the level of motion detection:
1. Using the Remote Control, press the MENU key once to access the
Setup software.
2. Press DOWN to highlight the Setup option and press ENTER to
access the Setup window.
3. Press RIGHT to navigate to the Motion tab.
4. Press ENTER to see the possible Motion Detection options.
5. Select one of the following: Off, Display, or Trigger
Noise Sensitivity
The Noise Sensitivity option enables you to set the level of acceptable
movement (or noise) that would trigger a recording session.
Options include:
• Very High
• High
• Medium
• Low
• Very Low
The default value is MEDIUM.
To set the noise sensitivity level:
1. Using the Infrared Remote Control, press the MENU key once to
access the Setup software.
2. Press DOWN to highlight the Setup option and press ENTER to
access the Setup window.
3. Press RIGHT to navigate to the Motion tab.
Sting II User Guide 24
Page 26

Setup Software
4. Use the UP/DOWN keys to navigate to the Noise Sensitivity option
and select one of the options.
Size
The Size option indicates the size of the options that should be detected by
the motion detector.
Options include:
• Small
• Medium
• Large
The default value is MEDIUM.
To set the size level:
1. Using the Remote Control, press the MENU key once to access the
Setup software.
2. Press DOWN to highlight the Setup option and press ENTER to
access the Setup window.
3. Press RIGHT to navigate to the Motion tab.
4. Use the UP/DOWN keys to navigate to the Size option and select
one of the options.
Sting II User Guide 25
Page 27

Setup Software
Speed Sensitivity
The Speed Sensitivity option indicates what speed an object must move in
order to trigger a recording session.
Options include:
• High
• Medium
• Low
The default value is MEDIUM.
To set the speed sensitivity level:
1. Using the Remote Control, press the MENU key once to access the
Setup software.
2. Press DOWN to highlight the Setup option and press ENTER to
access the Setup window.
3. Press RIGHT to navigate to the Motion tab.
4. Use the UP/DOWN keys to navigate to the Speed Sensitivity option
and select one of the options.
Sting II User Guide 26
Page 28

Media Tab
The Media tab enables you to select various options related to where STING
II stores recorded files.
Setup Software
Options on this tab include:
• Set Primary Disk
• Format Primary Disk
• Encrypted Files
Set Primary Disk
You can save files that are stored on the STING II to one of two primary
disk options: Microdrive/Compact Flash plug-in cards or External USB hard
drive.
Sting II User Guide 27
Page 29

Note: If you choose USB and then connect a compact
To select the primary drive:
1. Using the Remote Control, press the MENU key once to access the
Setup software.
2. Press DOWN to highlight the Setup option and press ENTER to
access the Setup window.
3. Press RIGHT to navigate to the Media tab.
4. Press ENTER to view the options for the Set Primary Disk. Select CF
(for Microdrive/Compact Flash) or USB.
Format Primary Disk
If you wish to format or reformat the Primary Disk, you can use the Format
Primary Disk option.
Setup Software
flash, STING II will record on the compact flash.
Similarly, if you mistakenly select compact flash
and then connect a USB device, the STING II will
still record to the USB.
WARNING: Formatting the primary disk will erase the current
contents of the disk.
To format or reformat the disk:
1. Using the Remote Control, press the MENU key once to access the
Setup software.
2. Press DOWN to highlight the Setup option and press ENTER to
access the Setup window.
3. Press RIGHT to navigate to the Media tab.
4. Navigate to the Format Primary Disk option. You are asked to confirm
your selection. Click ENTER to format the primary disk, or use the
RIGHT key to move to Cancel (then click ENTER to cancel).
Sting II User Guide 28
Page 30

Encrypted Files
STING II can encrypt all files so you can make sure no one but you or the
person that has the password can view the recorded files. Encrypted files
can only be decrypted with a password (set in the STING II Media Center)
from within the STING II Media Center.
Setup Software
WARNING: If you forget the password, it is impossible
decrypt and view the files.
to
To enable encryption of files:
1. Using the Remote Control, press the MENU key once to access the
Setup software.
2. Press DOWN to highlight the Setup option and press ENTER to
access the Setup window.
3. Press RIGHT to navigate to the Media tab.
4. Press ENTER to navigate to the Encrypted Files option.
5. Select either ON or OFF. The default value is OFF.
System Tab
The System tab of the Setup menu enables you to:
• Return the STING II to the factory default settings originally
programmed into the unit.
• Set the camera power save mode.
• Specify the date and time format to be used as a date stamp on all
files.
• Set the current date and time (this is the time that will be used in the
date/time stamp.
Sting II User Guide 29
Page 31

Factory Defaults
Select Factory Defaults to return the STING II configuration settings to
the original factory-set options. You are prompted to confirm your
selection. Click OK to reset the STING II configuration settings, or Cancel
to close the message box without changing the current settings.
Setup Software
Camera Power Save
Automatic power-save mode can be configured for the STING II using the
Camera Power Save option. This means that the camera will go into
power-save mode when the camera is not being used for a specified period
of time (ranging from 10 seconds to never). The options are: Never; 10
sec.; 30 sec.; or 1 minute. The default value is 10 sec. The Camera Power
Save mode will only be activated when you are not in record mode.
Sting II User Guide 30
Page 32

Typically, you will use the NEVER set ting to enable you to position the
camera in cases where you want to perform surveillance from a fixed
location. Once the camera is in position and you change the setting, the
STING II is programmed to automatically continue giving power to 5-volt
connection while the camera is in record mode.
As soon as you next indicate that you want to record, power to the 5-volt
connection (and to the external camera) is immediately activated. When
you stop recording, the power-save mode will begin after the specified
period of time (or never, if you selected NEVER).
Video Output Std.
You can set the video output according to one of the following standards:
• PAL
• NTSC
Setup Software
Sting II User Guide 31
Page 33

Date and Time Format
Set the date and time format.
Options are:
Setup Software
• US format
• US military format
• European format
System Info Tab
The System Info menu is read-only. It is intended to offer you information
on the following options:
• Network
• Disk
• Virtual
• Firmware
Network
The Network tab details the STING II’s:
• MAC Address
• IP Address
• Gateway Address
Sting II User Guide 32
Page 34

Disk
Setup Software
The Disk tab details information about the current disk connected to the
STING II, its total size and the amount of free space available.
Sting II User Guide 33
Page 35

Virtual
Setup Software
If a virtual adaptor is connected, information about its current status will be
detailed on the Virtual tab.
Firmware
The current software and hardware version of the STING II is detailed on the Firmware tab.
For information on updating the Firmware, see Updating the STING II.
Sting II User Guide 34
Page 36

Default Settings
The following values configured in the STING II when originally shipped,
and are reassigned when you click Factory Defaults on the System tab.
Setting Default Value
Record Mode Audio/video
Record Quality High (5Mbps)
Time Lapse Interval 10 seconds
Time position Top left:
Time Stamp Colour Opaque
Setup Software
• X – 64
• Y Pal - 30
• Y NTSC - 30 in pixels
Motion Detection OFF
Noise Sensitivity Medium
Size Medium
Speed Sensitivity High
VMD Record Time 30 seconds
Primary Disk CF
Encrypted Files NO
Camera Power Save 10 seconds
Screen Saver 300 seconds
Video Output Std. NTSC
Date & Time Format US
File Maximum Size 4093 MB
Sting II User Guide 35
Page 37

Updating the STING II
Occasionally, the STING II software is updated. These updates are available
without charge by connecting the STING II and downloading the new
version. There are several options for upgrading.
To upgrade the STING II firmware:
1. Download the file from the Internet and save the file to the STING
II’s memory card.
2. Insert the memory card into the STING II, while the STING II is
turned Off.
When you turn the STING II On, the red and green lights will flash,
indicating that the unit is in the process of being updated. This process will
take about three minutes and it is important not to interrupt the STING II
while it is the process of upgrading. When the LEDs stop flashing, the top
light should be green, indicating a successful upgrade.
Setup Software
If the second light is red, or any other color but green, this may indicate
that you are low on disk space and may need to delete some or all of the
files before starting another recording session. If both lights are green, you
are ready to use the STING II with the latest available software.
Note: After upgrading the software, it is recommended
that you click Factory Defaults on the Systems
tab.
You are asked to confirm your selection. Click OK to reset the settings to
the factory defaults, or Cancel to close the dialog box without changing the
current configuration.
Sting II User Guide 36
Page 38

Setup Software
Sting II User Guide 37
Page 39

Using the Remote Control
Using the Remote Control
The Sting Remote Control offers the
following options:
Opens the Setup main
menu.
REC: begins a recording
session.
For future use.
When in Camera Power
Save mode (see
Power Save
this button diverts power
to the 5-volt connection for
the specified period of time
(10 sec, 30 sec, or 1 min.).
When you are viewing the
Setup menu, this button
also performs as a Back
button, returning to the
previous option or view.
Navigation panel to move
through the menu. Select
Enter to confirm your
selection.
Image Capture button
initiates the STING II to
capture a single frame
image and save it in jpg
format when viewing a
play back video.
Camera
on page 30),
Sting II User Guide 38
Page 40

Using the STING II Media Center
Using the STING II Media Center
The STING II Media Center is a software program that communicates with
your STING II, and enables you to preview, upload and delete recordings.
It also enables you to decrypt files that were encrypted during a STING II
recording session.
The main window of the STING II Media Center is divided into two main
sections:
File Browser area: enables you to view all the files currently on the Sting
(or browse through your computer to view files that were previously
recorded and saved to another location), extract a single frame from within
a video file, etc.
STING II configuration area: enables you to set the video quality and
encryption password that is used by the STING II, and view system
messages.
Installing the STING II Media Center
The STING II Media Center is included on the product CD shipped with each
unit. To install the Media Center, double-click on StingII.exe. The STING II
Media Center will open.
Sting II User Guide 39
Page 41

Using the STING II Media Center
Accessing the STING Media Center
1. Click the program’s desktop icon, or click the Start button and select
Programs > STING > STING Media Center.
If the STING II unit is already connected to the computer when you open
the STING II Media Center, “Found Sting Media” will be displayed in the
upper right corner of the window.
STING II Tab Options
About: Enables you to determine what version of the Sting Media Center
you are using.
Help: Enables you to access the application’s online help, offering
information and instructions on working wit h STING II.
Exit: Closes the Media Center.
File Browser Area
The File Browser area displays a list of files that are current ly stored on the
Sting. Once the STING II is connected (typically via USB cable) to the
computer on which the STING II Media Center has been installed, click
Show Files to update the display.
On the left side of the screen, the file name, creating date and time, and
the file size are displayed for each file. You can use your mouse to navigate
through the list.
Sting II User Guide 40
Page 42

Using the STING II Media Center
To delete files via the Media Cent er:
Highlight one or more files and click Delete Files. You are prompted to
confirm your request before the file or files are deleted.
To preview a file:
Click on the file on the left side of the screen. The first frame will be
automatically displayed in the Preview Pane. You can use the media
controls to navigate through the file:
Pause the display.
Review/reverse the direction of the display.
Continue displaying the current file.
Fast forward through the file.
Adjust the sound/volume of the file.
Security Options in the Media Center
You can configure STING II to encrypt files during the recording session. If
you choose this option in the Setup (see
should set a password that can authorize the decrypting of files to be
viewed. The password is created in the Media Center (see
Encryption Password on page 43). You can also set the Video Quality that is
used during recording.
Once files have been recorded, the STING II Media Center is the ONLY
software that enables you to decrypt them so that they can be viewed.
Encrypted Files on page 29), you
Creating an
Decrypting Files
When you decrypt a file, it is copied to another location and “unlocked.”
This means that the original file is still encry p ted and remains unedited.
The decrypted file can then be viewed in the STING II Media Center or any
other MP2-compatible viewer.
To decrypt a file:
1. Select a file from the File Browser list.
3. Click Decrypt. When prompted, confirm that you wish to decrypt the
file.
Sting II User Guide 41
Page 43

Using the STING II Media Center
Verifying the Authenticity of Files and Images (Watermark)
The STING II automatically includes Watermarked Files
To verify that files have not been tam pe red or edited:
1. Using the Remote Control, press the MENU key once to access the
Setup software.
2. Press ENTER to open the Event Library. You will see a list of files on
the left side of the window.
3. You can use the UP and DOWN keys on the STING II remote control
to navigate through the files on the displayed page. To move to
another page, use the LEFT and RIGHT keys. Navigate to the file
you wish to verify.
4. Click ENTER to access the Event Library menu.
5. On the menu, use the UP and DOWN keys to navigate. In this case,
select VERIFY and press ENTER. If the original file was edited in any way,
you will see on the System Messages area: “File is not original!!!!!!”
Configuration Options in the Media Center
Configuration options in the Media Center include:
• Setting the video quality
• Viewing any system messages related to actions in the Media Center
• Selecting a recording setting
• Assigning a password
• Viewing the current firmware version
Video Quality
The current video quality of each recording session is configured in the
Media Center in the Video Quality section. Select from High, Medium, Low
or Very Low. In general, the higher the quality setting, the larger the file
will be.
If there is no storage problem, you may choose to set the video quality at a
higher level. On the other hand, if space on the compact disk may be a
problem, you may choose to record at a lower quality and thus be able to
record for a longer period of time.
Sting II User Guide 42
Page 44

To set the video quality:
1. Select an option from the list of possible video quality levels.
2. Click Set Video Quality.
System Messages
This is a read-only field that displays system messages as appropriate.
Using the STING II Media Center
Record Settings
In the Record Settings section, you can enable the Record Settings for
the STING II. The STING II can be configured to encrypt all files created
during a recording session (still images, video, or audio), by enabling the
Encryption radio button.
In addition to the Encryption setting, you
can select one of the following record
settings:
• Audio/Video
• Video only
• Audio only
Click Set after you select your preferences.
Creating an Encryption Password
If you choose to encrypt recording sessions, you will need to first create a
password that the STING II will use to protect the files. You can only
decrypt files if you have this password. If for any reason you lose ( or
forget) the password, it will be impossible
Note: The default password is:
to open the file.
Sting
Sting II User Guide 43
Page 45

To set a password:
The STING II needs to be connected via the USB in order to access the
STING II Media Center to create or change the password.
1. Enter the new password in the New Password field of the STING II
Media Center.
2. In the Confirm Password field, enter the exact password again.
3. Click Set Password to save the password.
After you set the password and click Set Password, you need to shut off
the Sting and then turn it back on again so that the new password will take
effect.
Firmware Version
You can check what Firmware version is installed on the STING II by
connecting the Sting via the USB cable to your computer and opening the
STING II Media Center. Click Firmware Version. The version number will
be displayed.
The firmware file name is sys.bif. Typically, a standard upgrade will take at
least 7 minutes. A progress bar is displayed in the browser, indicating the
progress of the upgrade process. You should not disconnect the STING II
until the upgrade process is completed.
Using the STING II Media Center
Sting II User Guide 44
Page 46

Remote Access
Remote Access
Using a web interface option and a standard Internet browser (such as
Microsoft Internet Explorer), you can access the files currently stored on a
STING II unit located at a remote location. Files can be viewed and saved
locally. You can also control the recording process in the STING II to
remotely initiate a recording session.
To establish remote access, you must first determine the IP address of the
STING II. Once you know the IP address, you can access the STING II
remotely from any computer with Internet access or locally through the
Ethernet/RJ-45 connections.
Determining the STING II’s IP Address
The STING II is assigned an IP address when it is connected to the router
and communication is established. This IP address is then used by the
remote Web Interface to enable you to access and control the STING II
remotely.
To determine the STING II address:
1. Connect the STING II to the router and to a TV/Monitor and turn the
STING II On.
2. Although the process of configuring your router may vary slightly
depending on the router, the basic procedure involves accessing the
setup page (for example, with Linksys, open Internet Explorer and
http://192.168.1.1 in the address field).
type
3. On the main setup page, enter the Static IP address found on the
Setup’s Main Menu > Systems Info > Network tab.
4. When setting up the STING II to allow remote access over the
Internet, you will need to configure the Port Forwarding on your
router.
This can be accomplished either by setting the Specific Port
Forwarding option or the DMZ host. For specific details, see your
router documentation.
5. If you wish to accomplish this via port forwarding, you should define
the ports as follows: ports 80 (web) and 21 (ftp).
6. Disable any firewall option on these ports in the router to enable
remote connection.
Sting II User Guide 45
Page 47

Once connectivity is established, the login screen appears.
Logging In
To log in:
Once you have established a local or remote connection, the login screen
appears.
Remote Access
If the MAC address appears as all zeros, this indicates
that there is not Ethernet connectivity between the STING
II and the router. Check the connections and then verify
the MAC address again.
Some routers may require a crossed cable to enable
successful communication with the STING II.
Enter the user name and password and click OK to enter the remote access
Web interface.
By default, the STING II user name and password are both “admin.” These
can and should be changed either in the STING II Media Center or via the
Setup settings. Once you complete the login process, the STING II Web
Interface window opens.
Sting II User Guide 46
Page 48

Remote Access
On the left side, the menu details all of the available options. On the right
side, a Preview window enables you to view previously recorded sessions,
capture current images, display the current view of the connected camera
live, and more. The options on the web interface include:
• File list
• Capture Image
• Remote Capture Image
• WebCam (CIF resolution)
• WebCam (Full resolution)
• Change Password
• System Status
File List
Click File List to display a list of all files currently stored on the STING II.
The file name, date the file was created, and the file size are displayed. You
can click on a file to download it to the local computer.
Capture Image
Select Capture Image to view a single frame image of the camera’s
current view. The image will be displayed in the Preview window . The
image is displayed with the current date and time stamp.
Remote Capture Image
Select Remote Capture Image to view a single frame image of the
camera’s current view and also save that view to a .jpg graphics file for
viewing at a later time. The image is displayed (and saved) with the curren t
date and time stamp.
Sting II User Guide 47
Page 49

WebCam (Full resolution)
Select WebCam (Full resolution) to display the current camera view in
real time (one frame per second). The view is displayed in the full area of
the Preview window. The display is updated every few seconds.
WebCam (CIF resolution)
Select WebCam (CIF resolution) to display the current camera view in
real time. The view is displayed in a portion of the Preview wind ow and is
updated every few seconds. Because it only uses a portion of the Preview
window, it uses fewer resources to update the image and therefore displays
more images in a shorter period of time.
Upgrade Firmware
You can upgrade the firmware on the STING II either via a USB connection
with the STING II directly, or via an Ethernet connection and the Internet.
Connect to the STING II via the remote Web interface and click Upgrade
Firmware to access and upload a new version.
Remote Access
Change Password
You can change the STING II password used for encryption via the Web
interface by selecting Change Password and then entering the following
the current password and then a new password (between 2 and 8
characters). You must then re-enter the new password in the Confirm
New Password field. Click OK to change the password.
System Status
Select System Status to display the following information (read-only):
• Software version: the current version number installed on the
STING II.
• Board revision: the current version of the STING II Board.
• Compact flash status: total space and percentage available.
• USB disk presence (or None).
• Video Status (NTSC or PAL)
• Recording: whether the unit is currently recording or not
• Motion Detection: what setting is currently in effect for the motion
detection setting
Sting II User Guide 48
Page 50

Maintenance and Troubleshooting
Caring for the STING II
The STING II does not require special maintenance. Keep the unit away
from moisture, dirt or excessive heat. Clean with a damp cloth and wipe
dry.
Do not use Acetone, Benzene or any other alcoholic agents when cleaning
the unit.
Do not use Acetone, Benzene or any other alcoholic
agents when cleaning the unit.
Unit Does Not Turn On
Maintenance and Troubleshooting
Probable Cause Corrective Action
Dead or Uncharged Battery Charge the battery. If the problem
persists send the unit in for service.
Cannot Start Recording
Probable Cause Corrective Action
A/V cable disconnected. Check the connections to
No sync signal detected.
No Microdrive detected. Check that the Microdrive is seated
correctly.
Sting II User Guide 49
Page 51

Technical Specifications
Technical Specifications
Physical
Dimensions 92 mm x 60 mm x 25 mm (3.62” x 2.36” x
0.98”)
Power
Internal Battery 3.6 Volts
External Charger Universal input: 90-264VAC Wall charger
Camera Power Source 5 Volts 200mA
Audio/Video
Video Format MPEG-2.
Video Input PAL/NTSC standard composite video.
Video Output
Video/Audio Playback Any MPEG-2 compatible player. (e.g.
Windows Media Player or Winamp)
Miscellaneous
PC Interfaces USB (1.1 or 2.0) or Ethernet
Sting II User Guide 50
Page 52

About ESP
Electronic Security Products, Inc. (ESP) is an internation a lly-based
manufacturer of high technology video surveillance equipment. The
company is comprised of engineers and technicians who specialize in
investigative tools and all aspects of investigative photography.
Established in 1993 and headquartered in New York, ESP has been the
choice manufacturer and supplier of high quality video surveillance
products for over a decade. The company caters exclusively and directly to
many Law Enforcement & Government Investigative Units worldwide,
striving to maintain a high standard of service, qualit y and consistency
throughout the production, design and manufacturing process to ensure
customer satisfaction.
Contact Information
Tel: +1.212.929.9914
Fax: +1.212.937.2362
www.espinc.com
ESP Inc.
185 Franklin Street
New York, NY, 10013
USA
Technical Specifications
Sting II User Guide 51
Page 53

Index
Technical Specifications
Accessing the Monitor........................ 14
Alarm Indication................................. 13
Authenticity of Files ........................... 42
Board revision..................................... 48
Camera Power Out............................. 7
Camera Power Save............................ 30
Capture Image..................................... 47
Change Password................................ 48
Charging the Battery............................. 8
Compact flash status........................... 48
Configuration Options .................... 8, 42
Connecting
Camera.............................................. 7
Microphone....................................... 7
via USB............................................. 9
Connecting
A/V Cable .........................................7
Date and Time Format........................ 32
Decrypting Files.................................. 41
Deleting Files...................................... 16
Disk..................................................... 33
Encrypted Files .............................16, 29
Encryption Password .......................... 43
Event Library...................................... 14
Factory Defaults.................................. 30
File Browser Area............................... 40
File List............................................... 47
File Types............................................ 11
Firmware............................................. 34
Firmware Version...............................44
Format Primary Disk........................... 28
GPRS 3G............................................... 5
IP Address........................................... 45
LED Indicators...................................... 5
Logging In........................................... 46
Media Center....................................... 39
Accessing........................................ 40
Installing ......................................... 39
Media Tab........................................... 27
Memory Card Status............................. 6
Menu Control........................................ 3
Monitor Software................................ 14
Motion Detection................................ 23
Motion Tab.......................................... 22
Network............................................... 32
Noise Sensitivity................................. 24
NTSC ..................................................31
Package Contents.................................. 6
PAL..................................................... 31
Password............................................. 43
Record Tab.......................................... 18
Recording
motion sensor.................................. 13
via control buttons........................... 13
via infrared remote control.............. 13
via vibrating remote........................ 12
Recording Methods............................. 12
Recording Mode.................................. 18
Recording Quality............................... 19
Remote Access.................................... 45
Remote Capture Image ....................... 47
Remote Control................................... 38
Security Options.................................. 41
Set Primary Disk................................. 27
Setup menu.......................................... 17
Show Files........................................... 40
Size...................................................... 25
Software version .................................48
Speed Sensitivity................................. 26
System Information Tab ..................... 29
System Menu Tab............................... 32
System Status...................................... 48
Technical Specifications..................... 50
Time Date Stamp ................................20
Time Date Stamp Colour.................... 22
Time Date Stamp Position.................. 21
Time Format........................................ 32
Time Lapse Interval............................ 20
Trigger................................................. 23
Updating the Sting II........................... 36
Upgrade Firmware.............................. 48
USB disk presence.............................. 48
Version................................................ 44
Vibrating Remote................................ 12
Video Output Std. ...............................31
Video Quality...................................... 42
Sting II User Guide 52
Page 54

Video Status........................................ 48
Viewing Files...................................... 15
Virtual................................................. 34
Watermark........................................... 42
Technical Specifications
WebCam (CIF resolution)................... 48
WebCam (Full resolution) ..................48
WiFi connection.................................... 5
Sting II User Guide 53
Page 55

Legal Notice
This manual contains information that is proprietary to ESP Inc. No part of this publication
may be reproduced in any form whatsoever without prior written approval by ESP.
Right, title and interest, all information, copyrights, patents, know-how, trade secrets
and other intellectual property or other proprietary rights relating to this manual and to the
STING II ™ (“the Product”), and any software components contained therein, are proprietary
products of ESP protected under international copyright law and shall be and remain solely
with ESP.
STING II ™ is a registered trademark of ESP. No right, license, or interest to such trademark
is granted hereunder, and you agree that no such right, license, or interest shall be asserted
by you with respect to such trademark.
You shall not copy, reverse compile or reverse assemble all or any portion of the Manual or the
Product. You are prohibited from, and shall not, directly or indirectly, develop, market,
distribute, license, or sell any product that supports substantially similar functionality as the
Product, based on or derived in any way from the Product. Your undertaking in this paragraph
shall survive the termination of this Agr eement.
This Agreement is effective upon your opening of the packaging of the Product, and shall
continue until terminated. ESP may terminate this Agreement upon the breach by you of any
term hereof. Upon such termination by ESP, you agree to return to ESP the Product and all
copies and portions thereof. For further information contact ESP at the address below or
contact your local distributor.
Technical Specifications
Sting II User Guide 54
Page 56

Warranty
Electronic Security Products, Inc. (hereinafter "ESP") warrants all instruments it manufactur es
to be free from defect in materials and factory workmanship, and agrees to repair or replace
any instrument that fails to perform as specified within one year after date of shipment.
This warranty shall not apply to any instrument that has been repaired, worked on or altered
by persons unauthorized by ESP in such a manner as to injure, in our sole judgment, the
performance, stability, or reliability of the instrument; subjected to misuse, negligence or
accident; or connected, installed, adjusted, or used otherwise than in accordance with the
instructions furnished by us.
At no charge, we will repair, at our plant, or an authorized repair station, or at our option,
replace any of our products found to be defective under this Warranty.
This Warranty is in lieu of any other warranties, expressed or implied, including any implied
warranties of merchantability or fitness for a particular purpose. There are no warranties
which extend beyond the description on the face hereof, Purchaser acknowledges that no
salesman, agent, employee or other person has made any such presentations or warranties or
otherwise assumed for ESP any liability in connection with the sale of any goods to th e
purchase. Buyer hereby waives all rights Buyer may have arising out of any breach of contract
or breach of warranty on the part of ESP, to any incidental or consequential damages,
including but not limited to damages to property, damages for injury to the person, damages
for loss of use, loss of time, loss of profits or income, or loss resulting from personal injury.
The Purchaser agrees that the Purchaser is responsible for notifying any subsequent Buyer of
goods manufactured by ESP of the warranty provisions, limitations, exclusions and disclaimers
stated herein, prior to the time any such goods are purchased by such Buyer, and the
Purchaser hereby agrees to indemnify and hold ESP harmless from any claim asserted against
or liability imposed on ESP occasioned by the failure of the Purchaser to so notify such buyer.
This provision is not intended to afford subsequent Purchasers any warranties or rights not
expressly granted to such subsequent Purchasers under the law.
ESP reserves the right to make any changes in the design or construction of its instruments at
any time, without incurring any obligation to make any change whatever in uni ts pr eviously
delivered. ESP sole liabilities, and Buyer’s sole remedies, under this agreement shall be limited
to the purchase price, or at our sole discretion, to the repair or replacement of any instrument
that proves, upon examination, to be defective, when returned to our factory, transportation
prepaid by the Buyer, within the applicable period of time from the date of original shipment.
Return transportation charges of repaired or replacement instruments under warranty will be
prepaid by ESP.
ESP is solely a manufacturer and assumes no responsibility of any form for the accuracy or
adequacy of any test results, data, or conclusions which may result from the use of its
equipment.
The manner in which the equipment is employed and the use to which the data and test
results may be put are completely in the hands of th e Purchaser. ESP shall in no way be liable
for damages consequential or incidental to defects in any of its products.
This warranty constitutes the full understanding between the manufacturer and buyer, and no
terms, conditions, understanding or agreem ent purporting to modify or vary the terms hereof
shall be binding unless hereafter made i n writing and signed by an authorized official of ESP.
Technical Specifications
Sting II User Guide 55
 Loading...