

PTZ10EXT
EXTERNAL PAN, TILT AND ZOOM
DOME CAMERA
USER MANUAL
Product Overview
FEATURES
• 10x optical zoom
• IR Night vision up to 50m
• 360 degree endless pan rotation
• Auto flip function to aid tracking of subjects beneath camera
• Control protocol auto-detect
• Supports Pelco D/P, Hik and Dahua control protocols
• Supports baud rates of 2400, 4800, 9600
• 220 location presets with scan/tour facilities
• Auto patrol function can be engaged when idle
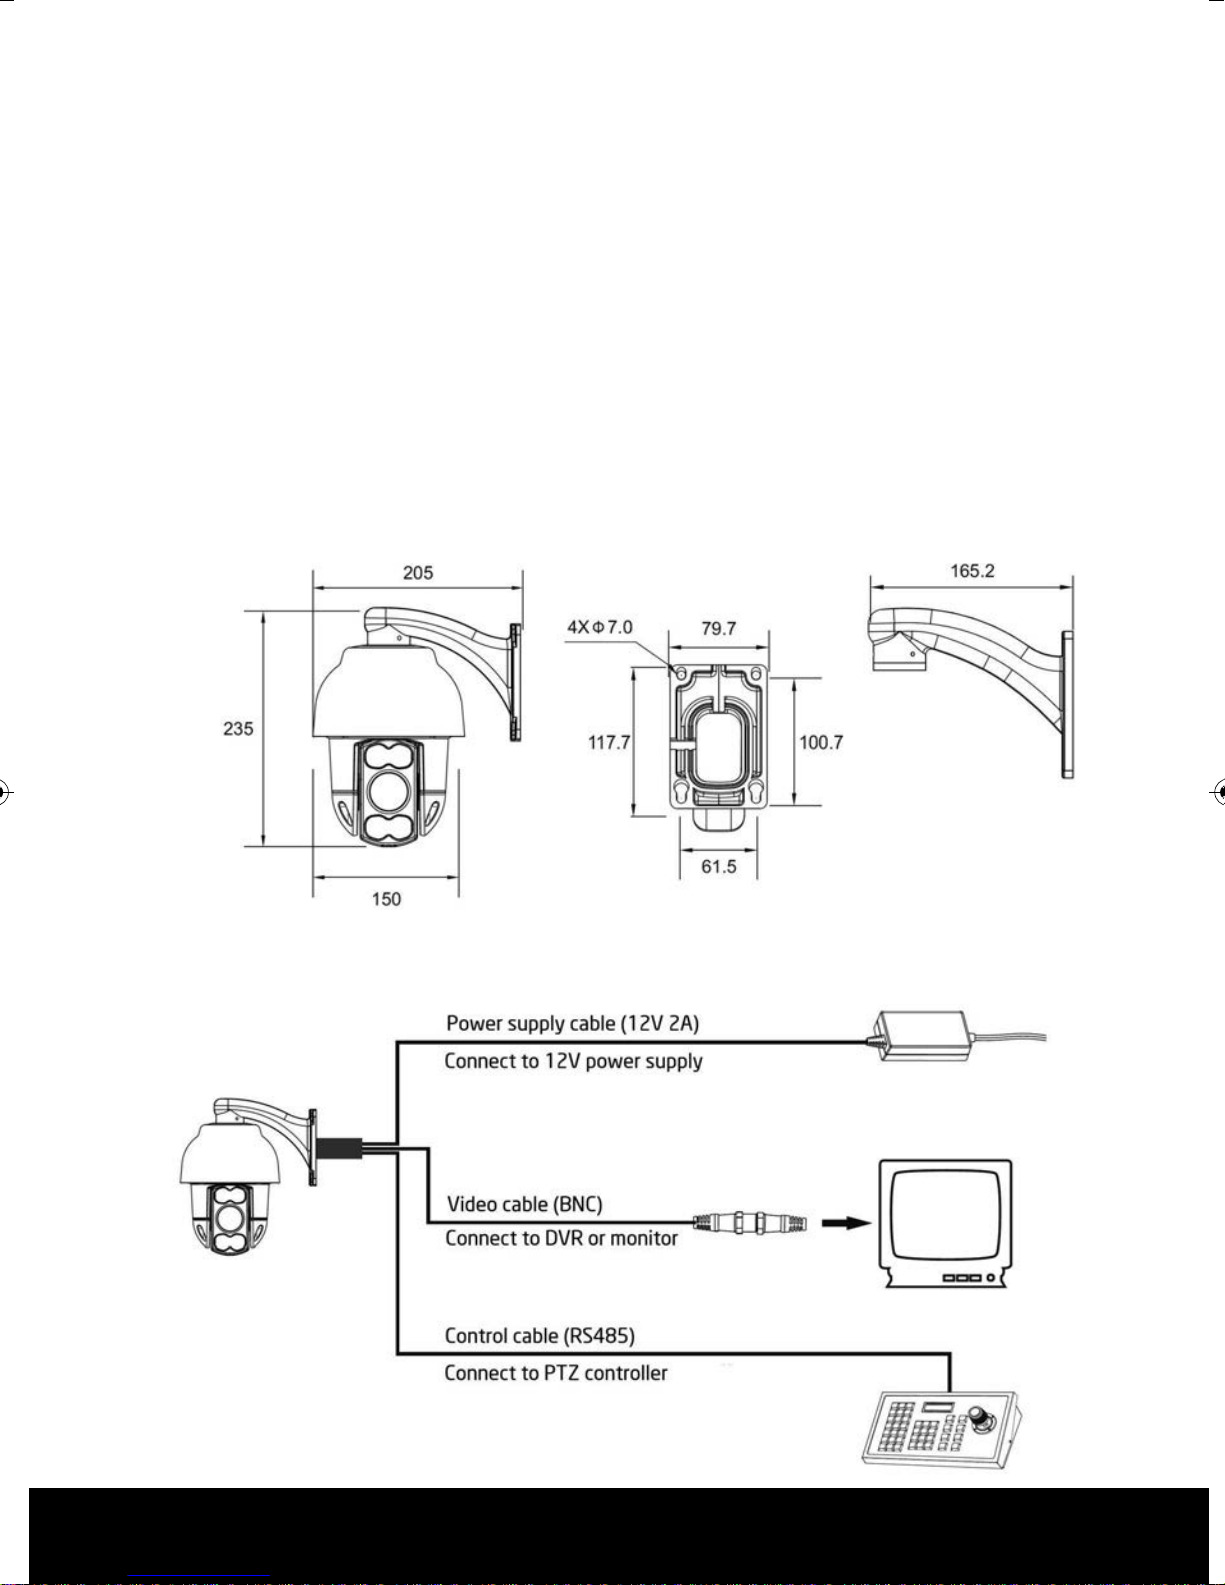
DIMENSIONS
CONNECTION OVERVIEW
(See page 6 for further wiring information)
2

Pre-Installation Guidance
SITING YOUR PTZ CAMERA
Do not install your PTZ camera in any of the following locations:
• In areas where humidity reaches >90%
• Near a boiler flue or air conditioning outlet.
• In environments high in smoke or dust.
Avoid directing the camera towards very strong light sources such as the sun. You should
also avoid high output light sources such as floodlighting. Prolonged exposure to strong
light sources damage the camera’s image sensor resulting in “bleached” colours.
ILLUMINATION
Multiple light sources from different directions will always produce better results than
relying only on the IR night vision, especially when trying to read vehicle number plates
in dark conditions.
If IR light is sourced from the same direction as the camera, it is reflected directly back at
the camera causing the number plate to appear as if illuminated/overexposed. Adequate
ambient light sourced from different directions will eliminate this. This applies to all
cameras with built-in IR.
POWER SUPPLY AND CABLING
Recommended cable types based on a standard installation (200M max cable run)
Control cable – Shielded control cable, 0.5mm (24AWG).
Video cable – RG59 <120M, CT100 or higher recommended for >120M
Power cable – Twin core minimum 0.2mm or higher
Please ensure all cabling is kept at least 300mm from main/high voltage cabling to avoid
interference.
Multiple PTZ cameras operated from the same controller must be wired in parallel in a
“daisy-chain” layout. For more information see page 6.
MAINTENANCE
Be aware that as PTZ cameras contain moving parts, they are subject to more wear and
tear than traditional fixed cameras.
Ensure that the lens is periodically cleaned as dust and dirt can cause the auto focus to
function incorrectly.
Use a damp cloth to clean the lens, do not use liquids or chemicals of any sort.
3
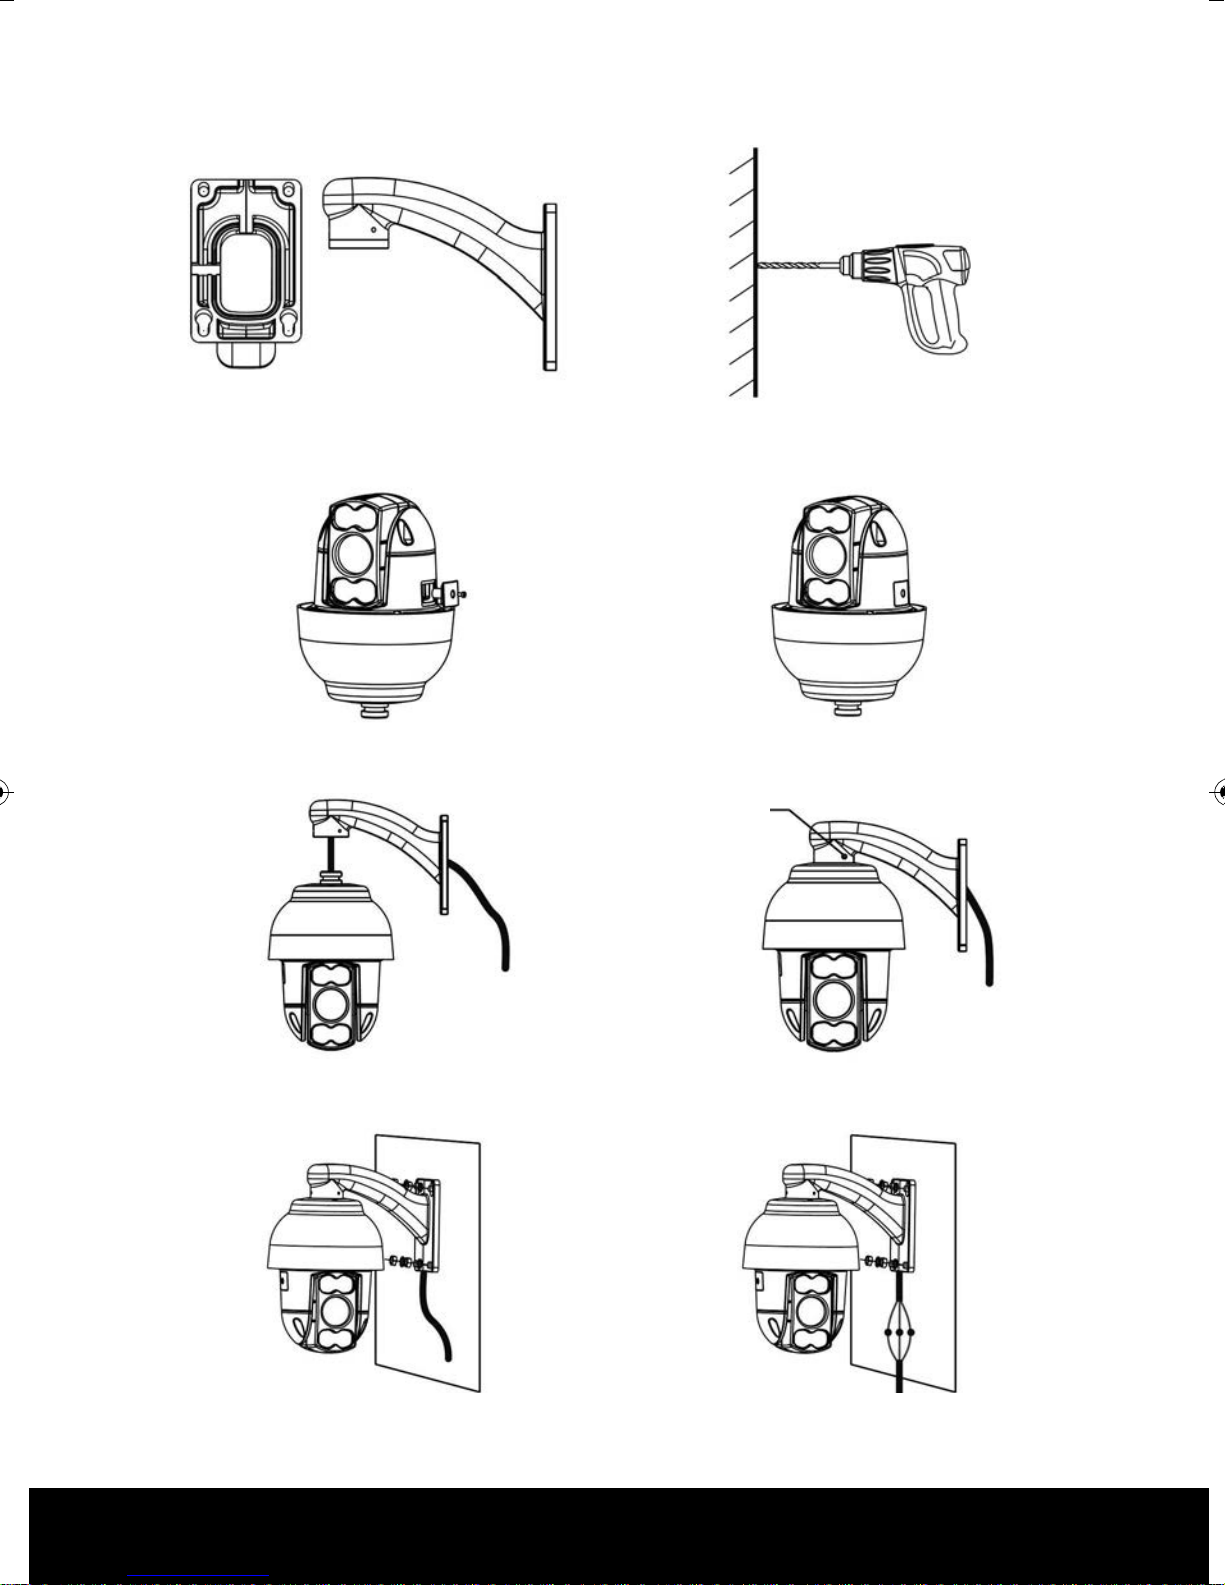
Installation
1. Mark out the holes for the 4 fixing
screws using template provided
3. Remove cover to access address/baud
rate/resistor switches (see page 5)
2. Drill holes and insert rawl plugs
4. Replace cover and screw
M4 SCREW
5. Thread cables through the bracket 6. Insert M4 screws into bracket to secure
7. Insert fixing screws and secure bracket
to wall
4
dome housing
8. Connect cables (see page 6)
 Loading...