

Page 1
REMOTE ACCESS SETUP
GUIDE
DVR4iPro - DVR8iPro
Digiview 4iPro - Digiview 8iPro
Compatible with
Windows XP, Vista, 7, 8
Page 2
STEP 1 – Connect your DVR to your network
Wired connection or wireless?
It is recommended to use a wired connection whenever possible.
Wired connections are considerably faster and are not prone to
any interference or issues with distance. Only when a wired
connection is not possible should you use wireless adapter to
connect via Wi-Fi.
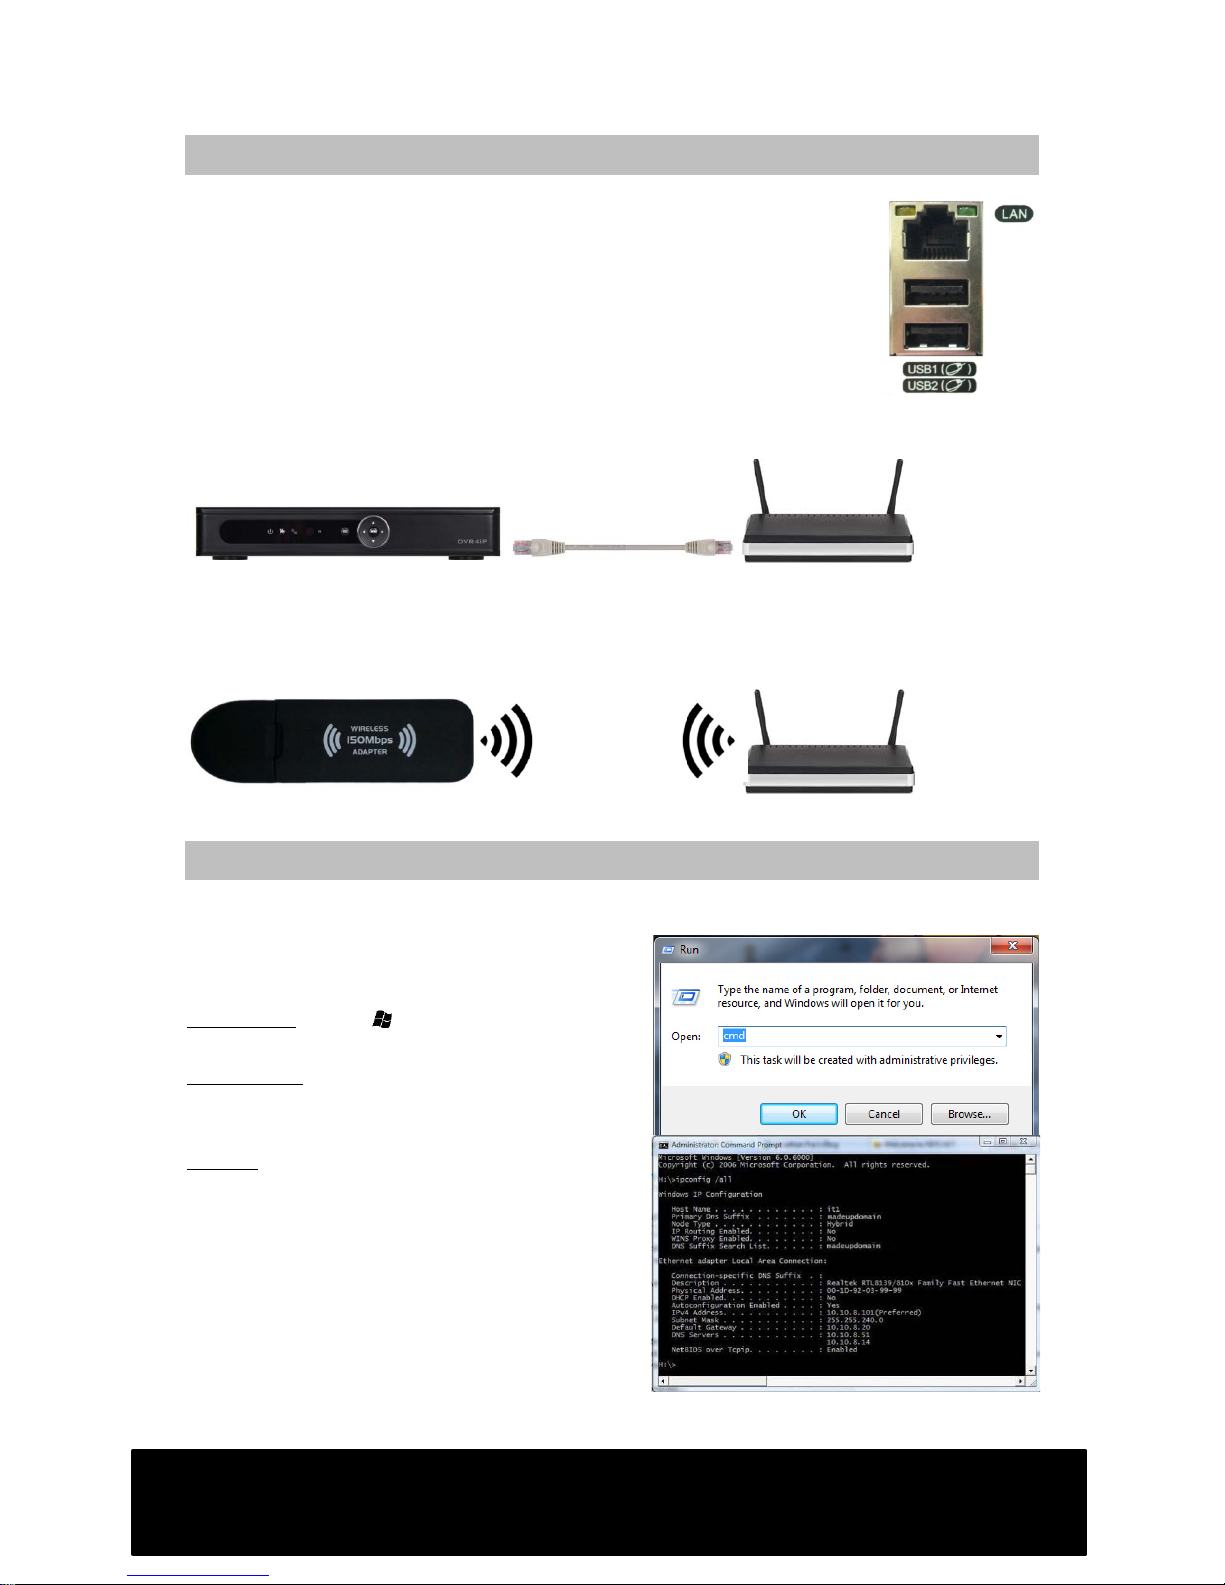
Wired connection
You will need to connect the LAN socket on your DVR to a socket on your router via
an Ethernet cable.
Wireless connection
Insert the wireless network adapter into one of the USB sockets on your DVR. Ensure
the DVR is powered down whilst this step is performed.
Proceed to step 2.
STEP 2 – Obtaining your network settings
Obtain your settings for your network either from a PC or mobile device via your Wi-Fi
by performing the following.
Retrieving settings from a Windows PC
Windows 8: Press :R on your keyboard,
type in “cmd” then press Enter.
Win 7/Vista: click on the Start Menu and
type “cmd” into the text input field then
press Enter.
Win XP:Click on the Start Menu, select
“Run”, type “cmd” and press Enter.
A new window (command prompt) will open.
Type “ipconfig /all” and press Return/Enter.
Your network info is now displayed.
Page 3
Copy down the following info:
• IP Address (IPv4 Address)
• Subnet Mask
• Default Gateway
• DNS Server(s)
Proceed to step 3.
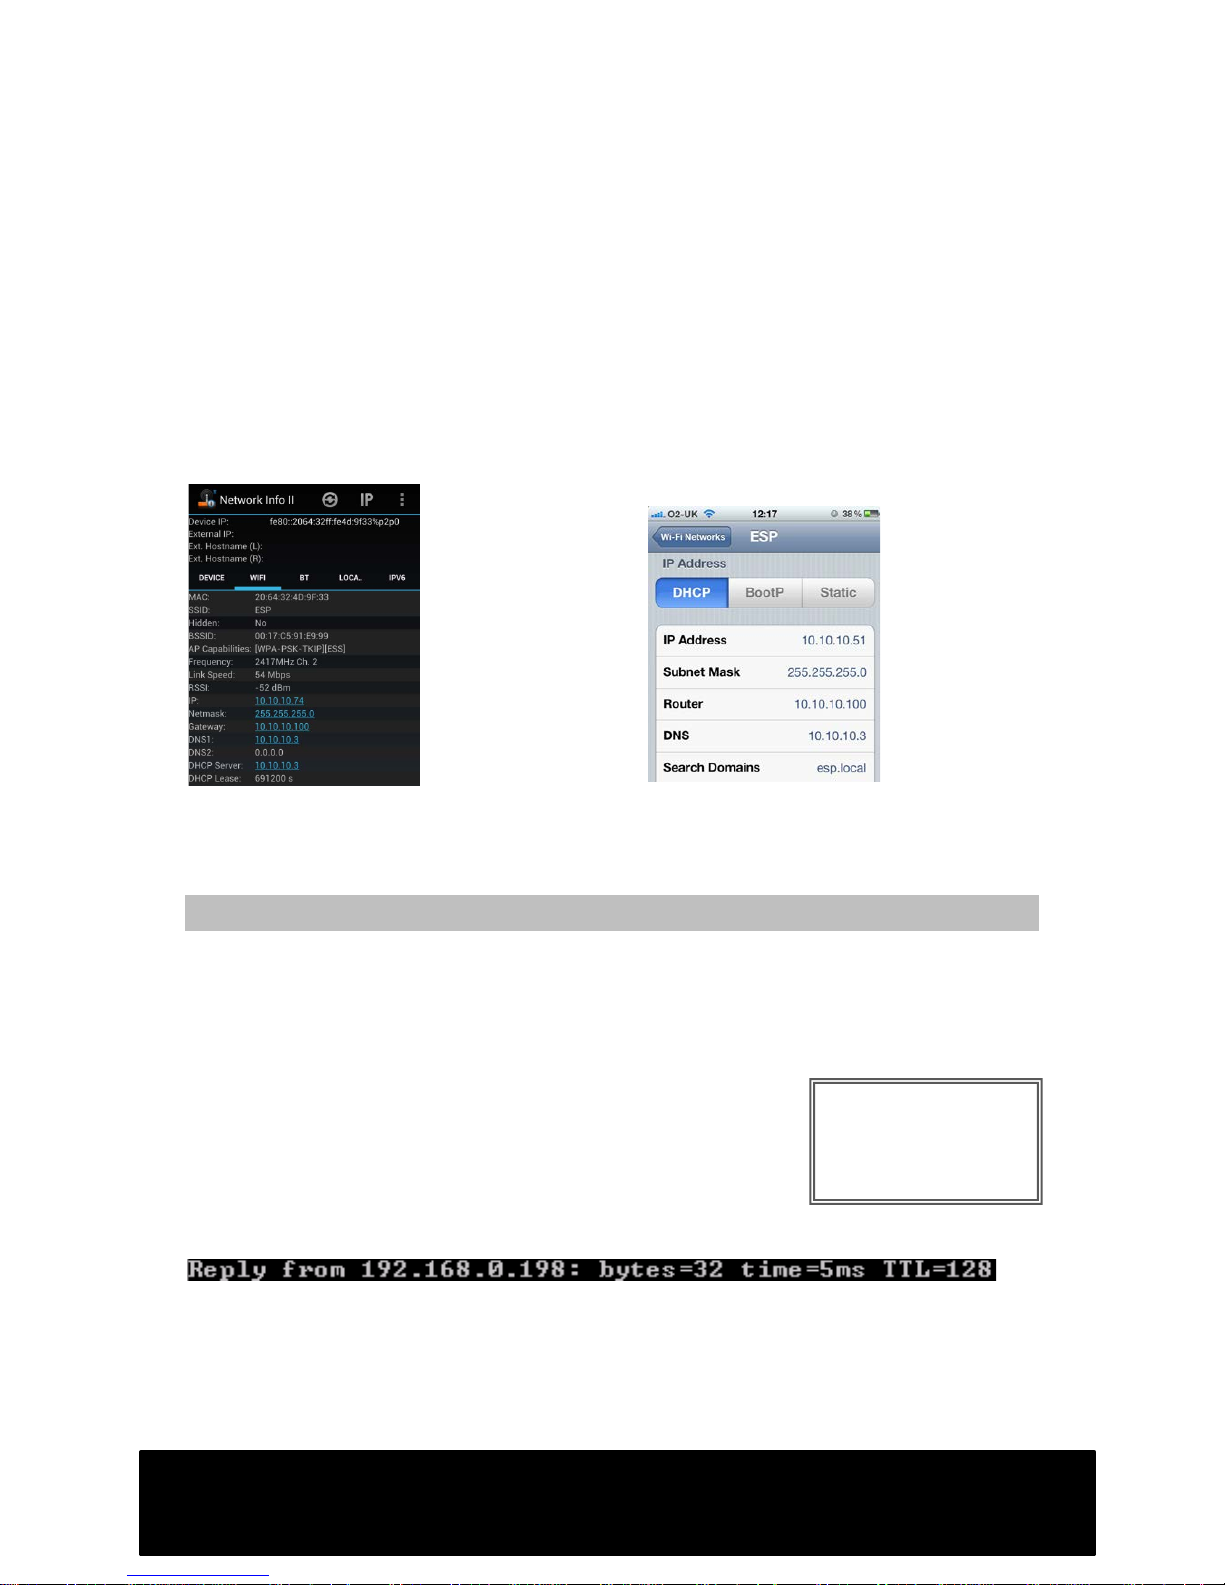
Retrieving settings from iPhone/ Android smartphones
To retrieve network configuration from a smartphone, ensure you are connected to
your Wi-Fi network.
Android
Go to Google Play Store, download free
app“Network Info II”
Select “Wi-Fi” to view your settings.
iPhone
Go to Settings-:Wi-Fi
Select the Wi-Fi network you are currently
connected to.
Note: Gateway = Router
Proceed to step 3.
STEP 3 – Choosing an IP address for your DVR
The IP address allocated to your DVR must be unique within your network. Use an
address similar to the other devices on your network. On each device, the first three
numbers must be the same. Only change the fourth numbers. Be aware that devices
with identical IP addresses will malfunction.
1. Open the Command Prompt (see previous step)
2. Type “ping 192.168.X.XXX” (replace X with desired IP
address)
If a device is already using this address, you will see a reply
from that address which will look similar to this:
If this address is not being used, you will see either “Destination host unreachable” or
“Request timed out”. If either message is displayed, you may allocate this IP address
to your DVR.
Proceed to step 4.
Example IP addresses
Router 192.168.0.1
iPhone 192.168.0.17
PC 192.168.0.65
DVR 192.168.0.198
Page 4

STEP 4 – Applying your network settings
1. Access your network settings page on your DVR.
2. Enter your chosen IP address, then add your subnest mask, default gateway
and DNS server addresses. (NB secondary DNS:8.8.8.8)
3. Set HTTP Port to 5000, set media port to 5001. Click “OK” and restart the DVR
when prompted.
4. Access network settings page, select “NetService”
5. Double-click on Mobile Monitor. Enable and set port to 5002. When complete,
click “OK” and restart the DVR when prompted.
Additional steps required for connection via Wi-Fi adapter
Ensure you connect your wireless adapter before turning the DVR on.
1. On your DVR, access MAIN MENU -: NETWORK -: NETSERVICE
2. Click on “Enable” followed by the “Search” button. Your Wi-Fi network should
appear in the list.
3. Click on your chosen Wi-Fi network, then enter your Wi-Fi network password.
4. Enter IP Address, Subnet Mask and Gateway as shown on the previous page.
Click “OK”.
How to access your DVR remotely
iPhone
1. Install the app MEyePro (V5) to your iPhone then launch the app.
2. Add a new device to the device list by pressing : as indicated by arrow (A)
3. Populate fields with DVR device details as follows:(B)
• Name – Your reference, can be anything
• Address – the IP address of your DVR
• Port – Mobile monitor port (see step 4)
• User ID/Name – Default:admin
• Password – your DVR login password – default: no password
4. Select save, press back, then select your device to show the cameras (C)
Page 5

iPhone
(A) (B) (C)
Android
1. Install MEyePro via Google Play store
2. Follow instructions for iPhone.
(A) (B)
Page 6

Accessing your CCTV on a Windows PC
(compatible with Internet Explorer only)
1. Insert the supplied CD into your CD/DVD-ROM drive and install all software on
the CD.
2. Open Internet Explorer, from the “Tools” menu select “Internet Options”.
Choose the “Security” tab from the top of the new window, then click the
“Custom Level” button.
3. Change any options regarding ActiveX to either “Prompt” or “Enable” then
click “OK.”
4. Disable/de-select ActiveX Filtering from the “Tools” menu as shown above.
5. (For versions of Internet Explorer 9 and above). From the “Tools” menu, select
“Compatibility view settings” then add the DVR’s IP address to the list. Close
the window when complete.
6. Enter your DVR IP into the Address Bar. Add a
colon and your http port number (shown in red
above) this will connect to the DVR login
screen. If the “User Name/Password/Login”
text is not displayed then recheck steps 1 to 4
- something has been missed out.
7. Add a bookmark for the page for easy access
in the future.
Page 7

8. To access from outside the building via Broadband or 3G/4G, use your public IP
address. To find this go to www.whatismyip.com.
You must also program your router to forward ports 5000-5002 to your
DVR’s local IP address. Contact your Internet Service Provider for support on
port forwarding or visit http://www.portforward.com for further guidance.
Tip?
Always run first connection attempt from a pc (or mobile) on the same local network
as the dvr, using the local or “private” ip address.
Do not use the your public ip address until you are sure that a direct connection can
be established.
?”What if i do not have a static ip address?”
If you do not have a static (fixed) IP then your dynamic IP will change periodically.
This makes it impossible to connect to your DVR as you will not know what it will
change to.
If your Internet Service Provider cannot supply you with a fixed IP address you can
sign up with DYNDNS.com who will supply you with a domain name to use in place of
your dynamic IP address. See Appendix A.
Appendix A: Setting up DDNS
You will need to set up an account at www.dyndns.com
The option shown here is the type of account you will need to
sign up for. This is likely to be far lower in cost than being
provided with a fixed IP by your Internet Service Provider.
Once signed up, select “My Services” from the menu on the left
then add a new host, shown below.
Page 8

You will need to create your own host domain name as shown. Your service type will
be Host with IP address. You must then enter your public IP- simply click on “Your
current location’s IP address….”
There is no requirement to select the Mail Routing or Wildcard options.
Once you have created your host domain name, you will need to enter your
DYNDNS.com account details into the DDNS menu which can be found in main Menu-:
Network -: NetService.
Once these details are correctly entered, go to Log Out -: Reboot to restart the DVR.
To access your CCTV images, simply use your domain name in place of your IP
address.
Be aware that your DVR will periodically update DYNDNS.com with your current IP
address, so if you cannot connect immediately, allow enough time for the DDNS
settings to update and take effect, this can take a few minutes.
Page 9

TROUBLESHOOTING GUIDE
Connection works over local Wi-Fi or wired
network but will not work over 3G or broadband in
another location
Check port forwarding within router.
Ensure ports are forwarded to DVR IP, not
public IP
Connection over local (wired) network fails
Check network cable, check the
corresponding light on the router is on or
flickering. Double-check your DVR network
configuration matches existing network
settings (see step 2)
Connection to DVR is successful but cannot login
via Internet Explorer. No text displayed on login
button or next to username/password input fields
on the login screen.
Active-X settings in Internet Explorer are
not correct (page 6)
Login successful but video is not displayed. Mobile
app shows “buffering” but fails to display images.
Ensure indicated options are selected (Fig.
1) and check Active-X settings within
Internet Explorer (page 6). Check DNS
servers are correct in network settings.
Images will not display in Firefox/ Google
Chrome/Safari
DVR is compatible with Internet Explorer
only.
Connection to DVR successful but login screen will
not load. Message is displayed in center of screen:
“Please install IE Active-X IE_Plugins.exe from CD
or download from Internet”
Install Active-X plugin from CD.
Select Tools -> Compatibility Mode within
Internet Explorer if using Windows 8.
Fig. 1
 Loading...