

Page 1
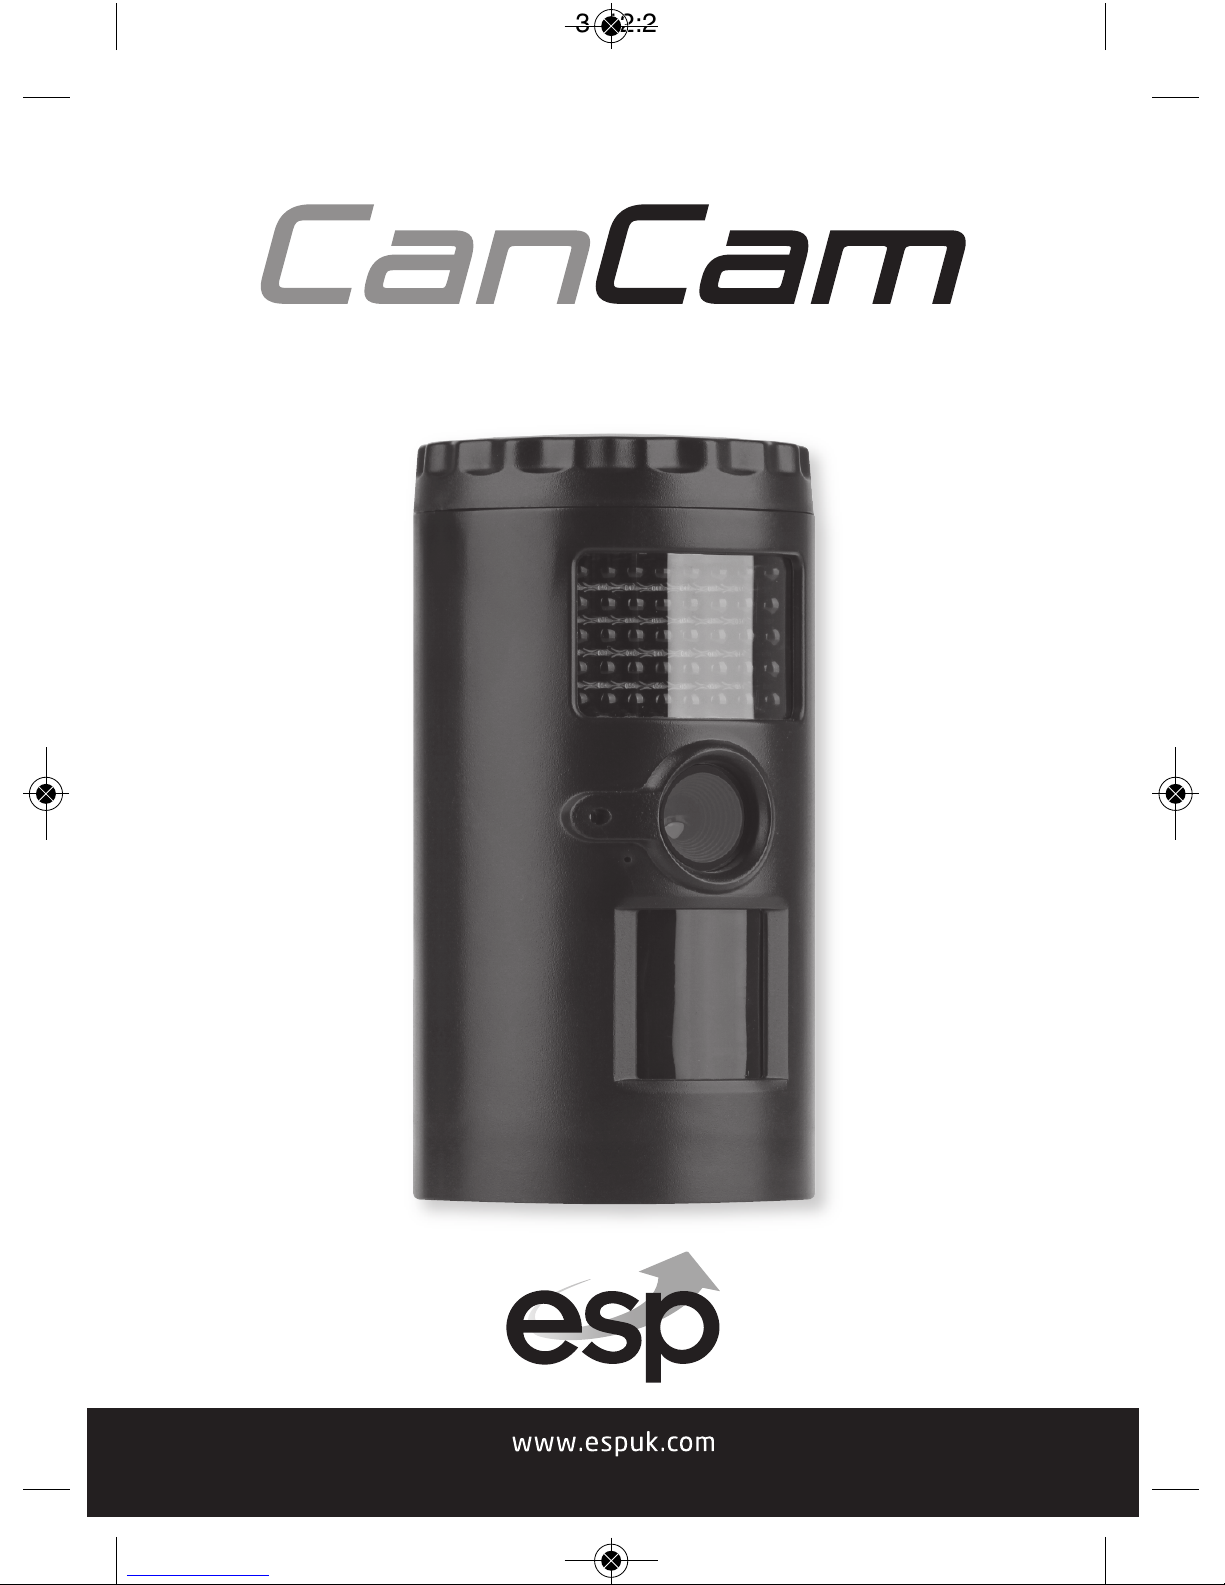
Rapid deployment surveillance system
CanCam Manual_Layout 5 05/09/2013 12:21 Page 1
Page 2

2
Table of contents
Camera Kit Contents ................................................................................. 2
System Requirements and Compatibility .............................................. 3
General Information.................................................................................. 3
Battery Life ................................................................................................ 3
Quick Start Guide....................................................................................... 4
Camera Overview ..................................................................................... 5
Installation ................................................................................................. 8
Battery and Memory Installation ........................................................... 9
Viewing and Deleting Files.................................................................... 10
Advanced Instructions / Camera Setup and Programming............... 12
CanCam Features and Specification..................................................... 19
Camera Kit Contents
CanCam•
Instruction Manual•
Strap•
USB Cable•
AV Cable•
Wall Bracket and Screws•
SD Card •
Mains Adaptor•
4 x C Cell Batteries (Installed)•
CanCam Manual_Layout 5 05/09/2013 12:21 Page 2
Page 3

3
System Requirements and Compatibility
Windows XP/Vista/Windows 7 and MAC 10.6 or above•
Pentium 4, 2GHz or above•
1GB RAM (2GB recommended)•
32 bit colour, Resolution 800x600 or above w/ 256MB•
2GB free hard disc space•
USB 1.1 port (USB 2.0 recommended)•
Direct X 9.0 or above•
NOTE: If there any questions regarding PC specifications please contact the•
PC’s manufacturer.
General Information
Care instructions
The camera is designed to be weather proof however never attempt to•
immerse the unit in water or any other type of liquid. This will damage the unit
and void the warranty.
Do not attempt to enter the internal workings of CanCam as this could cause•
serious damage and invalidate the warranty.
Storage and operating environment : -10 to 40 °C•
Take the batteries out when the camera is not in use over extended periods of•
time.
Do not mix new and old batteries.•
Battery Life
Potential operational battery life
Max Number of Triggers/Hour 6 10 20 30
Sleep mode setting 10mins 6mins 3mins 2mins
Day Video (30s) max days 17 13 95
Night Video (30s) max days 9643
Day Still - 3 shot burst max days 38 28 21 16
Night Still - 3 shot burst max days 36 26 20 14
Day Still - 9 shot burst max days 21 15 95
Night Still - 9 shot burst max days 20 14 85
CanCam Manual_Layout 5 05/09/2013 12:21 Page 3
Page 4

4
Quick Start Guide
This guide is designed to get the camera up and running in a matter of moments.
To get the most out of the CanCam and obtain a full understanding of its wide
range of options, please read the manual thoroughly before operating.
Quick Start-up:
Pull battery tab to activate batteries / Install 4 “C” cell batteries in correct•
polarity (+/-) as indicated in the battery compartment.
Insert SD card into the camera.•
Turn switch to CAM to adjust the Time and Date.•
The internal LCD screen displays T blinking.•
Press the [OK] button to start the Time settings.•
Press the [UP] or [DN] button to adjust the Minute setting and press [OK] to•
confirm and move to the Hour setting.
Repeat to set the Hour and then press [OK] to confirm and move to Date.•
Adjust the Month, Day, and Year by using [UP] or [DN] button. Each time you•
finish an adjustment you MUST press the [OK] button to confirm and move to
the next field for adjustment.
Once done, the word - dEL - will be blinking, this stands for Delete menu and•
will allow you to format your SD Card. (This will delete ALL images). Press the
[M] button to exit.
Select PSET (or CAM to input customised settings, see advanced programming)•
PSET This bypasses all user defined settings and uses the following
settings:
(PIR mode / Resolution: 3MP / Burst: 3P / Time out: 30 seconds)
P-SET Factory Default Settings:
Time Out: 30 Sec
Burst Mode: 3 Still Image
Resolution: 3M
Operation Mode: PIR
Video Mode: 10 Seconds (VGA Resolution)
Time lapse setting: 19:00-07:00 (Next day)
CanCam Manual_Layout 5 05/09/2013 12:21 Page 4
Page 5
5
Camera Overview
Front View
Batteries Cover : Turn to open1
the cover to install the
batteries. To replace cover line
up the arrows on the cover and
main body of CanCam, open
then press down and rotate the
cover in a clockwise direction.
Infrared LED : Allows stills /2
video to be taken at night time.
Camera Lens.3
Test Laser Beam : Shows the4
direction that the camera is
pointing in. Important note:
Avoid looking directly into the
laser beam.
Microphone.5
Passive Infrared Sensor.6
Bottom Cover : Turn to open the7
cover to access camera settings.
Back View
Tripod Nut : Enables wall8
mount attachment .
Strap Holes : Facilitates the9
mounting strap.
1
2
3
6
7
8
99
4
5
CanCam Manual_Layout 5 05/09/2013 12:21 Page 5
Page 6
6
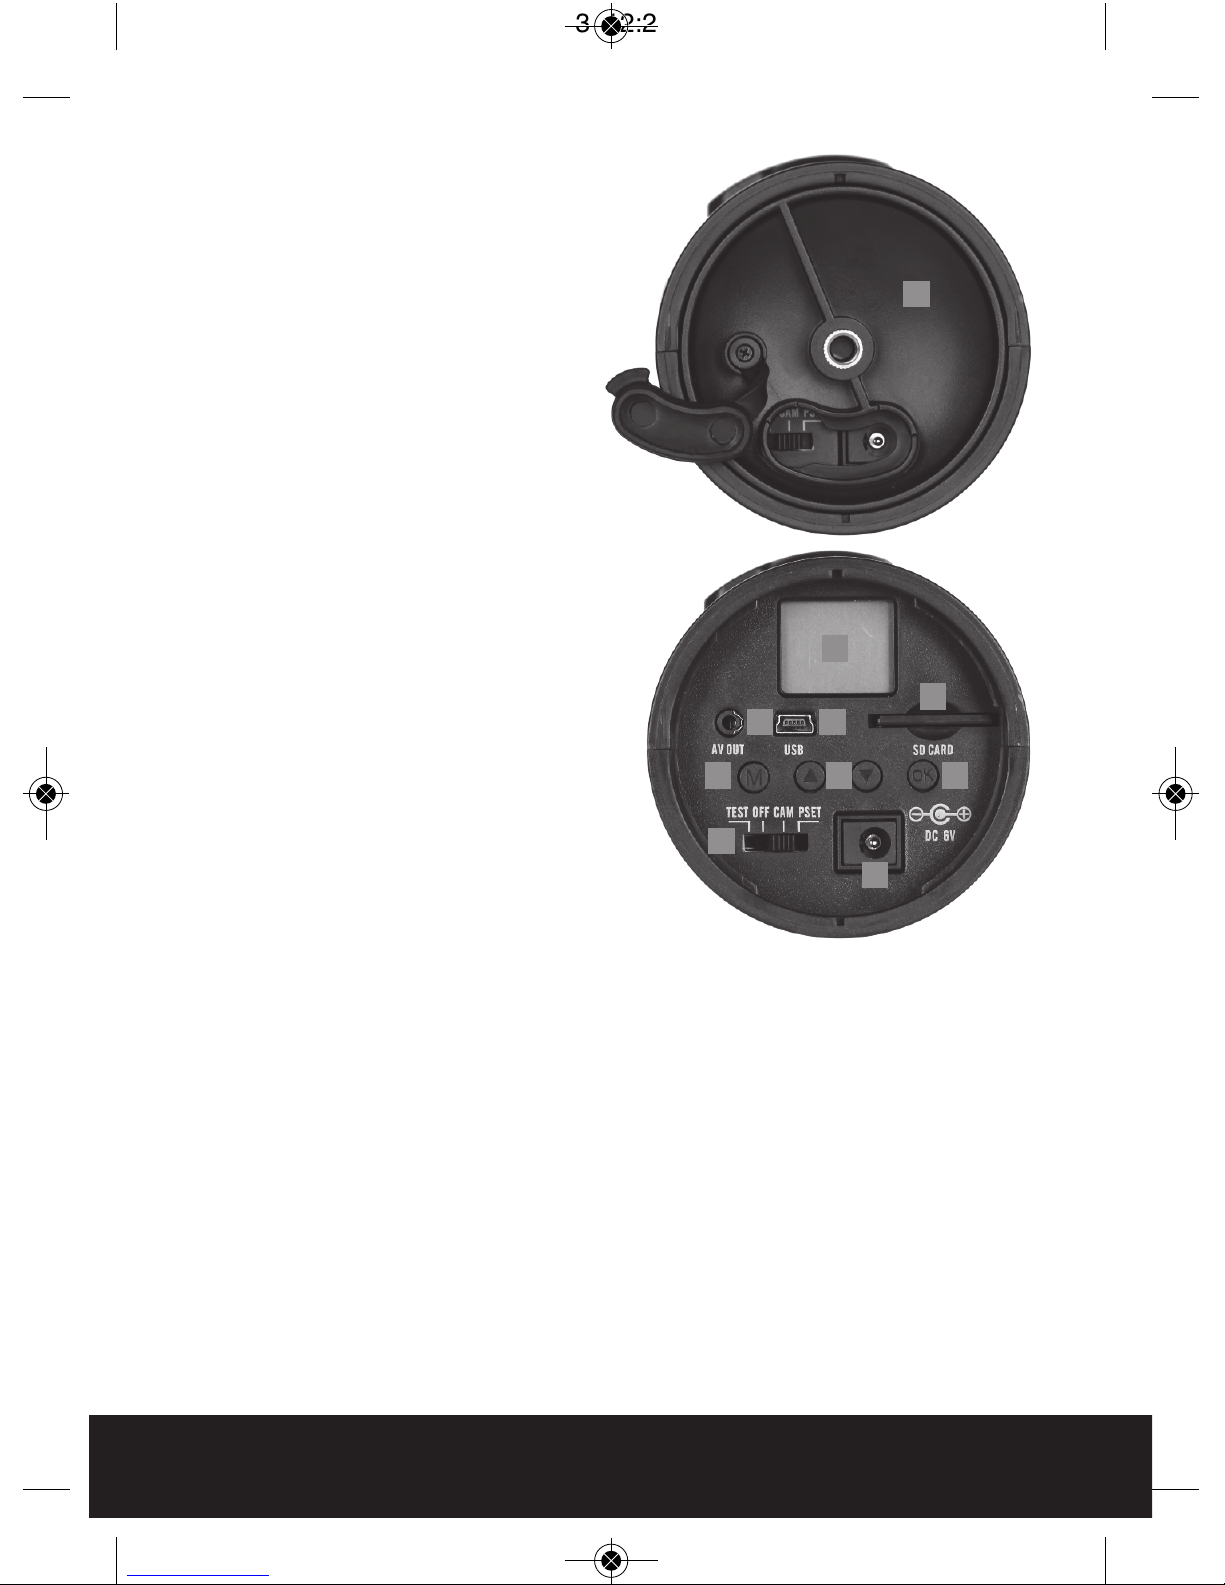
Bottom view
Open the Bottom Cover to show1
camera’s interface.
LCD display : displays the menu’s2
option and modes.
USB port : Connects the camera to3
a PC via USB cable to view stills or
video clips.
AV out : Connects camera to4
monitor on TV to view stills or
video clips.
Menu Button : Changes mode or5
setting in the menu.
Up and Down Button : Enables6
mode selection and adjustments to
the settings.
Switch : Select camera mode: 7
Turn on/Turn off /Test mode/Preset
Mode.
SD Card Slot : Compartment for SD8
card.
Confirm Button : Confirms the9
selection made.
DC 6V port : Connection for DC 6V10
external power adaptor.
NB Only use supplied power adaptor
to avoid damage to CanCam.
1
2
34
5 6 9
7
10
8
CanCam Manual_Layout 5 05/09/2013 12:22 Page 6
Page 7

7
Full (I
c
o
n o
n) Ha
lf
(I
c
o
n blinking) Lo
w (I
c
o
n of
f
)
W
he
n ba
tte
rie
s
a
r
e
lo
w,
the
L
C
D
dis
play s
ho
ws
bA
tLo
.
Ple
a
s
e
r
e
pla
c
e
with new
•
ba
tte
rie
s
.
Indicates the still image/video resolutions.
•
Image
r
esolution i
s 8M
p. •
Image resolution
is 5
M
p or
video resolution i
s H
D 72
0P.
•
Image resolution is 3Mp or video resolution is V
GA
•
D :
Indica
tes th
e camera is in
date setting.
•
T
: In
dica
tes th
e camera is in
time settin
g.
•
T-O
: In
dica
tes th
e camera is in
time ou
t settin
g.
•
PIR
: In
dica
tes th
e camera is in
PIR detection
M
ode.
•
T
LS : In
dica
tes th
e camera is in
Time
Lapse
M
ode.
•
: In
dicates
th
e da
te/time/ti
me ou
t value
during
setting or captured
•
image/v
ideo qu
ality.
Th
e
date an
d ti
me
wi
ll
vi
sible on
the still image and video
LCD Display
CAM : Indicates the camera is in still •
image mode.
VIDEO : Indicates the camera is in •
video mode.
: Indicates the camera is in burst •
mode or video length mode.
: Indicates the battery status. •
CanCam Manual_Layout 5 05/09/2013 12:22 Page 7
Page 8

8
Installation
Listed below are some helpful pointers on how to use your camera to get the best results.
Mount the camera between 1.5~2M (5~6 feet) high with the camera pointed at a•
slight downward angle.
Clear away any objects such as grass, leafs or weeds etc. from in front of the•
camera. This will cause false pictures caused by wind or during high temperatures.
Double check the battery polarity before turning the camera on.•
Make sure to insert the SD card after setting up the camera.•
Make sure to turn the camera to CAM or PSET mode (or take out of Test Mode)•
before you leave.
Verify time and date is correct.•
STRAP MOUNTING WALL MOUNTING
EFFECTIVE RANGE EFFECTIVE ANGLE
CanCam Manual_Layout 5 05/09/2013 12:22 Page 8
Page 9

9
Battery and Memory Installation
WARNING : Do not use different Voltage batteries other than the one specified in this•
section. Doing so will damage the camera and will void the warranty.
WARNING : ALWAYS have the camera in the OFF position when installing or removing•
batteries and SD card. Removing batteries or memory card while the camera is ON
may damage the camera.
Your CanCam is designed to operate using two different types of battery power options.
Batteries “C” cell
The internal battery compartment accepts 4 “C” cell batteries. Be sure to use high
quality brand name alkaline batteries. Install batteries with correct polarity (+/-) as
noted inside the battery compartment.
DC 6V external power
The camera is equipped with an external power jack designed to accept a barrel plug
cable of the DC 6V adaptor.
Make sure the camera is in the OFF position.•
Insert the external AC to DC power adaptor barrel plug into the DC 6V jack on the•
bottom of camera housing.
Turn the switch to CAM or PSET.•
Memory Options
The camera is equipped with an expandable media card slot capable of accepting up to
32GB SD card with Class 6 or below speed rating. The LCD display will show the number
of images stored on the SD card. If no SD card is inserted the front counter display will
show “NOSd”.
Once memory capacity is up to full, the camera will re-loop the memory to keep the
last image and delete the first image from the memory.
Inserting SD memory card
NOTE: Make sure camera is in the OFF position whenever adding or removing the
SD card.
Insert the SD card into the SD card slot completely and in the correct direction as•
shown by the sticker located on the side of the housing.
To remove the SD card, depress the SD card and pull out the card gently.•
SD cards must be formatted. Make sure to format the SD card in a computer prior to•
use in the camera.
FORMAT – Definition : When formatting a SD memory card, the operating system erases
all information and files on the card. Then it creates an internal address table that is
later used to locate information and files.
DO NOT USE File System type: “NTFS” or “exFAT”, these formats are not supported.
CanCam Manual_Layout 5 05/09/2013 12:22 Page 9
Page 10

10
Viewing and Deleting Files
The CanCam offers the user different options for viewing images. You can view
images or videos through your computer or home TV that is equipped with an RCA
Inputs.
The LCD display on bottom of the housing will show the number of stills stored on
the SD card.
Viewing files by computer
Your CanCam is a plug and play USB storage device for users of Windows XP /
Vista / Windows 7 operating systems. This camera is compatible with MAC 10.6
and above.
Viewing files on your computer via USB connection.
Make sure the camera’s power switch is in the OFF position.•
Plug the larger end of the USB cable into an available USB port on the computer.•
Plug the smaller end of USB cable into the camera’s side panel. •
The camera will automatically power ON and will display the word USb on the•
LCD screen.
At the same time the computer will recognize the camera as a Removable•
Storage device. It can be found under MY COMPUTER.
Mini 5P type B type
PC with USB portCanCam
CanCam Manual_Layout 5 05/09/2013 12:22 Page 10
Page 11

11
At this point there are several options:•
– To view images or play videos: Click on the Removable Storage device and
then select the file you want to see.
– To save images and videos: Highlight the file or files you want to save and
drag them to your hard drive.
– To delete images and videos: Highlight the files or files you want to delete
and press the [DELETE] button.
– To erase all files and reformat the SD card: Right click on the Removable
Storage device under My Computer and select FORMAT then click START. A
Warning message will appear, press [OK]. Then CLOSE to exit.
– NOTE: Before you FORMAT, make sure you are certain it is the Removable
Storage icon for the camera is selected, and not any other device associated
with your computer.
Once complete, simply unplug the cable from both the computer and the•
camera. The camera will turn OFF automatically.
For Viewing on Your home TV:
Attach the provided TV out cable to the TV port on the bottom of the camera•
and insert the other end into the RCA VIDEO IN jacks on the TV.
Turn on both the camera and TV.•
Make sure to switch to AUX / VIDEO IN mode on the TV. •
– (See TV owner’s manual for operations).
– If the TV monitor flickers, then you will need to proceed to the next step ‘TV
Out System Settings” to change your camera’s TV OUT from NTSC to PAL .
A series of stills will be visible on the TV. •
Press the [UP] or [DN] button to navigate through your thumbnail images.•
On the upper left hand corner of the TV monitor, it will either display•
the still OR the image with a video icon which indicates it’s a video clip.
To view in full screen, press the [OK] button. •
Press the [OK] button again, it will return to the thumbnail view from the full•
screen image.
NOTE: All videos are recorded with audio, but only have sound when viewing
playback on a PC.
CanCam Manual_Layout 5 05/09/2013 12:22 Page 11
Page 12

12
TV Out System Settings:
Press the [M] button once. •
The word “ tu ” on the camera’s internal screen will be blinking. •
Press the [OK] once and now you’ll see “ tu – n “ blinking.•
Press the [DN] button to set the camera’s TV OUT to PAL.•
The word “ tu – P ” will now be blinking. •
Press the [OK] to confirm this setting.•
The word “ tu - P “ will be blinking and then stops. •
Once the blinking stops, power off the camera. Wait for 5 seconds and then•
power up your camera again.
Advanced Instructions
There are 2 ways the camera can be programmed;
1. The camera unit can be programmed by using the pre-set mode:
PSET - This bypasses all user defined settings and uses the following
settings: (PIR mode / Resolution: 3MP / Burst: 3P / Time out: 30 seconds).
2. A fully user defined setting selection, which continues on the rest of the
manual’s pages.
CAM - This allows the user to define what setting the camera will use.
Camera Setup and Programming
When the camera switch is first turned to the CAM location, the internal LCD display
shows the camera status. The following information is present on this screen.
If no buttons are pressed after 30 seconds the LCD display will go into sleep mode
and the LCD display will switch to show the capture quality and enter a 1-minute
count down for the user to leave the capture area. The camera will then enter the
PIR detection mode or the Time lapse mode. To wake up the camera: press the UP
or DOWN button once, the LCD display will show the status of the camera.
Passive Infrared Mode Time-Lapse / PIR Mode
CanCam Manual_Layout 5 05/09/2013 12:22 Page 12
Page 13

13
Program CanCam using CAM mode
Setting the CAM Operation Mode:
The CanCam can be programmed to operation either in PIR Detection mode or
Time Lapse / PIR mode.
Slide the switch to the CAM position. •
LCD display will show the camera status screen. •
Press the [M] button once within 30 seconds to enter the programming mode,•
the word PIR or TLS will be blinking.
Press the [UP] or [DN] button to select PIR mode.•
Press [OK] to save your selection.•
Press [M] button to exit.•
Setting the Image Resolution in PIR mode:
The CanCam can be programmed to 3 different image resolutions: 3 Stars is 8Mp,
2 Stars is 5Mp and 1 Star is 3Mp.
Slide the switch to the CAM position, LCD display will show the camera status•
screen.
Press the [M] button once within 30 seconds to enter the programming mode.•
The word PIR will be blinking, press [OK] to confirm the camera’s operation is•
PIR detection.
Press [UP] or [DN] button until the word CAM is blinking.•
Press the [OK] button ONCE to confirm the camera into CAM mode, the STARTS•
will be blinking.
Press the [UP] or [DN] button to select the desired resolution.•
Press [OK] to save your selection, then current number of burst shoot will•
blinking. Press [OK] to enter the burst shoot setting or press [M] button to exit.
Setting the Image burst shoot in PIR mode:
The CanCam can be programmed to shoot 1-9 pictures per triggering.
Slide the switch to the CAM position, LCD display will show the camera status•
screen.
Press the [M] button once within 30 seconds to enter the programming mode.•
The word PIR will be blinking, press [OK] to confirm the camera’s operation is•
PIR detection.
Press [UP] or [DN] button until the word CAM is blinking.•
Press [OK] button ONCE to confirm camera into CAM mode. •
Press [UP] button ONCE to enter burst shoot setting, the current number of•
burst shoot will blink.
CanCam Manual_Layout 5 05/09/2013 12:22 Page 13
Page 14

14
Press [OK] then press the [UP] or [DN] button to select the desired burst mode•
setting or number of pictures per triggering.
Press [OK] to save your selection, then the time out T-O will blinking. Press•
[OK] button to enter time out setting or press [M] button to exit.
Setting the Video Resolution in PIR mode:
The CanCam can be programmed to 2 different video resolutions: 2 Stars is HD
720, 1 Star is VGA 640 x 480 pixels.
Slide the switch to the CAM position, LCD display will show the camera status•
screen.
Press the [M] button once within 30 seconds to enter the programming mode.•
The word PIR will be blinking, press [OK] to confirm the camera’s operation is•
PIR detection.
Press [UP] or [DN] button until the word VIDEO is blinking.•
Press the [OK] button ONCE to confirm the camera in VIDEO mode, the STARS•
will be blinking.
Press the [UP] or [DN] button to select the desired resolution.•
Press [OK] to save your selection, then current number of video length will•
blinking. Press [OK] button to enter video length setting or press [M] to exit.
Setting the Video length in PIR mode:
TheCanCam can be programmed to record 5-300 seconds of video per triggering.
The Video mode is only workable under PIR mode.
Slide the switch to the CAM position, LCD display will show the camera status•
screen.
Press the [M] button once within 30 seconds to enter the programming mode.•
The word PIR will be blinking, press [OK] to confirm the camera’s operation is•
PIR detection.
Press [UP] or [DN] button until the word VIDEO is blinking. •
Press the [OK] button ONCE to confirm the camera in VIDEO mode.•
Press [UP] button ONCE and the video length in seconds will be blinking.•
Press [UP] or [DN] button to select the desired video length from 5 to 300•
seconds in 5-second increments.
Press [OK] to save your selection then the time out T-O will blinking. Press [OK]•
button to enter time out setting or press [M] button to exit.
CanCam Manual_Layout 5 05/09/2013 12:22 Page 14
Page 15

15
Setting the Time Out in PIR mode:
The CanCam can be programmed to set the amount of time in seconds or minutes
the camera will sleep between PIR triggers.
Slide the switch to the CAM position, LCD display will show the camera status•
screen.
Press the [M] button once within 30 seconds to enter the programming mode.•
The word PIR will be blinking, press [OK] to confirm the camera’s operation is•
PIR detection.
Press [UP] or [DN] button until the word T-O (Time Out) is blinking.•
Press [OK] button and the MINUTES digits will be blinking. •
Press [UP] or [DN] button to increase or decrease the time value in minutes•
from 00 to 10 minutes in 1-minute increments.
Press [OK] to save the minute setting and the SECONDS digits will be blinking.•
Press [UP] or [DN] button to increase or decrease the time value in seconds•
from 01 to 55 seconds in 5-second increments.
Press [OK] to save the second setting.•
The letter T (Time) will be blinking. Press [OK] button to enter time setting or•
press [M] button to exit.
Setting the Time and Date in PIR operation mode:
The CanCam uses the 24hr time format.
Slide the switch to the CAM position, LCD display will show the camera status•
screen.
Press the [M] button once within 30 seconds to enter the programming mode.•
The word PIR will be blinking, press [OK] to confirm the camera’s operation is•
PIR detection.
Press [UP] or [DN] button until the letter T is blinking.•
Press [OK] to enter Minute setting first.•
The MINUTE digits will be blinking. •
Press [UP] or [DN] to increase or decrease the minute value (00 – 59).•
Press [OK] to save your selection and enter Hour setting.•
The HOUR digits will be blinking. •
Press [UP] or [DN] to increase or decrease the hour value (00 – 23).•
Press [OK] to save your selection and enter Month setting.•
The MONTH digits will be blinking. •
CanCam Manual_Layout 5 05/09/2013 12:22 Page 15
Page 16

16
Press [UP] or [DN] to increase or decrease the Month value (1 - 12).•
Press [OK] to save your selection and enter Day setting.•
The DAY digits will be blinking. •
Press [UP] or [DN] to increase or decrease the Day value (01 – 31).•
Press [OK] to confirm the Date setting and enter Year setting.•
The YEAR digits will be blinking. •
Press [UP] or [DN] to increase or decrease the Year value (01 – 99).•
Once this is all done, press [OK]. You’ll then see the word - dEL - blinking. •
Press [M] button to exit the program setting and back to the status screen.•
Setting the Time Lapse Mode:
The Time Lapse default setting value is from 17:00 to 07:00 the next day. When
the camera is set to use the Time-Lapse mode (TLS), the program settings will
follow the Time Lapse settings. Outside of the Time Lapse time frame; the camera
will follow the user defined PIR settings.
The user can set the program for a pre-determined time period [such as 19:00 to
07:00]. The user then sets the frequency of still images only (video function not
available in Time Lapse mode). The camera will remain in Time Lapse mode until
the user has changed the program setting.
Slide the switch to the CAM position, LCD display•
will show the camera status screen.
Press the [M] button once within 30 seconds to•
enter the programming mode, the word PIR or TLS
will be blinking.
Press [UP] button until you see the word TLS•
blinking.
Press [OK] to confirm and go into TLS Mode "Start•
Time" setting.
The display will show T + S-88:88 (S = Start,•
88:88 = time in HH:MM).
Press [OK] to set the “Start Time” setting. At this•
point you can adjust the time from 00:00 to 23:59.
The MINUTE digits will be blinking. •
Press [UP] or [DN] to increase or decrease the•
minute value (00 – 59).
Press [OK] to save your selection and enter Hour•
setting.
The HOUR digits will be blinking. •
CanCam Manual_Layout 5 05/09/2013 12:22 Page 16
Page 17

17
Press [UP] or [DN] to increase or decrease the hour value (00 – 23).•
Press [OK] to save the “Start Time” setting and move to the “End Time” setting.•
After completing the start time setting, camera will go into TLS Mode "End•
Time" setting.
The display will show T + E-88:88 •
(E = End, 88:88 = time in HH:MM)•
At this point you can adjust the time from 00:00 to 23:59 by pressing the•
[UP/DN/OK] buttons same as Start Time settings.
Press [OK] to save the “End Time” settings and move directly to the TIME OUT•
setting.
Please complete the TIME OUT, Still Image Resolution, Burst Mode, Zoom•
settings like the settings on the PIR operation mode.
Then press [M] button to exit.•
EXAMPLE:
1 – If a user selected the Time Lapse mode, and sets the Start Time to 07:00
and End Time at 20:30, then selects the Timeout to be 3mins with a Burst
mode of 3 pictures, this means that the camera will keep taking 3 pictures
for every 3 minutes within the time frame of 7:00AM to 8:30PM. When not
within the Time Lapse time frame, the camera will follow the normal PIR
detection settings.
2 – If a user selected the Time Lapse mode setting as Start Time 00:00 and End
Time 00:00, then selected the Timeout to be 5mins with a Burst mode of
3 pictures, this means the camera will keep taking 3 pictures for every 5
minutes, 24 hours a day non-stop.
Using The Camera in PIR Detection Mode
Open the bottom housing and slide the switch to either one of the CAM or PSET•
modes. At this point, you have 30 seconds to make any mode selection changes
before camera is ready to use.
If you chose CAM mode then make sure your camera is in the PIR mode and not•
Time Lapse (TLS). If you are not sure, please follow the “Camera setup and
program” above to set the camera into the proper mode.
To Capture Images, make sure display reads CAM:
Once in CAM mode, if the display does not read CAM then,
Press the [M] button once.•
If the LCD display does not show word CAM in blinking.•
Press the [UP] button ONCE to toggle to Camera mode.•
Press the [OK] button and then [M] Button to exit.•
CanCam Manual_Layout 5 05/09/2013 12:22 Page 17
Page 18

18
To Capture Videos, make sure display reads VIDEO:
Once in CAM mode, if the display does not read VIDEO then,•
Press the [M] button once.•
If the LCD display does not show word VIDEO in blinking.•
Press the [UP] button ONCE to toggle to Video mode.•
Press the [OK] button and then [M] Button to exit.•
30 seconds after making adjustments, the laser beam will begin blinking and enter•
the countdown mode.
After one minute, the camera will enter either Burst mode or Video mode based on•
the programmed settings. The cameras will then time out between 05-59 seconds
or 1-59 minutes depending on the programmed setting.
NOTE: The time between motion detection and the camera taking the pictures may
vary due to lighting conditions, program settings, and battery power level.
Using The Camera In Time Lapse Mode
Open the bottom housing and slide the switch to CAM mode. At this point, you have•
30 seconds to make any mode selection changes before camera is ready to use.
Make sure your camera is in Time Lapse (TLS) mode and not PIR mode. If your not•
sure, please follow the “Camera setup and program” above to set the camera into
TLS mode.
30 seconds after making adjustments, the laser beam will begin blinking and enter•
countdown mode. This is your indication to leave the coverage area within one
minute, then the camera will enter Time Lapse Mode.
Deleting files on the Camera
Slide the switch the CAM position. •
LCD screen will display the camera status screen. •
Press the [M] button within 30 seconds to enter the programming mode.•
Press the [DN] button until you see the word - dEL - in blinking on LCD display. •
Press [OK] button to enter the DELETE & FORMAT menu.•
Press [UP] or [DN] button to select the desired function. •
– NO-dL (No Delete) - No images get deleted.
– d-ONE (Delete One) - Only the last file will get deleted.
– d-ALL (Delete ALL) - Deletes ALL images on the SD card.
– Ft (Format) - Deletes all files and reformats the SD card.
Press [OK] to confirm your selection.•
Press [M] button to exit the program setting and back to the status screen.•
CanCam Manual_Layout 5 05/09/2013 12:22 Page 18
Page 19

19
CanCam Features and Specification
High precision multi-layer glass lens with coating.•
Effective viewing angle: 50 degrees•
Infrared LED effective Range for picture up to 18M (50 ft).•
Infrared LED effective Range for Video clip up to 18M (50 ft).•
PIR detection angle: 48 degrees•
Image resolution Options: 8MP, 5MP, 3MP•
Video resolution Options: HD 720P, VGA pixels with Audio recording.•
Capture Options: 1 - 9 image burst mode or up to 300 seconds video recording •
with audio.
Time Lapse Mode: Creates specific settings for a defined time of day.•
Real time clock for date and time stamping. •
Auto white balance and auto expose.•
Auto IR emitter light control.•
External memory support: Up to 32GB SD card. •
Laser beam TEST indication and countdown indication.•
Interface type: USB 2.0•
Built in TV output.•
Power: C cell alkaline Batteries x 4•
or optional 6vdc power adaptor supplied.
Weather resistant housing - IP67 rating.•
CanCam Manual_Layout 5 05/09/2013 12:22 Page 19
Page 20

Elite Security Products
Unit 7, Target Park, Shawbank Rd
Lakeside, Redditch B98 8YN
Telephone: 01527 515150
Fax: 01527 515143
email: info@espuk.com
CanCam Manual_Layout 5 05/09/2013 12:22 Page 20
 Loading...