

Page 1
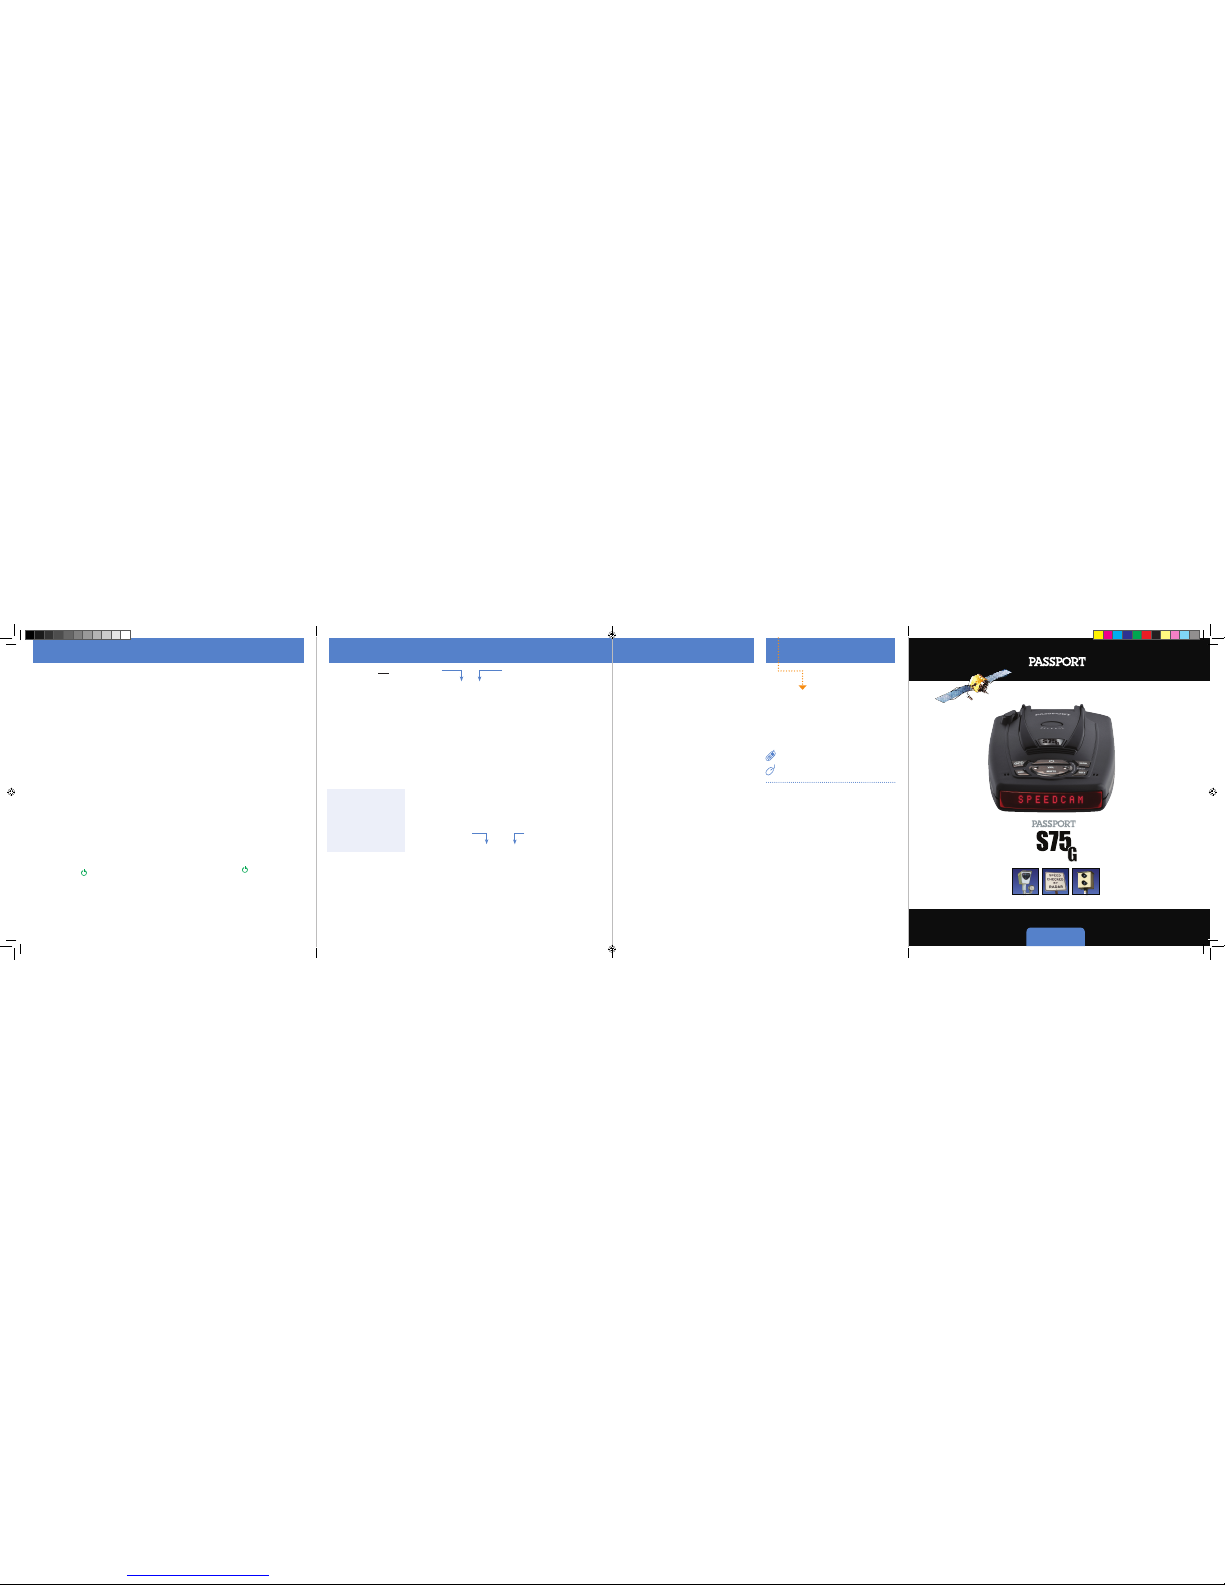
Quick Reference
RADAR•LASER•SAFETY CAMER A•DETECTOR
Contact Us
8
Settings & Preferences
76
Open ➜
Pre-loaded DEFENDER Database
Designed in the USA by Escort, Inc.,
Manufactured in the Philippines
ESCORT In c.
5440 West Chester Road
West Chester OH 45069
Sales/Ser vice 800.433. 3487
www.EscortRadar.com
©2017 ESCORT Inc. ESCORT®, PASSPORT®, TrueLock™, Spee dAlert™,
AutoLearn™, AutoSensitivity™, SmartMute™, MuteDisplay™, SpecDisplay™,
and ExpertMeter™ are tr ademarks of ESCOR T Inc.
FCC NOTE: Modications not ex pressly approved by t he manufacture r
could void the user’s FCC granted au thority to oper ate the equipment.
FCC ID: QKL9XM4
This device complies with par t 15 of the FCC rules. Operation is sub ject
to the following two conditions: (1) This device m ay not cause harmful
interference, and (2) this device must accept any interference received
including interference that may cause undesired operation.
Notes for Settings & Preferences
For descriptions of features and functions available
when connected to SmartCord Live with ESCORT
Live visit EscortRadar.com and download the
SmartCord Live user manual for your iOS or Android
OS smartphone.
To view serial number and
software revision press MRK and MUTE while
powering on detector.
Restoring the Factory Defa ult Settings:
To restore your PASSPORT to its original factory
settings, press and hold the “SEN” and “BRT”
buttons while turning the power on. A
Reset
message will be displayed, accompanied by an
audible alert acknowledging the reset.
Software Updates
PASSPORT’s red light and speed camera database
is easily updated using our exclusive detector
software tools found on our web site. Firmware, or
the operating software for the detector, can also
be updated using these tools.
In order to have access to these updates, you must
register your PASSPORT at www.EscortRadar.com.
Once registered, you will receive email
notifications that updates are now available for
your database or firmware.
To install your software and DEFENDER updates,
connect your PASSPORT to a computer via USB/
USB Mini B cable to use the software tools.
GPS Powered for Speed and Location Intelligence
How To Use Preferences
PASSPORT is ready to go, just plug it in and turn
it on, but you can also easily change features for
your preferences. There are 10 user-selectable
Preferences so you can customize your S75G for
your specific driving needs.
The buttons labeled “MRK” and “BRT” are used to
enter Preferences, REVIEW your current settings,
and to CHANGE any settings as desired. The word
PREF is located on the top of the detector, and is
highlighted in colored graphics.
How to use Preferences
1
To enter Preferences, press and hold
the “MRK” and “BRT” buttons down f or 2
seconds. The unit will beep twice, and will
display the word
Prefs.
2
Then press the “BRT” button to review the
current settings. You can either tap the button
to change from item to item, or hold the button
to scroll through the items.
3
Press the + or - button to change any setting.
You can either tap the button to change from
setting to setting, or hold the button to scroll
through all the options.
4
To exit Preferences, simply wait 8 seconds
without pressing any button, or press the
power button
. The unit will display
Complet e, beep 4 times, and return to normal
operation.
An example
Here is how you would turn PASSPORT’s AutoMute
feature o.
1
Enter Preferences by holding b oth the MRK and
BRT buttons down for 2 seconds. PASSPORT will
beep twice and display
Prefs.
2
Then hold the “B RT” button down. PASSPORT will
scroll through the categories, starting with Pilot
Light (
Pilot), then SpeedAlert (sAlrt), Power- on
sequence (
PwrOn), then Signal strength meter
(
Meter), and then AutoMute (aMute).
3
Release the “BRT ” button when PASSPORT
shows the AutoMute item. Since the factory
setting is for AutoMute to be on, PASSPORT will
display
aMute ON.
If you accidentally don’t release the “BRT” button
in time, and PASSPORT goes to the next category,
simply hold the “BRT” button down again, and
after PASSPORT scrolls through all categories, it will
begin again at the top of the list.
4
Press the + or – but ton to change from
aMute ON to aMute OFF.
5
To complete choosing your Preferences, simply
wait 8 seconds without pressing any buttons, or
press the power button
. PASSPORT will display
Complet e, beep 4 times, and return to normal
operation.
Registration
Register now to enter your new PASSPORT for our
product warranty and qualify for special oe rs at
EscortRadar.com
Info & Accessories
800.433.3 487
Escor tRadar.com
Press the BRT button to go from
one category to the next
Pilot Light
(Power-on indication)
SpeedAlert
AutoLearn
Signal Strength Meter
AutoMute
AutoPower
Units
Voice
Bands
Markers
Pilot HWY
Pilot H
Pilot H.>
Pilot V
Pilot SPD
sAlrt ON
sAlrt OFF
aLrn ON
aLrn OFF
Meter STD
Meter EXP
Meter SPC
aMute ON
aMute OFF
aPwr ON
aPwr OFF
Units ENG
Units MET
Voice ON
Voice OFF
Bands DFT
Bands MOD
X ON or OFF (default is on)
K ON or OFF (default is on)
Ka ON or OFF (default is on)
POP ON or OFF (default is o)
LSR ON or OFF (default is on)
TSR ON or OFF (default is on)
Marks DFT
Marks MOD
rCam ON or OFF (default is on)
sCam ON or OFF (default is on)
sTrap ON or OFF (default is on)
Othr ON or OFF (default is on)
Press the + or – button to change
your setting within a category
* Full word: Highway or Auto or City
Letter: H or A or C
Letter, with scanning dot
Vehicle voltage
Vehicle speed
* Displays current speed during alert
SpeedAlert feature o
* Automatically locks out false alarms
AutoLearn is o
* Standard signal strength meter
ExpertMeter mode
SpecDisplay mode
* Audio alerts increase automatically
Audio alerts are controlled manually
* Turns detector o after 4 hours
AutoPower feature is o
* Speed/distance in English units
Speed/distance in Metric units
* Voice announcements on
Voice announcements o
* Default settings
Bands have been modied
Press + or – to change your
setting within a catagory
*Default Setting
Press and hold the MRK
and BRT buttons to access
Preferences. To exit
Preferences, simply wait
a few seconds without
pressing a button. The unit
will display
Complet ed to
confirm your selections.
Press MRK to modify
band preferences and
go from one category
to the next
S75G QRG artwork: AW-1220057-1C Rev C
1220057-1_S75G_QRG.indd 1-4 5/24/17 11:44 AM
S75G QRG artwork: AW-1220057-1C Rev C
Page 2
• AutoLearn automatic ally learns and rejects false
radar sources based on exact location and
frequency.
• AutoPower automatically shut s off the detector
to save unnecessary drain on your battery.
• Web- ready access allows you to update your
safety camera data and other software through
our website.
• Revolutionary AutoSensitivity mode provides
real-time radar performance based on vehicle
speed, plus Highway and Auto No X settings.
• Spe edAlert provides an instant view of your
vehicle’s speed during an alert.
• Mark Locatio n feature allows you to instantly
“Mark” known speed traps, cameras and other
places of interest.
• Easy -to-use Preferences allow you to customize
up to 10 features.
• Ultra -bright alphanumeric display with 280 LEDs.
• E xclusive ExpertMeter tracks and displays up to 8
radar signals simultaneously.
• Exclusive SpecDisplay provides actual numeric
frequency for any radar signal.
• Sele ctable radar and laser bands (on/ off) allow
you to customize which bands are monitored.
• Sele ctable Markers (on/of f) allow you to
customize which Markers PASSPORT monitors.
• E xclusive SmartCord provides easy access to
Mute and TrueLock features.
* Requires Optional Smar tCord
Live and app subscription
available at EscortRadar.com
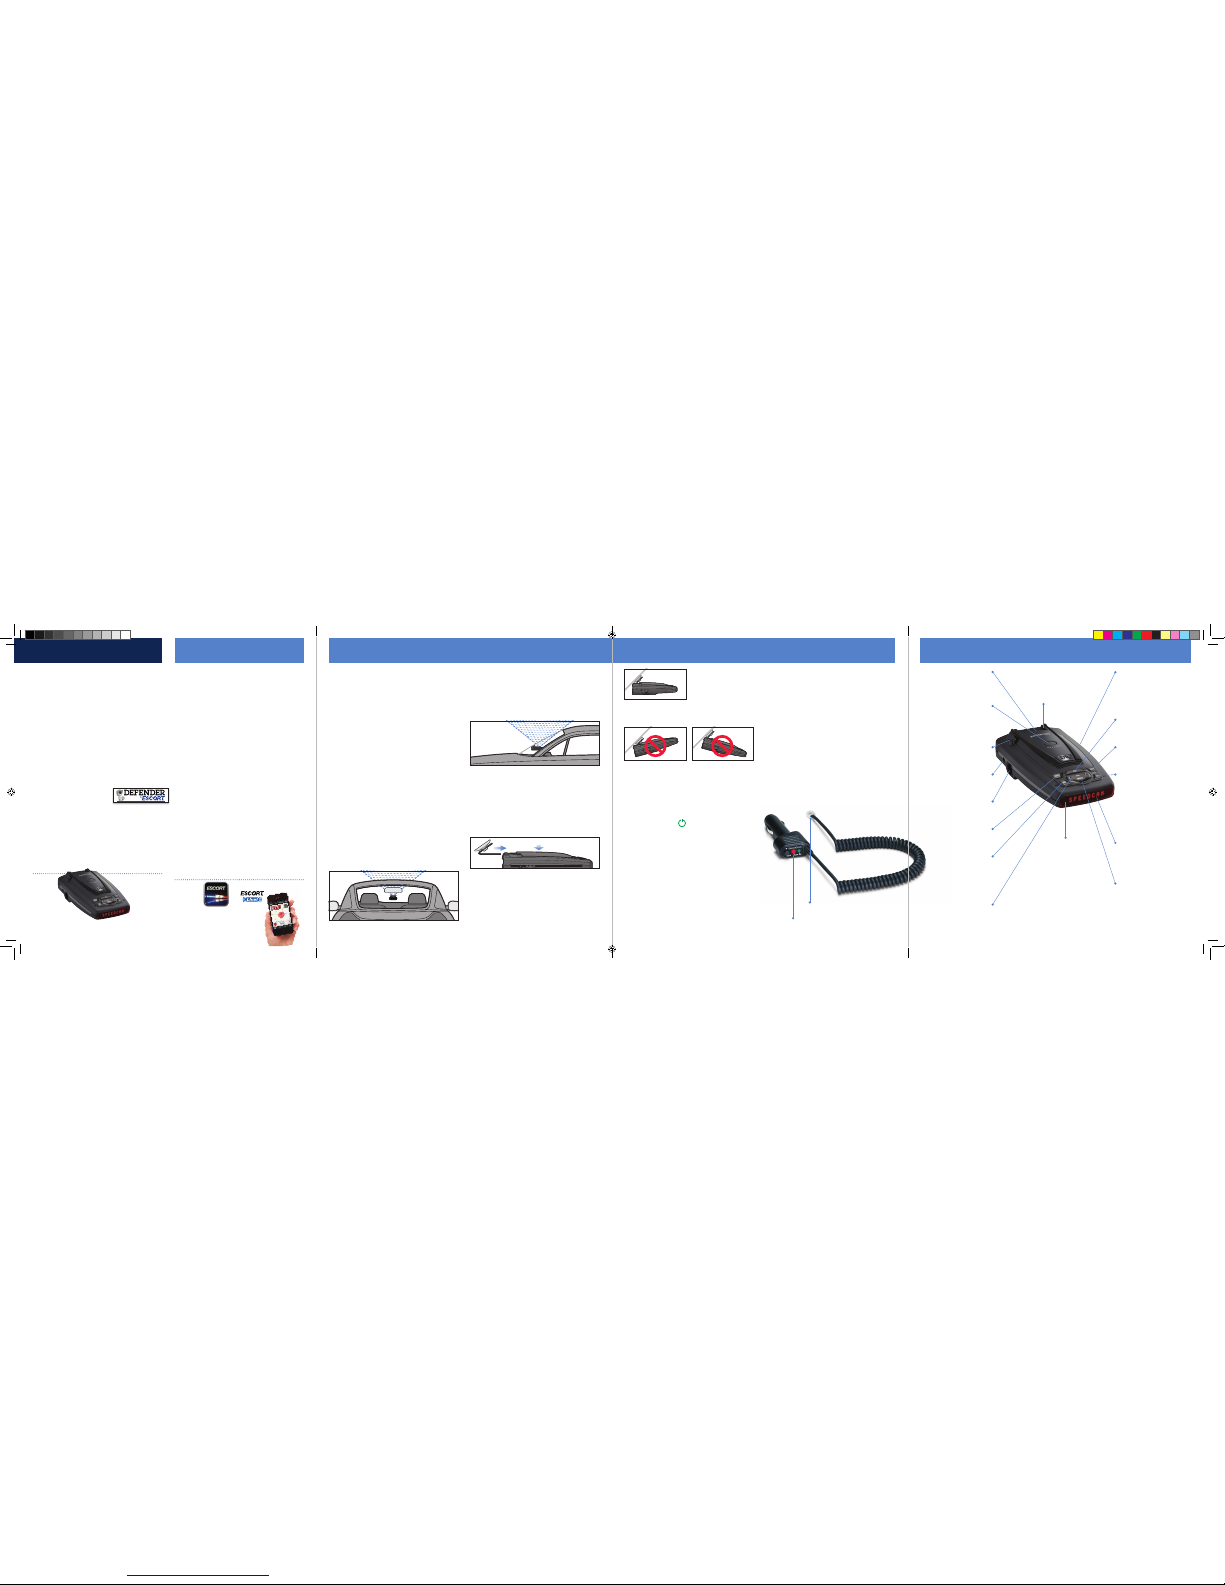
Controls & Features
Congratulations
PASSPORT S75G Feature s Installation
5432
Modular Connector
Plugs into detector jack
Lighter Adapter
Connects to lighter/accessory socket
®
Compatible with
You can easily access and customize all of your
Settings and Preferences by pressing and holding
the MRK and SEN buttons. See Settings &
Preferences for details.
NOTE: depending on your vehicle, the lighter socket
power may either be continuously on, or it may be
switched on and off with your ignition switch.
Optional Power Cords
Call or visit EscortRadar.com for our optional Directwire SmartCord.
Using SmartCord
• Mute Button: Press to mute an alert; press
three times to lock out a false alert; press
twice while receiving a locked-out alert to
unlock.
• Alert Light: Blinks when receiving an alert.
• Power Light: Lights when receiving power.
Facing Down Facing Up
Level mounting
USB Data Port
Allows updating DEFENDER
Database (red light and fixed
position speed cameras) and
other software from
EscortRadar.com
Power Button
Press this button to turn
PASSPORT on or off
Mark Location
Press to mark a specific
location (e.g. speed trap, etc.)
Brightness Button
Press to adjust the display
brightness. There are four
brightness settings: Min, Med,
Max, Auto, plus Full Dark
In the Dark Mode, PASSPORT’s
display will remain dark and
only the audio will alert you
GPS Signal Indicator
The GPS icon indicates
reception of GPS satellite
signals and confirms TrueLock
signal rejection
Mute Button
Briefly press button to
silence the audio for a specific
alert. (The audio will alert you
to the next encounter.)
Radar Antenna and Laser Lens
For best performance the rear panel
of your PASSPORT should have a
clear, unobstructed view of the
road ahead
Alphanumeric Display
PASSPORT’s display will
show Highway, Auto, or Auto
Nox as its power-on indication.
If you prefer, you can choose
other power-on indications
During an alert, the display will indicate
radar band and a precise bar-graph of
signal strength
NOTE: In the Dark Mode the display will
not light during an alert
EasyMount Slot
Inse rt PA SSPO RT ’s
adjustable windshield
bracket into this slot
EasyMount Button
Press the button, and
slide the windshield
bracket into one of its
four locking positions
Rear Laser Port
Receives laser signals from
behind the vehicle
Earphone Jack
Accepts standard 3.5mm
mono earphone
Power Jack
Plug the SmartCord into this
connector
TrueLock/GPS Filter
Switches TrueLock feature
(stored locations) on or off
Sensitivity Button
Switches between
Highway, Auto, and
Auto NoX settings.
In general, we recommend
the Auto mode
Volume Adjustment
Increases or decreases the
alert volume
Continued ➜
When installed and adjusted properly, the back top
edge of PASSPORT should rest solidly against your
windshield.
User’s Tip
You can leave the EasyMount bracket in place on
your windshield, and easily remove PASSPORT by
pressing the release button and sliding PASSPORT
off the mount. Again, be sure to position the
bracket where it won’t present a hazard in the
event of an accident. Additional mounts are
available at EscortRadar.com.
Power Connection
To power PASSPORT, plug the small end of the
SmartCord, (telephone-type connec tor) into the
modular jack on PASSPORT’s left side, and plug the
lighter plug adapter into your vehicle’s lighter
socket or accessory so cket.
Press the power button located on the top case
and adjust the volume level by pressing the “VOL”
+ or – buttons located on the top case.
PASSPORT operates on 12 volts DC negative
ground only. The lighter plug provided is a
standard size and will work in most vehicles.
However, some vehicles may require our optional
sleeve to ensure a snug fit. If so, simply call or visit
EscortRadar.com.
Mount PASSPORT away from windshield wipers,
other solid objects, and heavily tinted areas that
might obstruct the radar antenna or laser lens.
NOTE: In order for PASSPORT’s GPS-powered features
to work properly, the top case must have a clear view
of the sky.
1 Depress the release button on the top of
PASSPORT (by the word PASSPORT) and slide
the EasyMount bracket into the slot until it is
locked into the position which best fits the
angle of your windshield (there are four settings
available). For extremely horizontal or
extremely sloped windshields, the EasyMount
bracket can be bent. However, we suggest that
you do not do this when the bracket is
connected to the detector.
2 To adjust PASSPORT on your windshield, use the
EasyMount release button located on the top of
the PASSPORT, and slide PASSPORT forward or
backward to obtain a level position.
Windshield Mount
PASSPORT’s EasyMount windshield bracket is
designed for unobtrusive and hassle-free
mounting.
Mounting Location
WARNING: ESCORT cannot antic ipate the many
ways PASSPORT can be mounted. It is impo rtant
that you mount PASSPORT where it will not
impair your view nor present a haz ard in case of
an accident.
Using the supplied windshield mount, position your
PASSPORT level and high enough on your front
windshield to provide a clear view of the road ahead.
To ensure that the suction cups adhere to the
windshield firmly and be sure to keep both your
windshield and the suction cups clean. For optimum
detection performance, we recommend the
following on where to mount PASSPORT:
• Center of windshie ld between driver and
passenger.
• Ensure clear view of ro ad ahead and sky above.
• Avoid windshield wip ers and heavily tinted
areas.
• For optimum r ear detection, center the
detector between the driver and passenger.
You’ve just purchased the PASSPORT S75G which
combines award-winning radar and laser detection
with breakthrough intelligence.
The PASSPORT S75G delivers extreme long-range
warning on all radar bands including X, K,
Superwide Ka, and instant-on POP modes. Multiple
front and rear laser sensors provide 360 degree
laser protection, including the widest field of view.
For the ultimate in laser protection, the PASSPORT
S75G can also be used in conjunction with our
Laser Shifter product. Visit our website at
EscortRadar.com or call us toll-free at 800-433-3487
for more details.
The PASSPORT S75G’s GPS-powered intelligence
provides permanent relief from false alarms
including automatic door openers, motion sensors
and other radar-based sensors.
And, it comes pre-loaded with
ESCORT’s DEFENDER
Database to alert you to thousands of red light and
fixed position speed camera locations throughout
North America.
If this is your first detector, please read this Quick
Reference Guide in detail to get the most out of
your PASSPORT’s revolutionary performance and
innovative features.
Please drive safely.
1220057-1_S75G_QRG.indd 5-8 5/24/17 11:44 AM
 Loading...