

Page 1
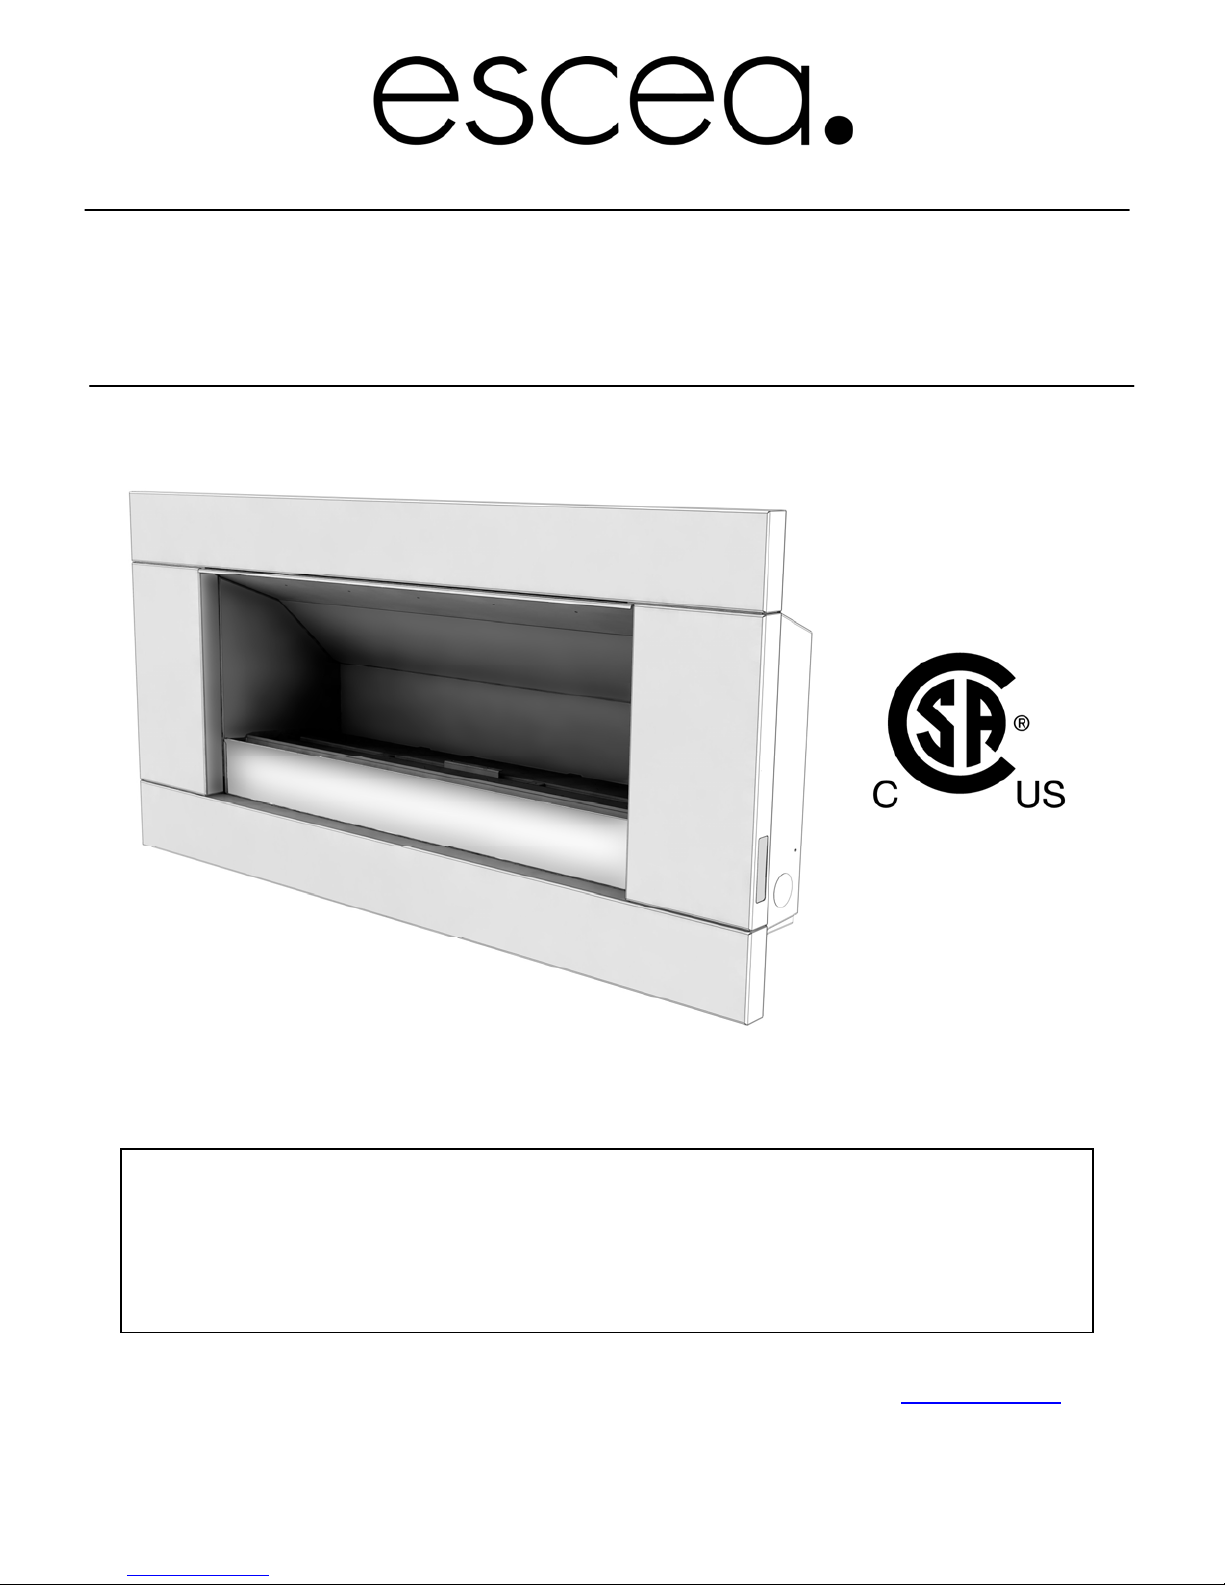
Gas Type Conversion
EF5000 – NZ v 1.0
- Installation, service and gas conversion must be performed by a qualified
installer, service agency or gas supplier.
- WARNING: Improper installation, adjustment, alteration, service or mainte-
nance can cause injury or property damage. Read the installation, operating
and maintenance instructions thoroughly before installing or servicing this
equipment.
Manufactured by: Escea Ltd, PO Box 5277 Dunedin NZ, Ph: +64 3 478 8220, email: [email protected]
For contact details of your local Escea distributor or dealer please visit www.escea.co.nz
630138 Gas Conversion Instructions EF5000 NZ
Page 2
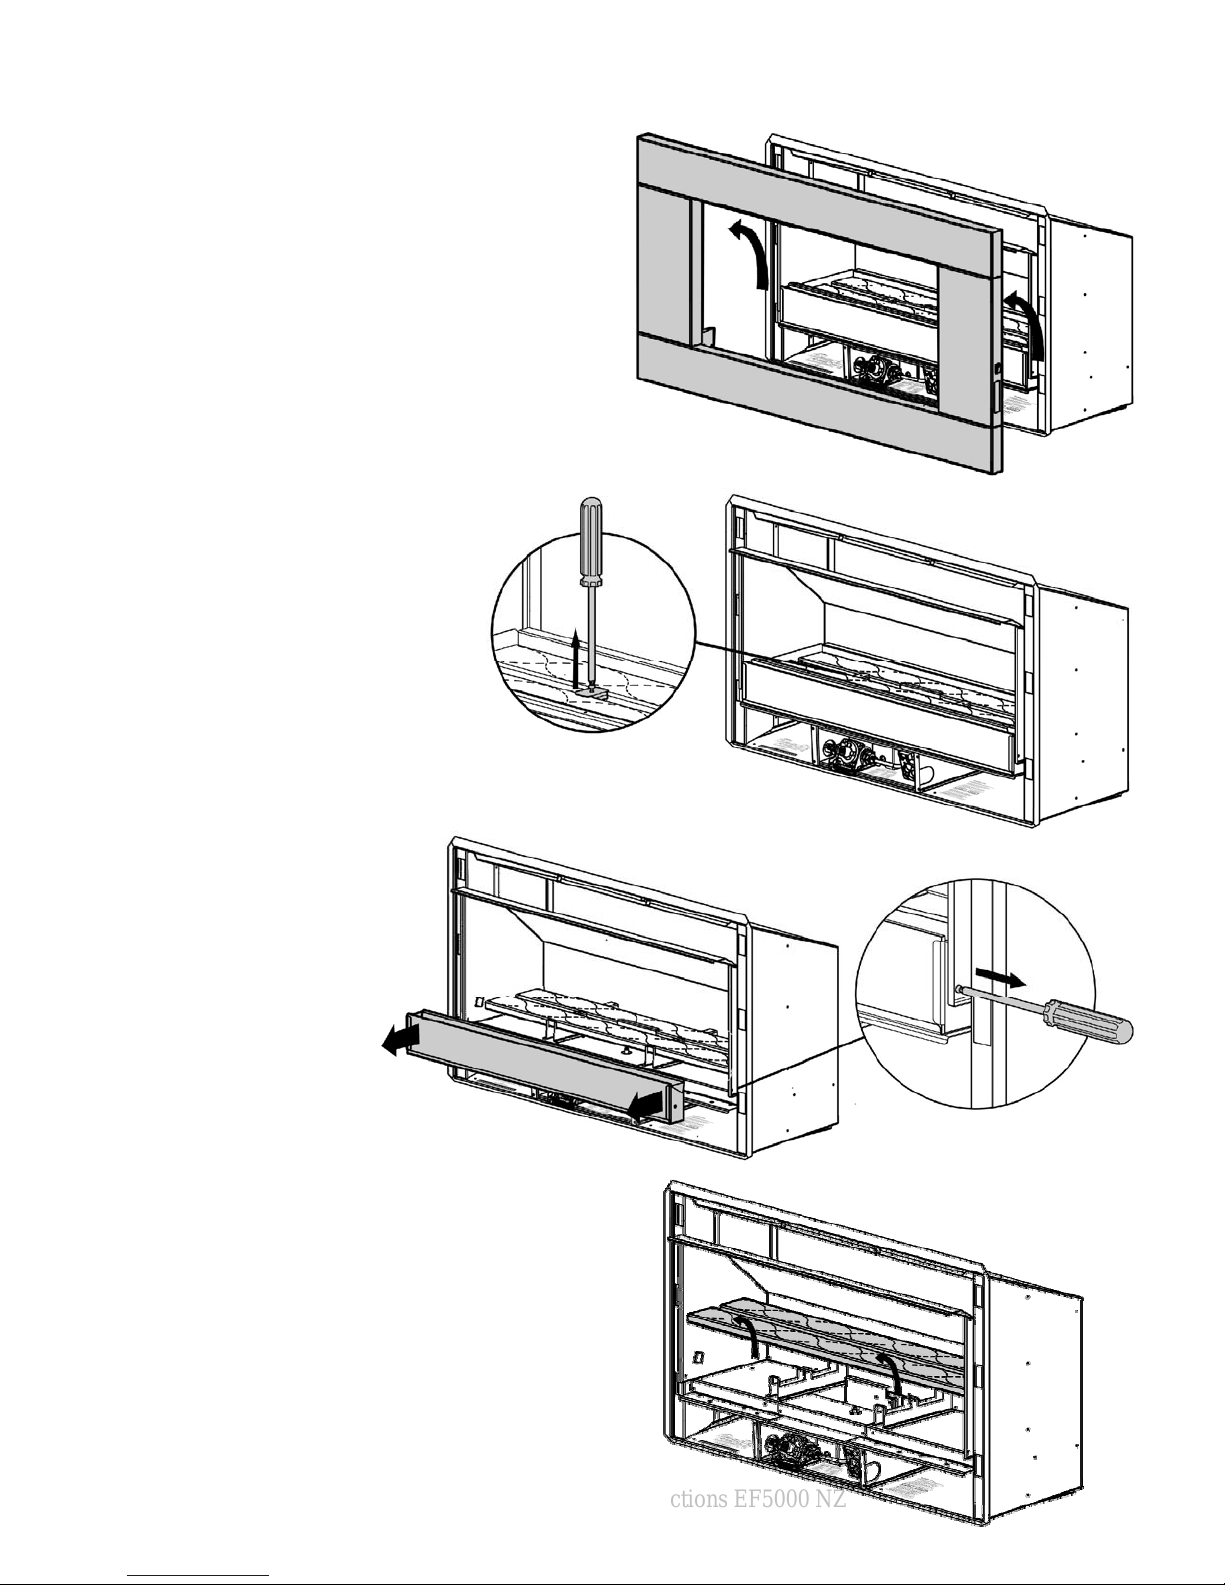
Warning: Before starting the gas conversion, ensure that the fireplace is cool.
Step one:
Lift the fascia and hang it in the
second slot, now you can unplug both of the fascia leads
and remove the Fascia from the
EF5000 firebox by lifting up and
outwards. This will give you access to remove the Burners and
Stone tray.
Step two:
Remove all of the coals
and the two screws
holding the burner
clamps in place, remove the clamps.
Step three:
Remove the two screws
holding the Stone tray in
place and lift it out.
Step four:
Lift out both burners, this
will give you access to
the jets (spuds).
630138 Gas Conversion Instructions EF5000 NZ
Page 3
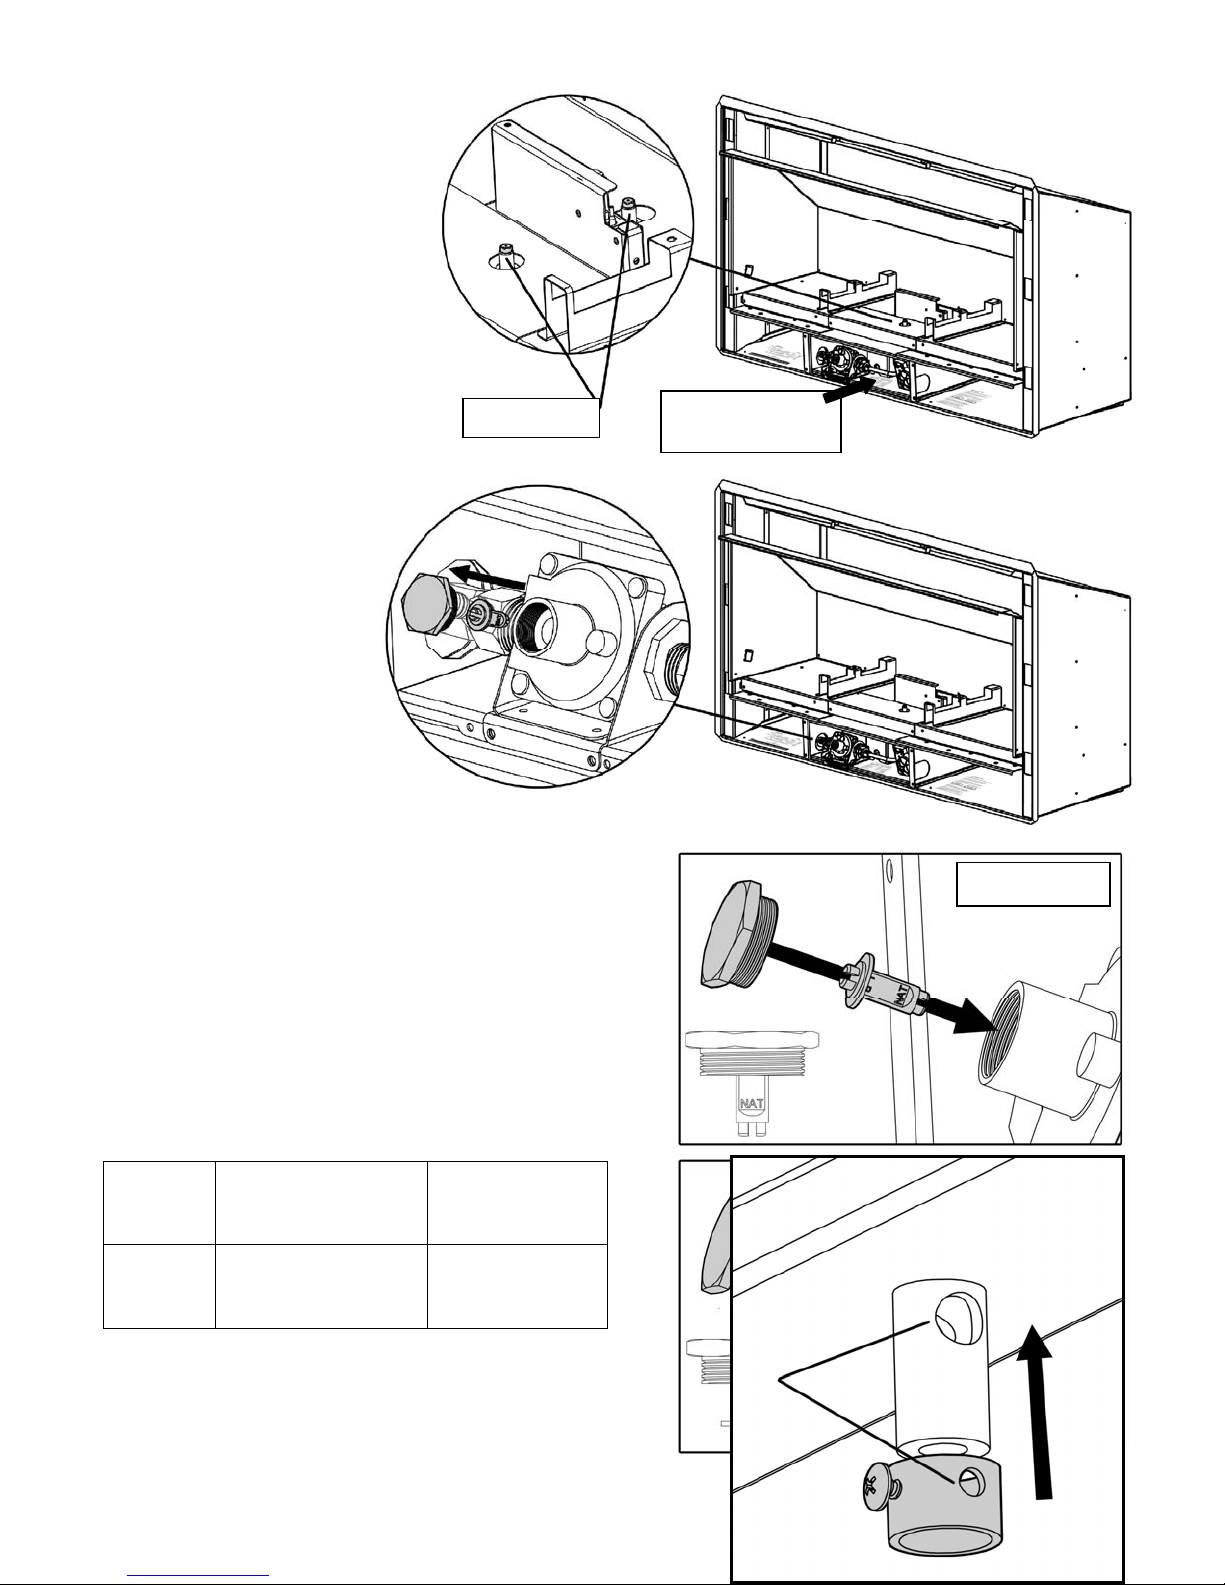
Step five:
Change the two jets with
the conversion jets supplied in kitset and bond
the new gas label over
the old at the bottom tray
of the engine.
Burner Jets
Step six:
To change regulator
pressure settings from
LPG to Natural gas simply unscrew the top cap
off the regulator and pull
the plunger from it. Then
re-insert on the opposite
side and screw the assembly back in the stack.
The pictures on the right show how the plunger
should be orientated when re-inserted into the
regulator.
It is important that the plunger is clipped into the
cap before re-inserting into the regulator.
Natural Gas
KPa
1.0
LPG
2.3
Replacement
Gas-Type Label
Natural Gas
LPG
630138 Gas Conversion Instructions EF5000 NZ
Page 4
Note: If you have been supplied with a new pair of conversion burners, skip step seven and continue with step eight.
If you have been supplied with only the restrictor sleeves then continue with step seven.
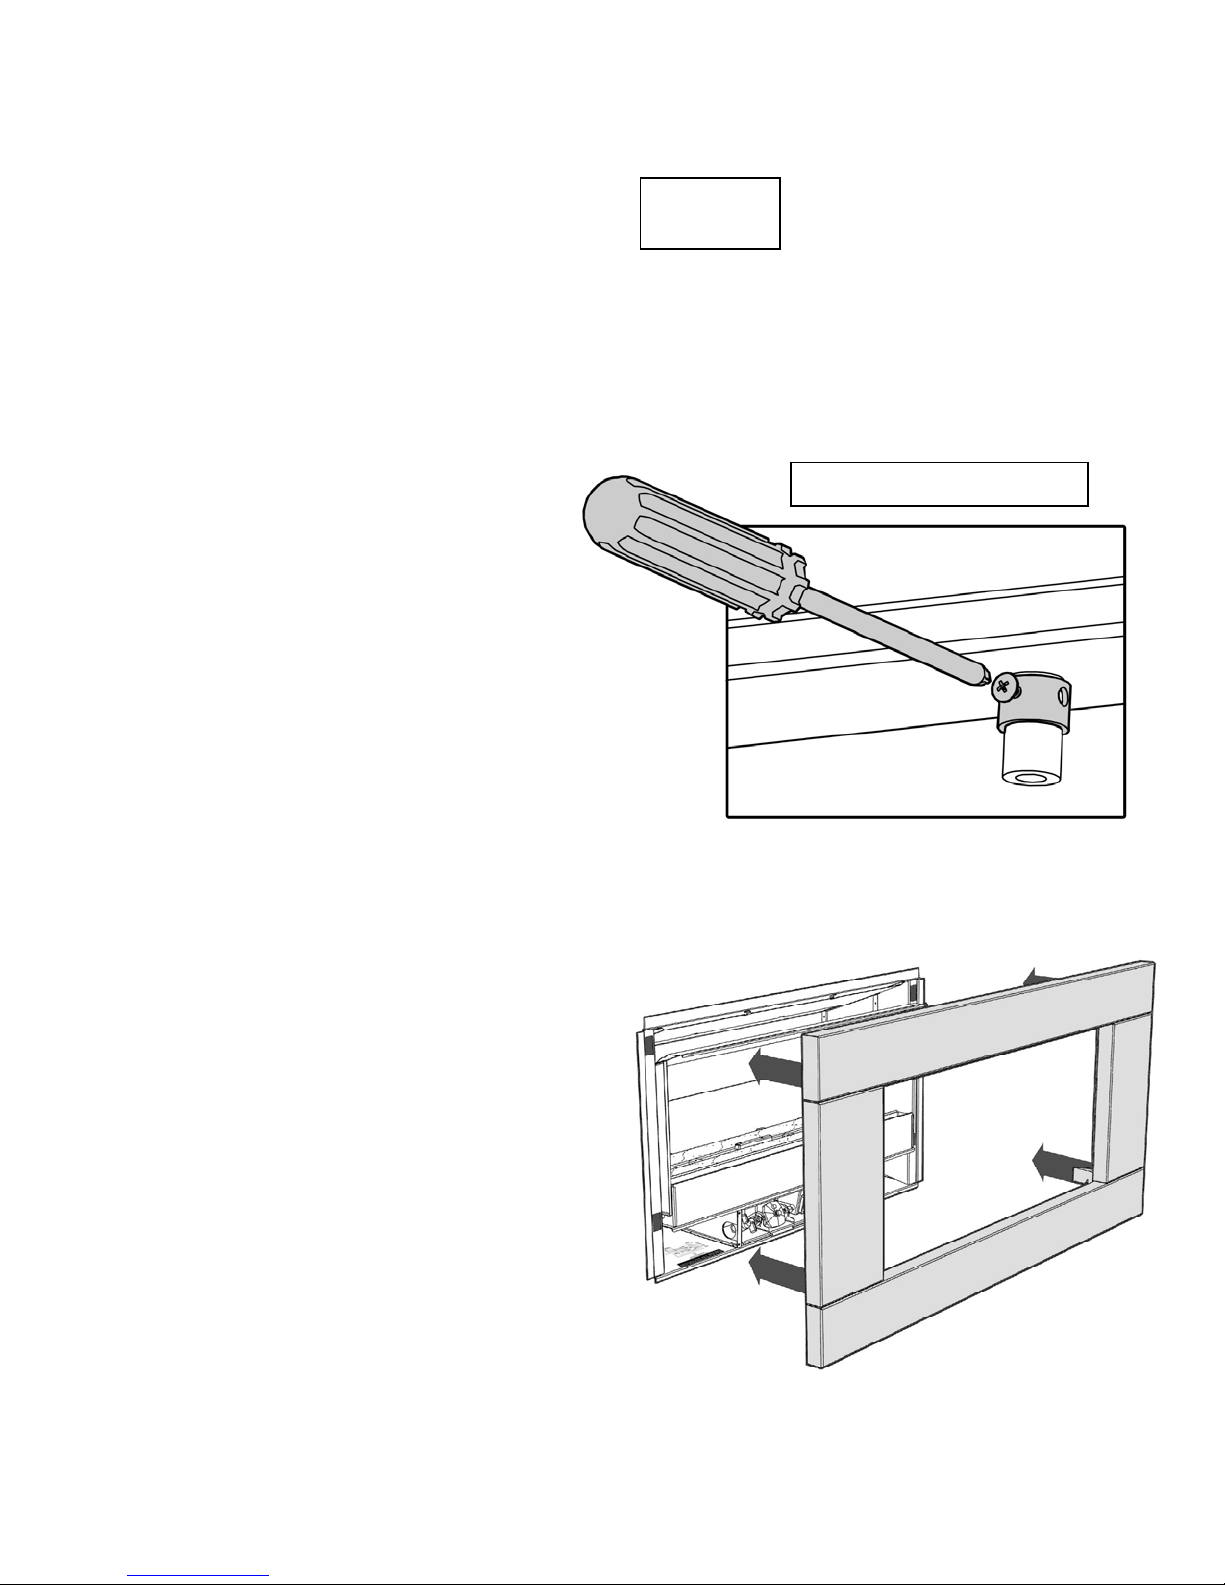
Step seven.
Holes must
line up
For LPG to Natural gas conversion you will need to fit the natural gas restrictor sleeve. These slide
over the burner tube on the underside of the burners, and must be screwed into place so that the
porting holes line up.
Note: For Natural gas to LPG conversion simply remove the restrictor sleeves from the burners.
Step eight.
Fitting the restrictor sleeve
a) Insert the new or modified burners
and fix them into place with the
burner clamps.
b) Replace the stone tray and fix it back
onto the firebox.
c) Replace the coals, ensuring you have
only one layer. Do not heap or
mound the coals.
Step nine.
Re-attach the fascia power supply leads.
Push them together until they ‘click’. Line
up the hooks with the receptacles on the
Firebox, take advantage of the first slot in
the hook where you can rest the fascia before you push the fascia into position.
630138 Gas Conversion Instructions EF5000 NZ
Page 5
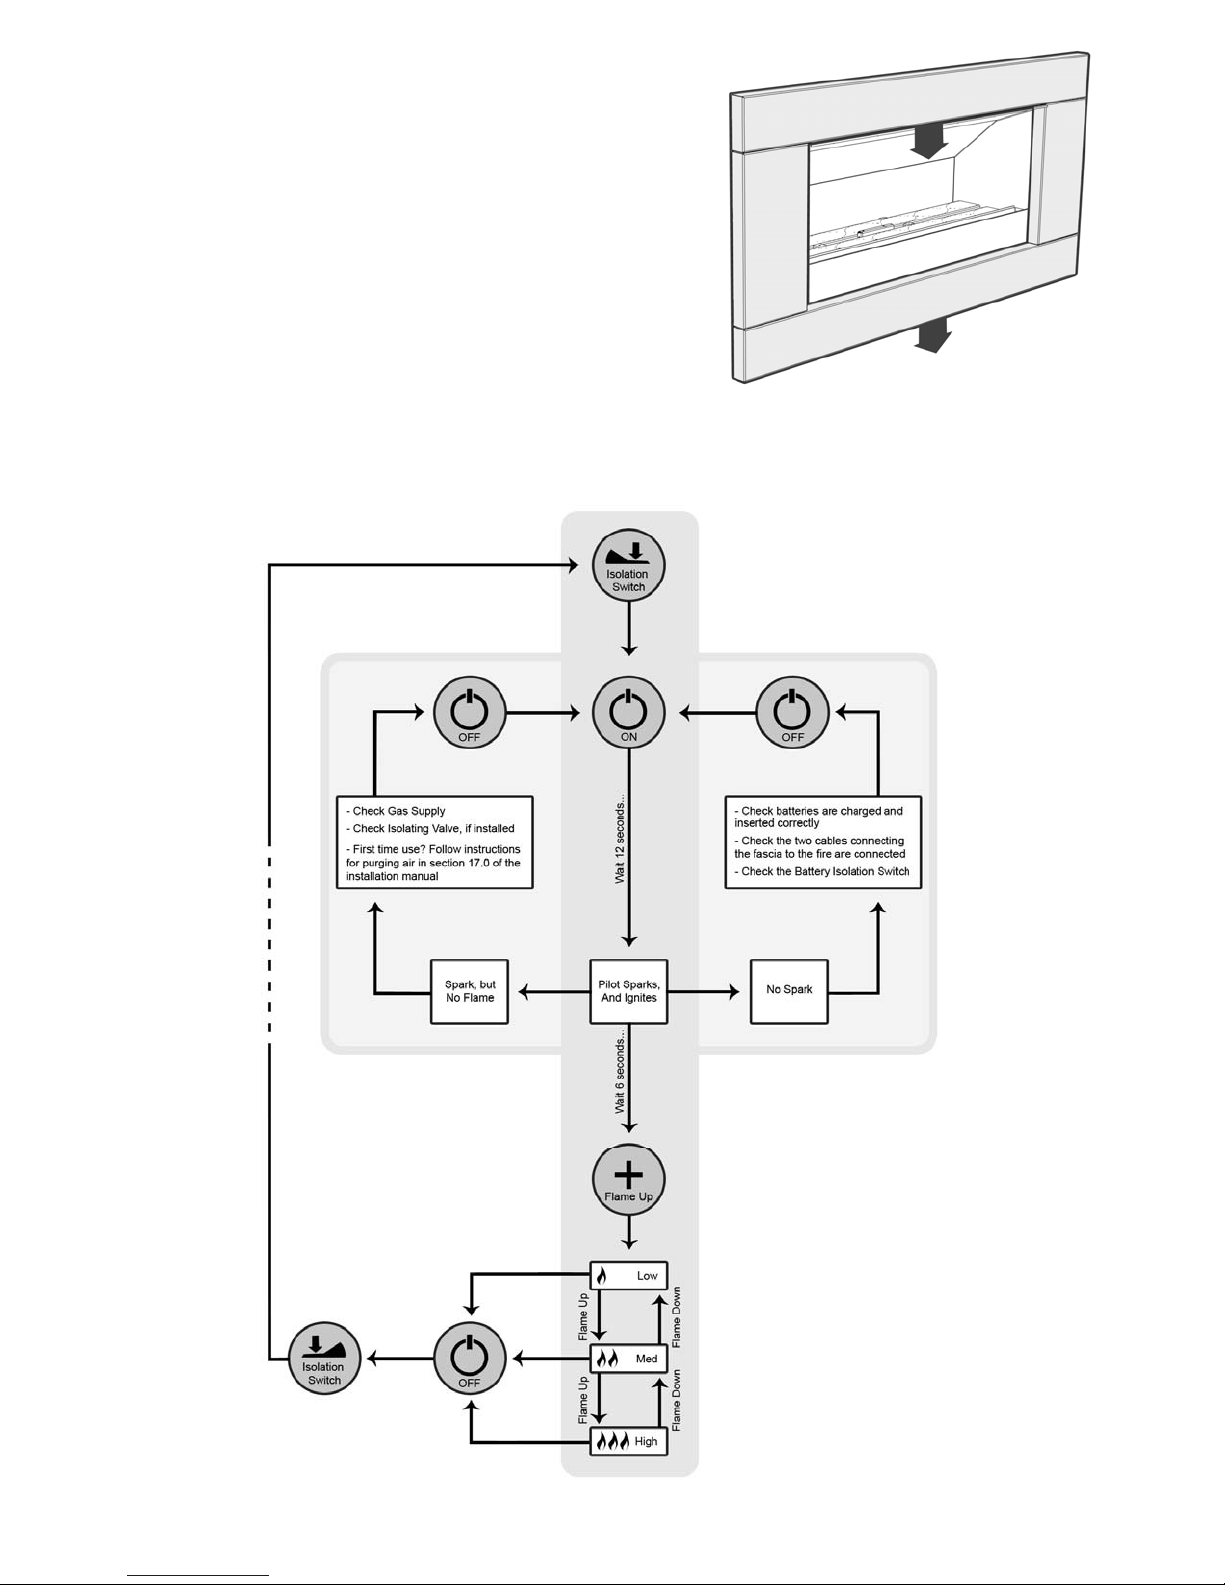
Step ten.
When you have pushed the fascia in
as far as it will go, briefly push down
on the fascia to secure the fascia into
position.
Operation Chart.
Once the fire has been re-assembled, test the fire to ensure it is running correctly.
630138 Gas Conversion Instructions EF5000 NZ
 Loading...