

Page 1
500-10191 - 19" Seat height
500-10211 - 21" Seat height
500-10241 - 24" Seat height
User Manual
Read Instructions carefully before use.
Rollator is designed for indoor & outdoor use.
Do NOT use as a wheelchair or as a transport chair.
Instruction manual must be given to the user.
Page 2
1. For Your Safety
a) Do NOT use the rollator to carry heavy
objects.
b) Do NOT push the rollator when someone is
sitting on the seat.
c) Rollator must be fully unfolded when being
used as a walking aid.
d) Always check the brakes are working before
using.
e) Do NOT sit on rollator and push yourself
around using your feet to propel.
f) Do NOT stand on the seat.
g) Parking brake must be applied
before sitting.
2. Assembly
* Phillips screwdriver required
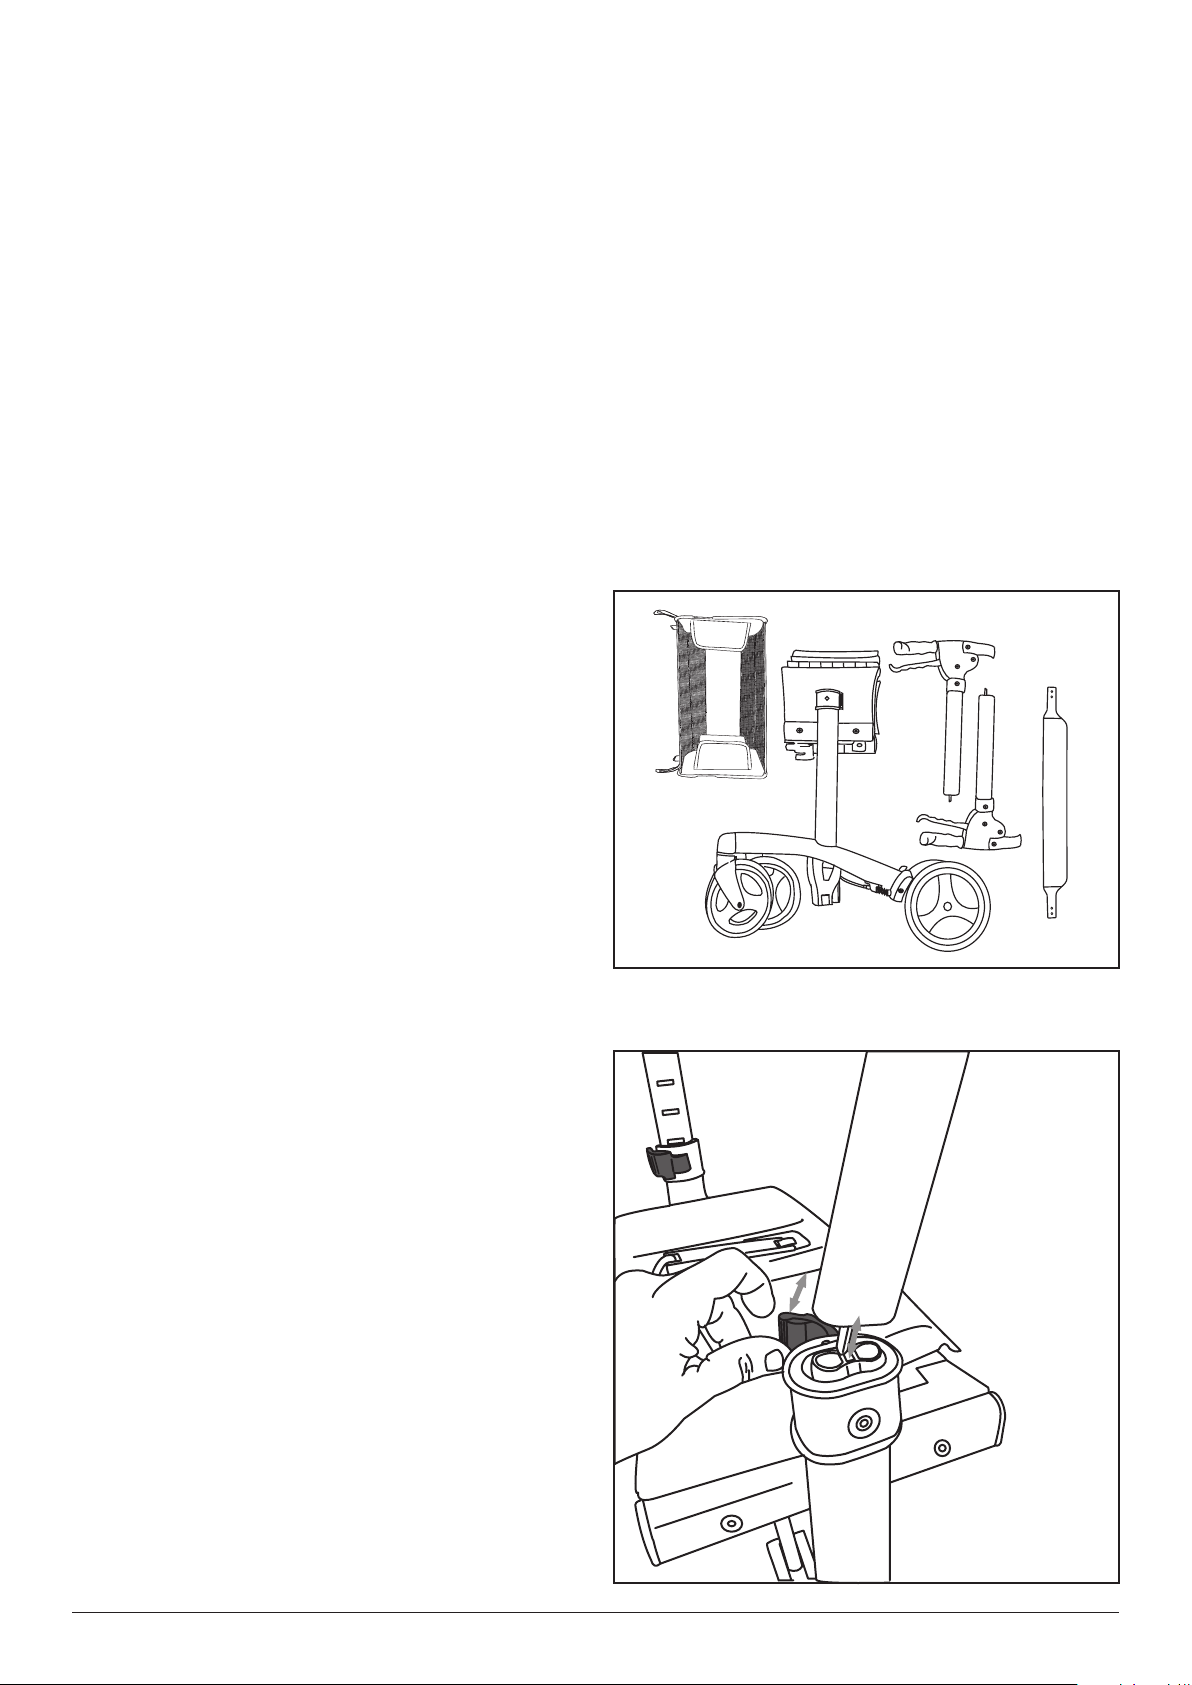
The Triumph Mobility Escape rollator consists of
the following parts.
(a) Rollator frame.
(b) Brake handles (pair).
(c) Shopping Bag.
(d) Backstrap & 2 screws and nuts.
h) Do NOT use on stairs or escalators.
i) Exercise caution when walking on sloped
surfaces.
j) Do NOT hang objects from the backstrap.
k) Do NOT use if the rollator is not functioning
properly.
l) The weight capacity of the rollator is
250Ibs/113Kgs.
m) The weight capacity of the shopping bag
is 11Ibs/5Kgs.
n) When storing your rollator, do not store
other items on top of your rollator.
c
b
a
d
Check each part carefully for shipping damage.
Do not use the rollator if there are signs of
damage and/or parts missing.
Install the brake handles
Rollator should be in the unfolded position
before beginning. While holding the ‘RED’
release lever in the open position, slide the
brake handle into the frame. Rectangular slots
on the brake handle tube should be facing
inwards.
The metal rod protruding from bottom of
brake handle tube must be inserted into the
rectangular slot in the middle of the frame.
Set the desired handle height, and close the
‘RED’ release lever. The release lever should
‘click’ when locked into the closed position.
Note: If brake handles are inserted with the
rectangular slots facing outwards, you will be
unable to set the handle height, as the ‘RED’
release lever will not close, and the brake will
not function.
Triumph Mobility2
Page 3
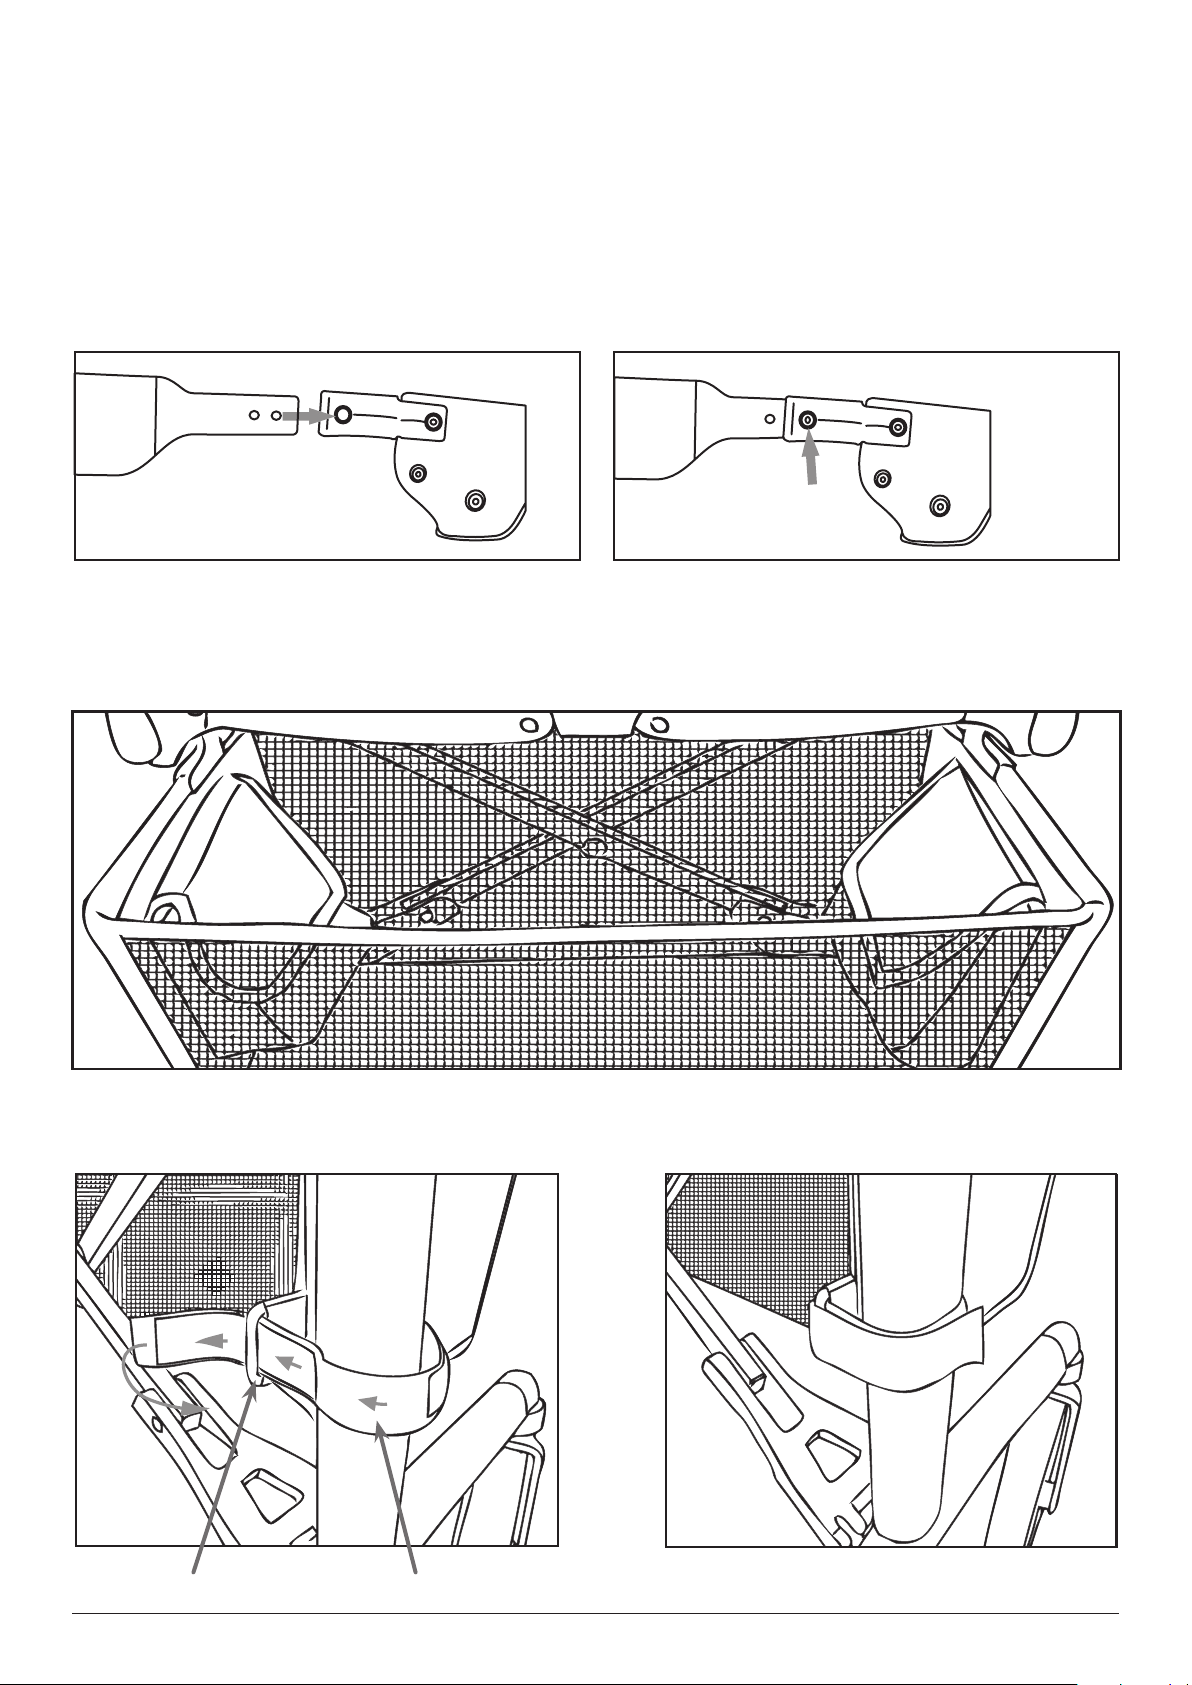
Install the backstrap
Slide backstrap into the backrest connector. The padded side of the backstrap should face the inside
of the rollator where it will meet the user’s back while seated.
Secure the backstrap into position by inserting the screw and nut. The nut should be positioned into
the hexagon shape hole on the inside of the backrest connector.
Tighten securely using a Philips screwdriver.
Install the Shopping Bag
Fix the shopping bag into the brackets located under the seat at the front.
Loop the strap (velcro) around the frame
and insert into wire tab
Firmly stick the strap
Wire Tab
Escape Rollator 3
Strap (Velcro)
Page 4
3. Operating Your Rollator
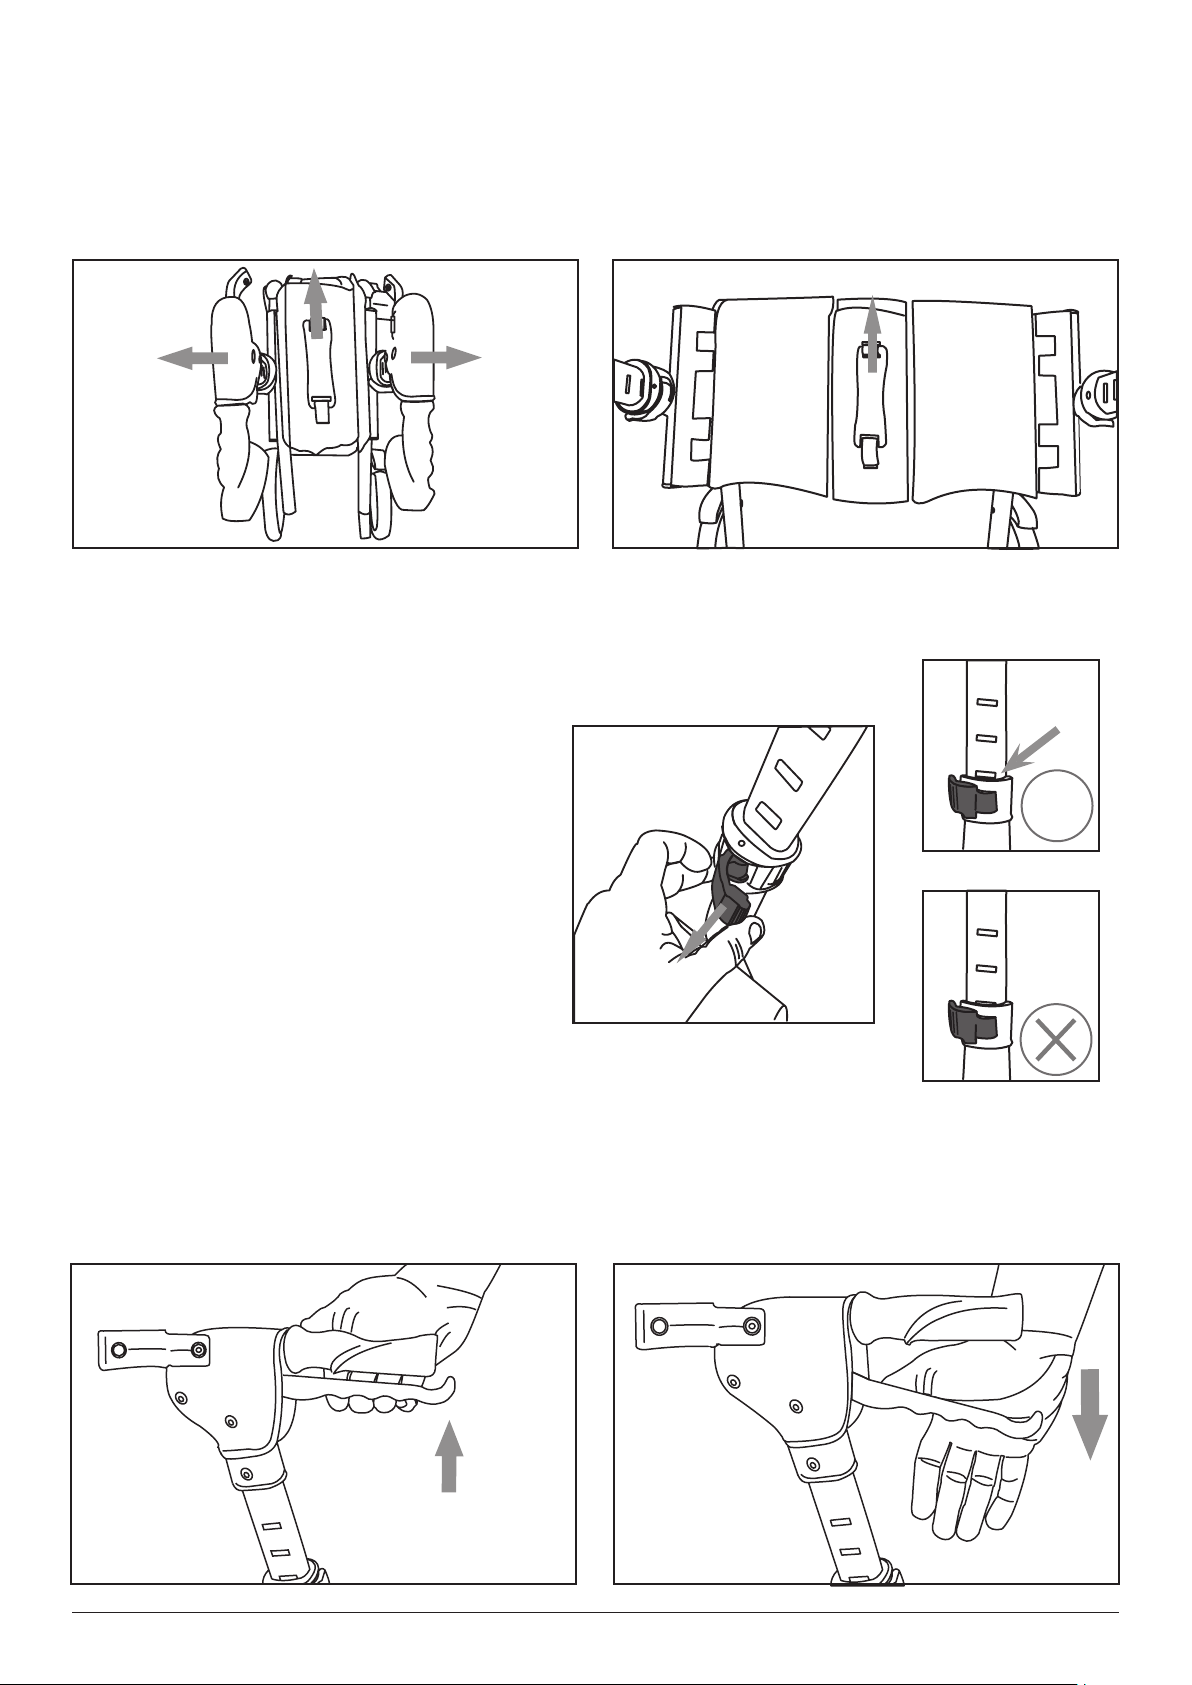
To unfold the Escape Rollator
To unfold rollator. Pull handles apart, and push
down on the seat to lock into place.
Adjust the Handle height
Pull the ‘RED’ release lever in the open
position. Set the desired handle height, and
close the ‘RED’ release lever. The release
lever should ‘click’ when locked into the
closed position.
To fold the Escape Rollator
To fold rollator pull up on the handle strap
located in the centre of the seat.
The bottom edge of the rectangular slot
will line up with the top edge of the frame.
To determine the correct handle handle
height of your rollator. Stand straight up with
your hands on the handgrips, your arms
should be slightly bent 20 – 30 degrees at
your elbows.
Using the Brakes
Pull up on brake handle to slow down or to
release the parking brake.
✓
Push down on brake handle to lock the brake
into PARK.
Always lock the brake before sitting.
Triumph Mobility4
Page 5
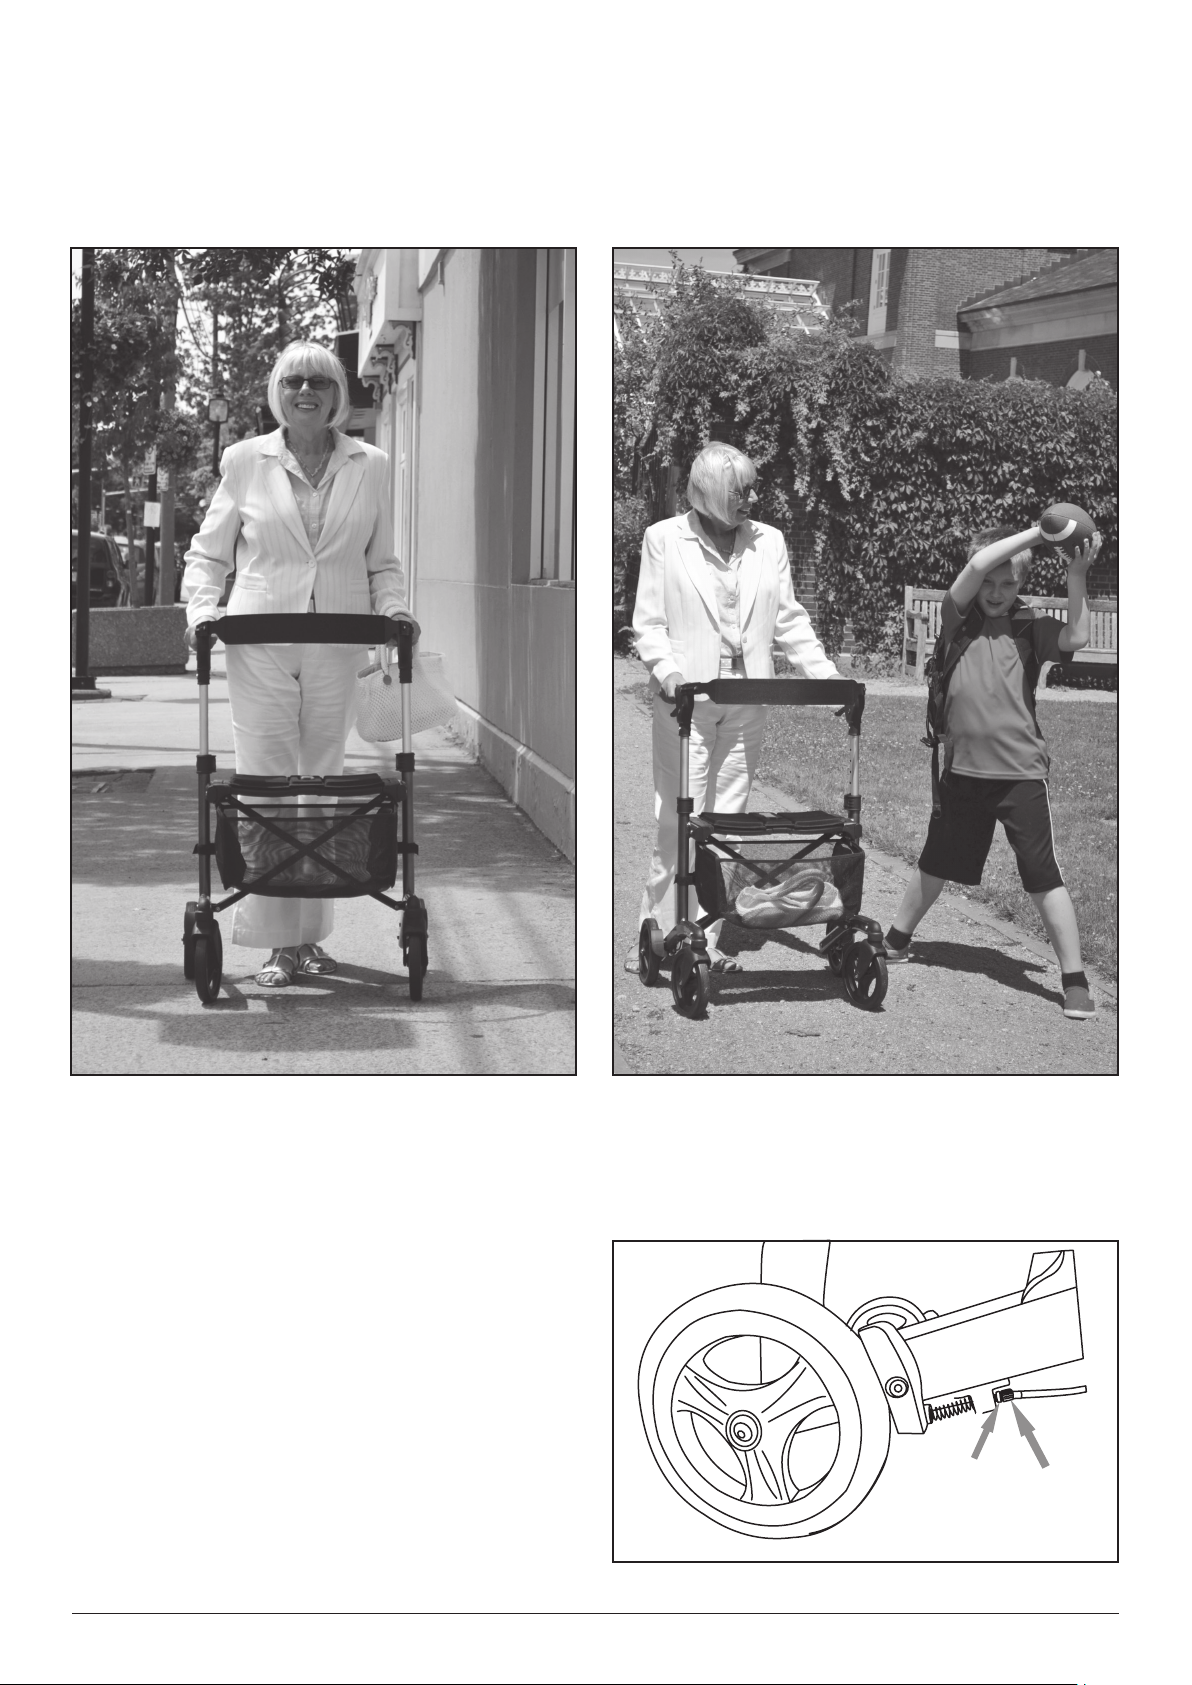
Walking with the rollator
Stand up as straight as possible, and walk with the rollator close to your body. Keep your feet
centred. Do not push the rollator away from your body, as this will cause you to bend your back,
and could cause a fall.
To adjust the brake tension
If the hand brake is too loose. Loosen the
locking nut, and turn the adjustment screw
counter clockwise.
If the hand brake is too tight. Loosen the locking
nut, and turn the adjustment screw clockwise.
Locking
Nut
Escape Rollator 5
Adjustment
Screw
Page 6
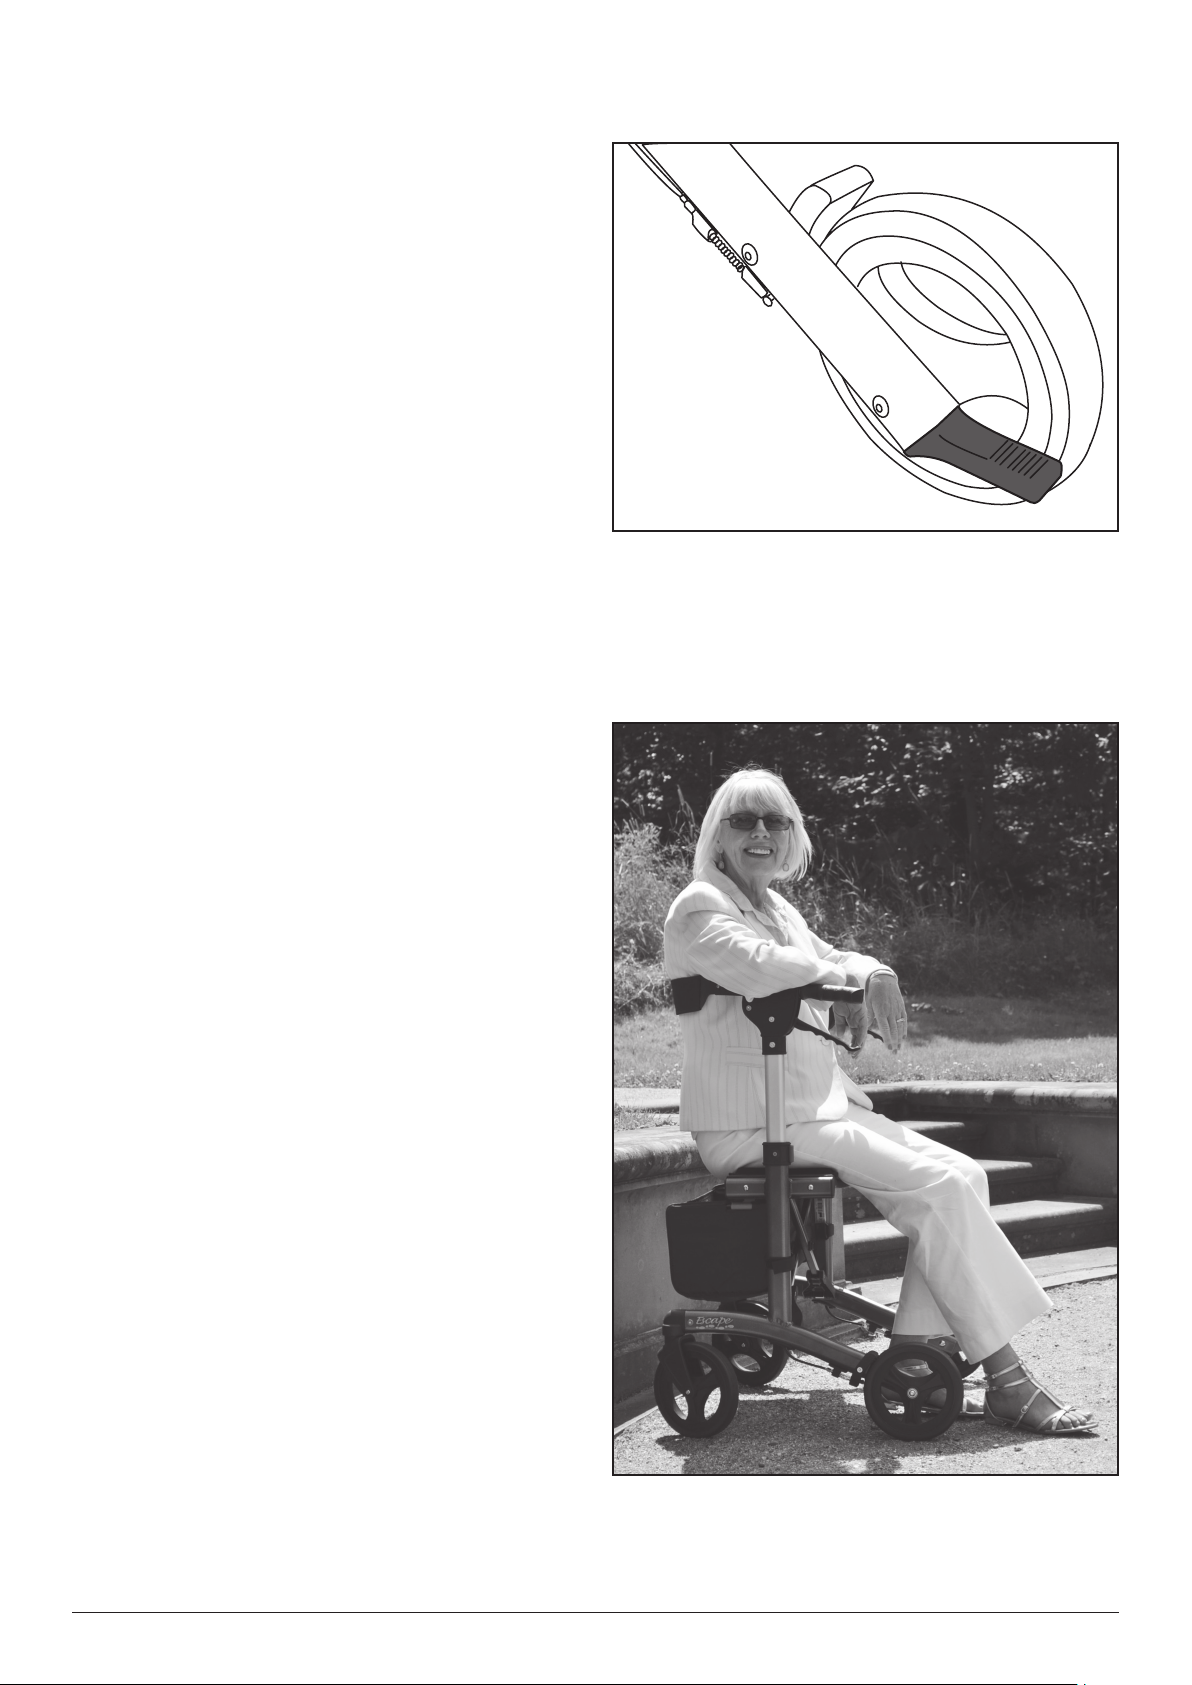
To use the curb climber
Use the curb climber to overcome obstacles
such as curbs and thresholds.
To use keep both hands on the handles, and
place foot onto the curb climber to lift the front
wheels of the rollator.
To sit on the Rollator
To sit on the rollator, ensure that the brakes are
in the LOCKED position, and the rollator cannot
move. Using the handles for stability carefully
turn around. Gently touch the back of your legs
on the edge of the seat, and sit down. Ensure
both feet make contact with the ground while
seated.
DO NOT STOP ON SLOPED SURFACES!
Triumph Mobility6
Page 7

Travelling with your Rollator
Storage
When travelling with your rollator, and
your rollator will be stored out of sight, we
recommend that you remove the brake handles
from the frame of the rollator to prevent
damage. For example when travelling on
airplanes, long distance buses, etc. It is best that
the handles be carried with you in your carry on
bag if possible.
When re-assembling the rollator, check all parts
of the rollator carefully for damage before
using.
4. Maintenance
Do not leave your rollator subject to the
elements outside for extended periods.
When storing the rollator, do not store other
objects on the rollator
5. Warranty
a) Clean the rollator using mild soap and water.
Wipe dry.
b) Keep wheels clean.
c) Check screws and handle height adjustments
are tight.
d) If your rollator is not working properly,
discontinue use, and contact your dealer for
service.
Triumph Mobility covers the Escape Rollator
by a lifetime warranty on the frame, and a five
(5) year warranty on the brake handles against
defects in materials and workmanship. All other
components are warrantied for one (1) year.
This warranty is valid for the original purchaser
only, and is not transferrable. Triumph
Mobility will not warranty any parts that have
been damaged due to improper installation,
modification, and /or misuse. For warranty
service, please return your rollator to your local
dealer. Service charges are at the discretion
of the dealer, and are not the responsibility of
Triumph Mobility.
Escape Rollator 7
Page 8
6. Rollator Specifications
Dimensions
Seat Height
Handle Height Range
Distance between handles
Distance between wheels
Seat Size
Overall Width
Overall Length
Super Low
19"
48cm
28 - 35.5"
71 - 90cm
18"
45.7cm
19"
48.25cm
18.5 x 9.5"
47 x 24cm
25"
63.5cm
25.6"
65cm
Low
21"
54cm
29 - 37"
74 - 94cm
18"
45.7cm
19"
48.25cm
18.5 x 9.5"
47 x 24cm
25"
63.5cm
25.6"
65cm
Standard
24"
61cm
32 - 40"
81.3 - 101.6cm
18"
45.7cm
19"
48.25cm
18.5 x 9.5"
47 x 24cm
25"
63.5cm
25.6"
65cm
Depth Folded
Wheel diameter
Weight Capacity of rollator
Weight capacity of basket
Product weight
11 "
28cm
8"
200mm
250Ibs
113Kgs
11Ibs
5Kgs
15.4Ibs
7Kgs
11 "
28cm
8"
200mm
250Ibs
113Kgs
11Ibs
5Kgs
15.6Ibs
7.1Kgs
11 "
28cm
8"
200mm
250Ibs
113Kgs
11Ibs
5Kgs
15.8Ibs
7.2Kgs
Triumph Mobility8
 Loading...