

Page 1
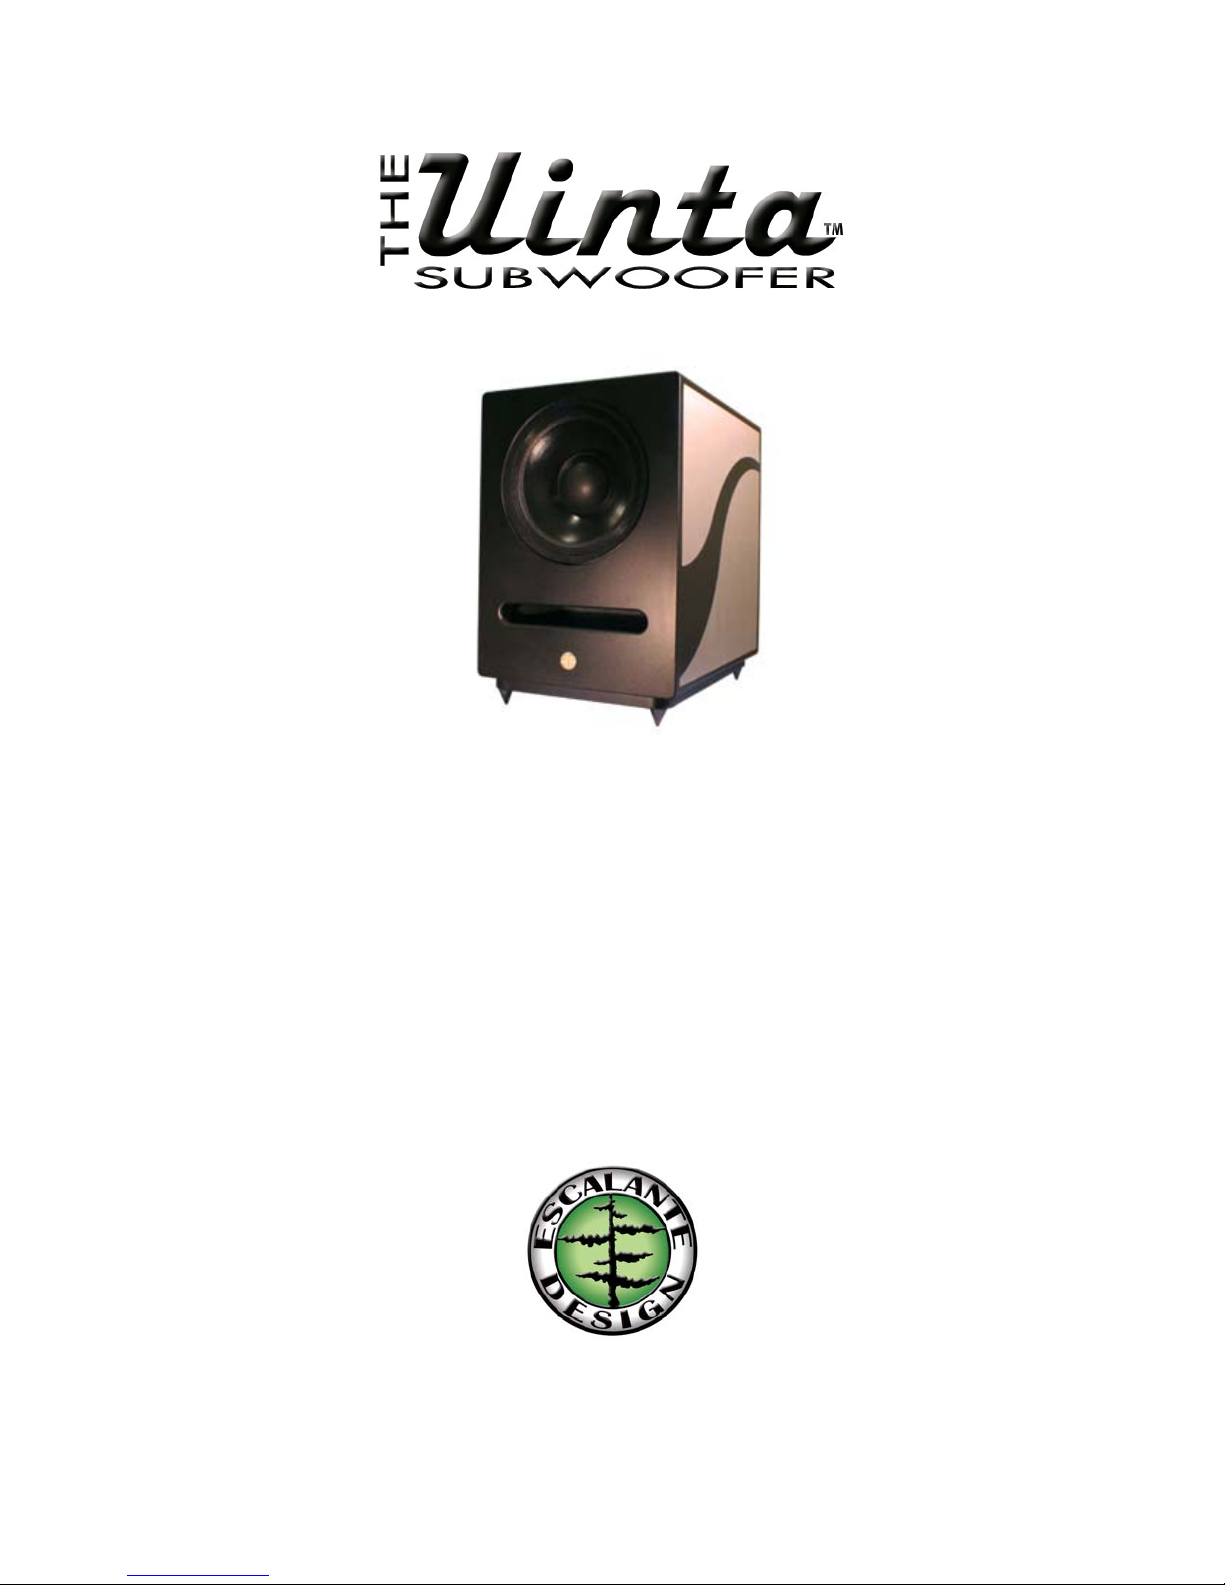
Reference Manual & Guidebook
A compilation of set-up and daily usage suggestions designed
to provide the owner with a broad understanding of the use
and enjoyment of The Uinta™ Subwoofer.
Page 2

Contents
Authentication ..........................................3
Foreword and Welcome............................. 4
Warnings ..................................................5
Initial Placement & Electrical Hook-up
- Location ............................................. 6
- Spikes ...............................................6
- Amplifier Hook-Up ...............................6
Break-In.................................................... 7
Subwoofer Set-up...................................... 7
- Placement...........................................7
- Phase.................................................8
- Crossover Frequency ............................8
Level ........................................................ 10
EQ .........................................................11
Grill Removal.............................................11
Amplification ............................................ 11
Care & Maintenance ..................................12
Listening Concerns....................................12
Technical...................................................13
Warranty...................................................14
2
Page 3

© 2006 Escalante Design L.C.
Reproducing The Uinta™ Subwoofer Owner’s Reference Manual &
Guidebook in whole or in part without prior written permission is
prohibited. All rights reserved. This manual may not be reproduced,
translated, or reduced to any machine-readable form, in whole or in
part, without prior written approval from Escalante Design.
The content contained within this manual is designed relative to The
Uinta™ Subwoofer; manufactured by Escalante Design. Escalante
Design is not responsible for the use of any information contained
within this manual as it is applied to any other loudspeakers.
Escalante Design will not be liable to the purchaser of The Uinta™
Subwoofer or any third parties for damage, loss, or expense incurred
by the purchaser or third parties as a result of: accident, misuse or
abuse of The Uinta™ Subwoofer, or unauthorized modifications,
repairs or alterations.
Trademark Notice: Escalante Design L.C., The Uinta™, and
Escalante Design, are trademarks of Escalante Design and Escalante
Design L.C
Patents: BUWA Tech L.C. has granted Exclusive rights to Escalante
Design L.C. for the use of its patents.
General Notice: Other product names used herein are for
identification purposes only and may be trademarks of their respective
owners. Escalante Design disclaims any and all rights in those marks.
Quality Control: Before each speaker leaves Escalante Design, it is
subject to 15 different quality control evaluations…including a listening
test. This is above and beyond the visual inspection of each individual
part when it enters the Escalante factory.
Trade Name: Escalante Design
Responsible Party: Escalante Design L.C.
Address: 3585 North University Ave. Suite 200
Provo, Utah 84604
Telephone: 801.373.4712
Fax: 801.373.4713
Web site: www.escalantedesigns.com
Email: [email protected]
For more specific information on Escalante Design
philosophy/technology visit our web site listed above.
3
Page 4

Foreword
For several generations inventors and audio enthusiasts have been
experimenting with ways to reproduce sound, or more specifically,
music. The audio industry has progressed from a mesmerizing
discovery, to an accepted form of communication, and now to a
necessity in many homes. Whether we are watching movies or reliving an exceptional performance, sound and music reproduction has
taken an integral place in our lives.
Unfortunately, in the years since its genesis, loudspeaker design has
often pursued a meandering path. The individuality of a loudspeaker
frequently establishes itself in the form of gimmicks, flavors, and/or
cookbook-style patterns: thus, straying from the goal of “total fidelity
to the source. The heart and soul of the original music has taken a
back seat to intellectual and philosophical interpretation...How much
musical excitement is there in a discussion of “air vs. harmonic
extension”?
Music is intended to be disarmingly joyous…
Come Listen.
…..Welcome to Escalante Design
We set out to create a technology which would adeptly accommodate
all the styles, moods, and listening levels of today’s audio/video
demands. Additionally, we have made it part of our philosophical
mission to implement earth friendly materials into the manufacturing
of our loudspeakers.
The technology embodied in your Escalante speaker system represents
both an increase in speed and a reduction in intermodulation
distortion. (U.S. Patent: 6,816,598)
This increased speed and lower distortion introduces a whole new level
of texture and dimensionality, not etched sterility.
Accordingly, our hope is to bring out the essence of the music:
harmonics, timbres, and dynamics that bloom in complete individual
and ensemble character; and resolution, which brings both musical
presence and warmth, not analytical detachment. It is our desire to
help you discover the qualities that will urge you to listen again and
again…this is what sets Escalante Design apart…
...Believability is what we do.
4
Page 5

WARNINGS
Hearing Damage: The Uinta™ Subwoofer is capable of producing
extremely low distortion, high-output levels. We find that this often
encourages the user to turn up the volume to elevated levels and
hearing damage may result if misused. Please read the LISTENING
CONCERNS section of this manual for a more complete understanding
of hearing damage avoidance and responsible playback.
Lifting Advisory: The Uinta™ Subwoofer weighs approximately 64 Kg
(140 lb). It is highly recommended that you employ proper lifting
techniques and have adequate help...especially if the subwoofer needs
to be moved up or down stairs.
Shock Hazard: Children should not be left unattended around
electronic devices with accessible power and loudspeaker level cables.
To reduce the risk of fire or electric shock, disconnect your amplifier
from the power source prior to disconnecting or connecting the
interconnecting cable. Do not expose loudspeaker to rain or moisture.
Do not operate loudspeaker near a pool, bathtub or other standing
water. Do not attempt to open up (or service) this unit beyond
instructions contained in this manual.
Sheilding: The Uinta makes use of a very powerful motor structure.
Do not locate sensitive electronic devises such as magnetic data
storage systems, CRT televisions, computer equipment, etc. within one
meter (3.3 feet) of subwoofer.
5
Page 6

Initial Placement & Electrical Hook-up
The Uinta™ Subwoofer has a fast enough response time to successfully
negotiate a crossover frequency well above 800Hz. Besides making
integration easier, such “speed” allows a wide range of placement with
a relative minimum of adverse reaction to room placement.
We recommend that you power everything down prior to connecting
the Uinta™ Subwoofer into your system. Do not install the spikes at
this time.
Location: It is not always possible to place the subwoofer in what
might be considered an “acoustically ideal” position. However, we have
made a concerted effort to design The Uinta™ around real listening
spaces. Feel free to place your new subwoofer in the best location to
compliment (or not detract, if you will) from, the room’s living space.
Additional information regarding room and loudspeaker integration can
be found in the Set-up section.
Spikes: In order to obtain the highest degree of performance, we
recommend the use of the supplied spikes. Such spikes do more than
provide a stable foundation; they help keep the bass solid and
dynamic. We also recommend that you wait to install the spikes until
speaker placement is determined. Caution should be used if the
subwoofer is to be positioned on delicate area rugs. To avoid damaging
such rugs, lift (a two person task) or carefully pivot, rather than slide
the loudspeaker into position.
Amplifier Hook-Up: When connecting the subwoofer, to reduce the
risk of electrical shock and possible system damage, make sure that
the amplifier is off. (i.e., unplugged)
There are only 2 potential ways of hooking up the powered Uinta™
Subwoofer
(exclusive to the 110volt U.S. amp). One is using the stereo
inputs (red and white), and the other is to use the input marked “LFE.”
(Low Frequency Effects—white.) The former is for two-channel hookup with the main speakers, and requires a direct connection to a
stereo pair of preamp outputs. The latter is for Home Theater set-up.
Under these conditions, the sub will be connected up to one output (on
the surround-sound (ss) processor, ss preamp, or ss receiver) marked
“subwoofer” or “LFE.” This set-up bypasses The Uinta™ Subwoofer’s
internal crossover, allowing the surround sound processor to control
the crossover integration. (see the processor’s owner’s manual for
more adjustment details.)
6
Page 7

Note: The amplifier automatically enters a stand-by mode after
approximately 10 min. of “no signal.” This keeps the input circuitry
“warmed-up” without needing to have the amplifier running. Turn-on
is instantaneous with the introduction of the signal.
Break-in
Burn-in usually entails about 150 hours of playing time, with at least
10% of this time involving material with a lot of low frequency
information. When you reach the point of break-in, the lowest
frequencies will seem more powerful and vibrant, and consequently
your overall system should sound more open and dynamic.
Subwoofer Set-Up
Under normal conditions, we do not recommend the use of acoustic
materials designed to absorb specific frequency ranges. (“tube traps,”
for example.) These devices should only be considered as a last resort.
In any case, please follow the set-up instructions first…introducing
tuning measures, as needed, afterwards.
Note: While performing initial set-up adjustments, place the EQ
“Level” control at the “0” position (approximately 2:00.) This
effectively removes the contribution of the EQ while overall position
and set-up are being determined. The EQ is meant to fine tune the
subwoofer’s response after the crossover and placement adjustments
are made.
Set up of the subwoofer will come in a series of 4 steps: 1) Placement
2) Phase 3) crossover frequency, and 4) overall level…in this order.
Placement: Before the subwoofer is even hooked-up and plugged-in,
determine a good room-position from which to start the integration
process. (see the “Initial Placement…” section.)
Ideally, the subwoofer should be placed in what could be considered,
visually, the most closed-in part of the room. That is, if the room has a
sloped ceiling, then the sub should be placed where the ceiling height
is at its lowest. If the room is L-shaped, then it should be placed in the
“elbow” of the “L.” Even if the room varies in width by only a few
centimeters, the sub should be placed at the most constricted end—
“firing” into the most open part of the room.
7
Page 8

While room size does affect the sense of “effortlessness” in the bottom
octaves, room position and associated equipment are the most
significant contributors to low-frequency performance. Low-frequency
wavelengths are quite long. We have found that both the development
of these frequencies and the dynamics of the subwoofer itself, are
more affected by room impedance than absolute room size.
Phase: With an external subwoofer, like this one, you have the ability
of changing the polarity (or “phase”) relative to that of the “satellites.”
This is accomplished through throwing the switch labeled “phase” on
the installed amplifier. (If your system possesses the capability of
“continuously variable phase,” skip to the “note” at the end of this
section.)
Before beginning the work on the tonal integration of the subwoofer
with the satellite, it is best to determine the appropriate relative
“phase” which will bring the best in-room low frequency extension. To
do this, we recommend the use of low frequency, steady-state tones:
whether through test-disc sine waves, or music. (i.e. sustained
synthesizer, organ, string bass, etc.)
In every room, we find that one polarity will bring a good deal of
“presence” in the mid-bass, while the other polarity seems to go
deeper. The latter of the two is the most desirable. Don’t be worried
by level comparisons, they’ll be readjusted as the crossover point and
tonal balance are set. (See below.)
There are no “absolutes,” when it comes to polarity settings…every
room is different; so don’t be bothered by the final choice.
Note
: With a continuously variable phase control, turning the control to
the point that provides the deepest, broadest, most “pure-tone”
sound—not necessarily the loudest—is the most appropriate.
At first, the bass output, and mid-bass contribution might appear less
impressive this way, but it will be “filled in” as we continue with the
placement/integration process.
Crossover Frequency: Beginning – Once the correct polarity setting
is determined, bass integration (crossover point) and level can be set.
At this point it is usually best to use music with which you are very
familiar. Certainly, pink noise + SPL meter could be used, instead of
music, but we have found that this method is often not as precise as
8
Page 9

we would expect it to be. This may be due to the fact that very few
microphones provide reliable feedback in the low frequencies.
2-channel only:
On the subwoofer’s amplifier there is a volume-like
control (labeled, “Frequency”) that indicates a range of 30 (turned
fully counter-clockwise) to 200 (fully clockwise). This is the range—30
Hz to 200 Hz—of crossover frequencies offered by The Uinta™
Subwoofer (110volt U.S. amp version). Determining an appropriate
crossover frequency and “integrating” the low-frequencies with the
main speakers will involve rotating this control until the bass has the
right overall “color,” or timbre.
Integration, stereo inputs: To determine the “best” crossover point, we
recommend that you listen for transient and timbrel continuity. If the
bass seems too “thick,” turn the knob slowly counter-clockwise. If it
seems lacking in “fullness,” you may need to turn it clock-wise. The
bass should sound “faster” and more precise. Too low of a crossover
point will reduce the sense of low-frequency “energy”--besides calling
undue attention to the bottom octave. Too much overlap will make the
mid-bass sound wooly, muddy, and slow. When the crossover is
adjusted correctly it should sound as if the subwoofer were part of the
satellites, or invisible. Turning the subwoofer amp on and off should
provide the only indication of the subwoofer’s presence. (It may
require level adjustments, and burn-in, before the blend is seamless.)
Integration, LFE input: If the audio signal enters the Uinta via the LFE
input, the internal crossover will be defeated. This allows the
surround-sound processor to control the crossover point. Under these
conditions, follow the instructions detailed in the processor’s owner’s
manual. However, we still recommend that you listen for the same
bass characteristics detailed in the preceding paragraph.
Finally:
If your set-up, and/or personal preferences, allow for a more
fastidious “tuning” of the low frequencies, you may wish to continue
with the following: After you find the crossover point which seems to
present the most accurate presentation, you’re ready to do the last
bits of fine-tuning. Without the use of a continuously variable phase,
be prepared to move the subwoofer forwards, or backwards, until the
“blend” is more musically correct. (“Continuously Variable Phase”
allows this type of “displacement” without moving the subwoofer.)
Once again, you’re listening for the sense of precision, speed, or
“forward movement” of the music--“pace and rhythm,” if you will.
9
Page 10

The closer you get to the correct setting, 2 things will happen: 1) the
mid-bass will sound less “murky,” and 2) the lowest octave will sound
deeper and more sinusoidal—i.e., pitch related.
Level: Subwoofer “level” is the area where we often find the greatest
divergence in preference. Some like to hear bass in everything that is
played, some wish to use the subwoofer to improve the sound of the
satellites alone.
If you’re interested in tonal neutrality, the “test” that we’ve found
works the best (after the phase and crossover adjustments are made)
is the following: Play a piece that involves a small ensemble (whether
chamber classical, or jazz), where there should be very little bass.
Turn the bass up slowly until the point where it begins to be “heard”;
then back it off just a touch. The same could be done with a vocal
piece, if you know it well enough. Or, alternatively, a piece with a
single bass line (like, a jazz piece with an upright string bass) can help
determine both crossover point and overall level. Once again, you
want to dial out “murkiness” and dial in pitch and bass depth and
breadth.
Once position, polarity, crossover point, and level are determined,
install the supplied spikes.
Feel free to investigate all of your personal “torture tests.” Set-up this
way, you will discover a whole new level of low-frequency musicality.
Traditional demo pieces will sound more natural, involving, and
dynamic
!
We recommend that you perform the Subwoofer Set-Up process again
after The Uinta™ has had sufficient break-in time. (see “Break-In”)
10
Page 11

EQ
The Uinta™ Subwoofer
(110volt U.S. amp version only) features a
“parametric” equalizer—boosting or cutting either a single frequency of
choice, or a broad range of connected frequencies. This type of
equalizer permits the greatest possible subwoofer integration under
the widest of possible scenarios.
EQ Frequency: This identifies the specific frequency at which EQ
boost or cut may be centered between 18 Hz and 80 Hz.
EQ Bandwidth: This determines how narrow or wide the EQ curve will
be within a range of 0.1 to 1.0. If, for example, a frequency of 55 Hz
were selected along with a Q of .1, the frequencies to either side of 55
Hz would be less affected. This is a narrow bandwidth that could be
useful for “surgically” removing an offending peak without disturbing
adjacent frequencies. On the other hand, a Q of 1 would result in a
much broader effect which could be used for smooth overall bass boost
or cut, to balance the overall tone character of the sub.
EQ Level: After choosing the “Q” (width or narrowness), the “Level”
allows up to 6 dB of boost or 14.5 dB of cut at the selected frequency
and bandwidth. Setting the control at the 0 position effectively
removes the EQ from the circuit path.
Note: High levels of boost reduce amplifier headroom by proportional
amounts.
Grill Removal
Escalante grills are magnetic and can be removed simply by holding
the frame and pulling sideways (away from the speaker).
Amplification
Due to the dynamic linearity of the Uinta, the installed amplifier should
provide all the output necessary for all conditions. The only conditions
under which this might not be the case, is that of filling large listening
spaces. (Typically 200m3/6000ft3) For rooms this large, we
recommend the use of 2 subwoofers, if so desired.
11
Page 12

Care & Maintenance
The Uinta subwoofer is a maintenance free system. It doesn’t offer any
serviceable parts or devices.
Placing anything on the top of the loudspeakers--such as live potted
plants or beverages—may result in finish damage.
Preferably place the loudspeaker in a shaded area. Long exposure to
direct sunlight may cause discoloring of the finish.
Listening Concerns
The undistorted, low resonance-factor presentation of The Uinta™
Subwoofer often leads us to listen at louder levels. Our ears are quite
resilient, yet very sensitive. Since The Uinta™ has the potential for
loud, undistorted playback; care should be taken while setting the
overall levels.
We believe that listening is about an emotional reaction. That is, does
it encourage you to broaden your horizons, or does it relegate you to
the few styles of music that entice you the most? Perhaps, rather than
asking, “How does it sound?” we should ask, “How does it make me
feel?”
12
Page 13

Technical
General Measurements
Amplifier Recommendation: 500 Watts (installed)
Transient power rating: 3000 Watts @ 10 mS
Sensitivity (1 Watt; 1 meter): 94 dB
SPL @ 10 Watts input: 104 dB cont. (107 dB peak, 1m)
SPL @ 100 Watts input: 114 dB cont. (117 dB peak, 1m)
SPL @ 500 Watts input: 121 dB cont. (122 dB peak, 1m)
Bandwidth (system): 18 Hz ~>800 Hz (40-80 Hz recommended
crossover frequency)
Nominal-impedance: 8 Ω
13
Page 14

Warranty
Escalante Design provides limited warranty services for its loudspeaker
systems, amplifiers, outboard electronics, stands, and enclosures for
the following periods of time beginning on the purchase date any
particular product was originally purchased:
Speakers: 5 years
Amplifiers & Outboard Electronics: 3 years
Enclosures & Stands: 2 years
To register your warranty, please visit us online at:
http://www.escalantedesigns.com//viewer/home/warranty.asd
This limited warranty inures to the benefit of the original purchaser
only and is non-transferable. The limited warranty covers defects in
material or workmanship, but does not cover damages:
(a) caused by accident, misuse, abuse, product modification or
neglect;
(b) incurred during shipment or transport by purchaser or purchaser's
agent;
(c) resulting from failure to follow Escalante's product instructions; or,
(d) resulting from repairs or upgrades made or attempted by an
unauthorized third party.
The limited warranty will not be honored, is void and unenforceable, if
the product's serial number has been defaced, modified, or removed.
Claiming repairs under the Escalante Design Limited Warranty:
If your Escalante Design product ever needs service, write, telephone,
or visit our website at:
Escalante Design
3585 North University Ave. Suite 200
Provo, Utah 84604
P: 801.373.4712
F: 801.373.4713 (attention: warranties)
E: [email protected] (subject: warranty claim)
URL: www.escalantedesigns.com
We may direct you to an authorized Escalante Design service agency
or ask you to send your product to the factory for repair. In either
14
Page 15

case, you will need to present the original bill of sale to establish the
date of purchase, and product serial number for our reference. Your
product should be shipped in its original shipping carton, because a
charge will be made if replacement cartons are requested. Please do
not ship your products to the factory without prior authorization.
If transportation of your Escalante product presents any unusual
difficulties, please advise us and we may make special arrangements
with you. Otherwise, you are responsible for transporting your product
for repair or arranging for its transportation and for payment of any
initial shipping charges. We will pay the return shipping charges if the
repairs are covered by the warranty. However, if the repairs are not
covered by the limited warranty, then you will be responsible for the
return shipping charges as well.
Limitation of Implied Warranties:
ALL IMPLIED WARRANTIES, INCLUDING WARRANTIES OF
MERCHANTABILITY AND FITNESS FOR PARTICULAR PURPOSE, ARE
LIMITED IN DURATION TO THE LENGTH OF THIS WARRANTY.
EXCLUSION OF CERTAIN DAMAGES
ESCALANTE DESIGN’S LIABILITY IS LIMITED TO THE REPAIR OR
REPLACEMENT (AT OUR OPTION) OF ANY DEFECTIVE PRODUCT AND
SHALL NOT INCLUDE INCIDENTAL OR CONSEQUENTIAL DAMAGES OF
ANY KIND. SOME STATES DO NOT ALLOW LIMITATIONS ON HOW
LONG AN IMPLIED WARRANTY LASTS AND/OR DO NOT ALLOW THE
EXCLUSION OF INCIDENTAL OR CONSEQUENTIAL DAMAGES, SO THE
ABOVE LIMITATIONS AND EXCLUSIONS MAY NOT APPLY TO YOU. THIS
WARRANTY GIVES YOU SPECIFIC LEGAL RIGHTS, AND YOU MAY ALSO
HAVE OTHER RIGHTS WHICH VARY FROM STATE TO STATE.
Escalante Design
3585 North University Ave. Suite 200
Provo, Utah 84604
P: 801.373.4712
F: 801.373.4713
E: [email protected]
URL: www.escalantedesigns.com
15
 Loading...