

Page 1
November, 2010
INSTRUCTIONS FOR
PREST-O-LITE ACETYLENE REGULATOR RENEWAL KIT
Part No. 62Y08
F-11-972
This kit is designed for use with all PREST‑O‑LITE R‑411 regulators. It is
also suitable for replacement of parts in the R413, R‑2233, and R‑2260 regu‑
lators. It must not be used for renewal of parts in an R‑412 oxygen regulator
or an R 416 propane regulator.
NOTE: Regulator repair should be undertaken only by property trained
per sonnel in adequately equipped repair facilities.
To install new parts:
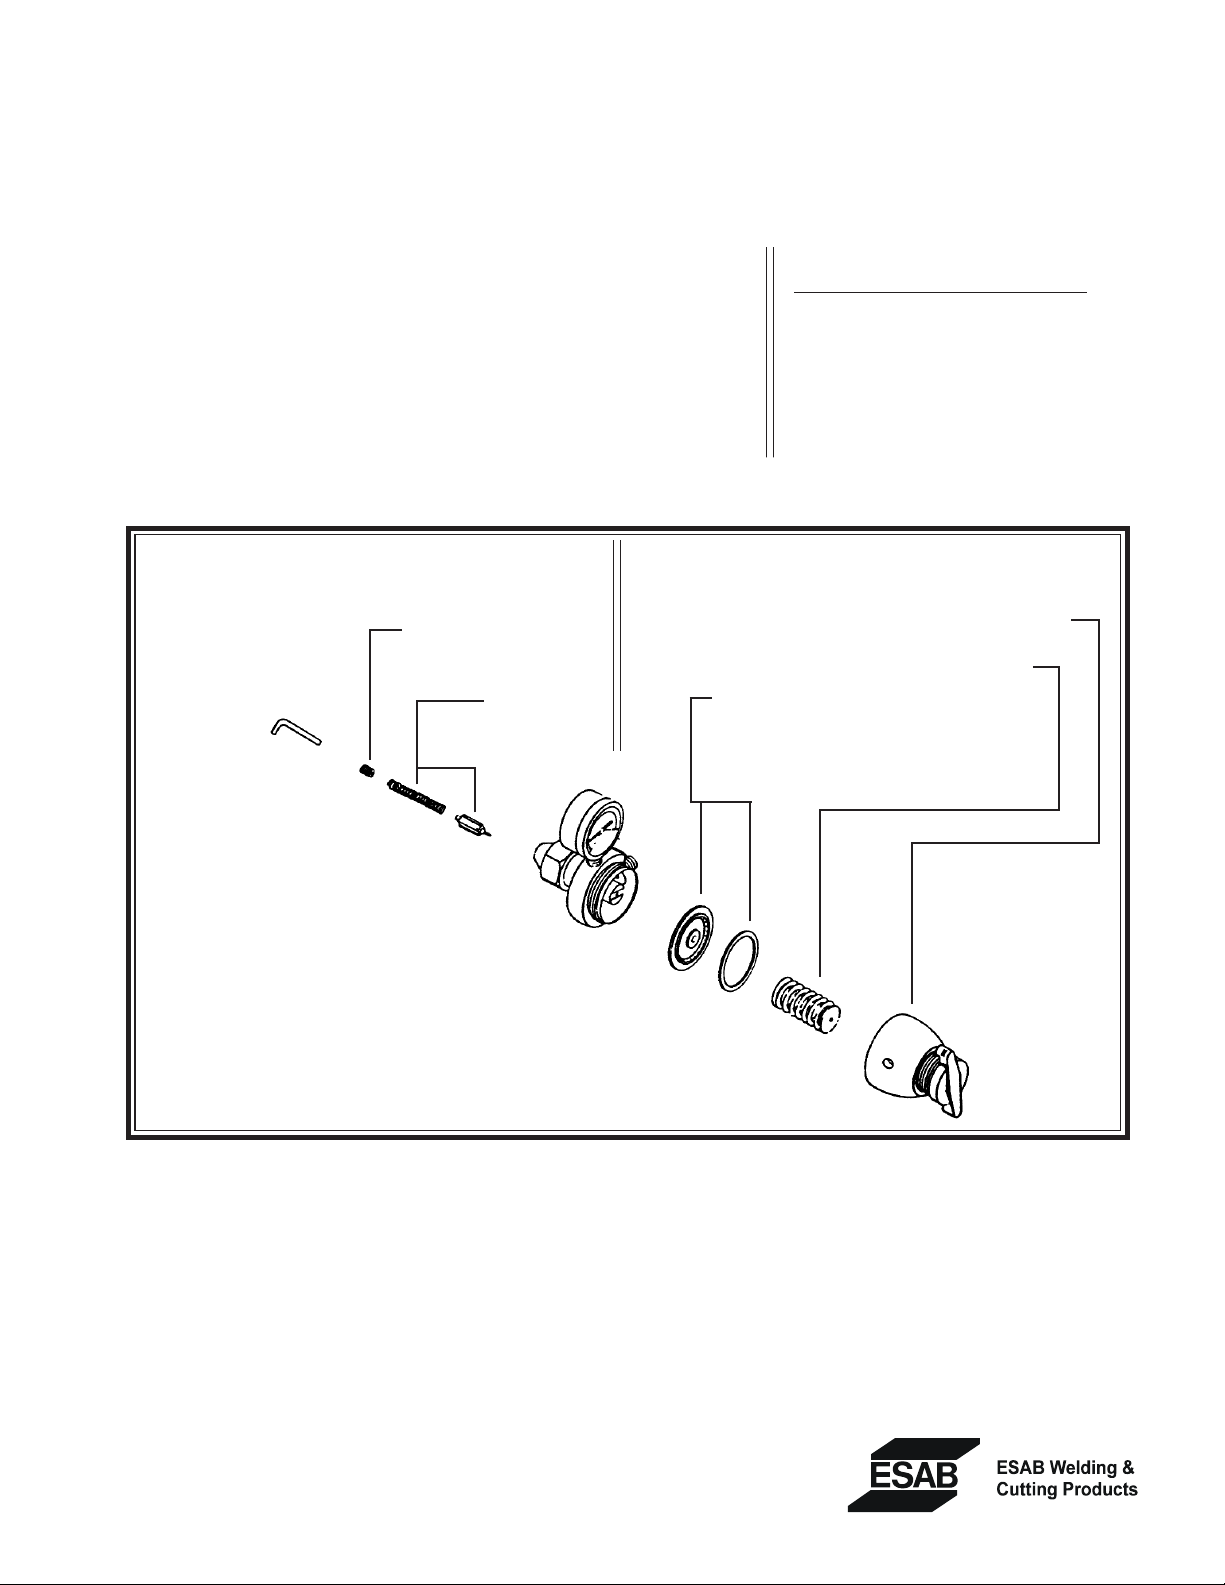
REPLACE INLET FILTER, VALVE
1 2
SEAT AND VALVE SPRING
Use Allen Wrench to unscrew
lter screw from inlet
connection nipple.
Shake out spring and
valve seat.
Replace all 3 parts
with new ones.
REPLACE DIAPHRAGM AND
DIAPHRAGM RING
Unscrew cap Use two 1/4” rods in holes as
handles to loosen.
Sping and spring washer will drop out.
Replace old diaphragm and diaphragm
and diaphragm ring with new ones.
Reassemble; tighten cap.
Contents of Kit:
Description Part No.
Filter Screw 34Y02
Seat and Stem 32Y43
Spring 29Z42
Diaphragm Assembly 820501
Diaphragm Ring 82Z40
HexWrench 9375‑0012
NOTE:
These instructions
apply to all models of the PREST O‑LITE
R‑411 and R‑413 Regulators, even though they
differ in external appearances. Other avail able replacement
parts: 134Z18 Pressure‑Adjusting Screw; Tank Contents
Gauge; Delivery Pressure Gouge.
To test, after installation of new parts:
1. Attach the regulator to a full small tank of acetylene, and tighten the inlet connection nut with a wrench. Back out the regu‑
lator pressure‑adjusting screw as far as it will go. Then slowly open the tank valve. Place a lm of soapy water across the
regulator outlet. If the lm bubbles and breaks, there is leakage past the valve seat in the regulator.
2. Holding your thumb over the regulator outlet, turn in the pressure‑adjusting screw and test for leaks around the joint between
cap and body, and at the two vent holes in the cap.
3. If either of the above tests discloses leakage, disassemble the regulator, inspect all parts, and wipe them with a clean, lint‑free
cloth. Then reassemble and repeat the leak testing. If any leak persists, return the regulator to your dealer for repair.
F‑11‑972 11/2010
 Loading...