

Page 1
ESAB PAPR System
Respiratory protective device
Instruction manual
ESAB PAPR System GB 20180614
Page 2

ESAB AB
Lindholmsallén 9
Box 8004
402 77 Gothenburg
Sweden
Phone +46 (0) 31 50 90 00
www.esab.com
Page 3

TABLE OF CONTENTS
1
SAFETY ....................................................................................................... 4
1.1 Meaning of symbols ............................................................................... 4
1.2 Safety precautions ................................................................................. 4
2
INTRODUCTION.......................................................................................... 6
2.1 Overview ................................................................................................. 6
2.2 Equipment ............................................................................................... 6
2.3 Prerequisites........................................................................................... 6
3
TECHNICAL DATA ...................................................................................... 8
3.1 System overview .................................................................................... 8
3.2 Technical data......................................................................................... 8
3.3 Warranty.................................................................................................. 9
4
OPERATION ................................................................................................ 10
4.1 Assembly ................................................................................................ 10
4.1.1 Belt adjustment..................................................................................... 10
4.1.2 Particle filter.......................................................................................... 11
4.1.3 Removing the filter ............................................................................... 11
4.1.4 Inserting a new filter ............................................................................. 12
4.1.5 Changing the pre-filter .......................................................................... 12
4.1.6 Attaching the hose to the blower unit ................................................... 12
4.1.7 Donning the welding helmet ................................................................. 12
4.2 Usage....................................................................................................... 13
4.3 Inspection before use ............................................................................ 13
4.3.1 Alarm test ............................................................................................. 13
4.3.2 Air flow test ........................................................................................... 14
4.3.3 Batteries ............................................................................................... 14
4.3.3.1 Charging the battery .......................................................................... 14
4.3.3.2 Replacing the battery ........................................................................ 15
5
MAINTENANCE........................................................................................... 16
5.1 Cleaning .................................................................................................. 16
5.2 Storage and transportation ................................................................... 16
6
TROUBLESHOOTING ................................................................................. 17
CERTIFIED HELMETS ........................................................................................ 18
ORDERING SPARE PARTS................................................................................ 19
ORDERING NUMBERS AND SPARE PARTS LIST ........................................... 20
ESAB PAPR System.................................................................................................. 20
Sentinel A50 Air ......................................................................................................... 21
Warrior Tech Air......................................................................................................... 21
F20 and F20 Air.......................................................................................................... 22
G30 and G30 Air ........................................................................................................ 23
G40, G50, G40 Air and G50 Air ................................................................................. 24
Rights reserved to alter specifications without notice.
ESAB PAPR System © ESAB AB 2018
Page 4
1 SAFETY
1 SAFETY
1.1 Meaning of symbols
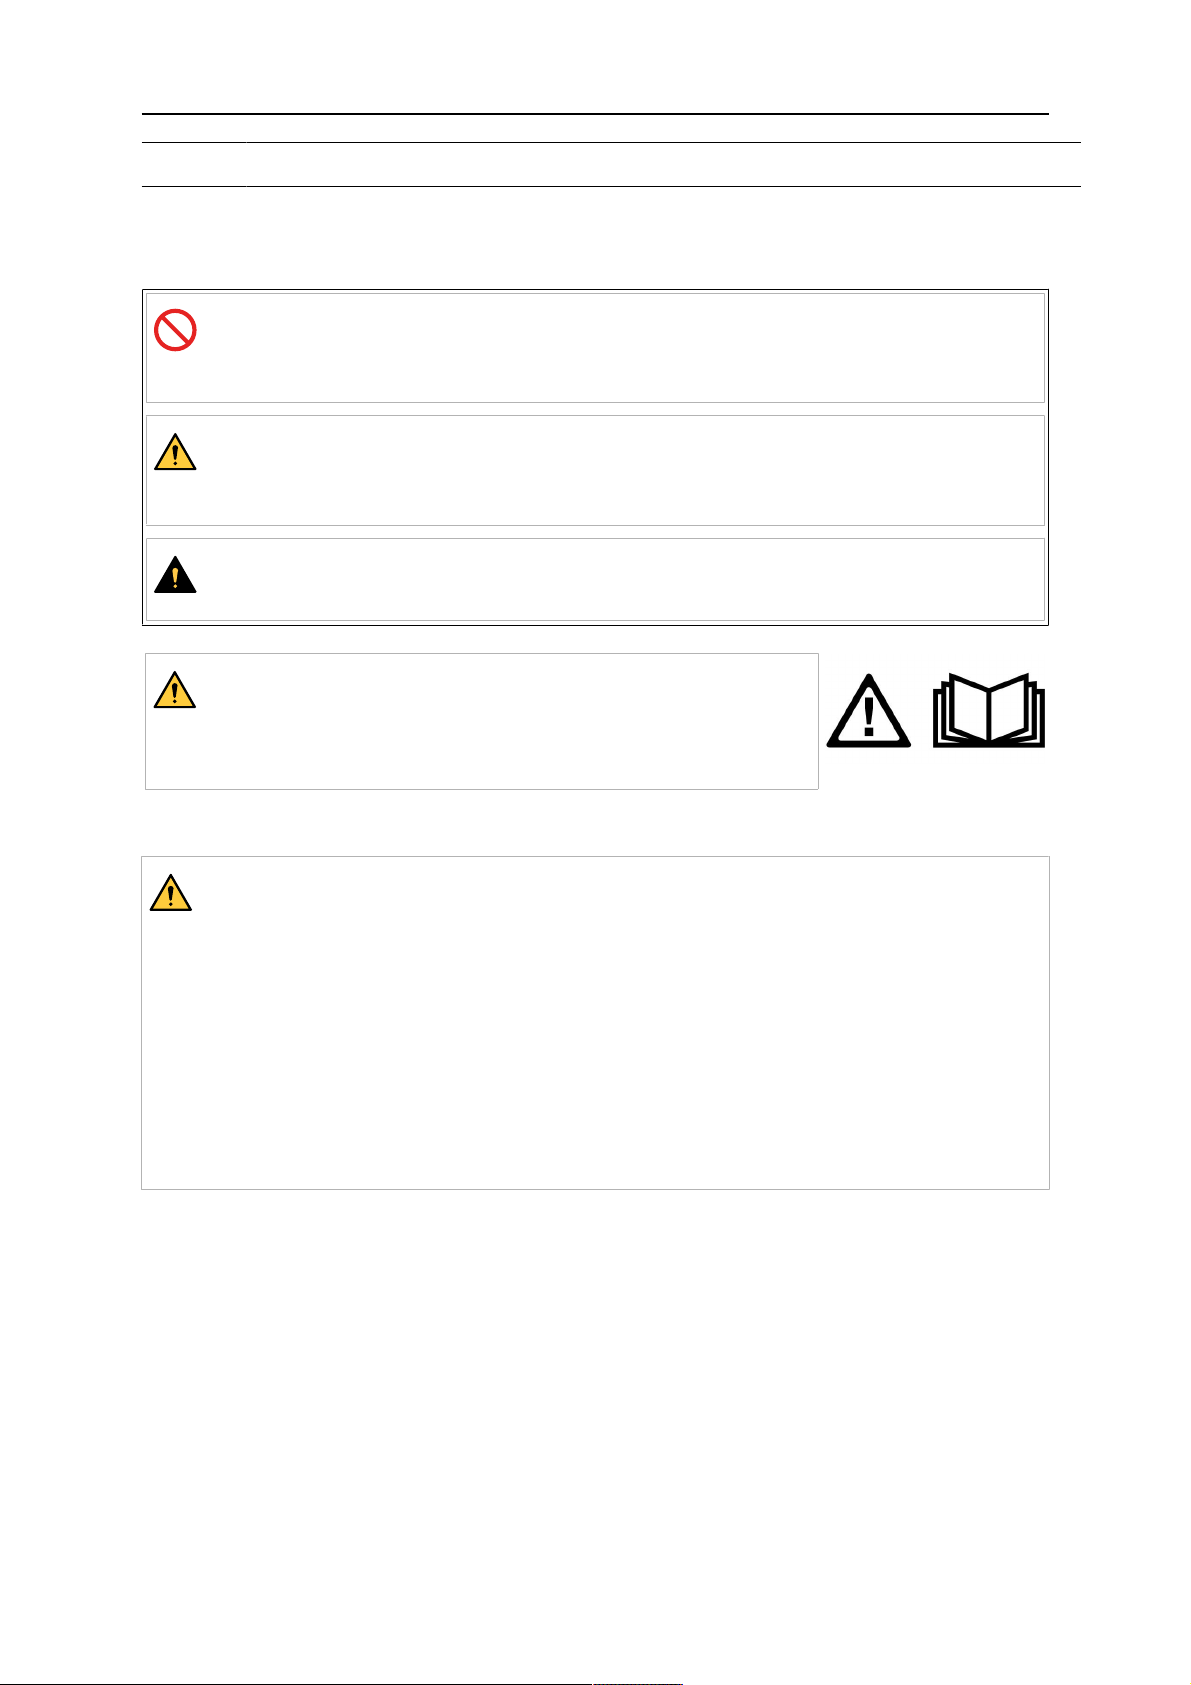
As used throughout this manual: Means Attention! Be Alert!
DANGER!
Means immediate hazards which, if not avoided, will result in immediate,
serious personal injury or loss of life.
WARNING!
Means potential hazards which could result in personal injury or loss of
life.
CAUTION!
Means hazards which could result in minor personal injury.
WARNING!
Before use, read and understand the instruction manual
and follow all labels, employer´s safety practices and Safety
Data Sheets (SDSs).
1.2 Safety precautions
WARNING!
Failing to follow these instructions may result in risk of fire, electric shock or
personal injury.
• Only charge the correct type of rechargeable battery to reduce the risk of
explosion, personal injury or other damages.
• Do not open the charger. Any repairs should be done by the
manufacturer or authorized service personnel.
• Do not attempt to take the unit apart, this action voids the warranty. Do
not disassemble the unit when it is plugged into the mains electric supply
to avoid the risk of electric shock or fire.
• Do not use the charger if it is visibly damaged.
Users of ESAB equipment have the ultimate responsibility for ensuring that anyone who
works on or near the equipment observes all the relevant safety precautions. Safety
precautions must meet the requirements that apply to this type of equipment. The following
recommendations should be observed in addition to the standard regulations that apply to
the workplace.
All work must be carried out by trained personnel well-acquainted with the operation of the
equipment. Incorrect operation of the equipment may lead to hazardous situations which can
result in injury to the operator and damage to the equipment.
ESAB PAPR System
- 4 -
© ESAB AB 2018
Page 5

1 SAFETY
1. Anyone who uses the equipment must be familiar with:
○ its operation
○ location of emergency stops
○ its function
○ relevant safety precautions
○ welding and cutting or other applicable operation of the equipment
2. The operator must ensure that:
○ no unauthorised person is stationed within the working area of the equipment
when it is started up
○ no-one is unprotected when the arc is struck or work is started with the
equipment
3. The workplace must:
○ be suitable for the purpose
○ be free from drafts
4. Personal safety equipment:
○ Always wear recommended personal safety equipment, such as safety glasses,
flame-proof clothing, safety gloves
○ Do not wear loose-fitting items, such as scarves, bracelets, rings, etc., which
could become trapped or cause burns
5. General precautions:
○ Make sure the return cable is connected securely
○ Work on high voltage equipment may only be carried out by a qualified
electrician
○ Appropriate fire extinguishing equipment must be clearly marked and close at
hand
○ Lubrication and maintenance must not be carried out on the equipment during
operation
NOTE!
Dispose of electronic equipment at the recycling
facility!
In observance of European Directive 2012/19/EC on Waste
Electrical and Electronic Equipment and its implementation
in accordance with national law, electrical and/or electronic
equipment that has reached the end of its life must be
disposed of at a recycling facility.
As the person responsible for the equipment, it is your
responsibility to obtain information on approved collection
stations.
For further information contact the nearest ESAB dealer.
ESAB has an assortment of welding accessories and personal protection equipment
for purchase. For ordering information contact your local ESAB dealer or visit us on
our website.
ESAB PAPR System
- 5 -
© ESAB AB 2018
Page 6

2 INTRODUCTION
2 INTRODUCTION
These user instructions must be followed when using and operating the ESAB PAPR
System. Failure to follow these instructions may void the warranty of the product(s). Refer to
the terms of your purchase contract in respect of the product(s) for the specific details of the
warranty.
2.1 Overview
The ESAB PAPR System is a respiratory protective system that circulates over-pressured air
in the hood. The belt-mounted blower unit delivers air through a filter and via an air hose into
the headpiece. The supply of filtered air creates positive pressure inside of the headpiece,
which prevents the external contaminated air from entering the breathing zone.
2.2 Equipment
The ESAB PAPR System is supplied with:
• Blower unit including battery, PRSL particle filter and pre-filter
• Belt
• Air hose
• Air flow indicator
• Battery charger
• Instructions manual
2.3 Prerequisites
Use the ESAB PAPR System during welding in unconfined spaces, strictly in accordance
with this Instruction manual and the instructions supplied with the corresponding helmets.
Do not use the unit:
• When the blower unit is switched off. When the blower unit is switched off, little or no
respiratory protection is to be expected. Rapid buildup of carbon dioxide and depletion
of oxygen may occur in the head unit.
• In an atmosphere that poses an immediate health or hygiene hazard and/or has less
than 19.5% oxygen content, or contains unknown substances.
• In confined spaces or unventilated areas such as tanks, pipes and canals.
• Near flames and/or sparks.
• In areas with danger of explosion.
• In areas with high winds.
• If the blower unit malfunctions.
Make sure moving parts are not blocked in their movement.
Do not modify or alter the unit or the particle filter in any way.
Protect the unit from ingress of water or other liquids, in particular the motor and fan, the filter
and the battery.
Make sure that the headpiece fits perfectly. The efficiency of the system is only sufficient in
this case. The protective factor of the complete system is reduced if the seal of the
headpiece is not fitted properly, for example if long hair or facial hair is extending into the seal
line.
Correct respiratory protection will not be provided if any part of the equipment is modified in
any way.
Position the blower unit in a way that minimises the risk of the head unit hose becoming
caught up during use. Filters must be attached to the blower unit, and not directly to the
headpiece.
ESAB PAPR System
- 6 -
© ESAB AB 2018
Page 7

2 INTRODUCTION
During elevated inhalation flow the pressure in the device may become negative.
Leave the contaminated area immediately and if needed seek medical advice if:
• The Manufacturer’s Minimum Design Flow (MMDF) warning alarm sounds.
• Breathing becomes difficult.
• Dizziness or distress occurs.
• Any part of the system becomes damaged.
• Airflow into the head unit decreases or stops.
• Contaminant can be smelt or tasted inside the head unit.
• In the unlikely event of an allergic reaction to the material of the headpiece.
ESAB PAPR System
- 7 -
© ESAB AB 2018
Page 8

3 TECHNICAL DATA
3 TECHNICAL DATA
3.1 System overview
The ESAB PAPR System is a belt mounted powered respirator with a replaceable,
disposable high efficiency particle filter. The system is certified with the helmets covered in
the “Certified helmets” section.
The unit has a removable and rechargeable Lithium-ion battery. Battery life varies depending
on the air quality and particle concentration of the work area.
The unit has visual alarm for indicating low battery and a multifunctional alarm for indicating
filter blockage. Do not use the unit when it alarms.
The particle filter is designed for the unit. Check the particle filter for any damage or
deformation that could lead to contaminated air getting into the unit. In a dusty environment
the filter needs to be replaced frequently. The particle filter must be disposed if it is damaged
or clogged, and is triggering the alarm.
The unit warns with an audible alarm and flashing LEDs if the MMDF of 170l/min is not
achieved. Leave the contaminated area immediately if the warning alarm sounds.
3.2 Technical data
Air flow
General 180–220l/min
Minimum 170l/min
Weight with particle filter 870g (1.9 lb)
Operating temperature 0–40°C (32–104°F)
Operating time
Minimum flow rate, fully charged battery, clean
environment >8hours
Maximum flow rate 6hours
Type of particle filter PRSL
Battery
Replaceable and rechargeable Li-ion
Type
Charging cycles >350
Alarms
Low battery Visual alarm
Insufficient flow rate (below 170 L/min) Visual, audible, vibration alarms
Actual Protection Factor (APF) 20/50
7.4V5200mAh
Noise level 65dBA
ESAB PAPR System
- 8 -
© ESAB AB 2018
Page 9

3 TECHNICAL DATA
Symbols
Refer to the manufacturer’s Instruction Manual
Store between 0-40°C (32–104°F)
Best before YYYY/MM
Maximum storage humidity <75%
Filter symbols:
R = The filter is reusable for more than one shift.
S = The filter protects against solid particles.
L = The filter protects against liquid particles.
3.3 Warranty
ESAB verifies that each product is free from defects of material and workmanship at the time
of delivery and is functioning according to its intended use.
ESAB provides warranty on defects of material and workmanship according to legal
requirements. Consumables are exempt from this warranty.
ESAB provides warranty on the ESAB Blower unit for a period of 12 months from the date of
purchase against mechanical or electrical defects.
ESAB provides warranty on the ESAB battery for a period of 12 months from the date of
manufacture.
The warranty does not cover any damages or functional deficiencies resulting from
• overloading, abusing or non-intended use of the product
• collisions or accidents
• non compliance with indications stated in these operating instructions
• improper installation or assembly
• insufficient maintenance
• modifying the product from its original state
• chemical influences
• normal wear and tear during proper operation
ESAB assumes no liability other than for replacement or repair of faulty parts.
NOTE!
In the event of a claim, contact the retailer from which the unit was purchased.
ESAB PAPR System
- 9 -
© ESAB AB 2018
Page 10

4 OPERATION
4 OPERATION
4.1 Assembly
Attach the respiratory unit onto the belt. Pass the strap through loops and the buckle.
Fit the battery to the blower unit:
Make sure that the battery is the indicated way up.
Make sure that the battery is snapped into position.
4.1.1 Belt adjustment
Fasten the belt using the adjusters to achieve a comfortable and secure fit. Secure any
excess belt.
ESAB PAPR System
- 10 -
© ESAB AB 2018
Page 11

4 OPERATION
Loosen Tighten
4.1.2 Particle filter
Use only particle filters supplied by ESAB.
WARNING!
Using any other filter voids the warranty and/or poses a serious risk to the health
of the operator.
Make sure to use correct kind of filter to acheive suitable protection from the hazard. The
respiratory power unit is equipped with a high efficiency particle filter of class PRSL.
At warning alarm, replace or check the pre-filter. In very dusty areas this is necessary on a
frequent basis.
Check and replace the filters regularly, see "Air flow test" section. Do not try to clean and
reuse filter.
Make sure the new filter is within the expiry date, unused and not damaged. The maximum
lifecycle of a filter is 2 weeks or 90 hours, whichever is reached first. Do not exceed the
timeframe.
4.1.3 Removing the filter
Pull up the cover from the right side of the blower to open the filter cover.
NOTE!
Do not use any tools to open the filter cover.
To remove the filter, pull it out of the unit. Clean the unit from dust ensuring no dust enters
the air inlet.
ESAB PAPR System
- 11 -
© ESAB AB 2018
Page 12

4 OPERATION
4.1.4 Inserting a new filter
To insert a new filter, put the filter back into position. Gently push until it fits well.
Snap the cover properly into the blower to close the filter cover. Do not use the blower unit
without the cover fitted correctly.
4.1.5 Changing the pre-filter
The pre-filter is a sleeve, fitted over the main
filter. To remove or replace simply pull off the
old filter and stretch the new one into
position. Make sure that the main filter is
completely covered by the pre-filter.
4.1.6 Attaching the hose to the blower unit
Align the pins of the hose bayonet connector with the slots in the air outlet of the blower.
Push the bayonet connector into the blower until it reaches the bottom of the hole and then
twist it clockwise until the locating pins clip into place.
Fit the hose to the hoods using the same method.
4.1.7 Donning the welding helmet
Set the rake of the welding helmet. Adjust the
welding filter to suit, see the helmet
Instruction manual.
Lift the helmet to its upper position.
Place over the head. Adjust the headgear
ratchet wheel by pushing it in and twisting
until a satisfactory tightness is achieved.
Pull the elasticated chin guard downwards
and at the same time pull the helmet down.
Ensure the elasticated chin guard fits
comfortably under the chin.
The welding helmet is now ready for use.
ESAB PAPR System
- 12 -
© ESAB AB 2018
Page 13

4 OPERATION
4.2 Usage
Switch on the unit by pressing the ON/OFF
button on the control panel. The airflow can
be adjusted by pressing the + / - buttons from
180l/min up to 220l/min in six speeds.
The green LED diodes show the actual
airflow level.
To prevent accidental changes, press and
hold the buttons for 2 seconds for the action
to occur.
The unit ensures constant supply of air. The microprocessor regulates the motor speed. If the
microprocessor cannot keep the adjusted airflow, a beeping alarm sounds. Check the blower
unit at this point. If possible, the microprocessor will reduce the airflow to the next lower level.
If it fails, the alarm continues to sound. When the airflow falls below the minimum safe
operating level, a second audible alarm joins the first. Leave the working environment and
reach a safe area to change the filter, or recharge or replace the battery.
Normal function is achieved with a fully charged battery.
At startup, the battery LED will flash red on the control panel. If the LED stays red the battery
level is low and must be charged.
If the problem persists, see "Troubleshooting" section.
4.3 Inspection before use
• Check that all components are in good condition with no visible damage.
Check the air hose, seals and the face piece. Replace any damaged or worn out parts.
• Make sure there is a good connection between the air hose, the headpiece and the
blower unit.
• Check that there is sufficient air flow, see "Air flow test" section.
• Check that the air is supplied through the whole respiratory system from the blower to
the hood.
• Check that the battery has sufficient charge, see "Batteries" section.
• Ensure the alarms are working correctly, see "Alarm test" section.
4.3.1 Alarm test
Block the air outlet with the palm of a hand or other suitable means.
The motor will try to compensate by increasing the speed until the alarm sounds.
ESAB PAPR System
- 13 -
© ESAB AB 2018
Page 14

4 OPERATION
4.3.2 Air flow test
1. Disconnect the air hose from the
blower unit.
2. Insert the airflow indicator into the
air hose connector and keep the
hose in vertical position at about eye
level.
3. Switch the power unit on. The
airflow is sufficient only if the ball
indicator reaches the minimum flow
rate level. If the indicator is below
the minimum flow rate level,
recharge or replace the battery or
change the filter. If the problem
persists, see "Troubleshooting"
section.
4.3.3 Batteries
WARNING!
Use only ESAB original battery charger delivered with the product. Using any
other battery charger voids the warranty and poses a serious risk of fire or
explosion to the health of the operator.
NOTE!
Batteries are delivered partially charged. All batteries must be fully charged
before first use. The battery can be charged separately or in the blower unit.
Do not use the charger for any other purpose than for which it was manufactured.
Do not charge the battery in a potentially explosive atmosphere.
The battery charger is intended for indoor use and it must be protected from moisture.
The battery charger controls the charging automatically. When the battery has been charged,
the charger switches to the trickle charging regime and keeps the battery fully charged. The
charging time is 4 to 6 hours.
4.3.3.1 Charging the battery
1. Check that the voltage of the electrical power supply is correct.
2. Plug the charger into the socket, either direct into the blower when the battery is fitted
or into the battery directly.
3. Connect the battery to the charger. The socket of the battery is positioned on the back
side. The charging state is indicated by a red LED.
4. After charging has been completed, the trickle charging regime is activated. The red
LED goes out and the green LED illuminates during trickle charging.
5. Disconnect the charger from the power supply. Do not leave the battery charger in
the power supply if not in use!
ESAB PAPR System
- 14 -
© ESAB AB 2018
Page 15

4 OPERATION
4.3.3.2 Replacing the battery
Remove the battery
Locate the battery catch. Pull back the battery catch and remove the battery by lifting it
upwards.
Insert the battery
Make sure the battery is facing the correct direction, see "Assembly" section. Slide it into the
blower until the battery catch engages.
Make sure that the battery catch is fully locked.
ESAB PAPR System
- 15 -
© ESAB AB 2018
Page 16

5 MAINTENANCE
5 MAINTENANCE
5.1 Cleaning
Clean the blower unit, filter housing and head unit regularly.
For single users, the units can be cleaned with a cloth moistened with lukewarm water and
soap.
For multiple users, disinfect when passed from one user to another.
Do not allow liquid to enter the workings of the blower unit or get on to the element of the
filter.
Allow the parts to air dry. Do not use solvents or abrasive cleaning agents. Do not dry the unit
using hot air or radiant heat.
The unit provides protection to the designed specification for 2 to 3 years, when maintained
in accordance with these instructions. Prior to each use check that the unit is free from
defects as cracks, split filters and hoses, cracked visors and helmet components.
5.2 Storage and transportation
Store or transport the blower and head units in the container in which they were provided, or
in similar container.
Protect it from direct sunlight, solvents and physical damage.
Store between 0-40°C and below 75%RH.
ESAB PAPR System
- 16 -
© ESAB AB 2018
Page 17

6 TROUBLESHOOTING
6 TROUBLESHOOTING
If there is a sudden change in air supply while using the system, check:
• the battery and its connector.
• that all parts of the air-supply system are assembled properly.
• that the charger is not faulty or malfunctioning (diodes off).
• if the filters are clogged and need to be replaced.
• that there is no hole in the air hose.
• that the hood seal is not damaged.
• that the working time after a full recharge of the battery has not decreased (if so,
replace the battery).
Fault Probable reason Recommendation
The blower unit does not work
at all.
Entirely depleted battery:
Check if the blower unit works
with another charged battery.
Faulty motor, circuit board or
Charge the battery. If the
problem persists, check the
battery.
Contact supplier.
connector.
Low airflow. Blocked air hose or airduct. Remove possible blockage.
Leakage. Check seals, connectors and
air hose. Make sure that air
cannot leak through holes or
tears.
Battery is not charged
enough.
Charge the battery. If the
problem persists, check the
battery.
Blocked filter or pre-filter. Change the pre-filter. If the
problem persists change the
main filter.
Short operating time. Clogged filter. Change filter.
Battery is not charged
properly.
Charge the battery. If the
problem persists, check the
battery.
Battery cannot be charged. Battery contact is damaged. Check the battery contact.
Charger is faulty. Contact supplier.
Battery cannot be charged
Battery is worn out. Install a new battery.
sufficiently.
ESAB PAPR System
- 17 -
© ESAB AB 2018
Page 18

CERTIFIED HELMETS
CERTIFIED HELMETS
Helmets certified together with the PAPR system:
A20
A30
SENTINEL A50™
Warrior™ Tech
F20
G30
G40
G50
ESAB PAPR System
- 18 -
© ESAB AB 2018
Page 19

ORDERING SPARE PARTS
ORDERING SPARE PARTS
CAUTION!
Repair and electrical work should be performed by an authorised ESAB service
technician. Use only ESAB original spare and wear parts.
The ESAB PAPR System is designed and manufactured in accordance with the
international and European standard EN12941:1998+A1:2003+A2:2008 as a TH2 / + P R
SL device offering an Assigned Protection Factor of 20 / 50 according to BS4275. Certified
by APAVE SUDEUROPE SAS Notified Body 0082. The ESAB PAPR System can provide
this level of protection when used with filters provided by the manufacturer marked ESAB
and EN12941:1998 TH2/3P R SL. Welding helmets are certified to EN 175B. This PPE
device complies with the following applicable EU standards: EN166B:2001 EN379:2003 +
A1:2009 EN175B. The ESAB PAPR System is manufactured under ISO 9001:2000 Quality
System. On completion of service or repair work, it is the responsibility of the person(s)
performing the work to ensure that the product still complies with the requirements of the
above standards.
Spare parts and wear parts can be ordered through your nearest ESAB dealer, see
esab.com. When ordering, please state product type, serial number, designation and spare
part number in accordance with the spare parts list. This facilitates dispatch and ensures
correct delivery.
ESAB PAPR System
- 19 -
© ESAB AB 2018
Page 20

ORDERING NUMBERS AND SPARE PARTS LIST
ORDERING NUMBERS AND SPARE PARTS LIST
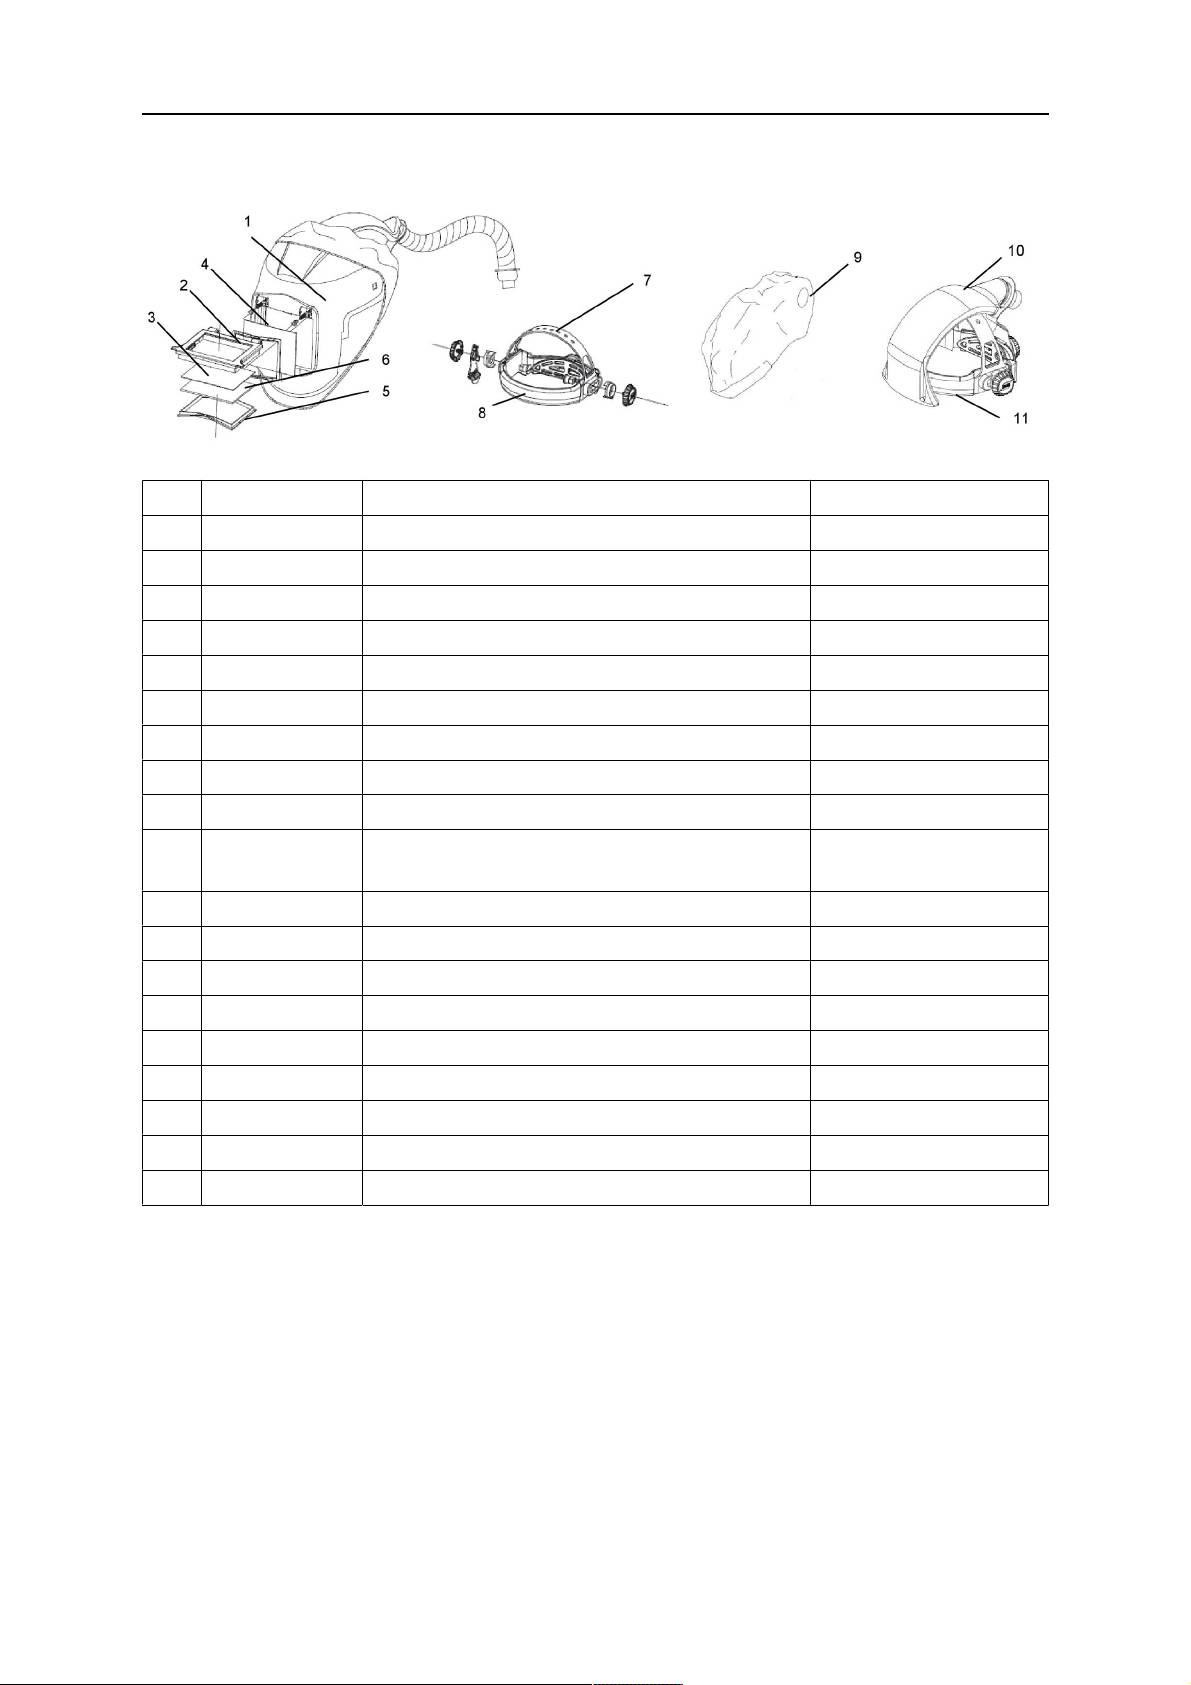
ESAB PAPR System
Item Ordering no. Denomination Notes
0700 002 303 Proban hose cover 1000 mm
0700 002 304 Proban hose cover 850 mm
0700 002 305 Air hose standard 850 mm
0700 002 306 Air hose long 1000 mm
0700 002 314 Flexi hose
0700 002 307 Comfort belt
0700 002 308 Motor unit
0700 002 309 P3 filter
0700 002 310 Pre-filter Pk 5
0700 002 311 Intelligent charger
0700 002 312 Battery
0700 002 313 Battery HD
ESAB PAPR System
- 20 -
© ESAB AB 2018
Page 21

ORDERING NUMBERS AND SPARE PARTS LIST
Sentinel A50 Air
Item Ordering no. Denomination Notes
1 0700 000 802 Front cover lens Clear
1 0700 000 803 Front cover lens Amber
2 0700 000 813 Sentinel A50 Air shell with air duct
3 0700 000 806 Auto-darkening filter Including 2 × CR2450
lithium battery
4 0700 000 807 2 × CR2450 lithium battery
5 0700 000 808 Inside cover lens 100 × 64 mm
6 0700 000 805 Headgear for A50 Air Including sweatbands
7 0700 000 810 Front sweat band
8 0700 000 812 Rear sweat band
9 0700 000 814 Face seal for A50 Air
Warrior Tech Air
Item Ordering no. Denomination Notes
2 0700 000 010 Front lens
4 0700 000 419 Warrior lens retainer
5 0700 000 420 Headgear and airduct
6 0700 000 421 Warrior face seal
ESAB PAPR System
- 21 -
© ESAB AB 2018
Page 22
ORDERING NUMBERS AND SPARE PARTS LIST
F20 and F20 Air
Item Ordering no. Denomination Notes
0700 000 426 F20, complete 60 × 110 mm
0700 000 427 F20, complete 90 × 110 mm
0700 000 428 F20 Air, complete 60 × 110 mm
0700 000 429 F20 Air, complete 90 × 110 mm
1 0700 000 509 Main shell F20
2 0700 000 510 Visor flip F20 60 × 110 mm
2 0700 000 511 Visor flip F20 90 × 110 mm
3 0160 307 001 Front cover lens F20 60 × 110 mm
3 0160 307 004 Front cover lens F20 90 × 110 mm
4 0160 307 004 Inside cover lens F20 90×110mm and
60×110mm
5 0700 000 256 Lens buckle 90 × 110 mm
5 0700 000 255 Lens buckle 60 × 110 mm
6 0760 031 633 Mineral glass 90 × 110 mm
6 0160 292 003 Mineral glass 60 × 110 mm
7 0700 000 415 Headgear
8 0700 000 414 Sweatband
9 0700 000 522 Head and face seal F20
10 0700 000 420 Headgear including airduct
11 0700 000 274 Sweatband for air
ESAB PAPR System
- 22 -
© ESAB AB 2018
Page 23

ORDERING NUMBERS AND SPARE PARTS LIST
G30 and G30 Air
Item Ordering no. Denomination Notes
0700 000 430 G30 DIN 10, complete
0700 000 431 G30 DIN 11, complete
0700 000 433 G30 Air DIN 10, complete
0700 000 434 G30 Air DIN 11, complete
1 0700 000 515 Main shell G30, G40 and G50
2 0700 000 415 Headgear
3 0700 000 414 Sweatband
4 0700 000 508 Flip up frame G30, Including screws
5 0700 000 501 Large inner visor Clear, G30, G40 and
G50
5 0700 000 502 Large inner visor G30 DIN 2
5 0700 000 503 Large inner visor G30 DIN 3
5 0700 000 504 Large inner visor G30 DIN 5
6 0700 000 505 Outer flip visor G30 DIN 5
6 0700 000 506 Outer flip visor G30 DIN 8
6 0700 000 507 Outer flip visor G30 DIN 10
7 0700 000 420 Headgear including air duct
8 0700 000 512 Head and face seal G30, G40 and G50
9 0700 000 274 Sweatband for air
ESAB PAPR System
- 23 -
© ESAB AB 2018
Page 24

ORDERING NUMBERS AND SPARE PARTS LIST
G40, G50, G40 Air and G50 Air
Item Ordering no. Denomination Notes
0700 000 436 G40, complete 60 × 110 mm
0700 000 437 G40, complete 90 × 110 mm
0700 000 438 G50 9-13, complete
0700 000 439 G40 Air, complete 60 × 110 mm
0700 000 440 G40 Air, complete 90 × 110 mm
0700 000 441 G50 Air 9-13, complete
1 0700 000 515 Main shell G30, G40 and G50
2 0700 000 501 Large inner visor Clear, G30, G40 and
G50
3 0700 000 517 Front cover lens G40 and G50
4 0160 292 003 Mineral glass G40 60 × 110 mm
4 0760 031 633 Mineral glass G40 90 × 110 mm
5 0700 000 518 Lens retainer G40 and G50
6 0700 000 523 ADF G50
7 0700 000 519 Cradle G40 90 × 110 mm and
G50
7 0700 000 520 Cradle G40 60 × 110 mm
8 0700 000 521 Gasket for mineral glass G40 60×110mm and
90×110mm
9 0700 000 415 Headgear
10 0700 000 420 Headgear including air duct
11 0700 000 951 Head and face seal G30, G40 and G50
0700 000 274 Sweatband for air
ESAB PAPR System
- 24 -
© ESAB AB 2018
Page 25

ORDERING NUMBERS AND SPARE PARTS LIST
ESAB PAPR System
- 25 -
© ESAB AB 2018
Page 26

ESAB AB, Lindholmsallén 9, Box 8004, 402 77 Gothenburg, Sweden, Phone +46 (0) 31 50 90 00
http://manuals.esab.com
For contact information visit esab.com
 Loading...