


Caddy Tig 150
LTT 150
Bruksanvisning
Brugsanvisning
Bruksanvisning
Käyttöohjeet
Instruction manual
Betriebsanweisung
Manuel d’instructions
Gebruiksaanwijzing
Instrucciones de uso
Istruzioni per l’uso
Manual de instruções
ПузгЯет чсЮуещт
Instrukcja obs³ugi
Valid for Serial NO 842 XXX--XXXX0457 391 101 980925

SVENSKA 3..............................................
DANSK 10................................................
NORSK 17................................................
SUOMI 24................................................
ENGLISH 31..............................................
DEUTSCH 38.............................................
FRANÇAIS 45.............................................
NEDERLANDS 52.........................................
ESPAÑOL 59..............................................
ITALIANO 66..............................................
PORTUGUÊS 73..........................................
ЕЛЛЗНЙКБ 80.............................................
POLSKI 87.................................................
Rätt ti ll ändring av specifikationer utan avisering förbehålles.
Ret til ændring af specifikationer uden varsel forbeholdes.
Rett til å endre spesifikasjoner uten varsel forbeholdes.
Oikeudet muutoksiin pidätetään.
Rights reserved to alter specifications without notice.
Änderungen vorbehalten.
Sous réserve de modifications sans avis préalable.
Recht op wijzigingen zonder voorafgaande mededeling voorbehouden.
Reservado el derecho de cambiar las especificaciones sin previo aviso.
Ci riserviamo il diritto di variare le specifiche senza preavviso.
Reservamo--nos o direito de alterar as especificações sem aviso prévio.
ДйбфзсеЯфбй фп дйкбЯщмб фспрпрпЯзузт рспдйбгсбцюн ЧщсЯт рспейдпрпЯзуз.
Zastrzegamy sobie prawo do wprowadzenia zmian.
-- 2 --

ENGLISH
1 DIRECTIVE 32........................................................
2SAFETY 32...........................................................
3 INTRODUCTION 33...................................................
3.1 Technical data 33............................................................
3.2 Equipment 34................................................................
3.3 Field of application 34.........................................................
4 INSTALLATION 34....................................................
4.1 Placing 34...................................................................
4.2 Connection 34...............................................................
5 OPERATION 35.......................................................
5.1 Start--up 35..................................................................
5.2 Overload protection 36........................................................
5.3 Mains voltage compensation 36................................................
5.4 Controls and connections 36...................................................
6 MAINTENANCE 36....................................................
6.1 Cleaning 36.................................................................
7 FAULT TRACING 37...................................................
7.1 Possible faults and measures to take 37.........................................
8 ORDERING OF SPARE PARTS 37......................................
DIAGRAM 95............................................................
SPARE PARTS LIST 96...................................................
TOCe
-- 3 1 --

1 DIRECTIVE
DECLARATION OF CONFORMITY
Esab Welding Equipment AB, 695 81 Laxå, Sweden, gives its unreserved guarantee
that welding power source LTT 150 from serial number 742 complies with standard
EN 60974--1, in accordance with the requirements of directive (73/23/EEA) and addendum (93/68/EEA) and standard EN 50199 in accordance with the requirements
of directive (89/336/EEA) and addendum (93/68/EEA) .
-- -- -- -- -- -- -- -- -- -- -- -- -- -- -- -- -- -- -- -- -- -- -- -- -- -- -- -- -- -- -- -- -- -- -- -- -- -- -- -- -- -- -- -- -- -- -- -- -- -- -- -- -- -- -- -- -- -- -- -- -- -- -- -------Laxå 97--10--10
Paul Karlsson
Managing Director
Esab Welding Equipment AB
695 81 LAXÅ
SWEDEN Tel: + 46 584 81000 Fax: + 46 584 12336
2SAFETY
WARNING
ARC WELDING AND CUTTING CAN BE INJURIOUS TO YOURSELF AND OTHERS. TAKE PRECAUTIONS WHEN WELDING. ASK FOR YOUR EMPLOYER’S SAFETY PRACTICES WHICH SHOULD BE
BASED ON MANUFACTURERS’ HAZARD DATA.
ELECTRIC SHOCK -- Can kill
S Install and earth the welding unit in accordance with applicable standards.
S Do not touch live electrical parts or electrodes with bare skin, wet gloves or wet clothing.
S Insulate yourself from earth and the workpiece.
S Ensure your working stance is safe.
FUMES AND GASES -- Can be dangerous to health
S Keep your head out of the fumes.
S Use ventilation, extraction at the arc, or both, to keep fumes and gases from your breathing zone and
the general area.
ARC RAYS -- Can injure eyes and burn skin.
S Protect your eyes and body. Use the correct welding screen and filter lens and wear protective
clothing.
S Protect bystanders with suitable screens or curtains.
FIRE HAZARD
S Sparks (spatter) can cause fire. Make sure therefore that there are no inflammable materials nearby.
NOISE -- Excessive noise can damage hearing
S Protect your ears. Use ear defenders or other hearing protection.
S Warn bystanders of the risk.
MALFUNCTION -- Call for expert assistance in the event of malfunction.
READ AND UNDERSTAND THE INSTRUCTION MANUAL BEFORE INSTALLING OR OPERATING.
bt21e
PROTECT YOURSELF AND OTHERS!
-- 3 2 --
3 INTRODUCTION
Note!
This product is solely intended for arc welding.
Caddy Tig is a DC welding power source that uses inverter technology and is
intended for TIG welding and welding with coated electrodes (MMA welding).
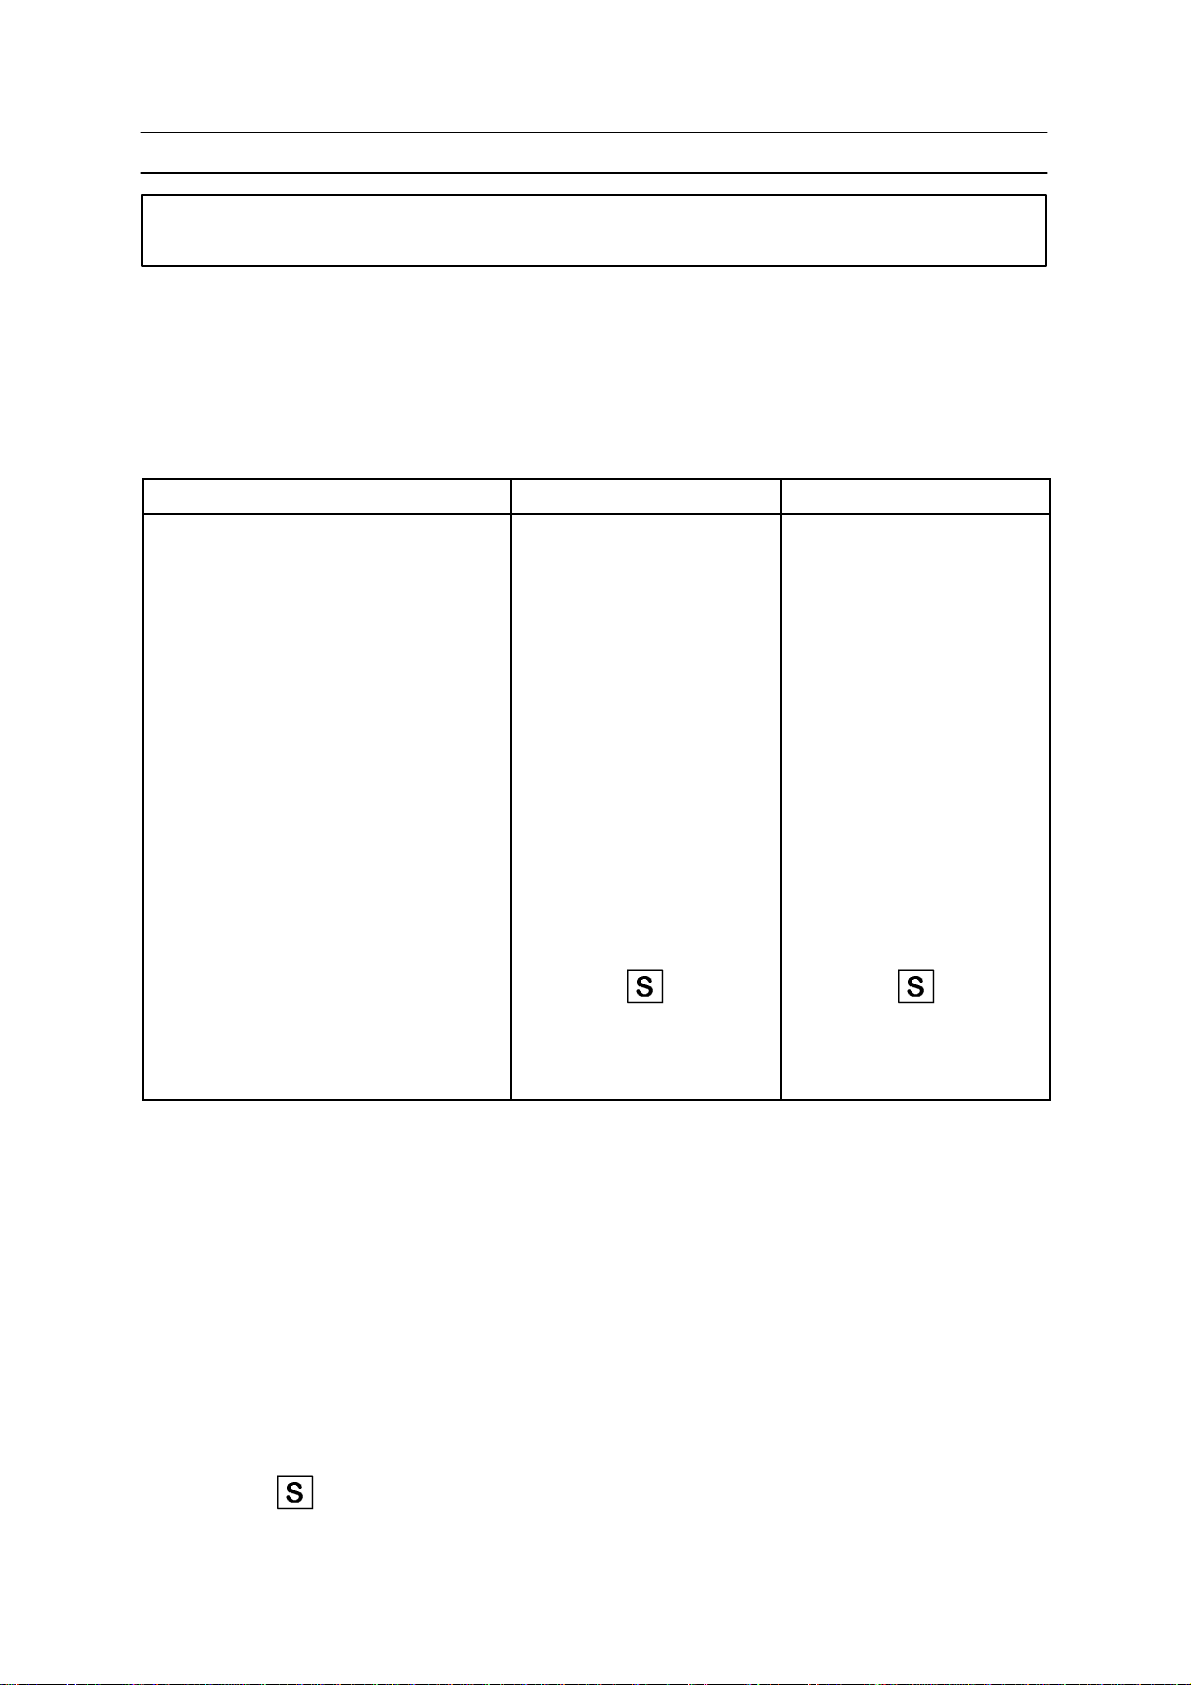
3.1 Technical data
MMA TIG
Performance:
at 25% duty cycle
at 35% duty cycle
at 60% duty cycle
at 100% duty cycle
Setting range 13--150 A 15--150 A
150 A/26 V
140 A/26 V
110A/25V
90 A/24 V
150 A/16 V
140 A/16 V
120 A/15 V
100 A/14 V
Open circuit voltage 70--90 V 50--60 V
Mains supply:
voltage
frequency
fuse
mains cable, area
Enclosure class IP 23 IP 23
Application class
Dimensions L x W x H 375 x 145 x 280 mm 375 x 145 x 280 mm
Weight 6,7 kg 6,7 kg
*When welding below 100 A a 10 A slow fuse is adequate..
**Power cable ratings complies with Swedish regulations..
Duty cycle
The duty cycle refers to the time in per cent of a ten--minute period that you can weld
at a certain load without overloading the welding power source.
Enclosure class
230 V AC
50/60 Hz
16 A*
3x1,5 mm2**
230 V AC
50/60 Hz
16 A*
3x1,5 mm2**
The IP code indicates the enclosure class, i. e. the degree of protection against
penetration by solid objects or water. Equipment marked IP 23 is designed for indoor
and outdoor use.
Application class
The symbol
there is an increased electrical hazard.
indicates that the power source is designed for use in areas where
-- 3 3 --bt21e

3.2 Equipment
Caddy Tig is supplied with:
S Mains cable ( 3 metres)
S Return cable with earth clamp (2.5 metres)
3.3 Field of application
Tig--welding
TIG welding is particularly useful when high quality standards are required and when
welding thin sheet.
Before using the Caddy for TIG welding it must be equipped with a TIG torch
(HW 20 ARVSW--3,8m), and gas valve, a cylinder of argon, an argon regulator,
tungsten electrodes and, if necessary, suitable filler metal.
The best method to use is the touch start, where you gently stroke the tungsten
electrode against the workpiece to establish the arc.
Caddy Tig 150 both supply direct current, which allows you to weld most alloyed and
non--alloyed steels, stainless steels and cast iron.
Caddy Tig lets you weld with coated electrodes from 1.6 mm to 3.25 mm diameter.
4 INSTALLATION
WARNING
This product is intended for repair and maintenance welding
In domestic or office environment this product m ay cause radio interference.
It is the responsibility of the user to take adequate precautions.
4.1 Placing
Place the machine so that there is nothing to prevent the cooling air from passing
through it.
4.2 Connection
4.2.1 Mains connection
The rating plate including connection data is placed on the underside of the welding
power source.
Connect the welding power source to an earthed mains terminal.
Make sure the welding power source is connected for the correct mains voltage and
properly fused.
S Mains voltage 230 V
S Mains frequency 50--60 Hz
S Fuse, slow rupture 16 A
S Mains cable, area 3 x 1,5 mm
bt21e
2
-- 3 4 --

4.2.2 Connection of welding and return cable
TIG
For TIG welding, the torch is connected to the negative
terminal and the control cable is connected to the Canon
socket on the front panel. Connect the return
cable to the positive terminal, and the gas hose
to the regulator on the gas bottle.
Return cable
Attach the r eturn cable clamp to the
workpiece and make sure there is good
contact between the workpiece and the
socket for the return cable on the
power source.
MMA
The welding power source has two terminals, one plus and one minus pole, for the
connection of the welding and the return cable. Connect the welding cable to the
pole indicated on the package of the electrode to be used.
5OPERATION
5.1 Start--up
TIG
S Connect the TIG torch and return cable.
S Connect the shielding gas to the torch.
S Set the toggle switch on the front of the power source to the TIG setting.
S Switch on the power source by setting the power switch to setting 1.
S Set the welding current using the knob on the front of the power source. Use the
recommended welding current range shown on the electrode packaging.
S Strike the arc without pressing the trigger, then press the trigger and allow the
current to rise to the preset value.The RK function allows you to control the heat
input by pressing or releasing the trigger.
MMA
S Make sure that the cables and the earth clamp are properly connected.
S Start the welding power source by setting the mains switch to position 1.
S Set the welding current, using the knob on the front panel of the power source.
Follow the instructions on the electrode package for the recommended welding
current.
-- 3 5 --bt21e

5.2 Overload protection
Caddy Tig 150 are provided with a thermal cut--out to prevent overheating of the
welding power source. In the event of overload the supply voltage is interrupted and
the orange lamp on the front goes on. Resetting takes place automatically as soon
as the welding power source has cooled down.
5.3 Mains voltage compensation
Caddy Tig 150 both have mains voltage compensation, which means that + 10%
fluctuation in the supply voltage produces only + 0.2% variation in the welding
voltage.
5.4 Controls and connections
1
6
2
7
5
3
4
1. Orange indicating lamp (overheating)
2. Knob for adjusting the welding current
3. Terminal, minus pole, for connecting welding or return cable
4. Terminal, plus pole, for connecting welding or return cable
5. Mains switch
6. Toggle switch
7. Canon socket for connecting torch
6 MAINTENANCE
Note:
All warranty undertakings given by the supplier cease to apply if the customer
attempts to rectify any faults on the machine during the warranty period.
6.1 Cleaning
Normally it is sufficient to blow the welding power source clean regularly using dry
compressed air (reduced pressure), and to clean the filter in the front regularly.
In dusty and dirty environment the welding power source should be cleaned at
shorter intervals.
bt21e
-- 3 6 --

7 F AULT TRACING
7.1 Possible faults and measures to take
Type of fault Measure
The current will rise to the preset value S Check that the Canon plug is
connected.
S Replace the torch if necessary.
Start--up is violent. S Check that the toggle switch is set to
TIG.
No arc is generated by the welding power source.
The welding current is interrupted in the
course of welding.
The thermal cut--out trips frequently. S Check that the filter is not packed
Poor welding result. S Check that the welding and return
S Make sur e the mains switch is on.
S Check that the welding and return
cables are properly connected.
S Make sure the welding current set is
correct.
S Check if the thermal cut--out has
tripped (the orange indicating lamp
on the front panel is on).
S Check the mains fuse.
with dust.
S Check that the ratings of the welding
power source have not been
exceeded (overload of the power
source).
cables are properly connected.
S Make sure the welding current set is
correct.
S Check that there is nothing wrong
with the electrodes.
8 ORDERING OF SPARE PARTS
Spare parts are ordered through your nearest ESAB representative, see back cover.
When ordering spare parts, please state machine type and number as well as designation and spare part number as shown in the spare parts list on page 96.
This will simplify dispatch and ensure you get the right part.
-- 3 7 --bt21e
 Loading...