

Page 1

Crossbow Operation
Quick Start Guide
Refer to Crossbow Instruction Manual
for detailed operating instructions.
Article Number: 0560956424
Revision Date: April 30, 2015
Revision Number: 00
Language: ENG
Page 2

CROSSBOW QUICK-START GUIDE
1
Procedure to create a new program from the Shape Library and load into temporary Run Memory.
Start from the Main Menu (pictured below).
If the control is not showing the Main Menu
(pictured above), press [ESC] key until the
Main Menu is reached.
Create Program From Library
Select desired shape
using Arrow Keys.
Press [F6] LIBRARY.
Make selection by
pressing [Enter].
Page 3

BASIC OPERATION
Type desired dimensions
on number pad, press [Enter]
to finish each entry.
Press [F6] APPLY to preview
part.
When finished, press [ESC].
The part is stored in temporary
Run Memory. The part can
be cut immediately by going
directly to procedure 5, “Run the
Program”.
Page 4

CROSSBOW QUICK-START GUIDE
2
Procedure to store a program from temporary Run Memory into permanent Internal Storage.
Save the Program
Press [F3] EDIT.
Verify part is correct, then press
[F7] VIEW again to close the
preview window.
Press [F7] VIEW to preview
program.
Press [F3] SAVE.
Page 5
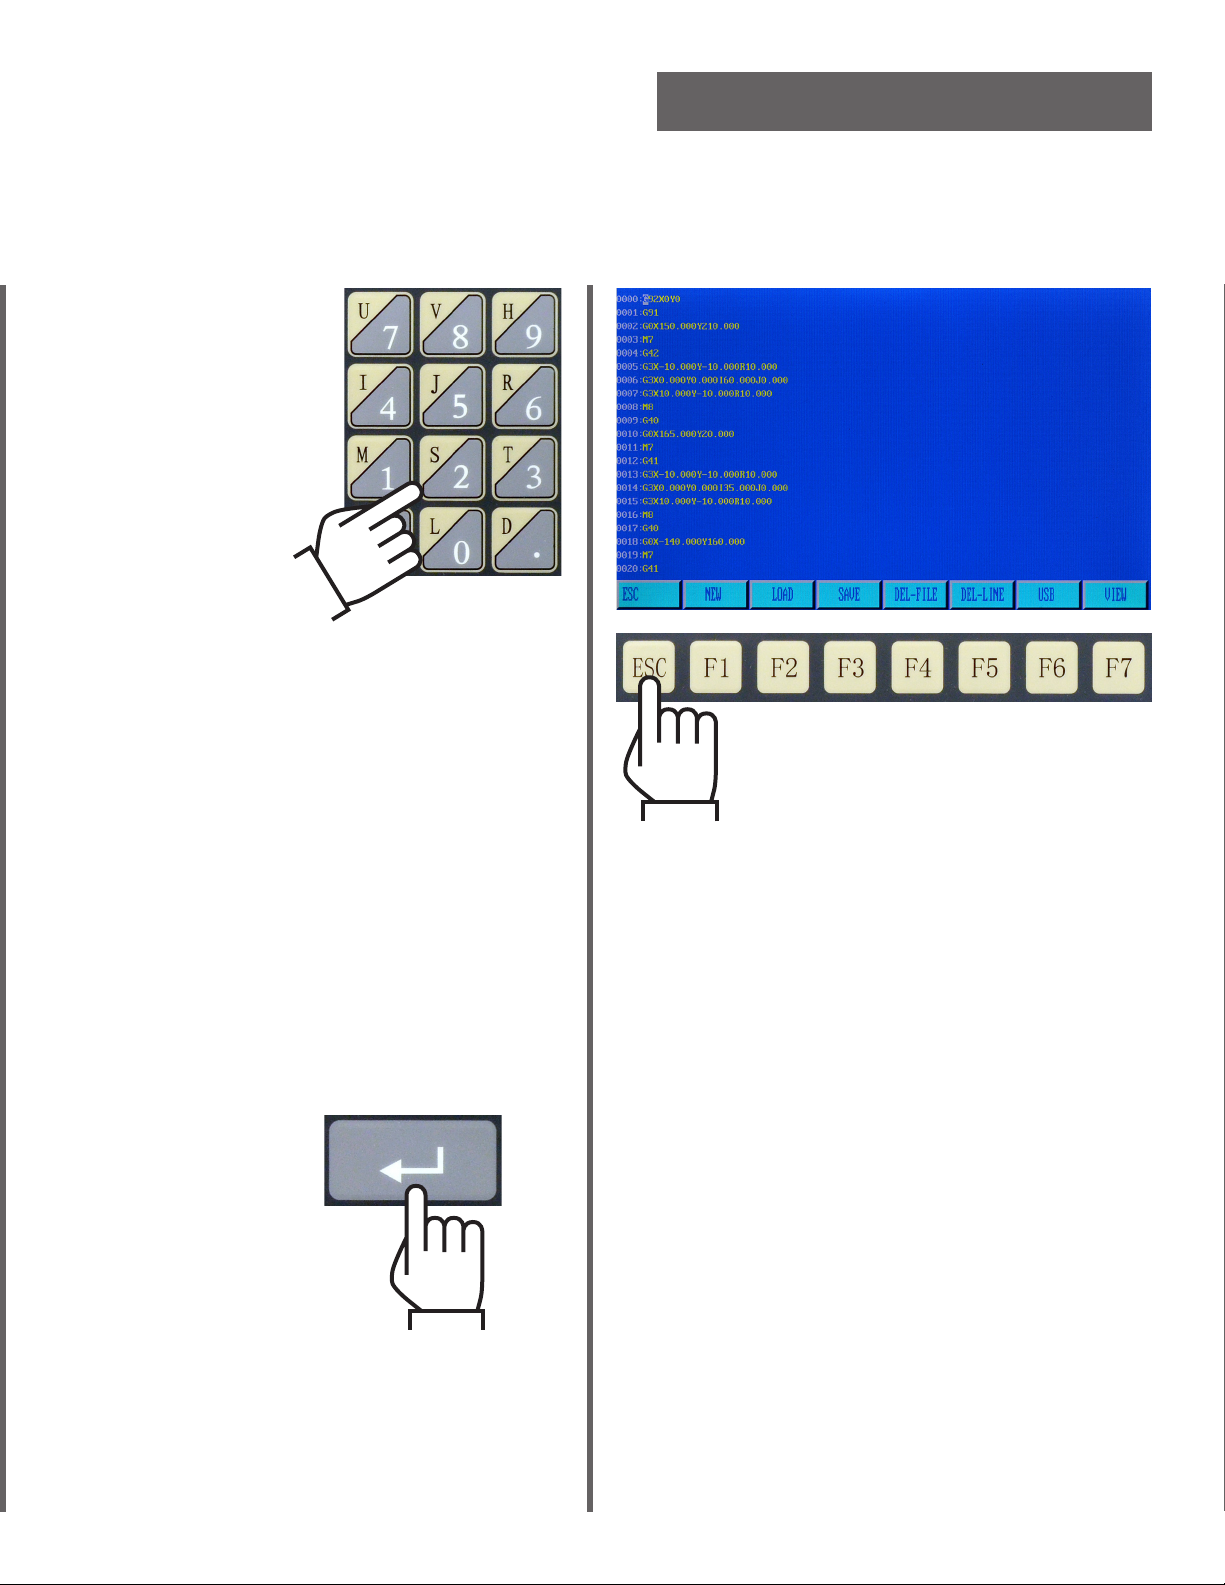
Type file name on
number pad.
BASIC OPERATION
File Naming:
The program name and extension should not
exceed 12 characters.
It is recommended to use a file name with
numbers only, up to 7 characters, plus “.TXT”
as the extension.
Be sure to use an extension, or the control
may be unable to recall the file.
When finished,
press [Enter].
When finished, press [ESC] to
return to main menu.
The file will be saved to permanent
Internal Storage.
Page 6

CROSSBOW QUICK-START GUIDE
3
Procedure to recall a program from permanent Internal Storage into temporary Run Memory.
Load Program from Memory
Press [F3] EDIT.
Use up and down arrow keys
to highlight name of desired
program.
Press [F2] LOAD.
Press [Enter] to select
desired program.
The selected program is opened in the editor.
Page 7

BASIC OPERATION
Press [F7] VIEW to preview
program.
When finished, press [ESC].
The part is stored in temporary
Run Memory.
Press [F7] VIEW again to
turn off preview.
Page 8

CROSSBOW QUICK-START GUIDE
4
Procedure to load a program from a USB disk onto the Crossbow CNC.
Load Program from USB
Press [F3] EDIT.
Press [F1] LOAD.
The contents of the USB disk are read and
displayed. If an error occurs, check the USB
drive and re-format if necessary.
USB disks used with the Crossbow must be
formatted as “FAT” or “FAT32” file systems.
Press [F6] USB.
Page 9

BASIC OPERATION
Use up and down arrow keys
to highlight name of desired
program.
Press [Enter] to select
desired program.
The selected program is opened in the editor.
Press [F3] SAVE to
store program in
permanent Internal
Storage.
To run the program directly from
USB drive without storing in
memory, press [ESC]. The part is
stored in temporary Run Memory.
Page 10

CROSSBOW QUICK-START GUIDE
5
Procedure to execute a program that has been loaded into temporary Run Memory.
Run the Program
Press [F1] AUTO.
Press [F4] PREVIEW
again to return to
Automatic Mode menu.
Press [F4] PREVIEW to
verify the correct part
is loaded.
If part looks correct, then proceed.
Switch Drive Enable to OFF.
Manually position the torch to the starting
point.
Make sure the plasma or oxy-fuel torch is
set up correctly, with proper consumables.
Switch Drive Enable to ON.
Page 11

BASIC OPERATION
Press [F] key to adjust
cutting speed (Feed rate).
Type desired speed on
number pad, then press
[Enter].
When ready
Press [START].
To interrupt program,
press [STOP].
Speed must be entered as four digits. To enter
45 inches per minute, enter 0045.
OPTION: Press [X] key to
enable DRY RUN mode if
you wish to run the program with out cutting.
Press [ESC] once to abandon
program and return to Auto Mode
menu.
Press [ESC] again to quit Auto
Mode and return to main menu.
Page 12

CROSSBOW QUICK-START GUIDE
6
Procedure to set control for using plasma torch.
Press [F4] SETUP.
Setup To Cut with Plasma
Use number keypad to
change PLASMA / OXYFUEL parameter to “1”.
Press [F5] CONTROL.
Press [F7] SAVE to store the new
parameters. Failure to press save
will cause any changes to be lost.
Page 13

Press [F4] PLASMA.
BASIC OPERATION
Below are recommended initial settings for
PLASMA parameters. Set PIERCE TIME and
FIRST PIERCE TIME depending on meterial
thickness. Refer to plasma torch manual for
recommended settings.
FIND INITIAL HEIGHT 1
IHS LOGIC 0
IHS AFTER PAUSE 0
INITIAL HEIGHT TIMER 00.50
TORCHUP TIME 001.00
TORCHDN TIME 000.00
USE ARC-ON SIGNAL 1
MAX TIME FOR ARC-ON 12.0
PIERCE TIME 0.50
FIRST PIERCE TIME 0.50
WATER INJECTION 0
NUM FOR PIERCE TIMER 1
AHC CORNER DISTANCE 00010
AHC-OFF LOOK AHEAD 02.0
ARC VOLTAGE DELAY 00.5
ARC ON M ORDER 12
ARC OFF M ORDER 13
Use up and down arrow keys
to navigate parameters.
Use number keypad to
change parameters as
required.
Press [F7] SAVE.
Continue immediately with the following
procedure to cut a part with plasma.
Page 14

CROSSBOW QUICK-START GUIDE
7
Procedure to cut a part using plasma torch.
Cut with Plasma
Press [F1] AUTO.
Press [F4] PREVIEW
again to return to
Automatic Mode menu.
Press [F4] PREVIEW to
verify the correct part
is loaded.
Press [F5] KERF to
set the kerf width.
Page 15

Type desired Kerf
width using number
pad, then press [Enter].
BASIC OPERATION
Switch Drive Enable to OFF.
Make sure the plasma torch is set up correctly,
with proper consumables.
Manually position the torch at the desired
starting position over the plate.
Press [F] key to adjust
cutting speed (Feedrate).
Type desired Speed
using number pad,
then press [Enter].
Switch Drive Enable to ON.
When ready
Press [START].
After torch begins to cut, use
“S-Up” and “S-Down” keys to
adjust the cutting height. The
Automatic Height Control will
maintain the new height.
Page 16

CROSSBOW QUICK-START GUIDE
8
Procedure to set control for using oxy-fuel torch.
Press [F4] SETUP.
Setup To Cut with Oxy-Fuel Torch
Use number keypad to
change PLASMA / OXYFUEL parameter to “0”.
Press [F5] CONTROL.
Press [F7] SAVE to store the new
parameters. Failure to press save
will cause any changes to be lost.
Page 17

BASIC OPERATION
Below are recommended initial settings for
FLAME parameters. Set PREHEAT TIME and
PIERCE TIME as needed.
IGNITE TIME 00.00
PREHEAT TIME 100.00
TORCHUP TIME(M70) 000.00
TORCHDN TIME(M71) 000.00
PIERCEUP HIGH(M72) 000.00
PIERCEDN HIGH(M73) 000.00
PIERCE TIME 000.00
CUT-OXY BLEED DELAY 00.50
USE HIGH-PREHEAT M24 0
GAS ON M ORDER 10
LEAVE PREHEATS ON 0
Use up and down arrow keys
to navigate parameters.
Use number keypad to
change parameters as
required.
Press [F3] FLAME.
Press [F7] SAVE.
Continue immediately with the following
procedure to cut a part with Oxy-Fuel.
Page 18

CROSSBOW QUICK-START GUIDE
9
Procedure to cut a part using oxy-fuel torch.
Cut with Oxy-Fuel
Press [F1] AUTO.
Press [F4] PREVIEW
again to return to
Automatic Mode menu.
Press [F4] PREVIEW to
verify the correct part
is loaded.
Press [F5] KERF to
set the kerf width.
Page 19

Type desired Kerf
width using number
pad, then press [Enter].
BASIC OPERATION
Switch Drive Enable to OFF.
Make sure the oxy-fuel torch is set up correctly, with proper consumables, flame is lit, and
adjusted properly.
Manually position the torch at the desired
starting position over the plate.
Press [F] key to adjust
cutting speed (Feedrate).
Type desired Speed
using number pad,
then press [Enter].
Switch Drive Enable to ON.
When ready
Press [START].
Press [G] key (CONTINUE) to
override Preheat Timer, turn
on cutting oxygen, and startthe Pierce Time.
While cutting, use “S-Up” and
“S-Down” keys to adjust the
cutting height as required.
Page 20

Customer // Technical Support
(843) 664-4405
(800) ESAB-123 (372-2123)
ESAB Welding and Cutting Products
PO BOX 100545 Ebenezer Road
Florence, SC 29501-0545
http://www.esab.com
ESAB Cutting Systems – Canada
6010 Tomken Road
Mississauga, Ontario Canada L5T 1X9
Phone: (905) 670-0220
Fax: (905) 670-4879
ESAB Cutting Systems GMBH
Robert-Bosch-Strasse 20
Pos tf ac h 1128
D-61184 Karben 1
Phone 011-49-6039-400
Fax 011-49-6039-403-02
http://www.esab.de
 Loading...