

Page 1
Service Alert
Arc Detector PN-675280
Installation
PRODUCT SERIES/ MODEL:
Digimatic II -------------------- All Versions
Digipulse Automatic-------- All Versions
SERIAL NO:
All Serial Numbers
SUMMARY:
The arc detector 675280 Rev. “E” has been updated to Rev “D”. The changes were made to:
• Simplify manufacture by incorporate common components and circuitry.
• improve performance reliability by eliminating mechanical switches.
• eliminate calibration problems by removing the calibration pot on the PCB.
0558005324
January 2005
The PCB P/N remains the same as the original but the installation of PN-675280 Rev. “D” PCB for the
Digimatic II and DigiPulse Automatic will require a change in position of the “Coding Plug” to accept the
new Revision “D” board. More details and installation instructions are provided below.
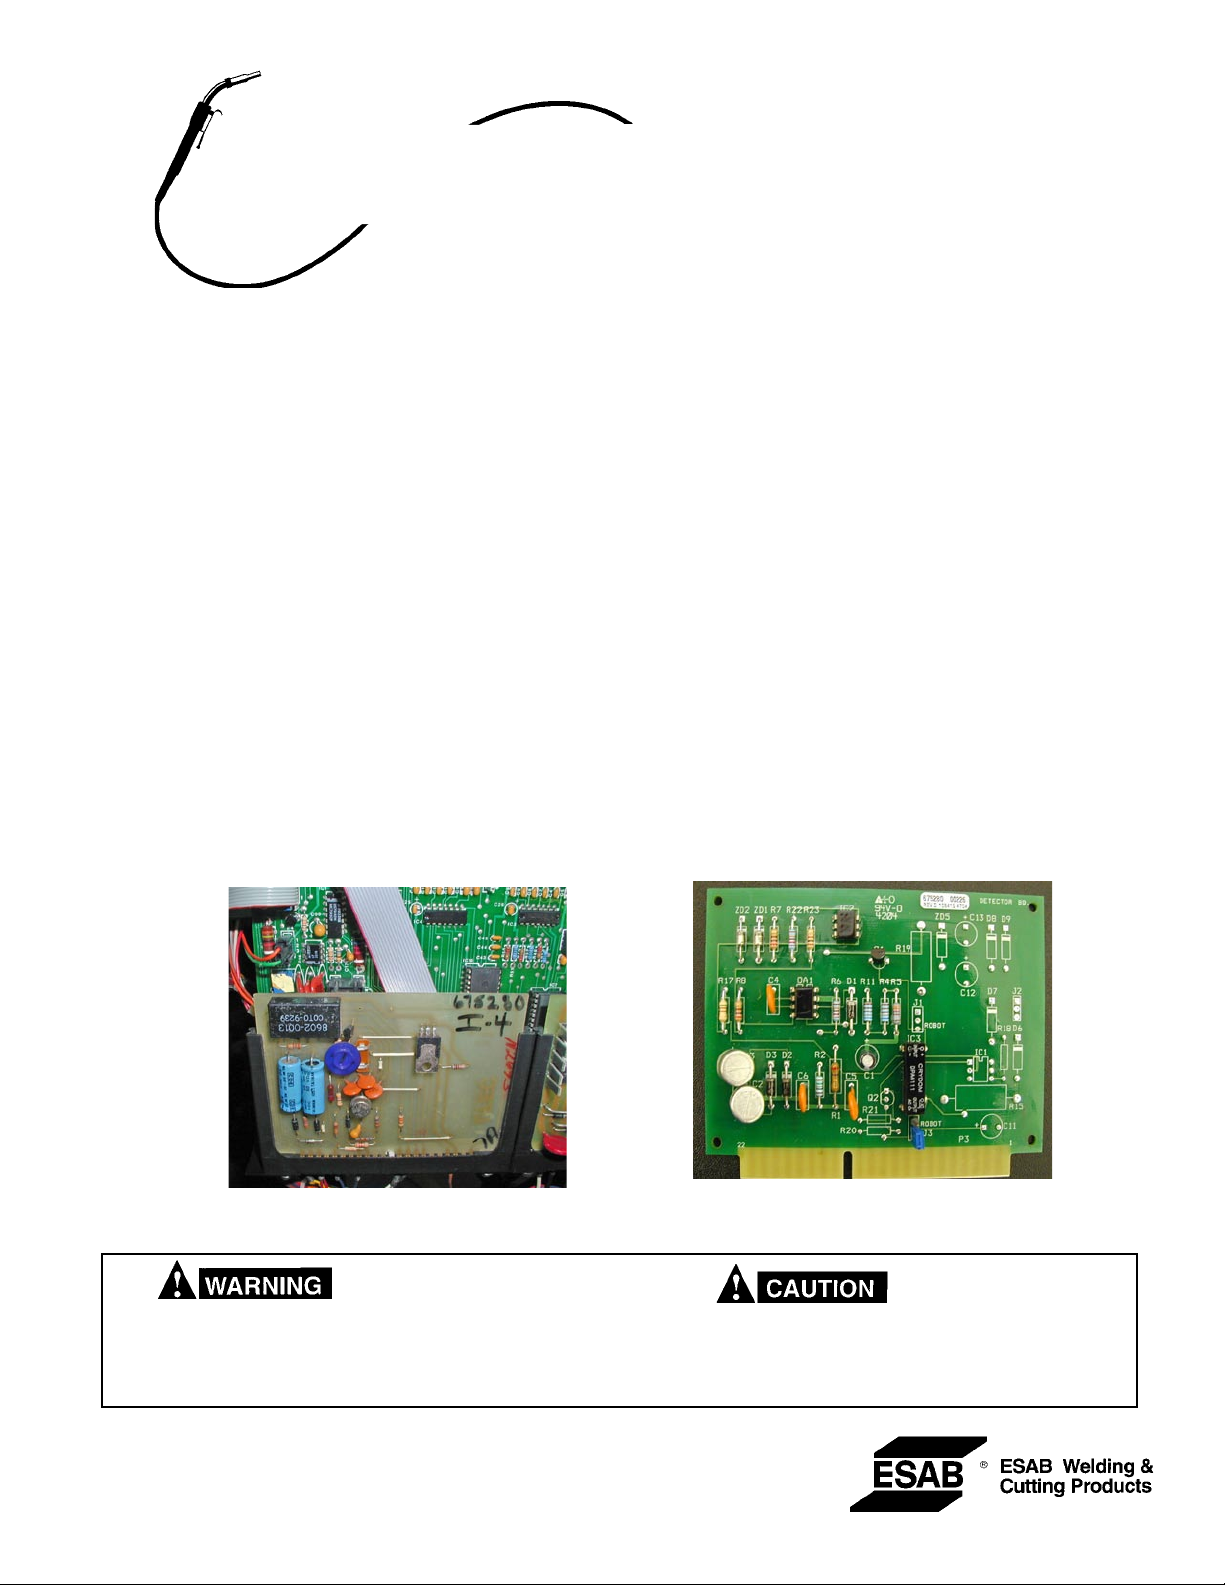
The old and new PCB’s are shown below:
OLD 675280 PCB NEW 675280 PCB
____________________________________________________________________________
DISCONNECT primary power at wall switch, or circuit
breaker, before attempting inspection or work inside
the power source.
All work should be completed by a qualified
electrical technician
Page 2
INSTALLATION:
Digimatic II /DigiPulse Automatic Arc Detect PCB
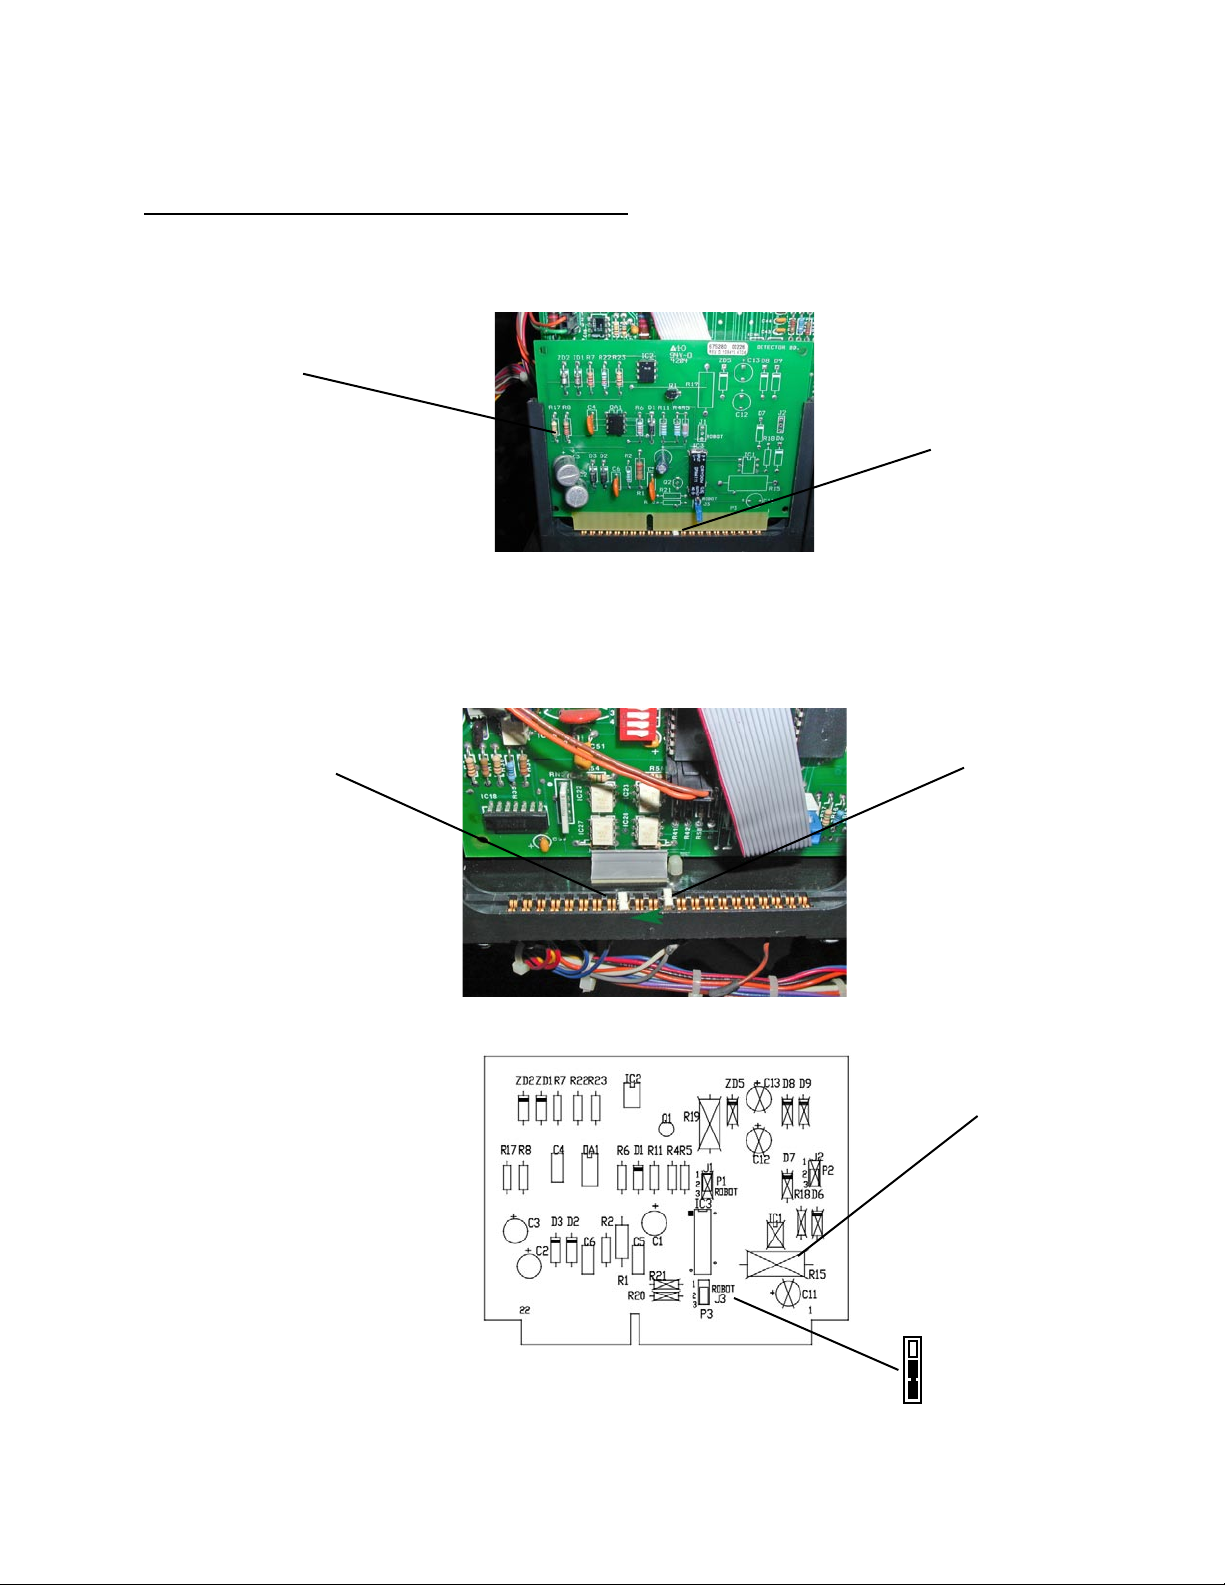
Replacement of the Digimatic II /DigiPulse Arc Detect PCB PN-675280 Rev. “D” requires the “Key Plug” to be
moved from position 11 to position 14 for proper installation of the new Revision “D” PCB. See Below:
To move “Key Plug” :
1. Gently pry up and remove plug (white) from card socket position 11
2. Move left to position 14 and press firmly in card socket. See Below.
3. Check J3 jumper plug position and install Arc Detect PCB.
New Revision “D” PCB
Key Plug in wrong position
CONTACT:
ESAB Welding & Cutting Products
Product & Service Information Group
843-664-4416 Phone
843-664-5539 FAX
Position 14
J3 Jumper Plug Position
Position 11
Components not installed
are indicated by "X"
ROBOT
J3
J1& J2 Not Used
 Loading...