

Page 1
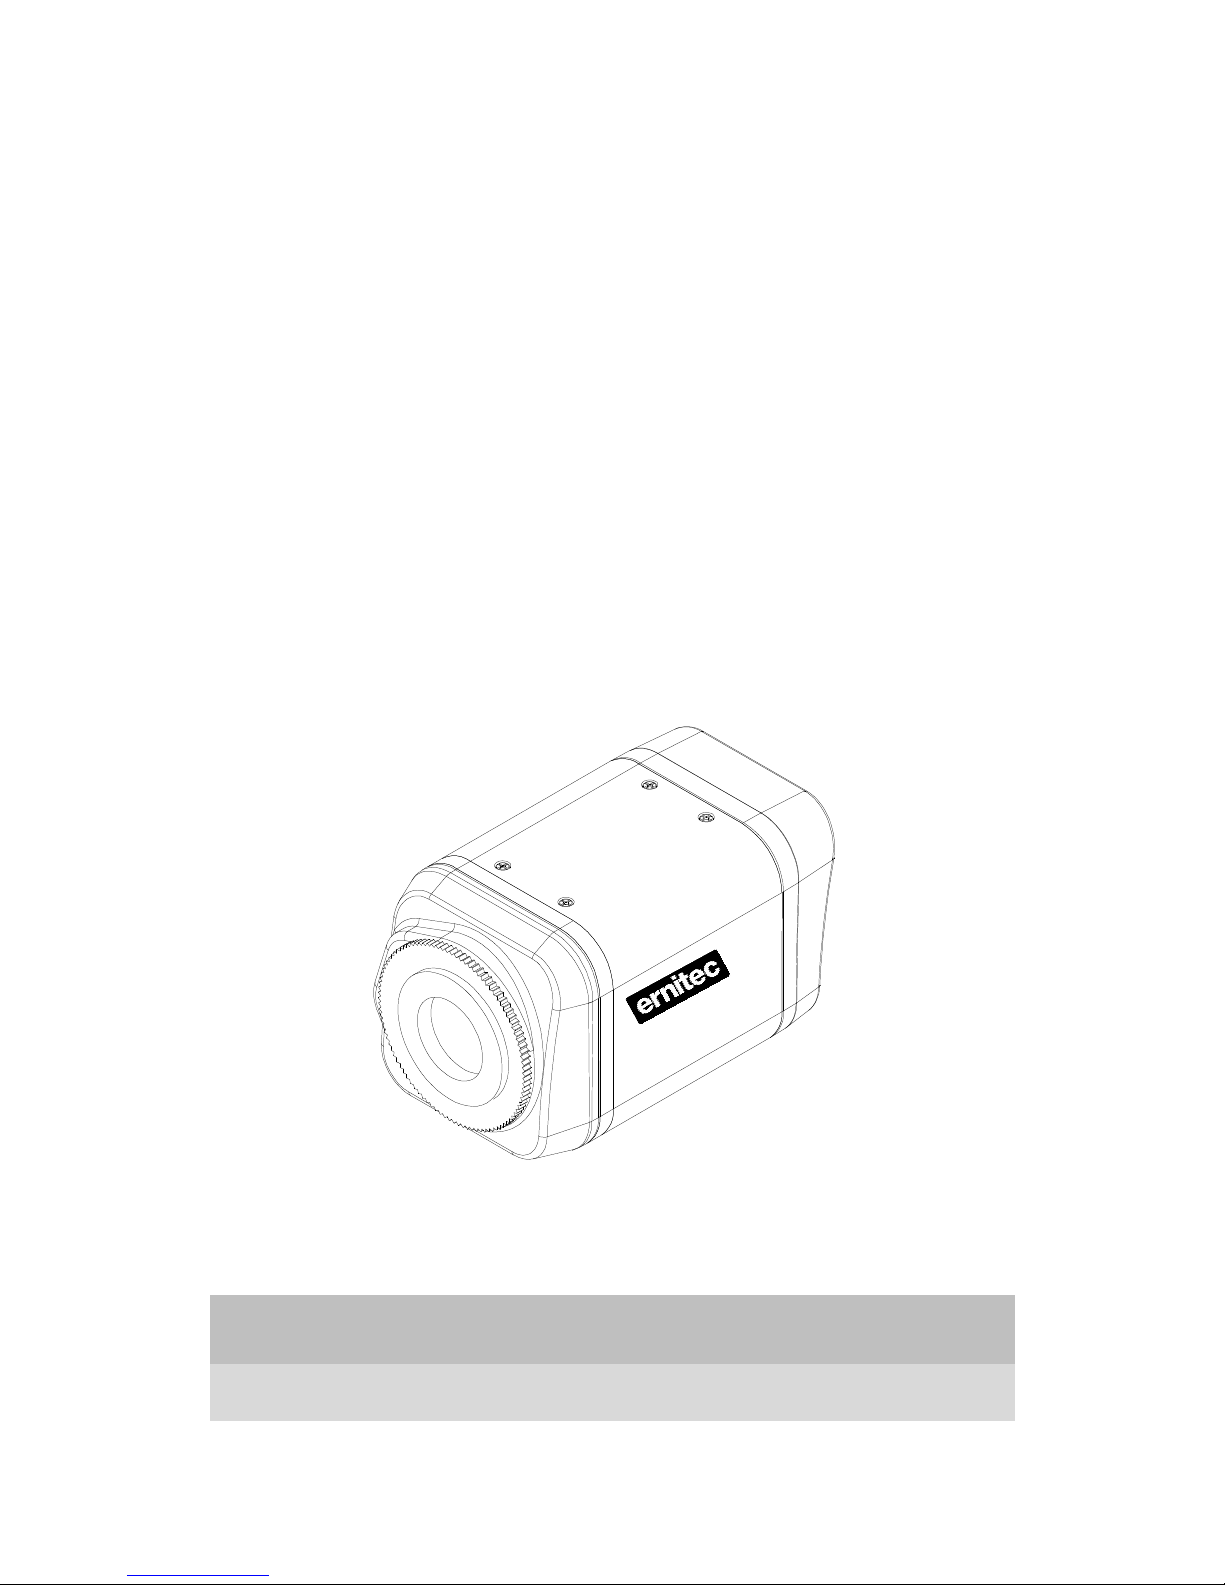
EVA 101
Installation Guide
Page 2
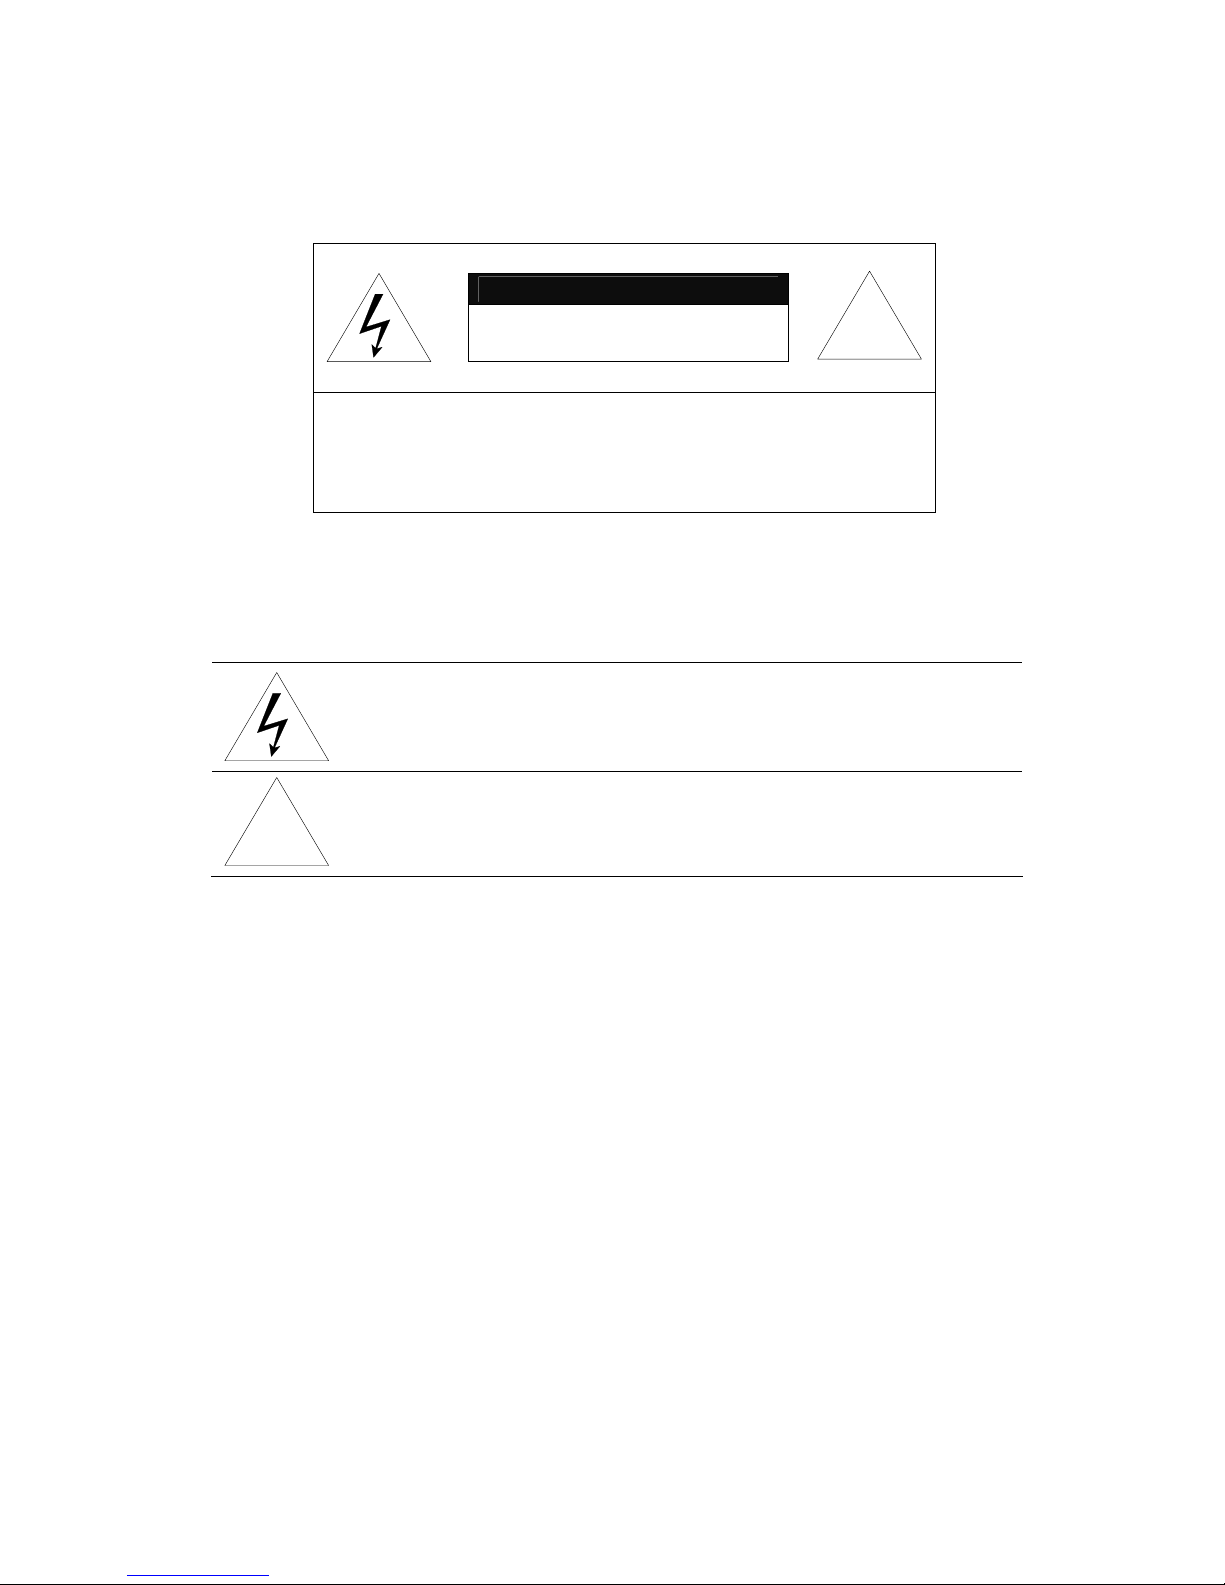
INFORMATION TO USER
CAUTION
RISK OF ELECTRIC SHOCK,
DO NOT OPEN
!
CAUTION: TO REDUCE THE RISK OF ELECTRIC SHOCK,
DO NOT REMOVE COVER (OR BACK).
NO USER SERVICEABLE PARTS INSIDE.
REFER SERVICING TO QUALIFIED SEERIVCE PERSONEL.
This symbol is intended to alert the user to the presence of un-insulated
“dangerous voltage” within the product’s enclosure that may be of sufficient
magnitude to constitute a risk of electric shock to persons.
!
This symbol is intended to alert the user to the presence of important
operating and maintenance (servicing) instructions in the literature
accompanying the appliance.
Page 3

NVC/IPE Series IPE1100 Installation Guide
02A.02 UDP Technology Ltd. 3
Table of Contents
FEATURES................................................................................................................. 4
PACKAGE CONTENTS ................................................................................................ 5
PART NAMES............................................................................................................ 6
Rear View ................................................................................................................................. 6
Bottom View.............................................................................................................................. 6
INSTALLATION.......................................................................................................... 9
Installing a C/CS Mounting lens ................................................................................................ 9
Installing an Auto IRIS lens........................................................................................................ 9
CONNECTIONS........................................................................................................ 12
9 pin terminal block................................................................................................................. 12
Power Adaptor Connector (DC 12V) ....................................................................................... 14
CONFIGURATION.................................................................................................... 15
Set up network environment .................................................................................................. 15
View video on web page ......................................................................................................... 15
View video using IPAdmin Tool........................................................................................... 15
View video using IP address................................................................................................ 18
Reset........................................................................................................................................ 18
Factory Default........................................................................................................................ 18
APPENDIX (A): SPECIFICATIONS .............................................................................. 19
Summary ................................................................................................................................. 19
VCA (Video Content Analysis) ................................................................................................. 20
Electrical Characteristics .........................................................................................................21
Environment Condition ........................................................................................................... 21
APPENDIX (B): DIMENSIONS ................................................................................... 22
APPENDIX (C): ACCESSORIES................................................................................... 23
APPENDIX (D): TROUBLE SHOOTING ....................................................................... 24
Checking your Firmware ......................................................................................................... 24
Support.................................................................................................................................... 24
REVISION HISTORY ................................................................................................. 25
Page 4

NVC/IPE Series IPE1100 Installation Guide
02A.02 UDP Technology Ltd. 4
FEATURES
FEATURESFEATURES
FEATURES
Camera
• Box type IP Camera
• Sony 1/3” Super HAD CCD & High Quality SS-HQ1 Full Kit Chip Set
Sony 1/3" Vertical Double Density Color CCD (Optional)
• True Day / Night (ICR) and WDR (Optional)
Streaming
• Dual streaming mode (such as different codec/resolution/bit rate and so on.)
• De-interlacing on DSP
• Burnt-in text supported
• Unicast/Multicast supported
Video/Audio
• Video compression: H.264/MPEG/MJPEG, 25/30FPS@D1(PAL/NTSC)
• Audio compression: G.711(µLaw, aLaw)/PCM
• Analog video out for external monitors
• Video Motion Detection supported
• 2-way mono audio supported
Network
• RTSP/ HTTP protocol supported
• 10/100 Base-T Ethernet
Additional Features
• RS-485 supported
• USB 2.0 supported (External storage, Wireless LAN)
• Micro SD card supported
• PoE supported
• Built-in Video Content Analysis
• OSD supported
• SDK (Software Development Kit) provided
VCA (Video Content Analysis)
• VCA Presence (Included as basic)
• VCA Surveillance (Optional)
Page 5
NVC/IPE Series IPE1100 Installation Guide
02A.02 UDP Technology Ltd. 5
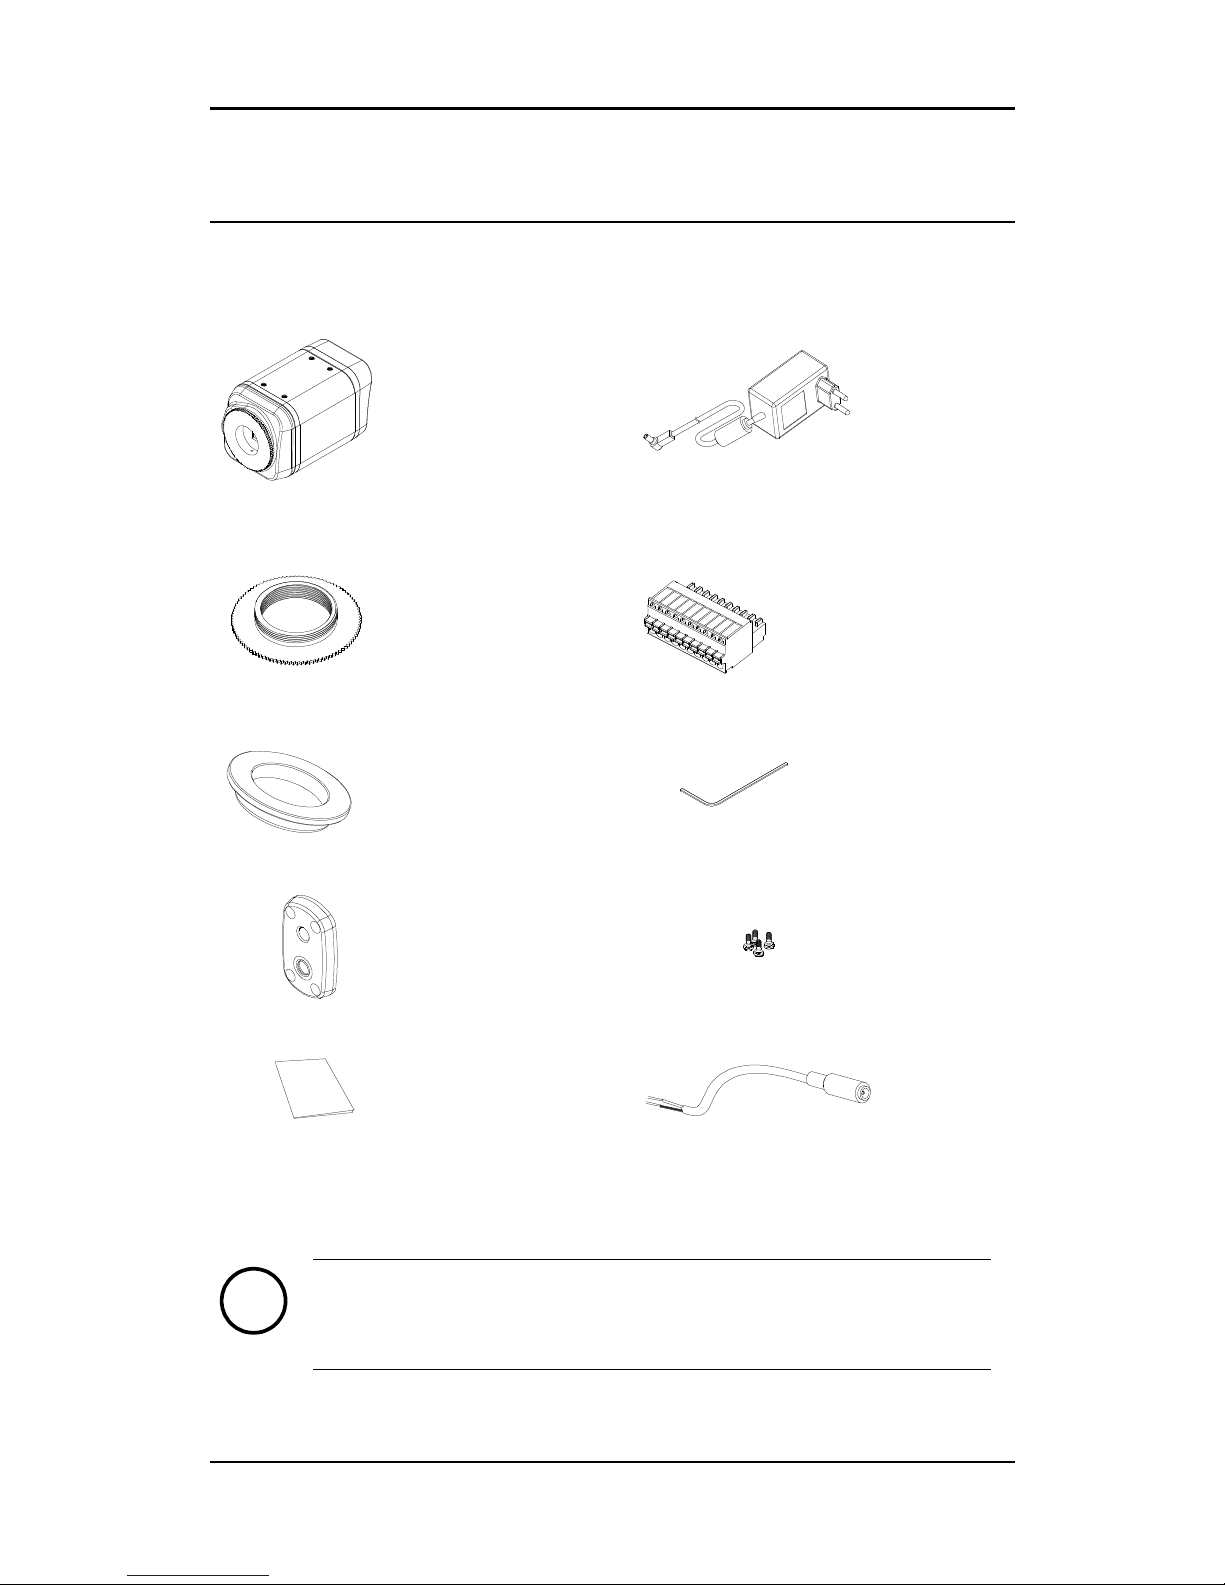
PACKAGE CONTENTS
PACKAGE CONTENTSPACKAGE CONTENTS
PACKAGE CONTENTS
Unpack carefully and handle the equipment with care. The packaging contains:
EVA 101 DC power adaptor
Mount ring 9 Pin terminal block
Rubber cap (for protecting CCD) Hexa wrench driver
Adaptor for mounting the camera Screws
Quick Installation Guide DC Jack Adaptor Cable
Note
i
The above contents are subject to change without prior notice.
Page 6
NVC/IPE Series IPE1100 Installation Guide
02A.02 UDP Technology Ltd. 6
PART
PARTPART
PART NAMES
NAMESNAMES
NAMES
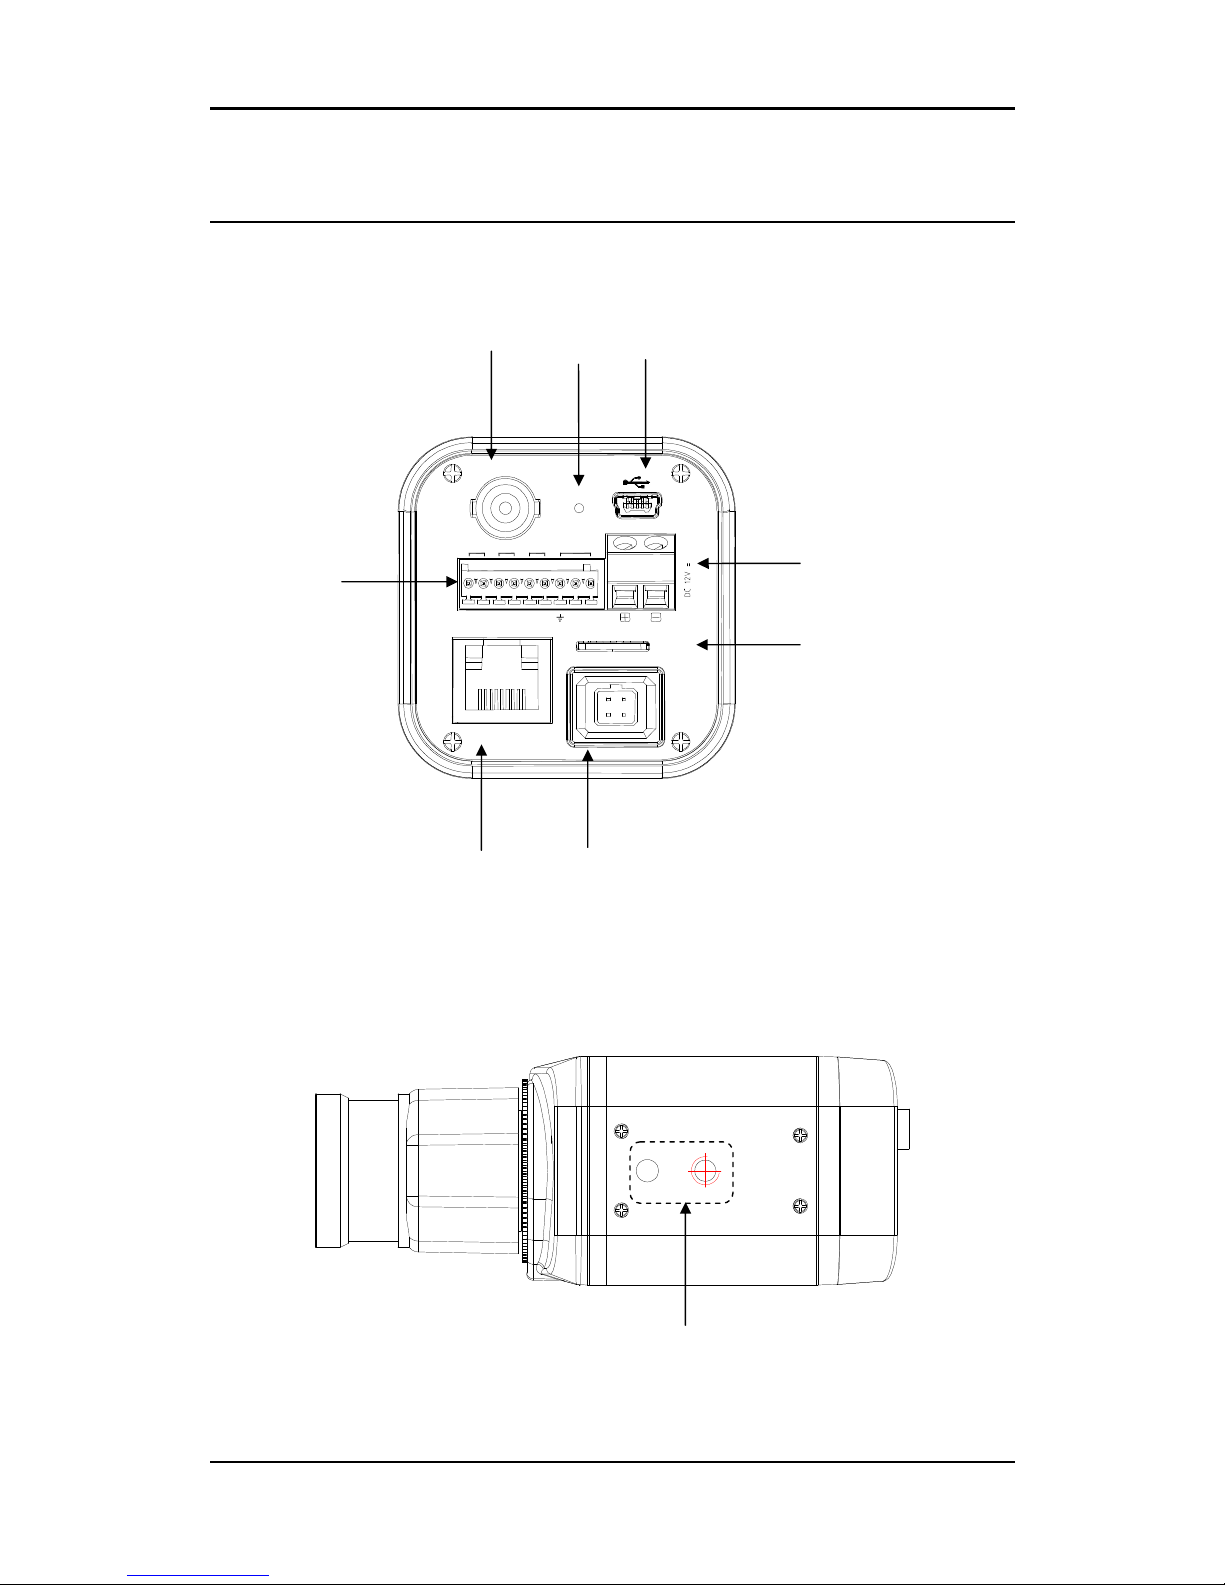
Rear View
Bottom View
⑥
⑥
⑥⑥ ⑥
⑥
⑥ ⑥
ETHERNET
Micro SD
RESET
LOOP OUT
RS-485 DO DI AUDIO
-
+
C
1 C 1
Out
In
⑥
Page 7
NVC/IPE Series IPE1100 Installation Guide
02A.02 UDP Technology Ltd. 7
○○○○,1 Analog video out
It is an analog video output port.
○○○○,2 Reset Switch (Reset)
Reset switch is used for restarting EVA 101 or resetting EVA 101 as Factory Default (FD).
○○○○,3 USB connector
Insert a USB storage device or Wi-Fi devices. (Only Ralink RT73 chipsets based wireless devices
are available.)
○○○○,4 9 pin terminal block for D/I, D/O, audio, and serial communication
○○○○,5 Power Adaptor Connector (DC 12V)
EVA 101 needs a DC12V for power supply.
Caution
!
Make sure the polarity is correct. Incorrect connection may cause malfunction
or damage to the IP device.
○○○○,6 Micro SD Card socket
It is a memory card slot for external storage.
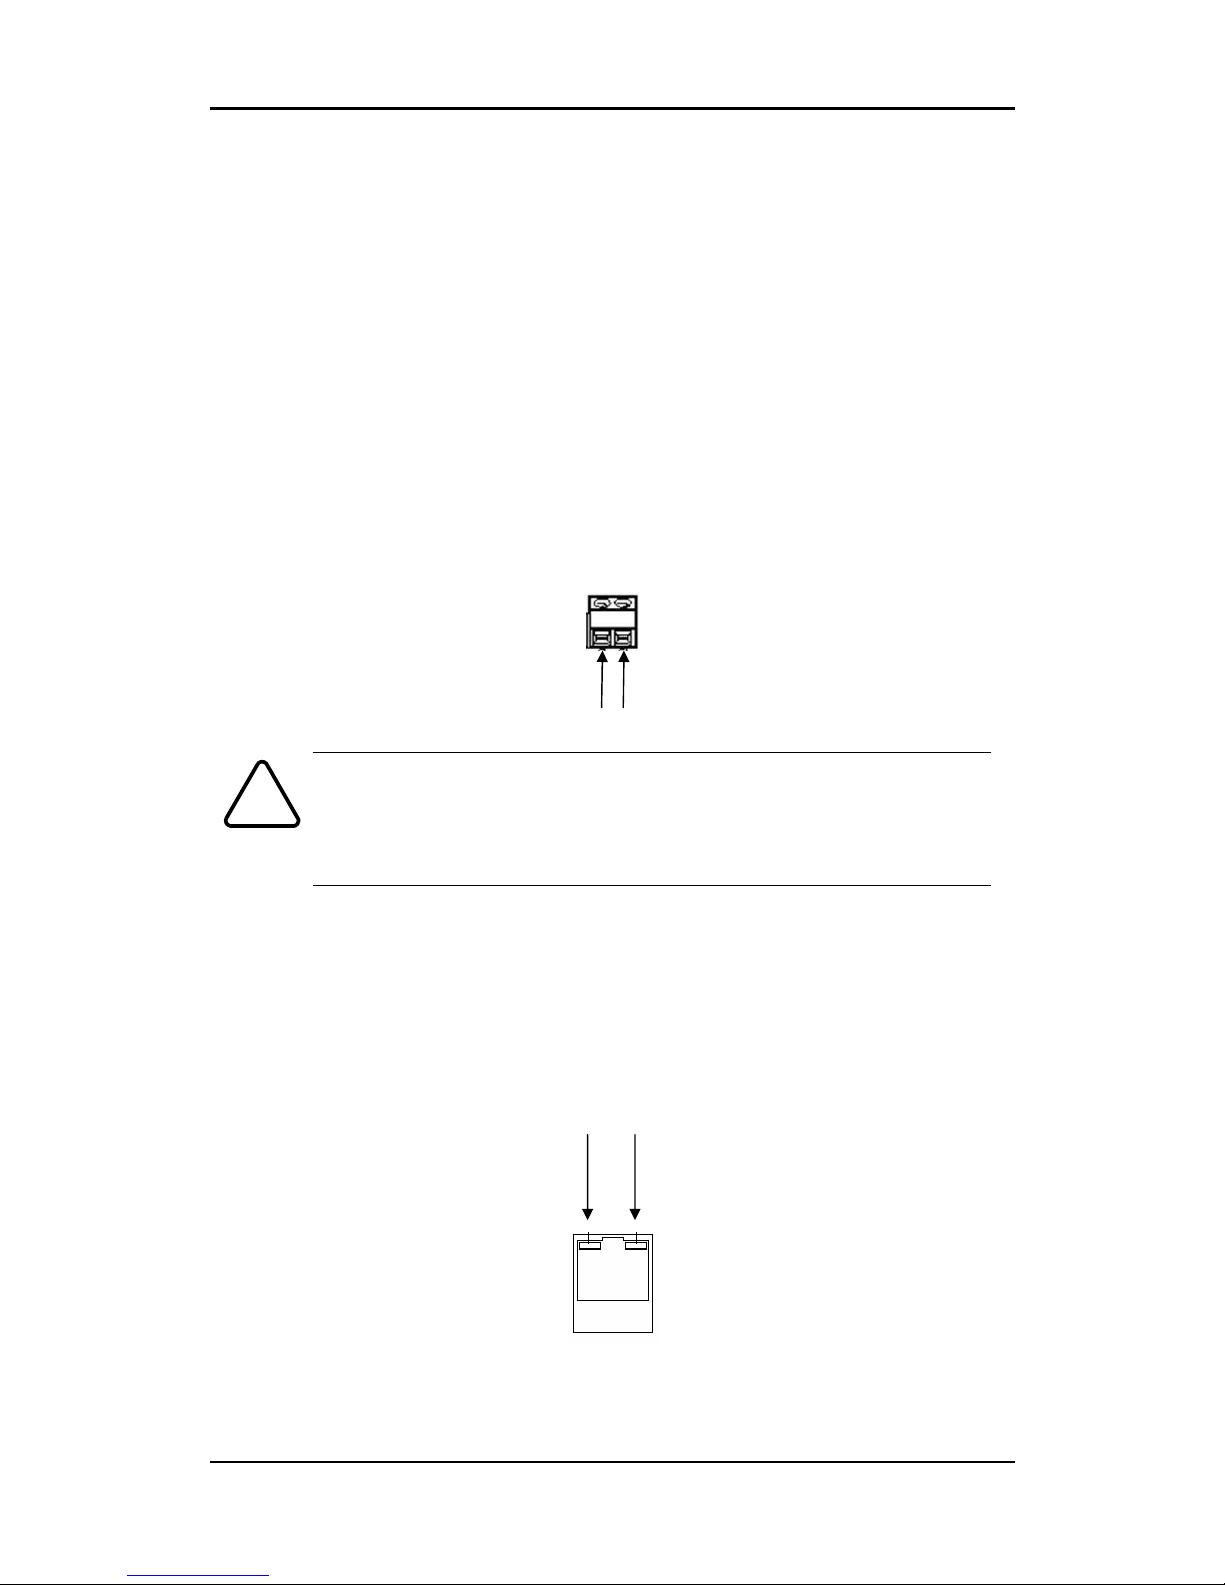
○○○○,7 LAN Connector (Ethernet)
This is a RJ45 LAN connector for 10/100 Base-T Ethernet.
Statu
s LED
Network LED
Page 8

NVC/IPE Series IPE1100 Installation Guide
02A.02 UDP Technology Ltd. 8
○○○○,8 4 pin connector for Auto IRIS
Only DC-drive type is supported.
○○○○,9 Adaptor for mounting the camera
Mounting points adaptor is provided on the bottom(or the top) of the camera for mounting
the camera on a bracket or tripod.
Page 9

NVC/IPE Series IPE1100 Installation Guide
02A.02 UDP Technology Ltd. 9
INSTALLATION
INSTALLATIONINSTALLATION
INSTALLATION
Installing a C/CS Mounting lens
1. Remove the protective rubber cap from the front of the camera.
2. Install the mount ring for lens and adjust the mount ring to fit C or CS lens.
3. Tighten the setscrews using the hexa wrench in the package.
Installing an Auto IRIS lens
1. Remove the cover of the auto iris lens plug and connect it with the lens cable.
2. Connect the auto iris lens plug to the 4-pin lens terminal on the back of the camera.
Note
i
Use the connection recommended by the manufacturer. For best
performance, read the lens manual carefully. You may need to set the flange
back focus.
Note
i
Only DC-drive type is supported.
CW
SET SCREW
Set Screw
(For IRIS LENS)
CCW
CW
Page 10

NVC/IPE Series IPE1100 Installation Guide
02A.02 UDP Technology Ltd. 10
4 pin connector for IRIS
PIN DC IRIS Lens
1 Damp2 Damp+
3 Drive+_
4 Drive-
2 1
4 3
Page 11

NVC/IPE Series IPE1100 Installation Guide
02A.02 UDP Technology Ltd. 11
Caution
!
When connecting the DC power supply, make sure the polarity is correct. Incorrect
connection may cause malfunction or damage to the camera.
DC Jack Adaptor
LAN
Cable
4 pin connector for iris
Analog
Video Out
Power Adaptor
ETHERNET
Micro SD
RESET
LOOP OUT
RS-485 DO
DI
AUDIO
-
+
C
1 C 1
Out
In
Page 12

NVC/IPE Series IPE1100 Installation Guide
02A.02 UDP Technology Ltd. 12
CONNECTIONS
CONNECTIONSCONNECTIONS
CONNECTIONS
9 pin terminal block
RS-485
The RS-485 serial port consists of TRX+(RX+) and TRX-(RX-) as following the following image.
RS-485 Connection
Sensor (DI) connection
EVA 101 provides 1 channel D/I. It can be connected to either a voltage type sensor or a relay
type sensor as the following figures. It can be selected by software.
Input voltage range: 0 VDC minimum to 24 VDC maximum
Input voltage threshold: 1 V
Caution
!
Do not exceed the maximum input voltage or relay rate.
ETHERNET
Micro SD
RESET
LOOP OUT
RS-485 DO DI AUDIO
-
+
C
1
C 1
Out
In
TRX+(RX+)
<RS-485 Application>
+ -
TRX-(RX-)
TX+
TX-
PTZ Device
485 Device
Page 13

NVC/IPE Series IPE1100 Installation Guide
02A.02 UDP Technology Ltd. 13
Alarm (DO) connection
Only the relay type is supported.
Relay Rating: Max 24VAC 500mA or 12VDC 1A
Caution
!
Do not exceed the maximum relay rating.
Audio connection
EVA 101 has a mono audio input and a mono audio output. As the output power for the audio
is low, amplifier speaker is needed. (Do not use a headphone or earphone directly to the
camera.)
DO
COM
Relay Type
Device
Internal
+5V
DI
COM
DI 1
COM + -
Relay
Type
Voltage
Type
+-
Output of
Sensor
Output of
Sensor
Internal
Internal
+
-
Mic
Ain
Speaker
Aout
Page 14

NVC/IPE Series IPE1100 Installation Guide
02A.02 UDP Technology Ltd. 14
Power Adaptor Connector (DC 12V)
Power adaptor connector connects to DC Jack adapter cable.
Caution
!
Make sure the polarity is correct. Incorrect connection may cause malfunction or
damage to the IP device
Caution
!
Power Adaptor Connector (DC 12V)
RED
+ -
+
-
Page 15

NVC/IPE Series IPE1100 Installation Guide
02A.02 UDP Technology Ltd. 15
CONFIGURAT
CONFIGURATCONFIGURAT
CONFIGURATION
IONION
ION
Set up network environment
The default IP address of your IP device is 192.168.XXX.XXX. You can find the available IP address
from the MAC address of your device. Please make sure the device and your PC are on the same
network segment before running the installation. If the network segment between your PC and
the device is different, change your PC’s settings as below.
IP address : 192.168.xxx.xxx
Subnet mask: 255.255.0.0
View video on web page
View the live video on a web page using your IP device and its IP address. You can use the
IPAdminTool or enter the IP address on the web page.
View video using IPAdmin Tool
IPAdminTool automatically searches all activated ERNITEC EVA series and shows the product
name, IP address, MAC address and etc. IPAdminTool is provided with SDK at the following SDK
path.
{SDK root}\BIN\TOOLS\AdminTool\
Page 16

NVC/IPE Series IPE1100 Installation Guide
02A.02 UDP Technology Ltd. 16
To use the IPAdminTool and view the live video on a web page:
1. Start IPAdminTool. Names and info of currently activated ID devices appear as a list.
2. Right-click on the desired device and select Web view.
3. Select Continue to this website on the Security Certificate Alert page.
(The explanation and captured images at this manual are mainly on the basis of Internet
Explorer 7.0)
4. Click pop-up blocked and install the ActiveX control as below. You need to install the
ActiveX for displaying the images.
Page 17

NVC/IPE Series IPE1100 Installation Guide
02A.02 UDP Technology Ltd. 17
5. Wait for a few seconds while the web page loads. The live video is displayed as below.
6. If the live video is not displayed and “Can not Create XMLDOMDocument Install
MSXML4.0” message is shown as below, please download and Install from the link
below.
http://www.microsoft.com/downloads/details.aspx?familyid=3144B72B-B4F2-46DAB4B6-C5D7485F2B42&displaylang=en
(VCA Library requires MS XML 4.0 library which is an xml parser made by Microsoft.)
Page 18

NVC/IPE Series IPE1100 Installation Guide
02A.02 UDP Technology Ltd. 18
View video using IP address
View the live video on a web page using your IP device and its IP address. To have the correct
IP address ready and use it on a web page:
1. Convert a MAC address to an IP address or check the IP address on the IPAdminTool.
(The MAC address is attached on the side or bottom of the device.)
2. Open a web browser and enter the IP address of the device.
3. Click Continue to this website on the Security Certificate Alert page.
4. Click pop-up blocked and install the ActiveX control as below. You need to install the ActiveX
for displaying the images.
5. Wait for a few seconds while the web page loads. The live video is displayed.
Reset
1. While the device is in use, press and hold the Reset button.
2. Release the Reset button after 3 seconds.
3. Wait for the system to reboot.
Factory Default
1. Disconnect the power supply from the device.
2. Connect the power to the device with the Reset button pressed and held.
3. Release the Reset button after 5 seconds.
4. Wait for the system to reboot.
address = 00
-13-23-01-14-B1
→ IP address = 192.168.
20.177
adecimal number
to Decimal
number
.
Page 19

NVC/IPE Series IPE1100 Installation Guide
02A.02 UDP Technology Ltd. 19
APPENDIX (A): SPECIFICATIONS
APPENDIX (A): SPECIFICATIONSAPPENDIX (A): SPECIFICATIONS
APPENDIX (A): SPECIFICATIONS
Summary
Camera Module
Model EVA 101-DN EVA 101-WDR
Image
Sensor
Sony 1/3” Super HAD CCD,
410K Pixel
SONY 1/3" Vertical Double
Density Color CCD
Effective
Pixels
NTSC: 768(H) x 494(V)
PAL: 752(H) x 582(V)
Size 1/3 inch interline transfer CCD
CCD
Scanning
system
2:1 Interlace
Sync Frequency
NTSC: 15.734 KHz (H) 59.94 Hz(V)
PAL:15.625 KHz(H) 50.00 Hz (V)
Resolution 540 TV Lines
560 TV lines (Color),
600 TV lines (B/W)
S/N (Y
signal)
50dB (AGC Off) 52dB (AGC Off)
Min.
Illumination
0.3Lux/F1.2(Color),
01.Lux/F1.2(B/W), 0.002Lux
(Sens-up)
0.3Lux/F1.2(Color),
0.03Lux/F1.2(B/W)
Wide
Dynamic
Range
Not supported 52dB(x128)
Color ON/AUTO
AGC Control OFF/LOW/MIDDLE/HIGH Selectable
White
Balance
ATW/AWC/MANUAL (1,800° K~10,500° K)
Electronic
Shutter
Speed
AUTO/
MANUAL
(NTSC: 1/60~1/120,000,
PAL: 1/50~1/120,000)
AUTO/
MANUAL
(NTSC: X256~1/60sec~
1/120,000sec,
PAL: X256~1/50sec~
1/120,000sec)
Sens-up and Sens-up Limit is
selectable / Flickerless
Sens-Up OFF/AUTO
ELECTRICAL
DNR
OFF/LOW/MIDDLE/HIGH
(Noise Reduction)
ON (Level 0~32) /
OFF Selectable
Lens Day & Night Vari-focal Auto Iris (Optional)
Day & Night
EVA 101-DN: S/W
EVA 101- : IR Cut Filter Remove
IR Cut Filter Remove
Video
Page 20

NVC/IPE Series IPE1100 Installation Guide
02A.02 UDP Technology Ltd. 20
Compression Format H.264, MPEG-4, MJPEG Selectable per Stream
Number of Streams Dual Stream, Configurable
Resolution D1, 4CIF, VGA, CIF, QCIF, QVGA
Compression FPS 25/30 fps@D1 (PAL/NTSC)
Deinterlacing Supported (DSP)
Motion Detection Supported
OSD Supported (DSP)
Burnt-in Text (Digital) Supported (DSP)
Output 1 Loop Out (BNC connector)
Audio
Input / Output 1/1 channel
Compression Format G.711
Function
Digital Input / Ouput 1/1 channel
RS-485 Supported
Network 10/100 Base-T
Protocol
TCP/IP, UDP/IP, HTTP, RTSP, RTCP, RTP/UDP, RTP/TCP,
SNTP, mDNS, UPnP, SMTP, SOCK, IGMP, DHCP, FTP, DDNS,
PPPoE, SSL, v2/v3, IEEE 802.1X, SNMP, SSH, and IPv6
USB 2.0 Supported
SD Slot
Supported (Micro SD)
※ Micro SD Card is not included
Material Aluminum
Dimensions 55(W) x 55(H) x 94.2(D) mm
VCA (Video Content Analysis)
VCA Presence (Included as Standard)
High Performance Advanced Tracking Algorithm, Low False Alarm Rate
Easy to Use Intuitive Web Browser Interface
Detection Zones Multi-segment Polygons and Lines
On-screen Display Real-time Display of Tracking Data and Events
VCA Surveillance (Optional)
Detection Behavior
Direction, Stopping, Loitering, Entering, Exiting, Appear, and
Disappear Filters
3D Behavior Perspective Corrected Size and Speed Filters
Statistics Counting Functions and Other Statistics
Meta Data Binary XML Format
Image Stabilization (Optional)
Electronic Stabilization Removes Camera Sway
Page 21

NVC/IPE Series IPE1100 Installation Guide
02A.02 UDP Technology Ltd. 21
Electrical Characteristics
Analog Video Output 1Vp-p, 75Ω
Audio Input Linein, 1.43Vp-p(Min 1.35Vp-p, max 1.49 Vp-p), 39 KΩ
Audio Output Lineout, 46mW Power, 16 Ω
Sensor(D/I) TTL level 4.5V threshold, Max 50mA
Alarm(D/O) Max 500mA@24VAC or 1A@12VDC
Power Source(Approx) 12 V DC 340 mA or PoE IEEE802.3af
Environment Condition
Operating Temperature
0 ˚C ~ 50 ˚C (32˚F ~ 122 ˚F)
Operating Humidity Up to 85% RH
Page 22

NVC/IPE Series IPE1100 Installation Guide
02A.02 UDP Technology Ltd. 22
APPENDIX (B): DIMENSIONS
APPENDIX (B): DIMENSIONSAPPENDIX (B): DIMENSIONS
APPENDIX (B): DIMENSIONS
H.264 Network Camera
94.2 9
1
.
4
55
55
Top view
Front view
Rear view
Right side view
UNIT: mm
ETHERNET
Micro SD
RESET
LOOP OUT
RS-485 DO DI AUDIO
-
+
C
1
C 1
Out
In
Page 23

NVC/IPE Series IPE1100 Installation Guide
02A.02 UDP Technology Ltd. 23
APPENDIX (
APPENDIX (APPENDIX (
APPENDIX (CCCC):
): ):
): ACCESSORIES
ACCESSORIESACCESSORIES
ACCESSORIES
Page 24

NVC/IPE Series IPE1100 Installation Guide
02A.02 UDP Technology Ltd. 24
APPENDIX (
APPENDIX (APPENDIX (
APPENDIX (DDDD): TROUBLE SHOOTING
): TROUBLE SHOOTING): TROUBLE SHOOTING
): TROUBLE SHOOTING
Checking your Firmware
Firmware is software that determines the functionality of the device. One of your first actions
when troubleshooting a problem should be to check the currently installed version. The latest
version may contain a correction that fixes your particular problem. The current firmware
version in your device can be seen under Setup > About > Version
New firmware can be downloaded at the FTP site. When you download firmware from the FTP,
your product will receive the latest available functionality. Always read the upgrade
instructions and release notes available with each new release, before updating the firmware.
Please contact us to get an FTP account.
Support
If you cannot resolve an issue, for additional assistance, please contact your supplier or system
integrator or go direct to our Technical Support Team. (support@udptechnology.com)
If you contact our support, please help us help you resolve your problems expediently by
providing a server report, log file and a brief description of the problem.
1. In the address bar of your browser, after the unit IP address enter following CGI
command.
<IP ADDRESS> /nvc-cgi/admin/param.cgi?action=list
The server report contains important information about the device, as well as a list of
the current parameters.
2. The Log messages in the device can prove a useful diagnostic tool for troubleshooting.
Go to Setup > Maintenance > System Log > LOG LIST > message.
Page 25

NVC/IPE Series IPE1100 Installation Guide
02A.02 UDP Technology Ltd. 25
REVISION HISTORY
REVISION HISTORYREVISION HISTORY
REVISION HISTORY
MAN# DATE(D/M/Y) Comments
01A.01 12/03/2009 Created.
01A.02 23/06/2009 Modified
01A.03 25/06/2009 Added TroubleShooting
01A.04 26/06/2009 Added Model specification
02A.00 24/07/2009 FW 1.00.07 official release version
02A.01 06/08/2009 PoE is supported by default.
Added images to package contents
02A.02 24/08/2009 Added the requirement of VCA : MSXML4.0
 Loading...