

Page 1
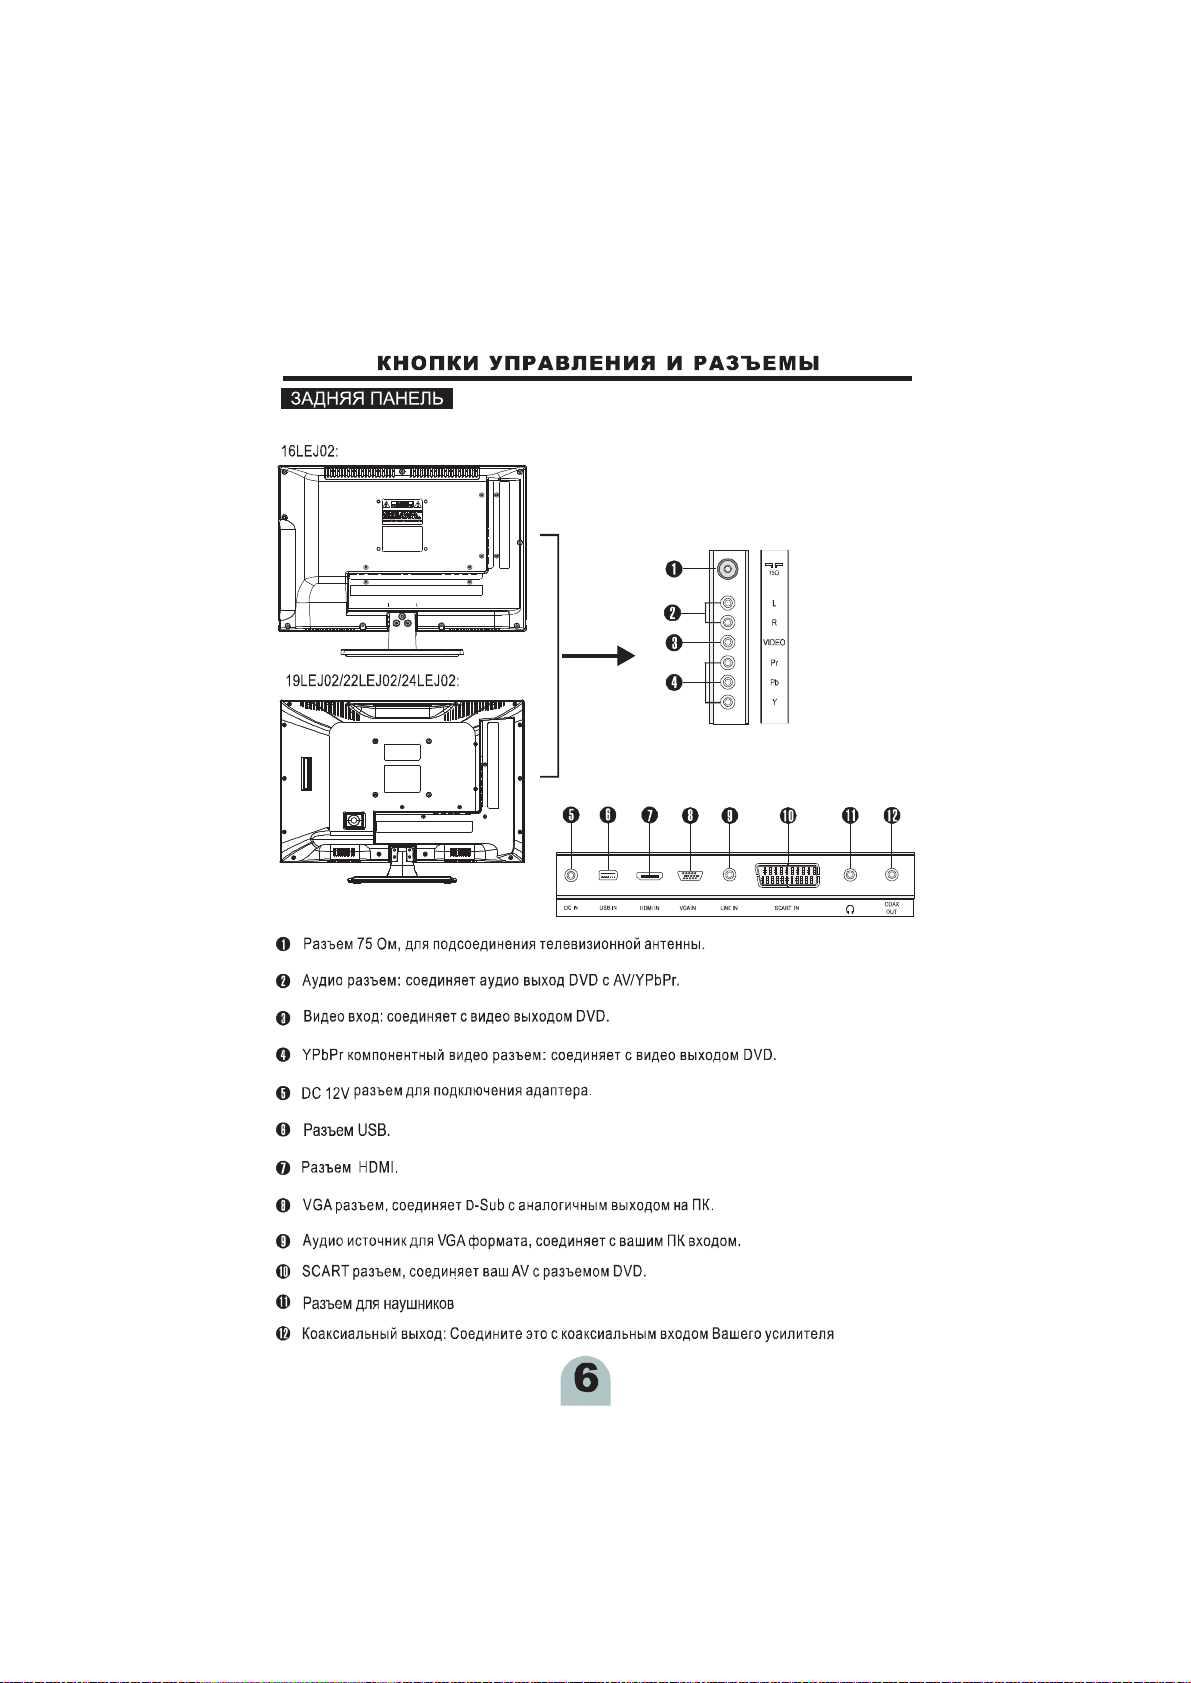
16LEJ02
19LEJ02
22LEJ02
24LEJ02
Page 2
ЗАДНЯЯ ПАНЕЛЬ
E
E
УСТАНОВКА БАТАРЕЙ
ОСНОВНЫЕ ОПЕРАЦИИ
ВКЛЮЧ ЕНИЕ/ВЫКЛЮЧЕНИЕ ТЕЛЕВИЗОРА
РЕГУЛИРОВКА ГРОМКОСТИ
ИСПОЛ ЬЗОВАНИЕ КНОПКИ MUTE
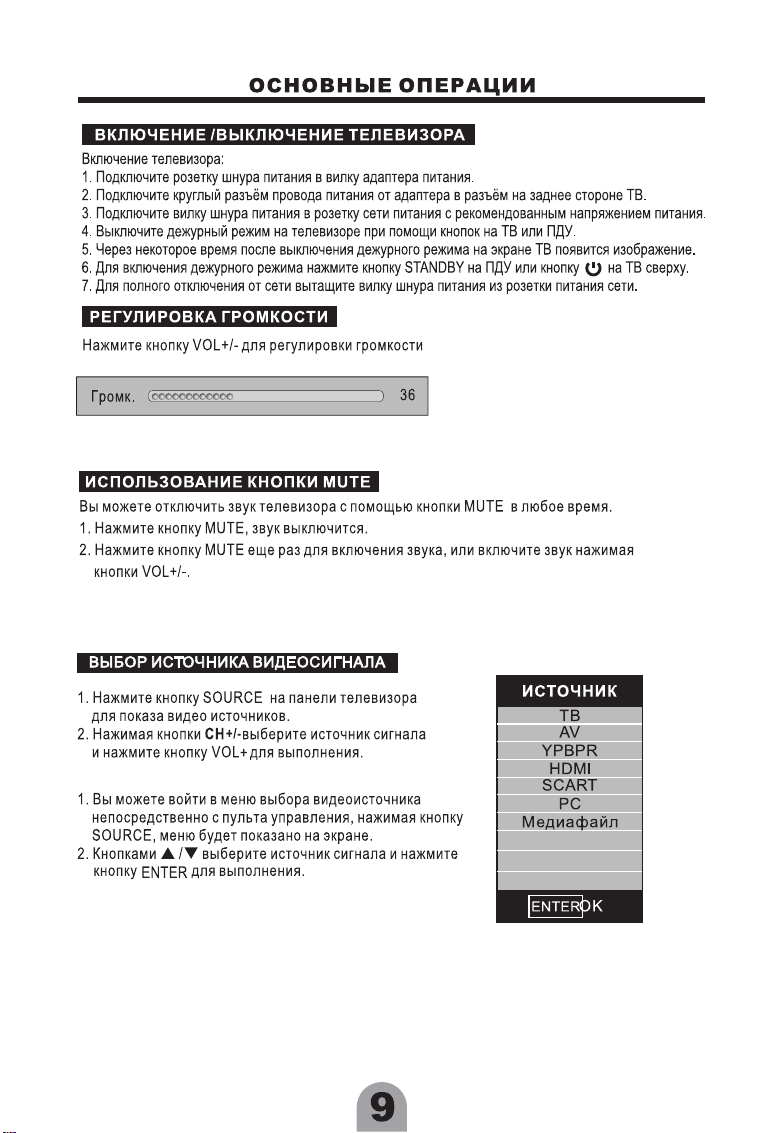
ВЫБОР ИСТОЧНИКА ВИДЕОСИГНАЛА
ПЕРЕК ЛЮЧЕНИЕ ТЕЛЕВИЗИОННЫХ КАНАЛОВ
ВЫБОР ФОРМАТА ЗВУКА УСТРОЙСТВА
РАБОТА С МЕНЮ
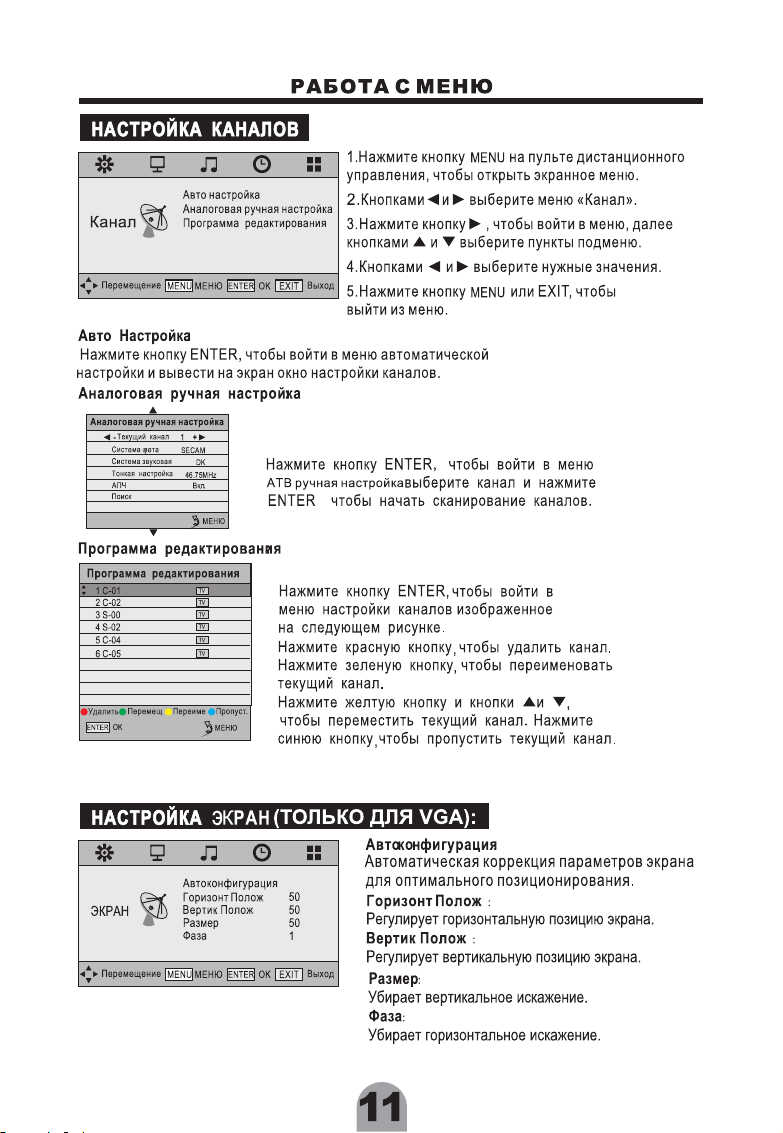
НАСТРОЙКА КАНАЛОВ
НАСТРОЙКА КРАН
НАСТРОЙКА ИЗОБРАЖЕНИЯ
НАСТРОЙКА ЗВУКА
НАСТРОЙК ВРЕМЕНИИ
НАСТРОЙКА ОПЦИЙ
НАСТРОЙК USBИ
ВИДЕО РЕЖИМЫ
ИНСТРУКЦИЯ ПО УСТАНОВКЕ ПОДСТАВКИ
8
9
9
9
9
9
10
10
11
11
11
12
12
13
13
14
15
16
17
18
20
1
Page 3
Page 4
Неправиль
Не п
ное подключение сетевого шнура может привести
ережимайте и не скручивайте кабель, это может при
уйте каких-либо чист
использ
ухой ткань
ю без ворса, не
Page 5
E
E
Элемен ты питания ААА
5.
6. Адаптер
E
4
Page 6
7
6
Наименование
INP UT
MEN U
VOLt/u
CH. t/u
Power Indicator
Remote Sensor
режим и обратно
Описание
перевода телевизора в дежурный
дежурный режим
E
5
Page 7
Page 8
16
1
17
2
3
4
5
6
18
19
20
6
7
8
MENU
7
10
8
9
10
11
12
13
USB FAV
14
15
13
21
22
23
24
25
26
27
11
USB
12
USB
13
14. USB
Нажмите, чтобы войти в режим USB напрямую.
15. FAV
Нажмите, чтобы отобразить список часто вызываемых каналов.
16
17
18
19
20
21
22
23
24.
25.
26.
27.
USB
В режиме USB, нажмите, чтобы выбрать пересылку играть.
USB
USB
Page 9
Page 10
Page 11

ВЫБОР ФОРМАТА ЗВУКА УСТРОЙСТВА
С помощью кнопки NICAM на пульте дистанционного управления
выберите необходимый
для вас формат звука устройства-МОНО, Стерео,
NICAM двойной II
или .
● При просмотре программы в формате МОНО, вы можете выбрать
только МОНО формат
● При просмотре программы в формате Стерео, вы можете выбрать как
МОНО, так и Стерео формат.
● Также вы можете выбрать формат звука или .
Примечание:
Если сигнал Стерео будет слабый, то он будет переключен на Моно
автоматически.
NICAM двойной I
NICAM двойной I NICAM двойной II
10
Page 12
Page 13
РАБ ОТ А С МЕН Ю
Реж им изоб ражен ия
Кон траст ность
Ярк ость
КАР ТИНКА
Пер емеще ние
Цве т
Отт eнок
Рез кость
Цве товая т емпер атура
Шум опода влени е
MENU
МЕН Ю
Режим изображения
Ста ндарт ный
50
50
50
50
50
Сре дний
Вкл .
Вых од
OK
,
MENU
:
,
.
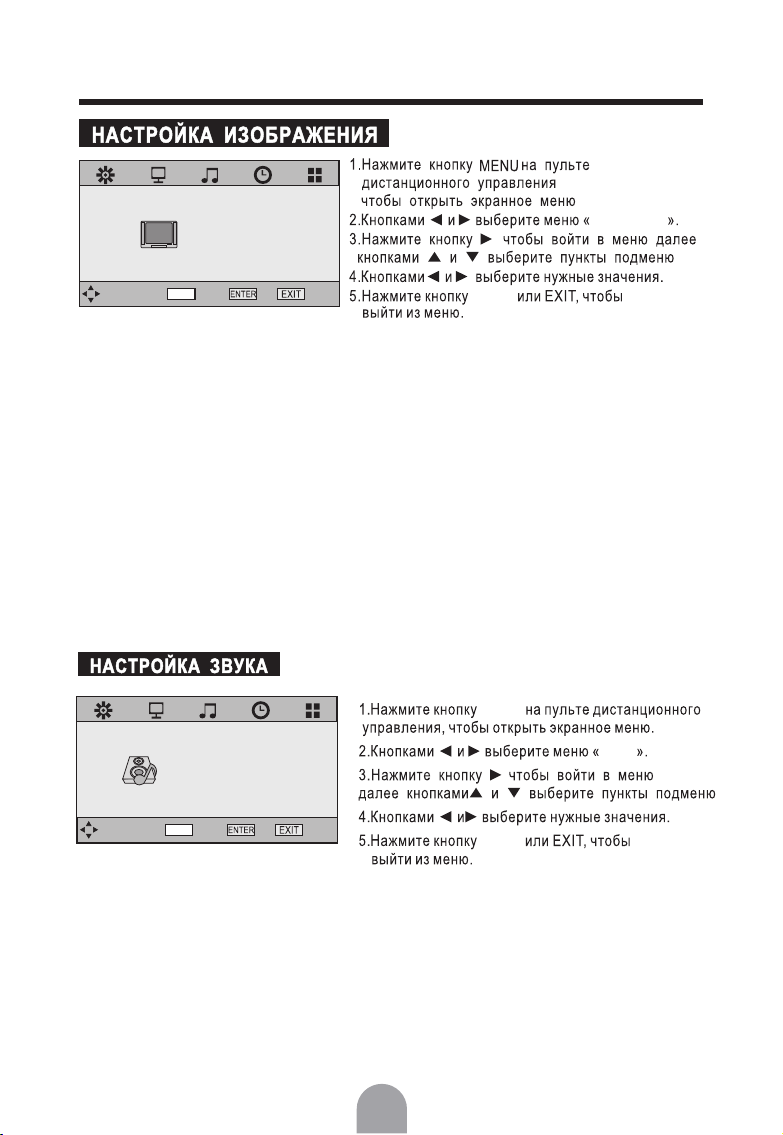
КАРТИНКА
Вы можете выбрать один из следующих форматов изображения - Динамич ный,
Стандартный,
Мягкий и Пользовательский
Форматы - форматы завода, формат Динамичный, Стандартный, Мягкий
Пользоват.– установленные пользователем настройки, позволяют
регулировать яркость, контраст, насыщенность цвета и т.д.
Вы можете выбрать режим картинки, нажимая кнопку PMODE на пульте
дистанционного управления.
Контрастность: регулировка контрастности изображения.
Яркость: регулировка яркости изображения.
Цвет: регулировка цветности изображения.
Оттенок: регулировка цветового тона, когда ваш ТВ в системе NTSC.
Резкость: регулировка резкости изображения
Цветовая температура: Выберите из Холодный, Средний или Теплый.
Шумоподавление: Выберите Включено или Отключено, чтобы включить или
выключить шумоподавление
MENU
ЗВУК
Пер емеще ние
Peж им звук a
Выс окие
Низ кие
Бал анс
Авт озвук
SPD IF Режи м
MTS
MENU
МЕН Ю
Ста ндарт ный
50
50
0
Вкл .
SPD IF Авто
Мон о
Вых од
OK
ЗВУК
,
MENU
,
.
,
.
Режим Звука:
Выберите необходимый вам звуковой формат - , Музыка,
или .
Польз.настр
Форматы - заданы заводом и не могут быть
Стандартный, Музыка, Кино, Кино, Спо рт
Стандартный Кино, Спорт
изменены, если вы хотите изменить некоторые настройки звука, вы можете
выбрать формат .
Польз.настр
Высокие:
Регулирует низкие частоты звука.
Низкие:
Регулирует высокие частоты звука.
12
Page 14

РАБ ОТ А С МЕН Ю
Баланс:
Регулирует баланс звука двух динамиков телевизора.
Автозвук:
SPDIF Режим: : , Выберите один из режимов Выключено Авто или PCM.
MTS: В режиме TB, в зависимости от типа звукового сигнала, используйте кнопку
NICAM для выбора соответствующего режима.
MENU
Тай мер ноч н.реж има
Авт ночно й режим.
Вре мя
Пер емеще ние
Osd п родол жител ьност ь
MENU
МЕН Ю
Таймер ночн. режима
:
Вык л.
Вык л.
10 Cek
Вых од
OK
MENU
Кнопками ▲и▼ выберите пункт меню «Таймер выключения», затем нажмите ENTER,
чтобы войти в подменю. Выберите параметры кнопками ▲и▼.
Авт. ночной режим:
Кнопками ▲и▼ выберите пункт меню «Автоматическое отключение», затем нажмите
ENTER, чтобы войти в подменю. Выберите параметры кнопками ▲и▼.
Osd продолжительность: Выберите 5с, 10с, 15с, 20с, 25с или 30с., чтобы установить
продолжительность индикации меню
MENU
Язы к эранн ого мен ю
Соо тноше ние сто рон
Язы к телет екста
ПАР АМЕТ. .
Пер емеще ние
Язык эранного меню
Соотношение сторон Выберите из 4:3 16:9 .
Син ий экра н
Бло киров ка кноп ок
Вос ст. ста нд. нас троек
MENU
МЕН Ю
: Позволяет выбрать язык меню.
: , , , : Зум 2
Рус ский
16:9
Рус ский
Вкл .
Вык л.
Вых од
OK
Зум1
MENU
ПАР АМЕТР Ы
TTX Язык (Язык телетекста)
Выберите при использовании телетекста язык, соответствующий языку программы,
которую желаете смотреть.
Примечание: Если язык телетекста не соответствует программе, которую вы смотрите,
субтитры языка телетекста могут отображаться неправильно.
Синий экран: Выберите Включено или Отключено.
Блокировка кнопок: Выберите Включено или Отключено для блокировки кнопок.
. . : Вернуть к заводским установкам.
Восст станд настроек
13
Page 15

РАБ ОТ А С МЕН Ю
USB2.0
Муз ыка
Фот о
◄ ►
Кин о
Фот о
Тек ст
Медиафайл
Музыка
Муз ыка
Вер нуть
Кино
Вер нуть
Кино
Кин о
Вер нуть
Тек ст
Вер нуть
14
Page 16

для отобра
Цвет
ные кнопки (КРАСНАЯ, ЗЕЛЕНАЯ, ЖЕЛТАЯ, СИНЯЯ):
Если ком
паниятелевещания использ
жения нормального экрана
Page 17

(16”/19”)
ВИ ДЕО РЕЖИМЫ
640x480
800x600
1024x768
1280X768
1360X768
640x480
800x600
1024x768
1280X768
1360X768
1920X1080
● Форматы, не перечисленные в таблице, не поддерживаются, рекомендуем
выбирать только перечисленные форматы.
● Форматы, указанные в таблице, поддерживаются операционной
системой Windows.
● Иногда изображение может быть искажено из-за стандартной частоты
карты VGA. Однако, это не ошибка
Вы можете улу чшить эту ситуацию, активизируя автоматическое
регулиро вание или, вручну ю настр ойкой ФАЗА в м еню.
(22”/24”)
31.5
37.9
48.4
64.0
47.7
31.5
37.9
48.4
64.0
47.7
67.5
60
60
60
60
60
60
60
60
60
60
60 VESA
DOS
VESA
VESA
VESA
VESA
DOS
VESA
VESA
VESA
VESA
16
Page 18

Убедитес ь в надежности подсое динен ия соединител ьного кабеля с
ПК или другим источником видео входа.
Убедитес ь, что ПК и источни к видео в хода вк лючен ы.
Отрегулируйте настройки Фаза
Отрегулируйте настройки Сдвиг.
17
ПК
ПК
E
Page 19

Частотный
Синхр.
диапазон
Page 20

36
Синхр.
4.5
5.5
Page 21

Page 22

Read the safety and operation instructions throughly before operating your LED TV.
FOLLO W ALL INSTR UCT ION S AND WAR NIN GS on your LED TV and in this manual.
TAB LE OF C ONT ENT S
IMPORTANT SAFETY INSTRUCTIONS
PACKAGE CONTENTS
CONTROL BUTTONS AND TERMINALS
FRONT PANEL
REAR PANEL
REMOTE CONTROLLER
BASIC CONNECTION
BATTERY INSTALLATION
BASIC OPERATION
SWITCHING THE LED TV ON/OFF
ADJUSTING THE VOLUME
USING MUTE
SELECTING INPUT SOURCE
CHOOSING A TV CHANNEL
SELECTING TV SOUND
USING THE MENU
CHANNEL SETUP
SCREEN SETUP
PICTURE SETUP
SOUND SETUP
TIME SETUP
OPTION SETUP
MULTIMEDIA FUNCTION
PLAY PHOTO
PLAY MUSIC
PLAY MOVIE
PLAY TEXT
TELETEXT FUNCTION
SUPPORTING OPERATIONAL MODES
TROUBLESHOOTING
SPECIFICATIONS
STAND IN STALLATION G UIDE
2
4
5
5
6
7
8
8
9
9
9
9
9
10
10
11
11
11
12
12
13
13
14
14
14
14
14
15
16
17
18
20
1
Page 23

Page 24

Page 25

IMPOR TANT SAF ETY I NSTRU CTION S
Carrying and moving
● Be sure to always carry the LED TV by two people holding it with two hands, one hand on each side.
If you carry the unit in a manner other than the specified, it may cause serious damage or injure.
● When transporting the LED TV, never carry the unit by holding into the speakers. The speakers may
be abruption and the unit may fall, causing serious damage to the LED TV and/or serious personal
injury.
Servicing
Do not open the cabinet or remove the rear cover of the unit. If any of the following conditions occurs,
unplug the AC power cord from the AC outlet, and contact a qualified service personnel.
● When the power cord or plug is damaged.
● When the LED panel is damaged.
● When the liquid is spilled on the unit or when objects have fallen into the unit.
● When the unit has been exposed to rain or water.
● If the unit has been dropped or the cabinet has been damaged in any way.
● If the unit does not work properly even after you have refer to the TROUBLESHOOTING section.
Replacement parts
● In case the unit needs parts replacement, make sure that the service personnel uses replacement
specified by the manufacturer, or those with the same characteristics and performance as the
original parts. Use of unauthorized parts can result in fire, electrical shock and/or other danger.
● Upon completion of service has been repaired work, request the service technician to perform
safety checks to ensure that the unit is in proper operating condition.
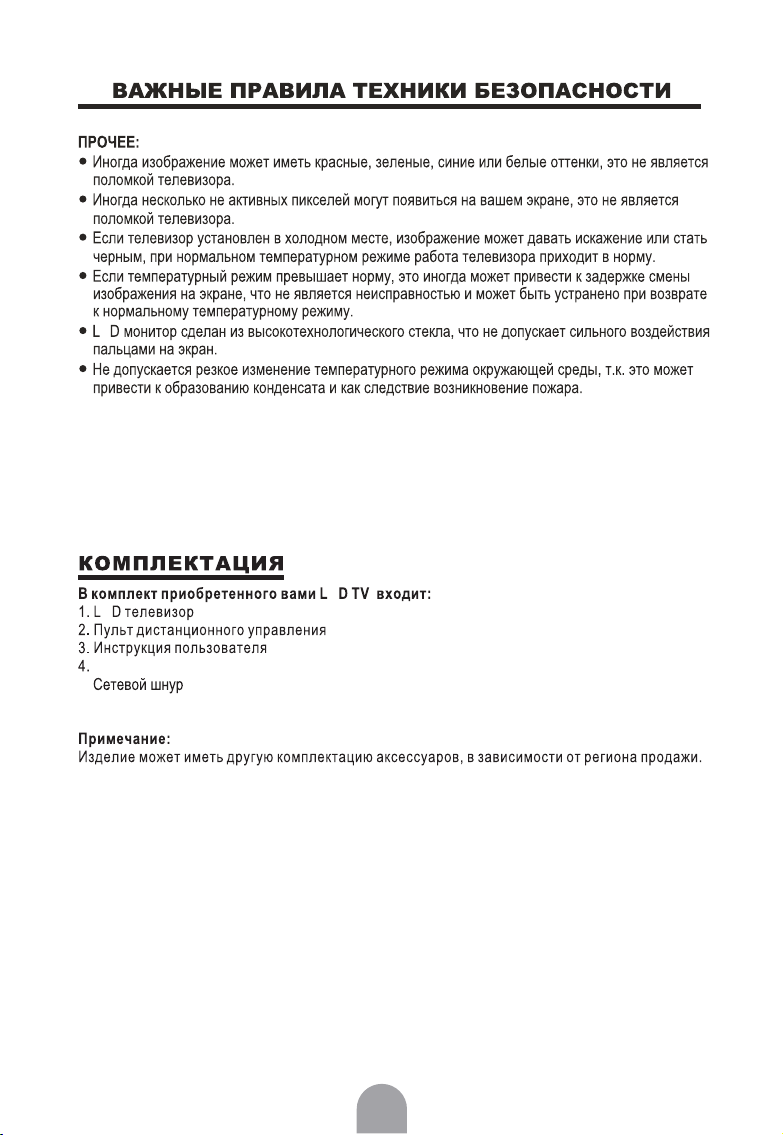
Other notices
● Sometimes, the image may have some tiny red, green, blue, white or black sports. This is normal
and does not affect the performance of the LED TV.
● Due to advanced technology of the LED TV, giving you fine picture details. Occasionally, a few non active pixels may appear on the screen as a fixed point of blue, green, or red. Please note that this
does not affect the performance of your LED TV.
● If the unit is used in a cold place, a smear may occur in the picture or the picture may become dark.
This does not indicate a failure. These phenomena improve as the temperature rises.
● In some cases, residual images may remain after the short-term display of still images is displayed.
These will disappear in a few minutes, and the display will return to normal. However, if used in high
temperatures, it sometimes spends some tens of minutes to return to normal. Please note that this
is not a malfunction.
● LED panel are made of finely processed glass, so please avoid pushing by fingers or hands and
giving strong impact on the panel. It may cause damage to the LC cells, and/or there is danger of
glass breakage.
● Do not use immediately after moving from a low temperature to a high temperature environment,
as this causes condensation, which may result on fire, electrical shock or other danger.
Your LED TV package includes:
1. LED TV Display
2. Remote Control
3. Operation Manual
4. Battery
5. Adaptor
6. Power Cord
Note:
Your product may also include various other accessories depending on region of purchase.
4
Page 26

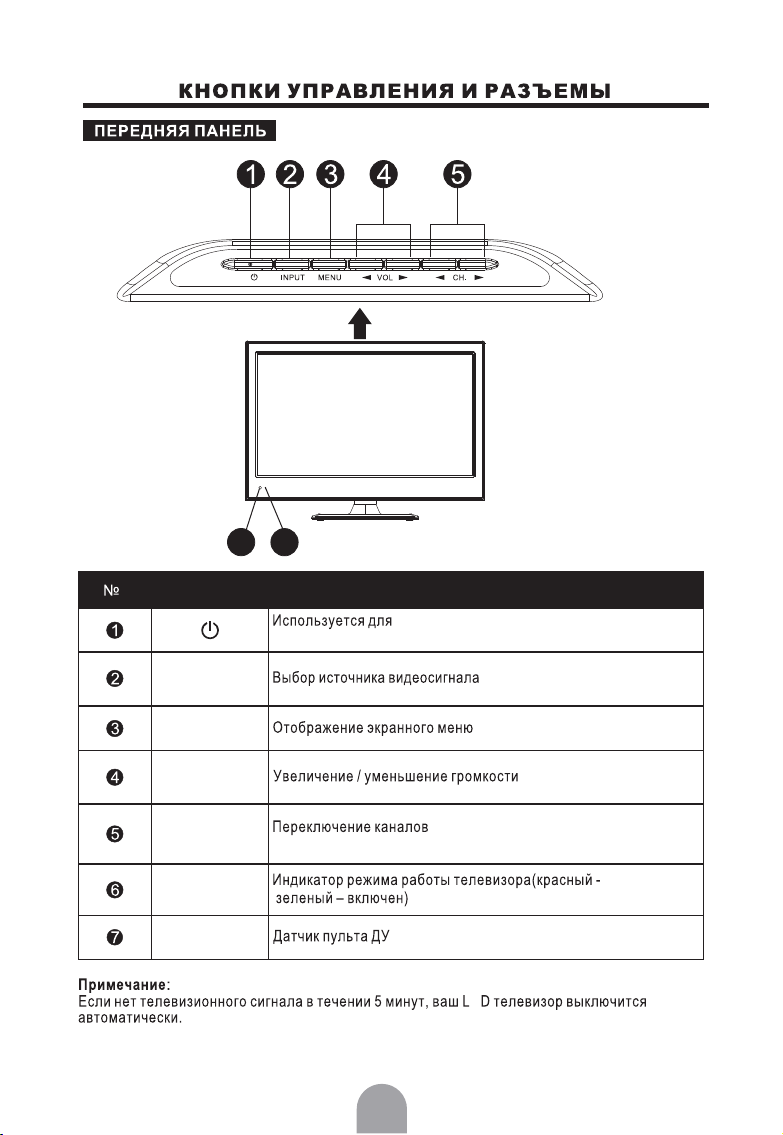
CONTROL BUT TO NS AN D TERMI NALS
FRONT PANEL
7
6
Item
Note:
If there is no signal input for 5 minutes , it will switch to standby mode automatically.
Button Name
INP UT
MEN U
VOLt/u
CH. t/u
Power Indicator
Remote Sensor
Switch on the LED TV when at standby mode and vice versa.
Press to display “Input Source ” menu, then press ▲/▼ b u tton to
select a input source.
Enter or exit from the menu.
Adjust the values of the selected menu item in the OSD menu.
When you are watching the TV program, press this button to
increase channel number.
In the main-menu, press to select menu item.
Illuminates red in standby mode.
Illuminates green when the LED TV is switched on.
Infrared sensor for the remote control.
Description
5
Page 27

Page 28

CONTROL BUTTONS AND TERMINALS
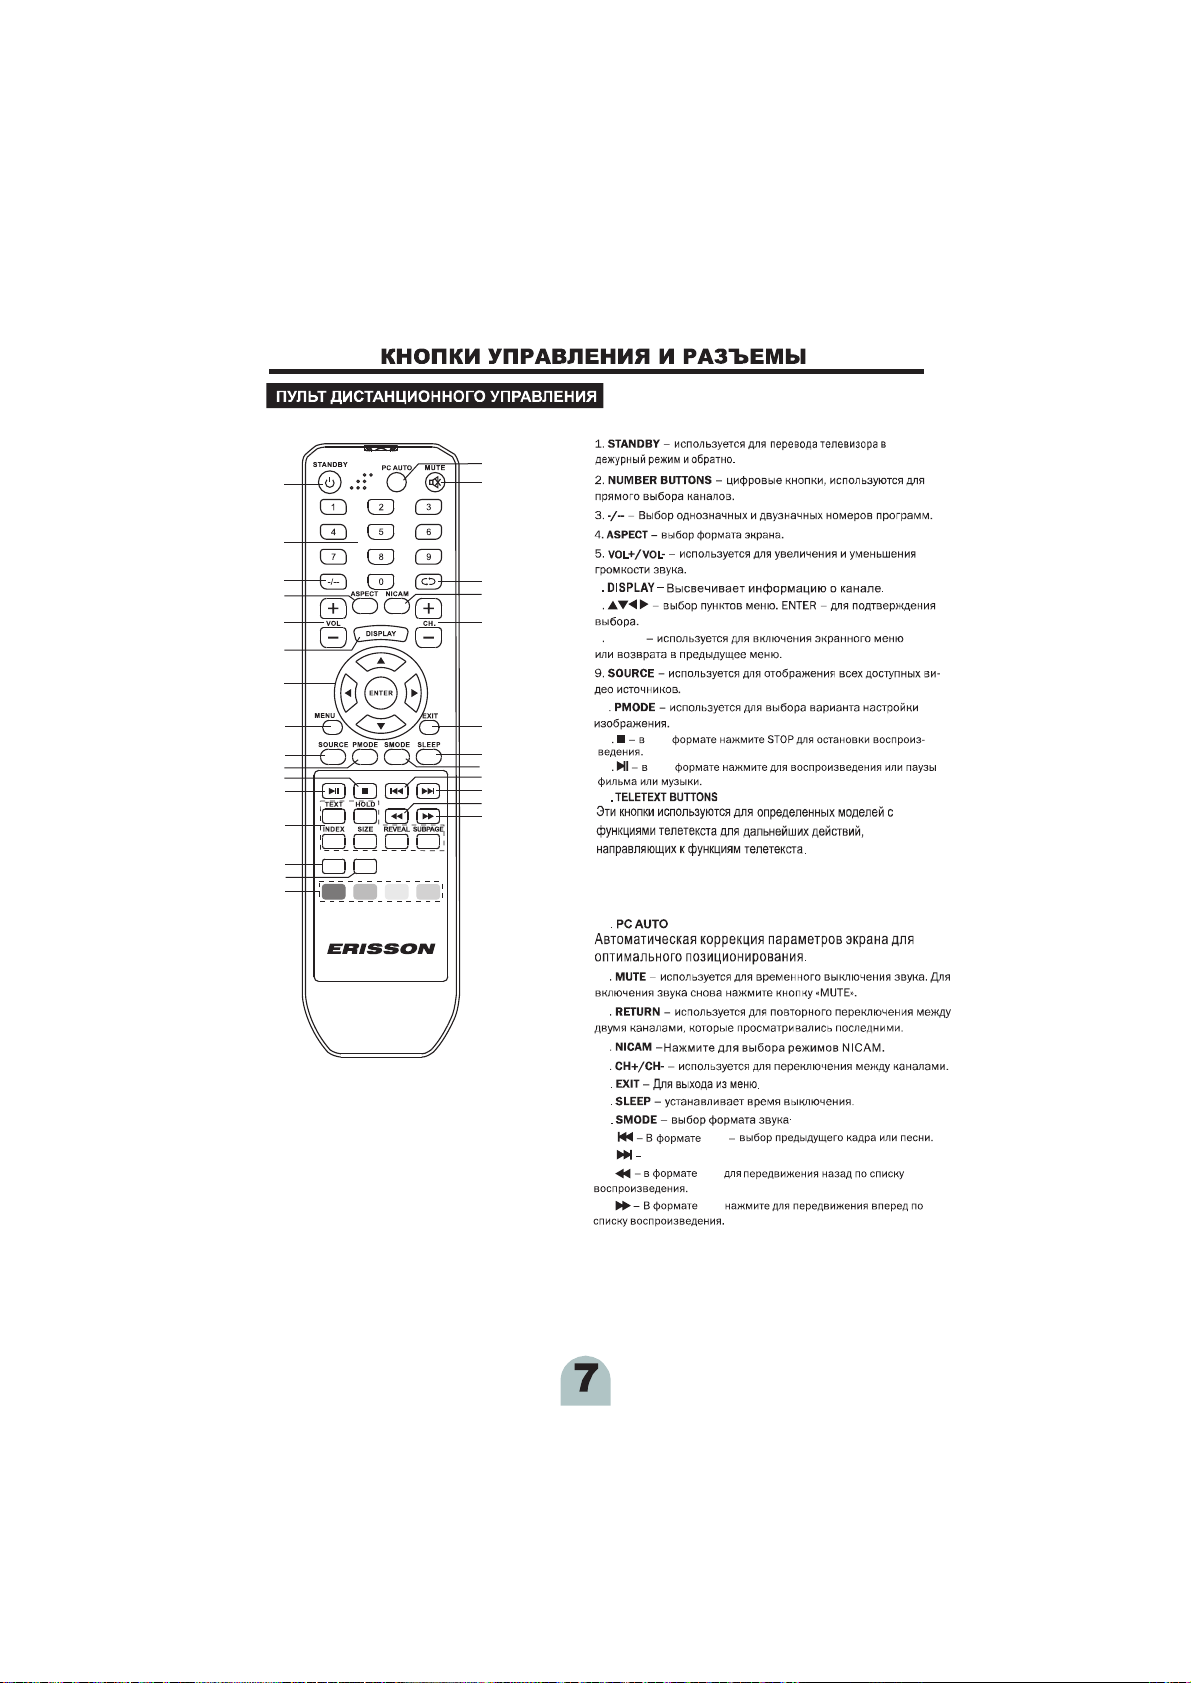
1. STANDBY
To switch on the TV/monitor when at standby mode and vice versa.
16
2. NUMBER BUTTONS
1
2
3
4
5
6
7
8
9
10
11
12
13
USB FAV
14
15
13
17
To directly select program number.
3. -/--
To select one or two-digit program number input options.
4. ASPECT
To select a display mode.
5. VOL+/VOL-
18
To increase or decrease the volume.
19
6. DISPLAY
To display current TV channel information.
20
7. ◄/►
To adjust menu settings.
▲/▼
To select a menu item.
ENTER
Execute the command.
8. MENU
21
To enter the menu, or exit from the menu.
9. SOURCE
22
To select an input signal.
23
10. PMODE
24
25
To select you desired picture mode.
26
11. ■
27
In USB mode, press to stop the play
12.
In USB mode, press to play or pause movies and music.
13. TELETEXT BUTTONS
These buttons are used for certain models with teletext functions.
For further details, refer to the ‘TELETEXT FUNCTION’’.
Note: the color buttons red, green and yellow are used for program
editing function. For further details, refer to the ‘Programme Edit’’.
14. USB
Press to enter the USB mode directly.
15. FAV
Press to display the favourite channel list.
16.PC AUTO
Press to adjust screen settings automatically for optimized picture position.
17. MUTE
To switch the sound on or off.
18 RETURN
To return to previously selected program number.
19. NICAM
Press to select the nicam modes.
20. CH+/CH-
To select the program in ascending or descending order.
21. EXIT
To exit the menu.
22. SLEEP
To set the sleep timer.
23. SMODE
To select the sound mode.
24.
In USB mode, press to select the anterior chapter or song.
25.
In USB mode, press to select the next chapter or song.
26.
In USB mode, press to select backwards play.
27.
In USB mode, press to select forwarding play.
7
‘
‘
Page 29

Page 30

Page 31

BA SIC OPE RATI ON
CHOOSING A TV CHANNEL
SELECTING TV SOUND
In TV mode, according to the type of sound signal, use the NICAM button to select an appropriate
m
ode from the following: Mono, NICAM STEREO, NICAM DUAL I NICAM DUAL II .
● When a mono programme is received, you can only choose Mono.
● When a stereo programme is received, you can switch between NICAM Stereo and Mono.
● When a bilingual programme is received,you can switch among NICAM DUALI, NICAM DUALII ,
and Mono.
NICAM DUALI sends the primary broadcast language to loudspeakers.
NICAM DUALII sends the secondary broadcast language to the loudspeakers.
Note:
f the stereo signal is weak, it will be switched to Mono automatically.
I
and
10
Page 32

MOVE
Auto Tuning
MENU
Auto Tuni ng
TV Manual Tuning
Programme Edit
MENU
USI NG T HE ME NU
OK
EXIT
TV Manual Tuning
TV Manual Tuning, press ENTER button to start searching.
TV Manual Tuning
Current CH
Color Syst em
Sound Syst em
Fine-Tune
AFC
Search
SECAM
46.75MHz
DK
On
Programme Edit
Programme Edit menu as the following picture.
Programme Edit
1 C-01
2 C-02
3 S-00
4 S-02
5 C-04
6 C-05
TV
Use RED button to delete the current channel.
TV
User GREEN button to rename the channel, press ▲/▼button to select
TV
TV
characters, press ◄/►button to move the position.
TV
User YELLOW button and ▲/▼button to move the channel.
TV
User BLUE button to skip the channel.
Skip
OK
Move
SCREEN SETTING (FOR PC MODE ONLY)
Auto Adjust:
Adjust screen settings automatically for optimized picture
position.
Horizontal Pos.:
Adjust the screen horizontal position.
SCREEN
Auto Adjust
Horizontal Pos.
Vertical Pos.
Size
Phase
50
50
50
1
Vertical Pos.:
MOVE
MENUMENU
OK
Adjust the screen Vertical position.
EXIT
Size:
Removes any vertical interference.
Phase:
Removes any horizontal interference.
11
Page 33

Page 34

Page 35

MULT IME DI A FUN CTI ON
1. Press the SOURCE button on the remote
controller to display the Input Source menu.
2. Press button to select the MEDIA.
3. Press the button to enter the menu.
4.
Press ◄/►button to select the files on the USB
device (PHOTO, MUSIC, MOVIE, TEXT) to view.
5. Press the SOURCE or EXIT button to exit from
the menu.
2. MUSIC
Play the music
PHOTO
p/q
ENTER
MUSIC
2. MOVIE
Play the movie
MOVIE
4.TEXT
Play the text
TEXT
14
Page 36

Page 37

SUPPO RTED OP ERAT ING MOD ES
COM PONEN T VIDEO ( YPbPr) INPUT
Mode
576i/50
480i/60
576p/50
480p/60
720p/60
1080i/50
1080i/60
1080p/50
1080p/60
RGB I NPUT( 16”/ 19 ”)
Resolution
640x480
800x600
1024x768
1280X768
1360X768
RGB I NPUT( 22”/ 24 ”)
Resolution
640x480
800x600
1024x768
1280X768
1360X768
1920X1080
HDM I INPUT
Mode
480i
576p
720p/60
1080i/50
1080i/60
1080p/50
1080p/60
● Mod es, whi ch are no t listed in the above table, may not be suppor ted. Fo r an opti mal pic ture
is re comme nded to choose a mode listed in the table.
● The i ncomi ng disp lay modes compatible with WINDOWS as sho wn in the table above.
● Som etime s, the im age may be disrupted due to th e frequ ency st andar d from th e VGA card.
How ever, th is is not a n error. You may improve this sit uatio n by acti vatin g the aut omati c
adj ustme nt or by manually changing the phase and the clock setting s in the me nu.
● To extend the service life of the pro duct, w e recom mend th at you us e your computer ’s power
man ageme nt function.
Resolution
720X576
640X480
720X576
640X480
1280X720
1920X1080
1920X1080
1920X1080
1920X1080
Horizontal
Frequency (K Hz)
31.5
37.9
48.4
64.0
47.7
Horizontal
Frequency (K Hz)
31.5
37.9
48.4
64.0
47.7
67.5
Resolution
640X480
720X576
1280X720
1920X1080
1920X1080
1920X1080
1920X1080
Horizontal
Frequency
(K Hz)
15.63
15.73
31.25
31.47
45.00
28.13
33.75
56.25
67.50
Vertical
Frequency (Hz)
60
60
60
60
60
Vertical
Frequency (Hz)
60
60
60
60
60
60 VESA
Horizontal
Frequency
(K Hz)
31.47
31.25
45.00
28.13
33.75
56.25
67.50
Vertical
Frequency
(Hz)
Comment
Comment
Vertical
Frequency
(Hz)
60.00
50.00
60.00
50.00
60.00
50.00
60.00
16
50.00
60.00
50.00
60.00
60.00
50.00
60.00
50.00
60.00
DOS
VESA
VESA
VESA
VESA
DOS
VESA
VESA
VESA
VESA
Page 38

Page 39

Page 40

36
4.5
5.5
Page 41

 Loading...