

Page 1
Installation Instructions
TDX50 Series
This CRITEC TDX50 Surge Protection Device (SPD) is a high-performance Transient Voltage Surge
Suppressor (TVSS), designed to provide protection for sensitive electronic loads connected to distribution
panelboards or switchboards or where the SPD is directly connected to the electronic device. Maximum
protection will only be achieved if the SPD is properly installed. Please read the installation instructions
carefully and follow the instructions.
DANGER: Electrical shock or burn hazard. The installation of this TVSS device should
be made by qualified personnel. Failure to lockout electrical power during installation or
maintenance can result in fatal electrocution or severe burns.
CAUTION: Check to make sure line voltage does not exceed TVSS voltage
requirement.
CAUTION: This unit must be installed in accordance with the National Electrical Code
(ANSI/NFPA-70) and applicable local codes, and must be installed on the load side of
the main over-current protection.
CAUTION: Do not install on unground ed electrical systems.
NOTICE: Do not cut wires until the SPD is mounted and minimum wire lengths have been verified. All
connection leads should be cut to minimum possible length; never coil or push aside excess
length.
INSTALLATION INSTRUCTIONS
1. Verify line voltage by measuring L-N, L-G,
L-L and N-G of the system. Confirm that the
SPD is correctly rated for the system to
which it is to be connected by comparing the
measured voltages to the SPD voltage
ratings shown on the product side rating
label. The (MCOV) maximum continuous
operating voltage specifications must not be
exceeded.
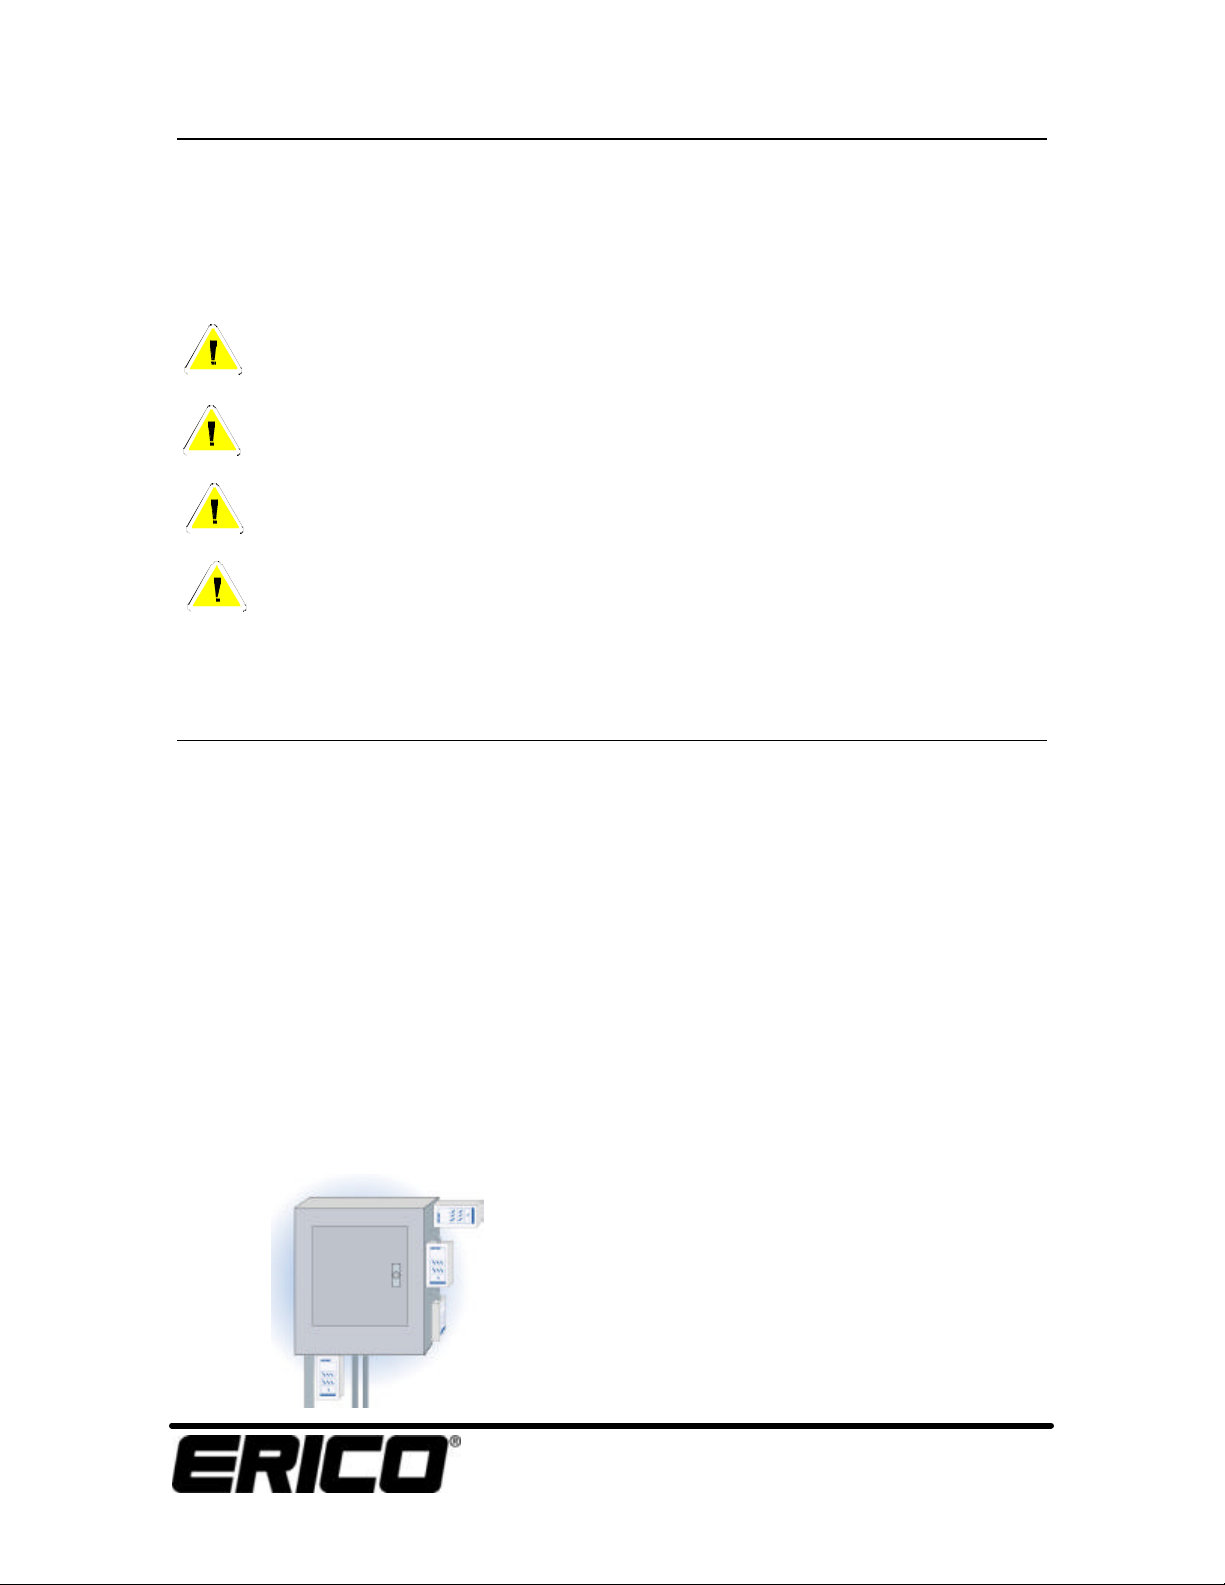
2. Identify proper location for SPD. Locate as
close as physically possible to panel being
protected. Mount top and bottom SPD
flanges securely. Mount as close to the
electrical connection as possible avoiding
excess distance and avoiding the need for
sharp bends in the wires. (Note: Refer to
installation diagram on SPD.) Use
appropriate conduit fittings to preserve the
SPD/panel NEMA enclosure rating.
3. Connect proper ground. An insulated
grounding conductor that is identical in size
and insulating material and thickness to the
grounded and ungrounded circuit supply
conductors, except that it is green with or
without one or more yellow stripes, is to be
installed as part of the circuit that supplies
the filter. The TDX is supplied with 914mm
(3ft) long of #10AWG, in accordance with
Table 250-122 of the National Electrical
Code", for this purpose. The housing of the
TDX unit is bonded to the grounding
conductor for equipment safety ground
purposes as per National Electrical Code.
The grounding conductor is to be grounded
to earth at the service equipment or other
acceptable building earth ground such as the
building frame in the case of a high-rise
steel-frame structure.
Attach the grounding conductor to the
panel’s ground bus for proper operation.
Wire length should be minimized to improve
performance. There is no minimum wire
length requirement.
Note: For isolated ground systems, bond the
grounding co nductor from the TDX unit to
the non-isolated equipment ground, not the
isolated equipment ground.
34600 Solon Road HBCR1591 REV 5
Solon, Ohio 44139
(440) 248-0100
www.erico.com
Page 2

Installation Instructions
TDX50 Series
4. Connect neutral conductor. The TDX units
are supplied with 10AWG leads. The white
Neutral conductor is 914mm (3ft) long. Wire
length should be minimized to improve
performance. There is no minimum wire
length requirement. Measure and trim the
neutral conductor to be as straight and short
as possible. Connect the neutral conductor
of the SPD to the neutral lug on the panel.
5. Connect phase conductors. All connection
leads should be cut to minimum length;
never coil or push aside excess length.
Multiple phase devices may be connected
without regard to phase A, B, C. With the
POWER OFF, connect each black phase
lead via:
a. 30 Amp circuit breakers. Use a multi-
pole circuit breaker, do not connect to
individual single-pole breakers for each
line.
b. or 30 Amp fused disconnected switch.
c. or if installed in compliance with Article
240-21, the NEC “tap rule”, over-current
protection may be omitted*.
* Note: In Australia, New Zealand and other
countries it is not permitted to omit overcurrent protection.
The TDX units are supplied with 10AWG
leads. Phase conductors are 610mm (2ft)
long. Wire length should be minimized to
improve performance. There is no minimum
wire length requirement.
6. Nearby Attachment-Plug Receptacles
Any attachment -plug receptacles in the
vicinity of the filter are to be of a grounding
type, and the grounding conductors serving
these receptacles are to be connected to
earth ground at the service equipment or
other acceptable building earth ground such
as the building frame in the case of a highrise steel-frame structure.
7. Connector and Lugs
Pressure terminals or pressure splicing
connectors and soldering lugs used in the
installation of the filter shall be identified as
being suitable for the material of the
conductors. Conductors of dissimilar metals
shall not be intermixed in a terminal or
splicing connector where physical contact
occurs between dissimilar conductors unless
the device is identified for the purpose and
conditions of use.
8. Activate unit. When power is applied,
diagnostic light(s) will indicate that each
phase is protected. If light(s) do not
illuminate, recheck fusing, the phase, neutral
and ground connections.
9. Flush Panel Mounting. For flush panel
mounting please order flush cover plate and
follow supplied instructions.
10. Problem Diagnostics. If problems continue
after checking the electrical connections,
contact your local ERICO representative.
11. No Neutral. For 480V Motor C ontrol
applications with no neutral, use the TDX50
277/480, but do not connect the neutral
conductor (white conductor). The neutral
conductor should be capped/insulated
34600 Solon Road HBCR1591 REV 5
Solon, Ohio 44139
(440) 248-0100
www.erico.com
Page 3

Installation Instructions
WARNING. Several “Delta” and “No-neutral” power systems exist and are often confused.
Failure to correctly identify and use the correct SPD may cause an electrical shock or burn hazard.
Three Phase
Grounded Delta
("Grounded B Phase")
120/240V TDX50 120/240
208V 480V 600V
L1L2L3
208V 480V 600V
Three Phase
Ungrounded Delta
240V 480V
High Leg Delta
or TDX100 Series
or TDX100 Series
Cap or insulate neutral
TDX50 Series
IMPORTANT
DESCRIPTION CONFIGURATION TYPICAL VOLTAGE SPD
Single Phase
1Ø 2W+G
L1
N
G
L-N
L-G
120V 240V
120V 240V
120V 240V
120V TDX50 120
240V TDX50 240
Single Phase
(Split)
1Ø 3W+G
Three Phase Wye
3Ø Wye 4W+G
Three Phase Wye
3Ø Wye 3W+G
(No Neutral)
Three Phase
3Ø 4W+G
∆
3Ø 3W+G
∆
L1
N
L2
G
L1
N
L2
L3
G
G
120/240V
L-L
240V
120V
L-N
120V
L-G
120/208V 277/480V 347/600V
L-L
120V 277V 347V
L-N
120V 277V 347V
L-G
208V 480V 600V
L-L
120V 277V 347V
L-G
120/208V TDX50 120/208
277/480V TDX50 277/480
347/600 TDX50 347/600
208V TDX50 120/208
480V TDX50 277/480
600V TDX50 347/600
(1)
(1)
(1)
(1)
240V
L-L
240V
208V
L1-N
L2-N
L3-N
L-L
L1-G
L2-G
L3-G
120V
120V
240V 480V
240V 480V
240V 480V
240V 480V
0V 0V
Use TDX150
Use TDX150
240V 480V
L-L
0- 240V 0-480V
3Ø 3W+G
∆
L-G
34600 Solon Road
Solon, Ohio 44139
(440) 248-0100
www.erico.com
Page 4

TDX Series 10 Year Limited Warranty.
This Product has a limited warranty to be free from defects in materials and
workmanship for a period of ten (10) years from the date of dispatch from
the Manufacturer. This warranty includes, but is not limited to, damage due
to over-voltages, damage due to an abno rmally high number of surges and
damage due to direct or indirect lightning strikes.
THE PURCHASER ACKNOWLEDGES THAT LIGHTNING IS A
NATURAL EVENT WITH STATISTICAL VARIATION IN BEHAVIOR
AND ENERGY LEVELS WHICH MAY EXCEED PRODUCT RATINGS,
AND THAT 100% PROTECTION IS NOT OFFERED AND CANNOT BE PROVIDED FOR. IN
ADDITION, THE PURCHASER ACKNOWLEDGES THESE RISKS AND HAS
DETERMINED THAT THEY ARE ACCEPTABLE FOR THE APPLICATION OF THE
PRODUCT. THE PURCHASER IS SOLELY RESPOSIBLE FOR ENSURING THAT THE
PRODUCT IS INSTALLED IN STRICT ACCORDANCE WITH THE MANUFACTURER’S
INSTRUCTIONS, AMERICAN NATIONAL STANDARD ANSI/IEEE C62.41.2 AND ALL
RELEVANT NATIONAL ELECTRICITY AND SAFETY STANDARDS.
The Manufacturer’s liability is limited to the repair or replacement of the product (at the
Manufacturer’s sole option) which, in the Manufacturer’s judgment, has not been abused, misused
or altered. The supply of replacement Products may be conditional upon the Manufacturer
performing a site power quality audit and implementation by the Purchaser of any resultant
recommended corrective measures.
EXCEPT AS STATED IN THE FIRST PARAGRAPH ABOVE, THE MANUFACTURER
MAKES NO WARRANTIES, EXPRESS, IMPLIED OR STATUTORY, AND SPECIFICALLY
DISCLAIMS ANY WARRANTY OF MERCHANTABILITY OR FITNESS FOR A
PARTICULAR PURPOSE.
The scope of this warranty does not provide for claims against the Manufacturer for consequential
damages or loss of operations or service or profits. This warranty does not indemnify the Purchaser
from any consequential claims by a third party for damages or loss of operations or service or
profits. The giving of, or failure to give, any advice or recommendations by the Manufacturer shall
not constitute liability.
Customers should contact their nearest Manufacturer’s agent to obtain a Re turn Material
Authorization (R.M.A.) which must be clearly marked on the outside of the shipping container as
well as on the unit being returned. It should then be forwarded, freight brokerage, and duty
prepaid, to: ERICO, Inc. 34600 Solon Road • Solon, Ohio • (440) 248-0100 along with a note
describing the problem. Proof of purchase should also accompany the request for warranty repair
or replacement. Return freight is customer collect.
34600 Solon Road
Solon, Ohio 44139
(440) 248-0100
www.erico.com
 Loading...