

ERGOMART SAA179, SAA2045 Installation Instructions Manual
SAA179 COMPACT MONITOR ARM
Installation Instructions
www.ergomart.com | 888 420 3200
1 2 3
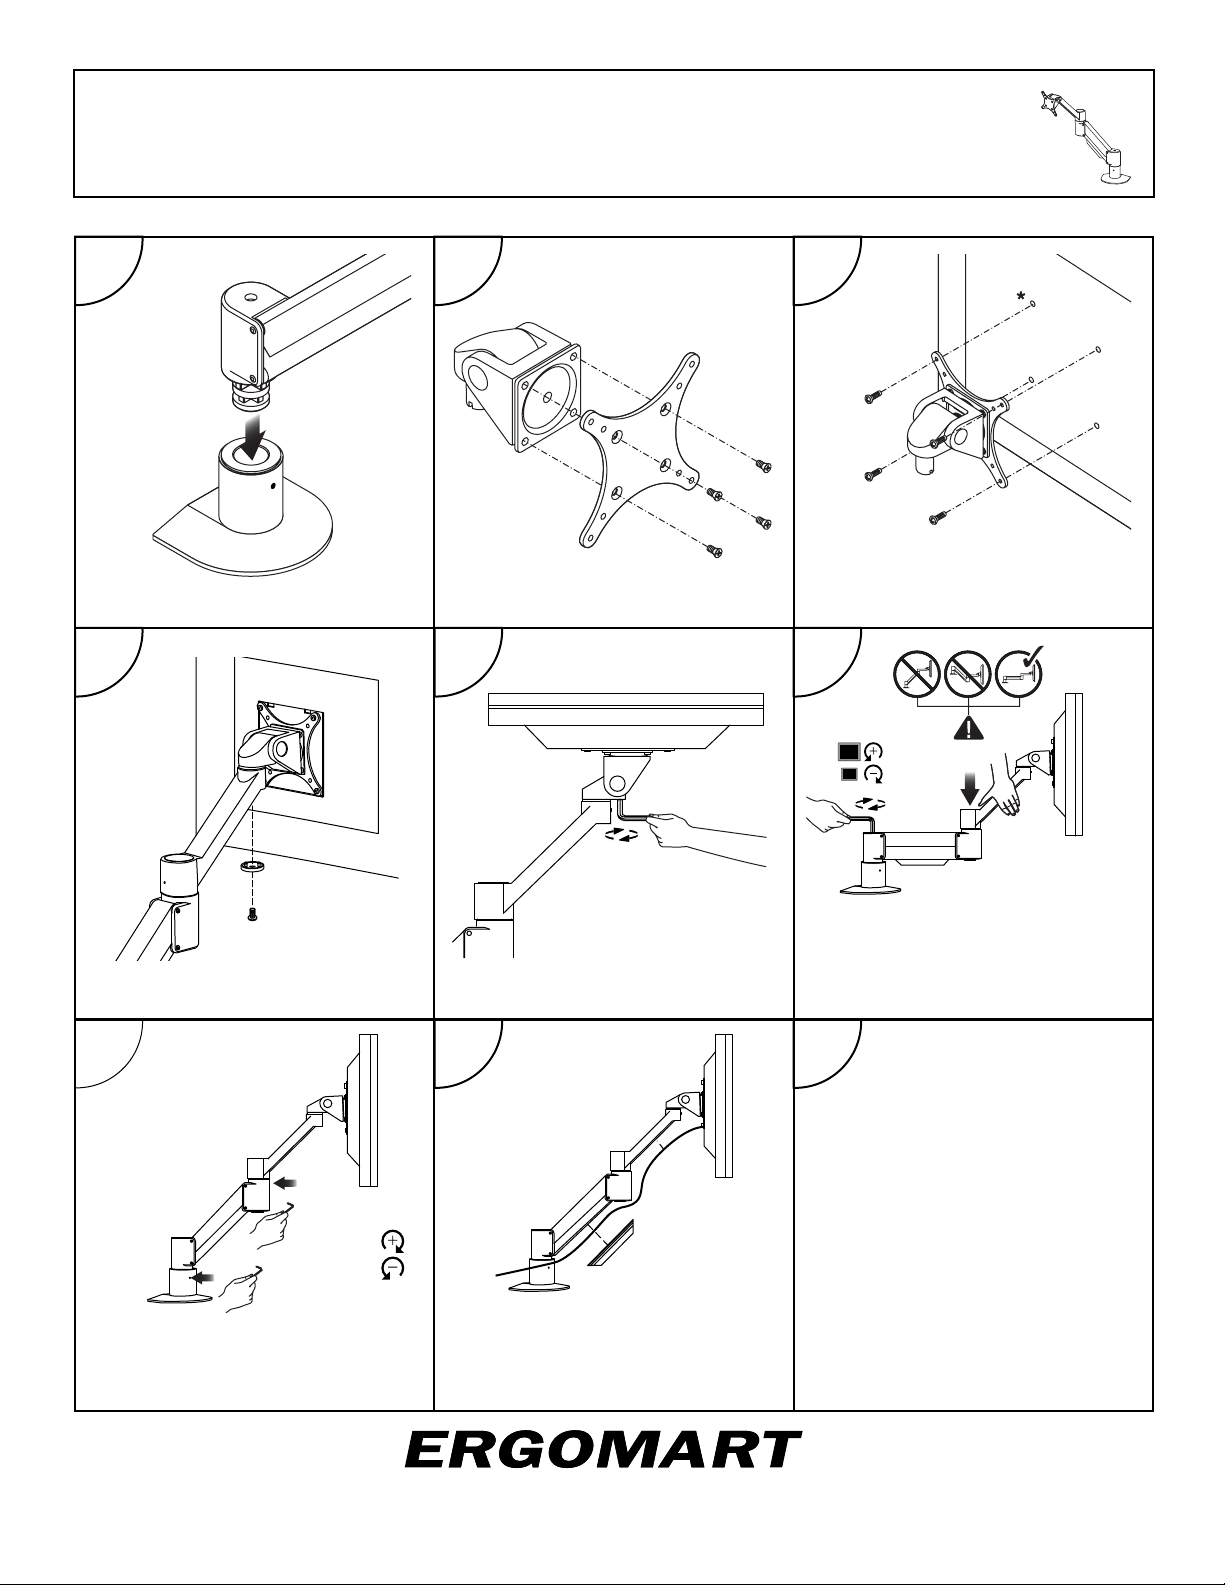
A.
B.
C.
C.
C.
C.
Insert arm pin into completely attached
and assembled mount.
Attach tilter head/VESA plate to
Monitor.
* Some monitors may require a spacer
hardware kit. See page 3 for details.
4 5 6
D.
D.
D.
D.
G.
E.
F.
Slide tilter pin into end of arm.
Adjust vertical tilt resistance on tilter
head.
Put arm in horizontal position and
rotate wrench CLOCKWISE to WEAKEN
arm until monitor stays wherever it is
placed. See page 2 for more detailed
instructions.
7 8 9
H.
I.
H.
Increase resistance to vertical travel
Increase resistance to rotation at
articulation points by tightening small
set screws.
DO NOT OVERTIGHTEN.
slightly with two hidden set screws on
bottom ends of lifting arm. This control
has modest effect and is set only after
gas cylinder floats LCD weight lessly.
G.
Please call Ergomart at
888 420 3200
with your questions
www.ergomart.com
Ergonomic solutions for office and light industrial work environments
©2016 Ergomart. All rights reserved.
PAGE 1 OF 3

SAA179 COMPACT MONITOR ARM
Installation Instructions
www.ergomart.com | 888 420 3200
How do I counterbalance my arm?
1
7/32" Allen Wrench
2
IMPORTANT!
• Monitor must be on arm
• Arm must be in mount
Press the arm down to
approximately parallel with
the desk prior to turning the
strength adjustment screw.
If the arm drifts upward, turn
the adjustment screw clockwise.
If the arm drifts downward, turn
the adjustment screw counterclockwise.
Depending on the weight of
your monitor, you may have
to make 15-20 turns.
In some instances, further
counterbalance adjustments
are needed to allow the arm’s
instant height adjustment
function to work properly.
If your arm is not staying in
position after performing
step 1, follow these steps:
s
_
(2)
With arm in raised position,
tighten set screw (1).
(1)
With arm in horizontal position,
tighten set screw (2).
3/32" Allen Wrench
Do not over tighten screws.
Ergonomic solutions for office and light industrial work environments
©2016 Ergomart. All rights reserved.
PAGE 2 OF 3
 Loading...