

Page 1
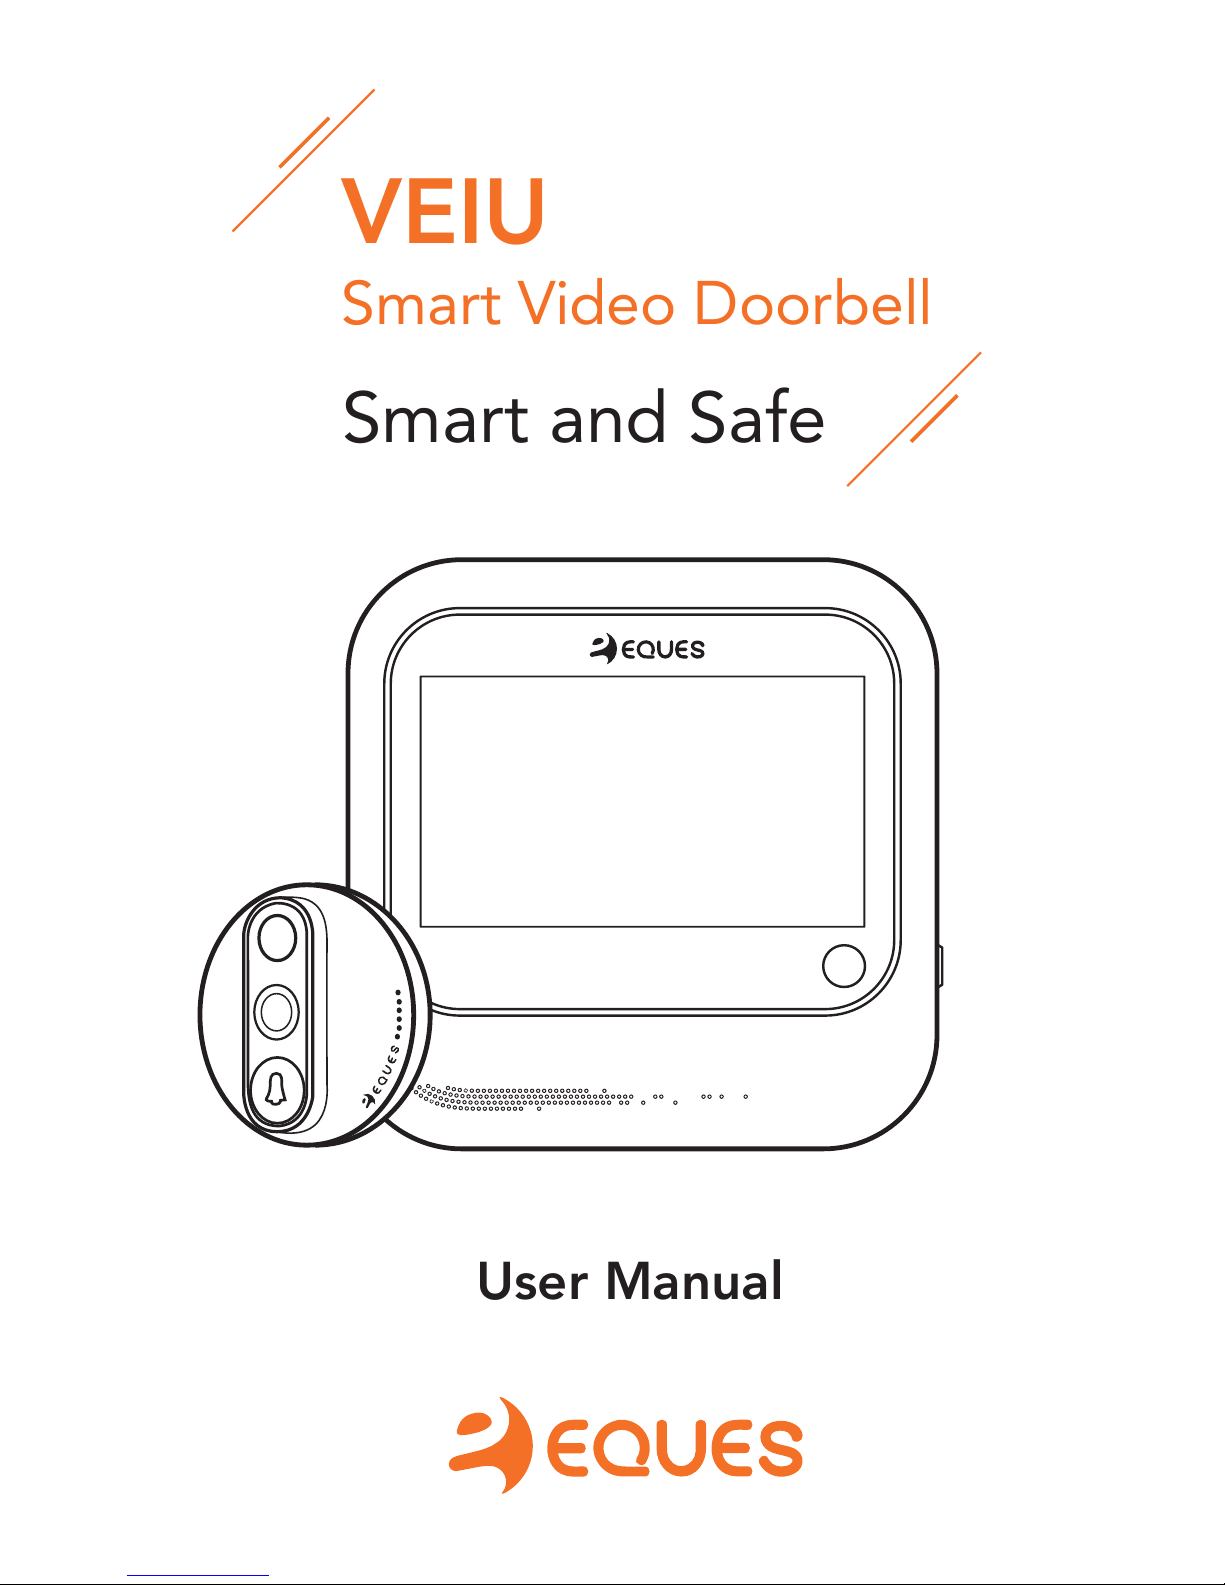
Smart and Safe
User Manual
VEIU
Smart Video Doorbell
Page 2
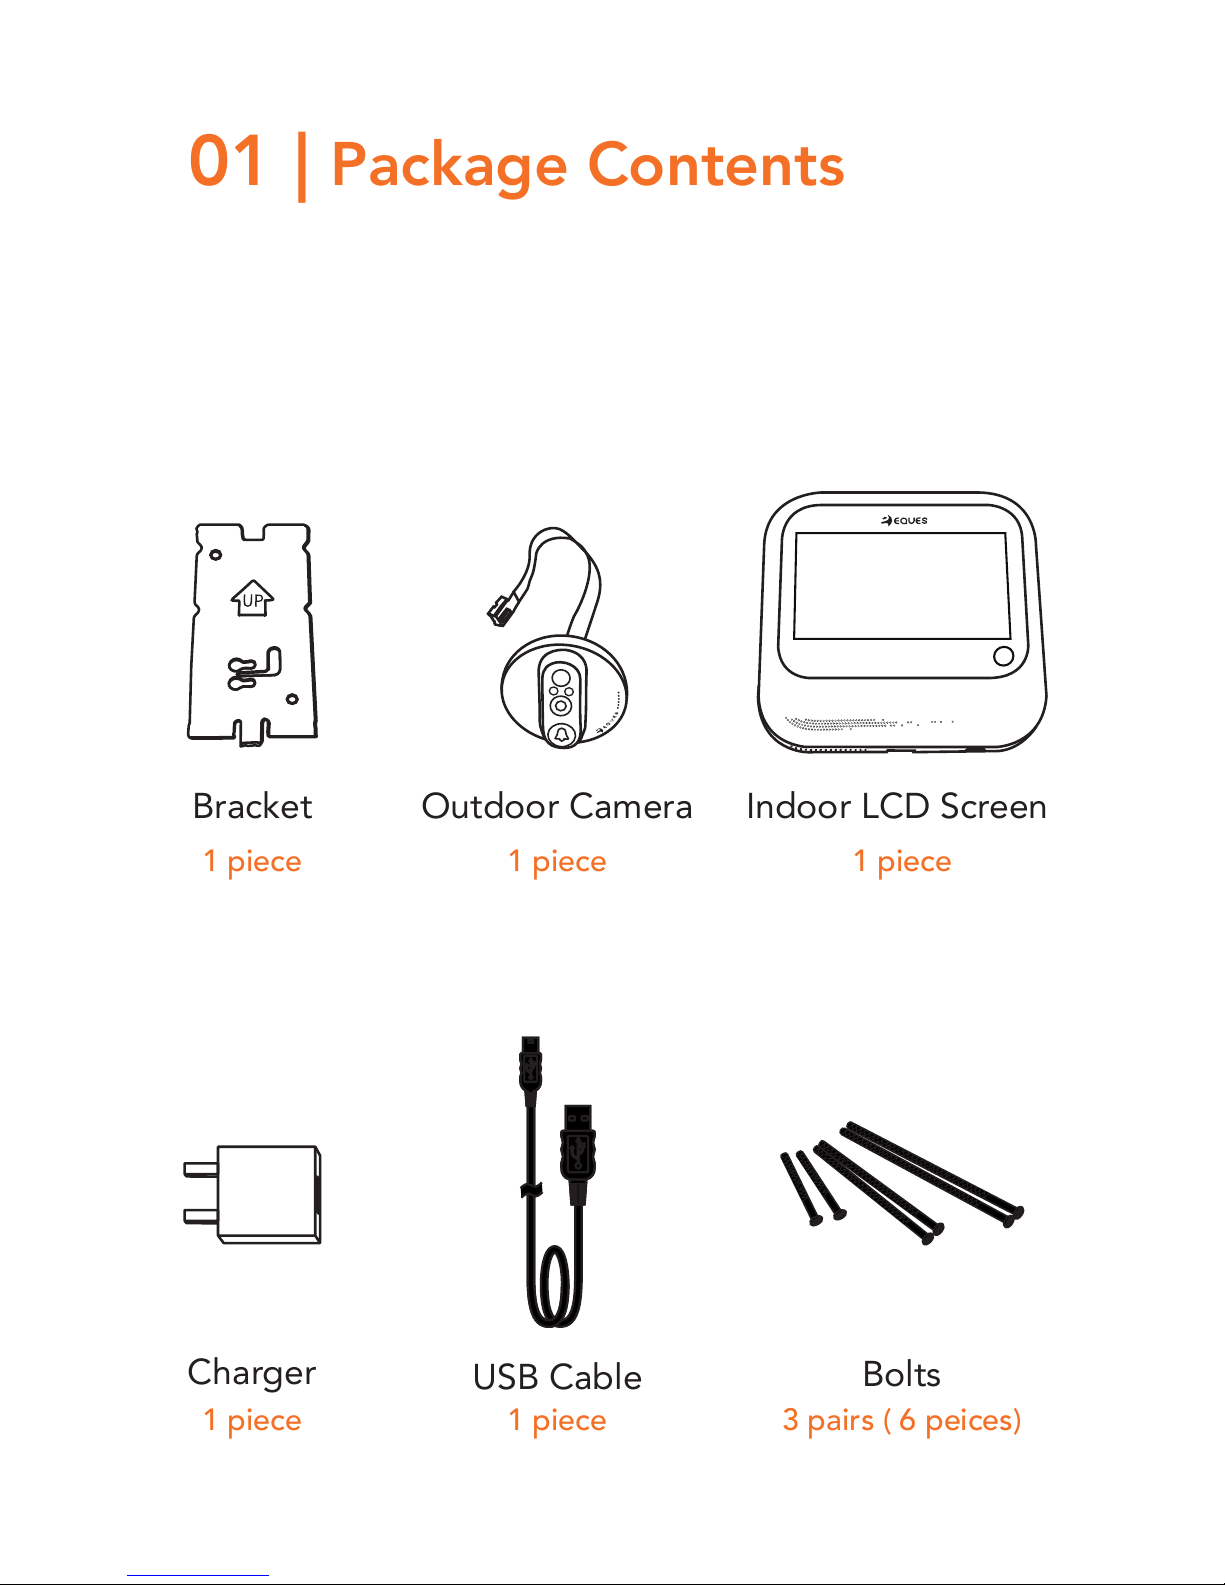
Bracket Outdoor Camera Indoor LCD Screen
Charger
USB Cable
Bolts
1 piece 1 piece 1 piece
1 piece 1 piece 3 pairs ( 6 peices)
01 | Package Contents
Page 3
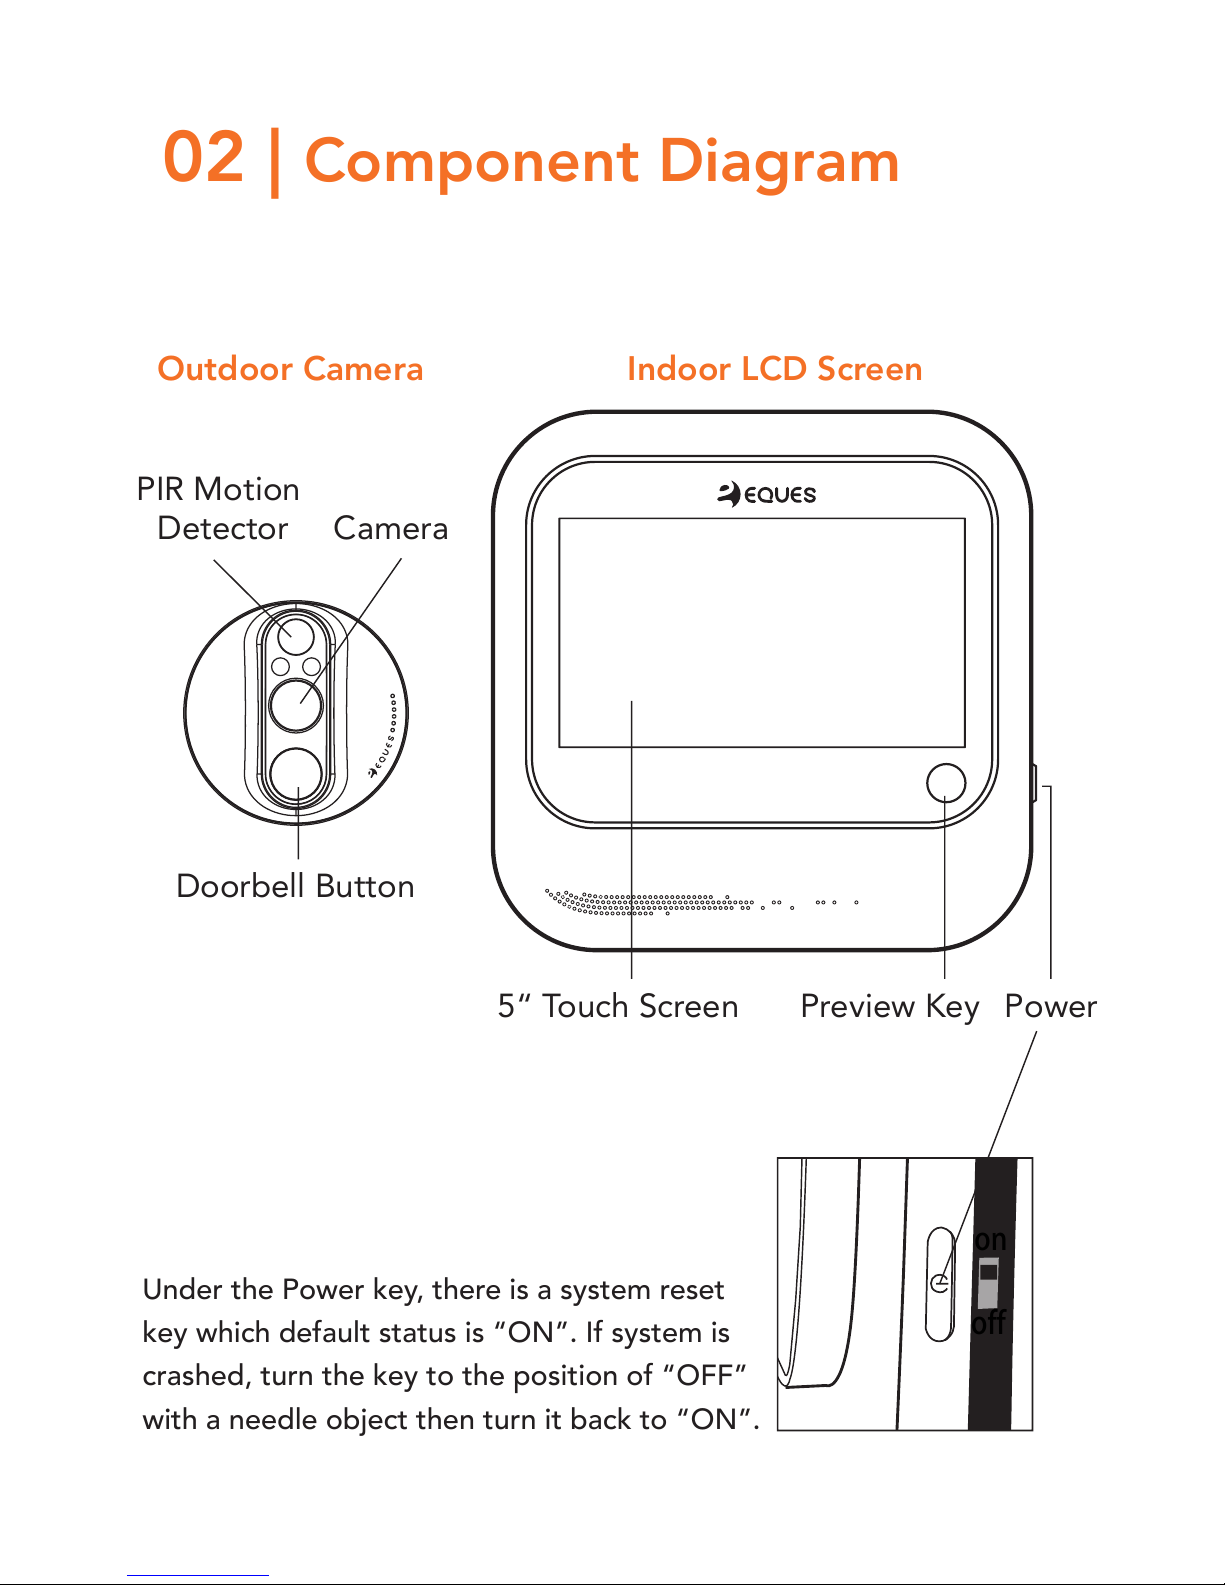
on
off
02 | Component Diagram
Under the Power key, there is a system reset
key which default status is “ON”. If system is
crashed, turn the key to the position of “OFF”
with a needle object then turn it back to “ON”.
PIR Motion
Detector Camera
Doorbell Button
5“ Touch Screen Preview Key Power
Indoor LCD ScreenOutdoor Camera
Page 4
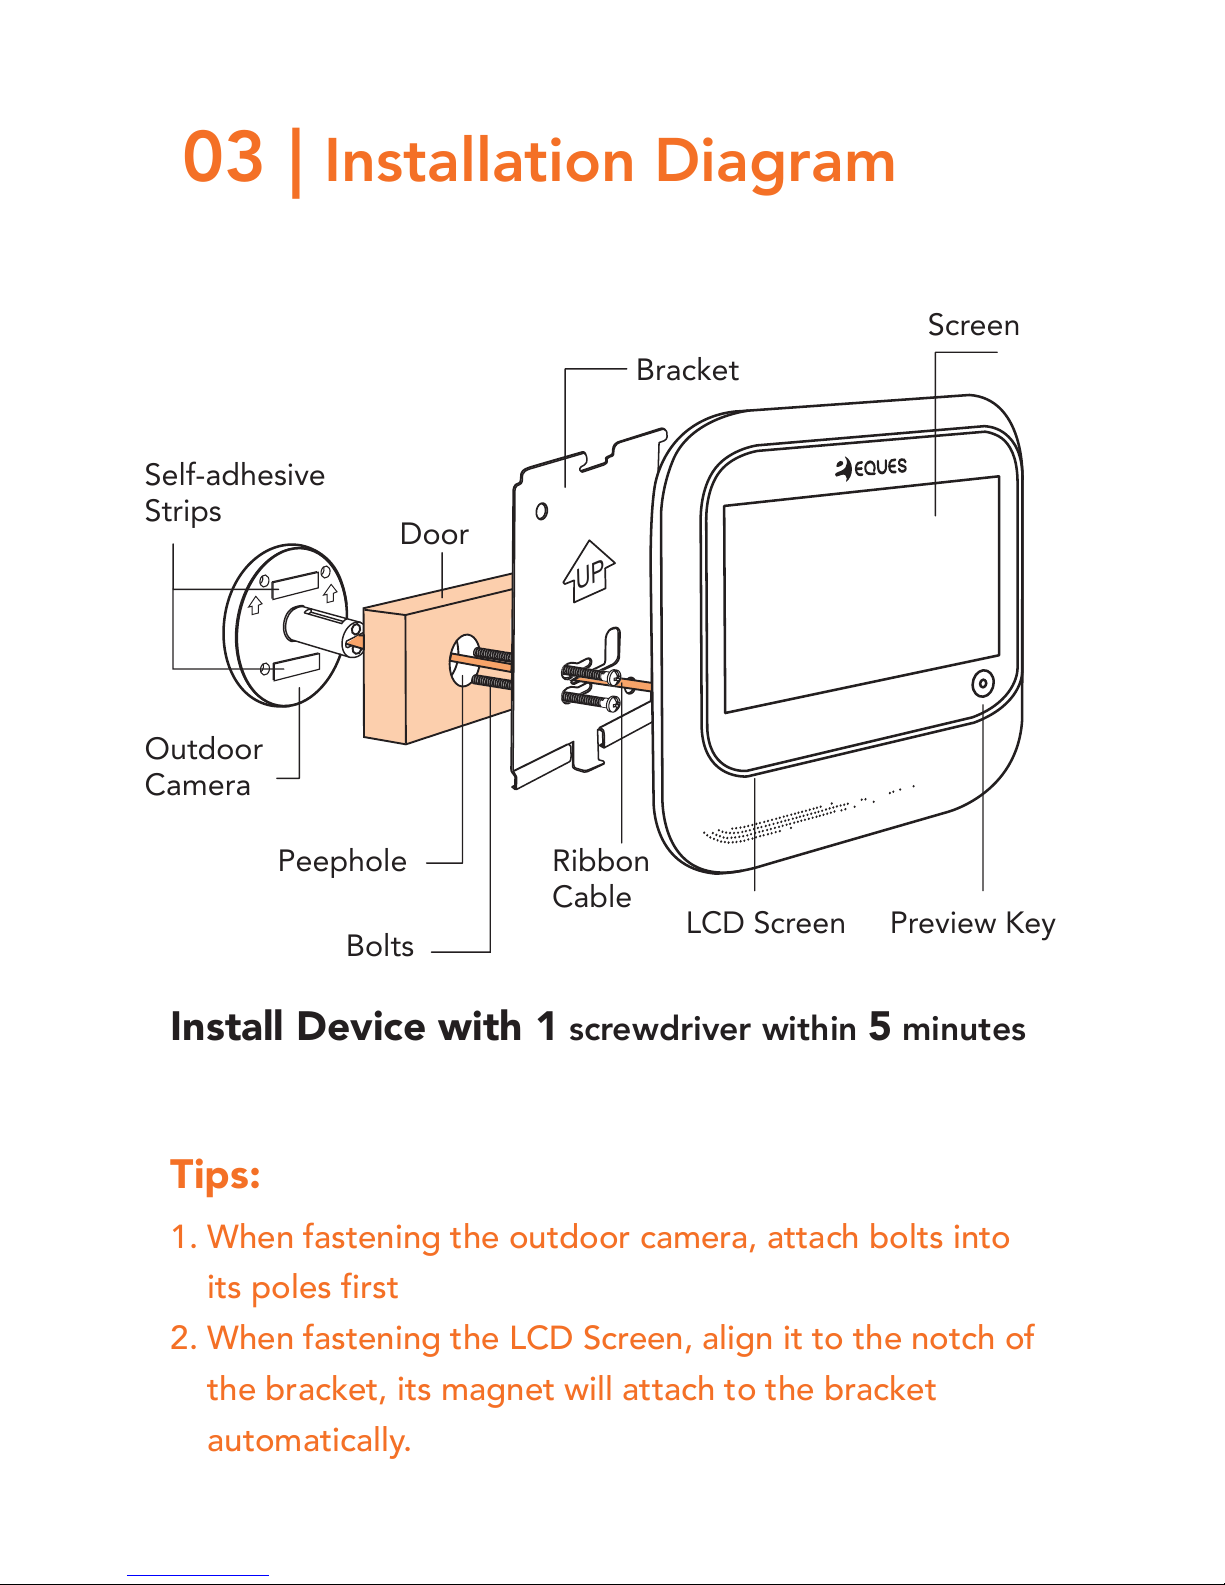
UP
03 | Installation Diagram
Tips:
Self-adhesive
Strips
Door
Bracket
Screen
Outdoor
Camera
Peephole
Bolts
Ribbon
Cable
LCD Screen Preview Key
Install Device with 1 screwdriver within 5 minutes
1. When fastening the outdoor camera, attach bolts into
its poles first
2. When fastening the LCD Screen, align it to the notch of
the bracket, its magnet will attach to the bracket
automatically.
Page 5
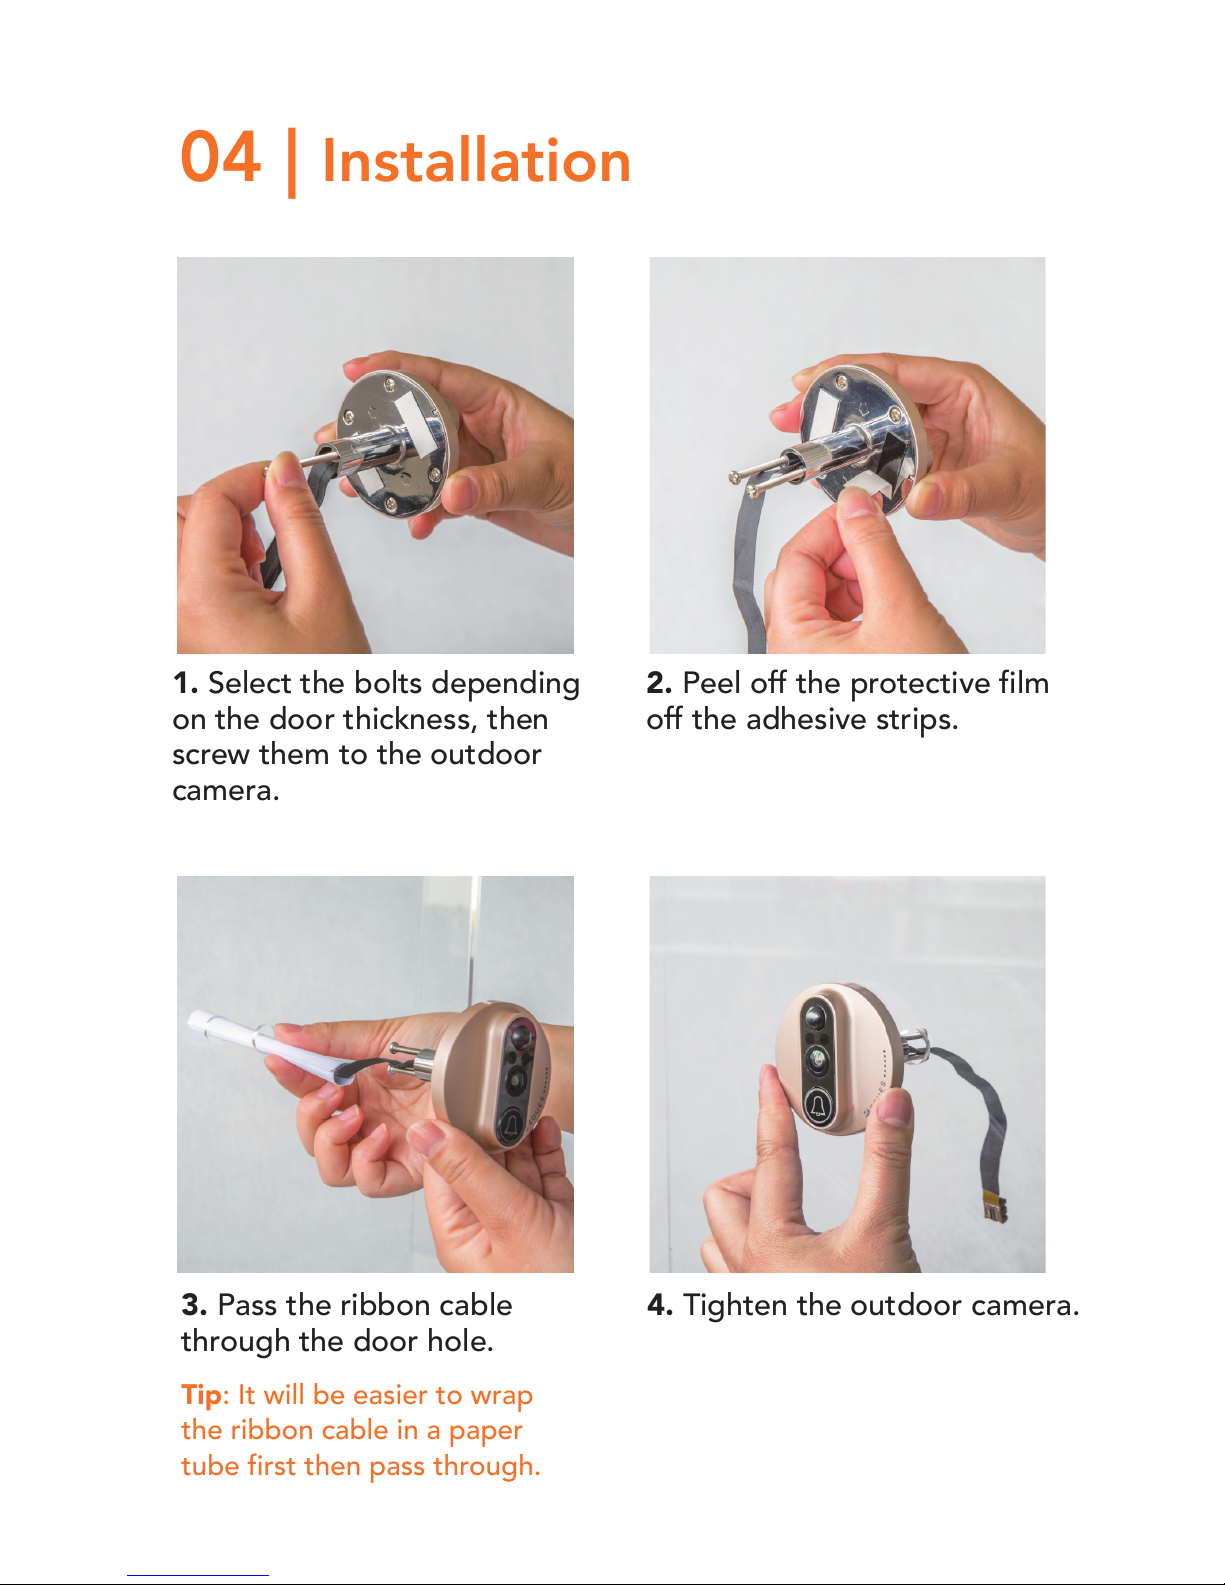
04 | Installation
1. Select the bolts depending
on the door thickness, then
screw them to the outdoor
camera.
2. Peel off the protective film
off the adhesive strips.
3. Pass the ribbon cable
through the door hole.
Tip: It will be easier to wrap
the ribbon cable in a paper
tube first then pass through.
4. Tighten the outdoor camera.
Page 6
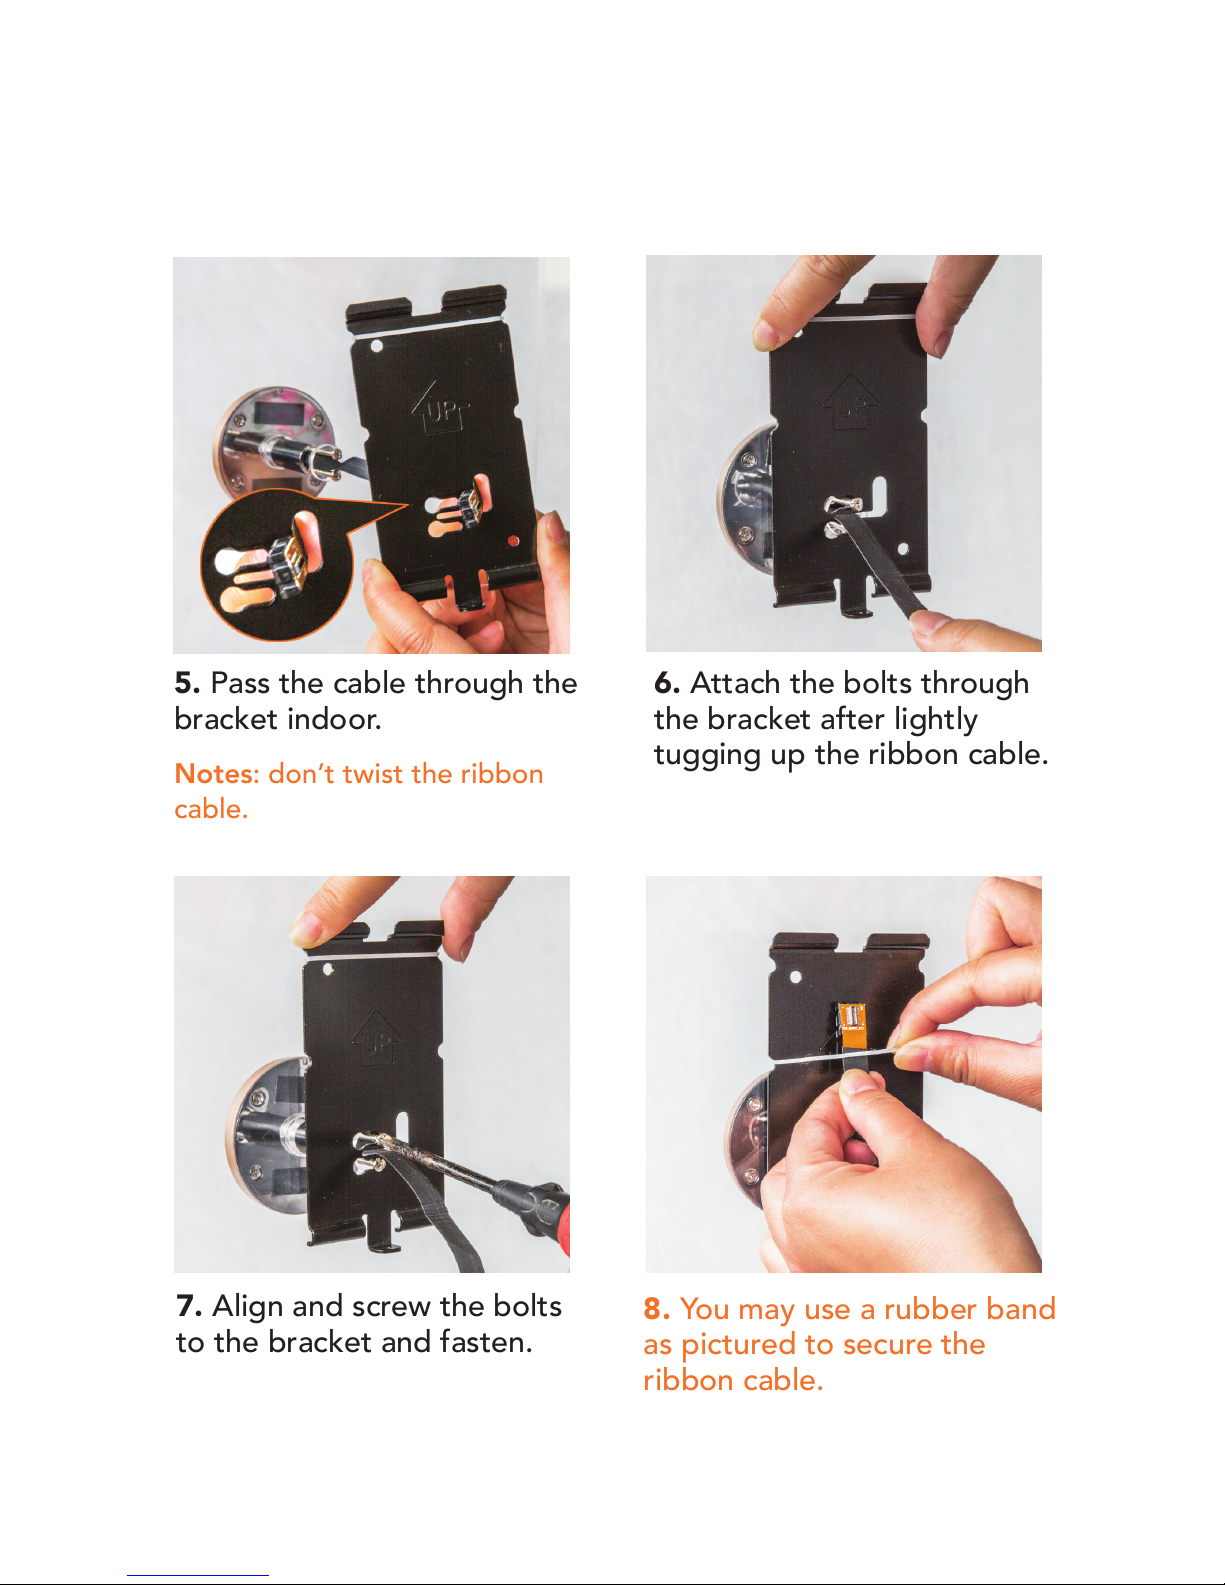
5. Pass the cable through the
bracket indoor.
Notes: don’t twist the ribbon
cable.
6. Attach the bolts through
the bracket after lightly
tugging up the ribbon cable.
7. Align and screw the bolts
to the bracket and fasten.
8. You may use a rubber band
as pictured to secure the
ribbon cable.
Page 7
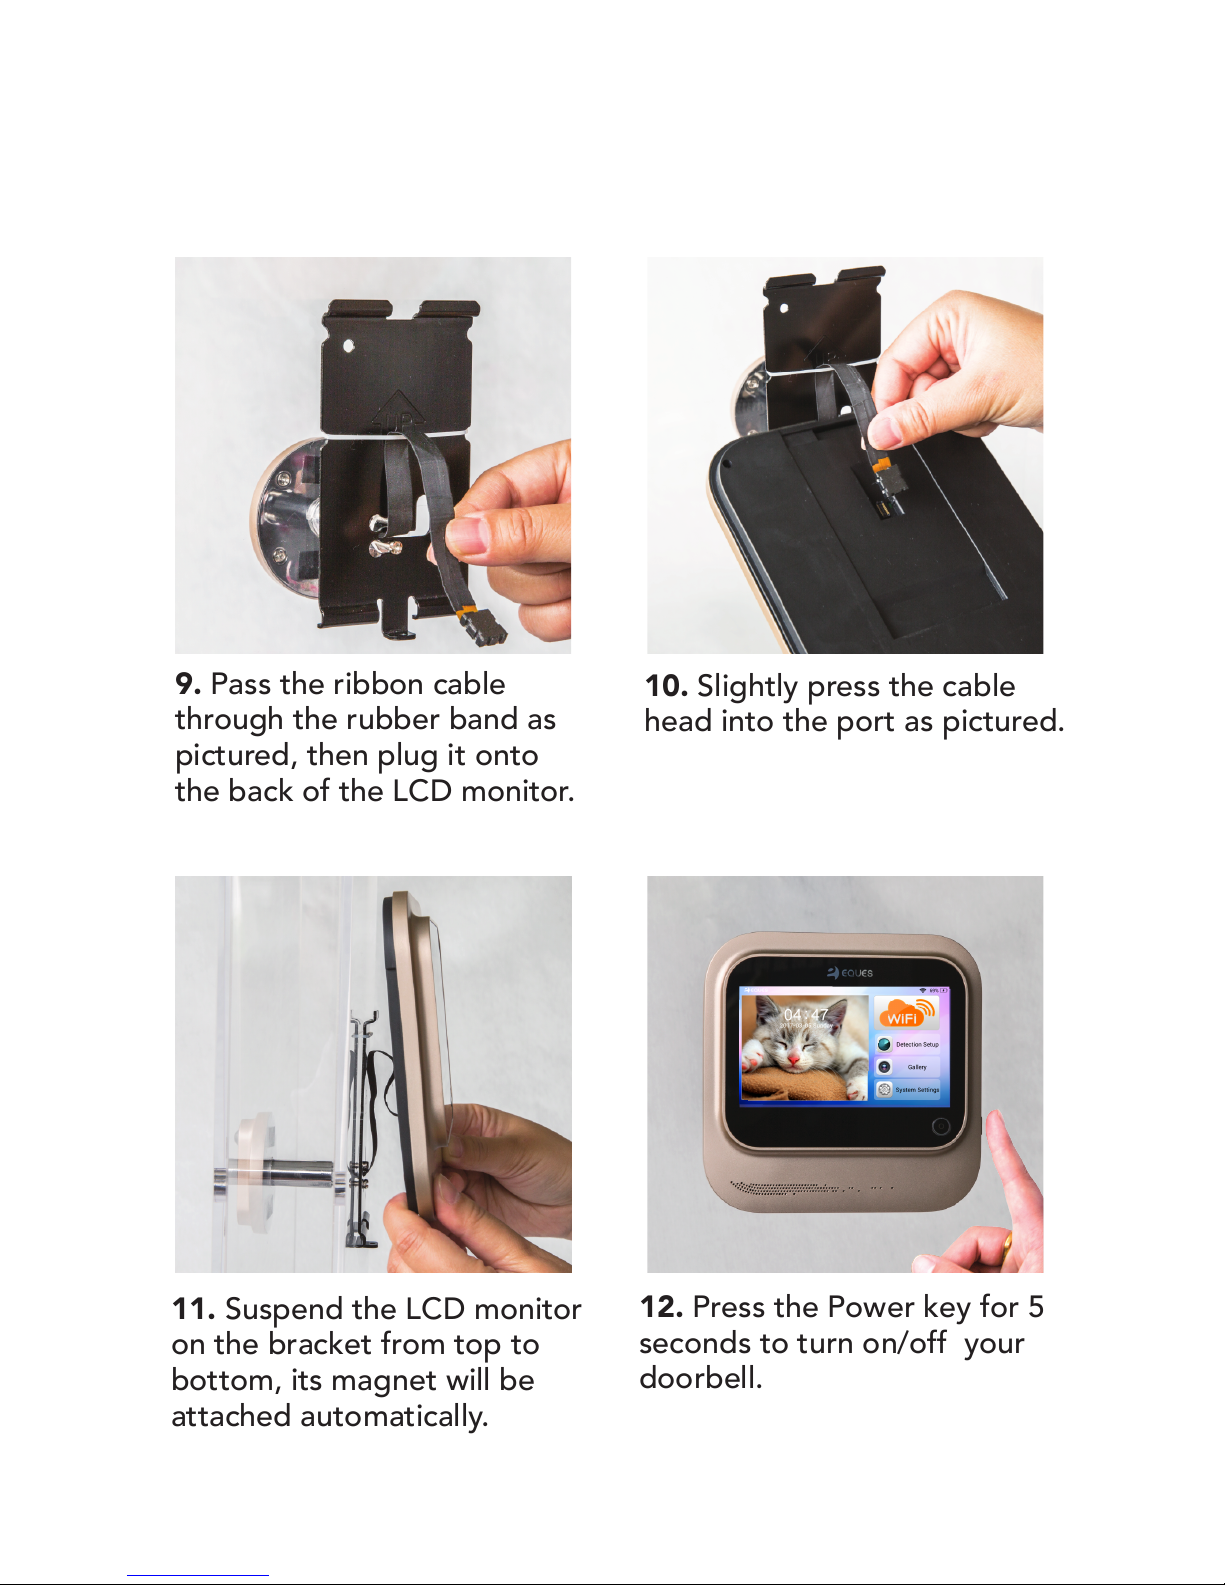
9. Pass the ribbon cable
through the rubber band as
pictured, then plug it onto
the back of the LCD monitor.
10. Slightly press the cable
head into the port as pictured.
11. Suspend the LCD monitor
on the bracket from top to
bottom, its magnet will be
attached automatically.
12. Press the Power key for 5
seconds to turn on/off your
doorbell.
Page 8
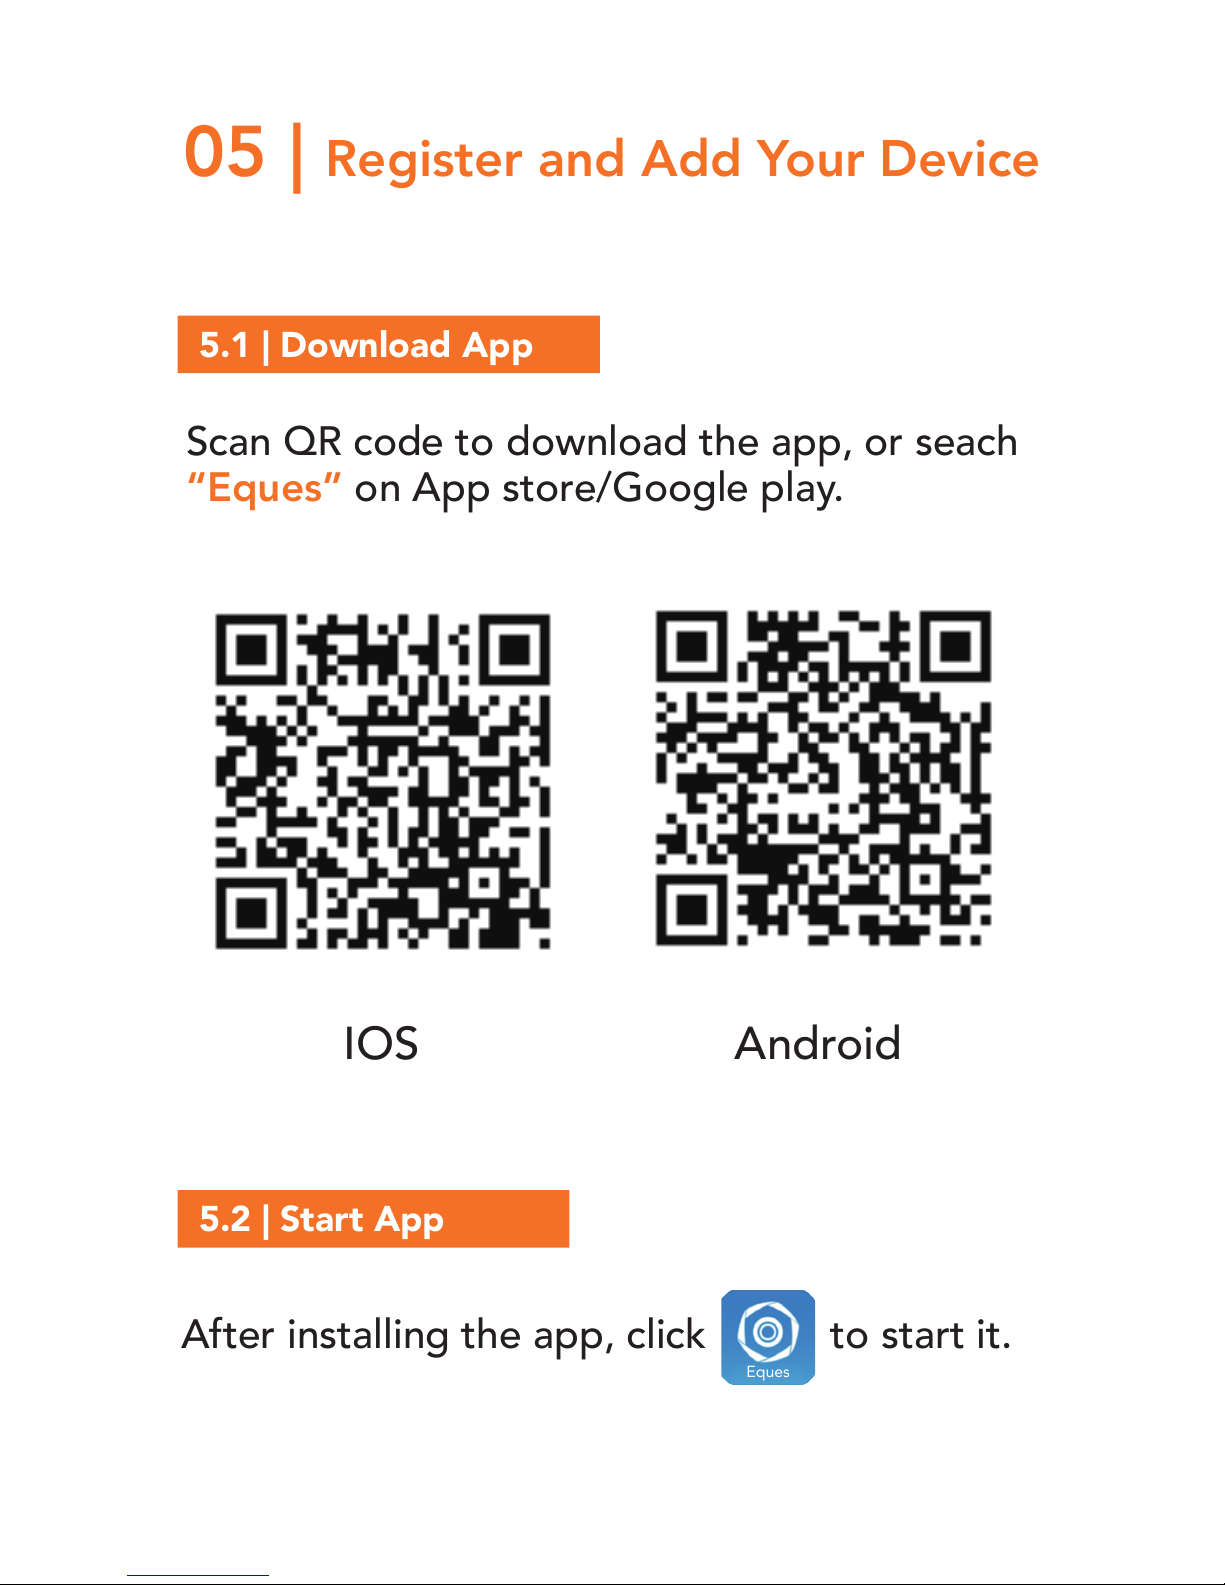
05 | Register and Add Your Device
Scan QR code to download the app, or seach
“Eques” on App store/Google play.
5.1 | Download App
5.2 | Start App
After installing the app, click to start it.
IOS Android
Eques
Page 9
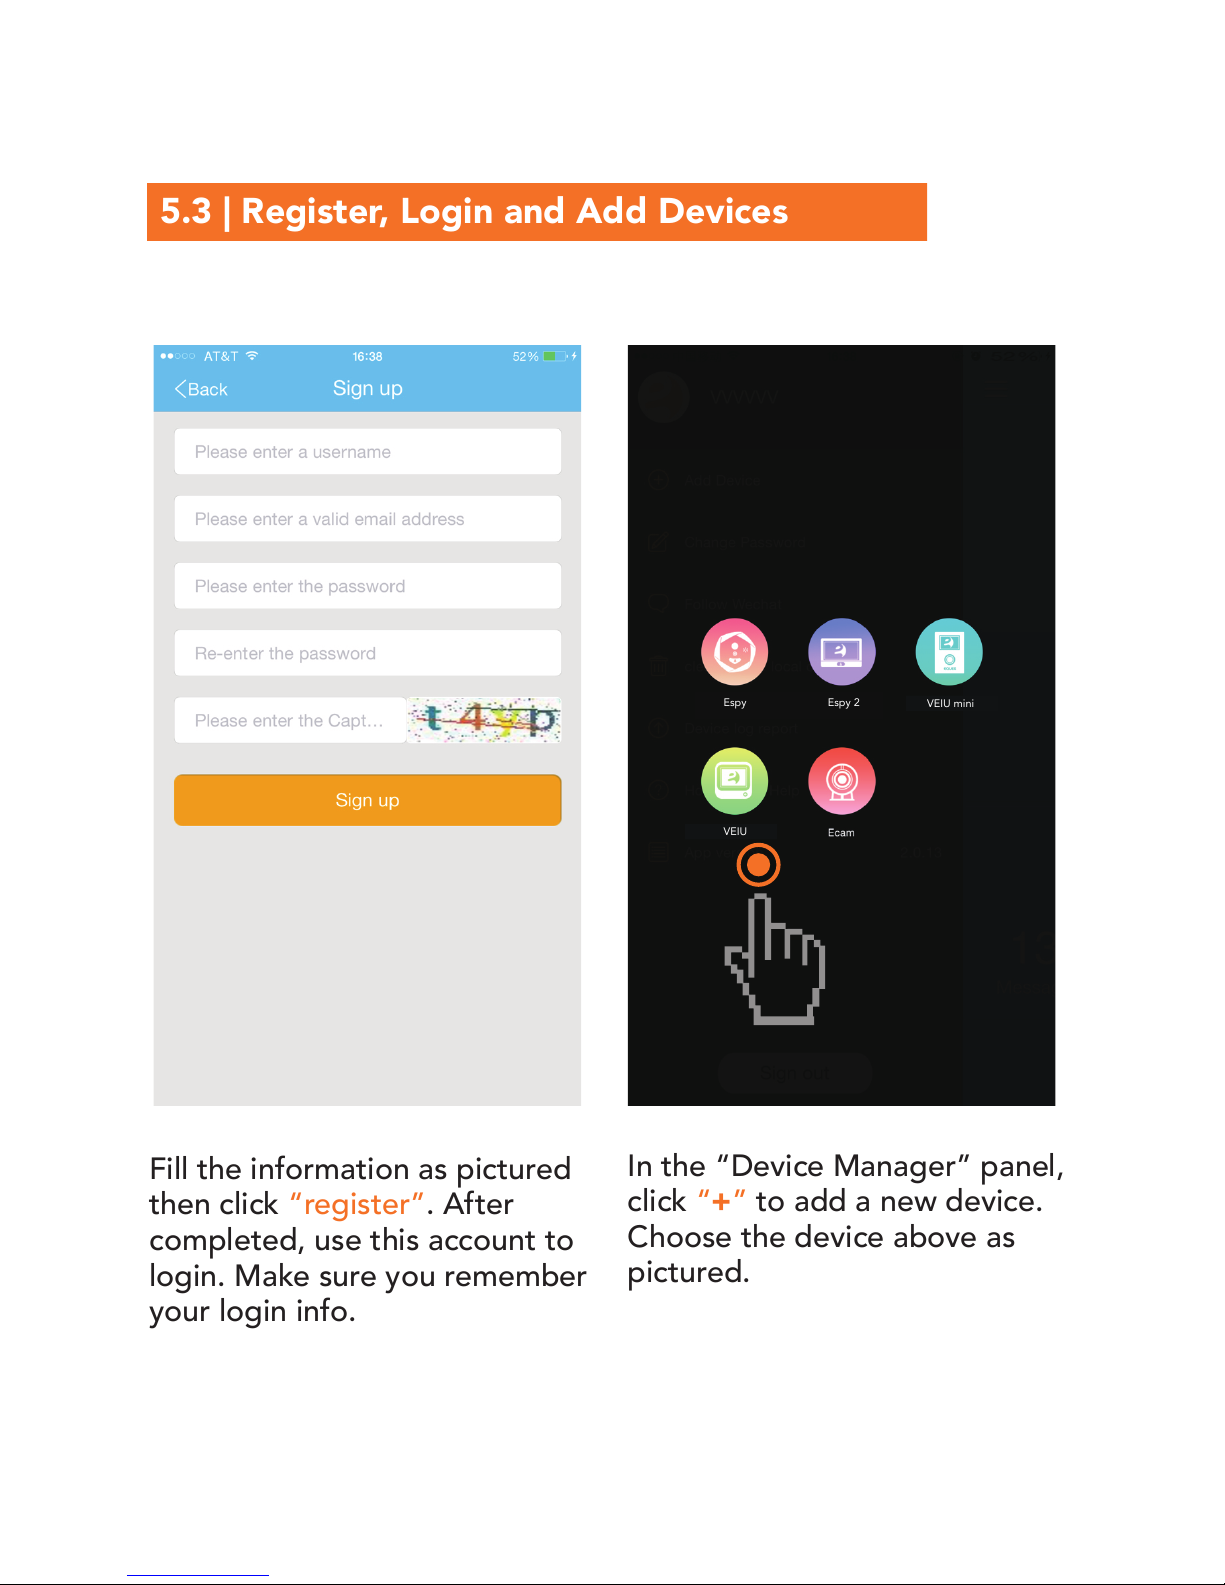
5.3 | Register, Login and Add Devices
Fill the information as pictured
then click “register”. After
completed, use this account to
login. Make sure you remember
your login info.
In the “Device Manager” panel,
click “+” to add a new device.
Choose the device above as
pictured.
VEIU mini
VEIU
Espy Espy 2
Page 10
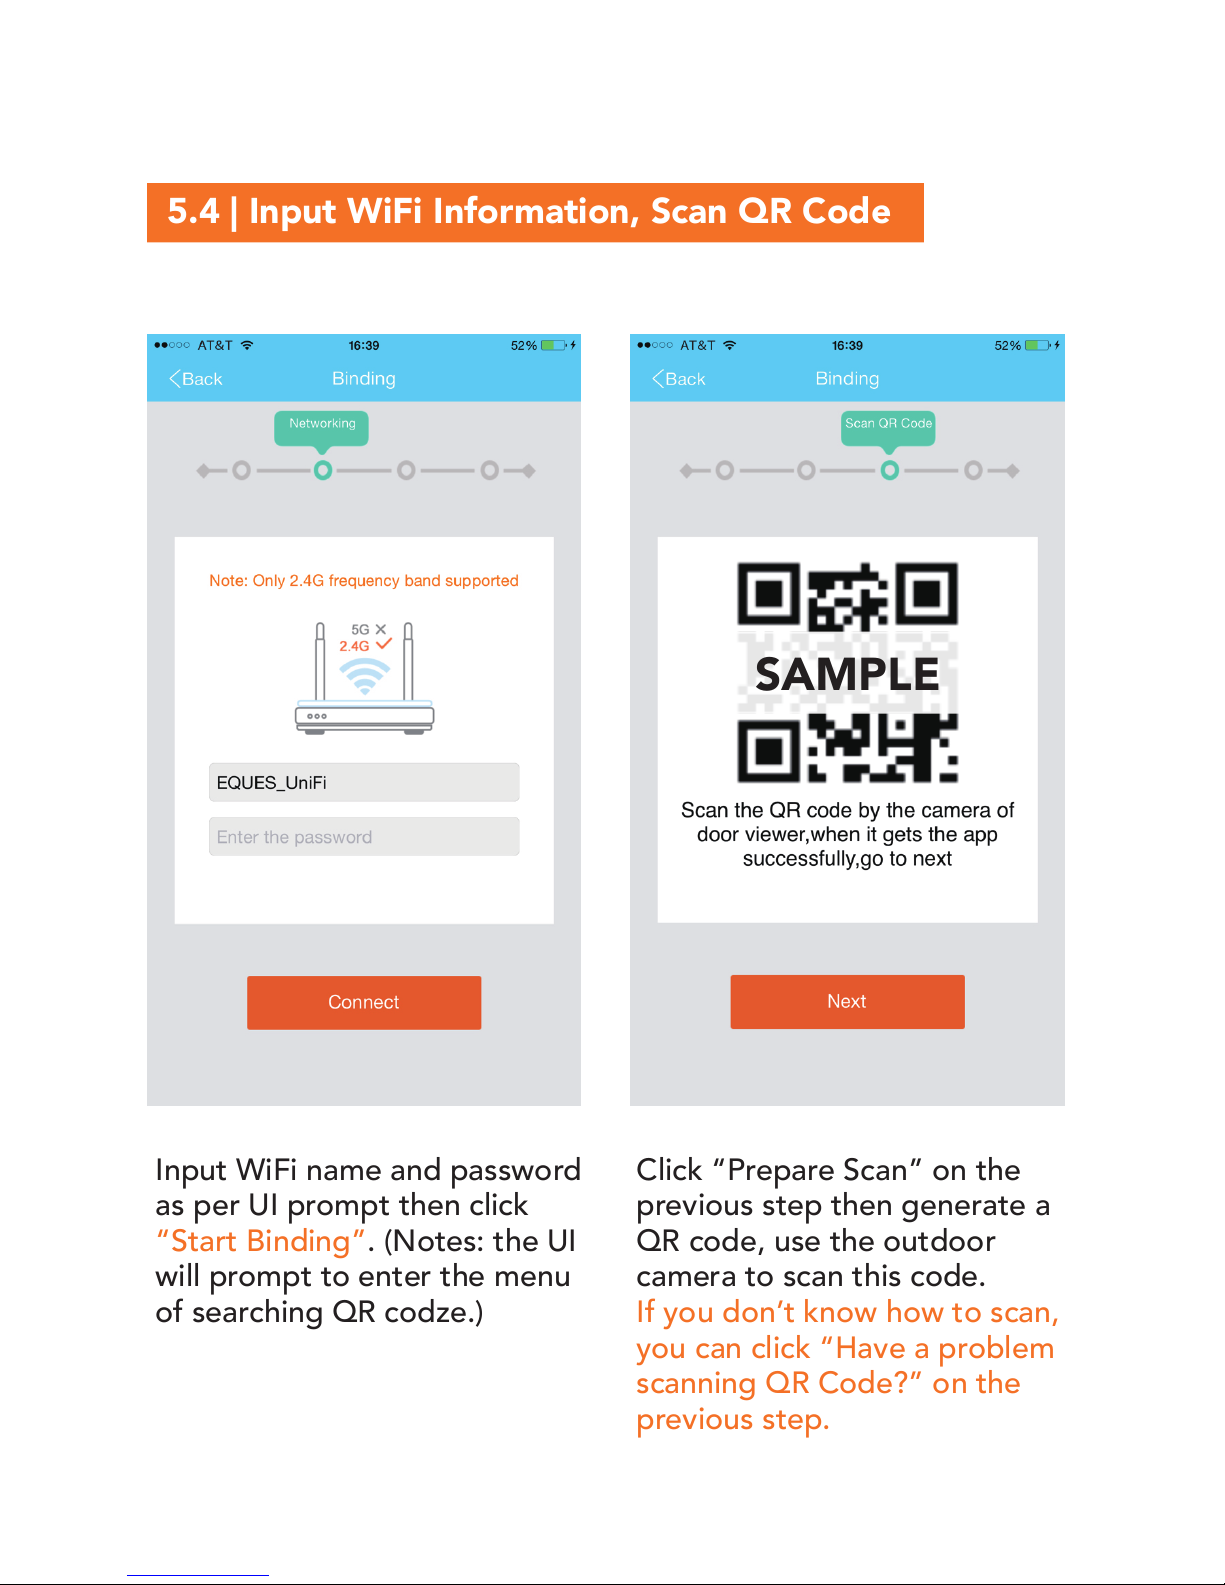
5.4 | Input WiFi Information, Scan QR Code
Input WiFi name and password
as per UI prompt then click
“Start Binding”. (Notes: the UI
will prompt to enter the menu
of searching QR codze.)
Click “Prepare Scan” on the
previous step then generate a
QR code, use the outdoor
camera to scan this code.
If you don’t know how to scan,
you can click “Have a problem
scanning QR Code?” on the
previous step.
SAMPLE
Page 11
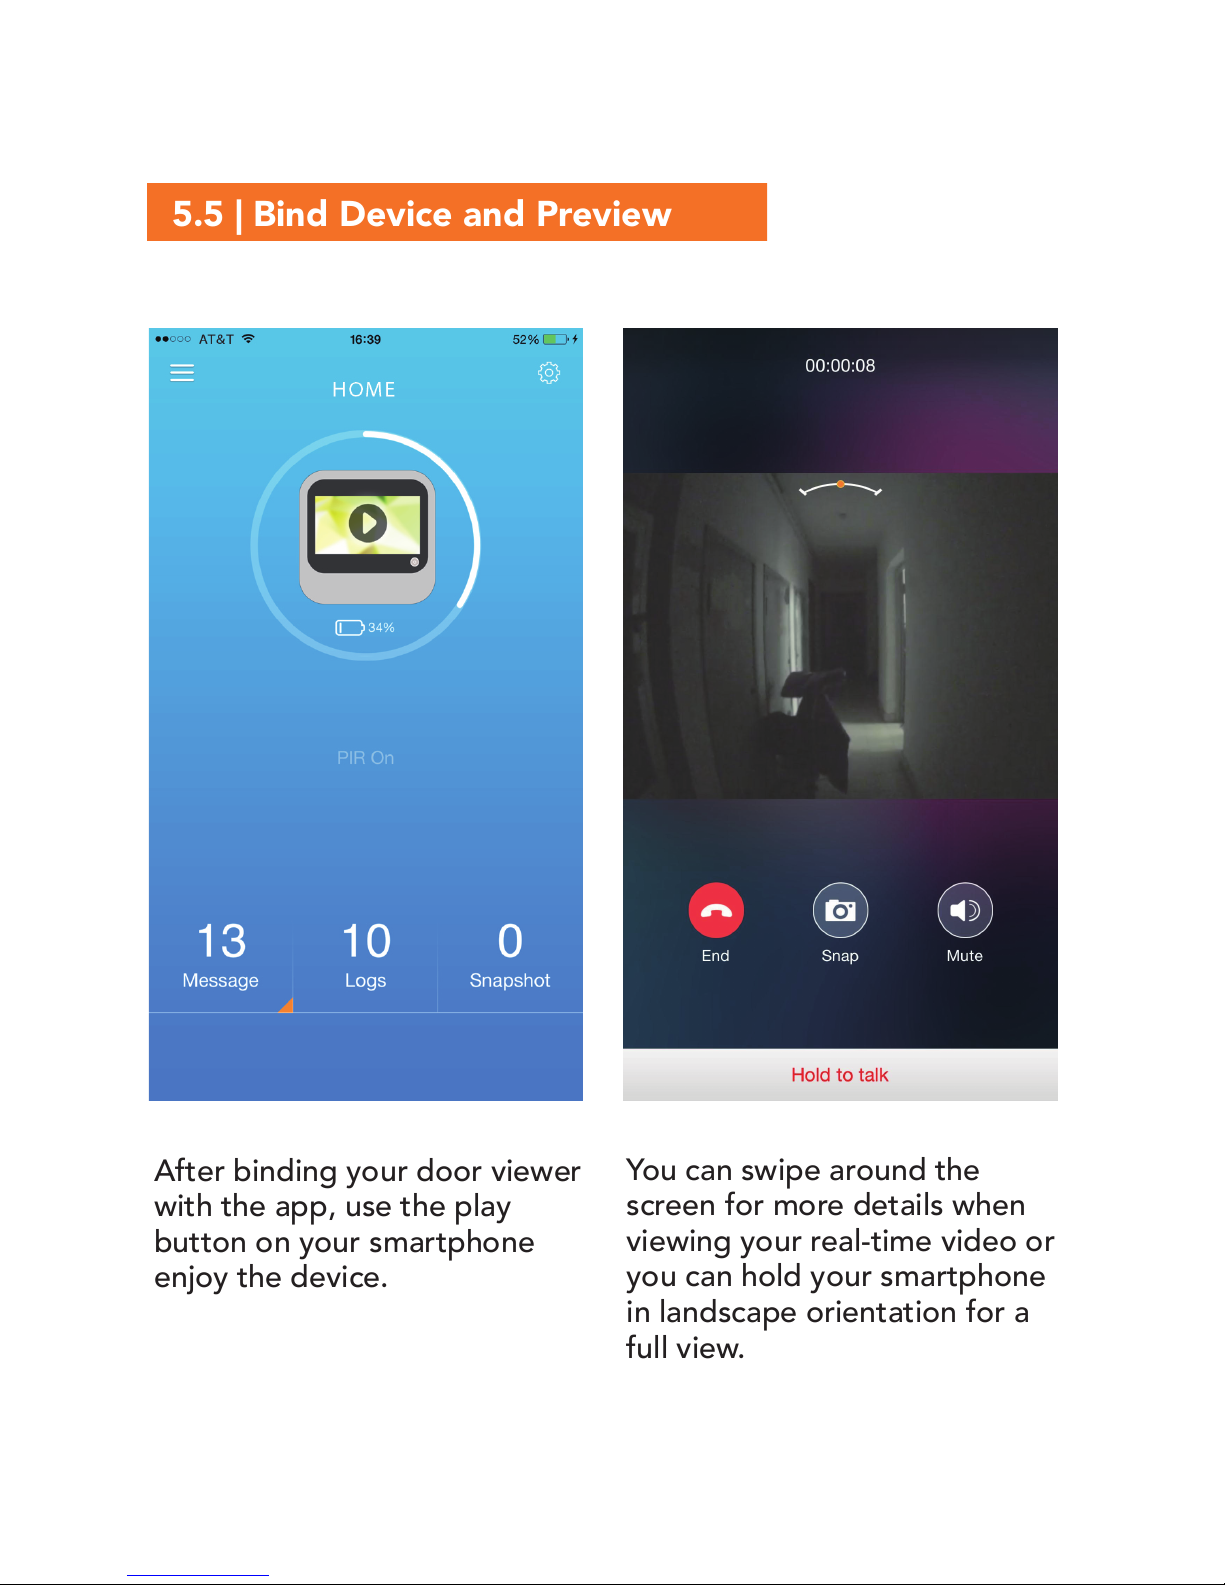
You can swipe around the
screen for more details when
viewing your real-time video or
you can hold your smartphone
in landscape orientation for a
full view.
5.5 | Bind Device and Preview
After binding your door viewer
with the app, use the play
button on your smartphone
enjoy the device.
Page 12
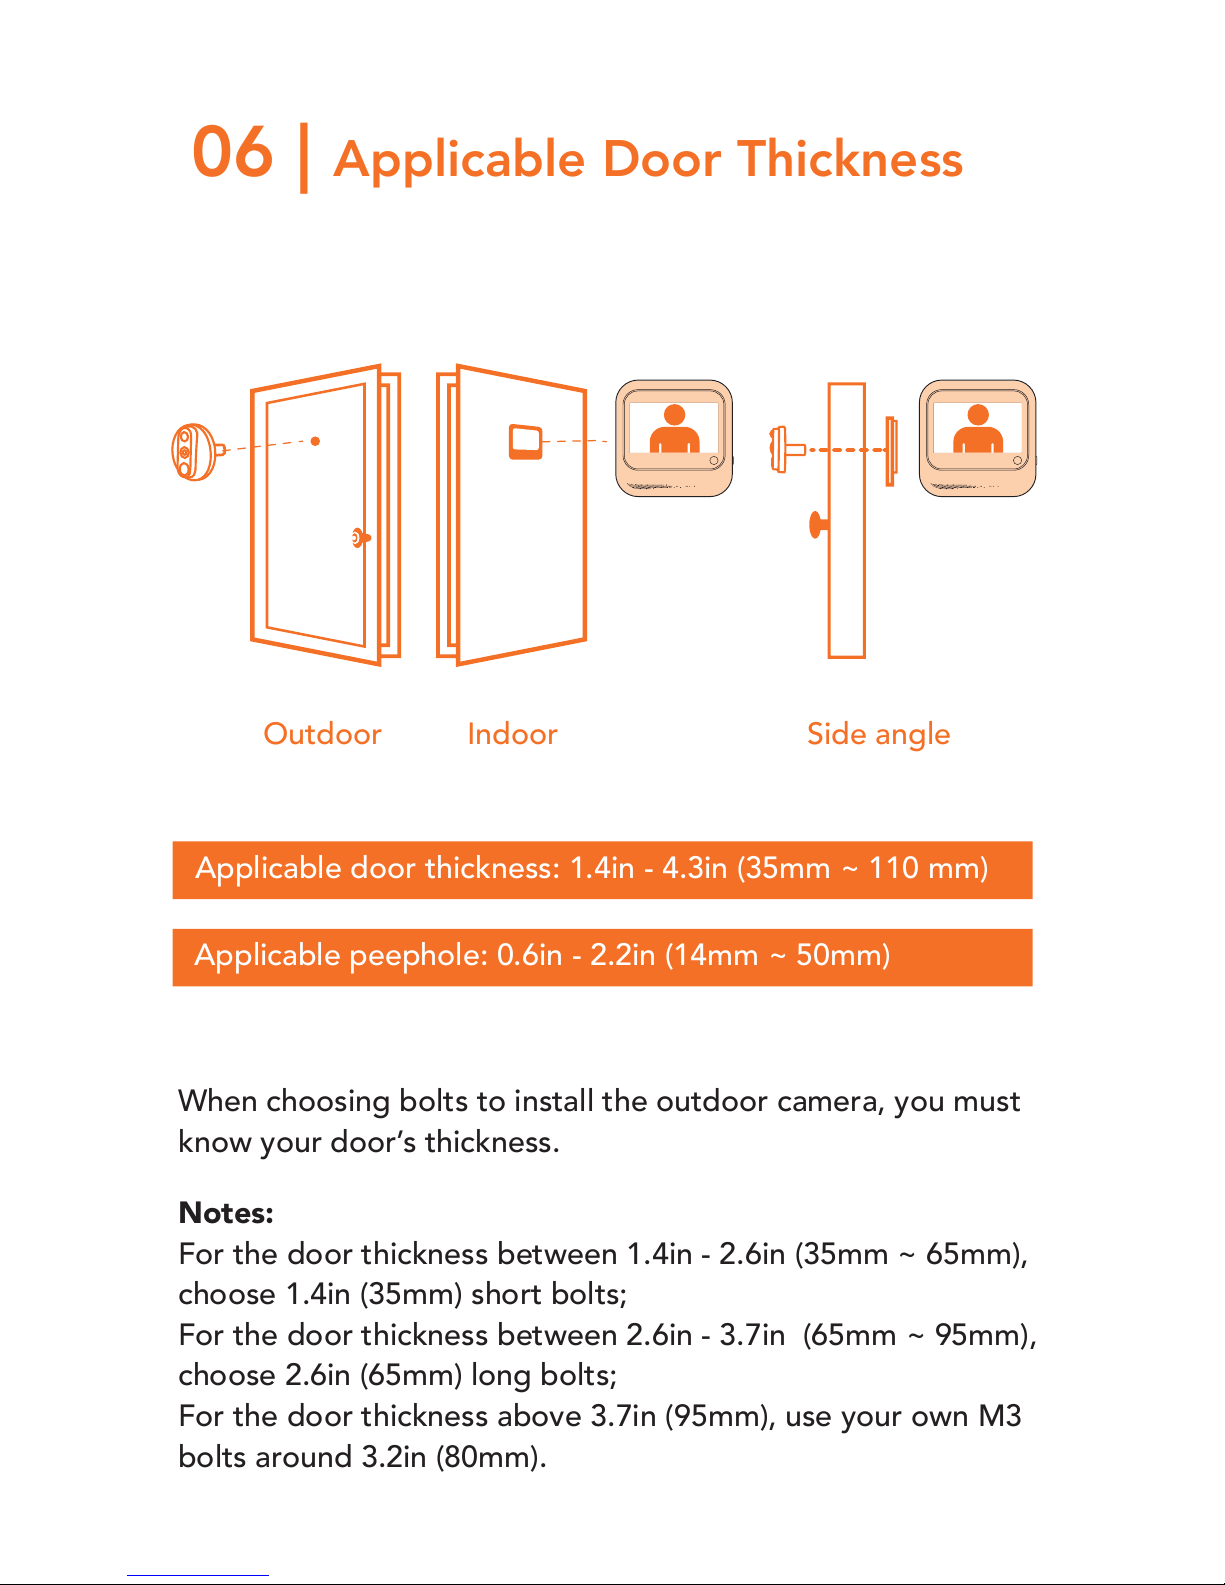
06 | Applicable Door Thickness
Outdoor Indoor Side angle
Applicable door thickness: 1.4in - 4.3in (35mm ~ 110 mm)
Applicable peephole: 0.6in - 2.2in (14mm ~ 50mm)
When choosing bolts to install the outdoor camera, you must
know your door’s thickness.
Notes:
For the door thickness between 1.4in - 2.6in (35mm ~ 65mm),
choose 1.4in (35mm) short bolts;
For the door thickness between 2.6in - 3.7in (65mm ~ 95mm),
choose 2.6in (65mm) long bolts;
For the door thickness above 3.7in (95mm), use your own M3
bolts around 3.2in (80mm).
Page 13
07 | Safety Guideline
Make sure you use the charger that is included in
the package. Unqualified chargers might cause
damage to the device.
Try to avoid placing the device in high-temperature,
high humidity, dusty or other harsh environments as
this may reduce its lifespan.
Don’t forcibly squeeze the camera lens and the
black ball on the top of the outdoor subcomponent;
otherwise it can cause hardware damage.
Treat the ribbon cable with care during installation,
don’t forcibly drag, scrape or cut the ribbon cable.
(The device will be out of warranty if it is damaged
by inappropriate installation.)
Page 14

CONTACT PAGE
ADDRESS:
2100 Geng Road, Suite 210,
Palo Alto, CA 94303, USA
CUSTOMER SERVICE EMAIL:
WEBSITE:
www.equeshome.com
 Loading...