

Page 1
www.equalizer.com
© 2012 Equalizer Industries, Inc.
Revision 11/10/17
ROCK STAR
™
Windshield Repair System
Part# RSR800
User Guide
Page 2
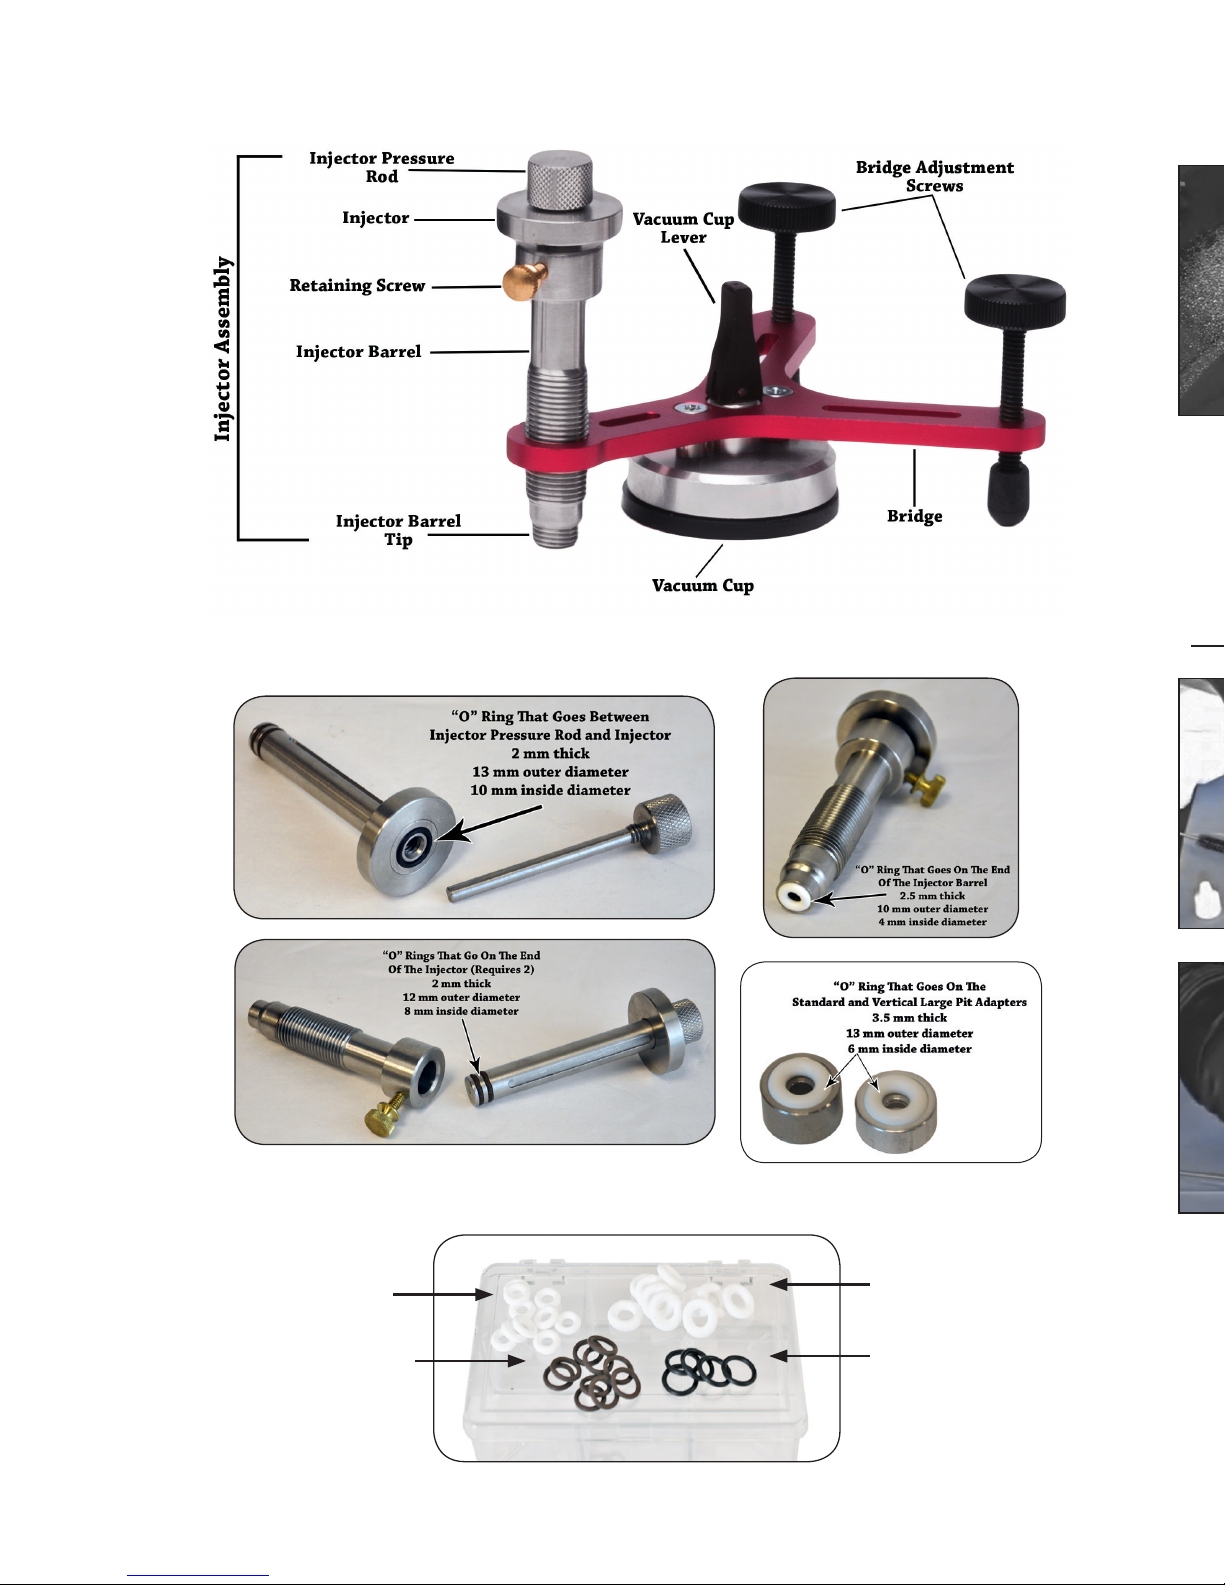
1
2.5 mm thick
10 mm outer diameter
4 mm inside diameter
2 mm thick
12 mm outer diameter
8 mm inside diameter
2 mm thick
13 mm outer diameter
10 mm inside diameter
3.5 mm thick
13 mm outer diameter
6 mm inside diameter
VOR1468
11. Clean the area that you have worked on with a good glass cleaner and a paper
towel.
Cleaning & Maintenance -
1. Clean the resin off of (and out of) your injector, o-rings and bridge with our
cleaning solution. *Keeping these items clean and free of build up assures no
contamination on you next repair, proper functioning of the tools, and will
increase the longevity of the tools. Failure to properly clean and maintain
these items could result in voiding your warranty!
VBA1443
Page 3
Inspection And Assessment -
1. Examine the damaged area from the inside and outside of the vehicle. Look for
hidden cracks, moisture, contamination or previous repair attempts.
2. Determine if the damage is within the scope of your technical experience to
repair.
3. Assess to make sure that the windshield is at the appropriate temperature.
Ideal temperature is between 65°F to 85°F plus or minus 5°F.
Preparing the Rock Chip -
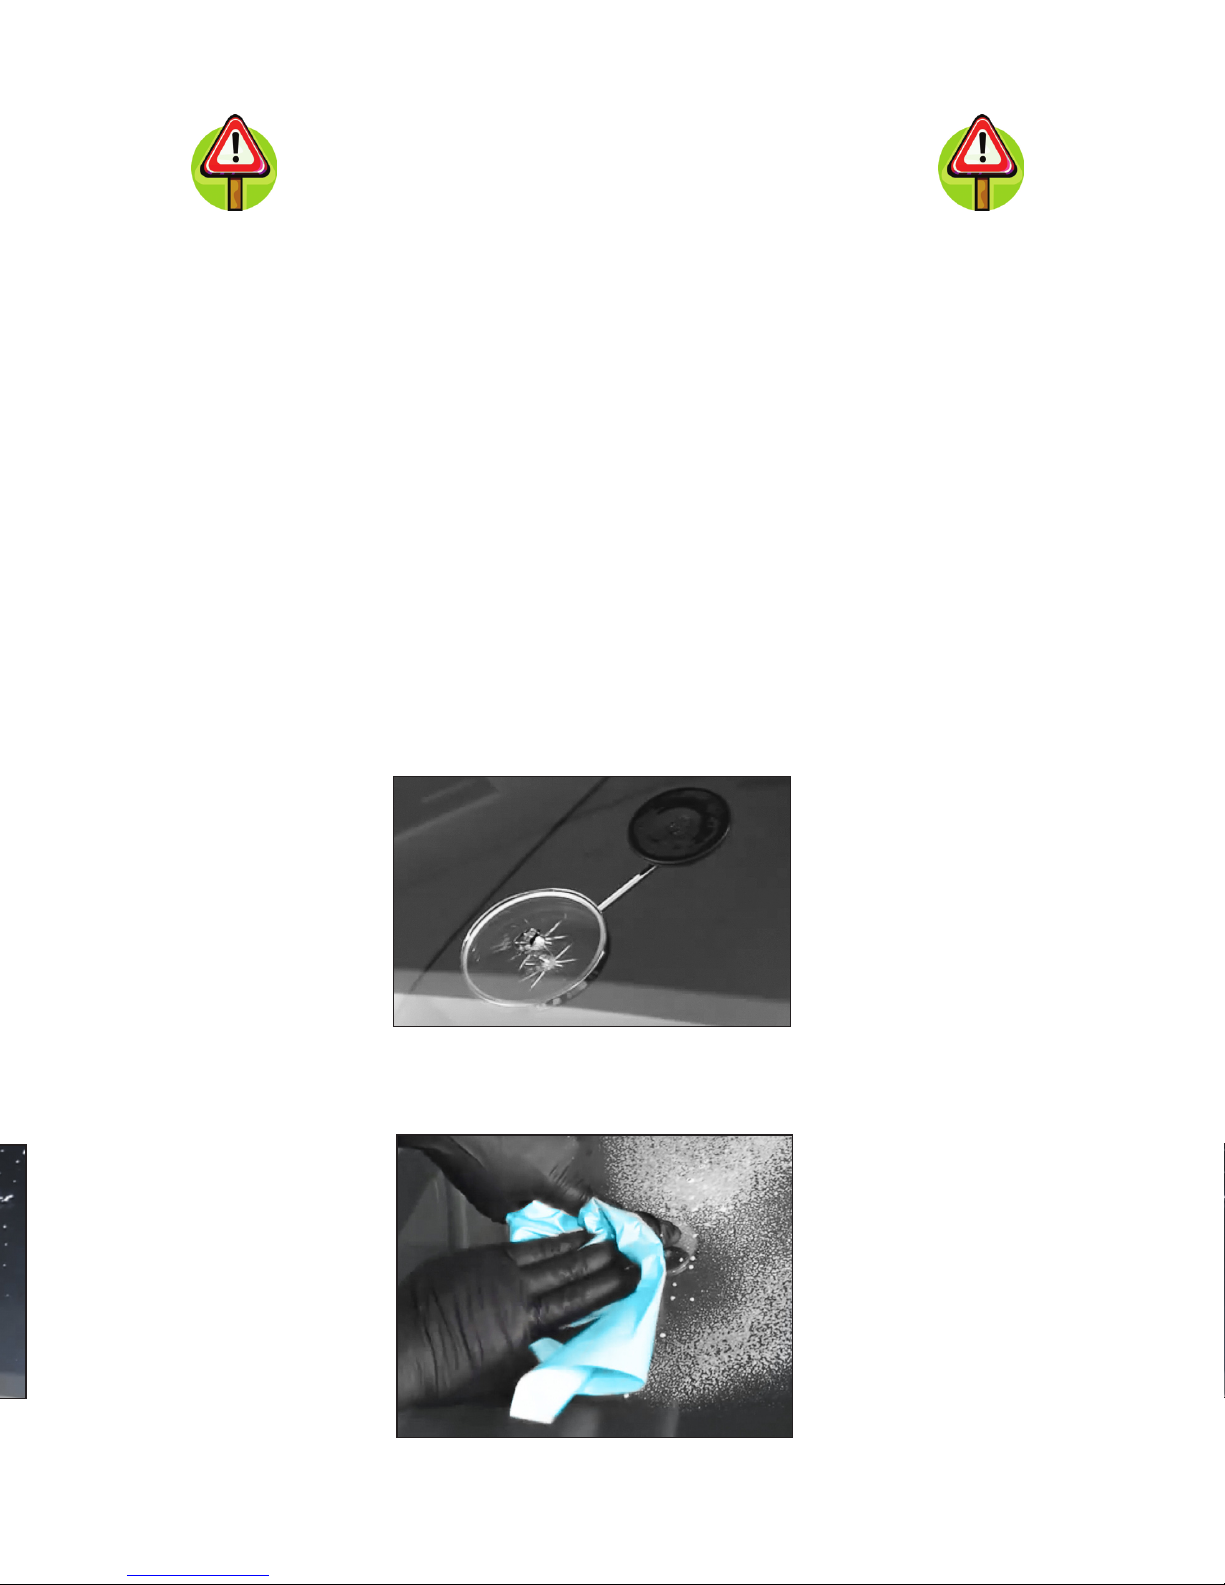
1. Place the mirror on the inside of the windshield, under the damaged area.
2. Clean around the damaged area. Be sure to place a nitrile glove-covered finger
over the rock chip in order to keep from contaminating the break.
Always wear safety glasses and nitrile gloves
when repairing a windshield!
Page 4
3 8
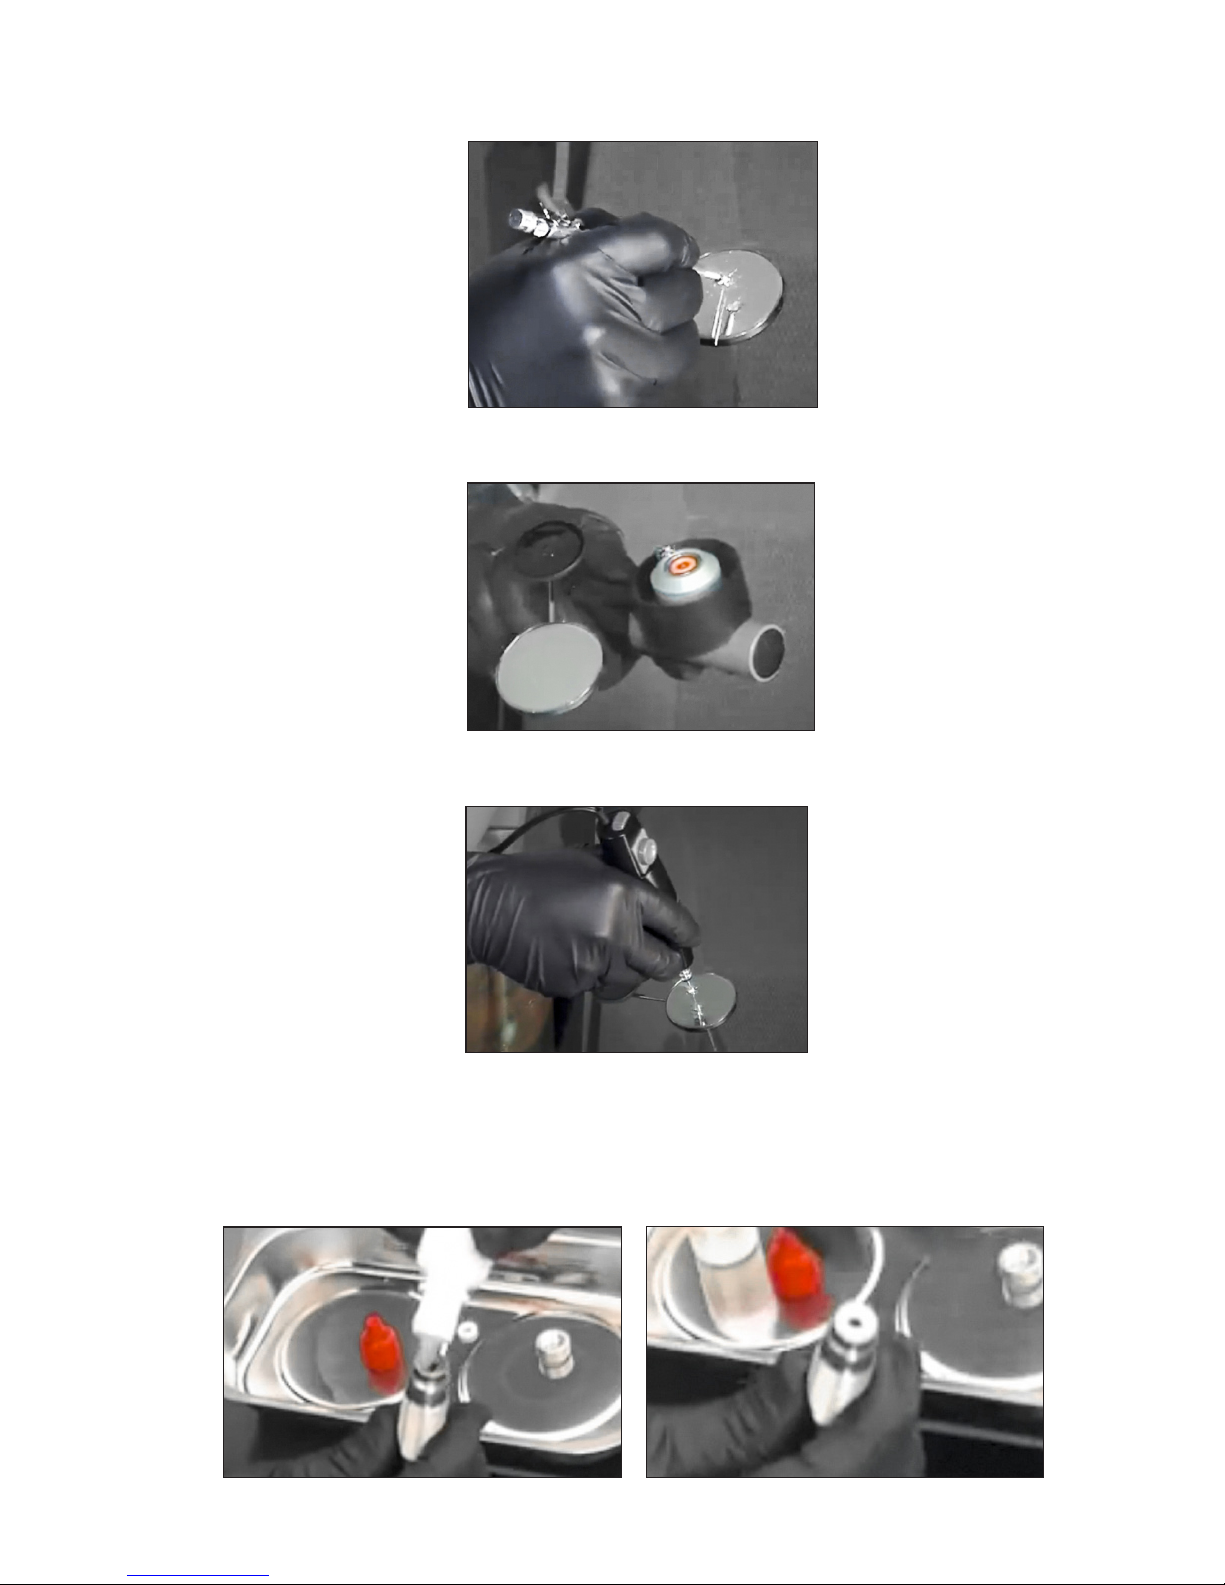
3. Using the probe, remove broken glass debris from the chip.
4. If moisture is present in the break, dry out by using the windshield chip
moisture evaporator.
5. If the rock chip area is not open, consider drilling the chip. At a slow setting start
to drill into the glass but be careful not to drill into the PVB (Poly Vinyl Butyral)
Preparing the Bridge and Injector Assembly -
1. Place the injector tip o-ring on the end of the injector assembly. To do so, use a
small drop of resin to wet the injector assembly tip and then put the o-ring in
place.
Curing Procedure -
1. When the repair is to your satisfaction, release the pressure by loosening the
injector pressure rod.
2. Release the lever on the vacuum cup.
3. Remove the bridge and injector assembly.
4. Wipe away any residual resin.
5. Apply a drop of pit filler resin.
6. Place a mylar square cure sheet onto the pit filler resin. Be sure to gently place the
cure sheet in a downward laying motion and let gravity do the rest.
Page 5
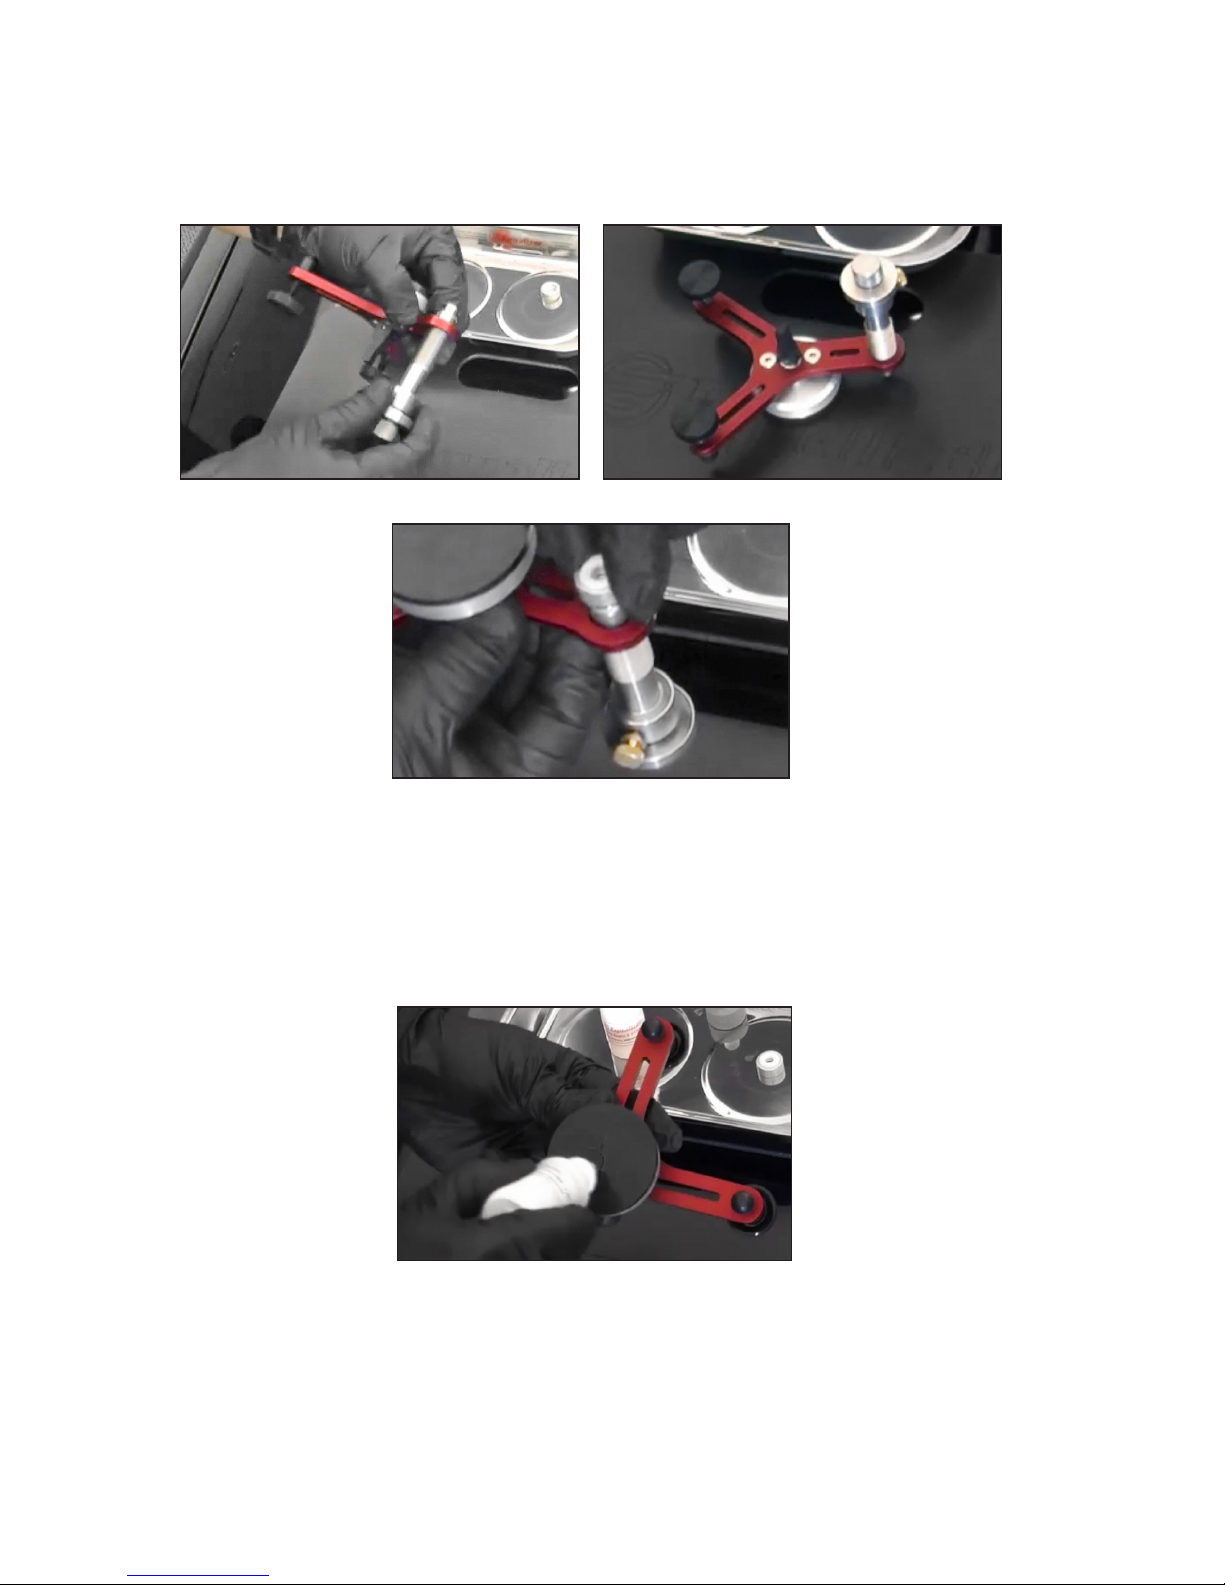
2. Screw the injector assembly into the bridge. If the rock chip area is larger than
the o-ring on the injector assembly tip, then add the large pit adaptor onto the
unit.
3. Place a light film of vacuum cup lubricant onto the vacuum cup of the bridge and
on the two bridge adjusting screws. Once the bridge and injector assembly is set
up on the glass this will help to move the unit if the o-ring placement needs to be
adjusted.
Page 6
5 6
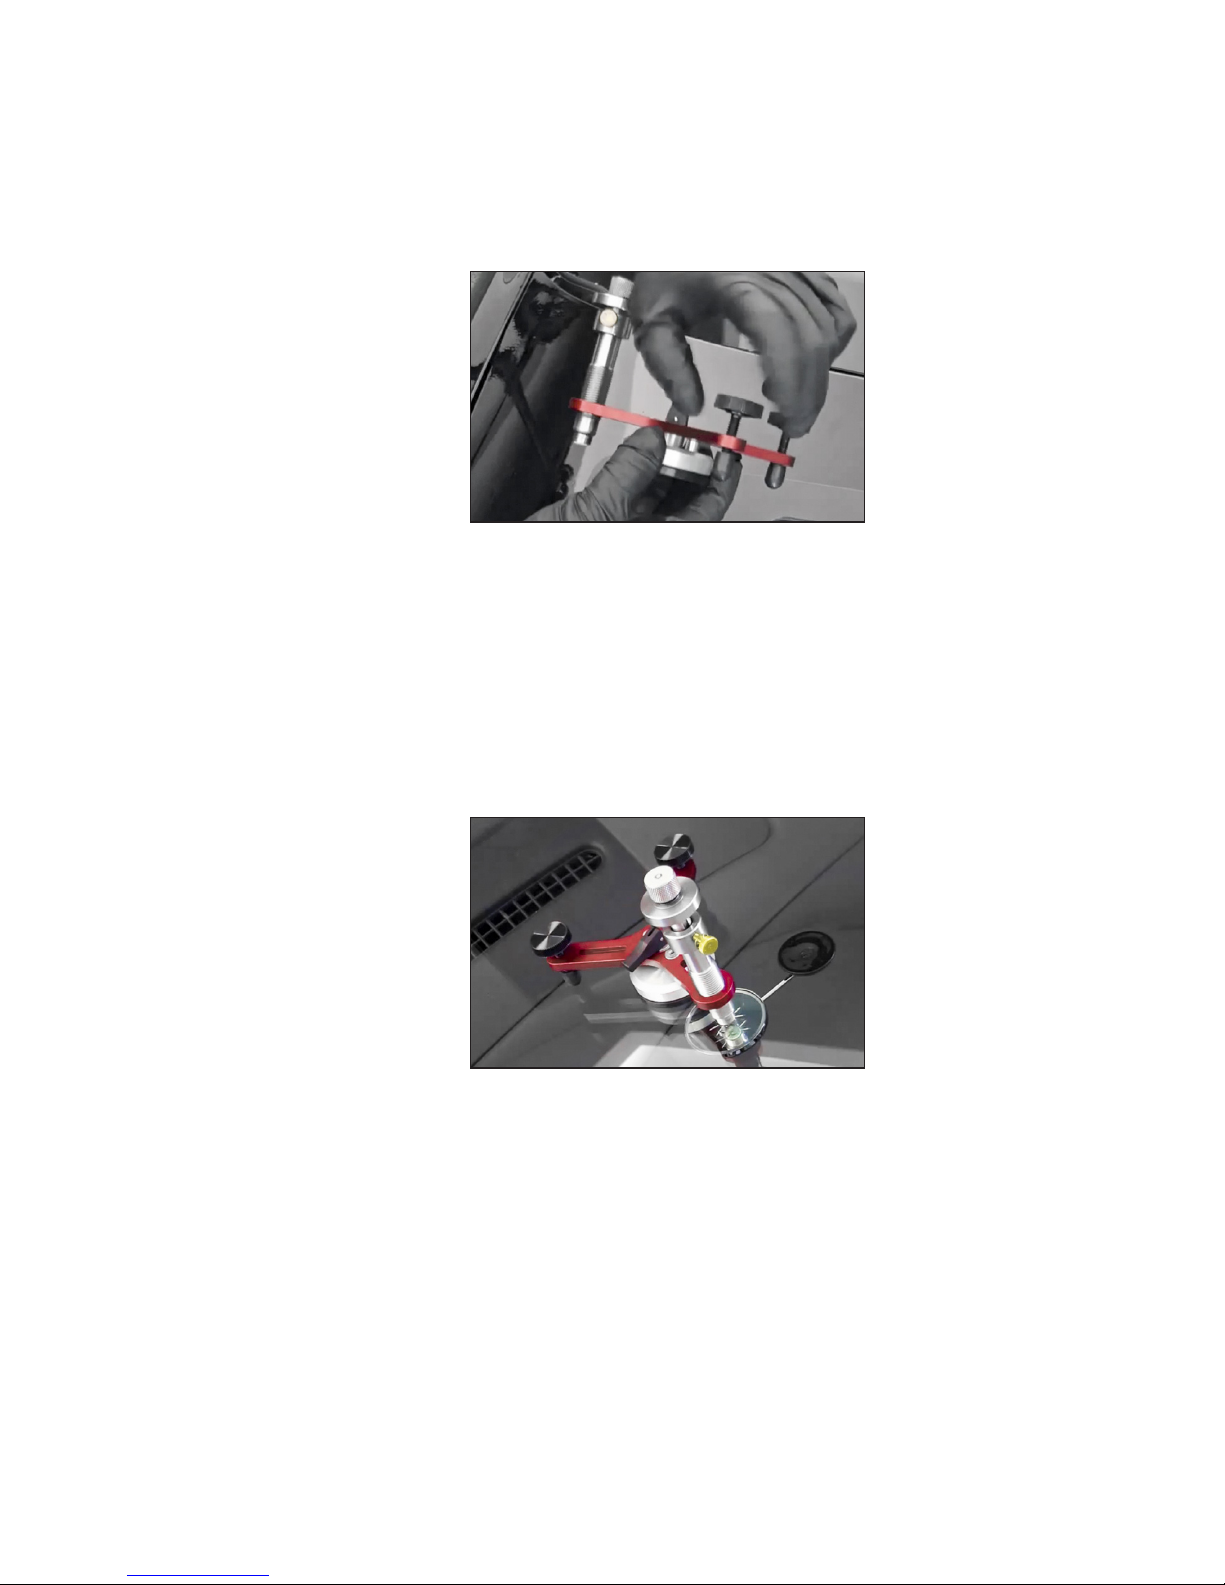
Injection Procedure -
1. Loosen the injector pressure rod.
2. Remove the injector from the barrel.
3. Place between 3 to 5 drops of resin into the injector barrel. *Always make sure to
use the right resin for the job. If the temperature of the work area is warm or the
job is at high altitude; always use a thicker resin. If the temperature of the work
area is cool or at sea level use a thinner resin.
4. Wet the two o-rings on the injector tip using resin.
5. Place the injector back into the injector barrel making sure that the groove on the
injector lines up with the retaining screw. Adjust the retaining screw so that the
threaded end of the screw slips into the groove and is just tight enough for the
injector to move freely up and down but not be removed from the barrel (the end
of the groove on the injector will catch the retaining screw and stop).
4. Make sure that the injector assembly and bridge adjusting screws are backed out
enough so that they do not make contact with the glass until the vacuum cup is
fully engaged on the glass. Note: If the injector assembly and bridge adjusting
screws are not backed far enough out, this could result in applying pressure and
causing further damage to the break.
Setting Up the Bridge and Injector Assembly -
1. Place the bridge and injector assembly onto the glass so that the injector tip
o-ring is over the rock chip.
2. Secure the bridge by flipping the vacuum cup lever.
3. Screw the injector assembly down until the o-ring makes contact with the surface
of the glass.
4. Screw the bridge adjusting screws down equally until the o-ring has a flat look to
its appearance. is will ensure that the o-ring is snug enough to create an airtight seal.
Note: Always make sure not to over-tighten the injector assembly or the bridge
adjusting screws. is could cause further damage to the break.
Page 7
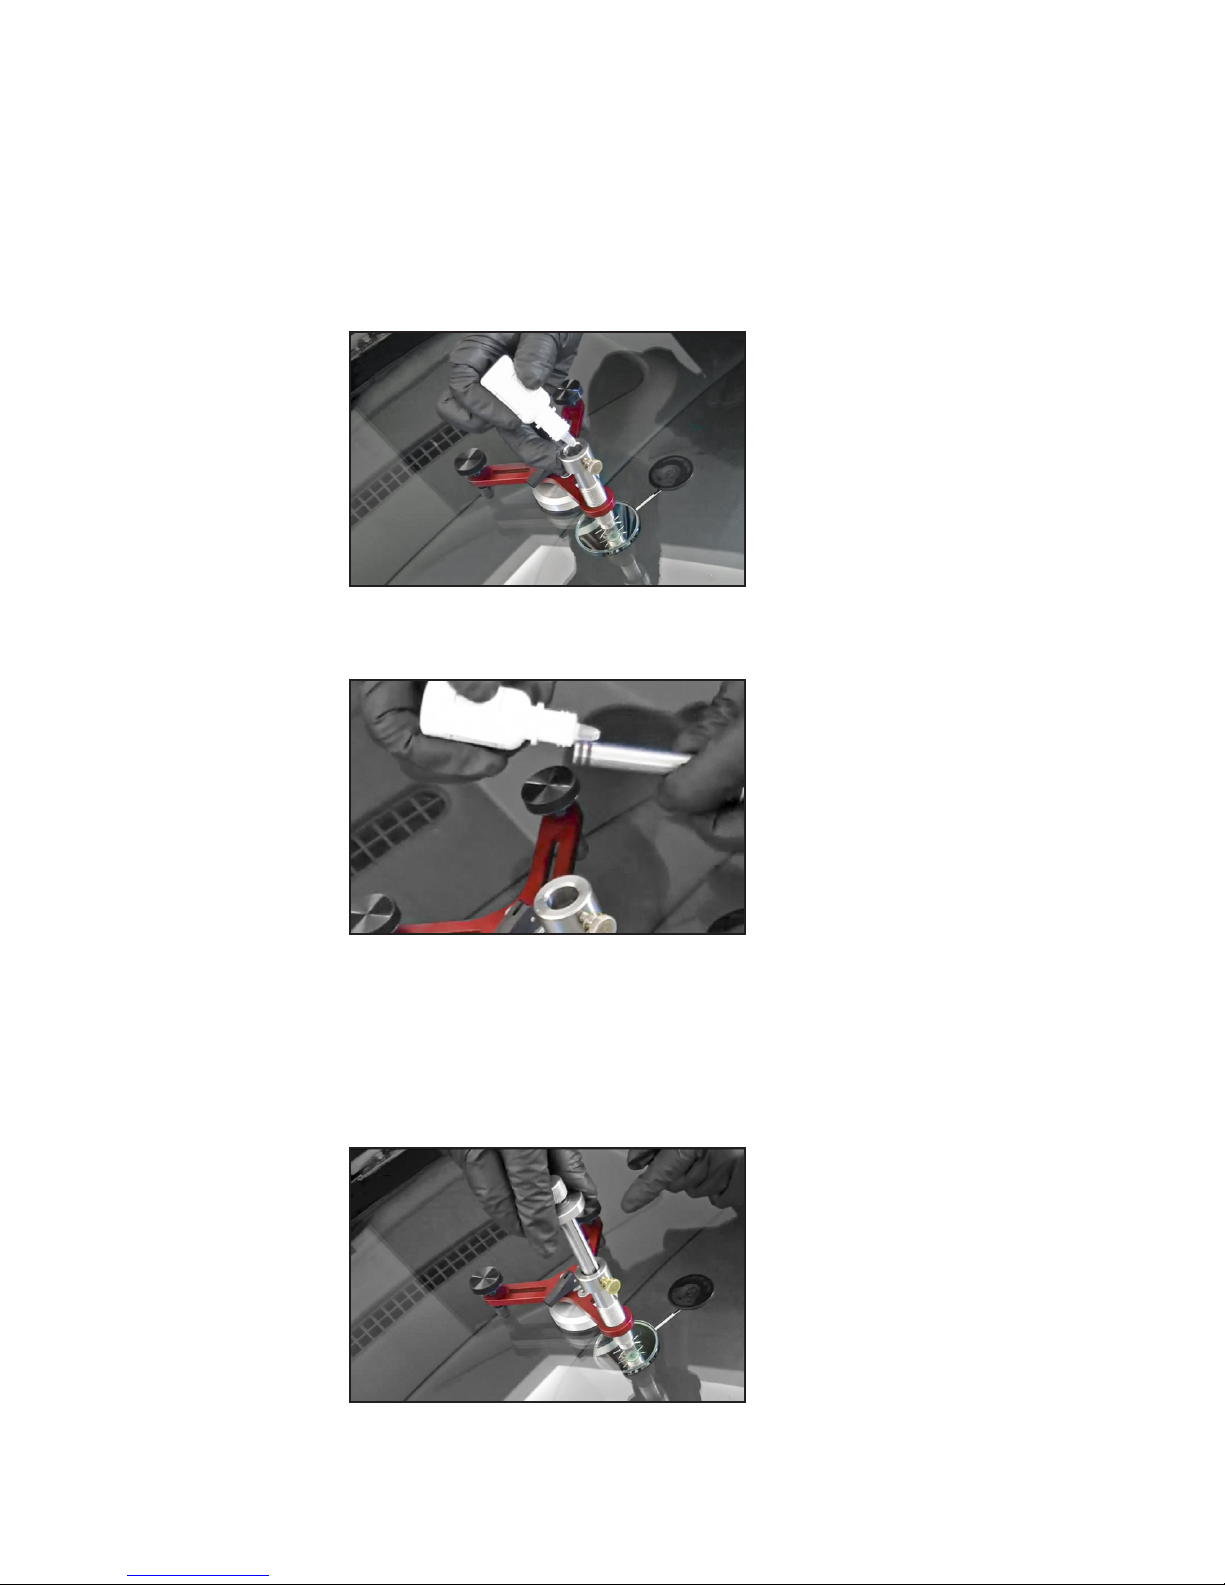
Injection Procedure -
1. Loosen the injector pressure rod.
2. Remove the injector from the barrel.
3. Place between 3 to 5 drops of resin into the injector barrel. *Always make sure to
use the right resin for the job. If the temperature of the work area is warm or the
job is at high altitude; always use a thicker resin. If the temperature of the work
area is cool or at sea level use a thinner resin.
4. Wet the two o-rings on the injector tip using resin.
5. Place the injector back into the injector barrel making sure that the groove on the
injector lines up with the retaining screw. Adjust the retaining screw so that the
threaded end of the screw slips into the groove and is just tight enough for the
injector to move freely up and down but not be removed from the barrel (the end
of the groove on the injector will catch the retaining screw and stop).
Page 8
7 4
2. Screw the injector assembly into the bridge. If the rock chip area is larger than
the o-ring on the injector assembly tip, then add the large pit adaptor onto the
unit.
3. Place a light film of vacuum cup lubricant onto the vacuum cup of the bridge and
on the two bridge adjusting screws. Once the bridge and injector assembly is set
up on the glass this will help to move the unit if the o-ring placement needs to be
adjusted.
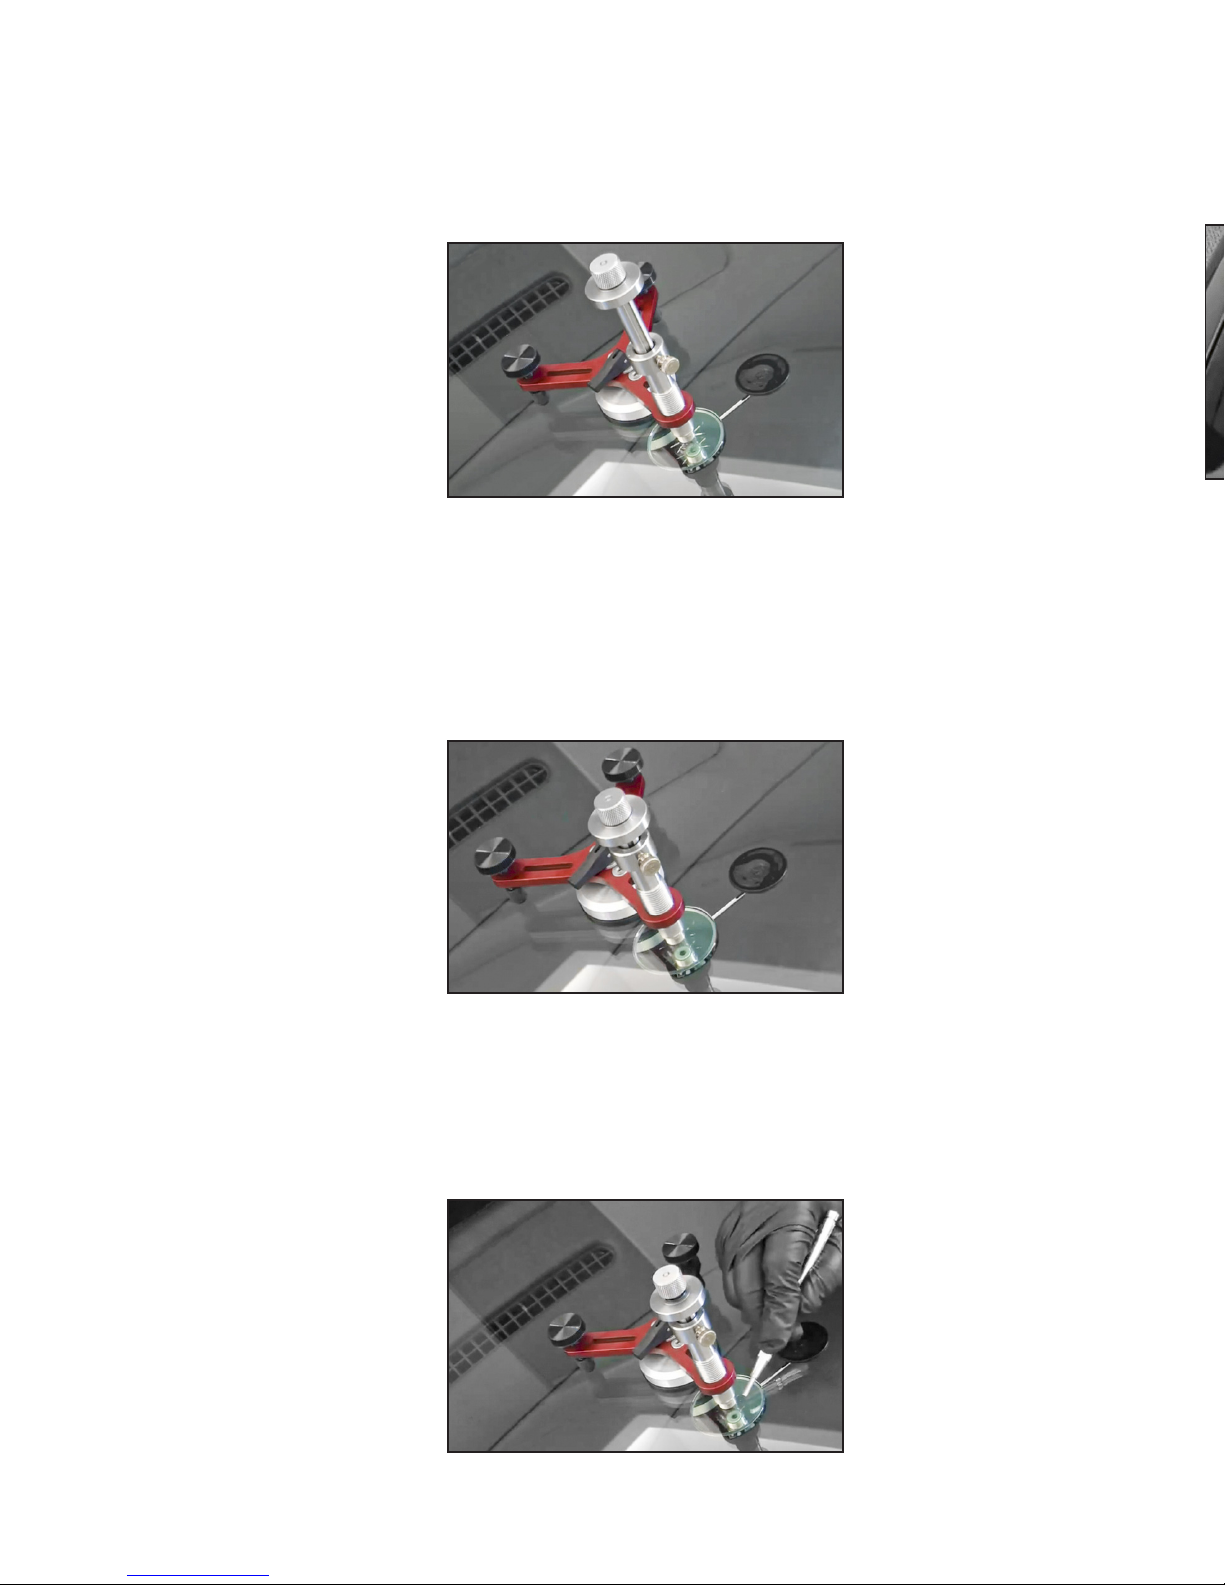
6. Now push the injector in until it hits the bottom of the barrel.
7. Tighten the injector pressure rod.
8. Pull the injector up until the end of the groove makes contact with the retaining
screw. Fully tighten the retaining screw. You are now in the vacuum phase.
9. Hold vacuum for one minute.
10. Next, release the vacuum by loosening the injector pressure rod.
11. en re-tighten the injector pressure rod to secure the seal.
12. Next, loosen the retaining screw and push the injector in a downward motion
until the point when you feel resistance. en tighten the retaining screw. You are
now in the pressure phase.
13. Hold pressure for two minutes.
Note: For stubborn breaks, you might have to repeat the vacuum to pressure cycle
until the break is fully filled. Applying a little pressure on your break with your probe
will flex the break and help move resin into the tight areas.
Page 9
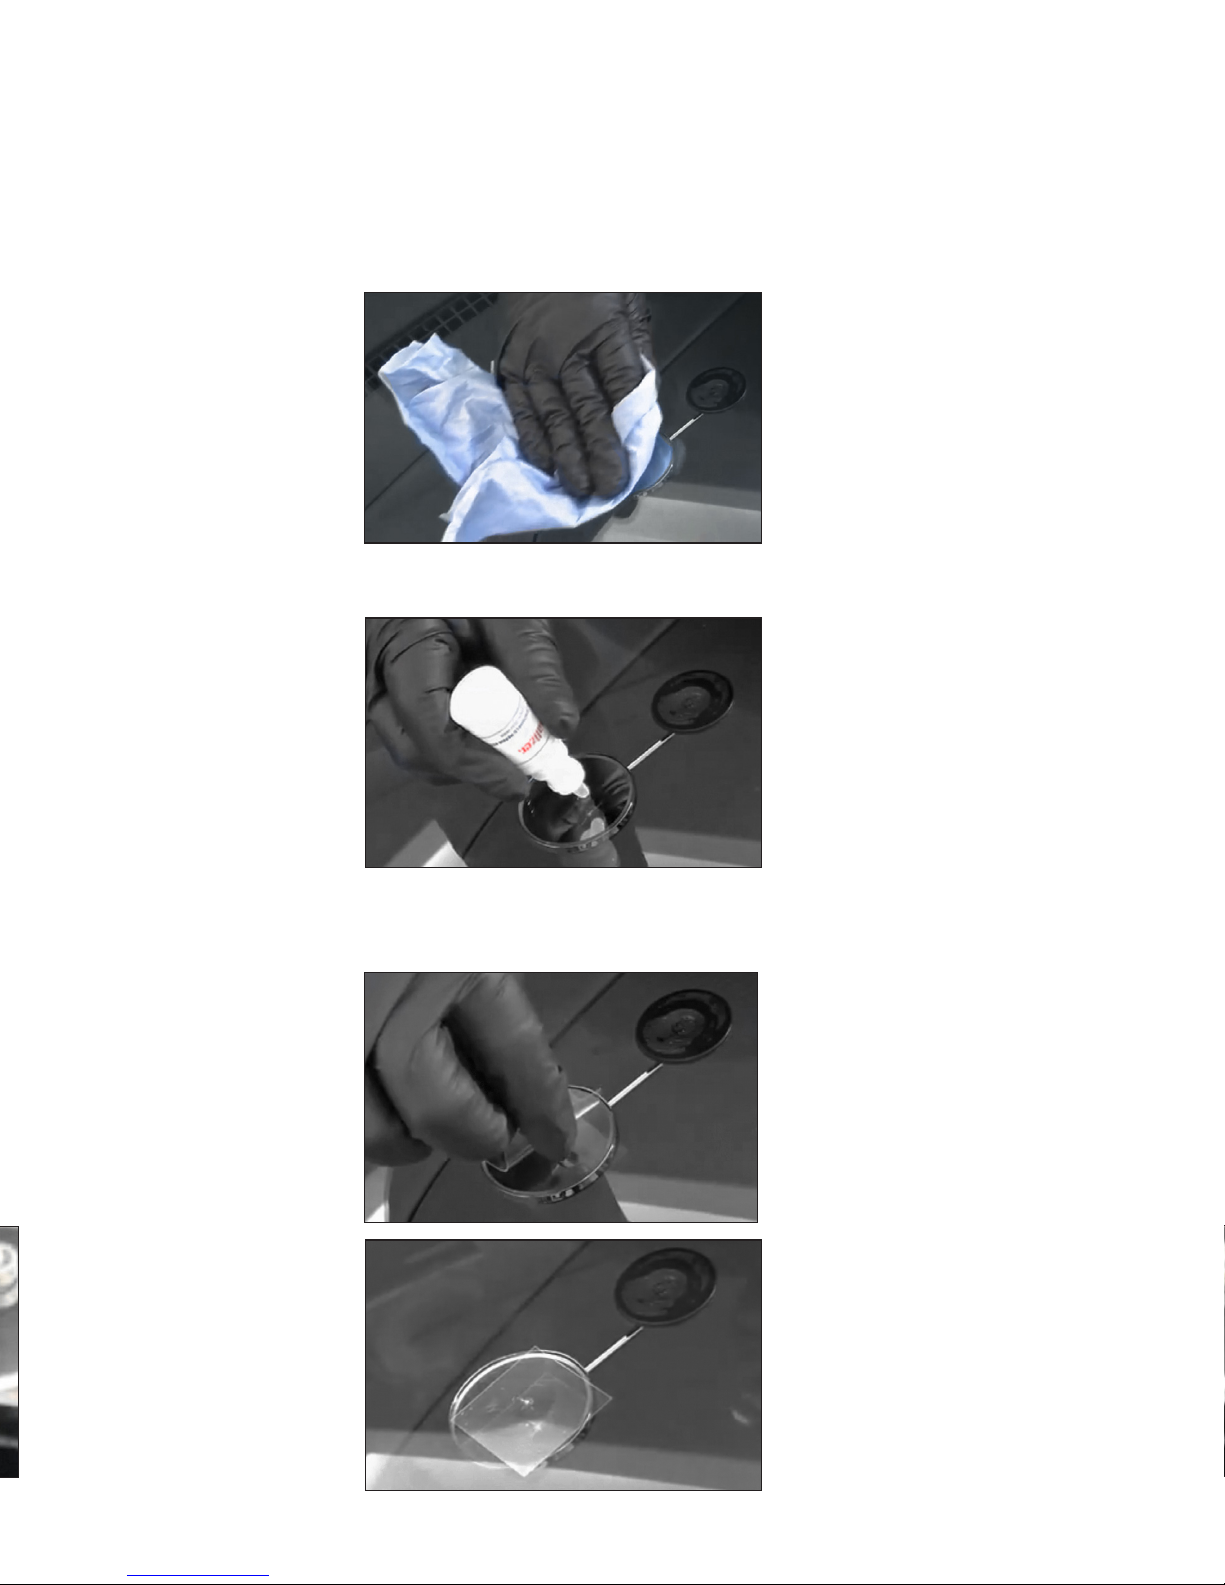
Curing Procedure -
1. When the repair is to your satisfaction, release the pressure by loosening the
injector pressure rod.
2. Release the lever on the vacuum cup.
3. Remove the bridge and injector assembly.
4. Wipe away any residual resin.
5. Apply a drop of pit filler resin.
6. Place a mylar square cure sheet onto the pit filler resin. Be sure to gently place the
cure sheet in a downward laying motion and let gravity do the rest.
Page 10
9 2
Inspection And Assessment -
1. Examine the damaged area from the inside and outside of the vehicle. Look for
hidden cracks, moisture, contamination or previous repair attempts.
2. Determine if the damage is within the scope of your technical experience to
repair.
3. Assess to make sure that the windshield is at the appropriate temperature.
Ideal temperature is between 65°F to 85°F plus or minus 5°F.
Preparing the Rock Chip -
1. Place the mirror on the inside of the windshield, under the damaged area.
2. Clean around the damaged area. Be sure to place a nitrile glove-covered finger
over the rock chip in order to keep from contaminating the break.
Always wear safety glasses and nitrile gloves
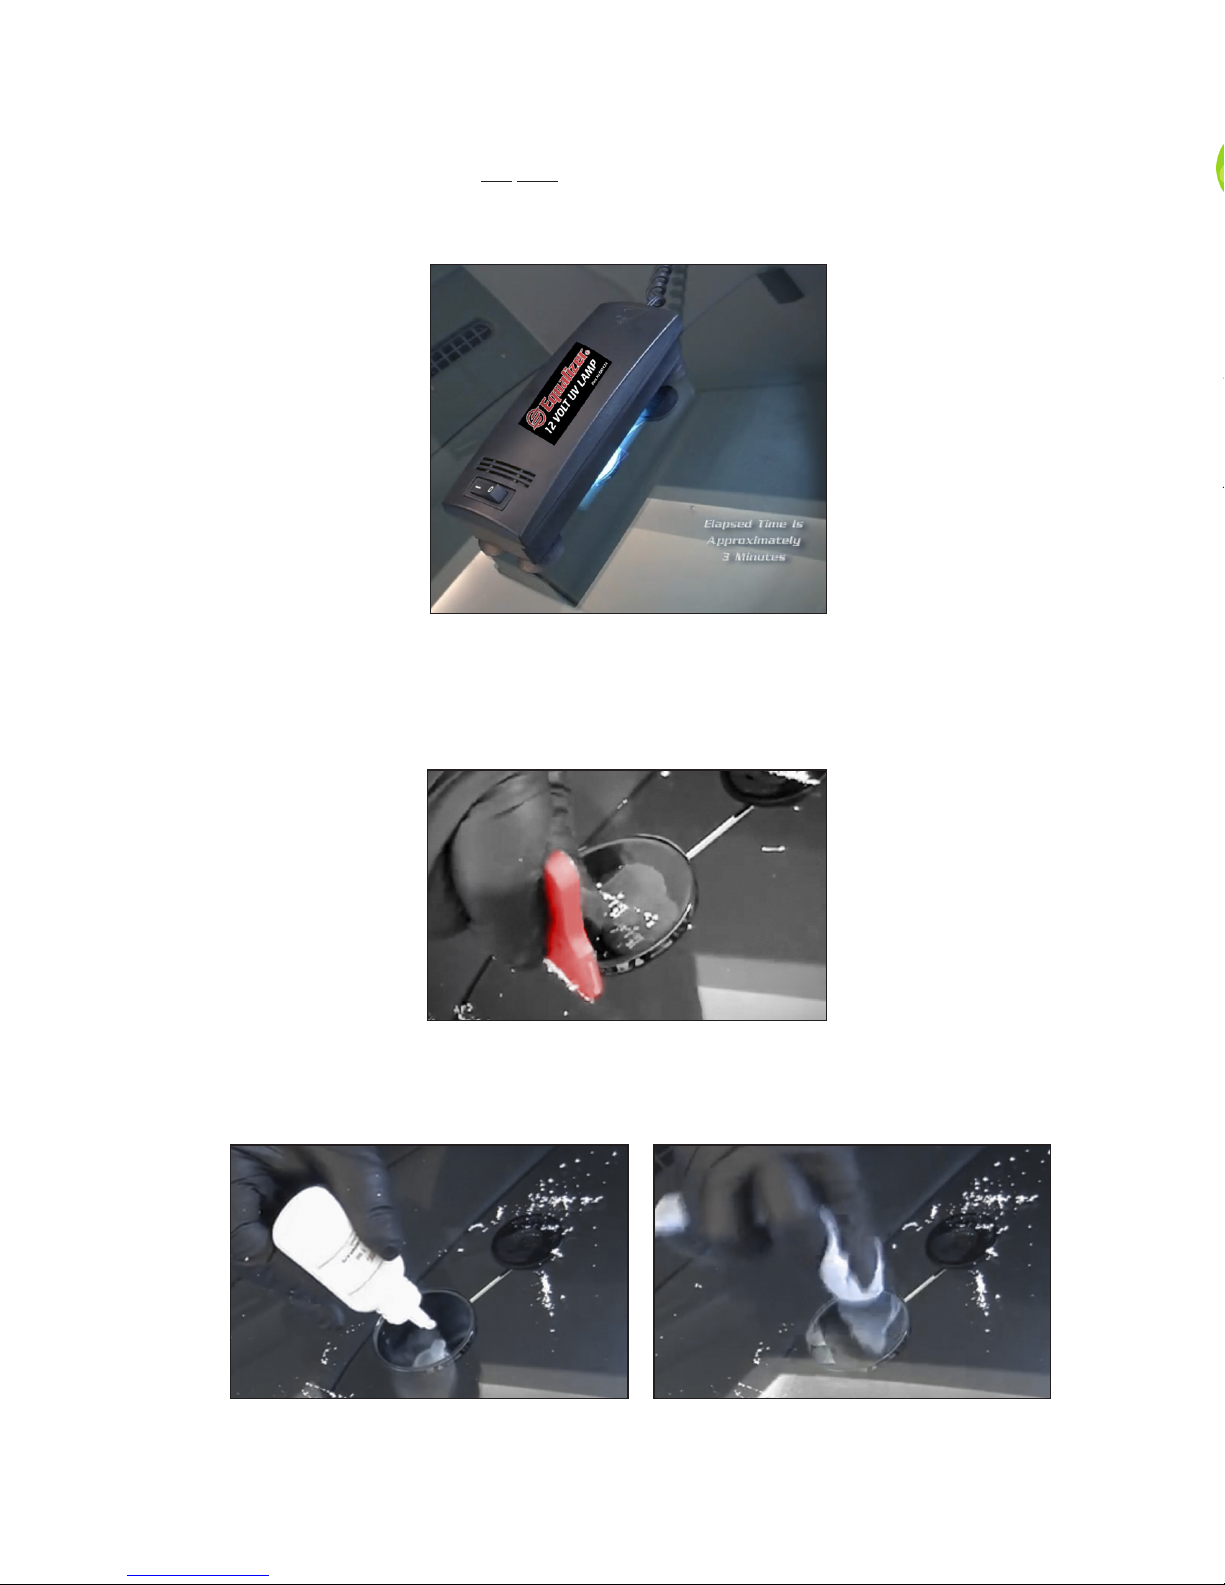
7. Cure the break for approximately three minutes using either an ultra violet lamp
or the use of natural sun light. *Always make sure to let the break cure to the
required allotted time. Do Not rush this process. e outer part of the break
might be cured but the actual pit may not be. It is very important that it be cured
all the way through.
8. Remove the mylar square cure sheet.
9. With the use of a new razor blade, scrape the cured resin in a back and forth, up
and down motion until the resin is even and level with windshield.
10. Apply a small amount of pit polish and vigorously buff with a soft cloth or paper
towel until the pit resin is shiny.
Page 11
10
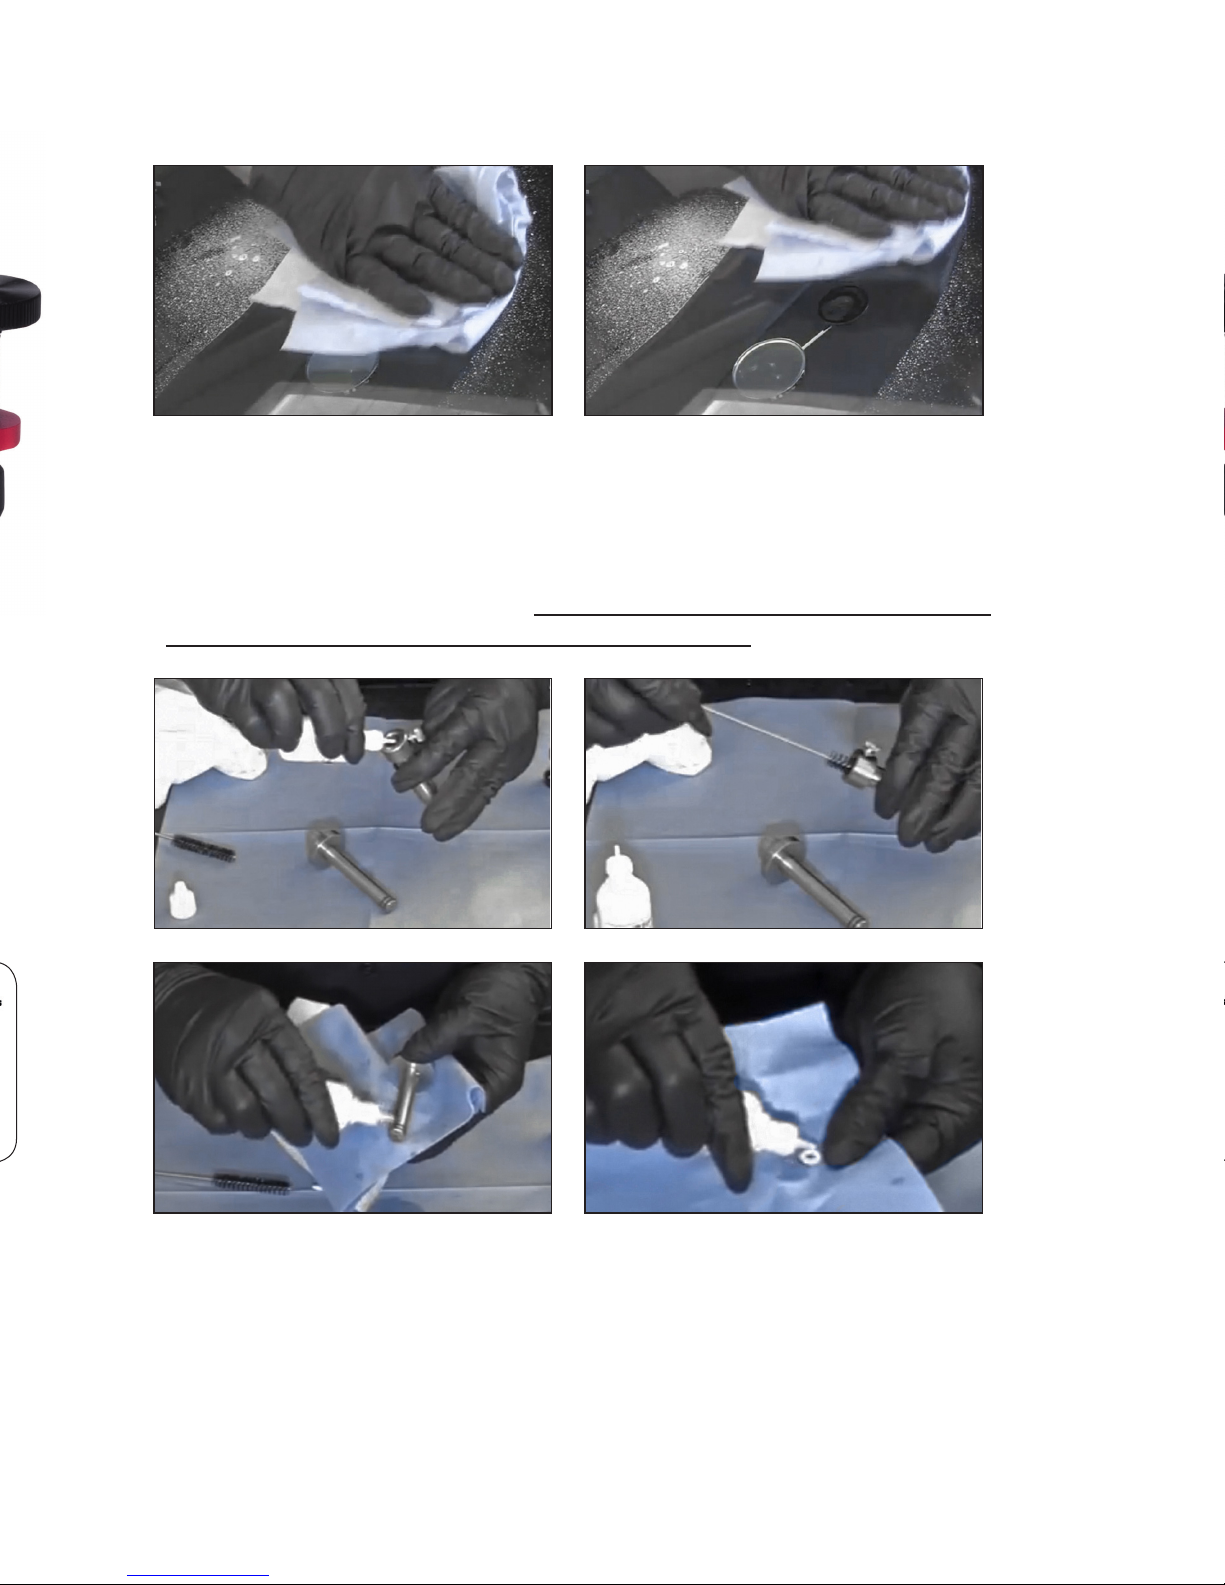
11. Clean the area that you have worked on with a good glass cleaner and a paper
towel.
Cleaning & Maintenance -
1. Clean the resin off of (and out of) your injector, o-rings and bridge with our
cleaning solution. *Keeping these items clean and free of build up assures no
contamination on you next repair, proper functioning of the tools, and will
increase the longevity of the tools. Failure to properly clean and maintain
these items could result in voiding your warranty!
Page 12
VCD1464
VAF1471
VAL1472
VPF1452
VPL1453
VMR1450
VML1451
VTR1448
VTL1449
TRR652
TRO653
2611 Oakmont Drive • Round Rock • Texas • 78665
Toll Free USA & Canada: 800.334.1334
International: 512.388.7715 • Fax: 512.388.4188
Email: [email protected]
www.equalizer.com
© 2012 Equalizer Industries, Inc.
Revision 11/10/17
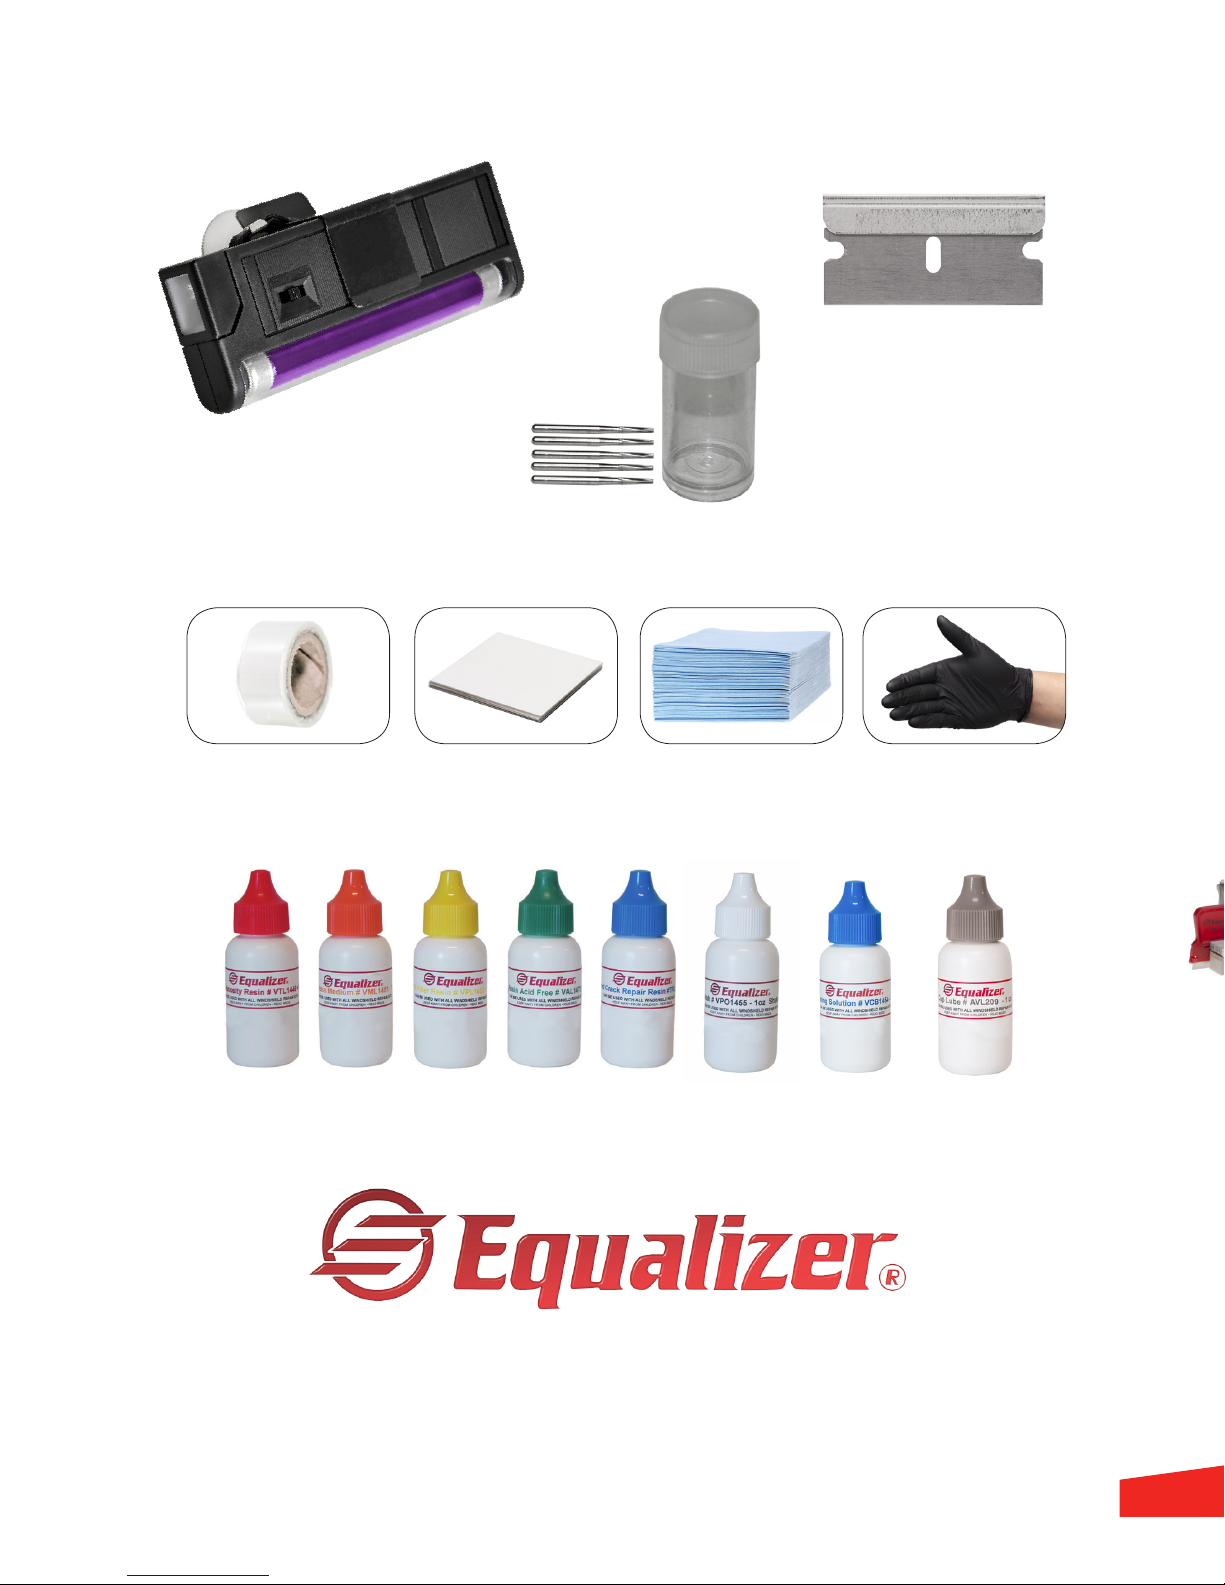
Additional Accessories
Windshield Repair System
VCB1454VPO1455 AVL209
DL1093 BNG418
BNL820
MS492VPT1489
RB497
VUV1447
 Loading...