

Page 1
Tools you ne ed:
NO. Name
Parameter
QTY
R15 RES 10R 1
RX1-4\RY5-12 RES 47R 12
R13.R14 RES 470K 2
C5 CAP 102 1
C2.C3.C4 CAP 104 3
C1 E-CAP 220uF 1
D1-D16 LED
2*5*7 Red
16
D17-D32 LED
2*5*7 Blue
16
J2.J3 Audio input socket SMD3P 2
J1 Power input socket DC3.5 1
U1 IC WD1084 1
S1 Contact switch 6*6*5 1
- PCB ASD-84 1
- USB to DC Line 100cm 1
- Audio input line 100cm 1
ASD-84 Audio spectrum component list
①Ir on ( 30 W)
②So ld er w ire
③Mu lt im eter
④Tw e eze rs
⑤Wire cut t e r s
Prec aution s:
①Ch eck p ar t va lue s & qu an tit ie s ag ain st p ar t lis t
②Al way s me te r res is to r val ue s be for e so ld eri ng
③Un der st an d all p ar t po lar it ie s and o ri en tat io ns
ASD-84
Rev.1.0 Ju n e 2 0 , 201 8 Produced by YiQi
Audio spectrum LED kit instru c t i o n s
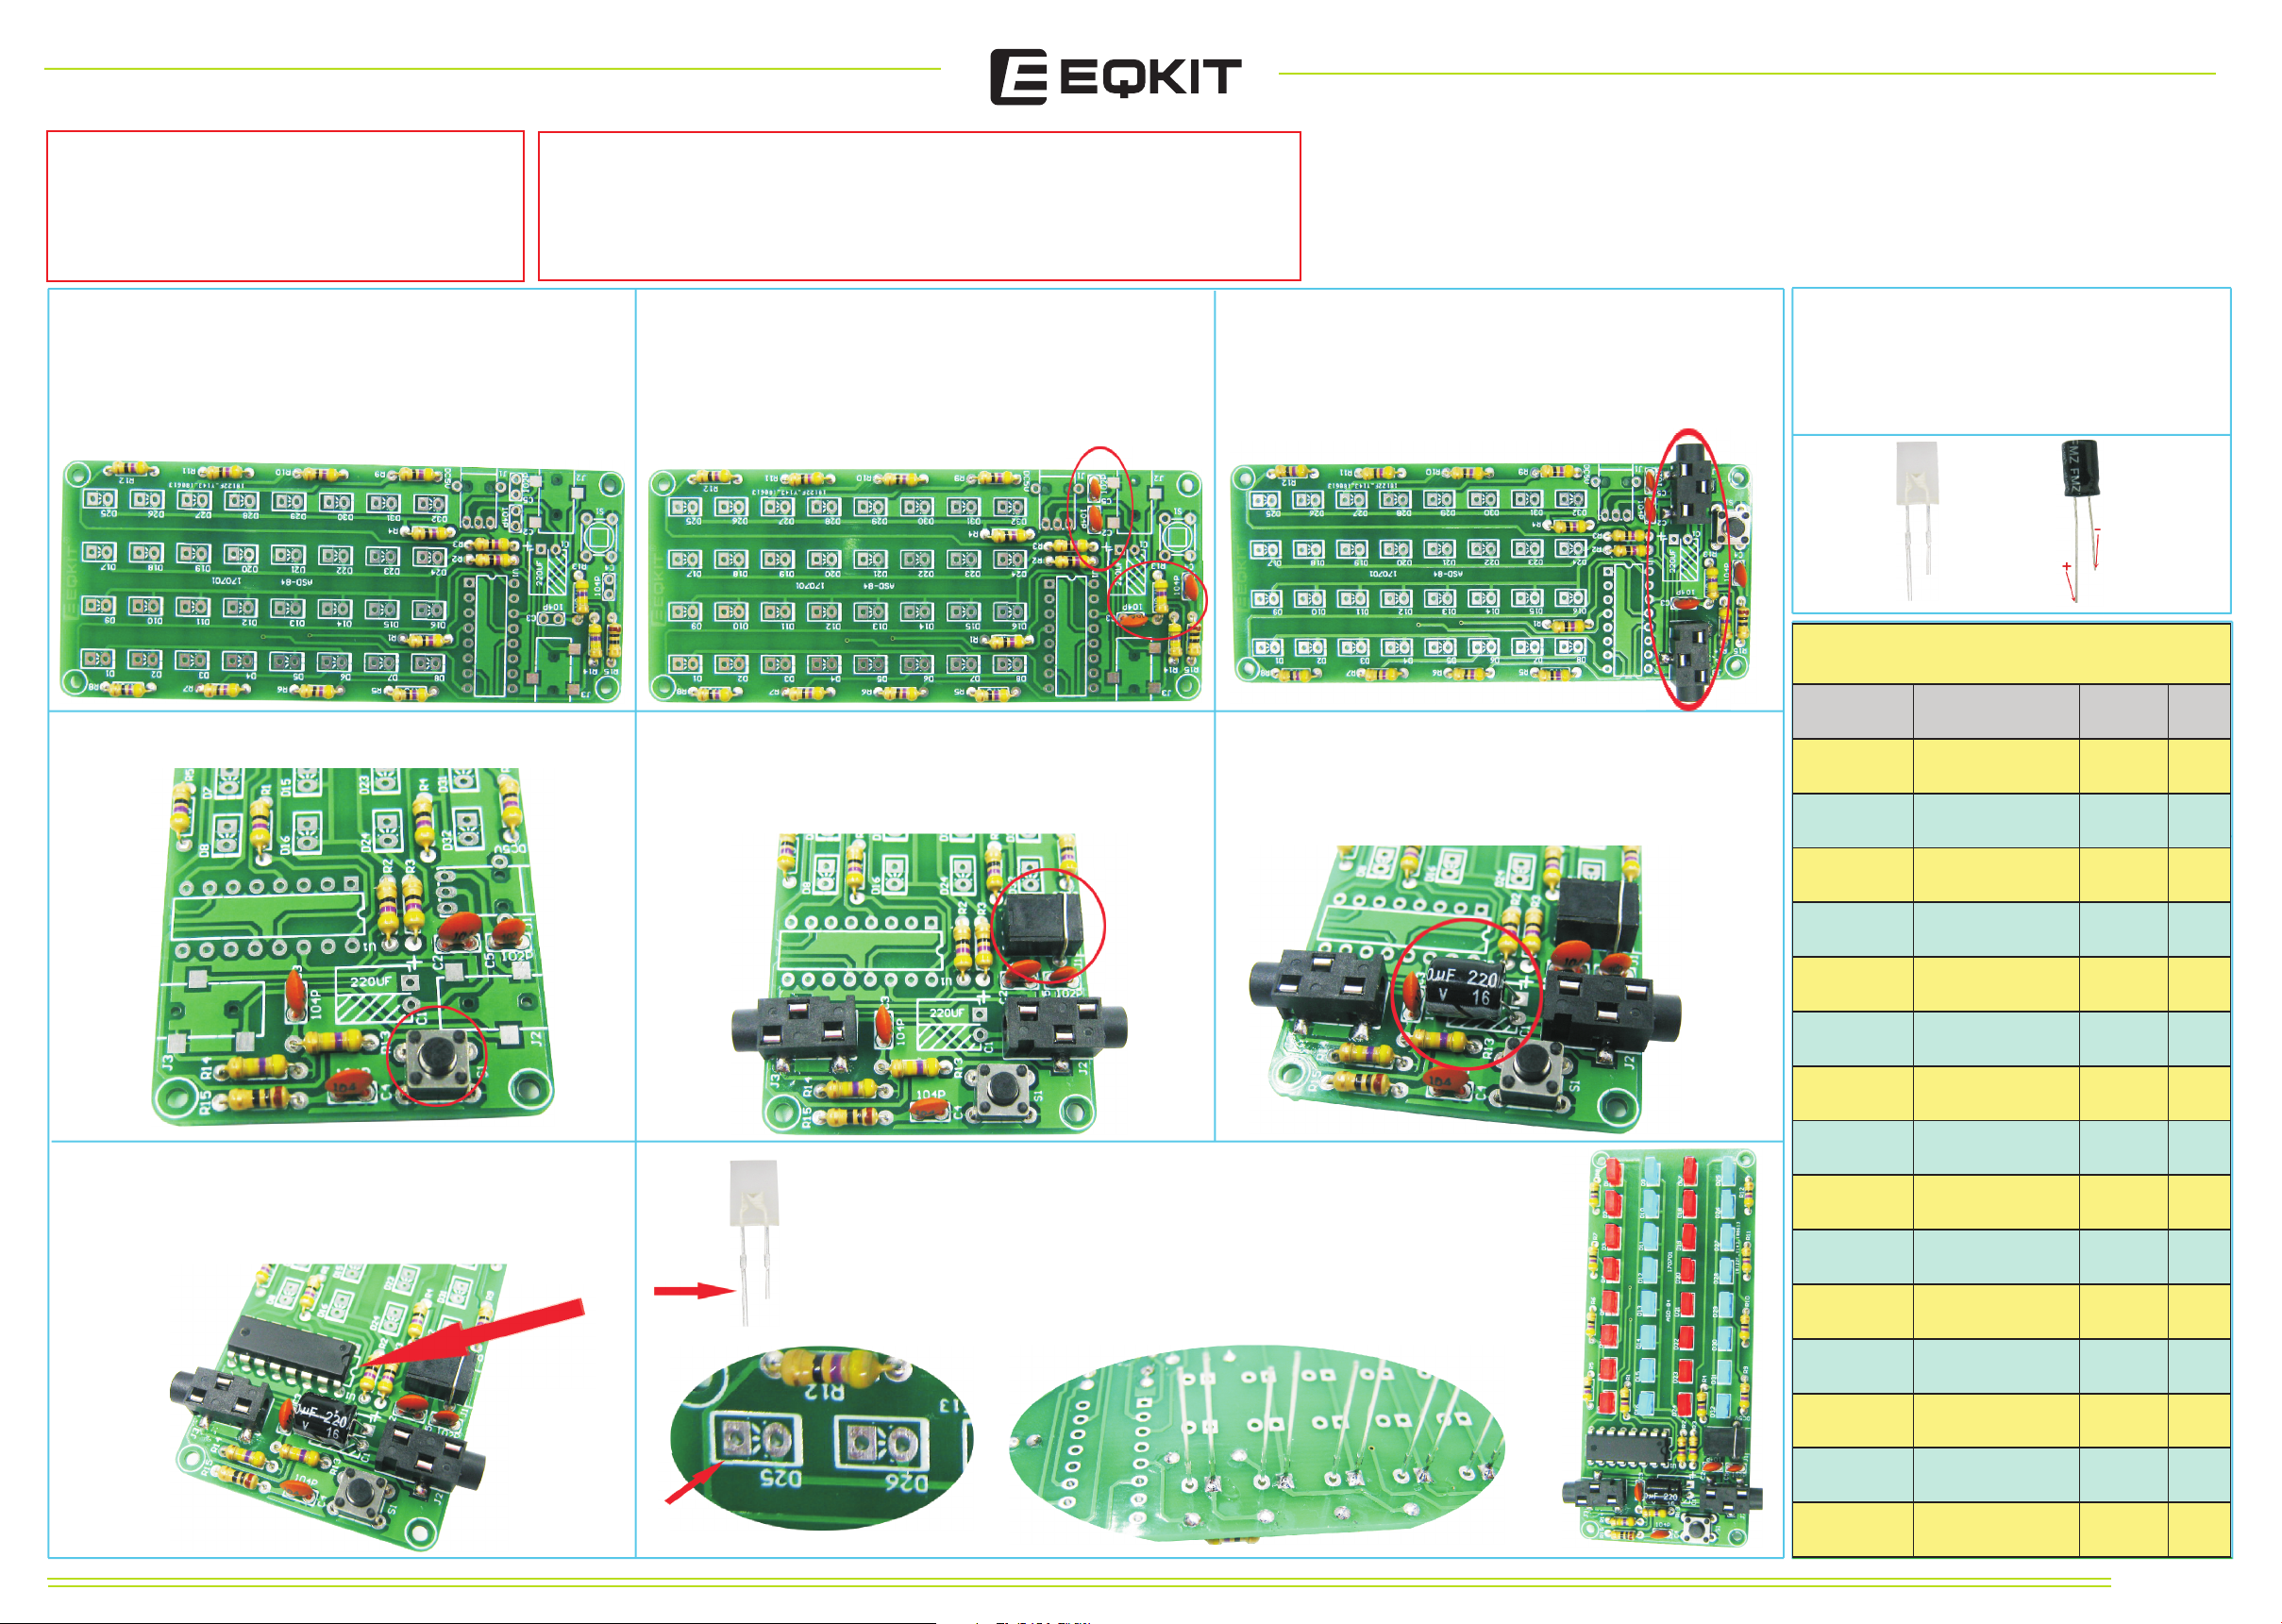
1.Install RES:
Refer to the resistance mark on the circuit
board and install the resistor well.
RX1~RX4,RY 5~RY12=47Ω.
4.Install Function key S1:
2.Install Ceramic capacitance:
C5=102=1000pF
C2C3C4=104=0.1uF=100nF
5.Install power input J1:
The installed power input holder must
be welded and fixed with a spare part pin.
3.Install Audio input socket:
Two input sockets are convenient
to connect to other devices again.
6.Install Electrolytic capacitor
The long pin of the electrolytic
capacitor is the positive pole
Warning:
Po l ar el eme nt:LE D Ele ctr oly tic c a pa c it o r
Th e p osi tiv eel ect rod e sha ll be s o ld e re d t o
th e s qua re pa d
+
-
7.Install Integrated circuit:
Pay attention to the direction
of installation
Notched
direction
①
Long pin is
a positive pol e
8.Install LED:
First, the positive and negative poles of LED are identified①
Install a row of LED first,
Install another row after welding and adjusting②
Please pay atte ntion to the inst allation of the lamp to maintain
ever y horizontal or vertica l co lor should be the sa me.
②
③
Square welding point is the positive pole
Page 1
Page 2
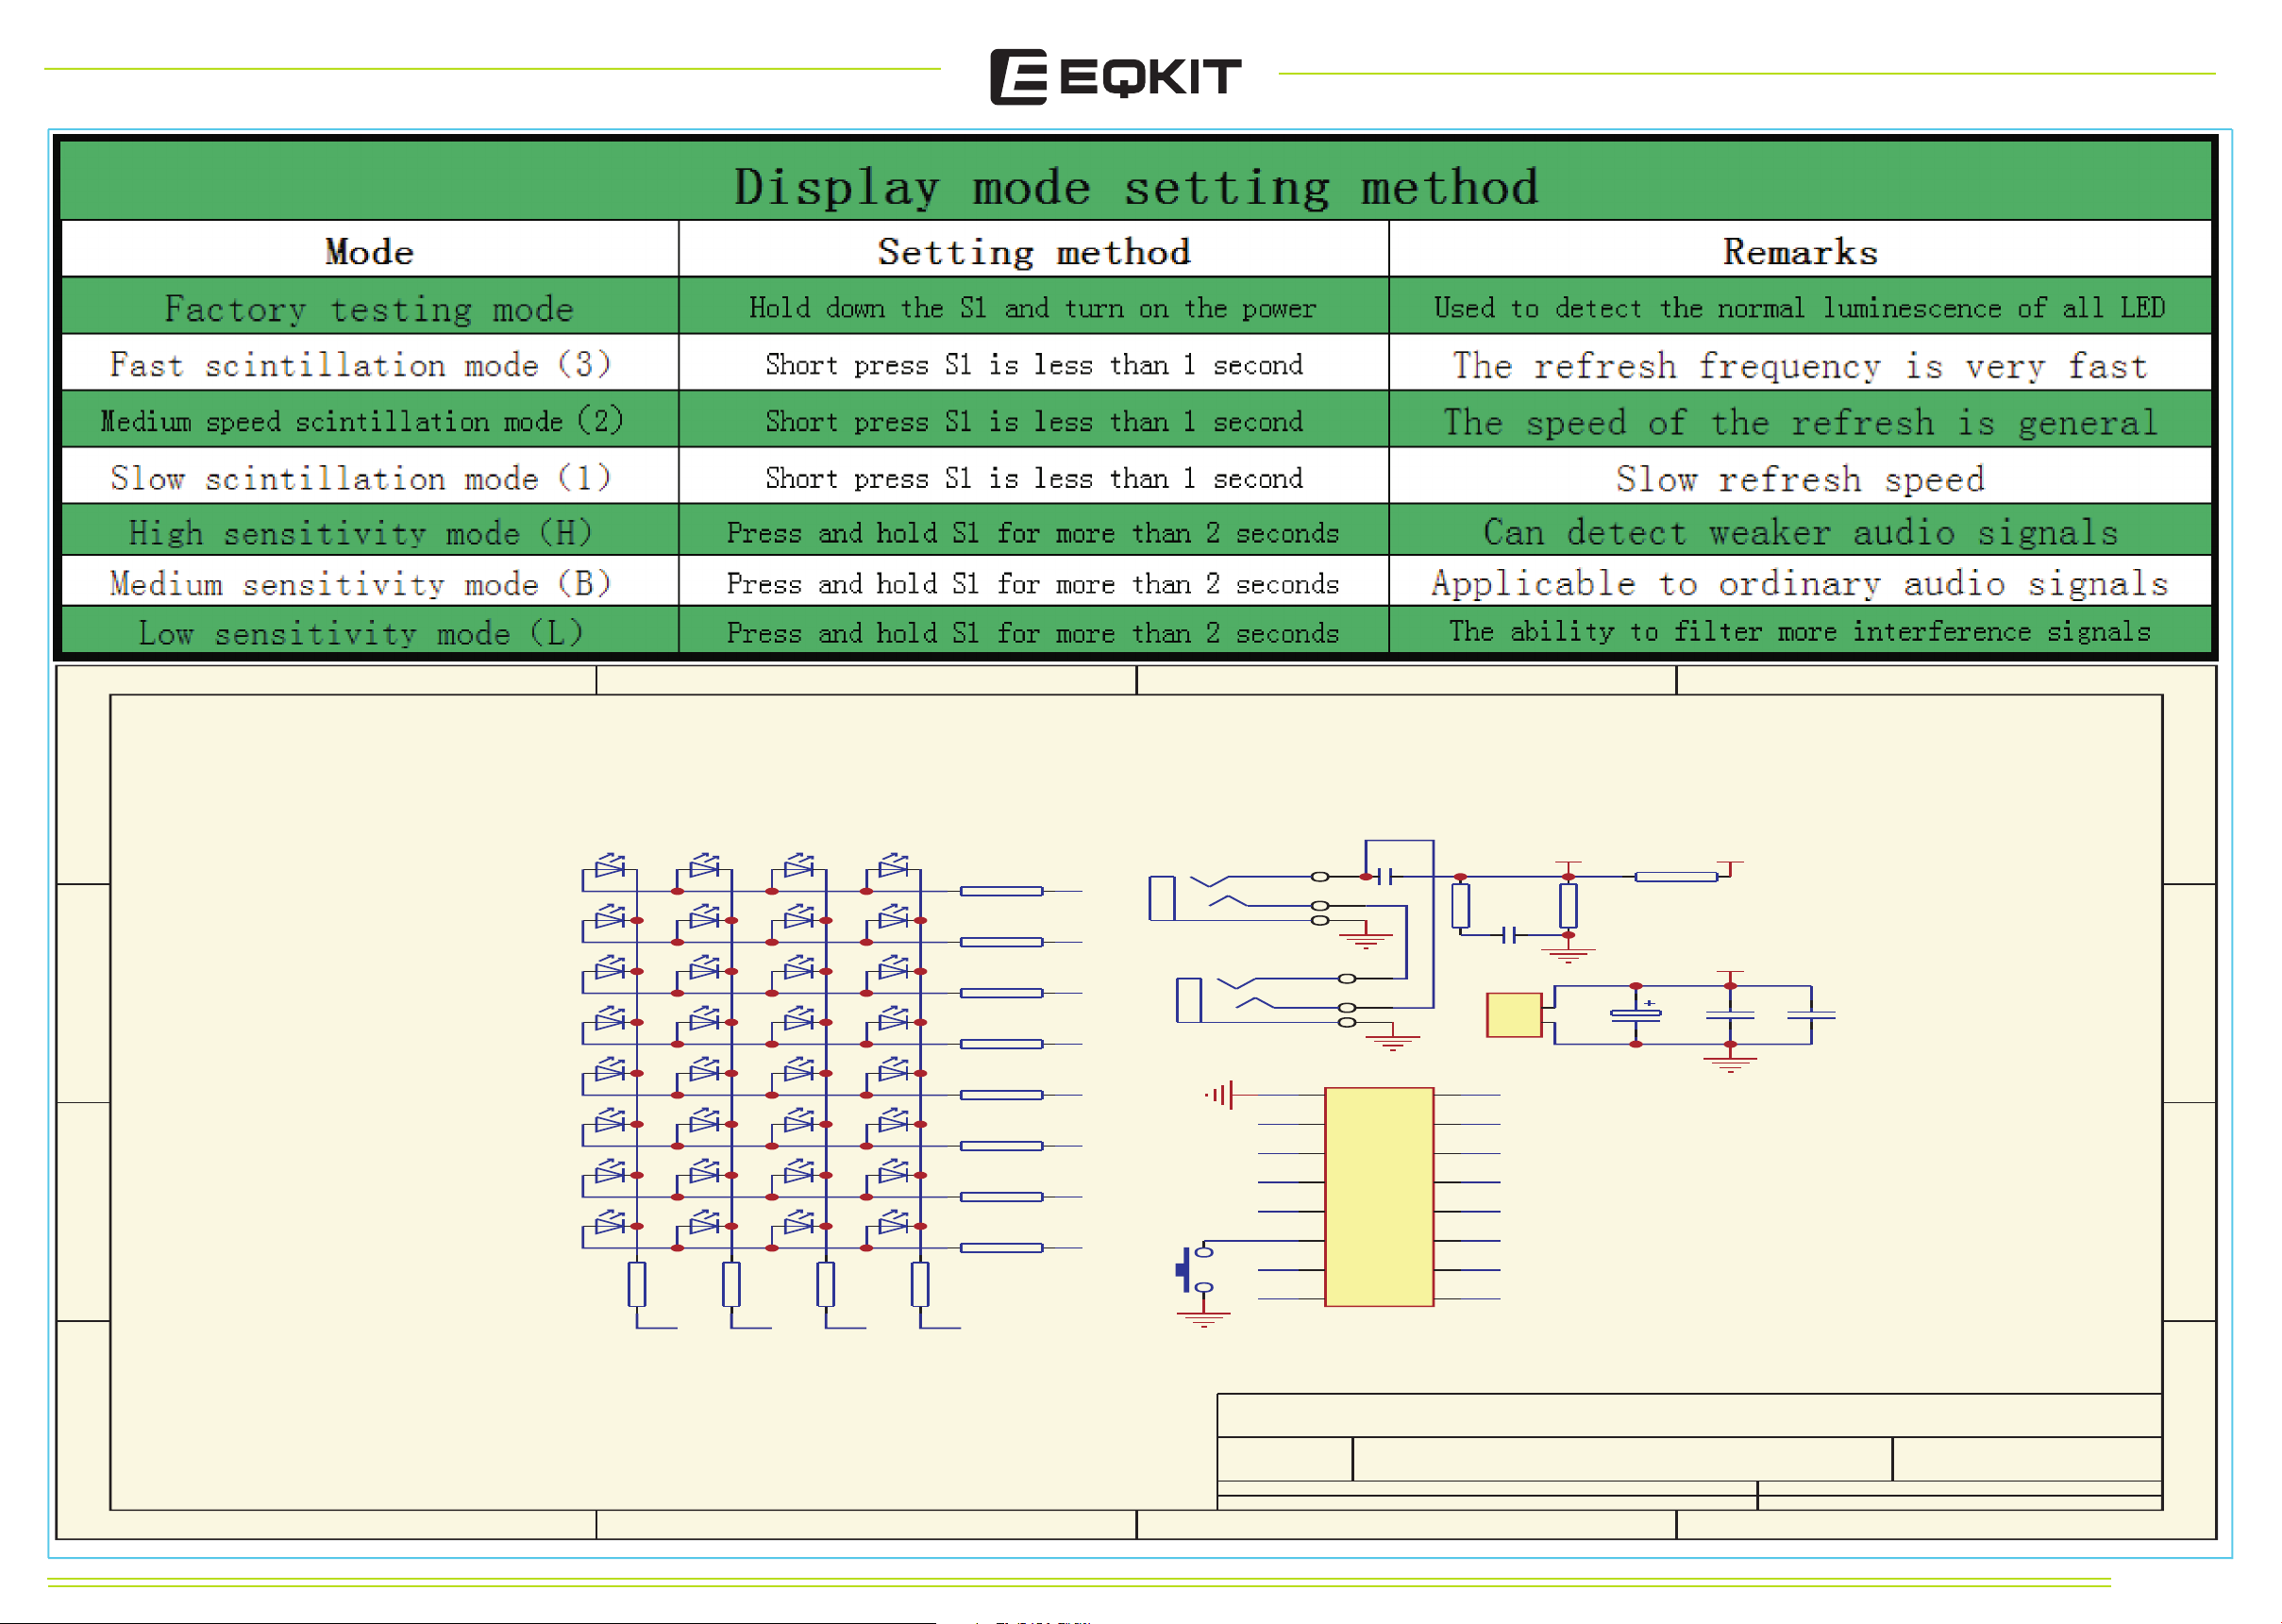
4321
D
D1
D2
D3
C
B
D4
D5
D6
D7
D8 D16 D24 D32
D9 D17 D25
D10 D18
D11
D12
D13
D14
D15
R1
RX1
V1 V2 V3 V4
R2
RX2
D19
D20
D21
D22
D23
R3
RX3
D26
D27
D28
D29
D30
D31
R4
RX4
R12
RY12
R11
RY11
R10
RY10
R9
RY9
R8
RY8
R7
RY7
R6
RY6
R5
RY5
H8
H7
H6
H5
H4
H3
H2
H1
J2
MODE
J3
VDD
H6
H3
H1
H2S1
U1
1
2
3
4
5
6
7
8 9
ASD84
C3
104P
16
15
14
13
12
11
10
AUDIO V DD
R15
10R
C4
104P
J1
2
1
CON2
H4
H5
H8
V1
AUDIO
V2
V3
V4H7
R14
470K
RX1~RX4=47R
RY5~RY12=47R
R13
470K
C1
220uF
VDD
104P
C2
C5
102P
D
C
B
Title
A
B
Date: 20-Jun-201 8 Sheet of
File: E:\longyon g. dd b Drawn By:
1 2 3 4
Number RevisionSize
A
Page 2
 Loading...