

EPV Peregrine HD 2 series User Manual

Fixed Frame Projection Screen
Peregrine
Elite Prime Vision, Peregrine
the screen. Correct usage and maintenance will
Dust, dirt and scratches on the projection surface will affect the picture quality,
the points below to prev
1. Do not touch the projection surface with
2. Do not write or draw on the projection surface
3. Do not use fingers or sharp objects to point on the projection surface; this will damage the
clean the projection surface; do not use chemical cleaning agents or
5. Use clean water when dampening the cleaning cloth and do not rub against the material to clean
Please make sure all parts are included in your package before proceeding to assemble your Elite
fixed frame projection screen.
top/bottom frame pcs + 2 side frame pcs)
x 1 pc
nsure a long
Thank you for choosing the
through this user guidebefore utilizing
Care & Use Instructions:
HD 2 Series
User’s Guide
HD 2fixed frame projection
screen! Please read
e
product life.
please take note of
screen material.
4. Use a soft-damp cloth to
alcohol.
it.
Hardware and Parts List
A. Frame Parts x 6 pcs
(4
B. CineWhite™ 2 Screen Material
C. Center joint x 2 pcs
D. Elbow Joint x4 pcs
E. Wall bracket x 4 pcs
F. Wood screw x 8 pcs
G. Hollow wall anchor x 8 pcs
Note:
Vision, PeregrineHD 2
ent that from occurring:
your hands
H. M5x15 screw x 16 pcs
I. Center Support Bar x 1 - 2 pcs
(depending on model/size)
J. Support joiner x 2 - 4 pcs
(depending on model/size)
K. Fix Plates x 60 - 180 pcs
(depending on model/size)
L. Rubber mallet x 1 pc
M. Screw driver x 1 pc
Prime
061715-JA
www.EPVscreens.com
1

FRAME ASSEMBLY
1. Insert the center joint (c) connector to the horizontal frame piece with bevel connection and flat head, and then
fasten it with two M5x15 screws (h).
M5x15 Screw
Flat head
½ Long Frame
bevel connection
2. Insert the other horizontal frame piece to the center joint connector and then fasten it with two M5x15 screws.
Flat head
½ Long Frame
Push
Bevel connection
×2
Horizontal Long Frame
Note: a. 2 long frames should be assembled for a screen.
b. Do not tighten the screws completely until all frame pieces have been assembled correctly.
3. Insert both elbow joint connectors into the long horizontal frame and then fasten it with twoM5x15 screws
(seeFig.1).Then insert the short frames and fasten them with screws (Fig.1.2).
Push
Long frame
Push
M5x15 screws
Joint
M5x15 screws
( fig.1)
061715-JA www.EPVscreens.com 2
M5×15Screws
Push
Short frame
Push
Short frame
(Fig.1.1)
Screw
(Fig.1.2)
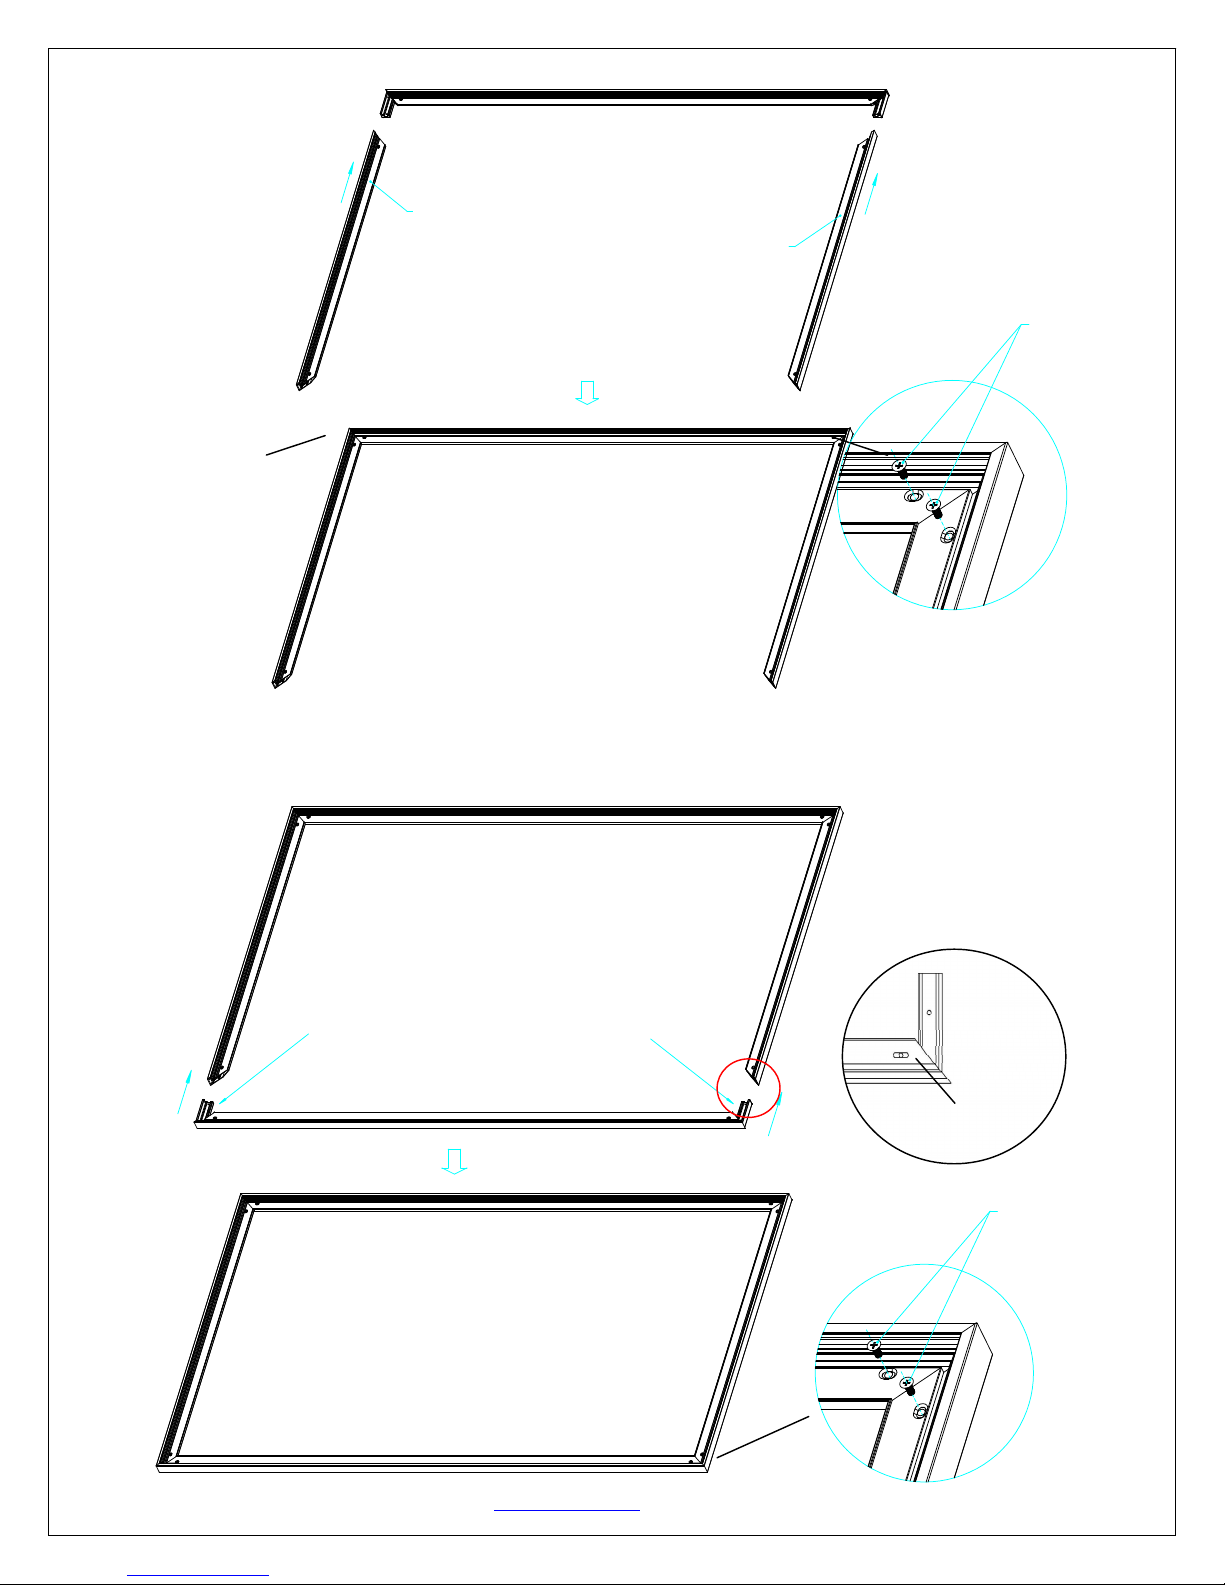
4. Join all four frame parts together following the steps shown below. (Fig.2)
Note: When assembled, please push simultaneously the two ends of the long frames.
Insert the exposed ends of the joint connectors
into the short (vertical) frame and align the four
corners so that they meet at perfect right angles
Push
Push
M5x15 screws
Screw
061715-JA www.EPVscreens.com 3
( fig.2)
 Loading...