

Page 1

Tablet PC
Android 5.1
User Manual
Page 2

Tablet of Contents
Specifications………………………………………………………………….
What’s inside the box…………………………………………………………
Tablet Parts……………………………………………………………………
Getting started………………………………………………………………...
How to use TF card …………………………………………………………
How to connect to PC ………………………………………………………
Connection to Internet………………………………………………………..
Camera……………………………………………………………………….
Trouble Shooting…………………………………………………………….
Warnings…………………………………………………………….……
Specifications
Internal Storage 8GB
Expansion Memory: Micro SD card up to 32GB (not supplied)
Display: 7 inch TN 1024X600 Capacitive multi-touch screen
CPU: A33 Quad Core, A7 1.3GHz
RAM: 1GB DDR III
GPU Mali-400 MP2
Built-In Wireless (b/g/n)
Front camera 0,3 Mpixels
Built-in microphone and speaker
Page 3
Micro USB input (USB cable supplied)
Micro SD slot
USB OTG function (HOST cable supplied)
Earphones jack 3,5mm
Operating System: Android 5.1KitKat
Rechargeable battery Lipo 3,7V (2200mAh)
AC Adapter: 100/240V – 50/60Hz DC 5V-1.5A
Weight: 254g
Instruction manual - 1pc
Warranty card 1p
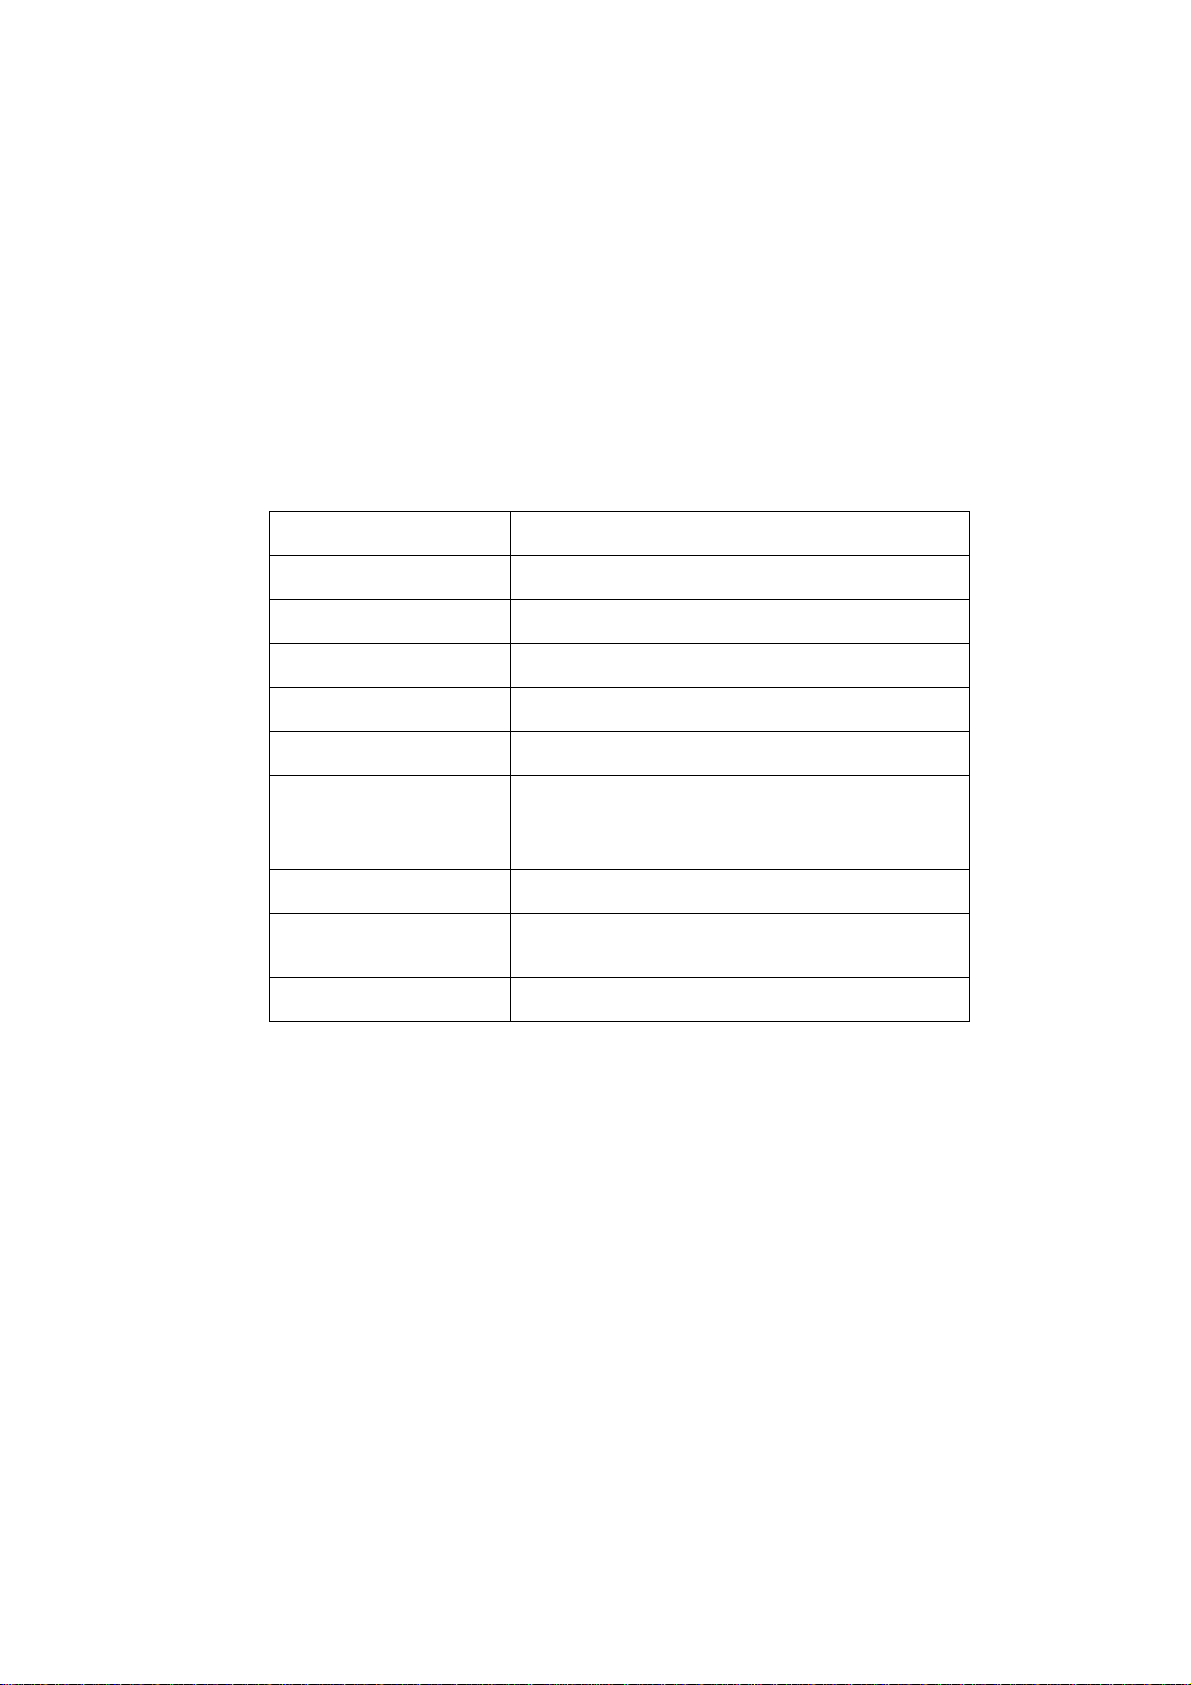
Name function
Reset Reset the system in case of stuck and reboot
Volume - Press to decrease the volume
Micro SD input Insert a micro SD card (up to 32GB)
Volume + Press to increase the volume
Microphone Built-in mic
USB OTG Port/micro
USB slot
Earphone jack Connect earphone to this standard 3.5mm jack
Power Keep pressed to turn on/off the tablet; shortly
Speaker Built-in speaker
PC connection/peripheral connection through
OTG cable (for example keyboard, USB
device)
press to activate standby
Page 4
Getting Started
Battery Charging
The tablet has a built-in rechargeable Li-polymer battery.
1. To charge connect the AC power adapter to the micro USB jack on
the top side of the tablet.
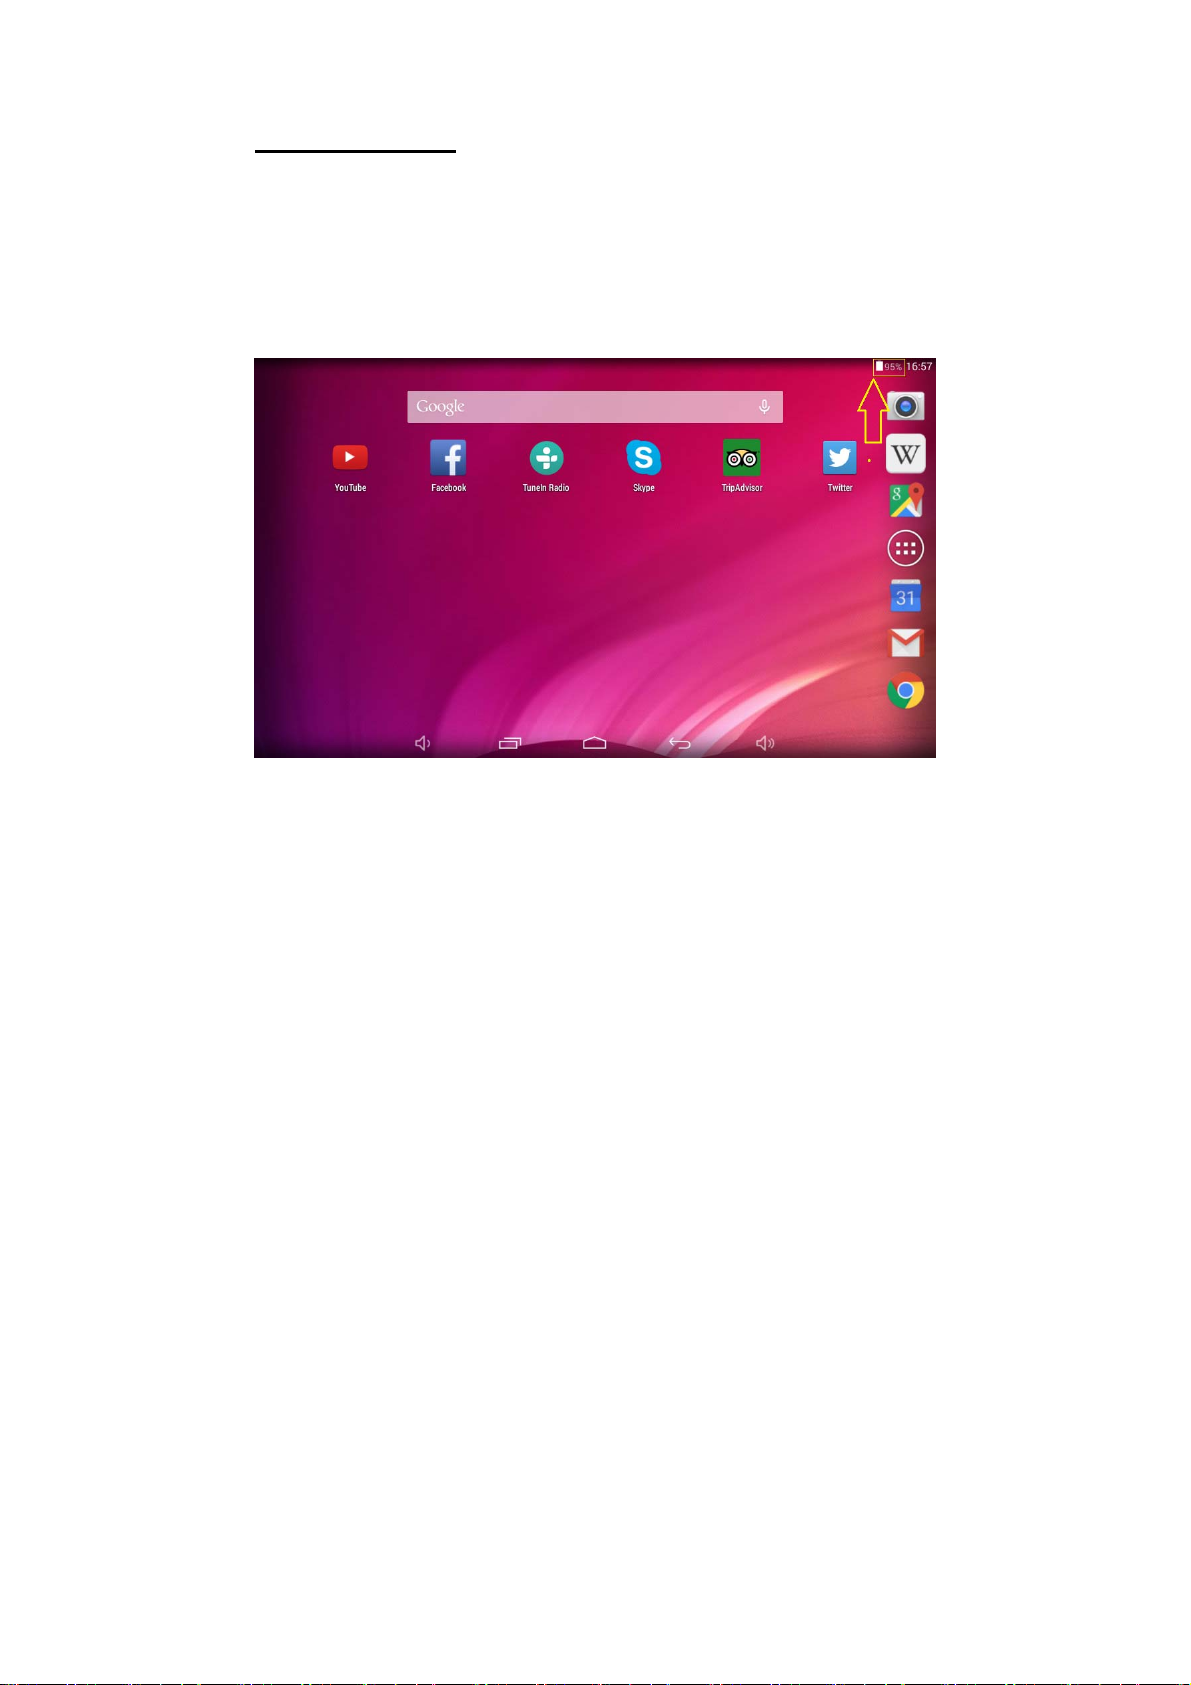
2. The battery icon shows the battery status and charging status
3. The tablet can be used even if the battery is being charged.
4. no replacement of battery without authorization, or the explosion
hazard might happen.
5. Recharge it for at least half hour if it has been idle for long time and
fails to start itself.
6. Regularly recharge it at least one time monthly
7. 35°—5° is the optimum temperature for the battery recharging or
the battery performance might deteriorate slightly
Disposal
the battery might contain the polluting material, please give it to the official
Page 5
recycling-station before disposing the tablet pc, and don’t litter.
4
Power ON/OFF
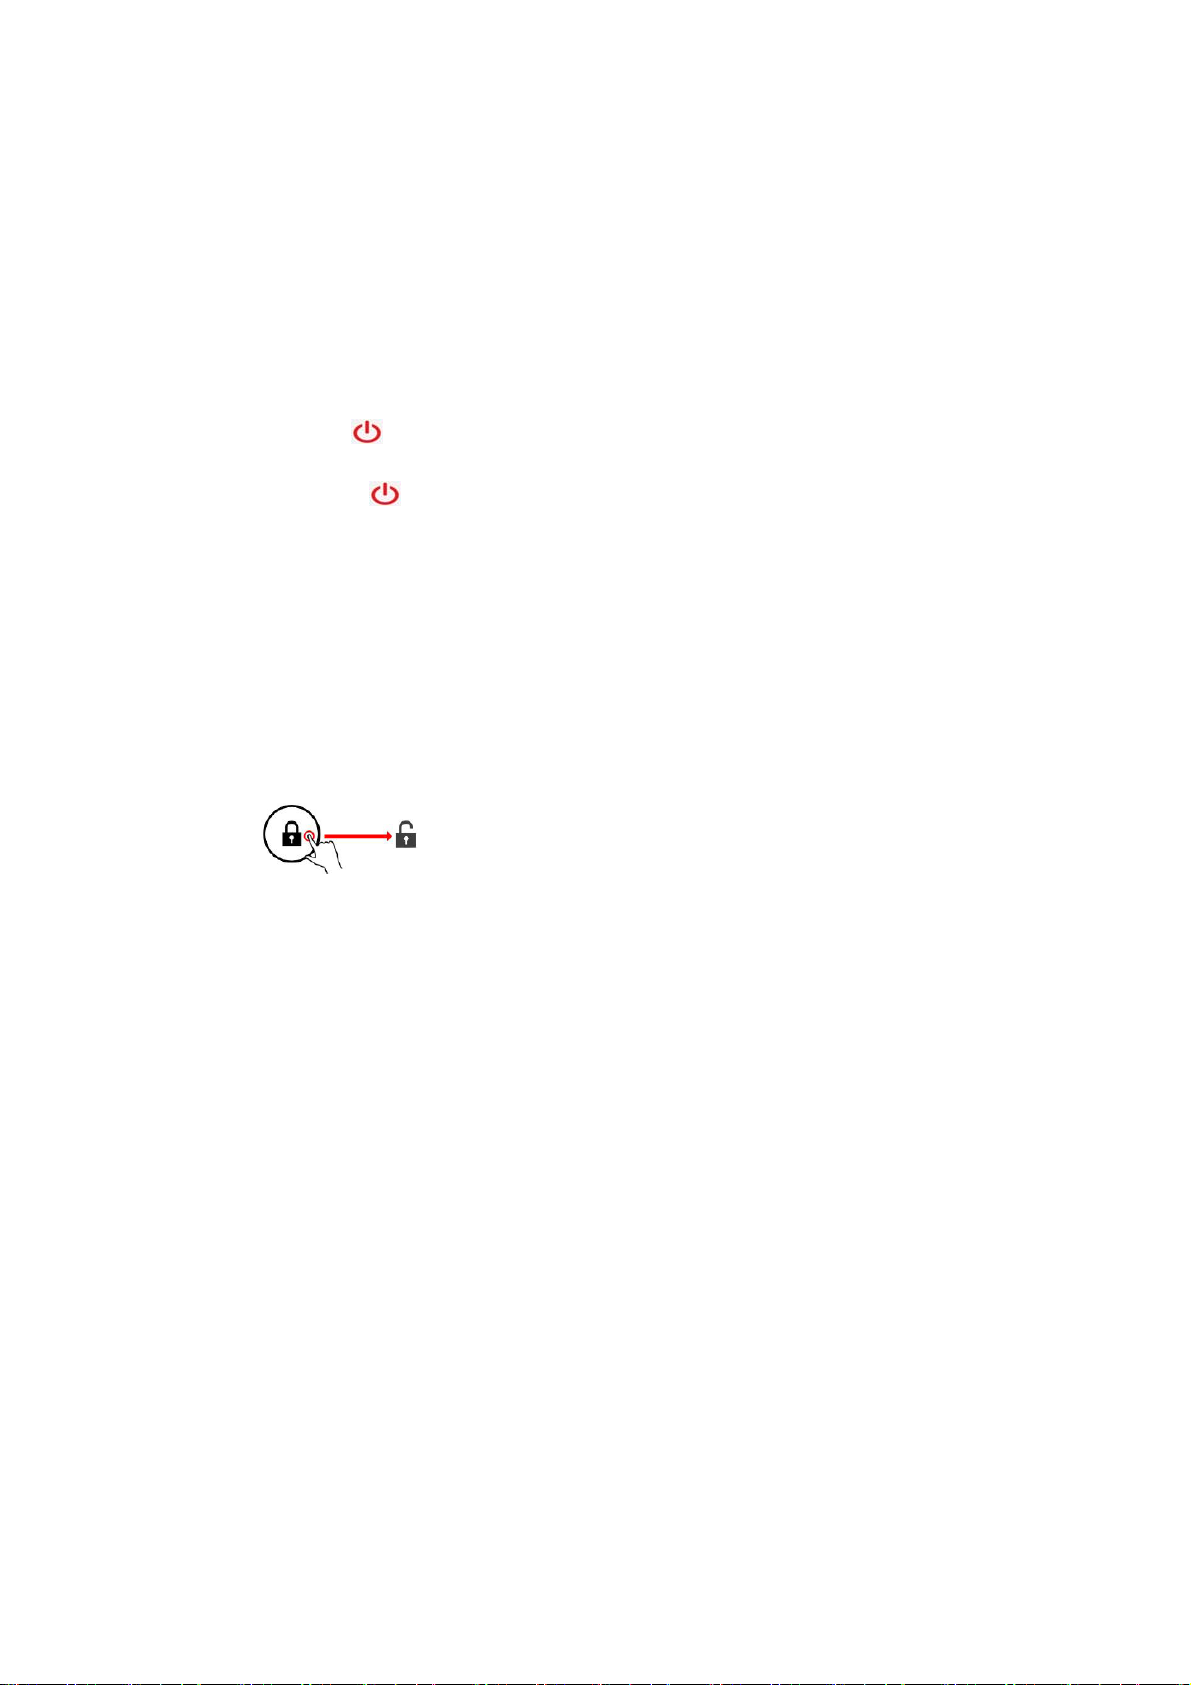
ON:
press the
button for continuous 5 seconds until the tablet turns “ON”.
OFF:
1.Press
the button for continuous 5 seconds and it will appear
2.Select OK to power off the tablet
Screen Lock
This feature locks the screen, at the same time turn OFF the screen’s
backlight after a few seconds.
Screen locks when:
1. System is idle.
2. Manually activated by pressing the Power button once.
Screen unlock :
Home screen
The Home screen will look similar to the picture below. It is actually five
screens, each of which can have a different layout of icons. To switch
between screens, simply slide your finger left or right across the display.
Page 6
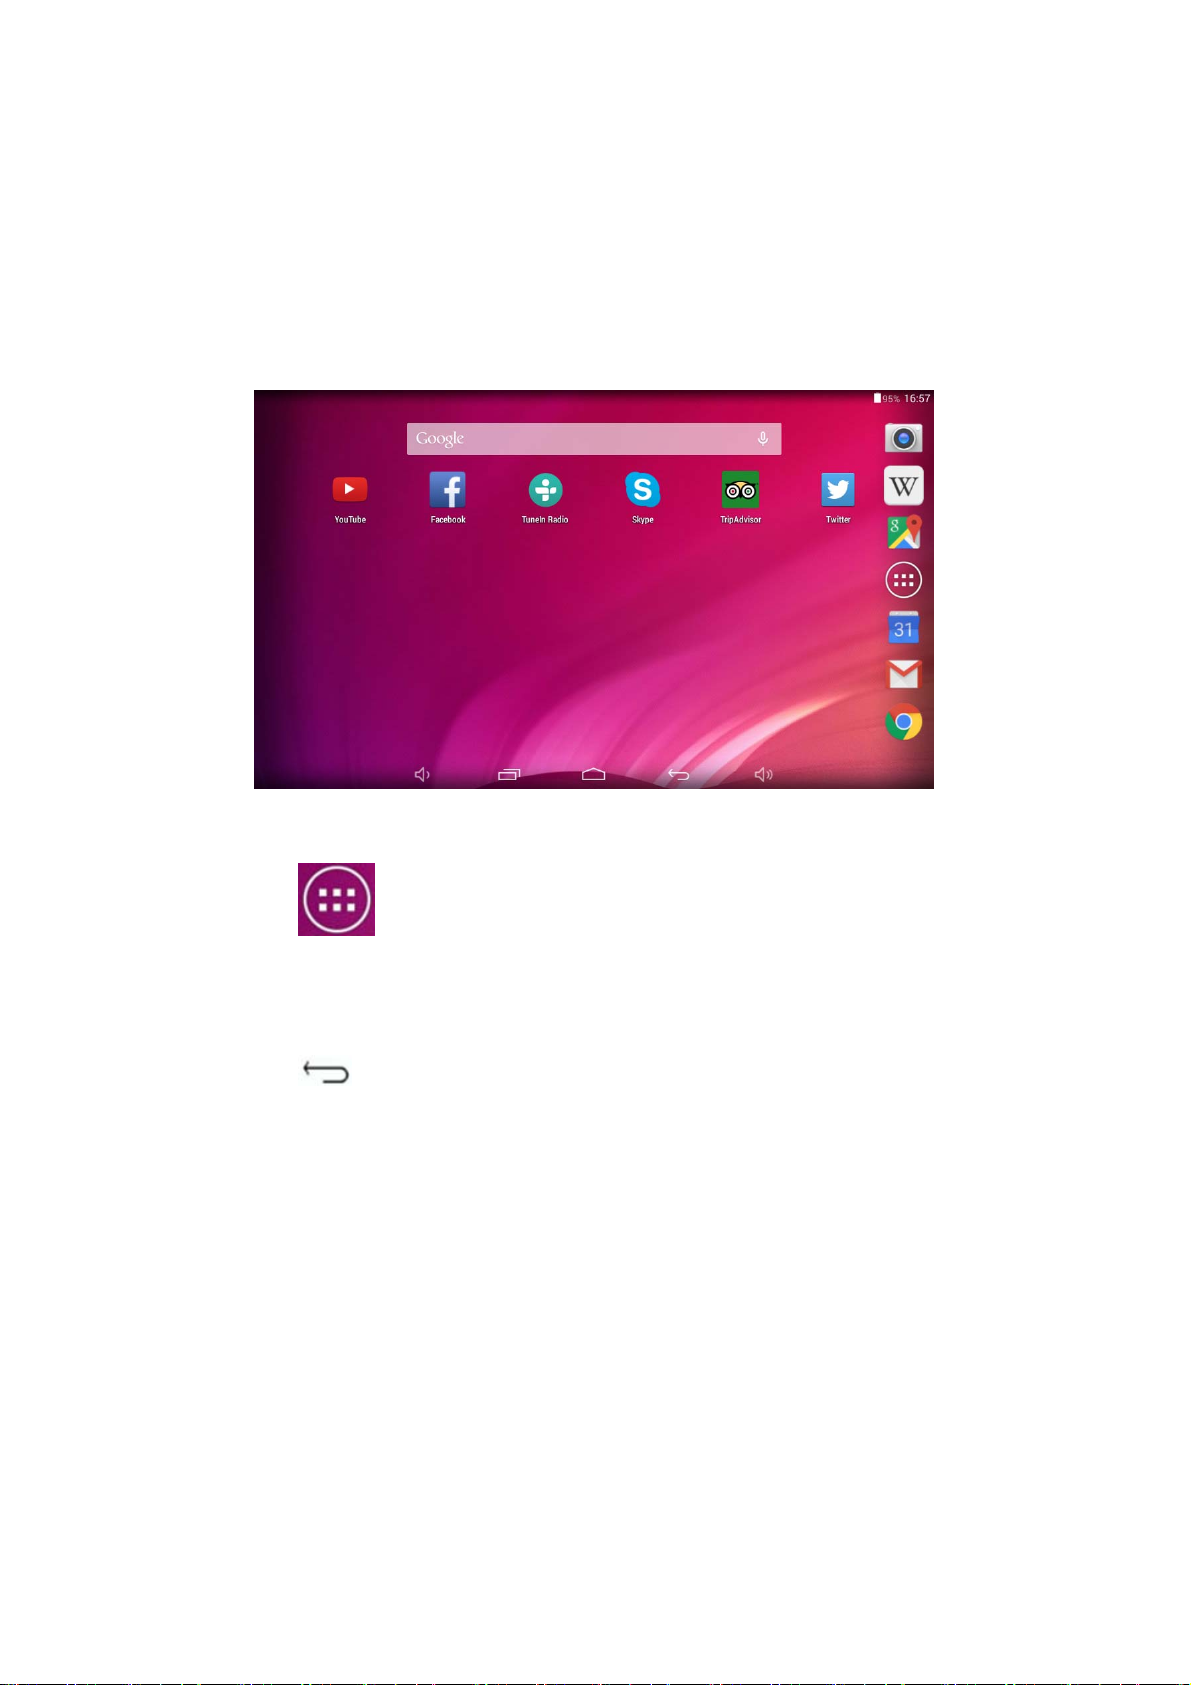
The status bar and navigation buttons are always visible, no matter which
Home screen you can currently viewing.
5
The Desktop contains shortcuts to your most-used applications and widgets
Touch the screen icon to quickly search the World Wide Web using Google.
The
icon will launch the Application menu.
The status bar displays system information, such as current time, wireless
connectivity and battery.
Touch to Expand the status bar for more detailed information.
The
but to n moves back one step to the previous menu/page.
Page 7

The but to ns returns immediately to the Android desktop.
The
button display a menu of recently opened applications.
Settings Menu
The settings menu allows you to adjust Tablet system configuration.
To change setti ngs:
1. Touch the "Settings"
menu icon on the Application menu. The
Settings menu will open.
6
2. Guide your finger up or down the left side of the screen to scroll through the
list of available categories.
3. Touch a category title to view further options on the right side of the screen.
Wi-Fi - Connect to /disconnect from wireless networks, view connection status
Data usage - view current usage for each application
Sound - Change volume, touch sound, screen lock sounds etc
Display - Change brightness, wallpaper, sleep settings, font size etc
Storage - Manage NAND and Micro SD card, view available capacity etc
Battery - See battery status and powered-on time
Apps - Manage applications, running services etc
Location services - approximate location detection
Security - Change screen lock type, encryption, password, credential storage etc
Language & input Select language, add to the dictionary, edit on-screen keyboard settings,
vocal search, etc
Backup & reset - Backup & restore data, perform factory reset, etc
Page 8

Date & time - Set date, time zone, time, clock format etc
Accessibility - Set up large text, auto-rotate screen, speak password etc
Print – online printing services manager (ex. Google Cloud Print)
About tablet - Information about your Android device
How to Use TF card
1. Insert the TF card into the TF card slot. Gently push TF card into slot
until it clicks into place.
2. A prompt will be seen on the screen saying “ Preparing SD card “
Removing TF card
1. Close all applications and documents which have been opened from
the TF card.
3. Select “Setting” and find “ Storage” then click “Unmount SD card”.
4. A prompt will be seen on the screen saying “ SD card safe to remove”
5. Gently press the TF card to remove and pull out the TF card.
Note: Insert the TF card in correct position, otherwise it will damage the
card and the slot.
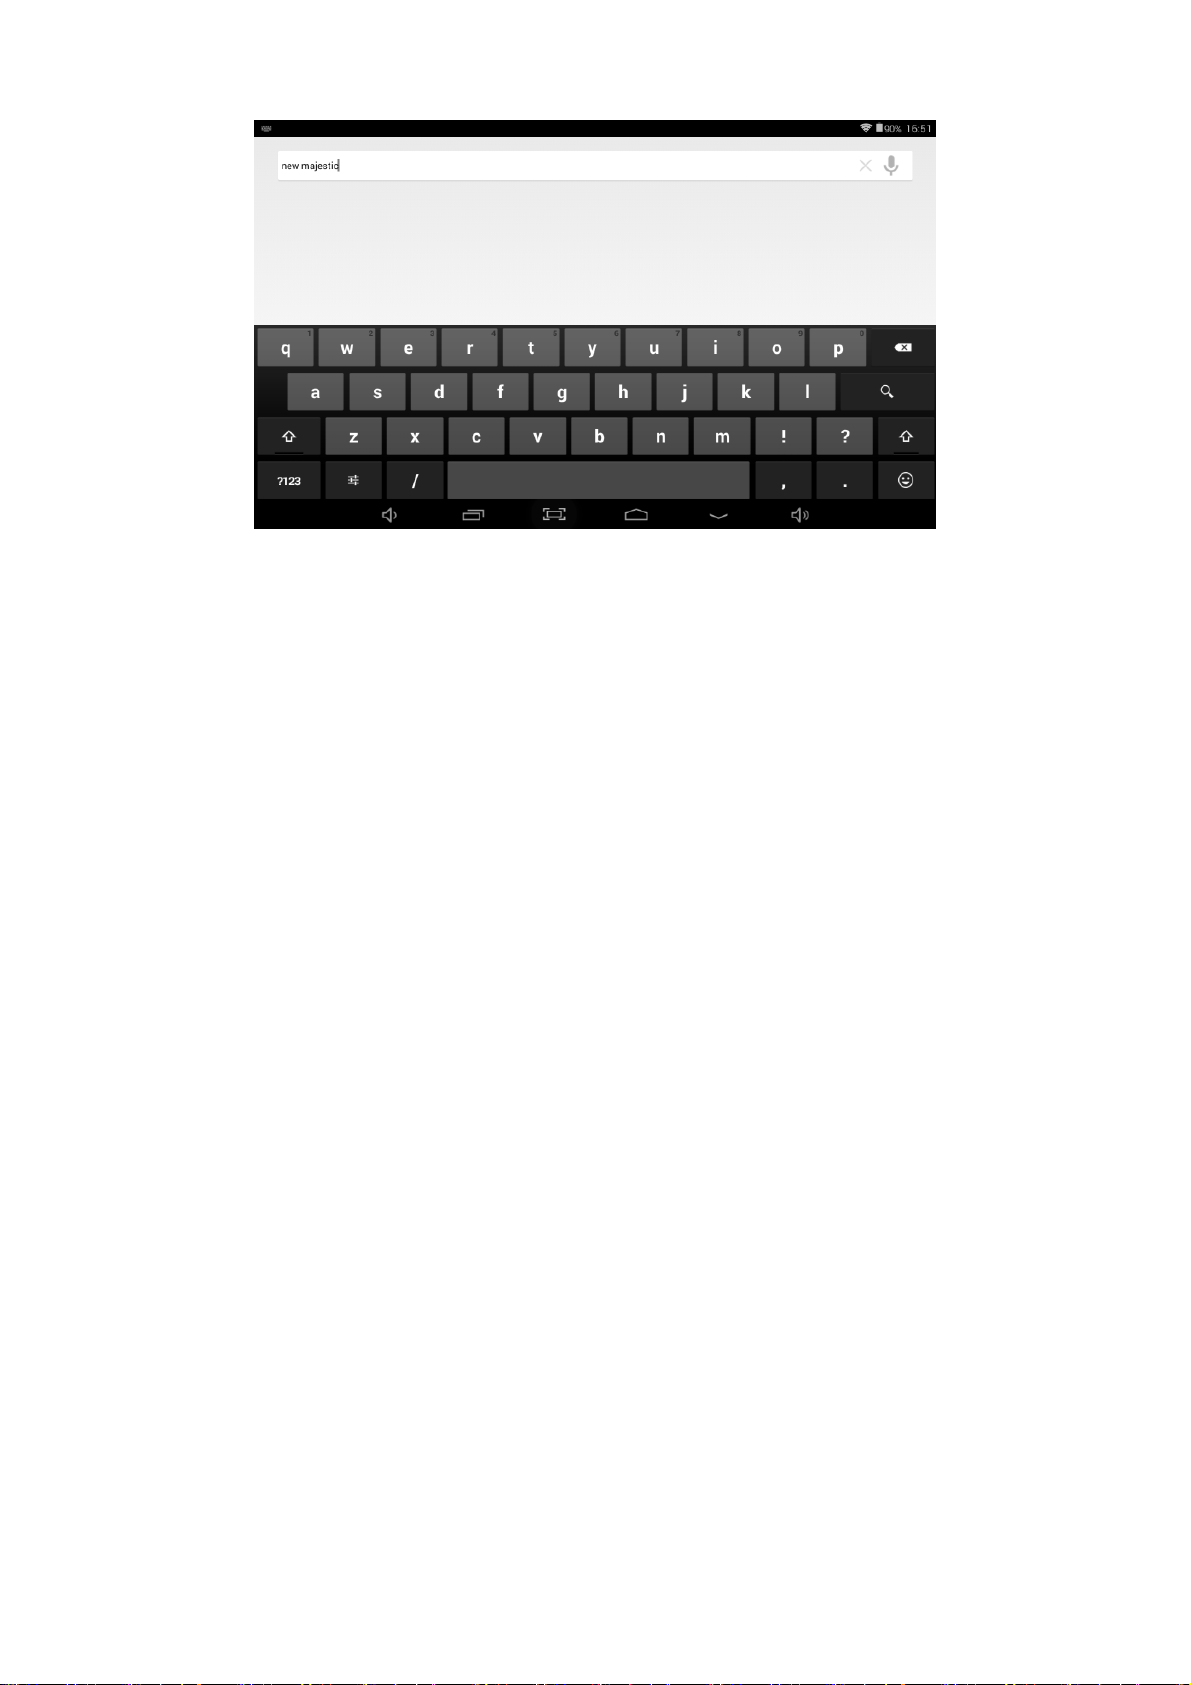
Software Keyboard
The tablet has a software keyboard which automatically show up
when you tap the place on screen where text or number are to be
entered.
Page 9
Touch Screen
The touch screen responds to finger touch.
Note: don’t place any object on the touch screen for it may damage or
crush the screen.
Single Click: single click one icon to choose the icon or option you want.
Long Press: press and hold one icon to make appear a menu related to
the executed function (if available).
Drag: drag on the screen and you can move between magic cube sides or
drag the application icons into the shortcut bar.
8
How to connect with computer
Note: Turn on your Tablet before connect the Tablet to PC by USB cable.
Page 10
1 Use USB cable to connect MID with computer. System will notice
USB connected on bottom of screen.
2 The computer will detect an external disc named “rk3026”; this is the
internal memory of the tablet.
3. Then the USB connection has been successfully.
9
Connection to Internet
Wireless:
1 Select “ Settings”
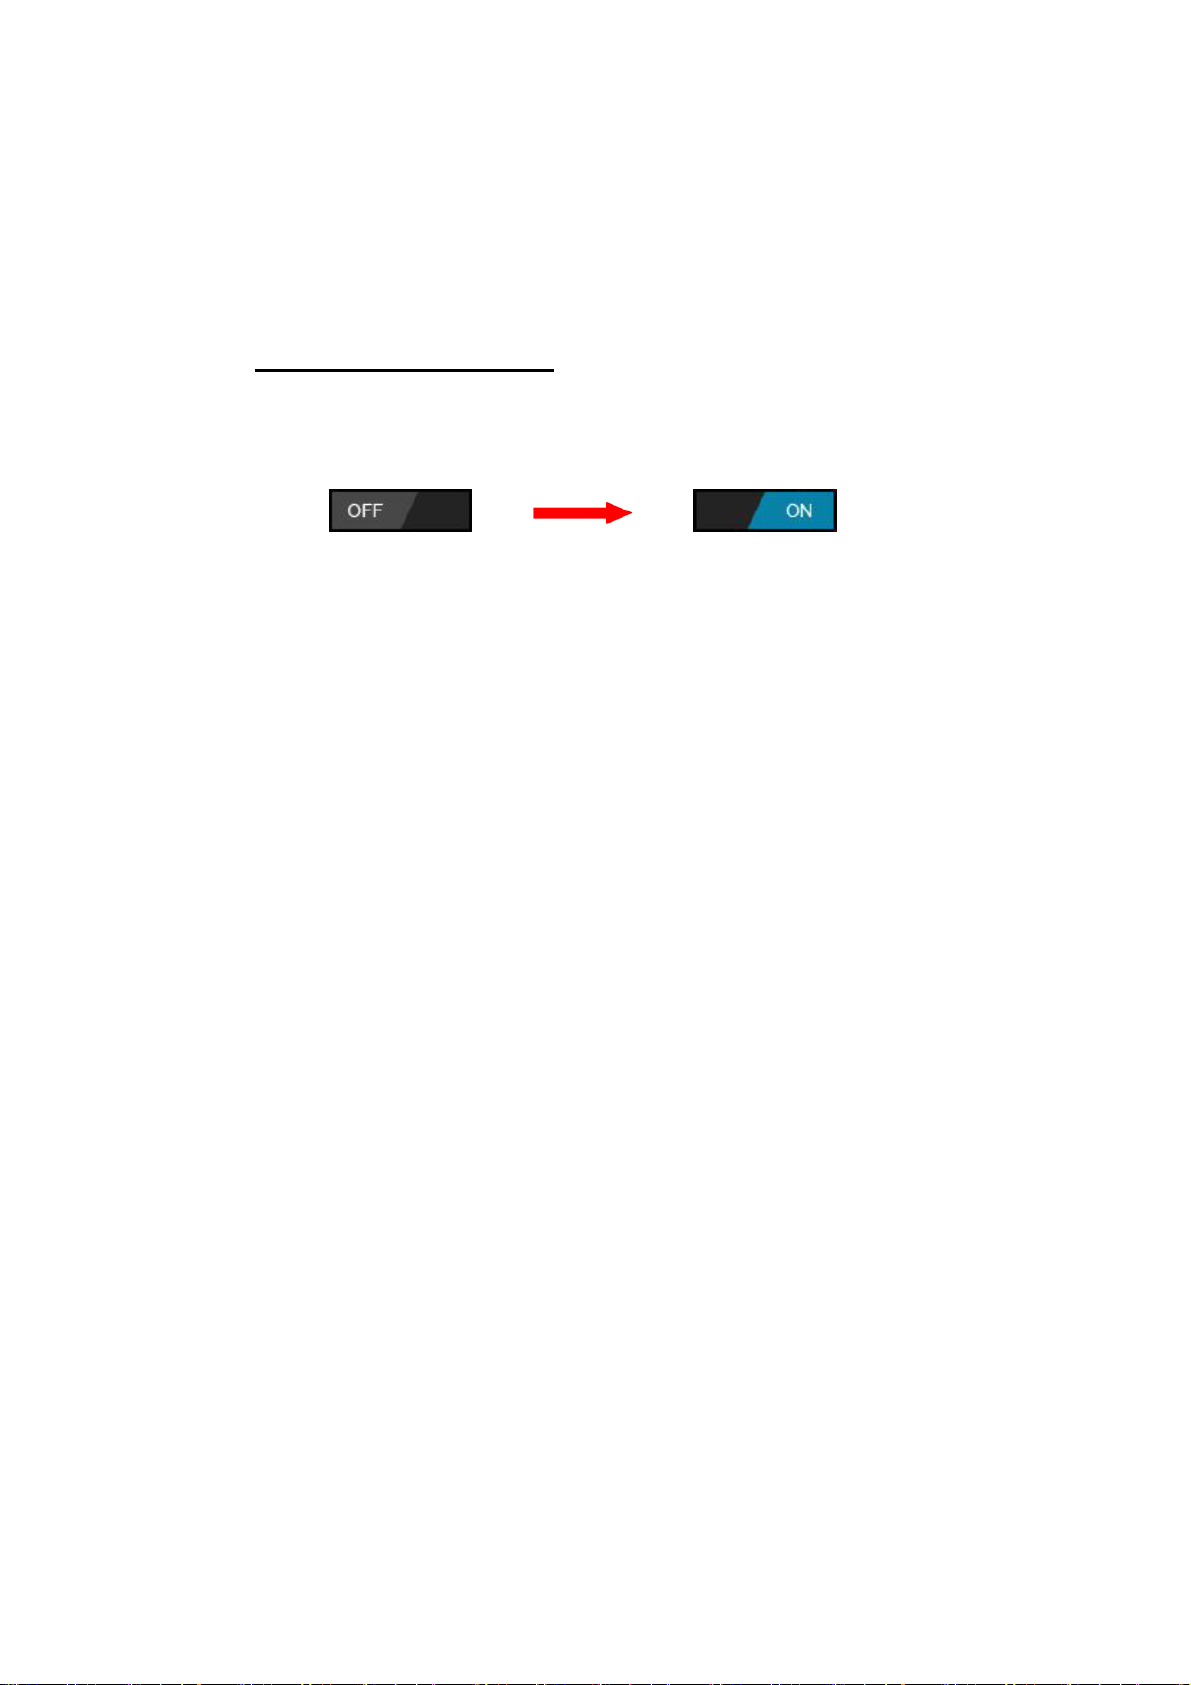
2 Select “Wi-Fi” and slide OFF to ON status.
3 All detected wireless networks in the area will be listed, Click to select
desired wireless connection.
4 Enter WEP key or network key if necessary.
5 Once connected to a wireless network, settings will be saved
6 Wireless icon will appear on the taskbar when connected
successfully.
Note: when the tablet detects the same wireless network in the future, the
device will connect to the network automatically with same password
record.
10
Page 11
Camera
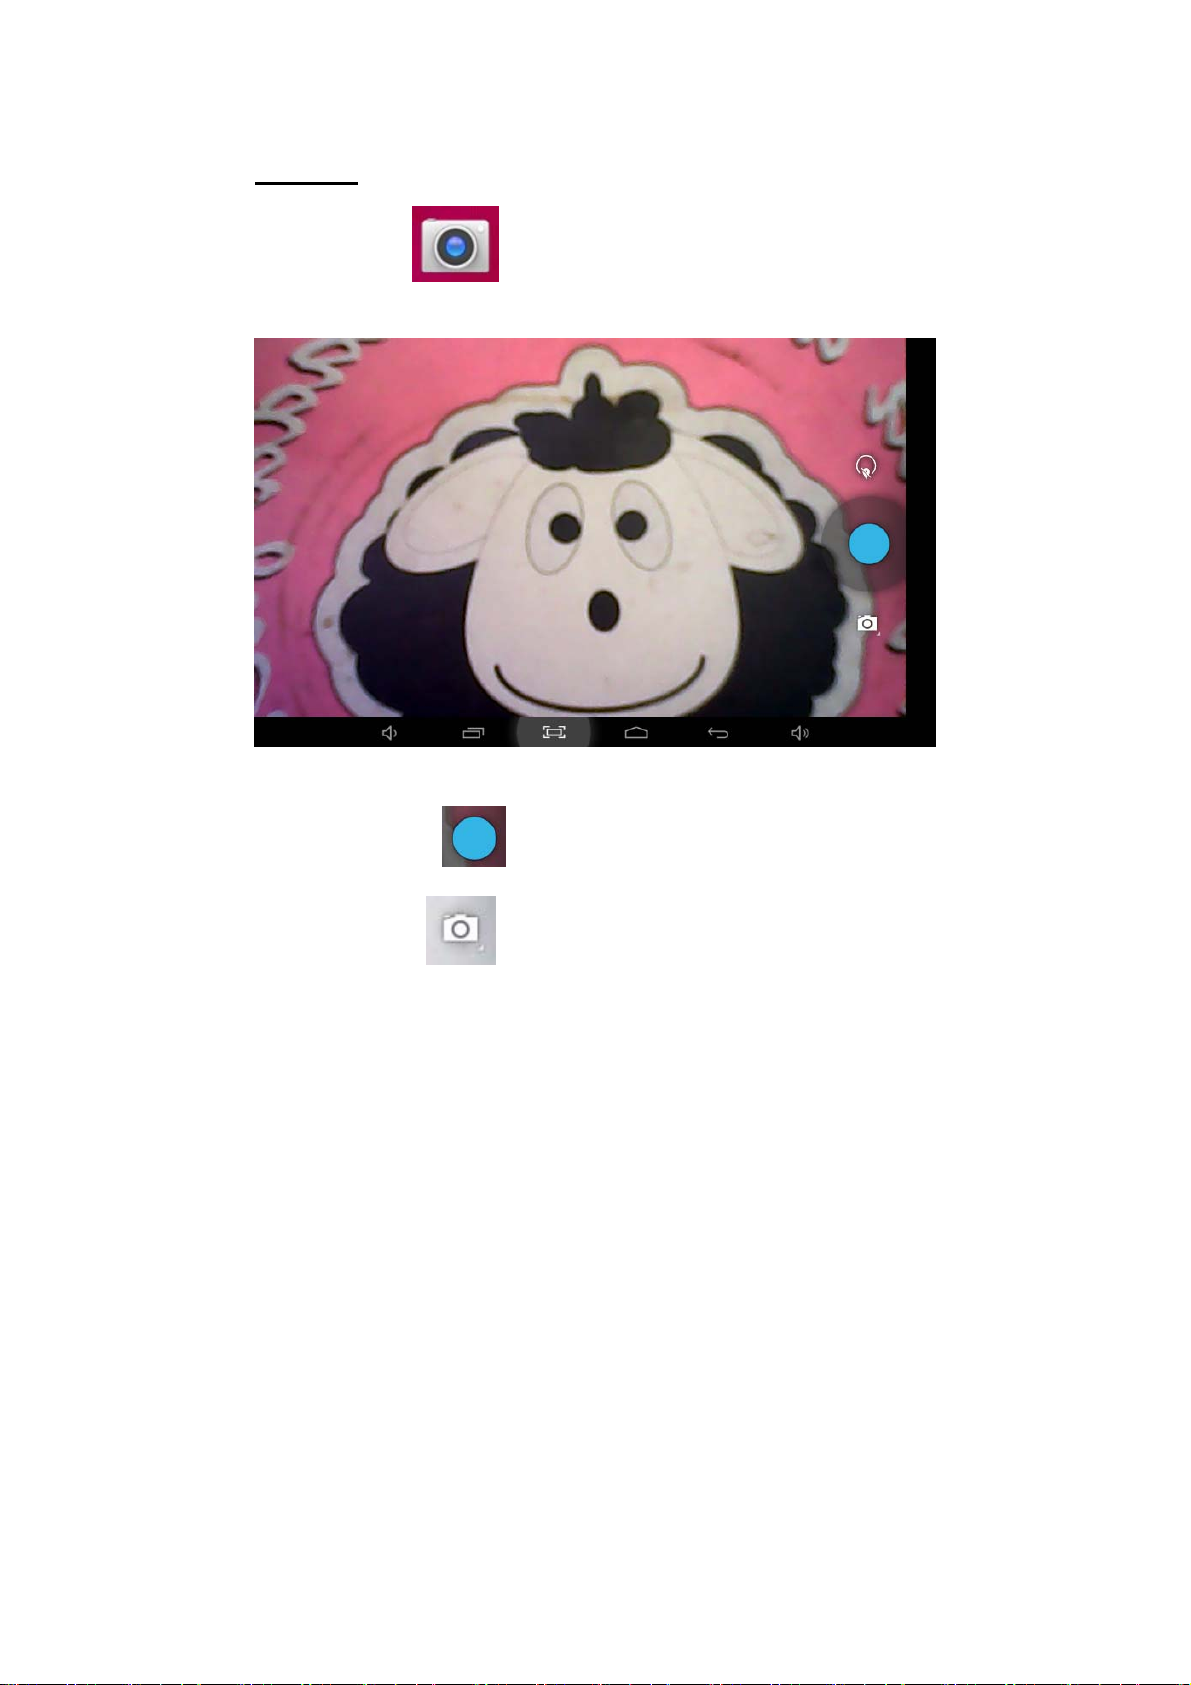
Touch the icon to enter camera mode and the interface is
shown as follows:
1. Touch the icon
2. Move the icon
recording mode.
in the middle to take photo
and you can switch camera mode to camera
Page 12
3. touch the icon to start video recording.
11
Trouble Shooting
Close Application
All running applications take up system memory and will slow down
system response. Please shut down all idle applications to release
memory and get the system speed back to normal.
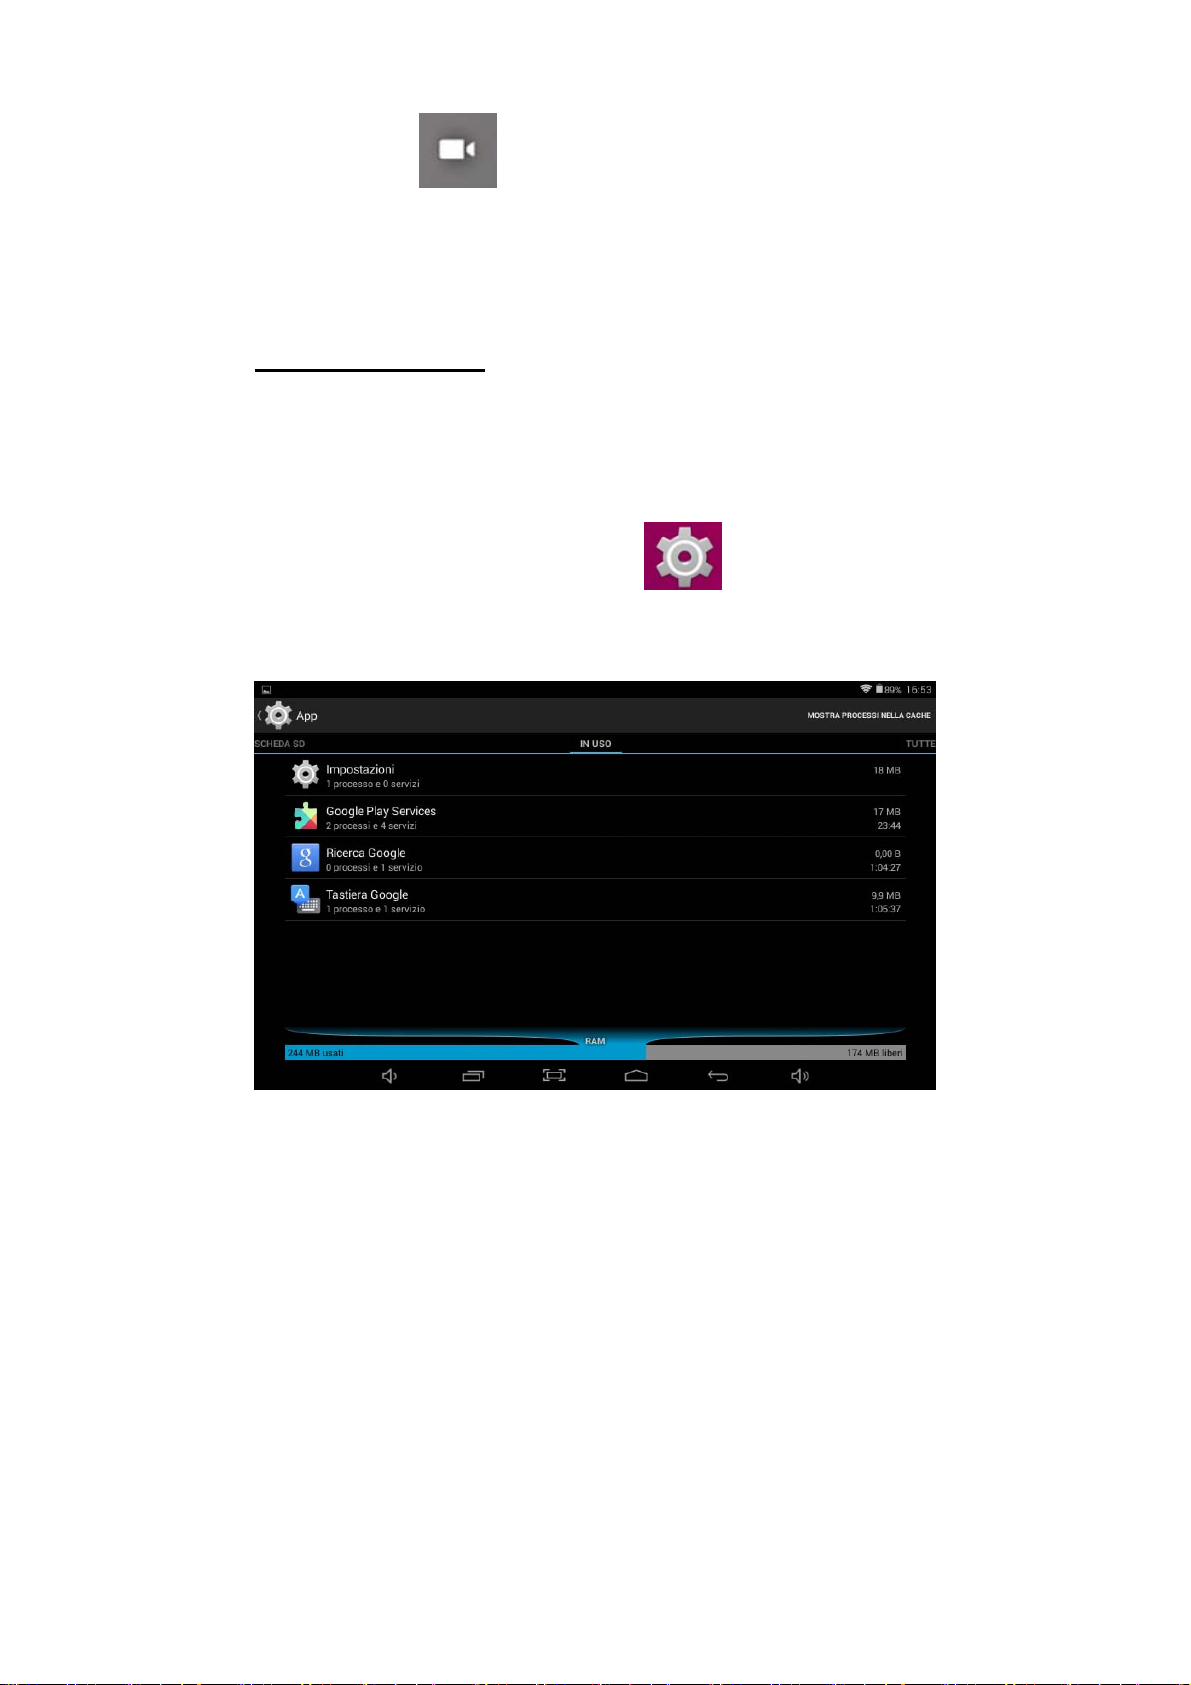
To close the application, click the icon
enter the system configuration interface. Select the Application →
Running services and the interface is shown as follows:
on the shortcut bar to
Page 13

Tap the application you want to close. A pop-up window will be displayed.
Tap “Stop” to close that application.
12
Mandatory Power off
1. Press and hold the power button for 5 seconds and the device will be
powered off.
2. Press the reset button on the back and the device will be forced to be
powered off.
Restore Default Setting
If you want to reset the factory setting and erase all materials, please
press Settings → Privacy → Factory data reset.
** Warning: Factory data reset setting will delete your data and
configuration of system and applications from downloading.
**Please use this function carefully.
13
WARNINGS
- Do not upgrade the operating system with new or different versions,
the device could be damaged.
- The guide to applications use, if available, will be directly inserted in
the application by the developers. New Majestic doesn’t take charge
of possible errors found in the online guides.
- All brands and copyright are property of the related owners.
- New Majestic Spa is not responsible for the problems of
incompatibility found during the use of software developed by third
party. New Majestic Spa declines all responsibilities on the breach of
copyright from the user.
Page 14

Any Changes or modifications not expressly approved by the party
responsible for compliance could void the user's authority to operate the
equipment.
This device complies with part 15 of the FCC Rules. Operation is subject to
the following two conditions: (1) This device may not cause harmful
interference, and (2) this device must accept any interference received,
including interference that may cause undesired operation.
FCC Radiation Exposure Statement:
This equipment complies with FCC radiation exposure limits set forth
for an uncontrolled environment .
This transmitter must not be co-located or operating in conjunction with any
other antenna or transmitter.
Note: This equipment has been tested and found to comply with the limits for
a Class B digital device, pursuant to part 15 of the FCC Rules. These limits
are designed to provide reasonable protection against harmful interference
in a residential installation. This equipment generates, uses and can radiate
radio frequency energy and, if not installed and used in accordance with the
instructions, may cause harmful interference to radio communications.
However, there is no guarantee that interference will not occur in a particular
installation. If this equipment does cause harmful interference to radio or
television reception, which can be determined by turning the equipment off
and on, the user is encouraged to try to correct the interference by one or
more of the following measures:
—Reorient or relocate the receiving antenna.
Page 15

—Increase the separation between the equipment and receiver.
—Connect the equipment into an outlet on a circuit different from that to
which the receiver is connected.
- —Consult the dealer or an experienced radio/TV technician for help.
 Loading...