

Page 1

Installing the Maintenance box
The Maintenance box is already installed when the product is shipped.
Read the handling instructions carefully before installing the Maintenance box.
See "Cautions on the Ink Cartridge / Maintenance box" on page 6
CAUTION
Replacing Maintenance Box
While using the product, waste ink is collected in the Maintenance box. The status of the Maintenance box is
shown as follows.
• MB NEAR FULL
• REPLACE MB
MB NEAR FULL
When there is not much free space in the maintenance box, the Ink LED flashes and [MB NEAR FULL] is
displayed on the LCD.
When “MB NEAR FULL” is displayed, prepare to replace the maintenance box.
The number of papers that can be printed before status changes from “MB NEAR FULL” to “REPLACE MB”
depends on usage conditions.
.
When “INK LOW LED” is set to not be displayed, the Ink LED does not flash.
46
Page 2
Chapter 2 Setup
REPLACE MB
When there is no more free space in the maintenance box, the Ink LED is lit, [REPLACE MB] is displayed on
the LCD and the product changes to offline.
Change to a Maintenance box with enough free space using the following steps.
Check that the INK LED on the printer is lit up, and check that the maintenance box
1
displays “REPLACE MAINT B” on the LCD.
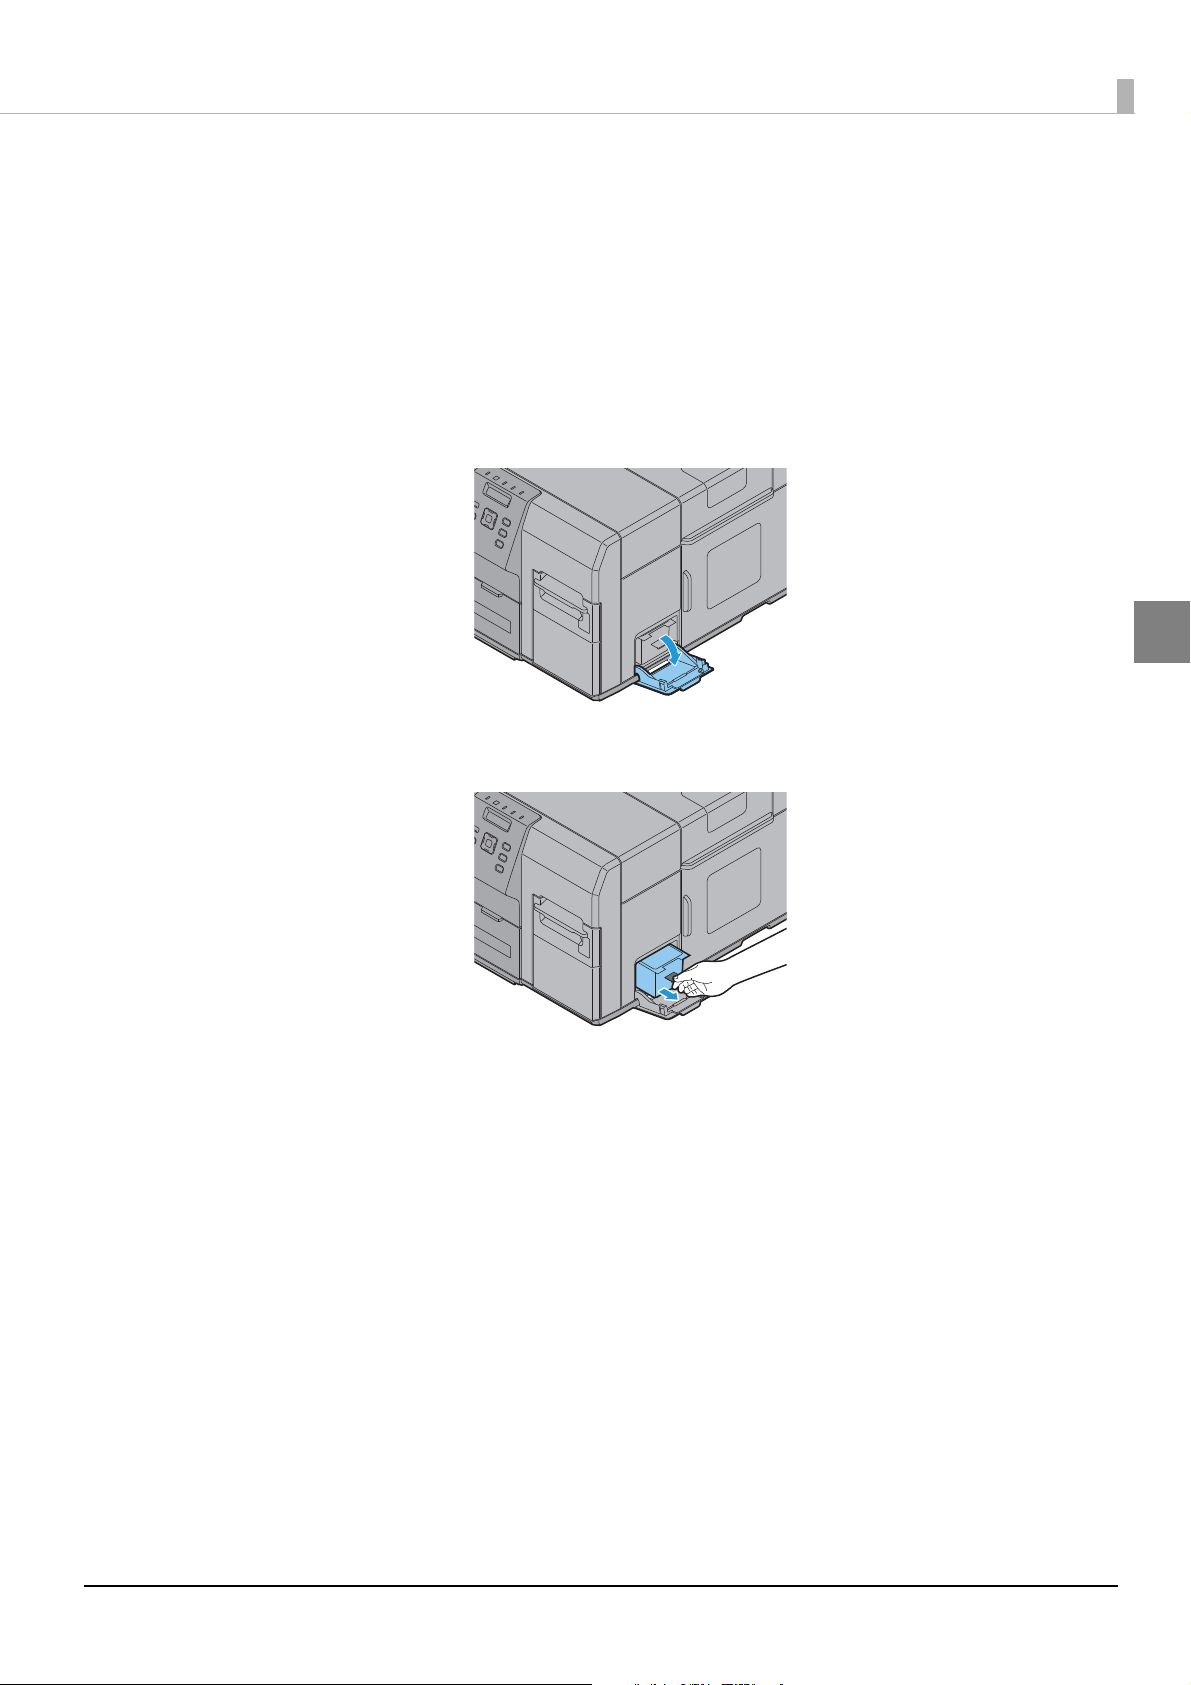
Open the maintenance box cover towards you.
2
2
Pull out the used maintenance box towards you.
3
47
Page 3

Put the maintenance box into the plastic bag for disposal of used maintenance box.
4
Push the new maintenance box gently in, with its labeled surface upward.
5
Close the maintenance box cover.
6
When the maintenance box replacement is completed, the INK LED turns off, and
7
printing can be performed.
The product goes into the pause state. Push the Pause button to release it, and the
8
product returns to the idle state.
48
 Loading...