

Page 1

MF1215-01
CMOS 8-BIT SINGLE CHIP MICROCOMPUTER
E0C88832/88862 T
ECHNICAL
M
ANU AL
E0C88832/88862 Technical Hardware
Page 2

NOTICE
No part of this material may be reproduced or duplicated in any form or by any means without the written
permission of Seiko Epson. Seiko Epson reserves the right to make changes to this material without notice.
Seiko Epson does not assume any liability of any kind arising out of any inaccuracies contained in this material
or due to its application or use in any product or circuit and, further, there is no representation that this material
is applicable to products requiring high level reliability, such as medical products. Moreover, no license to any
intellectual property rights is granted by implication or otherwise, and there is no representation or warranty that
anything made in accordance with this material will be free from any patent or copyright infringement of a third
party. This material or portions thereof may contain technology or the subject relating to strategic products under
the control of the Foreign Exchange and Foreign Trade Law of Japan and may require an export license from
the Ministry of International Trade and Industry or other approval from another government agency.
© SEIKO EPSON CORPORATION 2000 All rights reserved.
Page 3

E0C88832/88862 TECHNICAL MANUAL EPSON i
CONTENTS
Contents
1 INTRODUCTION .............................................................................................. 1
1.1 Configuration.....................................................................................................................1
1.2 Features .............................................................................................................................2
1.3 Block Diagram ...................................................................................................................3
1.4 Pin Layout Diagram ..........................................................................................................4
1.5 Mask Option.......................................................................................................................8
2 POWER SUPPLY.............................................................................................. 11
2.1 Operating Voltage.............................................................................................................11
2.2 Internal Power Supply Circuit ..........................................................................................11
2.3 Heavy Load Protection Mode ...........................................................................................12
3 CPU AND MEMORY CONFIGURATION ..................................................... 13
3.1 CPU ..................................................................................................................................13
3.2 Internal Memory ...............................................................................................................13
3.2.1 ROM ........................................................................................................................................13
3.2.2 RAM......................................................................................................................................... 13
3.2.3 I/O memory.............................................................................................................................. 13
3.2.4 Display memory....................................................................................................................... 13
3.3 Exception Processing Vectors ..........................................................................................13
3.4 CC (Customized Condition Flag) .....................................................................................14
4 INITIAL RESET ............................................................................................... 15
4.1 Initial Reset Factors..........................................................................................................15
4.1.1 RESET terminal....................................................................................................................... 15
4.1.2 Simultaneous LOW level input at input port terminals K00–K03...........................................15
4.1.3 Supply voltage detection (SVD) circuit ................................................................................... 16
4.1.4 Initial reset sequence...............................................................................................................16
4.2 Initial Settings After Initial Reset......................................................................................17
5 PERIPHERAL CIRCUITS AND THEIR OPERATION................................ 18
5.1 I/O Memory Map ..............................................................................................................18
5.2 Watchdog Timer................................................................................................................27
5.2.1 Configuration of watchdog timer ............................................................................................ 27
5.2.2 Interrupt function ....................................................................................................................27
5.2.3 Control of watchdog timer ......................................................................................................27
5.2.4 Programming notes .................................................................................................................27
5.3 Oscillation Circuits and Operating Mode ........................................................................28
5.3.1 Configuration of oscillation circuits ....................................................................................... 28
5.3.2 Mask option .............................................................................................................................28
5.3.3 OSC1 oscillation circuit ..........................................................................................................28
5.3.4 OSC3 oscillation circuit ..........................................................................................................29
5.3.5 Operating mode ....................................................................................................................... 29
5.3.6 Switching the CPU clocks ....................................................................................................... 30
5.3.7 Control of oscillation circuit and operating mode.................................................................. 31
5.3.8 Programming notes .................................................................................................................32
5.4 Input Ports (K ports).........................................................................................................33
5.4.1 Configuration of input ports....................................................................................................33
5.4.2 Mask option .............................................................................................................................33
5.4.3 Interrupt function and input comparison register................................................................... 34
Page 4

ii EPSON E0C88832/88862 TECHNICAL MANUAL
CONTENTS
5.4.4 Control of input ports .............................................................................................................. 36
5.4.5 Programming note................................................................................................................... 38
5.5 Output Ports (R ports) ......................................................................................................39
5.5.1 Configuration of output ports.................................................................................................. 39
5.5.2 Mask option ............................................................................................................................. 39
5.5.3 High impedance control .......................................................................................................... 39
5.5.4 DC output ................................................................................................................................39
5.5.5 Special output .......................................................................................................................... 39
5.5.6 Control of output ports ............................................................................................................ 42
5.5.7 Programming notes ................................................................................................................. 45
5.6 I/O Ports (P ports) ............................................................................................................46
5.6.1 Configuration of I/O ports....................................................................................................... 46
5.6.2 Mask option ............................................................................................................................. 46
5.6.3 I/O control registers and I/O mode ......................................................................................... 46
5.6.4 Control of I/O ports.................................................................................................................47
5.6.5 Programming note................................................................................................................... 47
5.7 Serial Interface .................................................................................................................48
5.7.1 Configuration of serial interface.............................................................................................48
5.7.2 Mask option ............................................................................................................................. 49
5.7.3 Transfer modes ........................................................................................................................ 49
5.7.4 Clock source ............................................................................................................................ 50
5.7.5 Transmit-receive control ......................................................................................................... 51
5.7.6 Operation of clock synchronous transfer ................................................................................52
5.7.7 Operation of asynchronous transfer ....................................................................................... 56
5.7.8 Interrupt function ....................................................................................................................60
5.7.9 Control of serial interface .......................................................................................................62
5.7.10 Programming notes ...............................................................................................................66
5.8 Clock Timer.......................................................................................................................67
5.8.1 Configuration of clock timer ................................................................................................... 67
5.8.2 Interrupt function ....................................................................................................................67
5.8.3 Control of clock timer ............................................................................................................. 69
5.8.4 Programming notes ................................................................................................................. 71
5.9 Stopwatch Timer ...............................................................................................................72
5.9.1 Configuration of stopwatch timer ........................................................................................... 72
5.9.2 Count up pattern...................................................................................................................... 72
5.9.3 Interrupt function ....................................................................................................................73
5.9.4 Control of stopwatch timer...................................................................................................... 74
5.9.5 Programming notes ................................................................................................................. 76
5.10 Programmable Timer........................................................................................................77
5.10.1 Configuration of programmable timer .................................................................................. 77
5.10.2 Count operation and setting basic mode...............................................................................77
5.10.3 Setting of input clock ............................................................................................................. 79
5.10.4 Timer mode............................................................................................................................ 79
5.10.5 Event counter mode ............................................................................................................... 80
5.10.6 Pulse width measurement timer mode................................................................................... 80
5.10.7 Interrupt function .................................................................................................................. 81
5.10.8 Setting of TOUT output ......................................................................................................... 81
5.10.9 Transmission rate setting of serial interface.........................................................................82
5.10.10 Control of programmable timer ..........................................................................................83
5.10.11 Programming notes ............................................................................................................. 88
5.11 LCD Controller.................................................................................................................89
5.11.1 Configuration of LCD controller ..........................................................................................89
5.11.2 Mask option ...........................................................................................................................89
5.11.3 LCD power supply................................................................................................................. 90
5.11.4 LCD driver ............................................................................................................................90
5.11.5 Display memory..................................................................................................................... 93
Page 5

E0C88832/88862 TECHNICAL MANUAL EPSON iii
CONTENTS
5.11.6 Display control ..................................................................................................................... 100
5.11.7 Control of LCD controller.................................................................................................... 101
5.11.8 Programming note................................................................................................................ 102
5.12 Sound Generator..............................................................................................................103
5.12.1 Configuration of sound generator........................................................................................ 103
5.12.2 Control of buzzer output.......................................................................................................103
5.12.3 Setting of buzzer frequency and sound level ........................................................................ 104
5.12.4 Digital envelope ................................................................................................................... 105
5.12.5 One-shot output ....................................................................................................................105
5.12.6 Control of sound generator ..................................................................................................106
5.12.7 Programming notes ..............................................................................................................108
5.13 Supply Voltage Detection (SVD) Circuit .........................................................................109
5.13.1 Configuration of SVD circuit ............................................................................................... 109
5.13.2 Operation of SVD circuit...................................................................................................... 109
5.13.3 Control of SVD circuit.......................................................................................................... 111
5.13.4 Programming notes ..............................................................................................................112
5.14 Interrupt and Standby Status ...........................................................................................113
5.14.1 Interrupt generation conditions ........................................................................................... 114
5.14.2 Interrupt factor flag..............................................................................................................114
5.14.3 Interrupt enable register ...................................................................................................... 115
5.14.4 Interrupt priority register and interrupt priority level......................................................... 115
5.14.5 Exception processing vectors ...............................................................................................116
5.14.6 Control of interrupt .............................................................................................................. 117
5.14.7 Programming notes ..............................................................................................................118
5.15 Notes for Low Current Consumption...............................................................................119
6 BASIC EXTERNAL WIRING DIAGRAM..................................................... 120
7 ELECTRICAL CHARACTERISTICS............................................................ 122
7.1 Absolute Maximum Rating...............................................................................................122
7.2 Recommended Operating Conditions ..............................................................................122
7.3 DC Characteristics ..........................................................................................................123
7.4 Analog Circuit Characteristics ........................................................................................124
7.5 Power Current Consumption ...........................................................................................127
7.6 AC Characteristics...........................................................................................................128
7.7 Oscillation Characteristics ..............................................................................................134
7.8 Characteristics Curves (reference value) ........................................................................135
8 PACKAGE ........................................................................................................ 142
8.1 Plastic Package................................................................................................................142
8.2 Ceramic Package .............................................................................................................144
9 PAD LAYOUT .................................................................................................. 145
9.1 Diagram of Pad Layout ...................................................................................................145
9.2 Pad Coordinates ..............................................................................................................147
10 PRECAUTIONS ON MOUNTING ................................................................. 149
Page 6

Page 7

E0C88832/88862 TECHNICAL MANUAL EPSON 1
1 INTRODUCTION
1 INTRODUCTION
The E0C88832/88862 microcomputer
features the E0C88 (Model 3) CMOS 8-bit core CPU
along with ROM, RAM, three different timers and a
serial interface with optional asynchronization or
clock synchronization.
The E0C88832/88862 fully operable over a wide
range of voltages, and can perform high speed
operations even at low voltage. Like all the
equipment in the E0C Family, these microcomputers have low power consumption.
1.1 Configuration
In this manual, the E0C88832/88862 is associated
with E0C88832 and E0C88862. In these models,
there are differences in built-in ROM capacity,
number of output ports and number of LCD drive
segments, but the other peripheral circuits are
made with the same configuration.
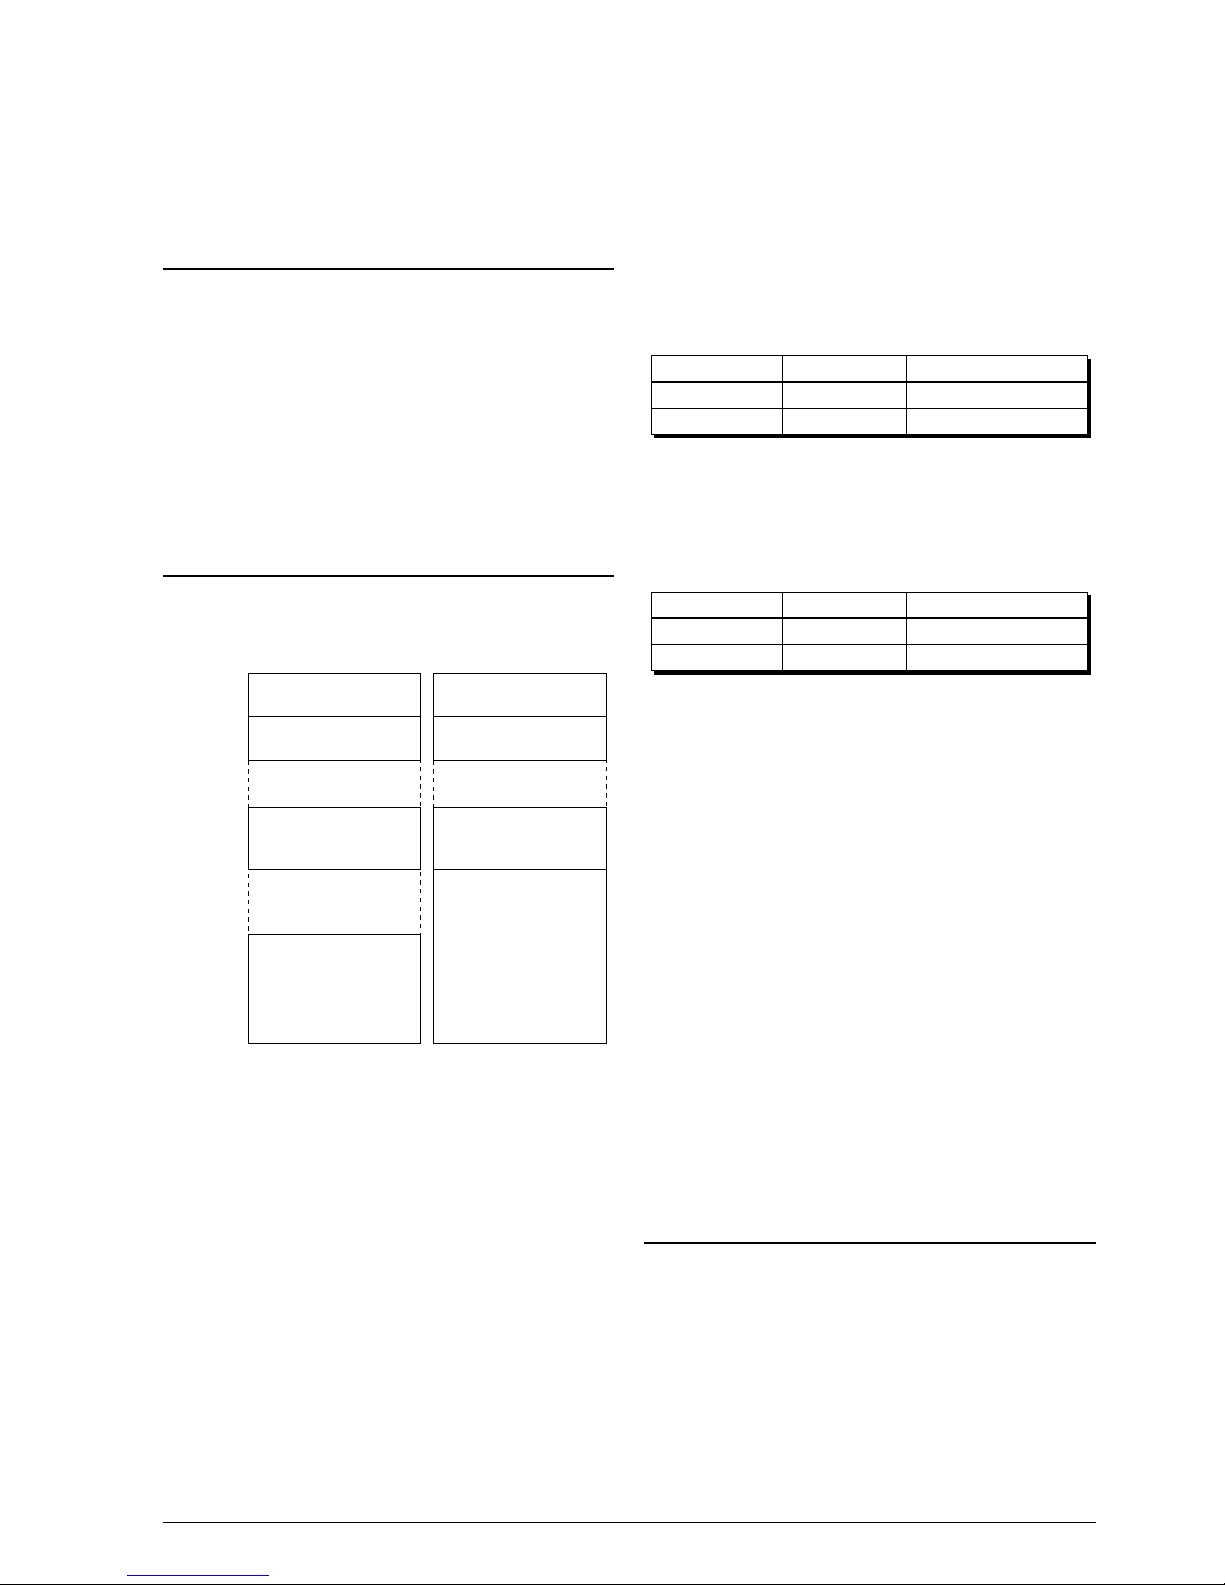
Table 1.1.1 Configuration
Model
E0C88832
E0C88862
Internal ROM
32K bytes
60K bytes
Output port
5 bits
4 bits
LCD segment
*
1
1,632 (Max.)
1,312 (Max.)
*1: Maximum number of drive segments
when the 32 common is selected.
Page 8

2 EPSON E0C88832/88862 TECHNICAL MANUAL
1 INTRODUCTION
1.2 Features
Table 1.2.1 lists the features of the E0C88832/88862.
Table 1.2.1 Main features
Model
Core CPU
OSC1 Oscillation circuit
OSC3 Oscillation circuit
Instruction set
Min. instruction execution time
Internal ROM capacity
Internal RAM capacity
Input port
Output port
I/O port
Serial interface
Timer
Power supply circuit to
drive liquid crystals
LCD driver
Sound generator
Watchdog timer
Supply voltage detection
(SVD) circuit
Interrupt
Supply voltage
Consumed
current
Supply form
E0C88 (MODEL3) CMOS 8-bit core CPU
Crystal oscillation circuit/CR oscillation circuit/external clock input 32.768 kHz (Typ.)
Crystal oscillation circuit/ceramic oscillation circuit/CR oscillation circuit/external clock input 8.2 MHz (Max.)
608 types (usable for multiplication and division instructions)
0.244 µsec/8.2 MHz (2 clock)
32K bytes
1.5K bytes/RAM, 3,216 bits/display memory
9 bits (1 bit can be set for event counter external clock input)
5 bits (can be set for buzzer output, TOUT signal and
FOUT output)
8 bits (4 bits can be set for serial interface input/output)
1ch (Optional clock synchronous system or asynchronous system)
Programmable timer (8 bits):
(1ch can be set as a an event counter or 2ch as a 16 bits programmable timer for 1ch)
Clock timer (8 bits):
Stopwatch timer (8 bits):
Built-in (booster type, 5 potentials/4 potentials)
Dot matrix type (compatible with 5 × 8 or 5 × 5 fonts)
51 segments × 32 common
67 segments × 16 common
67 segments × 8 common
Envelope function, equipped with volume control
Built-in
Can detect up to 16 different voltage levels
External interrupt:
Internal interrupt:
Normal mode:
Low power mode:
High speed mode:
60K bytes
1.5K bytes/RAM, 2,736 bits/display memory
4 bits (can be set for buzzer output and TOUT signal
output)
41 segments × 32 common
57 segments × 16 common
57 segments × 8 common
E0C88832 E0C88862
0.3 µA (Typ./normal mode)
1.5 µA (Typ./normal mode)
9 µA (Typ./normal mode)
1.1 mA (Typ./normal mode)
QFP8-128pin, QFP15-128pin or chip
SLEEP
HALT
In operation
In operation
2ch
1ch
1ch
Input interrupt
Timer interrupt
Serial interface interrupt
2.4 V–5.5 V (Max. 4.2 MHz)
1.8 V–3.5 V (Max. 80 kHz)
3.5 V–5.5 V (Max. 8.2 MHz)
2 systems (3 types)
3 systems (9 types)
1 system (3 types)
(32.768 kHz)
(32.768 kHz)
(4 MHz)
Page 9

E0C88832/88862 TECHNICAL MANUAL EPSON 3
1 INTRODUCTION
1.3 Block Diagram
Core CPU E0C88
Interrupt Controller
Input Port
Oscillator
OSC1, 2
OSC3, 4
Reset/Test
RESET
TEST
Watchdog Timer
K00–K07
K10 (EVIN)
I/O Port
Serial Interface
Output Port
Programmable Timer
/Event Counter
Clock Timer
Stopwatch Timer
Power Generator
V
DD
V
SS
V
D1
V
OSC
VC1–V
C5
Supply Voltage Detector
RAM
1.5KB
LCD Driver
ROM
60KB
P10 (SIN)
P11 (SOUT)
P12 (SCLK)
P13 (SRDY)
R26 (TOUT *)
R50 (BZ)
R27 (TOUT)
R51 (BZ *)
Sound Generator
SEG0–SEG40
COM16–COM31 (SEG66–SEG51)
COM0–COM15
P14–P17
CA–CG
∗ Selectable by mask option
E0C88832
Fig. 1.3.1 E0C88832 block diagram
E0C88862
Fig. 1.3.2 E0C88862 block diagram
Core CPU E0C88
Interrupt Controller
Input Port
Oscillator
OSC1, 2
OSC3, 4
Reset/Test
Watchdog Timer
K00–K07
K10 (EVIN)
I/O Port
Serial Interface
Output Port
Programmable Timer
/Event Counter
Clock Timer
Stopwatch Timer
Power Generator
Supply Voltage Detector
RAM
1.5KB
LCD Driver
ROM
32KB
P10 (SIN)
P11 (SOUT)
P12 (SCLK)
P13 (SRDY)
Sound Generator
SEG0–SEG50
COM16–COM31 (SEG66–SEG51)
COM0–COM15
P14–P17
R26 (TOUT *)
R34 (FOUT)
R50 (BZ)
R27 (TOUT)
R51 (BZ *)
∗ Selectable by mask option
RESET
TEST
V
DD
V
SS
V
D1
V
OSC
VC1–V
C5
CA–CG
Page 10

4 EPSON E0C88832/88862 TECHNICAL MANUAL
1 INTRODUCTION
1.4 Pin Layout Diagram
Fig. 1.4.1 E0C88832 pin layout
E0C88832
QFP8-128pin QFP15-128pin
6596
33
64
INDEX
321
128
97
6596
33
64
INDEX
321
128
97
Pin No. Pin name
1
2
3
4
5
6
7
8
9
10
11
12
13
14
15
16
17
18
19
20
21
22
23
24
25
26
27
28
29
30
31
32
Pin No. Pin name
OSC3
OSC4
V
OSC
V
D1
V
DD
V
SS
OSC1
OSC2
TEST
RESET
K10/EVIN
K07
K06
K05
K04
K03
K02
K01
K00
P17
P16
P15
P14
P13/SRDY
P12/SCLK
P11/SOUT
P10/SIN
R26/TOUT
R27/TOUT
R34/FOUT
R50/BZ
R51/BZ
COM19/SEG63
COM18/SEG64
COM17/SEG65
COM16/SEG66
COM15
COM14
COM13
COM12
COM11
COM10
COM9
COM8
COM7
COM6
COM5
COM4
COM3
COM2
COM1
COM0
CG
CF
CE
CD
CC
CB
CA
V
C5
V
C4
V
C3
V
C2
V
C1
Pin No. Pin name
65
66
67
68
69
70
71
72
73
74
75
76
77
78
79
80
81
82
83
84
85
86
87
88
89
90
91
92
93
94
95
96
N.C.
SEG0
SEG1
SEG2
SEG3
SEG4
SEG5
SEG6
SEG7
SEG8
SEG9
SEG10
SEG11
SEG12
SEG13
SEG14
SEG15
SEG16
SEG17
SEG18
SEG19
SEG20
SEG21
SEG22
SEG23
SEG24
SEG25
SEG26
SEG27
SEG28
SEG29
SEG30
N.C.: No Connection
Pin No. Pin name
97
98
99
100
101
102
103
104
105
106
107
108
109
110
111
112
113
114
115
116
117
118
119
120
121
122
123
124
125
126
127
128
SEG31
SEG32
SEG33
SEG34
SEG35
SEG36
SEG37
SEG38
SEG39
SEG40
SEG41
SEG42
SEG43
SEG44
SEG45
SEG46
SEG47
SEG48
SEG49
SEG50
COM31/SEG51
COM30/SEG52
COM29/SEG53
COM28/SEG54
COM27/SEG55
COM26/SEG56
COM25/SEG57
COM24/SEG58
COM23/SEG59
COM22/SEG60
COM21/SEG61
COM20/SEG62
33
34
35
36
37
38
39
40
41
42
43
44
45
46
47
48
49
50
51
52
53
54
55
56
57
58
59
60
61
62
63
64
Page 11

E0C88832/88862 TECHNICAL MANUAL EPSON 5
1 INTRODUCTION
Table 1.4.1 E0C88832 pin description
Pin No.
V
DD
VSS
VD1
VOSC
VC1–VC5
CA–CG
OSC1
OSC2
OSC3
OSC4
K00–K07
K10/EVIN
R26/TOUT
R27/TOUT
R34/FOUT
R50/BZ
R51/BZ
P10/SIN
P11/SOUT
P12/SCLK
P13/SRDY
P14–P17
COM0–COM15
COM16–COM31
/SEG66–SEG51
SEG0–SEG50
RESET
TEST
∗1
Pin name In/out Function
37
38
36
35
32–28
27–21
39
40
33
34
51–44
43
60
61
62
63
64
59
58
57
56
55–52
20–5
4–1, 128–117
66–116
42
41
–
–
–
–
O
–
I
O
I
O
I
I
O
O
O
O
O
I/O
I/O
I/O
I/O
I/O
O
O
O
I
I
Power supply (+) terminal
Power supply (GND) terminal
Regulated voltage for internal circuit
Regulated voltage for OSC1 oscillation circuit
LCD drive voltage output terminals
Voltage boost/reduce-capacitor connection terminals for LCD
OSC1 oscillation input terminal
(select crystal oscillation/CR oscillation/external clock input with mask option)
OSC1 oscillation output terminal
OSC3 oscillation input terminal
(select crystal/ceramic/CR oscillation/external clock input with mask option)
OSC3 oscillation output terminal
Input terminals (K00–K07)
Input terminal (K10) or event counter external clock input terminal (EVIN)
Output terminal (R26) or programmable timer underflow signal inverted
output terminal (TOUT) (selectable by mask option)
Output terminal (R27)
or programmable timer underflow signal output terminal (TOUT)
Output terminal (R34) or clock output terminal (FOUT)
Output terminal (R50) or buzzer output terminal (BZ)
Output terminal (R51) or buzzer inverted output terminal (BZ)
(selectable by mask option)
I/O terminal (P10) or serial I/F data input terminal (SIN)
I/O terminal (P11) or serial I/F data output terminal (SOUT)
I/O terminal (P12) or serial I/F clock I/O terminal (SCLK)
I/O terminal (P13) or serial I/F ready signal output terminal (SRDY)
I/O terminals (P14–P17)
LCD common output terminals
LCD common output terminals (when 1/32 duty is selected)
or LCD segment output terminal (when 1/16 or 1/8 duty is selected)
LCD segment output terminals
Initial reset input terminal
Test input terminal
∗1 TEST is the terminal used for shipping inspection of the IC. For normal operation be sure it is connected to VDD.
Page 12

6 EPSON E0C88832/88862 TECHNICAL MANUAL
1 INTRODUCTION
6596
33
64
INDEX
321
128
97
6596
33
64
INDEX
321
128
97
1
2
3
4
5
6
7
8
9
10
11
12
13
14
15
16
17
18
19
20
21
22
23
24
25
26
27
28
29
30
31
32
N.C.
COM15
COM14
COM13
COM12
COM11
COM10
COM9
COM8
COM7
COM6
COM5
COM4
COM3
COM2
COM1
COM0
CG
CF
CE
CD
CC
CB
CA
V
C5
V
C4
V
C3
V
C2
V
C1
OSC3
OSC4
N.C.
N.C.
N.C.
N.C.
SEG28
SEG29
SEG30
SEG31
SEG32
SEG33
SEG34
SEG35
SEG36
SEG37
SEG38
SEG39
SEG40
COM31/SEG51
COM30/SEG52
COM29/SEG53
COM28/SEG54
COM27/SEG55
COM26/SEG56
COM25/SEG57
COM24/SEG58
COM23/SEG59
COM22/SEG60
COM21/SEG61
COM20/SEG62
COM19/SEG63
COM18/SEG64
COM17/SEG65
COM16/SEG66
65
66
67
68
69
70
71
72
73
74
75
76
77
78
79
80
81
82
83
84
85
86
87
88
89
90
91
92
93
94
95
96
N.C.
V
OSC
V
D1
V
DD
V
SS
OSC1
OSC2
TEST
RESET
K10/EVIN
K07
K06
K05
K04
K03
K02
K01
K00
P17
P16
P15
P14
P13/SRDY
P12/SCLK
P11/SOUT
P10/SIN
R26/TOUT
R27/TOUT
R50/BZ
R51/BZ
N.C.
N.C.
97
98
99
100
101
102
103
104
105
106
107
108
109
110
111
112
113
114
115
116
117
118
119
120
121
122
123
124
125
126
127
128
N.C.
N.C.
N.C.
N.C.
SEG0
SEG1
SEG2
SEG3
SEG4
SEG5
SEG6
SEG7
SEG8
SEG9
SEG10
SEG11
SEG12
SEG13
SEG14
SEG15
SEG16
SEG17
SEG18
SEG19
SEG20
SEG21
SEG22
SEG23
SEG24
SEG25
SEG26
SEG27
33
34
35
36
37
38
39
40
41
42
43
44
45
46
47
48
49
50
51
52
53
54
55
56
57
58
59
60
61
62
63
64
N.C.: No Connection
Pin No. Pin name Pin No. Pin name Pin No. Pin name Pin No. Pin name
E0C88862
QFP8-128pin QFP15-128pin
Fig. 1.4.2 E0C88862 pin layout
Page 13

E0C88832/88862 TECHNICAL MANUAL EPSON 7
1 INTRODUCTION
Pin No.
V
DD
VSS
VD1
VOSC
VC1–VC5
CA–CG
OSC1
OSC2
OSC3
OSC4
K00–K07
K10/EVIN
R26/TOUT
R27/TOUT
R50/BZ
R51/BZ
P10/SIN
P11/SOUT
P12/SCLK
P13/SRDY
P14–P17
COM0–COM15
COM16–COM31
/SEG66–SEG51
SEG0–SEG40
RESET
TEST
∗1
Pin name In/out Function
68
69
67
66
61–57
56–50
70
71
62
63
82–75
74
91
92
93
94
90
89
88
87
86–83
49–34
32–17
101–128, 4–16
73
72
–
–
–
–
O
–
I
O
I
O
I
I
O
O
O
O
I/O
I/O
I/O
I/O
I/O
O
O
O
I
I
Power supply (+) terminal
Power supply (GND) terminal
Regulated voltage for internal circuit
Regulated voltage for OSC1 oscillation circuit
LCD drive voltage output terminals
Voltage boost/reduce-capacitor connection terminals for LCD
OSC1 oscillation input terminal
(select crystal oscillation/CR oscillation/external clock input with mask option)
OSC1 oscillation output terminal
OSC3 oscillation input terminal
(select crystal/ceramic/CR oscillation/external clock input with mask option)
OSC3 oscillation output terminal
Input terminals (K00–K07)
Input terminal (K10) or event counter external clock input terminal (EVIN)
Output terminal (R26) or programmable timer underflow signal inverted
output terminal (TOUT) (selectable by mask option)
Output terminal (R27)
or programmable timer underflow signal output terminal (TOUT)
Output terminal (R50) or buzzer output terminal (BZ)
Output terminal (R51) or buzzer inverted output terminal (BZ)
(selectable by mask option)
I/O terminal (P10) or serial I/F data input terminal (SIN)
I/O terminal (P11) or serial I/F data output terminal (SOUT)
I/O terminal (P12) or serial I/F clock I/O terminal (SCLK)
I/O terminal (P13) or serial I/F ready signal output terminal (SRDY)
I/O terminals (P14–P17)
LCD common output terminals
LCD common output terminals (when 1/32 duty is selected)
or LCD segment output terminal (when 1/16 or 1/8 duty is selected)
LCD segment output terminals
Initial reset input terminal
Test input terminal
Table 1.4.2 E0C88862 pin description
∗1 TEST is the terminal used for shipping inspection of the IC. For normal operation be sure it is connected to VDD.
Page 14

8 EPSON E0C88832/88862 TECHNICAL MANUAL
1 INTRODUCTION
1.5 Mask Option
Mask options shown below are provided for the
E0C88832/88862. Several hardware specifications
are prepared in each mask option, and one of them
can be selected according to the application. The
function option generator WINFOG, that has been
prepared as the development software tool of the
E0C88832/88862, is used for this selection. Mask
pattern of the IC is finally generated based on the
data created by the WINFOG. Refer to the "E0C88
Family Development Tool Manual" for details on
the WINFOG.
Functions selectable with E0C88832/88862 mask options
(1)RESET terminal pull-up resistor
This mask option can select whether the pull-up
resistor for the RESET terminal is used or not.
(2)External reset by simultaneous LOW
input to the input port (K00–K03)
This function resets the IC when several keys
are pressed simultaneously. The mask option is
used to select whether this function is used or
not. Further when the function is used, a
combination of the input ports (K00–K03),
which are connected to the keys to be pressed
simultaneously, can be selected. Refer to Section
4.1.2, "Simultaneous LOW level input at input
port terminals K00–K03", for details.
(3)OSC1 oscillation circuit
The specification of the OSC1 oscillation circuit
can be selected from among four types: "Crystal
oscillation", "CR oscillation", "Crystal oscillation
(gate capacitor built-in)" and "External clock
input". Refer to Section 5.3.3, "OSC1 oscillation
circuit", for details.
(4)OSC3 oscillation circuit
The specification of the OSC3 oscillation circuit
can be selected from among four types: "Crystal
oscillation", "Ceramic oscillation", "CR
oscillation" and "External clock input". Refer to
Section 5.3.4, "OSC3 oscillation circuit", for
details.
(5)Input port pull-up resistor
This mask option can select whether the pull-up
resistor for the input port terminal is used or
not. It is possible to select for each bit of the
input ports. Refer to Section 5.4, "Input Ports (K
ports)", for details.
(6)R26, R51 output port specifications
The R26 port can be configured as a generalpurpose output port or as the TOUT output
port (TOUT inverted output).
The R51 port can be configured as a generalpurpose output port or as the BZ output port
(BZ inverted output). Refer to Section 5.5,
"Output Ports (R ports)", for details.
(7)I/O port pull-up resistor
This mask option can select whether the pull-up
resistor for the I/O port terminal (it works
during input mode) is used or not. It is possible
to select for each bit of the I/O ports. Refer to
Section 5.6, "I/O Ports (P ports)", for details.
Since P10 to P13 are shared with the serial
interface I/O terminals, the selected P10 and
P12 terminal configuration is applied to the
serial input (SIN) terminal and serial clock input
terminal (SCLK in clock synchronous mode)
when the serial interface is used. Refer to
Section 5.7, "Serial Interface", for details.
(8)LCD drive duty
The drive duty for the built-in LCD driver can
be selected whether it will be 1/32 and 1/16
software-switched or fixed at 1/8. Refer to
Section 5.11, "LCD Controller", for details.
(9)LCD power supply
Either the internal power supply or an external
power supply can be selected as the LCD
system power source. Furthermore, when using
the internal power supply, the LCD drive
voltage can be set for a 4.5 V panel or a 5.5 V
panel and the drive bias to 1/5 or 1/4. Refer to
Section 5.11, "LCD Controller", for details.
(10) Initial reset by SVD circuit
The SVD circuit has a function that generates an
initial reset signal when the supply voltage
drops to level 0 or less. The mask option is used
to select whether this function is used or not.
Refer to Section 5.13, "Supply Voltage Detection
(SVD) Circuit", for details.
Page 15

E0C88832/88862 TECHNICAL MANUAL EPSON 9
1 INTRODUCTION
Option list
The following options can be set for the E0C88832/88862. Multiple specifications are available in each
option item as indicated in the Option List. Select the specifications that meet the target system and check
the appropriate box.
The option selection is done interactively on the screen during WINFOG execution, using this option list as
reference.
E0C88832/88862 mask option list (1/2)
1 OSC1 SYSTEM CLOCK
■■ 1. Crystal
■■ 2. External Clock
■■ 3. CR
■■ 4. Crystal (with Gate Capacity)
2 OSC3 SYSTEM CLOCK
■■ 1. Crystal
■■ 2. Ceramic
■■ 3. CR
■■ 4. External Clock
3 MULTIPLE KEY ENTRY RESET
• Combination ... ■■ 1. Not Use
■■ 2. Use K00, K01
■■ 3. Use K00, K01, K02
■■ 4. Use K00, K01, K02, K03
4 SVD RESET
■■ 1. Not Use
■■ 2. Use
5 INPUT PORT PULL UP RESISTOR
• K00 ................... ■■ 1. With Resistor ■■ 2. Gate Direct
• K01 ................... ■■ 1. With Resistor ■■ 2. Gate Direct
• K02 ................... ■■ 1. With Resistor ■■ 2. Gate Direct
• K03 ................... ■■ 1. With Resistor ■■ 2. Gate Direct
• K04 ................... ■■ 1. With Resistor ■■ 2. Gate Direct
• K05 ................... ■■ 1. With Resistor ■■ 2. Gate Direct
• K06 ................... ■■ 1. With Resistor ■■ 2. Gate Direct
• K07 ................... ■■ 1. With Resistor ■■ 2. Gate Direct
• K10 ................... ■■ 1. With Resistor ■■ 2. Gate Direct
• RESET .............. ■■ 1. With Resistor ■■ 2. Gate Direct
6 I/O PORT PULL UP RESISTOR
• P10 .................... ■■ 1. With Resistor ■■ 2. Gate Direct
• P11 .................... ■■ 1. With Resistor ■■ 2. Gate Direct
• P12 .................... ■■ 1. With Resistor ■■ 2. Gate Direct
• P13 .................... ■■ 1. With Resistor ■■ 2. Gate Direct
• P14 .................... ■■ 1. With Resistor ■■ 2. Gate Direct
• P15 .................... ■■ 1. With Resistor ■■ 2. Gate Direct
• P16 .................... ■■ 1. With Resistor ■■ 2. Gate Direct
• P17 .................... ■■ 1. With Resistor ■■ 2. Gate Direct
Page 16

10 EPSON E0C88832/88862 TECHNICAL MANUAL
1 INTRODUCTION
E0C88832/88862 mask option list (2/2)
7 LCD DRIVE DUTY
■■ 1. 1/32 & 1/16 Duty
■■ 2. 1/8 Duty
8 LCD POWER SUPPLY
■■ 1. Internal TYPE A (V
C2 Standard, 1/5 Bias, 4.5 V)
■■ 2. External
■■ 3. Internal TYPE B (VC2 Standard, 1/5 Bias, 5.5 V)
■■ 4. Internal TYPE C (VC2 Standard, 1/4 Bias, 4.5 V)
■■ 5. Internal TYPE D (VC1 Standard, 1/4 Bias, 4.5 V)
9 R51 OUTPUT PORT SPECIFICATION
■■ 1. With BZ (Use)
■■ 2. Without BZ (Not Use)
10 R26 OUTPUT PORT SPECIFICATION
■■ 1. With TOUT (Use)
■■ 2. Without TOUT (Not Use)
Page 17

E0C88832/88862 TECHNICAL MANUAL EPSON 11
2 POWER SUPPLY
2 POWER SUPPLY
In this section, we will explain the operating
voltage and the configuration of the internal power
supply circuit of the E0C88832/88862.
2.1 Operating Voltage
The E0C88832/88862 operating power voltage is as
follows:
Normal mode: 2.4 V to 5.5 V
Low power mode: 1.8 V to 3.5 V
High speed mode: 3.5 V to 5.5 V
If supply voltage drops below level 0 (see Chapter
7, "ELECTRICAL CHARACTERISTICS"), the
system is automatically reset by a supply voltage
detection (SVD) circuit described in the latter. This
function can be selected by mask option.
2.2 Internal Power Supply Circuit
The E0C88832/88862 incorporates the power supply
circuit shown in Figure 2.2.1. When voltage within
the range described above is supplied to VDD (+) and
VSS (GND), all the voltages needed for the internal
circuit are generated internally in the IC.
Roughly speaking, the power supply circuit is
divided into three sections.
The internal logic voltage regulator generates the
operating voltage <VD1> for driving the internal
logic circuits and the OSC3 oscillation circuit. The
VD1 voltage can be selected from the following
three types: 1.3 V for low-power mode, 2.2 V for
normal mode and 3.3 V for high-speed mode.
It should be selected by a program to switch
according to the supply voltage and oscillation
frequency.
See Section 5.3, "Oscillation Circuits and Operating
Mode", for the switching of operating mode.
The oscillation system voltage regulator generates
the operating voltage <VOSC> for the OSC1
oscillation circuit.
The LCD system power supply circuit generates the
LCD drive voltages <VC1> to <VC5>. In 1/5 bias
mode, VC1 is generated by halving VC2 output from
the LCD system voltage regulator and VC3 to VC5 are
generated by boosting VC2. These five voltages can
be supplied from outside the IC by mask option.
Furthermore, 1/4 bias drive can be selected by
mask option. In this case, the VC2 voltage level
becomes equal to the VC3 voltage level. When using
with 1/4 bias configuration, the mask option also
allows selection of VC1 standard mode that
generates VC2 to VC5 by boosting VC1.
See Chapter 7, "ELECTRICAL CHARACTERISTICS" for the voltage values.
In the E0C88832/88862, the LCD drive voltage is
supplied to the built-in LCD driver which drives
the LCD panel connected to the SEG and COM
terminals.
Note: Do not use the VC1–VC5 outputs for driving
external circuits.
Fig. 2.2.1 Configuration of power supply circuit
V
DD
V
V
OSC
D1
V
C1
V
C3
V
C4
V
C5
CA
CB
CC
CD
CE
CF
CG
V
SS
LCD system
power supply
circuit
LCD driver
V
D1
VC1–V
C5
V
OSC
V
C2
External
power
supply
OSC3, OSC4
OSC1, OSC2
Regulator
Booster/reducer
Internal logic
voltage regulator
OSC3
oscillation circuit
Internal voltage
setting circuit
Oscillation system
voltage regulator
Internal circuit
OSC1
oscillation circuit
COM0~COM15
COM16~COM31/SEG66~SEG51
SEG0~SEG50
COM0~COM15
COM16~COM31/SEG66~SEG51
SEG0~SEG40
E0C88832
E0C88862
Page 18

12 EPSON E0C88832/88862 TECHNICAL MANUAL
2 POWER SUPPLY
2.3 Heavy Load Protection Mode
The E0C88832/88862 has a heavy load protection
function for stable operation even when the supply
voltage fluctuates by driving a heavy load. The
heavy load protection mode becomes valid when
the peripheral circuits are in the following status:
(1) The OSC3 oscillation circuit is switched ON
(OSCC = "1" and not in SLEEP)
(2) The buzzer output is switched ON
(BZON = "1" or BZSHT = "1")
SLEEP status
Heavy load
protection mode
OSCC
BZON
BZSHT
Fig. 2.3.1 Configuration of heavy load protection mode
control circuit
For details of the OSC3 oscillation circuit and
buzzer output, see "5.3 Oscillation Circuits and
Operating Mode" and "5.12 Sound Generator",
respectively.
Page 19
E0C88832/88862 TECHNICAL MANUAL EPSON 13
3 CPU AND MEMORY CONFIGURATION
3 CPU AND MEMORY CONFIGURATION
In this section, we will explain the CPU and memory configuration.
3.1 CPU
The E0C88832/88862 utilize the E0C88 8-bit core
CPU whose resistor configuration, command set,
etc. are virtually identical to other units in the
family of processors incorporating the E0C88.
See the "E0C88 Core CPU Manual" for the E0C88.
The E0C88832/88862 supports Model 3/minimum
mode of the E0C88 CPU which allows accessing of
the internal memory mapped within the physical
space from 000000H to 00FFFFH.
3.2 Internal Memory
The E0C88832/88862 is equipped with internal
ROM and RAM as shown in Figure 3.2.1.
3.2.1 ROM
The internal ROM capacity is shown in Table
3.2.1.1.
Table 3.2.1.1 Internal ROM capacity
Fig. 3.2.1 Internal memory map
I/O memory
Display memory
Unused area
RAM
(1.5K bytes)
ROM
(60K bytes)
E0C88832 E0C88862
00FFFFH
00FF00H
00FD42H
00F800H
00F7FFH
00F600H
00F5FFH
00F000H
00EFFFH
008000H
007FFFH
000000H
I/O memory
Display memory
Unused area
RAM
(1.5K bytes)
Unused area
ROM
(32K bytes)
Model
E0C88832
E0C88862
ROM capacity
32K bytes
60K bytes
Address
000000H–007FFFH
000000H–00EFFFH
3.2.2 RAM
The internal ROM capacity is shown in Table
3.2.2.1.
Table 3.2.2.1 Internal ROM capacity
Model
E0C88832
E0C88862
RAM capacity
1.5K bytes
1.5K bytes
Address
00F000H–00F5FFH
00F000H–00F5FFH
3.2.3 I/O memory
A memory mapped I/O method is employed in the
E0C88832/88862 for interfacing with internal
peripheral circuit. Peripheral circuit control bits and
data register are arranged in data memory space.
Control and data exchange are conducted via
normal memory access. The I/O memory is
arranged from address 00FF00H to address
00FFFFH. See Section 5.1, "I/O Memory Map", for
details of the I/O memory.
3.2.4 Display memory
The E0C88832/88862 is equipped with an internal
display memory which stores a display data for
LCD driver.
The display memory is arranged from address
00F800H to address 00FD42H (including the
unused area). See Section 5.11, "LCD Controller",
for details of the display memory.
3.3 Exception Processing Vectors
Address 000000H to address 000023H in the
program area of the E0C88832/88862 is assigned as
exception processing vectors. Furthermore, from
address 000026H to address 0000FFH, software
interrupt vectors are assignable to any two bytes
which begin with an even address.
Table 3.3.1 lists the vector addresses and the
exception processing factors to which they
correspond.
Page 20

14 EPSON E0C88832/88862 TECHNICAL MANUAL
3 CPU AND MEMORY CONFIGURATION
Table 3.3.1 Vector addresses and
exception processing factors
3.4 CC (Customized Condition Flag)
The E0C88832/88862 does not use the customized
condition flag (CC) in the core CPU. Accordingly, it
cannot be used as a branching condition for the
conditional branching instruction (JRS, CARS).
Vector
address
000000H
000002H
000004H
000006H
000008H
00000AH
00000CH
00000EH
000010H
000012H
000014H
000016H
000018H
00001AH
00001CH
00001EH
000020H
000022H
000024H
000026H
:
0000FEH
Priority
High
↑
↓
Low
No
priority
rating
Exception processing factor
Reset
Zero division
Watchdog timer (NMI)
Programmable timer 1 interrupt
Programmable timer 0 interrupt
K10 input interrupt
K04–K07 input interrupt
K00–K03 input interrupt
Serial I/F error interrupt
Serial I/F receiving complete interrupt
Serial I/F transmitting complete interrupt
Stopwatch timer 100 Hz interrupt
Stopwatch timer 10 Hz interrupt
Stopwatch timer 1 Hz interrupt
Clock timer 32 Hz interrupt
Clock timer 8 Hz interrupt
Clock timer 2 Hz interrupt
Clock timer 1 Hz interrupt
System reserved (cannot be used)
Software interrupt
For each vector address and the address after it, the
start address of the exception processing routine is
written into the subordinate and super ordinate
sequence. When an exception processing factor is
generated, the exception processing routine is
executed starting from the recorded address.
When multiple exception processing factors are
generated at the same time, execution starts with
the highest priority item.
The priority sequence shown in Table 3.3.1 assumes
that the interrupt priority levels are all the same.
The interrupt priority levels can be set by software
in each system. (See Section 5.14 "Interrupt and
Standby Status".)
Note: For exception processing other than reset,
SC (system condition flag) and PC (program
counter) are evacuated to the stack and
branches to the exception processing
routines. Consequently, when returning to
the main routine from exception processing
routines, please use the RETE instruction.
See the "E0C88 Core CPU Manual" for information
on CPU operations when an exception processing
factor is generated.
Page 21

E0C88832/88862 TECHNICAL MANUAL EPSON 15
4 INITIAL RESET
4.1.1 RESET terminal
Initial reset can be done by executed externally
inputting a LOW level to the RESET terminal.
Be sure to maintain the RESET terminal at LOW
level for the regulation time after the power on to
assure the initial reset.
In addition, be sure to use the RESET terminal for
the first initial reset after the power is turned on.
The RESET terminal is equipped with a pull-up
resistor. You can select whether or not to use by
mask option.
4.1.2 Simultaneous LOW level input at
input port terminals K00–K03
Another way of executing initial reset externally is to
input a LOW level simultaneously to the input ports
(K00–K03) selected by mask option.
Since there is a built-in time authorize circuit, be
sure to maintain the designated input port terminal
at LOW level for two seconds (when the oscillation
frequency fOSC1 = 32.768 kHz) or more to perform
the initial reset by means of this function.
However, the time authorize circuit is bypassed
during the SLEEP (standby) status and oscillation
stabilization waiting period, and initial reset is
executed immediately after the simultaneous LOW
level input to the designated input ports.
The combination of input ports (K00–K03) that can
be selected by mask option are as follows:
(1) Not use
(2) K00 & K01
(3) K00 & K01 & K02
(4) K00 & K01 & K02 & K03
For instance, if mask option (4) "K00 & K01 & K02
& K03" is selected, initial reset will take place when
the input level at input ports K00–K03 is simultaneously LOW.
When using this function, make sure that the
designated input ports do not simultaneously
switch to LOW level while the system is in normal
operation.
4 INITIAL RESET
Initial reset in the E0C88832/88862 is required in order to initialize circuits. This chapter describes
initial reset factors and the initial settings for internal registers.
4.1 Initial Reset Factors
There are three initial reset factors for the
E0C88832/88862 as shown below.
(1) RESET terminal
(2) Simultaneous LOW level input at input port
terminals K00–K03.
(3) Supply voltage detection (SVD) circuit
Figure 4.1.1 shows the configuration of the initial
reset circuit.
The CPU and peripheral circuits are initialized by
means of initial reset factors. When the factor is
canceled, the CPU commences reset exception
processing. (See "E0C88 Core CPU Manual".)
When this occurs, reset exception processing
vectors, Bank 0, 000000H–000001H from program
memory are read out and the program (initialization routine) which begins at the readout address is
executed.
K00
Input port K00
K01
Input port K01
K02
Input port K02
K03
Input port K03
V
DD
RESET
V
DD
V
DD
SLEEP status
Time authorize
circuit
Oscillation stability waiting signal
Internal initial reset
Mask option
Supply voltage detection
(SVD) circuit
Fig. 4.1.1 Configuration of initial reset circuit
Page 22

16 EPSON E0C88832/88862 TECHNICAL MANUAL
4 INITIAL RESET
4.1.3 Supply voltage detection (SVD) circuit
When the SVD circuit detects that supply voltage
has dropped below level 0 four successive times
(see Chapter 7, "ELECTRICAL CHARACTERISTICS"), it outputs an initial reset signal until the
supply voltage has been restored to level 2.
You can select whether or not to use the initial reset
according to the SVD circuit by mask option. If you
use it, the supply voltage must be at least level 2 for
the first sampling of the SVD circuit, when the
power is turned on. At this time, if the power
voltage level is less than level 2, the initial reset
status will not be canceled and instead the SVD
circuit will continue sampling until the supply
voltage reaches level 2 or more.
For more information, see "5.13 Supply Voltage
Detection (SVD) Circuit" in this Manual.
4.1.4 Initial reset sequence
After cancellation of the LOW level input to the
RESET terminal, when the power is turned on, the
start-up of the CPU is held back until the oscillation
stabilization waiting time (8,192/fOSC1 sec.) has
elapsed. When the initial reset by the SVD circuit
has been used, an initial sampling time (248/fOSC1
sec.) is added as additional waiting time.
Figure 4.1.4.1 shows the operating sequence
following initial reset release.
Also, when using the initial reset by simultaneous
LOW level input into the input port, you should be
careful of the following points.
(1) During SLEEP status, since the time authoriza-
tion circuit is bypassed, an initial reset is
triggered immediately after a LOW level
simultaneous input value. In this case, the CPU
starts after waiting the oscillation stabilization
time and the SVD circuit initial sampling time
(when used with the mask option), following
cancellation of the LOW level simultaneous
input.
(2) Other than during SLEEP status, an initial reset
will be triggered 1–2 seconds after a LOW level
simultaneous input. In this case, since a reset
differential pulse (64/f
OSC1 sec.) is generated
within the E0C88832/88862, the CPU will start
even if the LOW level simultaneous input status
is not canceled.
PC PC PC 00-0000
Dummy Dummy VECL
f
OSC1
RESET
Internal initial reset
Internal address bus
Internal data bus
Internal read signal
8192/f
OSC1
[sec]
Oscillation stable waiting time
248/f
OSC1
[sec]
First SVD sampling time * Dummy cycle Reset exception processing
∗
When the initial reset by the SVD circuit with the mask option has been used, this cycle is inserted as the waiting time.
Fig. 4.1.4.1 Initial reset sequence
Page 23

E0C88832/88862 TECHNICAL MANUAL EPSON 17
4 INITIAL RESET
Register name
Code Setting value
Data register A
Data register B
Index (data) register L
Index (data) register H
Index register IX
Index register IY
Program counter
Stack pointer
Base register
Zero flag
Carry flag
Overflow flag
Negative flag
Decimal flag
Unpack flag
Interrupt flag 0
Interrupt flag 1
New code bank register
Code bank register
Expand page register
Expand page register for IX
Expand page register for IY
A
B
L
H
IX
IY
PC
SP
BR
Z
C
V
N
D
U
I0
I1
NB
CB
EP
XP
YP
Undefined
Undefined
Undefined
Undefined
Undefined
Undefined
Undefined
Undefined
Undefined
0
0
0
0
0
0
1
1
01H
Undefined
00H
00H
00H
Bit length
8
8
8
8
16
16
16
16
8
1
1
1
1
1
1
1
1
8
8
8
8
8
*
*
4.2 Initial Settings After Initial Reset
The CPU internal registers are initialized as follows
during initial reset.
Table 4.2.1 Initial settings
* Reset exception processing loads the preset
values stored in 0 bank, 000000H–000001H into
the PC. At the same time, 01H of the NB initial
value is loaded into CB.
Initialize the registers which are not initialized at
initial reset using software.
Since the internal RAM and display memory are
not initialized at initial reset, be sure to initialize
using software.
The respectively stipulated initializations are done
for internal peripheral circuits. If necessary, the
initialization should be done using software.
For initial value at initial reset, see the sections on
the I/O memory map and peripheral circuit
descriptions in the following chapter of this
Manual.
Page 24

18 EPSON E0C88832/88862 TECHNICAL MANUAL
5 PERIPHERAL CIRCUITS AND THEIR OPERATION (I/O Memory Map)
5 PERIPHERAL CIRCUITS AND
THEIR OPERATION
The peripheral circuits of the E0C88832/88862 is interfaced with the CPU by means of the memory
mapped I/O method. For this reason, just as with other memory access operations, peripheral circuits can
be controlled by manipulating I/O memory. Below is a description of the operation and control method for
each individual peripheral circuit.
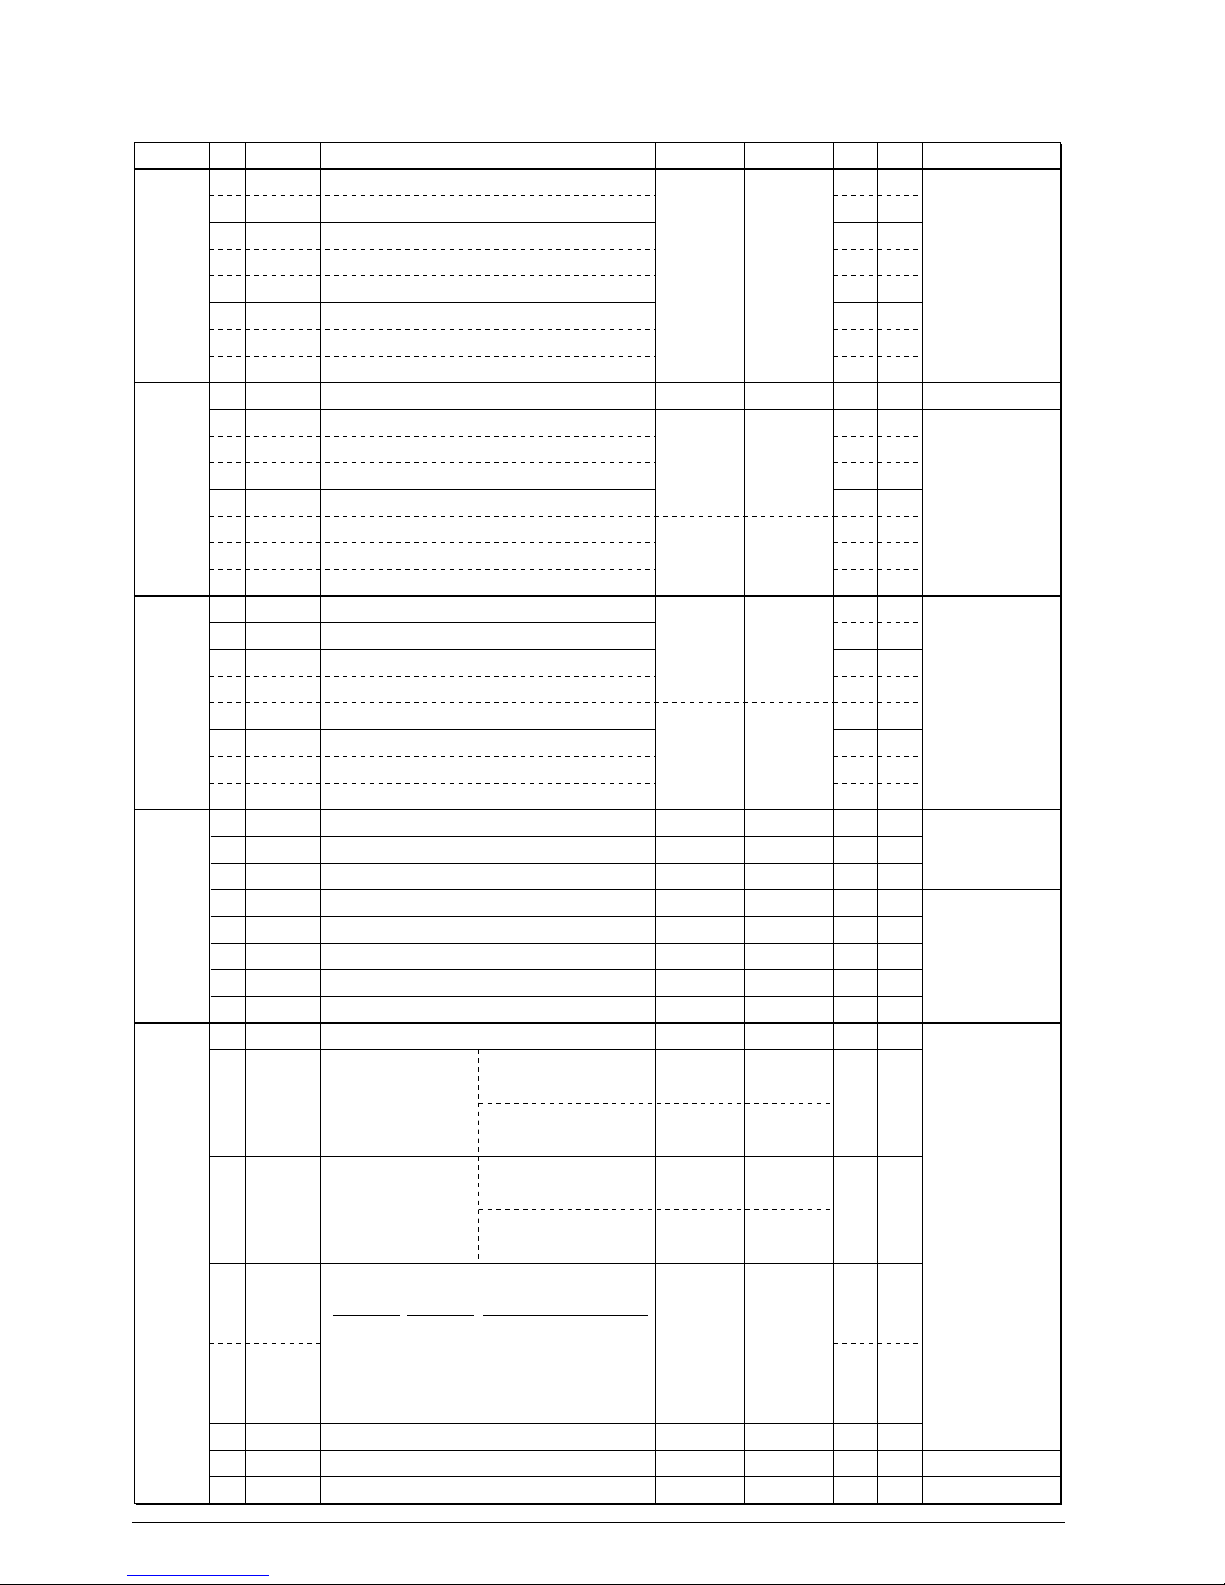
5.1 I/O Memory Map
Table 5.1.1(a) I/O Memory map (00FF00H–00FF10H)
Address Bit Name
00FF00 D7
D6
D5
D4
D3
D2
D1
D0
BSMD1
BSMD0
CEMD1
CEMD0
CE3
CE2
CE1
CE0
SR R/WFunction Comment
General-purpose register
General-purpose register
General-purpose register
General-purpose register
General-purpose register
General-purpose register
General-purpose register
General-purpose register
Reserved register
(Note)
10
0
0
1
1
0
0
0
0
R/W
R/W
R/W
R/W
R/W
R/W
R/W
R/W
1 0
00FF01 D7
D6
D5
D4
D3
D2
D1
D0
SPP7
SPP6
SPP5
SPP4
SPP3
SPP2
SPP1
SPP0
General-purpose register
General-purpose register
General-purpose register
General-purpose register
General-purpose register
General-purpose register
General-purpose register
General-purpose register
Reserved register
(Note)
0
0
0
0
0
0
0
0
R/W
R/W
R/W
R/W
R/W
R/W
R/W
R/W
10
00FF02 D7
D6
D5
D4
D3
D2
D1
D0
EBR
WT2
WT1
WT0
CLKCHG
OSCC
VDC1
VDC0
General-purpose register
General-purpose register
General-purpose register
General-purpose register
CPU operating clock switch
OSC3 oscillation On/Off control
Operating mode selection
0
0
0
0
0
0
0
0
R/W
R/W
R/W
R/W
R/W
R/W
R/W
R/W
1
OSC3
On
0
OSC1
Off
VDC1
1
0
0
VDC0
×
1
0
High speed (VD1=3.3V)
Low power (V
D1
=1.3V)
Normal (V
D1
=2.2V)
Operating mode
00FF10 D7
D6
D5
D4
D3
D2
D1
D0
–
–
–
LCCLK
LCFRM
DTFNT
LDUTY
SGOUT
–
–
–
General-purpose register
General-purpose register
LCD dot font selection
LCD drive duty selection
General-purpose register
Constantry "0" when
being read
Reserved register
–
–
–
0
0
0
0
0
R/W
R/W
R/W
R/W
R/W
–
–
–
1
5 x 5 dots
1/16 duty
1
–
–
–
0
5 x 8 dots
1/32 duty
0
*1
Reserved register
*1 When 1/8 duty has been selected by mask option, setting of this register becomes invalid.
Note) When debugging using the E0C88 Family debugging tools ICE88R (ICE88) and PRC88348,
all the interrupts including NMI are disabled until values are written to addresses "00FF00H"
and "00FF01H".
Reserved register
Page 25

E0C88832/88862 TECHNICAL MANUAL EPSON 19
5 PERIPHERAL CIRCUITS AND THEIR OPERATION (I/O Memory Map)
Table 5.1.1(b) I/O Memory map (00FF11H–00FF22H)
Address Bit Name SR R/WFunction Comment10
00FF11 D7
D6
D5
D4
D3
D2
D1
D0
–
DSPAR
LCDC1
LCDC0
LC3
LC2
LC1
LC0
–
LCD display memory area selection
LCD display control
LCD contrast adjustment
"0" when being read
These bits are reset
to (0, 0) when
SLP instruction
is executed.
–
0
0
0
0
0
0
0
R/W
R/W
R/W
R/W
R/W
R/W
R/W
–
Display area 1–Display area 0
LCDC1
1
1
0
0
LCDC0
1
0
1
0
LCD display
All LCDs lit
All LCDs out
Normal display
Drive off
LC3
1
1
:
0
LC2
1
1
:
0
LC1
1
1
:
0
LC0
1
0
:
0
Contrast
Dark
:
:
Light
00FF12 D7
D6
D5
D4
D3
D2
D1
D0
–
–
SVDSP
SVDON
SVD3
SVD2
SVD1
SVD0
–
–
SVD auto-sampling control
SVD continuous sampling control/status
SVD detection level
Constantry "0" when
being read
These registers are
reset to "0" when
SLP instruction
is executed.
*2
–
–
0
1→0*1
0
X
X
X
X
R/W
R/W
R
R
R
R
–
–
On
Busy
On
–
–
Off
Ready
Off
R
W
SVD3
1
1
:
0
SVD2
1
1
:
0
SVD1
1
1
:
0
SVD0
1
0
:
0
Detection level
Level 15
Level 14
:
Level 0
*1 After initial reset, this status is set "1" until conclusion of hardware first sampling.
*2 Initial values are set according to the supply voltage detected at first sampling by hardware.
Until conclusion of first sampling, SVD0–SVD3 data are undefined.
00FF20 D7
D6
D5
D4
D3
D2
D1
D0
PK01
PK00
PSIF1
PSIF0
PSW1
PSW0
PTM1
PTM0
K00–K07 interrupt priority register
Serial interface interrupt priority register
Stopwatch timer interrupt priority register
Clock timer interrupt priority register
0
0
0
0
0
0
0
0
R/W
R/W
R/W
R/W
R/W
R/W
R/W
R/W
PK01
PSIF1
PSW1
PTM1
1
1
0
0
PK00
PSIF0
PSW0
PTM0
1
0
1
0
Priority
level
Level 3
Level 2
Level 1
Level 0
00FF21 D7
D6
D5
D4
D3
D2
D1
D0
–
–
–
–
PPT1
PPT0
PK11
PK10
–
–
–
–
Programmable timer interrupt priority register
K10 interrupt priority register
Constantly "0" when
being read
–
–
–
–
0
0
0
0
R/W
R/W
R/W
R/W
–
–
–
–
–
–
–
–
PPT1
PK11
1
1
0
0
PPT0
PK10
1
0
1
0
Priority
level
Level 3
Level 2
Level 1
Level 0
00FF22 D7
D6
D5
D4
D3
D2
D1
D0
–
ESW100
ESW10
ESW1
ETM32
ETM8
ETM2
ETM1
–
Stopwatch timer 100 Hz interrupt enable register
Stopwatch timer 10 Hz interrupt enable register
Stopwatch timer 1 Hz interrupt enable register
Clock timer 32 Hz interrupt enable register
Clock timer 8 Hz interrupt enable register
Clock timer 2 Hz interrupt enable register
Clock timer 1 Hz interrupt enable register
"0" when being read
–
0
0
0
0
0
0
0
R/W
R/W
R/W
R/W
R/W
R/W
R/W
–
Interrupt
enable
–
Interrupt
disable
Page 26
20 EPSON E0C88832/88862 TECHNICAL MANUAL
5 PERIPHERAL CIRCUITS AND THEIR OPERATION (I/O Memory Map)
Table 5.1.1(c) I/O Memory map (00FF23H–00FF31H)
Address Bit Name SR R/WFunction Comment10
D7
D6
D5
D4
D3
D2
D1
D0
00FF24 D7
D6
D5
D4
D3
D2
D1
D0
–
FSW100
FSW10
FSW1
FTM32
FTM8
FTM2
FTM1
–
Stopwatch timer 100 Hz interrupt factor flag
Stopwatch timer 10 Hz interrupt factor flag
Stopwatch timer 1 Hz interrupt factor flag
Clock timer 32 Hz interrupt factor flag
Clock timer 8 Hz interrupt factor flag
Clock timer 2 Hz interrupt factor flag
Clock timer 1 Hz interrupt factor flag
"0" when being read
–
0
0
0
0
0
0
0
R/W
R/W
R/W
R/W
R/W
R/W
R/W
–
(R)
Interrupt
factor is
generated
(W)
Reset
–
(R)
No interrupt
factor is
generated
(W)
No operation
00FF25 D7
D6
D5
D4
D3
D2
D1
D0
FPT1
FPT0
FK1
FK0H
FK0L
FSERR
FSREC
FSTRA
Programmable timer 1 interrupt factor flag
Programmable timer 0 interrupt factor flag
K10 interrupt factor flag
K04–K07 interrupt factor flag
K00–K03 interrupt factor flag
Serial I/F (error) interrupt factor flag
Serial I/F (receiving) interrupt factor flag
Serial I/F (transmitting) interrupt factor flag
0
0
0
0
0
0
0
0
R/W
R/W
R/W
R/W
R/W
R/W
R/W
R/W
(R)
Interrupt
factor is
generated
(W)
Reset
(R)
No interrupt
factor is
generated
(W)
No operation
00FF23 EPT1
EPT0
EK1
EK0H
EK0L
ESERR
ESREC
ESTRA
Programmable timer 1 interrupt enable register
Programmable timer 0 interrupt enable register
K10 interrupt enable register
K04–K07 interrupt enable register
K00–K03 interrupt enable register
Serial I/F (error) interrupt enable register
Serial I/F (receiving) interrupt enable register
Serial I/F (transmitting) interrupt enable register
0
0
0
0
0
0
0
0
R/W
R/W
R/W
R/W
R/W
R/W
R/W
R/W
Interrupt
enable
Interrupt
disable
00FF30 D7
D6
D5
D4
D3
D2
D1
D0
–
–
–
MODE16
CHSEL
PTOUT
CKSEL1
CKSEL0
–
–
–
8/16-bit mode selection
TOUT output channel selection
TOUT output control
Prescaler 1 source clock selection
Prescaler 0 source clock selection
Constantry "0" when
being read
–
–
–
0
0
0
0
0
R/W
R/W
R/W
R/W
R/W
–
–
–
16-bit x 1
Timer 1
On
f
OSC3
f
OSC3
–
–
–
8-bit x 2
Timer 0
Off
f
OSC1
f
OSC1
00FF31 D7
D6
D5
D4
D3
D2
D1
D0
EVCNT
FCSEL
PLPOL
PSC01
PSC00
CONT0
PSET0
PRUN0
Timer 0 counter mode selection
Timer 0
function selection
Timer 0
pulse polarity
selection
Timer 0 prescaler dividing ratio selection
Timer 0 continuous/one-shot mode selection
Timer 0 preset
Timer 0 Run/Stop control
"0" when being read
0
0
0
0
0
0
–
0
R/W
R/W
R/W
R/W
R/W
R/W
W
R/W
Event counter
Pulse width
measurement
With
noise rejector
Rising edge
of K10 input
High level
measurement
for K10 input
Continuous
Preset
Run
Timer
Normal
mode
Without
noise rejector
Falling edge
of K10 input
Low level
measurement
for K10 input
One-shot
No operation
Stop
In timer mode
In event counter mode
Down count timing
in event counter mode
In pulse width
measurement mode
PSC01
1
1
0
0
PSC00
1
0
1
0
Prescaler dividing ratio
Source clock / 64
Source clock / 16
Source clock / 4
Source clock / 1
Page 27

E0C88832/88862 TECHNICAL MANUAL EPSON 21
5 PERIPHERAL CIRCUITS AND THEIR OPERATION (I/O Memory Map)
Table 5.1.1(d) I/O Memory map (00FF32H–00FF36H)
Address Bit Name SR R/WFunction Comment10
00FF32
D7
D6
D5
D4
D3
D2
D1
D0
RLD07
RLD06
RLD05
RLD04
RLD03
RLD02
RLD01
RLD00
Timer 0 reload data D7 (MSB)
Timer 0 reload data D6
Timer 0 reload data D5
Timer 0 reload data D4
Timer 0 reload data D3
Timer 0 reload data D2
Timer 0 reload data D1
Timer 0 reload data D0 (LSB)
1
1
1
1
1
1
1
1
R/W
R/W
R/W
R/W
R/W
R/W
R/W
R/W
High Low
00FF33
D7
D6
D5
D4
D3
D2
D1
D0
–
–
–
PSC11
PSC10
CONT1
PSET1
PRUN1
–
–
–
Timer 1 prescaler dividing ratio selection
Timer 1 continuous/one-shot mode selection
Timer 1 preset
Timer 1 Run/Stop control
Constantry "0" when
being read
"0" when being read
–
–
–
0
0
0
–
0
R/W
R/W
R/W
W
R/W
–
–
–
Continuous
Preset
Run
–
–
–
One-shot
No operation
Stop
PSC11
1
1
0
0
PSC10
1
0
1
0
Prescaler dividing ratio
Source clock / 64
Source clock / 16
Source clock / 4
Source clock / 1
D7
D6
D5
D4
D3
D2
D1
D0
RLD17
RLD16
RLD15
RLD14
RLD13
RLD12
RLD11
RLD10
Timer 1 reload data D7 (MSB)
Timer 1 reload data D6
Timer 1 reload data D5
Timer 1 reload data D4
Timer 1 reload data D3
Timer 1 reload data D2
Timer 1 reload data D1
Timer 1 reload data D0 (LSB)
1
1
1
1
1
1
1
1
R/W
R/W
R/W
R/W
R/W
R/W
R/W
R/W
High Low
00FF34
D7
D6
D5
D4
D3
D2
D1
D0
PTD07
PTD06
PTD05
PTD04
PTD03
PTD02
PTD01
PTD00
Timer 0 counter data D7 (MSB)
Timer 0 counter data D6
Timer 0 counter data D5
Timer 0 counter data D4
Timer 0 counter data D3
Timer 0 counter data D2
Timer 0 counter data D1
Timer 0 counter data D0 (LSB)
1
1
1
1
1
1
1
1
R
R
R
R
R
R
R
R
High Low
00FF35
D7
D6
D5
D4
D3
D2
D1
D0
PTD17
PTD16
PTD15
PTD14
PTD13
PTD12
PTD11
PTD10
Timer 1 counter data D7 (MSB)
Timer 1 counter data D6
Timer 1 counter data D5
Timer 1 counter data D4
Timer 1 counter data D3
Timer 1 counter data D2
Timer 1 counter data D1
Timer 1 counter data D0 (LSB)
1
1
1
1
1
1
1
1
R
R
R
R
R
R
R
R
High Low
00FF36
Page 28

22 EPSON E0C88832/88862 TECHNICAL MANUAL
5 PERIPHERAL CIRCUITS AND THEIR OPERATION (I/O Memory Map)
Table 5.1.1(e) I/O Memory map (00FF40H–00FF44H)
Address Bit Name
00FF40 D7
D6
D5
D4
D3
D2
D1
D0
–
FOUT2
FOUT1
FOUT0
FOUTON
WDRST
TMRST
TMRUN
SR R/WFunction Comment
–
FOUT frequency selection
FOUT output control
Watchdog timer reset
Clock timer reset
Clock timer Run/Stop control
"0" when being read
This is just R/W
register on
E0C88862.
Constantly "0" when
being read
10
–
0
0
0
0
–
–
0
R/W
R/W
R/W
R/W
W
W
R/W
–
On
Reset
Reset
Run
–
Off
No operation
No operation
Stop
00FF41 D7
D6
D5
D4
D3
D2
D1
D0
TMD7
TMD6
TMD5
TMD4
TMD3
TMD2
TMD1
TMD0
Clock timer data
Clock timer data
Clock timer data
Clock timer data
Clock timer data
Clock timer data
Clock timer data
Clock timer data
0
0
0
0
0
0
0
0
R
R
R
R
R
R
R
R
High
Low
1 Hz
2 Hz
4 Hz
8 Hz
16 Hz
32 Hz
64 Hz
128 Hz
FOUT2
0
0
0
0
1
1
1
1
FOUT1
0
0
1
1
0
0
1
1
FOUT0
0
1
0
1
0
1
0
1
Frequency
f
OSC1
/ 1
f
OSC1
/ 2
f
OSC1
/ 4
f
OSC1
/ 8
f
OSC3
/ 1
f
OSC3
/ 2
f
OSC3
/ 4
f
OSC3
/ 8
00FF42 D7
D6
D5
D4
D3
D2
D1
D0
–
–
–
–
–
–
SWRST
SWRUN
–
–
–
–
–
–
Stopwatch timer reset
Stopwatch timer Run/Stop control
Constantly "0" when
being read
–
–
–
–
–
–
–0W
R/W
–
–
–
–
–
–
Reset
Run
–
–
–
–
–
–
No operation
Stop
00FF43 D7
D6
D5
D4
D3
D2
D1
D0
SWD7
SWD6
SWD5
SWD4
SWD3
SWD2
SWD1
SWD0
Stopwatch timer data
BCD (1/10 sec)
Stopwatch timer data
BCD (1/100 sec)
0
0
0
0
0
0
0
0
R
R
R
R
R
R
R
R
00FF44 D7
D6
D5
D4
D3
D2
D1
D0
–
BZSTP
BZSHT
SHTPW
ENRTM
ENRST
ENON
BZON
–
One-shot buzzer forcibly stop
One-shot buzzer trigger/status
One-shot buzzer duration width selection
Envelope attenuation time
Envelope reset
Envelope On/Off control
Buzzer output control
Constantry "0" when
being read
"0" when being read
*1
–
–
0
0
0
–
0
0
W
R/W
R/W
R/W
W
R/W
R/W
–
Forcibly stop
Busy
Trigger
125 msec
1 sec
Reset
On
On
–
No operation
Ready
No operation
31.25 msec
0.5 sec
No operation
Off
Off
R
W
*1 Reset to "0" during one-shot output.
Page 29

E0C88832/88862 TECHNICAL MANUAL EPSON 23
5 PERIPHERAL CIRCUITS AND THEIR OPERATION (I/O Memory Map)
Table 5.1.1(f) I/O Memory map (00FF45H–00FF49H)
Address Bit Name SR R/WFunction Comment10
00FF45 D7
D6
D5
D4
D3
D2
D1
D0
–
DUTY2
DUTY1
DUTY0
–
BZFQ2
BZFQ1
BZFQ0
–
Buzzer signal duty ratio selection
–
Buzzer frequency selection
"0" when being read
"0" when being read
–
0
0
0
–
0
0
0
R/W
R/W
R/W
R/W
R/W
R/W
–
–
–
–
0
0
0
0
1
1
1
1
0
0
1
1
0
0
1
1
0
1
0
1
0
1
0
1
8/16
7/16
6/16
5/16
4/16
3/16
2/16
1/16
4096.0
2048.0
8/20
7/20
6/20
5/20
4/20
3/20
2/20
1/20
3276.8
1638.4
12/24
11/24
10/24
9/24
8/24
7/24
6/24
5/24
2730.7
1365.3
12/28
11/28
10/28
9/28
8/28
7/28
6/28
5/28
2340.6
1170.3
210
Buzzer frequency (Hz)DUTY2–1
BZFQ2
0
0
0
0
1
1
1
1
BZFQ1
0
0
1
1
0
0
1
1
BZFQ0
0
1
0
1
0
1
0
1
Frequency (Hz)
4096.0
3276.8
2730.7
2340.6
2048.0
1638.4
1365.3
1170.3
00FF48 D7
D6
D5
D4
D3
D2
D1
D0
–
EPR
PMD
SCS1
SCS0
SMD1
SMD0
ESIF
–
Parity enable register
Parity mode selection
Clock source selection
Serial I/F mode selection
Serial I/F enable register
"0" when being read
Only for
asynchronous mode
In the clock synchronous slave mode,
external clock is
selected.
–
0
0
0
0
0
0
0
R/W
R/W
R/W
R/W
R/W
R/W
R/W
–
With parity
Odd
Serial I/F
–
Non parity
Even
I/O port
SCS1
1
1
0
0
SCS0
1
0
1
0
Clock source
Programmable timer
f
OSC3
/ 4
f
OSC3
/ 8
f
OSC3
/ 16
SMD1
1
1
0
0
SMD0
1
0
1
0
Mode
Asynchronous 8-bit
Asynchronous 7-bit
Clock synchronous slave
Clock synchronous master
00FF49 D7
D6
D5
D4
D3
D2
D1
D0
–
FER
PER
OER
RXTRG
RXEN
TXTRG
TXEN
–
Framing error flag
Parity error flag
Overrun error flag
Receive trigger/status
Receive enable
Transmit trigger/status
Transmit enable
"0" when being read
Only for
asynchronous mode
–
0
0
0
0
0
0
0
R/W
R/W
R/W
R/W
R/W
R/W
R/W
–
Error
Reset (0)
Error
Reset (0)
Error
Reset (0)
Run
Trigger
Enable
Run
Trigger
Enable
–
No error
No operation
No error
No operation
No error
No operation
Stop
No operation
Disable
Stop
No operation
Disable
R
W
R
W
R
W
R
W
R
W
Page 30

24 EPSON E0C88832/88862 TECHNICAL MANUAL
5 PERIPHERAL CIRCUITS AND THEIR OPERATION (I/O Memory Map)
Table 5.1.1(g) I/O Memory map (00FF4AH–00FF54H)
Address Bit Name SR R/WFunction Comment10
00FF4A D7
D6
D5
D4
D3
D2
D1
D0
TRXD7
TRXD6
TRXD5
TRXD4
TRXD3
TRXD2
TRXD1
TRXD0
X
X
X
X
X
X
X
X
R/W
R/W
R/W
R/W
R/W
R/W
R/W
R/W
High
Low
Transmit/Receive data D7 (MSB)
Transmit/Receive data D6
Transmit/Receive data D5
Transmit/Receive data D4
Transmit/Receive data D3
Transmit/Receive data D2
Transmit/Receive data D1
Transmit/Receive data D0 (LSB)
00FF50 D7
D6
D5
D4
D3
D2
D1
D0
SIK07
SIK06
SIK05
SIK04
SIK03
SIK02
SIK01
SIK00
K07 interrupt selection register
K06 interrupt selection register
K05 interrupt selection register
K04 interrupt selection register
K03 interrupt selection register
K02 interrupt selection register
K01 interrupt selection register
K00 interrupt selection register
0
0
0
0
0
0
0
0
R/W
R/W
R/W
R/W
R/W
R/W
R/W
R/W
Interrupt
enable
Interrupt
disable
00FF51 D7
D6
D5
D4
D3
D2
D1
D0
–
–
–
–
–
–
SIK11
SIK10
–
–
–
–
–
–
General-purpose register
K10 interrupt selection register
Constantly "0" when
being read
Reserved register
–
–
–
–
–
–
00R/W
R/W
–
–
–
–
–
–
1
Enable
–
–
–
–
–
–
0
Disable
00FF53 D7
D6
D5
D4
D3
D2
D1
D0
–
–
–
–
–
–
KCP11
KCP10
–
–
–
–
–
–
General-purpose register
K10 input comparison register
Constantly "0" when
being read
Reserved register
–
–
–
–
–
–
11R/W
R/W
–
–
–
–
–
–
1
Falling edge
–
–
–
–
–
–
0
Rising edge
00FF52 D7
D6
D5
D4
D3
D2
D1
D0
KCP07
KCP06
KCP05
KCP04
KCP03
KCP02
KCP01
KCP00
K07 input comparison register
K06 input comparison register
K05 input comparison register
K04 input comparison register
K03 input comparison register
K02 input comparison register
K01 input comparison register
K00 input comparison register
1
1
1
1
1
1
1
1
R/W
R/W
R/W
R/W
R/W
R/W
R/W
R/W
Interrupt
generated
at falling
edge
Interrupt
generated
at rising
edge
00FF54 D7
D6
D5
D4
D3
D2
D1
D0
K07D
K06D
K05D
K04D
K03D
K02D
K01D
K00D
K07 input port data
K06 input port data
K05 input port data
K04 input port data
K03 input port data
K02 input port data
K01 input port data
K00 input port data
–
–
–
–
–
–
–
–
R
R
R
R
R
R
R
R
High level
input
Low level
input
Page 31

E0C88832/88862 TECHNICAL MANUAL EPSON 25
5 PERIPHERAL CIRCUITS AND THEIR OPERATION (I/O Memory Map)
Table 5.1.1(h) I/O Memory map (00FF55H–00FF72H)
Address Bit Name SR R/WFunction Comment10
00FF55 D7
D6
D5
D4
D3
D2
D1
D0
–
–
–
–
–
–
–
K10D
–
–
–
–
–
–
–
K10 input port data
Constantly "0" when
being read
"1" when being read
–
–
_
_
_
_
–
–R
–
–
–
–
–
–
–
High level
–
–
–
–
–
–
–
Low level
00FF61 D7
D6
D5
D4
D3
D2
D1
D0
IOC17
IOC16
IOC15
IOC14
IOC13
IOC12
IOC11
IOC10
P17 I/O control register
P16 I/O control register
P15 I/O control register
P14 I/O control register
P13 I/O control register
P12 I/O control register
P11 I/O control register
P10 I/O control register
0
0
0
0
0
0
0
0
R/W
R/W
R/W
R/W
R/W
R/W
R/W
R/W
Output Input
00FF63 D7
D6
D5
D4
D3
D2
D1
D0
P17D
P16D
P15D
P14D
P13D
P12D
P11D
P10D
P17 I/O port data
P16 I/O port data
P15 I/O port data
P14 I/O port data
P13 I/O port data
P12 I/O port data
P11 I/O port data
P10 I/O port data
1
1
1
1
1
1
1
1
R/W
R/W
R/W
R/W
R/W
R/W
R/W
R/W
High Low
00FF70 D7
D6
D5
D4
D3
D2
D1
D0
HZR51
HZR50
HZR4H
HZR4L
HZR1H
HZR1L
HZR0H
HZR0L
R51 high impedance control
R50 high impedance control
General-purpose register
General-purpose register
General-purpose register
General-purpose register
General-purpose register
General-purpose register
Reserved register
0
0
0
0
0
0
0
0
R/W
R/W
R/W
R/W
R/W
R/W
R/W
R/W
Hi-Z
1
Output
0
00FF71 D7
D6
D5
D4
D3
D2
D1
D0
HZR27
HZR26
HZR25
HZR24
HZR23
HZR22
HZR21
HZR20
R27 high impedance control
R26 high impedance control
General-purpose register
General-purpose register
General-purpose register
General-purpose register
General-purpose register
General-purpose register
Reserved register
0
0
0
0
0
0
0
0
R/W
R/W
R/W
R/W
R/W
R/W
R/W
R/W
Hi-Z
1
Output
0
00FF72*1D7
D6
D5
D4
D3
D2
D1
D0
HZR37
HZR36
HZR35
HZR34
HZR33
HZR32
HZR31
HZR30
General-purpose register
General-purpose register
General-purpose register
R34 high impedance control
General-purpose register
General-purpose register
General-purpose register
General-purpose register
0
0
0
0
0
0
0
0
R/W
R/W
R/W
R/W
R/W
R/W
R/W
R/W
1
Hi-Z
1
0
Output
0
Reserved register
Reserved register
*1 This address is unavailable in the E0C88862.
Page 32

26 EPSON E0C88832/88862 TECHNICAL MANUAL
5 PERIPHERAL CIRCUITS AND THEIR OPERATION (I/O Memory Map)
Table 5.1.1(i) I/O Memory map (00FF75H–00FF78H)
Address Bit Name SR R/WFunction Comment10
00FF75 D7
D6
D5
D4
D3
D2
D1
D0
R27D
R26D
R25D
R24D
R23D
R22D
R21D
R20D
R27 output port data
R26 output port data
General-purpose register
General-purpose register
General-purpose register
General-purpose register
General-purpose register
General-purpose register
Reserved register
00FF76*2D7
D6
D5
D4
D3
D2
D1
D0
R37D
R36D
R35D
R34D
R33D
R32D
R31D
R30D
General-purpose register
General-purpose register
General-purpose register
R34 output port data
General-purpose register
General-purpose register
General-purpose register
General-purpose register
1
1
1
1
1
1
1
1
R/W
R/W
R/W
R/W
R/W
R/W
R/W
R/W
1
High
1
0
Low
0
00FF78 D7
D6
D5
D4
D3
D2
D1
D0
–
–
–
–
–
–
R51D
R50D
–
–
–
–
–
–
R51 output port data
R50 output port data
Constantly "0" when
being read
–
–
–
–
–
–
10R/W
R/W
–
–
–
–
–
–
High
–
–
–
–
–
–
Low
1
1
∗1
1
1
1
1
1
1
R/W
R/W
R/W
R/W
R/W
R/W
R/W
R/W
High
1
Low
0
Reserved register
Reserved register
*1 "0" when TOUT output is selected by mask option.
*2 This address is unavailable in the E0C88862.
Page 33

E0C88832/88862 TECHNICAL MANUAL EPSON 27
5 PERIPHERAL CIRCUITS AND THEIR OPERATION (Watchdog Timer)
5.2 Watchdog Timer
5.2.1 Configuration of watchdog timer
The E0C88832/88862 is equipped with a watchdog
timer driven by OSC1 as source oscillation. The
watchdog timer must be reset periodically in
software, and if reset of more than 3–4 seconds
(when fOSC1 = 32.768 kHz) does not take place, a
non-maskable interrupt signal is generated and
output to the CPU.
Figure 5.2.1.1 is a block diagram of the watchdog
5.2.2 Interrupt function
In cases where the watchdog timer is not periodically reset in software, the watchdog timer outputs
an interrupt signal to the CPU's NMI (level 4) input.
Unmaskable and taking priority over other interrupts, this interrupt triggers the generation of
exception processing. See the "E0C88 Core CPU
Manual" for more details on NMI exception
processing.
This exception processing vector is set at 000004H.
5.2.3 Control of watchdog timer
Table 5.2.3.1 shows the control bits for the watchdog timer.
WDRST: 00FF40H•D2
Resets the watchdog timer.
When "1" is written: Watchdog timer is reset
When "0" is written: No operation
Reading: Constantly "0"
By writing "1" to WDRST, the watchdog timer is
reset, after which it is immediately restarted.
Writing "0" will mean no operation.
Since WDRST is for writing only, it is constantly set
to "0" during readout.
5.2.4 Programming notes
(1) The watchdog timer must reset within 3-second
cycles by software.
(2) Do not execute the SLP instruction for 2 msec
after a NMI interrupt has occurred (when fOSC1
is 32.768 kHz).
Table 5.2.3.1 Watchdog timer control bits
timer.
Fig. 5.2.1.1 Block diagram of watchdog timer
By running watchdog timer reset during the main
routine of the program, it is possible to detect
program runaway as if watchdog timer processing
had not been applied. Normally, this routine is
integrated at points that are regularly being
processed.
The watchdog timer continues to operate during
HALT and when a HALT state is continuous for
longer than 3–4 seconds, the CPU shifts to exception processing.
During SLEEP, the watchdog timer is stopped.
1 Hz
Watchdog timer
reset signal
Non-maskable
interrupt (NMI)
Watchdog
timer
Divider
WDRST
f
OSC1
OSC1
oscillation
circuit
Address Bit Name
00FF40 D7
D6
D5
D4
D3
D2
D1
D0
–
FOUT2
FOUT1
FOUT0
FOUTON
WDRST
TMRST
TMRUN
SR R/WFunction Comment
–
FOUT frequency selection
FOUT output control
Watchdog timer reset
Clock timer reset
Clock timer Run/Stop control
"0" when being read
This is just R/W
register on
E0C88862.
Constantly "0" when
being read
10
–
0
0
0
0
–
–
0
R/W
R/W
R/W
R/W
W
W
R/W
–
On
Reset
Reset
Run
–
Off
No operation
No operation
Stop
FOUT2
0
0
0
0
1
1
1
1
FOUT1
0
0
1
1
0
0
1
1
FOUT0
0
1
0
1
0
1
0
1
Frequency
fOSC1 / 1
f
OSC1 / 2
f
OSC1 / 4
fOSC1 / 8
f
OSC3 / 1
fOSC3 / 2
f
OSC3 / 4
f
OSC3 / 8
Page 34

28 EPSON E0C88832/88862 TECHNICAL MANUAL
5 PERIPHERAL CIRCUITS AND THEIR OPERATION (Oscillation Circuits and Operating Mode)
5.3 Oscillation Circuits and
Operating Mode
5.3.1 Configuration of oscillation circuits
The E0C88832/88862 is twin clock system with two
internal oscillation circuits (OSC1 and OSC3).
OSC1 oscillation circuit generates the 32.768 kHz
(Typ.) main clock and OSC3 oscillation circuit the
sub-clock when the CPU and some peripheral
circuits (output port, serial interface and programmable timer) are in high speed operation.
Figure 5.3.1.1 shows the configuration of the
oscillation circuit.
5.3.3 OSC1 oscillation circuit
The OSC1 oscillation circuit generates the 32.768 kHz
(Typ.) system clock which is utilized during low
speed operation (low power mode) of the CPU and
peripheral circuits. Furthermore, even when OSC3 is
utilized as the system clock, OSC1 continues to
generate the source clock for the clock timer and
stopwatch timer.
This oscillation circuit stops when the SLP instruction is executed. However, in case the SVD circuit is
executing an SLP instruction, oscillation is stopped
in synchronization with the completion of sampling.
In terms of the oscillation circuit types, either
crystal oscillation, CR oscillation, crystal oscillation
(gate capacitor built-in) or external clock input can
be selected with the mask option.
Figure 5.3.3.1 shows the configuration of the OSC1
oscillation circuit.
Fig. 5.3.1.1 Configuration of oscillation circuits
At initial reset, OSC1 oscillation circuit is selected
for the CPU operating clock and OSC3 oscillation
circuit is in a stopped state. ON/OFF switching of
the OSC3 oscillation circuit and switching of the
system clock between OSC1 and OSC3 are controlled in software. OSC3 circuit is utilized when high
speed operation of the CPU and some peripheral
circuits become necessary. Otherwise, OSC1 should
be used to generate the operating clock and OSC3
circuit placed in a stopped state in order to reduce
current consumption.
5.3.2 Mask option
OSC1 oscillation circuit
■■ Crystal oscillation circuit
■■ External clock input
■■ CR oscillation circuit
■■
Crystal oscillation circuit
(gate capacitor built-in)
OSC3 oscillation circuit
■■ Crystal oscillation circuit
■■ Ceramic oscillation circuit
■■ CR oscillation circuit
■■ External clock input
In terms of the oscillation circuit types for OSC1,
either crystal oscillation, CR oscillation, crystal
oscillation (gate capacitor built-in) or external clock
input can be selected with the mask option.
In terms of oscillation circuit types for OSC3, either
crystal oscillation, ceramic oscillation, CR oscillation or external clock input can be selected with the
mask option, in the same way as OSC1.
(3) CR oscillation circuit
To CPU (CLK)
OSC1
oscillation circuit
Clock
switch
OSC3
oscillation circuit
To peripheral
circuit (f
OSC1
)
OSCC
Oscillation circuit
control signal
CLKCHG
CPU clock
selection signal
To some peripheral
circuit (f
OSC3
)
SLEEP
status
OSC2
OSC1
R
CR1
f
OSC1
SLEEP status
V
SS
OSC2
OSC1
SLEEP status
f
OSC1
X'tal1
V
SS
f
OSC1
V
SS
V
SS
OSC2
OSC1
X'tal1
C
G1
SLEEP status
f
OSC1
V
SS
SLEEP status
OSC2
OSC1
External
clock
N.C.
V
SS
V
DD
(1) Crystal oscillation circuit
(2) External clock input
(4) Crystal oscillation circuit (gate capacitor built-in)
Fig. 5.3.3.1 OSC1 oscillation circuit
Page 35

E0C88832/88862 TECHNICAL MANUAL EPSON 29
5 PERIPHERAL CIRCUITS AND THEIR OPERATION (Oscillation Circuits and Operating Mode)
When crystal oscillation is selected, a crystal
oscillation circuit can be easily formed by connecting a crystal oscillator X'tal1 (Typ. 32.768 kHz)
between the OSC1 and OSC2 terminals along with
a trimmer capacitor CG1 (5–25 pF) between the
OSC1 terminal and VSS.
In addition, the gate capacitor CG1 (15 pF) can be
built into the circuit by the mask option.
When CR oscillation is selected, connect a resistor
(RCR1) between the OSC1 and OSC2 terminals.
When external input is selected, release the OSC2
terminal and input the rectangular wave clock into
the OSC1 terminal.
5.3.4 OSC3 oscillation circuit
The OSC3 oscillation circuit generates the system
clock when the CPU and some peripheral circuits
(output port, serial interface and programmable
timer) are in high speed operation.
This oscillation circuit stops when the SLP instruction is executed, or the OSCC register is set to "0".
In terms of oscillation circuit types, any one of
crystal oscillation, ceramic oscillation, CR oscillation or external clock input can be selected with the
mask option.
Figure 5.3.4.1 shows the configuration of the OSC3
oscillation circuit.
When crystal or ceramic oscillation circuit is
selected, the crystal or ceramic oscillation circuit are
formed by connecting either a crystal oscillator
(X'tal2) or a combination of ceramic oscillator
(Ceramic) and feedback resistor (Rf) between OSC3
and OSC4 terminals and connecting two capacitors
(C
G2, CD2) between the OSC3 terminal and VSS, and
between the OSC4 terminal and VSS, respectively.
When CR oscillation is selected, the CR oscillation
circuit is formed merely by connecting a resistor
(RCR3) between OSC3 and OSC4 terminals.
When external input is selected, release the OSC4
terminal and input the rectangular wave clock into
the OSC3 terminal.
5.3.5 Operating mode
You can select three types of operating modes using
software, to obtain a stable operation and good
characteristics (operating frequency and current
consumption) over a broad operation voltage. Here
below are indicated the features of the respective
modes.
• Normal mode (VDD = 2.4 V–5.5 V)
This mode is set following the initial reset. It
permits the OSC3 oscillation circuit (Max. 4.2
MHz) to be used and also permits relative low
power operation.
• Low power mode (VDD = 1.8 V–3.5 V)
This is a lower power mode than the normal
mode. It makes ultra-low power consumption
possible by operation on the OSC1 oscillation
circuit, although the OSC3 circuit cannot be used.
• High speed mode (V
DD = 3.5 V–5.5 V)
This mode permits higher speed operation than
the normal mode. Since the OSC3 oscillation
circuit (Max. 8.2 MHz) can be used, you should
use this mode, when you require operation at 4.2
MHz or more. However, the current consumption will increase relative to the normal mode.
Using software to switch over among the above
three modes to meet your actual usage circumstances will make possible a low power system. For
example, you will be able to reduce current consumption by switching over to the normal mode
when using the OSC3 as the CPU clock and,
conversely, changing over to the low power mode
when using the OSC1 as the CPU clock (OSC3
oscillation circuit is OFF).
Note: Do not turn the OSC3 oscillation circuit ON in
the low power mode. Do not switch over the
operating mode (normal mode ´ high speed
mode) in the OSC3 oscillation circuit ON
status, as this will cause faulty operation.
You can not use two modes, the low power
mode and the high speed mode on one
application, with respect to the operating
voltages.
V
SS
OSC4
OSC3
Rf
C
D2
C
G2
f
OSC3
Oscillation circuit
control signal
SLEEP status
X'tal 2
or
Ceramic
Oscillation circuit
control signal
SLEEP status
OSC4
OSC3
R
CR3
f
OSC3
OSC4
OSC3
External
clock
N.C.
V
SS
V
DD
f
OSC3
Oscillation circuit
control signal
SLEEP status
(1) Crystal/Ceramic oscillation circuit
(2) CR oscillation circuit
(3) External clock input
Fig. 5.3.4.1 OSC3 oscillation circuit
Page 36

30 EPSON E0C88832/88862 TECHNICAL MANUAL
5 PERIPHERAL CIRCUITS AND THEIR OPERATION (Oscillation Circuits and Operating Mode)
When switching over from the OSC3 to the OSC1,
turn the OSC3 oscillation circuit OFF immediately
following the clock changeover.
The basic clock switching procedure is as described
above, however, you must also combine it with the
changeover of the operating mode to permit low
current consumption and high speed operation.
Figure 5.3.6.1 indicates the status transition diagram for the operation mode and clock changeover.
Note:
When turning ON the OSC3 oscillation circuit
after switching the operating mode, you should
allow a minimum waiting time of 5 msec.
5.3.6 Switching the CPU clocks
You can use either OSC1 or OSC3 as the system
clock for the CPU and you can switch over by
means of software.
You can save power by turning the OSC3 oscillation circuit off while the CPU is operating in OSC1.
When you must operate on OSC3, you can change
to high speed operation by turning the OSC3
oscillation circuit ON and switching over the
system clock. In this case, since several 100 µsec to
several 10 msec are necessary for the oscillation to
stabilize after turning the OSC3 oscillation circuit
ON, you should switch over the clock after
stabilization time has elapsed. (The oscillation start
time will vary somewhat depending on the oscillator and on the externally attached parts. Refer to
the oscillation start time example indicated in
Chapter 7, "ELECTRICAL CHARACTERISTICS".)
* The return destination from the standby status becomes the program execution status prior to shifting to the standby
status
Fig. 5.3.6.1 Status transition diagram for the operation mode and clock changeover
ON
ON or OFF
STOP
HALT status
OSC1
OSC3
CPU clock
OFF
OFF
STOP
SLEEP status
OSC1
OSC3
CPU clock
Program Execution Status
Standby Status
HALT instruction SLP instruction
*
Interrupt
*
Interrupt
(Input interrupt)
VDC0=0
VDC1=0
OSCC=0
RESET
OSCC=1
CLKCHG=0
CLKCHG=1
OSCC=0
OSCC=1
CLKCHG=0
CLKCHG=1
ON
OFF
OSC1
ON
OFF
OSC1
ON
ON
OSC1
ON
ON
OSC1
ON
ON
OSC3
ON
ON
OSC3
High speed mode
ON
OFF
OSC1
Normal mode
Low power mode
High speed mode
Normal mode
High speed mode
Normal mode
VDC0=
VDC1=1
VDC0=1
VDC1=0
VDC0=0
VDC1=0
×
OSC1
OSC3
CPU clock
OSC1
OSC3
CPU clock
OSC1
OSC3
CPU clock
OSC1
OSC3
CPU clock
OSC1
OSC3
CPU clock
OSC1
OSC3
CPU clock
OSC1
OSC3
CPU clock
Page 37

E0C88832/88862 TECHNICAL MANUAL EPSON 31
5 PERIPHERAL CIRCUITS AND THEIR OPERATION (Oscillation Circuits and Operating Mode)
5.3.7 Control of oscillation circuit and operating mode
Table 5.3.7.1 shows the control bits for the oscillation circuits and operating modes.
Table 5.3.7.1 Oscillation circuit and operating mode control bits
VDC1, VDC0: 00FF02H•D1, D0
Selects the operating mode according to supply
voltage and operating frequency.
Table 5.3.7.2 shows the correspondence between
register preset values and operating modes.
Table 5.3.7.2 Correspondence between register
preset values and operating modes
CLKCHG: 00FF02H•D3
Selects the operating clock for the CPU.
When "1" is written: OSC3 clock
When "0" is written: OSC1 clock
Reading: Valid
When the operating clock for the CPU is switched
to OSC3, CLKCHG should be set to "1" and when
the clock is switched to OSC1, CLKCHG should be
set to "0".
At initial reset, CLKCHG is set to "0" (OSC1 clock).
2.4–5.5 V
1.8–3.5 V
3.5–5.5 V
Operating
frequency
4.2 MHz
80 kHz
8.2 MHz
VD1
2.2 V
1.3 V
3.3 V
VDC1
0
0
1
VDC0
0
1
×
Normal mode
Low power mode
High speed mode
(Max.)
(Max.)
(Max.)
Operating
mode
Power
voltage
* The VD1 voltage is the value where VSS has been
made the standard (GND).
At initial reset, this register is set to "0" (normal
mode).
OSCC: 00FF02H•D2
Controls the ON and OFF settings of the OSC3
oscillation circuit.
When "1" is written: OSC3 oscillation ON
When "0" is written: OSC3 oscillation OFF
Reading: Valid
When the CPU and some peripheral circuits
(output port, serial interface and programmable
timer) are to be operated at high speed, OSCC is to
be set to "1". At all other times, it should be set to
"0" in order to reduce current consumption.
At initial reset, OSCC is set to "0" (OSC3 oscillation
OFF).
Address Bit Name SR R/WFunction Comment10
00FF02 D7
D6
D5
D4
D3
D2
D1
D0
EBR
WT2
WT1
WT0
CLKCHG
OSCC
VDC1
VDC0
General-purpose register
General-purpose register
General-purpose register
General-purpose register
CPU operating clock switch
OSC3 oscillation On/Off control
Operating mode selection
0
0
0
0
0
0
0
0
R/W
R/W
R/W
R/W
R/W
R/W
R/W
R/W
1
OSC3
On
0
OSC1
Off
VDC1
1
0
0
VDC0
×
1
0
High speed (VD1=3.3V)
Low power (V
D1
=1.3V)
Normal (V
D1
=2.2V)
Operating mode
Reserved register
Page 38

32 EPSON E0C88832/88862 TECHNICAL MANUAL
5 PERIPHERAL CIRCUITS AND THEIR OPERATION (Oscillation Circuits and Operating Mode)
5.3.8 Programming notes
(1) When the high speed CPU operation is not
necessary, you should operate the peripheral
circuits according to the setting outline indicate
below.
• CPU operating clock
OSC1
• OSC3 oscillation circuit
OFF (When the OSC3 clock is not necessary
for some peripheral circuits.)
• Operating mode
Low power mode (When V
DD–VSS is 3.5 V
or less)
or Normal mode (When VDD–VSS is 3.5 V or
more)
(2) Do not turn the OSC3 oscillation circuit ON in
the low power mode.
Do not switch over the operating mode (normal
mode ↔ high speed mode) in the OSC3 oscillation circuit ON status, as this will cause faulty
operation.
(3) When turning ON the OSC3 oscillation circuit
after switching the operating mode, you should
allow a minimum waiting time of 5 msec.
(4) Since several 100 µsec to several 10 msec are
necessary for the oscillation to stabilize after
turning the OSC3 oscillation circuit ON.
Consequently, you should switch the CPU
operating clock (OSC1 → OSC3) after allowing
for a sufficient waiting time once the OSC3
oscillation goes ON. (The oscillation start time
will vary somewhat depending on the oscillator
and on the externally attached parts. Refer to
the oscillation start time example indicated in
Chapter 7, "ELECTRICAL CHARACTERISTICS".)
(5) When switching the clock from OSC3 to OSC1,
be sure to switch OSC3 oscillation OFF with
separate instructions. Using a single instruction
to process simultaneously can cause a malfunction of the CPU.
Page 39

E0C88832/88862 TECHNICAL MANUAL EPSON 33
5 PERIPHERAL CIRCUITS AND THEIR OPERATION (Input Ports)
5.4 Input Ports (K ports)
5.4.1 Configuration of input ports
The E0C88832/88862 is equipped with 9 input port
bits (K00–K07 and K10) which are usable as general
purpose input port terminals with interrupt
function.
K10 terminal doubles as the external clock (EVIN)
input terminal of the programmable timer (event
counter) with input port functions sharing the
input signal as is. (See "5.10 Programmable Timer")
Each input port is equipped with a pull-up resistor.
The mask option can be used to select either "With
resistor" or "Gate direct" for each input port.
Figure 5.4.1.1 shows the structure of the input port.
Fig. 5.4.1.1 Structure of input port
Each input port terminal is directly connected via a
three-state buffer to the data bus. Furthermore, the
input signal state at the instant of input port
readout is read in that form as data.
5.4.2 Mask option
Input port pull-up resistors
K00 .... ■■ With resistor ■■ Gate direct
K01 .... ■■ With resistor ■■ Gate direct
K02 .... ■■ With resistor ■■ Gate direct
K03 .... ■■ With resistor ■■ Gate direct
K04 .... ■■ With resistor ■■ Gate direct
K05 .... ■■ With resistor ■■ Gate direct
K06 .... ■■ With resistor ■■ Gate direct
K07 .... ■■ With resistor ■■ Gate direct
K10 .... ■■ With resistor ■■ Gate direct
Input ports K00–K07 and K10 are all equipped with
pull-up resistors. The mask option can be used to
select 'With resistor' or 'Gate direct' for each port
(bit).
The 'With resistor' option is rendered suitable for
purposes such as push switch or key matrix input.
When changing the input terminal from LOW level
to HIGH with the built-in pull-up resistor, a delay
in the waveform rise time will occur depending on
the time constant of the pull-up resistor and the
load capacitance of the terminal. It is necessary to
set an appropriate wait time for introduction of an
input port. In particular, special attention should be
paid to key scan for key matrix formation. Make
this wait time the amount of time or more calculated by the following expression.
Wait time = RIN x (CIN + load capacitance on the
board) x 1.6 [sec]
RIN: Pull up resistance Max. value
CIN: Terminal capacitance Max. value
When 'Gate direct' is selected, the pull-up resistor is
detached and the port is rendered suitable for
purposes such as slide switch input and interfacing
with other LSIs.
In this case, take care that a floating state does not
occur in input.
For unused input ports, select the default setting of
"With resistor".
Input
interrupt
circuit
VDD
VSS
Data bus
Kxx
KxxD
Address
Mask
option
Page 40

34 EPSON E0C88832/88862 TECHNICAL MANUAL
5 PERIPHERAL CIRCUITS AND THEIR OPERATION (Input Ports)
5.4.3 Interrupt function and input
comparison register
Input port K00–K07 and K10 are all equipped with
an interrupt function. These input ports are divided
into three groupings: K00–K03 (K0L), K04–K07
(K0H) and K10 (K1). Furthermore, the interrupt
generation condition for each series of terminals
can be set by software.
When the interrupt generation condition set for
each series of terminals is met, the interrupt factor
flag FK0L, FK0H or FK1 corresponding to the
applicable series is set at "1" and an interrupt is
generated.
Interrupt can be prohibited by setting the interrupt
enable registers EK0L, EK0H and EK1 for the
corresponding interrupt factor flags.
Furthermore, the priority level for input interrupt
can be set at the desired level (0–3) using the
interrupt priority registers PK00–PK01 and PK10–
PK11 corresponding to each of two groups K0x
(K00–K07) and K10.
For details on the interrupt control registers for the
above and on operations subsequent to interrupt
generation, see "5.14 Interrupt and Standby Status".
The exception processing vectors for each interrupt
factor are set as follows:
K10 input interrupt: 00000AH
K04–K07 input interrupt: 00000CH
K00–K03 input interrupt: 00000EH
Figure 5.4.3.1 shows the configuration of the input
interrupt circuit.
Data bus
K00
Input comparison
register KCP00
Address
Address
K01
K02
K03
Input port
K00D
Interrupt factor
flag FK0L
Address
K04
Input comparison
register KCP04
Address
Address
K05
K06
K07
Input port
K04D
Address
K10
Input comparison
register KCP10
Interrupt selection
register SIK00
Interrupt selection
register SIK04
Interrupt selection
register SIK10
Address
Address
Input port
K10D
Interrupt priority
level judgement
circuit
Interrupt
priority
register
PK00, PK01
Interrupt priority
level judgement
circuit
Interrupt
priority
register
PK10, PK11
Interrupt
request
Interrupt
request
Interrupt enable
register EK0L
Address
Address
Interrupt factor
flag FK1
Address
Interrupt enable
register EK1
Address
Interrupt factor
flag FK0H
Interrupt enable
register EK0H
Address
Address
Fig. 5.4.3.1 Configuration of input interrupt circuit
Page 41

E0C88832/88862 TECHNICAL MANUAL EPSON 35
5 PERIPHERAL CIRCUITS AND THEIR OPERATION (Input Ports)
The interrupt selection registers SIK00–SIK03,
SIK04–SIK07 and SIK10 and input comparison
registers KCP00–KCP03, KCP04–KCP07 and KCP10
for each port are used to set the interrupt generation condition described above.
Input port interrupt can be permitted or prohibited
by the setting of the interrupt selection register SIK.
In contrast to the interrupt enable register EK
which masks the interrupt factor for each series of
terminals, the interrupt selection register SIK is
masks the bit units.
The input comparison register KCP selects whether
the interrupt for each input port will be generated
on the rising edge or the falling edge of input.
When the data content of the input terminals in
which interrupt has been permitted by the interrupt
selection register SIK and the data content of the
input comparison register KCP change from a
conformity state to a non-conformity state, the
interrupt factor flag FK should be set to "1" and an
interrupt is generated.
Figure 5.4.3.2 shows an example of interrupt
generation in the series of terminals K0L (K00–K03).
Because interrupt has been prohibited for K00 by
the interrupt selection register SIK00, with the
settings as shown in (2), an interrupt will not be
generated.
Since K03 is "0" in the next settings (3) in the figure,
the non-conformity between the input terminal
data K01–K03 where interrupt is permitted and the
data from the input comparison registers KCP01–
KCP03 generates an interrupt.
In line with the explanation above, since the change
in the contents of input data and input comparison
registers KCP from a conformity state to a nonconformity state introduces an interrupt generation
condition, switching from one non-conformity state
to another, as is the case in (4) in the figure, will not
generate an interrupt. Consequently, in order to be
able to generate a second interrupt, either the input
terminal must be returned to a state where its
content is once again in conformity with that of the
input comparison register KCP, or the input
comparison register KCP must be reset.
Input terminals for which interrupt is prohibited
will not influence an interrupt generation condition.
Interrupt is generated in exactly the same way in
the other two series of terminals K0H (K04–K07)
and K1 (K10).
SIK03 SIK01
11
SIK02
1
SIK00
0
Interrupt selection register
KCP03
KCP01
11
KCP02
0
KCP00
0
Input comparison register
With the settings shown above, interrupt of K0L (K00–K03) is generated under the condition shown below.
K03 K01
11
K02
0
K00
0
Input port
(1)
K03 K01
11
K02
0
K00
1
(2)
K03 K01
01
K02
0
K00
1
(3)
K03 K01
01
K02
1
K00
1
(4)
(Initial values)
→ Interrupt generation
Because interrupt has been prohibited for K00, interrupt will be generated
when non-conformity occurs between the contents of the three bits
K01–K03 and the three bits input comparison register KCP01–KCP03.
↓
↓
↓
Fig. 5.4.3.2 Interrupt generation example in K0L (K00–K03)
Page 42

36 EPSON E0C88832/88862 TECHNICAL MANUAL
5 PERIPHERAL CIRCUITS AND THEIR OPERATION (Input Ports)
5.4.4 Control of input ports
Table 5.4.4.1 shows the input port control bits.
Table 5.4.4.1(a) Input port control bits
Address Bit Name SR R/WFunction Comment10
00FF50 D7
D6
D5
D4
D3
D2
D1
D0
SIK07
SIK06
SIK05
SIK04
SIK03
SIK02
SIK01
SIK00
K07 interrupt selection register
K06 interrupt selection register
K05 interrupt selection register
K04 interrupt selection register
K03 interrupt selection register
K02 interrupt selection register
K01 interrupt selection register
K00 interrupt selection register
0
0
0
0
0
0
0
0
R/W
R/W
R/W
R/W
R/W
R/W
R/W
R/W
Interrupt
enable
Interrupt
disable
00FF51 D7
D6
D5
D4
D3
D2
D1
D0
–
–
–
–
–
–
SIK11
SIK10
–
–
–
–
–
–
General-purpose register
K10 interrupt selection register
Constantly "0" when
being read
Reserved register
–
–
–
–
–
–
00R/W
R/W
–
–
–
–
–
–
1
Enable
–
–
–
–
–
–
0
Disable
00FF53 D7
D6
D5
D4
D3
D2
D1
D0
–
–
–
–
–
–
KCP11
KCP10
–
–
–
–
–
–
General-purpose register
K10 input comparison register
Constantly "0" when
being read
Reserved register
–
–
–
–
–
–
11R/W
R/W
–
–
–
–
–
–
1
Falling edge
–
–
–
–
–
–
0
Rising edge
00FF52 D7
D6
D5
D4
D3
D2
D1
D0
KCP07
KCP06
KCP05
KCP04
KCP03
KCP02
KCP01
KCP00
K07 input comparison register
K06 input comparison register
K05 input comparison register
K04 input comparison register
K03 input comparison register
K02 input comparison register
K01 input comparison register
K00 input comparison register
1
1
1
1
1
1
1
1
R/W
R/W
R/W
R/W
R/W
R/W
R/W
R/W
Interrupt
generated
at falling
edge
Interrupt
generated
at rising
edge
00FF54 D7
D6
D5
D4
D3
D2
D1
D0
K07D
K06D
K05D
K04D
K03D
K02D
K01D
K00D
K07 input port data
K06 input port data
K05 input port data
K04 input port data
K03 input port data
K02 input port data
K01 input port data
K00 input port data
–
–
–
–
–
–
–
–
R
R
R
R
R
R
R
R
High level
input
Low level
input
00FF55 D7
D6
D5
D4
D3
D2
D1
D0
–
–
–
–
–
–
–
K10D
–
–
–
–
–
–
–
K10 input port data
Constantly "0" when
being read
"1" when being read
–
–
_
_
_
_
–
–R
–
–
–
–
–
–
–
High level
–
–
–
–
–
–
–
Low level
Page 43

E0C88832/88862 TECHNICAL MANUAL EPSON 37
5 PERIPHERAL CIRCUITS AND THEIR OPERATION (Input Ports)
Table 5.4.4.1(b) Input port control bits
K00D–K07D: 00FF54H
K10D: 00FF55H•D0
Input data of input port terminal Kxx can be read out.
When "1" is read: HIGH level
When "0" is read: LOW level
Writing: Invalid
The terminal voltage of each of the input port K00–
K07 and K10 can be directly read out as either a "1"
for HIGH (V
DD) level or a "0" for LOW (VSS) level.
This bit is exclusively for readout and are not
usable for write operations.
SIK00–SIK07: 00FF50H
SIK10: 00FF51H•D0
Sets the interrupt generation condition (interrupt
permission/prohibition) for input port terminals
K00–K07 and K10.
When "1" is written: Interrupt permitted
When "0" is written: Interrupt prohibited
Reading: Valid
SIKxx is the interrupt selection register which
correspond to the input port Kxx. A "1" setting
permits interrupt in that input port and a "0"
prohibits it. Changes of state in an input terminal in
which interrupt is prohibited, will not influence
interrupt generation.
At initial reset, this register is set to "0" (interrupt
prohibited).
Address Bit Name SR R/WFunction Comment10
00FF20 D7
D6
D5
D4
D3
D2
D1
D0
PK01
PK00
PSIF1
PSIF0
PSW1
PSW0
PTM1
PTM0
K00–K07 interrupt priority register
Serial interface interrupt priority register
Stopwatch timer interrupt priority register
Clock timer interrupt priority register
0
0
0
0
0
0
0
0
R/W
R/W
R/W
R/W
R/W
R/W
R/W
R/W
PK01
PSIF1
PSW1
PTM1
1
1
0
0
PK00
PSIF0
PSW0
PTM0
1
0
1
0
Priority
level
Level 3
Level 2
Level 1
Level 0
00FF21 D7
D6
D5
D4
D3
D2
D1
D0
–
–
–
–
PPT1
PPT0
PK11
PK10
–
–
–
–
Programmable timer interrupt priority register
K10 interrupt priority register
Constantly "0" when
being read
–
–
–
–
0
0
0
0
R/W
R/W
R/W
R/W
–
–
–
–
–
–
–
–
PPT1
PK11
1
1
0
0
PPT0
PK10
1
0
1
0
Priority
level
Level 3
Level 2
Level 1
Level 0
00FF25 D7
D6
D5
D4
D3
D2
D1
D0
FPT1
FPT0
FK1
FK0H
FK0L
FSERR
FSREC
FSTRA
Programmable timer 1 interrupt factor flag
Programmable timer 0 interrupt factor flag
K10 interrupt factor flag
K04–K07 interrupt factor flag
K00–K03 interrupt factor flag
Serial I/F (error) interrupt factor flag
Serial I/F (receiving) interrupt factor flag
Serial I/F (transmitting) interrupt factor flag
0
0
0
0
0
0
0
0
R/W
R/W
R/W
R/W
R/W
R/W
R/W
R/W
(R)
Interrupt
factor is
generated
(W)
Reset
(R)
No interrupt
factor is
generated
(W)
No operation
D7
D6
D5
D4
D3
D2
D1
D0
00FF23 EPT1
EPT0
EK1
EK0H
EK0L
ESERR
ESREC
ESTRA
Programmable timer 1 interrupt enable register
Programmable timer 0 interrupt enable register
K10 interrupt enable register
K04–K07 interrupt enable register
K00–K03 interrupt enable register
Serial I/F (error) interrupt enable register
Serial I/F (receiving) interrupt enable register
Serial I/F (transmitting) interrupt enable register
0
0
0
0
0
0
0
0
R/W
R/W
R/W
R/W
R/W
R/W
R/W
R/W
Interrupt
enable
Interrupt
disable
Page 44

38 EPSON E0C88832/88862 TECHNICAL MANUAL
5 PERIPHERAL CIRCUITS AND THEIR OPERATION (Input Ports)
KCP00–KCP07: 00FF52H
KCP10: 00FF53H•D0
Sets the interrupt generation condition (interrupt
generation timing) for input port terminals K00–
K07 and K10.
When "1" is written: Falling edge
When "0" is written: Rising edge
Reading: Valid
KCPxx is the input comparison register which
correspond to the input port Kxx. Interrupt in those
ports which have been set to "1" is generated on the
falling edge of the input and in those set to "0" on
the rising edge.
At initial reset, this register is set to "1" (falling edge).
PK00, PK01: 00FF20H•D6, D7
PK10, PK11: 00FF21H•D0, D1
Sets the input interrupt priority level. The two bits
PK00 and PK01 are the interrupt priority registers
corresponding to the interrupts for K00–K07 (K0L
and K0H). Corresponding to K10 (K1), the two bits
PK10 and PK11 perform the same function.
Table 5.4.4.2 shows the interrupt priority level
which can be set by this register.
Table 5.4.4.2 Interrupt priority level settings
FK0L, FK0H, FK1: 00FF25H•D3, D4, D5
Indicates the generation state for an input interrupt.
When "1" is read: Interrupt factor present
When "0" is read:
Interrupt factor not present
When "1" is written: Reset factor flag
When "0" is written: Invalid
The interrupt factor flag FK0L corresponds to K00–
K03, FK0H to K04–K07, and FK1 to K10 and they
are set to "1" by the occurrence of an interrupt
generation condition.
When set in this manner, if the corresponding
interrupt enable register is set to "1" and the
corresponding interrupt priority register is set to a
higher level than the setting of interrupt flags (I0
and I1), an interrupt will be generated to the CPU.
Regardless of the interrupt enable register and
interrupt priority register settings, the interrupt
factor flag will be set to "1" by the occurrence of an
interrupt generation condition.
To accept the subsequent interrupt after interrupt
generation, re-setting of the interrupt flags (set
interrupt flag to lower level than the level indicated
by the interrupt priority registers, or execute the
RETE instruction) and interrupt factor flag reset are
necessary. The interrupt factor flag is reset to "0" by
writing "1".
At initial reset, this flag is all reset to "0".
5.4.5 Programming note
When changing the input terminal from LOW level
to HIGH with the built-in pull-up resistor, a delay
in the waveform rise time will occur depending on
the time constant of the pull-up resistor and the
load capacitance of the terminal. It is necessary to
set an appropriate wait time for introduction of an
input port. In particular, special attention should be
paid to key scan for key matrix formation. Make
this wait time the amount of time or more calculated by the following expression.
Wait time = RIN x (CIN + load capacitance on the
board) x 1.6 [sec]
RIN: Pull up resistance Max. value
CIN: Terminal capacitance Max. value
At initial reset, this register is set to "0" (level 0).
EK0L, EK0H, EK1: 00FF23H•D3, D4, D5
How interrupt generation to the CPU is permitted
or prohibited.
When "1" is written: Interrupt permitted
When "0" is written: Interrupt prohibited
Reading: Valid
The interrupt enable register EK0L corresponds to
K00–K03, EK0H to K04–K07, and EK1 to K10.
Interrupt is permitted in those series of terminals
set to "1" and prohibited in those set to "0".
At initial reset, this register is set to "0" (interrupt
prohibited).
PK11
PK01
PK10
PK00
Interrupt priority level
1
1
0
0
1
0
1
0
Level 3 (IRQ3)
Level 2 (IRQ2)
Level 1 (IRQ1)
Level 0 (None)
Page 45

E0C88832/88862 TECHNICAL MANUAL EPSON 39
5 PERIPHERAL CIRCUITS AND THEIR OPERATIO (Output Ports)
5.5 Output Ports (R ports)
5.5.1 Configuration of output ports
The E0C88832 is equipped with 5 bits of output
ports (R26, R27, R34, R50 and R51) and the
E0C88862 is equipped with 4 bits of output ports
(R26, R27, R50 and R51).
Figure 5.5.1.1 shows the basic structure (excluding
special output circuits) of the output ports.
The output specification of each port is fixed at
complementary output.
5.5.3 High impedance control
The output port can be high impedance controlled
in software.
A high impedance control register is set for each
output port terminal as shown below. Either
complementary output and high impedance state
can be selected with this register.
HZR26: R26 high impedance control register
HZR27: R27 high impedance control register
HZR34: R34 high impedance control register ∗
HZR50: R50 high impedance control register
HZR51: R51 high impedance control register
∗ Available only in the E0C88832.
When a high impedance control register HZRxx is
set to "1", the corresponding output port terminal
becomes high impedance state and when set to "0",
it becomes complementary output.
5.5.4 DC output
As Figure 5.5.1.1 shows, when "1" is written to the
output port data register, the output terminal
switches to HIGH (VDD) level and when "0" is
written it switches to LOW (VSS) level. When
output is in a high impedance state, the data
written to the data register is output from the
terminal at the instant when output is switched to
complementary.
5.5.5 Special output
Besides normal DC output, each output port can
also be assigned special output function in software
(R27, R34*, R50) or mask option (R26, R51) as
shown in Table 5.5.5.1.
Table 5.5.5.1 Special output ports
VDD
VSS
Data bus
Rxx
Address
Data register
Address
High impedance
control register
Fig. 5.5.1.1 Structure of output ports
Each output port can be set into high impedance
state by software.
Besides normal DC output, the output ports have
special output functions. The R27, R34 (E0C88832
only) and R50 functions can be selected by software
and the R26 and R51 functions can be selected by
mask option.
5.5.2 Mask option
R26 and R51 output port specifications
R26 .......... ■■ DC output ■■ TOUT output
R51 .......... ■■ DC output ■■ BZ output
The mask option allows selection of special outputs
for the R26 and R51 output ports as well as the DC
output. The R26 port can be set as the TOUT output
port (TOUT signal inverted output) and the R51
port can be set as the BZ output port (buzzer signal
inverted output).
Output port
R26
R27
R34*
R50
R51
Special output
TOUT output (mask option)
TOUT output (software selection)
FOUT output (software selection)
BZ output (software selection)
BZ output (mask option)
∗ R34 (FOUT) is available only in the E0C88832.
Page 46

40 EPSON E0C88832/88862 TECHNICAL MANUAL
5 PERIPHERAL CIRCUITS AND THEIR OPERATION (Output Ports)
■ TOUT output (R27), TOUT output (R26)
In order for the E0C88832/88862 to provide clock
signal to an external device, the R27 output port
terminal can be used to output a TOUT signal
(clock output by the programmable timer).
Furthermore, the R26 output port terminal can be
used to output a TOUT signal (TOUT inverted
signal). The configuration of the output ports R26
and R27 is shown in Figure 5.5.5.1.
Register R27D
Register PTOUT
R27 output
R26 output
Mask option
TOUT signal
Register R26D
Fig. 5.5.5.1 Configuration of R26 and R27
The output control for the TOUT (TOUT) signals is
done by the register PTOUT. When you set "1" for
the PTOUT, the TOUT (TOUT) signal is output
from the R27 (R26) output port terminal. When "0"
is set, the R27 goes HIGH (VDD) and the R26 goes
LOW (VSS).
To output the TOUT signal, "1" must always be set
for the data register R27D.
The data register R26D does not affect the TOUT
output.
The TOUT signal is generated from the
programmable timer underflow signal by halving
the frequency.
With respect to frequency control, see "5.10 Programmable Timer".
Since the TOUT (TOUT) signal is generated
asynchronously from the register PTOUT, when the
signal is turned ON or OFF by setting the register, a
hazard of a 1/2 cycle or less is generated.
Figure 5.5.5.2 shows the output waveform of the
TOUT (TOUT) signal.
PTOUT
TOUT output (R27)
TOUT output (R26) *
01
∗ when selected by mask option
Fig. 5.5.5.2 TOUT (TOUT) output waveform
■ FOUT output (R34)...E0C88832 only
In order for the E0C88832 to provide clock signal to
an external device, a FOUT signal (divided clock of
oscillation clock fOSC1 or fOSC3) can be output from
the output port terminal R34.
Figure 5.5.5.3 shows the configuration of output
port R34.
Register R34D
Register FOUTON
R34 output
FOUT signal
Fig. 5.5.5.3 Configuration of R34
The output control for the FOUT signal is done by
the register FOUTON. When you set "1" for the
FOUTON, the FOUT signal is output from the
output port terminal R34, when "0" is set, the HIGH
(VDD) level is output. At this time, "1" must always
be set for the data register R34D.
The frequency of the FOUT signal can be selected in
software by setting the registers FOUT0–FOUT2.
The frequency is selected any one from among
eight settings as shown in Table 5.5.5.2.
Table 5.5.5.2 FOUT frequency setting
FOUT2 FOUT frequency
0
0
0
0
1
1
1
1
f
OSC1
/ 1
f
OSC1
/ 2
f
OSC1
/ 4
f
OSC1
/ 8
f
OSC3
/ 1
f
OSC3
/ 2
f
OSC3
/ 4
f
OSC3
/ 8
FOUT1
0
0
1
1
0
0
1
1
FOUT0
0
1
0
1
0
1
0
1
f
OSC1
:
f
OSC3
:
OSC1 oscillation frequency
OSC3 oscillation frequency
When the FOUT frequency is made "fOSC3/n", you
must turn on the OSC3 oscillation circuit before
outputting FOUT. A time interval of several 100
µsec to several 10 msec, from the turning ON of the
OSC3 oscillation circuit to until the oscillation
stabilizes, is necessary, due to the oscillation
element that is used. Consequently, if an abnormality occurs as the result of an unstable FOUT signal
being output externally, you should allow an
adequate waiting time after turning ON of the
OSC3 oscillation, before turning outputting FOUT.
(The oscillation start time will vary somewhat
depending on the oscillator and on the externally
attached parts. Refer to the oscillation start time
example indicated in Chapter 7, "ELECTRICAL
CHARACTERISTICS".)
At initial reset, OSC3 oscillation circuit is set to OFF
state.
Page 47

E0C88832/88862 TECHNICAL MANUAL EPSON 41
5 PERIPHERAL CIRCUITS AND THEIR OPERATIO (Output Ports)
Since the FOUT signal is generated asynchronously
from the register FOUTON, when the signal is
turned ON or OFF by the register settings, a hazard
of a 1/2 cycle or less is generated.
Figure 5.5.5.4 shows the output waveform of the
FOUT signal.
FOUTON
FOUT output (R34)
01
Fig. 5.5.5.4 Output waveform of FOUT signal
■ BZ output (R50), BZ output (R51)
In order for the E0C88832/88862 to drive an
external buzzer, a BZ signal (sound generator
output) can be output from the output port
terminal R50. Furthermore, the R51 output port
terminal can be used to output a BZ signal (BZ
inverted signal).
The configuration of the output ports R50 and R51
is shown in Figure 5.5.5.5.
BZ signal
R
SQ
One-shot
time up
R50 output
Register BZSTP
Register BZON
Register BZSHT
Register R50D
R51 output
Mask option
Register R51D
Fig. 5.5.5.5 Configuration of R50 and R51
The output control for the BZ (BZ) signal is done by
the registers BZON, BZSHT and BZSTP. When you
set "1" for the BZON or BZSHT, the BZ (BZ) signal
is output from the output port terminal R50 (R51).
When "0" is set for the BZON or "1" is set for the
BZSTP, the R50 goes LOW (VSS) and the R51 goes
HIGH (VDD).
To output the BZ signal, "0" must always be set for
the data register R50D. The data register R51D does
not affect the BZ output.
The BZ (BZ) signal is generated by the sound
generator. With respect to control of frequency and
envelope, see "5.12 Sound Generator".
Since the BZ (BZ) signal is generated asynchronously from the registers BZON, BZSHT and
BZSTP, when the signal is turned ON or OFF by
setting the registers, a hazard of a 1/2 cycle or less
is generated.
Figure 5.5.5.6 shows the output waveform of the BZ
(BZ) signal.
BZON/BZSHT
BZ output (R50)
BZ output (R51) *
01
∗ when selected by mask option
Fig. 5.5.5.6 BZ (BZ) output waveform
Page 48

42 EPSON E0C88832/88862 TECHNICAL MANUAL
5 PERIPHERAL CIRCUITS AND THEIR OPERATION (Output Ports)
5.5.6 Control of output ports
Table 5.5.6.1 shows the output port control bits.
Table 5.5.6.1(a) Output port control bits
Address Bit Name SR R/WFunction Comment10
00FF70 D7
D6
D5
D4
D3
D2
D1
D0
HZR51
HZR50
HZR4H
HZR4L
HZR1H
HZR1L
HZR0H
HZR0L
R51 high impedance control
R50 high impedance control
General-purpose register
General-purpose register
General-purpose register
General-purpose register
General-purpose register
General-purpose register
Reserved register
0
0
0
0
0
0
0
0
R/W
R/W
R/W
R/W
R/W
R/W
R/W
R/W
Hi-Z
1
Output
0
00FF71 D7
D6
D5
D4
D3
D2
D1
D0
HZR27
HZR26
HZR25
HZR24
HZR23
HZR22
HZR21
HZR20
R27 high impedance control
R26 high impedance control
General-purpose register
General-purpose register
General-purpose register
General-purpose register
General-purpose register
General-purpose register
Reserved register
0
0
0
0
0
0
0
0
R/W
R/W
R/W
R/W
R/W
R/W
R/W
R/W
Hi-Z
1
Output
0
00FF72*2D7
D6
D5
D4
D3
D2
D1
D0
HZR37
HZR36
HZR35
HZR34
HZR33
HZR32
HZR31
HZR30
General-purpose register
General-purpose register
General-purpose register
R34 high impedance control
General-purpose register
General-purpose register
General-purpose register
General-purpose register
0
0
0
0
0
0
0
0
R/W
R/W
R/W
R/W
R/W
R/W
R/W
R/W
1
Hi-Z
1
0
Output
0
Reserved register
Reserved register
00FF75 D7
D6
D5
D4
D3
D2
D1
D0
R27D
R26D
R25D
R24D
R23D
R22D
R21D
R20D
R27 output port data
R26 output port data
General-purpose register
General-purpose register
General-purpose register
General-purpose register
General-purpose register
General-purpose register
Reserved register
00FF76*2D7
D6
D5
D4
D3
D2
D1
D0
R37D
R36D
R35D
R34D
R33D
R32D
R31D
R30D
General-purpose register
General-purpose register
General-purpose register
R34 output port data
General-purpose register
General-purpose register
General-purpose register
General-purpose register
1
1
1
1
1
1
1
1
R/W
R/W
R/W
R/W
R/W
R/W
R/W
R/W
1
High
1
0
Low
0
00FF78 D7
D6
D5
D4
D3
D2
D1
D0
–
–
–
–
–
–
R51D
R50D
–
–
–
–
–
–
R51 output port data
R50 output port data
Constantly "0" when
being read
–
–
–
–
–
–
10R/W
R/W
–
–
–
–
–
–
High
–
–
–
–
–
–
Low
1
1
∗1
1
1
1
1
1
1
R/W
R/W
R/W
R/W
R/W
R/W
R/W
R/W
High
1
Low
0
Reserved register
Reserved register
*1 "0" when TOUT output is selected by mask option.
*2 These addresses are unavailable in the E0C88862.
Page 49

E0C88832/88862 TECHNICAL MANUAL EPSON 43
5 PERIPHERAL CIRCUITS AND THEIR OPERATIO (Output Ports)
Table 5.5.6.1(b) Output port control bits
Address Bit Name SR R/WFunction Comment10
00FF30 D7
D6
D5
D4
D3
D2
D1
D0
–
–
–
MODE16
CHSEL
PTOUT
CKSEL1
CKSEL0
–
–
–
8/16-bit mode selection
TOUT output channel selection
TOUT output control
Prescaler 1 source clock selection
Prescaler 0 source clock selection
Constantry "0" when
being read
–
–
–
0
0
0
0
0
R/W
R/W
R/W
R/W
R/W
–
–
–
16-bit x 1
Timer 1
On
f
OSC3
fOSC3
–
–
–
8-bit x 2
Timer 0
Off
f
OSC1
fOSC1
00FF40 D7
D6
D5
D4
D3
D2
D1
D0
–
FOUT2
FOUT1
FOUT0
FOUTON
WDRST
TMRST
TMRUN
–
FOUT frequency selection
FOUT output control
Watchdog timer reset
Clock timer reset
Clock timer Run/Stop control
"0" when being read
This is just R/W
register on
E0C88862.
Constantly "0" when
being read
–
0
0
0
0
–
–
0
R/W
R/W
R/W
R/W
W
W
R/W
–
On
Reset
Reset
Run
–
Off
No operation
No operation
Stop
FOUT2
0
0
0
0
1
1
1
1
FOUT1
0
0
1
1
0
0
1
1
FOUT0
0
1
0
1
0
1
0
1
Frequency
fOSC1 / 1
f
OSC1 / 2
f
OSC1 / 4
f
OSC1 / 8
f
OSC3 / 1
f
OSC3 / 2
f
OSC3 / 4
f
OSC3 / 8
00FF44 D7
D6
D5
D4
D3
D2
D1
D0
–
BZSTP
BZSHT
SHTPW
ENRTM
ENRST
ENON
BZON
–
One-shot buzzer forcibly stop
One-shot buzzer trigger/status
One-shot buzzer duration width selection
Envelope attenuation time
Envelope reset
Envelope On/Off control
Buzzer output control
Constantry "0" when
being read
"0" when being read
*1
–
–
0
0
0
–
0
0
W
R/W
R/W
R/W
W
R/W
R/W
–
Forcibly stop
Busy
Trigger
125 msec
1 sec
Reset
On
On
–
No operation
Ready
No operation
31.25 msec
0.5 sec
No operation
Off
Off
R
W
*1 Reset to "0" during one-shot output.
Page 50

44 EPSON E0C88832/88862 TECHNICAL MANUAL
5 PERIPHERAL CIRCUITS AND THEIR OPERATION (Output Ports)
■ High impedance control
HZR26: 00FF71H•D6
HZR27: 00FF71H•D7
HZR34: 00FF72H•D4
∗
HZR50: 00FF70H•D6
HZR51: 00FF70H•D7
Sets the output terminals to a high impedance state.
When "1" is written: High impedance
When "0" is written: Complementary
Reading: Valid
HZRxx is the high impedance control register
which correspond to the Rxx output port terminal.
When "1" is set to the HZRxx register, the corresponding output port terminal becomes high
impedance state and when "0" is set, it becomes
complementary output.
This control is effective even if the port is set as a
special output port.
At initial reset, this register is set to "0"
(complimentary).
∗ HZR34 is unavailable in the E0C88862.
■ DC output control
R26D: 00FF75H•D6
R27D: 00FF75H•D7
R34D: 00FF76H•D4
∗
R50D: 00FF78H•D0
R51D: 00FF78H•D1
Sets the data output from the output port terminal
Rxx.
When "1" is written: HIGH level output
When "0" is written: LOW level output
Reading: Valid
RxxD is the data register for the Rxx output port.
When "1" is set to the register, the corresponding
output port terminal goes HIGH (V
DD), and when
"0" is set, it goes LOW (VSS).
At initial reset, R50D is set to "0" (LOW level
output). The other registers are set to "1" (HIGH
level output).
When R26 and/or R51 are set to the special outputs
by mask option, R26D and/or R51D can be used as
general-purpose registers that do not affect the
output status.
∗ R34D is unavailable in the E0C88862.
■ Special output control
PTOUT: 00FF30H•D2
Controls the TOUT (programmable timer output
clock) signal output.
When "1" is written: TOUT signal output ON
When "0" is written: TOUT signal output OFF
Reading: Valid
PTOUT is the output control register for TOUT
signal. When "1" is set to the register, the TOUT
(TOUT) signal is output from the output port
terminal R27 (R26). When "0" is set, the R27 goes
HIGH (VDD) and the R26 goes LOW (VSS).
To output the TOUT signal, "1" must always be set
for the data register R27D. The data register R26D
does not affect the TOUT output.
At initial reset, PTOUT is set to "0" (output OFF).
The TOUT signal can be output from R26 only
when the function is selected by mask option.
FOUTON: 00FF40H•D3
∗
Controls the FOUT (fOSC1/fOSC3 dividing clock)
signal output.
When "1" is written: FOUT signal output
When "0" is written: HIGH level (DC) output
Reading: Valid
FOUTON is the output control register for FOUT
signal. When "1" is set, the FOUT signal is output
from the output port terminal R34 and when "0" is
set, HIGH (V
DD) level is output. At this time, "1"
must always be set for the data register R34D.
At initial reset, FOUTON is set to "0" (HIGH level
output).
∗ In the E0C88862, FOUTON is a general purpose
register with read/write capabilities.
FOUT0, FOUT1, FOUT2: 00FF40H•D4, D5, D6
∗
FOUT signal frequency is set as shown in Table
5.5.6.2.
Table 5.5.6.2 FOUT frequency settings
At initial reset, this register is set to "0" (fOSC1/1).
∗ In the E0C88862, FOUT0, FOUT1 and FOUT2
are general purpose registers with read/write
capabilities.
FOUT2 FOUT frequency
0
0
0
0
1
1
1
1
f
OSC1
/ 1
f
OSC1
/ 2
f
OSC1
/ 4
f
OSC1
/ 8
f
OSC3
/ 1
f
OSC3
/ 2
f
OSC3
/ 4
f
OSC3
/ 8
FOUT1
0
0
1
1
0
0
1
1
FOUT0
0
1
0
1
0
1
0
1
f
OSC1
:
f
OSC3
:
OSC1 oscillation frequency
OSC3 oscillation frequency
Page 51

E0C88832/88862 TECHNICAL MANUAL EPSON 45
5 PERIPHERAL CIRCUITS AND THEIR OPERATIO (Output Ports)
BZON: 00FF44H•D0
Controls the buzzer (BZ and BZ) signal output.
When "1" is written: Buzzer signal output ON
When "0" is written: Buzzer signal output OFF
Reading: Valid
BZON is the output control register for buzzer
signal. When "1" is set to the register, the BZ (BZ)
signal is output from the output port terminal R50
(R51). When "0" is set, the R50 goes LOW (V
SS) and
the R51 goes HIGH (VDD).
To output the BZ signal, "0" must always be set for
the data register R50D. The data register R51D does
not affect the BZ output.
At initial reset, BZON is set to "0" (output OFF).
The BZ signal can be output from R51 only when
the function is selected by mask option.
BZSHT: 00FF44H•D5
Controls the one-shot buzzer output.
When "1" is written: Trigger
When "0" is written: No operation
When "1" is read: Busy
When "0" is read: Ready
Writing "1" into BZSHT causes the one-shot output
circuit to operate. The BZ (BZ) signal is output from
the R50 (R51) terminal. The buzzer output is
automatically turned OFF after the time set by
SHTPW has elapsed.
To output the BZ signal, "0" must always be set for
the data register R50D. The data register R51D does
not affect the BZ output.
The one-shot output is only valid when the normal
buzzer output is OFF (BZON = "0") state. The
trigger is invalid during ON (BZON = "1") state.
When a re-trigger is assigned during a one-shot
output, the one-shot output time set with SHTPW is
measured again from that point. (time extension)
The operation status of the one-shot output circuit
can be confirmed by reading BZSHT, when the oneshot output is ON, "1" is read from BZSHTand
when the output is OFF, "0" is read.
At initial reset, BZSHT is set to "0" (ready).
The BZ signal can be output from R51 only when
the function is selected by mask option.
BZSTP: 00FF44H•D6
Forcibly stops the one-shot buzzer output.
When "1" is written: Forcibly stop
When "0" is written: No operation
Reading: Constantly "0"
By writing "1" into BZSTP, the one-shot buzzer
output can be stopped prior to the elapsing of the
time set with SHTPW.
Writing "0" is invalid and writing "1" except during
one-shot output is also invalid.
When "1" is written to BZSHT and BZSTP simultaneously, BZSTP takes precedence and one-shot
output becomes stop status.
Since BZSTP is for writing only, during readout it is
constantly set to "0".
5.5.7 Programming notes
(1) Since the special output signals (TOUT/TOUT,
FOUT, BZ/BZ) are generated asynchronously
from the output control registers (PTOUT,
FOUTON, BZON, BZSHT and BZSTP), when
the signals is turned ON or OFF by the output
control register settings, a hazard of a 1/2 cycle
or less is generated.
(2) The SLP instruction has executed when the
special output signals (TOUT,/TOUT, FOUT,
BZ/BZ) are in the enable status, an unstable
clock is output for the special output at the time
of return from the SLEEP state. Consequently,
when shifting to the SLEEP state, you should set
the special output signal to the disable status
prior to executing the SLP instruction.
(3) When the FOUT frequency is made "fOSC3/n",
you must turn on the OSC3 oscillation circuit
before outputting FOUT. A time interval of
several 100 µsec to several 10 msec, from the
turning ON of the OSC3 oscillation circuit to
until the oscillation stabilizes, is necessary, due
to the oscillation element that is used. Consequently, if an abnormality occurs as the result of
an unstable FOUT signal being output externally, you should allow an adequate waiting
time after turning ON of the OSC3 oscillation,
before turning outputting FOUT. (The oscillation start time will vary somewhat depending
on the oscillator and on the externally attached
parts. Refer to the oscillation start time example
indicated in Chapter 7, "ELECTRICAL CHARACTERISTICS".)
At initial reset, OSC3 oscillation circuit is set to
OFF state.
∗ FOUT output is available only in the E0C88832.
Page 52

46 EPSON E0C88832/88862 TECHNICAL MANUAL
5 PERIPHERAL CIRCUITS AND THEIR OPERATION (I/O Ports)
5.6 I/O Ports (P ports)
5.6.1 Configuration of I/O ports
The E0C88832/88862 is equipped with 8 bits of I/O
ports (P10–P17).
Figure 5.6.1.1 shows the structure of an I/O port.
Fig. 5.6.1.1 Structure of I/O port
I/O port can be set for input or output mode in one
bit unit. These settings are performed by writing
data to the I/O control registers.
I/O port terminals P10–P13 are shared with serial
interface input/output terminals. The function of
the terminals is switchable in software. With
respect to the serial interface, see "5.7 Serial Interface".
The data registers and I/O control registers of the
I/O ports set as serial interface outputs are usable
as general purpose registers with read/write
capabilities which do not affect I/O activities of the
terminal.
The same as above, I/O control registers of the I/O
ports set as serial interface inputs are usable as
general purpose register.
5.6.2 Mask option
I/O port pull-up resistors
P10 ............ ■■ With resistor ■■ Gate direct
P11 ............ ■■ With resistor ■■ Gate direct
P12 ............ ■■ With resistor ■■ Gate direct
P13 ............ ■■ With resistor ■■ Gate direct
P14 ............ ■■ With resistor ■■ Gate direct
P15 ............ ■■ With resistor ■■ Gate direct
P16 ............ ■■ With resistor ■■ Gate direct
P17 ............ ■■ With resistor ■■ Gate direct
Input
control
VDD
VSS
Data bus
Pxx
Data
register
I/O control
register
Mask
option
*1
*2
*1: During output mode
*2: During input mode
I/O ports P10–P17 are equipped with a pull-up
resistor which goes ON in the input mode. Whether
this resistor is used or not can be selected for each
port (one bit unit).
In cases where the 'With resistor' option is selected,
the pull-up resistor goes ON when the port is in
input mode.
When changing the port terminal from LOW level
to HIGH with the built-in pull-up resistor, a delay
in the waveform rise time will occur depending on
the time constant of the pull-up resistor and the
load capacitance of the terminal. It is necessary to
set an appropriate wait time for introduction of an
I/O port. Make this wait time the amount of time
or more calculated by the following expression.
Wait time = RIN x (CIN + load capacitance on the
board) x 1.6 [sec]
RIN: Pull up resistance Max. value
CIN: Terminal capacitance Max. value
For unused I/O ports, select the default setting of
"With resistor".
5.6.3 I/O control registers and I/O mode
I/O ports P10–P17 are set either to input or output
modes by writing data to the I/O control registers
IOC10–IOC17 which correspond to each bit.
To set an I/O port to input mode, write "0" to the I/O
control register.
An I/O port which is set to input mode will shift to a
high impedance state and functions as an input port.
Readout in input mode consists simply of a direct
readout of the input terminal state: the data being "1"
when the input terminal is at HIGH (VDD) level and
"0" when it is at LOW (VSS) level.
When the "With resistor" option is selected using
the mask option, the resistor is pulled up onto the
port terminal in input mode.
Even in input mode, data can be written to the data
registers without affecting the terminal state.
To set an I/O port to output mode, write "1" to the
I/O control register. An I/O port which is set to
output mode functions as an output port.
When port output data is "1", a HIGH (VDD) level is
output and when it is "0", a LOW (VSS) level is
output. Readout in output mode consists of the
contents of the data register.
At initial reset, I/O control registers are set to "0"
(I/O ports are set to input mode).
Page 53

E0C88832/88862 TECHNICAL MANUAL EPSON 47
5 PERIPHERAL CIRCUITS AND THEIR OPERATIO (I/O Ports)
P10D–P17D: 00FF63H
How I/O port terminal P1x data readout and
output data settings are performed.
When writing data:
When "1" is written: HIGH level
When "0" is written: LOW level
When the I/O port is set to output mode, the data
written is output as is to the I/O port terminal. In
terms of port data, when "1" is written, the port
terminal goes to HIGH (V
DD) level and when "0" is
written to a LOW (VSS) level.
Even when the port is in input mode, data can still
be written in.
When reading out data:
When "1" is read: HIGH level ("1")
When "0" is read: LOW level ("0")
When an I/O port is in input mode, the voltage
level being input to the port terminal is read out.
When terminal voltage is HIGH (V
DD), it is read as
a "1", and when it is LOW (VSS), it is read as a "0".
Furthermore, in output mode, the contents of the
data register are read out.
At initial reset, this register is set to "1" (HIGH
level).
The data registers of I/O ports set for the output
terminal of serial interface can be used as general
purpose registers with read/write capabilities
which do not affect I/O activities of the terminals.
IOC10–IOC17: 00FF61H
Sets the I/O ports to input or output mode.
When "1" is written: Output mode
When "0" is written: Input mode
Reading: Valid
IOC1x is the I/O control register which correspond
to each I/O port in a bit unit.
Writing "1" to the IOC1x register will switch the
corresponding I/O port P1x to output mode, and
writing "0" will switch it to input mode.
At initial reset, this register is set to "0" (input
mode).
The data registers of I/O ports set for the input
terminal of serial interface can be used as general
purpose registers with read/write capabilities
which do not affect I/O activities of the terminals.
5.6.5 Programming note
When changing the port terminal from LOW level
to HIGH with the built-in pull-up resistor, a delay
in the waveform rise time will occur depending on
the time constant of the pull-up resistor and the
load capacitance of the terminal. It is necessary to
set an appropriate wait time for introduction of an
I/O port. Make this wait time the amount of time
or more calculated by the following expression.
Wait time = RIN x (CIN + load capacitance on the
board) x 1.6 [sec]
RIN: Pull up resistance Max. value
CIN: Terminal capacitance Max. value
5.6.4 Control of I/O ports
Table 5.6.4.1 shows the I/O port control bits.
Table 5.6.4.1 I/O port control bits
Address Bit Name SR R/WFunction Comment10
00FF61 D7
D6
D5
D4
D3
D2
D1
D0
IOC17
IOC16
IOC15
IOC14
IOC13
IOC12
IOC11
IOC10
P17 I/O control register
P16 I/O control register
P15 I/O control register
P14 I/O control register
P13 I/O control register
P12 I/O control register
P11 I/O control register
P10 I/O control register
0
0
0
0
0
0
0
0
R/W
R/W
R/W
R/W
R/W
R/W
R/W
R/W
Output Input
00FF63 D7
D6
D5
D4
D3
D2
D1
D0
P17D
P16D
P15D
P14D
P13D
P12D
P11D
P10D
P17 I/O port data
P16 I/O port data
P15 I/O port data
P14 I/O port data
P13 I/O port data
P12 I/O port data
P11 I/O port data
P10 I/O port data
1
1
1
1
1
1
1
1
R/W
R/W
R/W
R/W
R/W
R/W
R/W
R/W
High Low
Page 54

48 EPSON E0C88832/88862 TECHNICAL MANUAL
5 PERIPHERAL CIRCUITS AND THEIR OPERATION (Serial Interface)
5.7 Serial Interface
5.7.1 Configuration of serial interface
The E0C88832/88862 incorporates a full duplex
serial interface (when asynchronous system is
selected) that allows the user to select either clock
synchronous system or asynchronous system.
The data transfer method can be selected in software.
When the clock synchronous system is selected, 8bit data transfer is possible.
When the asynchronous system is selected, either 7bit or 8-bit data transfer is possible, and a parity
check of received data and the addition of a parity
bit for transmitting data can automatically be done
by selecting in software.
Figure 5.7.1.1 shows the configuration of the serial
interface.
Serial interface input/output terminals, SIN, SOUT,
SCLK and SRDY are shared with I/O ports P10–P13.
In order to utilize these terminals for the serial
interface input/output terminals, proper settings
have to be made with registers ESIF, SMD0 and
SMD1. (At initial reset, these terminals are set as I/O
port terminals.)
The direction of I/O port terminals set for serial
interface input/output terminals are determined by
the signal and transfer mode for each terminal.
Furthermore, the settings for the corresponding I/O
control registers for the I/O ports become invalid.
SIN and SOUT are serial data input and output
terminals which function identically in clock
synchronous system and asynchronous system.
SCLK is exclusively for use with clock synchronous
system and functions as a synchronous clock input/
output terminal. SRDY is exclusively for use in clock
synchronous slave mode and functions as a sendreceive ready signal output terminal.
When asynchronous system is selected, since SCLK
and SRDY are superfluous, the I/O port terminals
P12 and P13 can be used as I/O ports.
In the same way, when clock synchronous master
mode is selected, since SRDY is superfluous, the I/O
port terminal P13 can be used as I/O port.
Table 5.7.1.1 Configuration of input/output terminals
Fig. 5.7.1.1 Configuration of serial interface
Terminal When serial interface is selected
P10
P11
P12
P13
SIN
SOUT
SCLK
SRDY
* The terminals used may vary depending on the transfer mode.
f
OSC3
Data bus
SOUT(P11)
Serial I/O control
& status register
Received
data buffer
Interrupt
control circuit
Serial input
control circuit
Received data
shift register
Transmitting data
shift register
Serial output
control circuit
SIN(P10)
Clock
control circuit
READY output
control circuit
SCLK(P12)
Error detection
circuit
SRDY(P13)
Start bit
detection circuit
Programmable timer 1 underflow signal
Interrupt
request
OSC3 oscillation circuit
Page 55

E0C88832/88862 TECHNICAL MANUAL EPSON 49
5 PERIPHERAL CIRCUITS AND THEIR OPERATION (Serial Interface)
5.7.2 Mask option
Since serial interface input/output terminals are
shared with the I/O ports, serial interface terminal
specifications have necessarily been selected with
the mask option for I/O ports.
I/O port pull-up resistors
P10 (SIN) ........ ■■ With resistor ■■ Gate direct
P12 (SCLK) .... ■■ With resistor ■■ Gate direct
Each I/O port terminal is equipped with a pull-up
resistor which goes ON in input mode. A selection
can be made for each port (one bit unit) as to
whether or not the resistor will be used.
Specifications (whether the pull-up will be used or
not) of P10 (SIN) and P12 (SCLK) which will become
input terminals when using the serial interface are
decided by settings the options for the I/O port.
When "Gate direct" is selected in the serial I/F
mode, be sure that the input terminals do not go
into a floating state.
5.7.3 Transfer modes
There are four transfer modes for the serial interface and mode selection is made by setting the two
bits of the mode selection registers SMD0 and
SMD1 as shown in the table below.
Table 5.7.3.1 Transfer modes
At initial reset, transfer mode is set to clock synchronous master mode.
■ Clock synchronous master mode
In this mode, the internal clock is utilized as a
synchronous clock for the built-in shift registers,
and clock synchronous 8-bit serial transfers can be
performed with this serial interface as the master.
Table 5.7.3.2 Terminal settings corresponding
to each transfer mode
The synchronous clock is also output from the
SCLK terminal which enables control of the
external (slave side) serial I/O device. Since the
SRDY terminal is not utilized in this mode, it can be
used as an I/O port.
Figure 5.7.3.1(a) shows the connection example of
input/output terminals in the clock synchronous
master mode.
■ Clock synchronous slave mode
In this mode, a synchronous clock from the external
(master side) serial input/output device is utilized
and clock synchronous 8-bit serial transfers can be
performed with this serial interface as the slave.
The synchronous clock is input to the SCLK
terminal and is utilized by this interface as the
synchronous clock.
Furthermore, the SRDY signal indicating the
transmit-receive ready status is output from the
SRDY terminal in accordance with the serial
interface operating status.
In the slave mode, the settings for registers SCS0
and SCS1 used to select the clock source are invalid.
Figure 5.7.3.1(b) shows the connection example of
input/output terminals in the clock synchronous
slave mode.
■ Asynchronous 7-bit mode
In this mode, asynchronous 7-bit transfer can be
performed. Parity check during data reception and
addition of parity bit (odd/even/none) during
transmitting can be specified and data processed in
7 bits with or without parity. Since this mode
employs the internal clock, the SCLK terminal is
not used. Furthermore, since the SRDY terminal is
not utilized either, both of these terminals can be
used as I/O ports.
Figure 5.7.3.1(c) shows the connection example of
input/output terminals in the asynchronous mode.
■ Asynchronous 8-bit mode
In this mode, asynchronous 8-bit transfer can be
performed. Parity check during data reception and
addition of parity bit (odd/even/none) during
transmitting can be specified and data processed in
8 bits with or without parity. Since this mode
employs the internal clock, the SCLK terminal is
not used. Furthermore, since the SRDY terminal is
not utilized either, both of these terminals can be
used as I/O ports.
Figure 5.7.3.1(c) shows the connection example of
input/output terminals in the asynchronous mode.
SMD1 SMD0 Mode
1
1
0
0
1
0
1
0
Asynchronous 8-bit
Asynchronous 7-bit
Clock synchronous slave
Clock synchronous master
Mode SIN
Asynchronous 8-bit
Asynchronous 7-bit
Clock synchronous slave
Clock synchronous master
P13
P13
Output
P13
SOUT SCLK SRDY
P12
P12
Input
Output
Output
Output
Output
Output
Input
Input
Input
Input
Page 56

50 EPSON E0C88832/88862 TECHNICAL MANUAL
5 PERIPHERAL CIRCUITS AND THEIR OPERATION (Serial Interface)
This register setting is invalid in clock synchronous
slave mode and the external clock input from the
SCLK terminal is used.
When the "programmable timer" is selected, the
programmable timer 1 underflow signal is divided
by 1/2 and this signal used as the clock source.
With respect to the transfer rate setting, see "5.10
Programmable Timer".
At initial reset, the synchronous clock is set to
"fOSC3/16".
Whichever clock is selected, the signal is further
divided by 1/16 and then used as the synchronous
clock.
Furthermore, external clock input is used as is for
SCLK in clock synchronous slave mode.
Table 5.7.4.2 shows an examples of transfer rates
and OSC3 oscillation frequencies when the clock
source is set to programmable timer.
When the demultiplied signal of the OSC3 oscillation circuit is made the clock source, it is necessary
to turn the OSC3 oscillation ON, prior to using the
serial interface.
A time interval of several 100 µsec to several 10
msec, from the turning ON of the OSC3 oscillation
circuit to until the oscillation stabilizes, is
necessary, due to the oscillation element that is
used. Consequently, you should allow an adequate
waiting time after turning ON of the OSC3
oscillation, before starting transmitting/receiving
of serial interface. (The oscillation start time will
vary somewhat depending on the oscillator and on
the externally attached parts. Refer to the oscillation
start time example indicated in Chapter 7, "ELECTRICAL CHARACTERISTICS".)
At initial reset, the OSC3 oscillation circuit is set to
OFF status.
Transfer rate
(bps)
9,600
4,800
2,400
1,200
600
300
150
OSC3 oscillation frequency / Programmable timer settings
f
OSC3
= 3.072 MHz
PSC1X
0 (1/1)
0 (1/1)
0 (1/1)
0 (1/1)
0 (1/1)
1 (1/4)
1 (1/4)
RLD1X
09H
13H
27H
4FH
9FH
4FH
9FH
f
OSC3
= 4.608 MHz
PSC1X
0 (1/1)
0 (1/1)
0 (1/1)
0 (1/1)
0 (1/1)
1 (1/4)
1 (1/4)
RLD1X
0EH
1DH
3BH
77H
EFH
77H
EFH
f
OSC3
= 4.9152 MHz
PSC1X
0 (1/1)
0 (1/1)
0 (1/1)
0 (1/1)
0 (1/1)
1 (1/4)
1 (1/4)
RLD1X
0FH
1FH
3FH
7FH
FFH
7FH
FFH
Table 5.7.4.2
OSC3 oscillation frequencies
and transfer rates
Data input
Data output
CLOCK output
READY input
SIN(P10)
SOUT(P11)
SCLK(P12)
SRDY(P13)
External
serial device
E0C88832/88862
Data input
Data output
CLOCK input
READY output
SIN(P10)
SOUT(P11)
SCLK(P12)
Input port(Kxx)
External
serial device
E0C88832/88862
(a) Clock synchronous master mode
(b) Clock synchronous slave mode
(c) Asynchronous 7-bit/8-bit mode
Fig. 5.7.3.1 Connection examples of serial interface I/O terminals
5.7.4 Clock source
There are four clock sources and selection is made
by setting the two bits of the clock source selection
register SCS0 and SCS1 as shown in table below.
Table 5.7.4.1 Clock source
Data input
Data output
SIN(P10)
SOUT(P11)
External
serial device
E0C88832/88862
f
OSC3
1/4
1/8
1/16
1/16
Synchronous clock
Programmable timer 1
underflow signal
SCLK
(Clock synchronous slave mode)
Divider Selector Selector
1/2
OSC3
oscillation
circuit
Fig. 5.7.4.1
Division of the synchronous clock
SCS1
1
1
0
0
SCS0
1
0
1
0
Clock source
Programmable timer
f
OSC3
/ 4
f
OSC3
/ 8
f
OSC3
/ 16
Page 57

E0C88832/88862 TECHNICAL MANUAL EPSON 51
5 PERIPHERAL CIRCUITS AND THEIR OPERATION (Serial Interface)
5.7.5 Transmit-receive control
Below is a description of the registers which handle
transmit-receive control. With respect to transmitreceive control procedures and operations, please
refer to the following sections in which these are
discussed on a mode by mode basis.
■ Shift register and received data buffer
Exclusive shift registers for transmitting and
receiving are installed in this serial interface.
Consequently, duplex communication simultaneous transmit and receive is possible when the
asynchronous system is selected.
Data being transmitted are written to TRXD0–
TRXD7 and converted to serial through the shift
register and is output from the SOUT terminal.
In the reception section, a received data buffer is
installed separate from the shift register.
Data being received are input to the SIN terminal
and is converted to parallel through the shift
register and written to the received data buffer.
Since the received data buffer can be read even
during serial input operation, the continuous data
is received efficiently.
However, since buffer functions are not used in
clock synchronous mode, be sure to read out data
before the next data reception begins.
■ Transmit enable register and transmit
control bit
For transmitting control, use the transmit enable
register TXEN and transmit control bit TXTRG.
The transmit enable register TXEN is used to set the
transmitting enable/disable status. When "1" is
written to this register to set the transmitting enable
status, clock input to the shift register is enabled
and the system is ready to transmit data. In the
clock synchronous mode, synchronous clock input/
output from the SCLK terminal is also enabled.
The transmit control bit TXTRG is used as the
trigger to start transmitting data.
Data to be transmitted is written to the transmit
data shift register, and when transmitting preparations a recomplete, "1" is written to TXTRG whereupon data transmitting begins.
When interrupt has been enabled, an interrupt is
generated when the transmission is completed. If
there is subsequent data to be transmitted it can be
sent using this interrupt.
In addition, TXTRG can be read as the status. When
set to "1", it indicates transmitting operation, and
"0" indicates transmitting stop.
For details on timing, see the timing chart which
gives the timing for each mode.
When not transmitting, set TXEN to "0" to disable
transmitting status.
■ Receive enable register, receive control bit
For receiving control, use the receive enable register
RXEN and receive control bit RXTRG.
Receive enable register RXEN is used to set receiving enable/disable status. When "1" is written into
this register to set the receiving enable status, clock
input to the shift register is enabled and the system
is ready to receive data. In the clock synchronous
mode, synchronous clock input/output from the
SCLK terminal is also enabled.
With the above setting, receiving begins and serial
data input from the SIN terminal goes to the shift
register.
The operation of the receive control bit RXTRG is
slightly different depending on whether a clock
synchronous system or an asynchronous system is
being used.
In the clock synchronous system, the receive
control bit TXTRG is used as the trigger to start
receiving data.
When received data has been read and the preparation for next data receiving is completed, write "1"
into RXTRG to start receiving. (When "1" is written
to RXTRG in slave mode, SRDY switches to "0".)
In an asynchronous system, RXTRG is used to
prepare for next data receiving. After reading the
received data from the received data buffer, write
"1" into RXTRG to signify that the received data
buffer is empty. If "1" is not written into RXTRG,
the overrun error flag OER will be set to "1" when
the next receiving operation is completed. (An
overrun error will be generated when receiving is
completed between reading the received data and
the writing of "1" to RXTRG.)
In addition, RXTRG can be read as the status. In
either clock synchronous mode or asynchronous
mode, when RXTRG is set to "1", it indicates
receiving operation and when set to "0", it indicates
that receiving has stopped.
For details on timing, see the timing chart which
gives the timing for each mode.
When you do not receive, set RXEN to "0" to disable
receiving status.
Page 58

52 EPSON E0C88832/88862 TECHNICAL MANUAL
5 PERIPHERAL CIRCUITS AND THEIR OPERATION (Serial Interface)
(2) Port selection
Because serial interface input/output ports SIN,
SOUT, SCLK and SRDY are set as I/O port
terminals P10–P13 at initial reset, "1" must be
written to the serial interface enable register
ESIF in order to set these terminals for serial
interface use.
(3) Setting of transfer mode
Select the clock synchronous mode by writing
the data as indicated below to the two bits of the
mode selection registers SMD0 and SMD1.
Master mode: SMD0 = "0", SMD1 = "0"
Slave mode: SMD0 = "1", SMD1 = "0"
(4) Clock source selection
In the master mode, select the synchronous
clock source by writing data to the two bits of
the clock source selection registers SCS0 and
SCS1. (See Table 5.7.4.1.)
This selection is not necessary in the slave
mode.
Since all the registers mentioned in (2)–(4) are
assigned to the same address, it's possible to set
them all with one instruction. The parity enable
register EPR is also assigned to this address,
however, since parity is not necessary in the
clock synchronous mode, parity check will not
take place regardless of how they are set.
(5) Clock source control
When the master mode is selected and programmable timer for the clock source is selected, set transfer rate on the programmable
timer side. (See "5.10 Programmable Timer".)
When the divided signal of OSC3 oscillation
circuit is selected for the clock source, be sure
that the OSC3 oscillation circuit is turned ON
prior to commencing data transfer. (See "5.3
Oscillation Circuits and Operating Mode".)
SCLK
Data D0 D1 D2 D3 D4 D5 D6 D7
LSB MSB
Fig. 5.7.6.1 Transfer data configuration using
clock synchronous mode
Below is a description of initialization when
performing clock synchronous transfer, transmitreceive control procedures and operations.
With respect to serial interface interrupt, see "5.7.8
Interrupt function".
■ Initialization of serial interface
When performing clock synchronous transfer, the
following initial settings must be made.
(1) Setting of transmitting/receiving disable
To set the serial interface into a status in which
both transmitting and receiving are disabled, "0"
must be written to both the transmit enable
register TXEN and the receive enable register
RXEN. Fix these two registers to a disable status
until data transfer actually begins.
5.7.6 Operation of
clock synchronous transfer
Clock synchronous transfer involves the transfer of
8-bit data by synchronizing it to eight clocks. The
same synchronous clock is used by both the
transmitting and receiving sides.
When the serial interface is used in the master
mode, the clock signal selected using SCS0 and
SCS1 is further divided by 1/16 and employed as
the synchronous clock. This signal is then sent via
the SCLK terminal to the slave side (external serial
I/O device).
When used in the slave mode, the clock input to the
SCLK terminal from the master side (external serial
input/output device) is used as the synchronous
clock.
In the clock synchronous mode, since one clock line
(SCLK) is shared for both transmitting and receiving, transmitting and receiving cannot be performed simultaneously. (Half duplex only is
possible in clock synchronous mode.)
Transfer data is fixed at 8 bits and both transmitting
and receiving are conducted with the LSB (bit 0)
coming first.
Page 59

E0C88832/88862 TECHNICAL MANUAL EPSON 53
5 PERIPHERAL CIRCUITS AND THEIR OPERATION (Serial Interface)
■ Data transmit procedure
The control procedure and operation during
transmitting is as follows.
(1) Write "0" in the transmit enable register TXEN
and the receive enable register RXEN to reset
the serial interface.
(2) Write "1" in the transmit enable register TXEN
to set into the transmitting enable status.
(3) Write the transmitting data into TRXD0–
TRXD7.
(4) In case of the master mode, confirm the receive
ready status on the slave side (external serial
input/output device), if necessary. Wait until it
reaches the receive ready status.
(5) Write "1" in the transmit control bit TXTRG and
start transmitting.
In the master mode, this control causes the
synchronous clock to change to enable and to be
provided to the shift register for transmitting
and output from the SCLK terminal.
In the slave mode, it waits for the synchronous
clock to be input from the SCLK terminal.
The transmitting data of the shift register shifts
one bit at a time at each falling edge of the
synchronous clock and is output from the SOUT
terminal. When the final bit (MSB) is output, the
SOUT terminal is maintained at that level, until
the next transmitting begins.
The transmitting complete interrupt factor flag
FSTRA is set to "1" at the point where the data
transmitting of the shift register is completed.
When interrupt has been enabled, a transmitting complete interrupt is generated at this
point.
Set the following transmitting data using this
interrupt.
(6) Repeat steps (3) to (5) for the number of bytes of
transmitting data, and then set the transmit
disable status by writing "0" to the transmit
enable register TXEN, when the transmitting is
completed.
Data transmitting
End
TXEN ← 0, RXEN ← 0
No
Yes
Transmit complete ?
Set transmitting data
to TRXD0–TRXD7
No
Yes
FSTRA = 1 ?
TXEN ← 0
TXTRG ← 1
TXEN ← 1
No
Yes
Receiver ready ?
In case of master mode
Fig. 5.7.6.2 Transmit procedure in clock synchronous mode
Page 60

54 EPSON E0C88832/88862 TECHNICAL MANUAL
5 PERIPHERAL CIRCUITS AND THEIR OPERATION (Serial Interface)
■ Data receive procedure
The control procedure and operation during
receiving is as follows.
(1) Write "0" in the receive enable register RXEN
and transmit enable register TXEN to reset the
serial interface.
(2) Write "1" in the receive enable register RXEN to
set into the receiving enable status.
(3) In case of the master mode, confirm the transmit
ready status on the slave side (external serial
input/output device), if necessary. Wait until it
reaches the transmit ready status.
(4) Write "1" in the receive control bit RXTRG and
start receiving.
In the master mode, this control causes the
synchronous clock to change to enable and is
provided to the shift register for receiving and
output from the SCLK terminal.
In the slave mode, it waits for the synchronous
clock to be input from the SCLK terminal. The
received data input from the SIN terminal is
successively incorporated into the shift register
in synchronization with the rising edge of the
synchronous clock.
At the point where the data of the 8th bit has
been incorporated at the final (8th) rising edge
of the synchronous clock, the content of the shift
register is sent to the received data buffer and
the receiving complete interrupt factor flag
FSREC is set to "1". When interrupt has been
enabled, a receiving complete interrupt is
generated at this point.
(5) Read the received data from TRXD0–TRXD7
using receiving complete interrupt.
(6) Repeat steps (3) to (5) for the number of bytes of
receiving data, and then set the receive disable
status by writing "0" to the receive enable
register RXEN, when the receiving is completed.
Data receiving
End
RXEN ← 0, TXEN ← 0
No
Yes
Receiving complete ?
Received data reading
from TRXD0–TRXD7
No
Yes
FSREC = 1 ?
RXEN ← 0
RXTRG ← 1
RXEN ← 1
No
Yes
Transmitter ready ?
In case of master mode
Fig. 5.7.6.3 Receiving procedure in clock synchronous mode
Page 61

E0C88832/88862 TECHNICAL MANUAL EPSON 55
5 PERIPHERAL CIRCUITS AND THEIR OPERATION (Serial Interface)
(a) Transmit timing for master mode
(b) Transmit timing for slave mode
(c) Receive timing for master mode
(d) Receive timing for slave mode
Fig. 5.7.6.4 Timing chart (clock synchronous system transmission)
■ Transmit/receive ready (SRDY) signal
When this serial interface is used in the clock
synchronous slave mode (external clock input), an
SRDY signal is output to indicate whether or not
this serial interface can transmit/receive to the
master side (external serial input/output device).
This signal is output from the SRDY terminal and
when this interface enters the transmit or receive
enable (READY) status, it becomes "0" (LOW level)
and becomes "1" (HIGH level) when there is a
BUSY status, such as during transmit/receive
operation.
The SRDY signal changes the "1" to "0," immediately after writing "1" into the transmit control bit
TXTRG or the receive control bit RXTRG and
returns from "0" to "1", at the point where the first
synchronous clock has been input (falling edge).
When you have set in the master mode, control the
transfer by inputting the same signal from the slave
side using the input port or I/O port. At this time,
since the SRDY terminal is not set and instead P13
functions as the I/O port, you can apply this port
for said control.
■ Timing chart
The timing chart for the clock synchronous system
transmission is shown in Figure 5.7.6.4.
SCLK
TXTRG (RD)
SOUT D0 D1 D2 D3 D4 D5 D6 D7
TXEN
Interrupt
TXTRG (WR)
SCLK
TXTRG (RD)
SOUT D0 D1 D2 D3 D4 D5 D6 D7
TXEN
Interrupt
TXTRG (WR)
SRDY
SCLK
RXTRG (RD)
SIN D0 D1 D2 D3 D4 D5 D6 D7
RXEN
Interrupt
RXTRG (WR)
TRXD 7F 1st data
SRDY
7F
SCLK
RXTRG (RD)
SIN D0D1D2D3D4D5D6D7
RXEN
Interrupt
RXTRG (WR)
TRXD 7F 1st data
Page 62

56 EPSON E0C88832/88862 TECHNICAL MANUAL
5 PERIPHERAL CIRCUITS AND THEIR OPERATION (Serial Interface)
5.7.7 Operation of asynchronous transfer
Asynchronous transfer is a mode that transfers by
adding a start bit and a stop bit to the front and the
back of each piece of serial converted data. In this
mode, there is no need to use a clock that is fully
synchronized clock on the transmit side and the
receive side, but rather transmission is done while
adopting the synchronization at the start/stop bits
that have attached before and after each piece of
data. The RS-232C interface functions can be easily
realized by selecting this transfer mode.
This interface has separate transmit and receive
shift registers and is designed to permit full duplex
transmission to be done simultaneously for transmitting and receiving.
For transfer data in the asynchronous 7-bit mode,
either 7 bits data (no parity) or 7 bits data + parity
bit can be selected. In the asynchronous 8-bit mode,
either 8 bits data (no parity) or 8 bits data + parity
bit can be selected.
Parity can be even or odd, and parity checking of
received data and adding a party bit to transmitting
data will be done automatically. Thereafter, it is not
necessary to be conscious of parity itself in the
program.
The start bit and stop bit are respectively fixed at
one bit and data is transmitted and received by
placing the LSB (bit 0) at the front.
■ Initialization of serial interface
The below initialization must be done in cases of
asynchronous system transfer.
(1) Setting of transmitting/receiving disable
To set the serial interface into a status in which
both transmitting and receiving are disabled, "0"
must be written to both the transmit enable
register TXEN and the receive enable register
RXEN. Fix these two registers to a disable status
until data transfer actually begins.
(2) Port selection
Because serial interface input/output terminals
SIN and SOUT are set as I/O port terminals P10
and P11 at initial reset, "1" must be written to
the serial interface enable register ESIF in order
to set these terminals for serial interface use.
SCLK and SRDY terminals set in the clock
synchronous mode are not used in the asynchronous mode. These terminals function as I/O
port terminals P12 and P13.
(3) Setting of transfer mode
Select the asynchronous mode by writing the
data as indicated below to the two bits of the
mode selection registers SMD0 and SMD1.
7-bit mode: SMD0 = "0", SMD1 = "1"
8-bit mode: SMD0 = "1", SMD1 = "1"
(4) Parity bit selection
When checking and adding parity bits, write "1"
into the parity enable register EPR to set to "with
parity check". As a result of this setting, in the
asynchronous 7-bit mode, it has a 7 bits data +
parity bit configuration and in the asynchronous
8-bit mode it has an 8 bits data + parity bit
configuration.In this case, parity checking for
receiving and adding a party bit for transmitting
is done automatically in hardware. Moreover,
when "with parity check" has been selected,
"odd" or "even" parity must be further selected in
the parity mode selection register PMD.
When "0" is written to the PMD register to select
"without parity check" in the asynchronous 7-bit
mode, data configuration is set to 7 bits data (no
parity) and in the asynchronous 8-bit mode (no
parity) it is set to 8 bits data (no parity) and parity
checking and parity bit adding will not be done.
(5) Clock source selection
Select the clock source by writing data to the
two bits of the clock source selection registers
SCS0 and SCS1. (See Table 5.7.4.1.)
Since all the registers mentioned in (2)–(5) are
assigned to the same address, it's possible to set
them all with one instruction.
Sampling
clock
8bit data
D0
D1 D2 D3 D4 D5 D6 ps1 s2
7bit data
+parity
D0
D1 D2 D3 D4 D5 D6 D7s1 s2
8bit data
+parity
D0
D1 D2 D3 D4 D5 D6 D7s1 p s2
s1
s2
p
: Start bit (Low level, 1 bit)
: Stop bit (High level, 1 bit)
: Parit
y
bit
7bit data D0
D1 D2 D3 D4 D5 D6s1 s2
Fig. 5.7.7.1 Transfer data configuration
for asynchronous system
Here following, we will explain the control sequence and operation for initialization and transmitting /receiving in case of asynchronous data
transfer. See "5.7.8 Interrupt function" for the serial
interface interrupts.
Page 63

E0C88832/88862 TECHNICAL MANUAL EPSON 57
5 PERIPHERAL CIRCUITS AND THEIR OPERATION (Serial Interface)
(6) Clock source control
When the programmable timer is selected for
the clock source, set transfer rate on the programmable timer side. (See "5.10 Programmable
Timer".)
When the divided signal of OSC3 oscillation
circuit is selected for the clock source, be sure
that the OSC3 oscillation circuit is turned ON
prior to commencing data transfer. (See "5.3
Oscillation Circuits and Operating Mode".)
■ Data transmit procedure
The control procedure and operation during
transmitting is as follows.
(1) Write "0" in the transmit enable register TXEN
to reset the serial interface.
(2) Write "1" in the transmit enable register TXEN
to set into the transmitting enable status.
(3)
Write the transmitting data into TRXD0–TRXD7.
Also, when 7-bit data is selected, the TRXD7
data becomes invalid.
(4) Write "1" in the transmit control bit TXTRG and
start transmitting.
This control causes the shift clock to change to
enable and a start bit (LOW) is output to the
SOUT terminal in synchronize to its rising edge.
The transmitting data set to the shift register is
shifted one bit at a time at each rising edge of
the clock thereafter and is output from the
SOUT terminal. After the data output, it outputs
a stop bit (HIGH) and HIGH level is maintained
until the next start bit is output.
The transmitting complete interrupt factor flag
FSTRA is set to "1" at the point where the data
transmitting is completed. When interrupt has
been enabled, a transmitting complete interrupt
is generated at this point.
Set the following transmitting data using this
interrupt.
(5) Repeat steps (3) to (4) for the number of bytes of
transmitting data, and then set the transmit
disable status by writing "0" to the transmit
enable register TXEN, when the transmitting is
completed.
Data transmitting
End
TXEN ← 0
No
Yes
Transmit complete ?
Set transmitting data
to TRXD0–TRXD7
No
Yes
FSTRA = 1 ?
TXEN ← 0
TXTRG ← 1
TXEN ← 1
Fig. 5.7.7.2 Transmit procedure in asynchronous mode
Page 64

58 EPSON E0C88832/88862 TECHNICAL MANUAL
5 PERIPHERAL CIRCUITS AND THEIR OPERATION (Serial Interface)
■ Data receive procedure
The control procedure and operation during
receiving is as follows.
(1)
Write "0" in the receive enable register RXEN to
set the receiving disable status and to reset the
respective PER, OER, FER flags that indicate
parity, overrun and framing errors.
(2)
Write "1" in the receive enable register RXEN to
set into the receiving enable status.
(3)
The shift clock will change to enable from the
point where the start bit (LOW) has been input
from the SIN terminal and the receive data will
be synchronized to the rising edge following the
second clock, and will thus be successively
incorporated into the shift register.
After data bits have been incorporated, the stop bit
is checked and, if it is not HIGH, it becomes a
framing error and the error interrupt factor flag
FSERR is set to "1". When interrupt has been
enabled, an error interrupt is generated at this point.
When receiving is completed, data in the shift
register is transferred to the received data buffer
and the receiving complete interrupt flag FSREC
is set to "1". When interrupt has been enabled, a
receiving complete interrupt is generated at this
point. (When an overrun error is generated, the
interrupt factor flag FSREC is not set to "1" and a
receiving complete interrupt is not generated.)
If "with parity check" has been selected, a parity
check is executed when data is transferred into
the received data buffer from the shift register
and if a parity error is detected, the error interrupt factor flag is set to "1". When the interrupt
has been enabled, an error interrupt is generated
at this point just as in the framing error mentioned above.
(4)
Read the received data from TRXD0–TRXD7
using receiving complete interrupt.
(5)
Write "1" to the receive control bit RXTRG to
inform that the receive data has been read out.
When the following data is received prior to
writing "1" to RXTRG, it is recognized as an
overrun error and the error interrupt factor flag is
set to "1". When the interrupt has been enabled,
an error interrupt is generated at this point just as
in the framing error and parity error mentioned
above.
(6)
Repeat steps (3) to (5) for the number of bytes of
receiving data, and then set the receive disable
status by writing "0" to the receive enable register
RXEN, when the receiving is completed.
End
RXEN ← 1
No
Yes
Receiving interrupt ?
Yes
Receiving complete ?
Received data reading
from TRXD0–TRXD7
RXEN ← 0
RXTRG ← 1
No
Yes
Error generated ?
Error processing
Data receiving
RXEN ← 0
Resets error flags
PER, OER and FER
No
Fig. 5.7.7.3 Receiving procedure in asynchronous mode
Page 65

E0C88832/88862 TECHNICAL MANUAL EPSON 59
5 PERIPHERAL CIRCUITS AND THEIR OPERATION (Serial Interface)
■ Receive error
During receiving the following three types of errors
can be detected by an interrupt.
(1) Parity error
When writing "1" to the EPR register to select
"with parity check", a parity check (vertical
parity check) is executed during receiving. After
each data bit is sent a parity check bit is sent.
The parity check bit is a "0" or a "1". Even parity
checking will cause the sum of the parity bit
and the other bits to be even. Odd parity causes
the sum to be odd. This is checked on the
receiving side.
The parity check is performed when data
received in the shift register is transferred to the
received data buffer. It checks whether the
parity check bit is a "1" or a "0" (the sum of the
bits including the parity bit) and the parity set
in the PMD register match. When it does not
match, it is recognized as an parity error and the
parity error flag PER and the error interrupt
factor flag FSERR is set to "1".
When interrupt has been enabled, an error
interrupt is generated at this point.
The PER flag is reset to "0" by writing "1".
Even when this error has been generated, the
received data corresponding to the error is
transferred in the received data buffer and the
receive operation also continues.
The received data at this point cannot assured
because of the parity error.
(2) Framing error
In asynchronous transfer, synchronization is
adopted for each character at the start bit ("0")
and the stop bit ("1"). When receiving has been
done with the stop bit set at "0", the serial
interface judges the synchronization to be off
and a framing error is generated. When this
error is generated, the framing error flag FER
and the error interrupt factor flag FSERR are set
to "1". When interrupt has been enabled, an
error interrupt is generated at this point.
The FER flag is reset to "0" by writing "1".
Even when this error has been generated, the
received data for it is loaded into the receive
data buffer and the receive operation also
continues. However, even when it does not
become a framing error with the following data
receipt, such data cannot be assured.
Even when this error has been generated, the
received data corresponding to the error is
transferred in the received data buffer and the
receive operation also continues. However, even
when it does not become a framing error with
the following data receiving, such data cannot
be assured.
(3) Overrun error
When the next data is received before "1" is
written to RXTRG, an overrun error will be
generated, because the previous receive data
will be overwritten. When this error is generated, the overrun error flag OER and the error
interrupt factor flag FSERR are set to "1". When
interrupt has been enabled, an error interrupt is
generated at this point. The OER flag is reset to
"0" by writing "1" into it.
Even when this error has been generated, the
received data corresponding to the error is
transferred in the received data buffer and the
receive operation also continues.
Furthermore, when the timing for writing "1" to
RXTRG and the timing for the received data
transfer to the received data buffer overlap, it
will be recognized as an overrun error.
■ Timing chart
Figure 5.7.7.4 show the asynchronous transfer
timing chart.
Page 66

60 EPSON E0C88832/88862 TECHNICAL MANUAL
5 PERIPHERAL CIRCUITS AND THEIR OPERATION (Serial Interface)
TXEN
TXTRG(RD)
TXTRG(WR)
SOUT
Interrupt
(In 8-bit mode/Non parity)
D0 D1 D2 D3 D4 D5 D6 D7
Sumpling
clock
(a) Transmit timing
RXEN
RXTRG(RD)
RXTRG(WR)
SIN
TRXD
OER control signal
OER
Interrupt
(In 8-bit mode/Non parity)
D0 D1 D2 D3 D4 D5 D6 D7 D0 D1 D6 D7 D0 D1 D2 D3 D4 D5 D6 D7D2 D3 D4 D5
1st data 2st data
Sumpling
clock
(b) Receive timing
Fig. 5.7.7.4 Timing chart (asynchronous transfer)
5.7.8 Interrupt function
This serial interface includes a function that
generates the below indicated three types of
interrupts.
• Transmitting complete interrupt
• Receiving complete interrupt
• Error interrupt
The interrupt factor flag FSxxx and the interrupt
enable register ESxxx for the respective interrupt
factors are provided and then the interrupt enable/
disable can be selected by the software. In addition,
a priority level of the serial interface interrupt for
the CPU can be optionally set at levels 0 to 3 by the
interrupt priority registers PSIF0 and PSIF1.
For details on the above mentioned interrupt
control register and the operation following
generation of an interrupt, see "5.14 Interrupt and
Standby Status".
Figure 5.7.8.1 shows the configuration of the serial
interface interrupt circuit.
■ Transmitting complete interrupt
This interrupt factor is generated at the point where
the sending of the data written into the shift
register has been completed and sets the interrupt
factor flag FSTRA to "1". When set in this manner, if
the corresponding interrupt enable register ESTRA
is set to "1" and the corresponding interrupt priority
registers PSIF0 and PSIF1 are set to a higher level
than the setting of interrupt flags (I0 and I1), an
interrupt will be generated to the CPU.
When "0" has been written into the interrupt enable
register ESTRA and interrupt has been disabled, an
interrupt is not generated to the CPU. Even in this
case, the interrupt factor flag FSTRA is set to "1".
The interrupt factor flag FSTRA is reset to "0" by
writing "1".
The following transmitting data can be set and the
transmitting start (writing "1" to TXTRG) can be
controlled by generation of this interrupt factor.
The exception processing vector address for this
interrupt factor is set at 000014H.
Page 67

E0C88832/88862 TECHNICAL MANUAL EPSON 61
5 PERIPHERAL CIRCUITS AND THEIR OPERATION (Serial Interface)
Data bus
Interrupt
request
Address
Error generation
Interrupt factor
flag FSERR
Address
Interrupt enable
register ESERR
Address
Receive completion
Interrupt factor
flag FSREC
Address
Interrupt enable
register ESREC
Address
Transmit completion
Interrupt factor
flag FSTRA
Address
Interrupt enable
register ESTRA
Interrupt priority
level judgement
circuit
Address
Interrupt priority
register PSIF0, PSIF1
■ Receiving complete interrupt
This interrupt factor is generated at the point where
receiving has been completed and the receive data
incorporated into the shift register has been transferred into the received data buffer and it sets the
interrupt factor flag FSREC to "1". When set in this
manner, if the corresponding interrupt enable
register ESREC is set to "1" and the corresponding
interrupt priority registers PSIF0 and PSIF1 are set to
a higher level than the setting of interrupt flags (I0
and I1), an interrupt will be generated to the CPU.
When "0" has been written into the interrupt enable
register ESREC and interrupt has been disabled, an
interrupt is not generated to the CPU. Even in this
case, the interrupt factor flag FSREC is set to "1".
The interrupt factor flag FSREC is reset to "0" by
writing "1".
The generation of this interrupt factor permits the
received data to be read.
Also, the interrupt factor flag is set to "1" when a
parity error or framing error is generated.
The exception processing vector address for this
interrupt factor is set at 000012H.
■ Error interrupt
This interrupt factor is generated at the point where
a parity error, framing error or overrun error is
detected during receiving and it sets the interrupt
factor flag FSERR to "1". When set in this manner, if
the corresponding interrupt enable register ESERR
is set to "1" and the corresponding interrupt priority
registers PSIF0 and PSIF1 are set to a higher level
than the setting of interrupt flags (I0 and I1), an
interrupt will be generated to the CPU.
When "0" has been written in the interrupt enable
register ESERR and interrupt has been disabled, an
interrupt is not generated to the CPU. Even in this
case, the interrupt factor flag FSERR is set to "1".
The interrupt factor flag FSERR is reset to "0" by
writing "1".
Since all three types of errors result in the same
interrupt factor, you should identify the error that
has been generated by the error flags PER (parity
error), OER (overrun error) and FER (framing
error).
The exception processing vector address for this
interrupt factor is set at 000010H.
Fig. 5.7.8.1 Configuration of serial interface interrupt circuit
Page 68

62 EPSON E0C88832/88862 TECHNICAL MANUAL
5 PERIPHERAL CIRCUITS AND THEIR OPERATION (Serial Interface)
5.7.9 Control of serial interface
Table 5.7.9.1 show the serial interface control bits.
Table 5.7.9.1(a) Serial interface control bits
Address Bit Name SR R/WFunction Comment10
00FF48 D7
D6
D5
D4
D3
D2
D1
D0
–
EPR
PMD
SCS1
SCS0
SMD1
SMD0
ESIF
"0" when being read
Only for
asynchronous mode
In the clock synchronous slave mode,
external clock is
selected.
–
0
0
0
0
0
0
0
R/W
R/W
R/W
R/W
R/W
R/W
R/W
–
With parity
Odd
Serial I/F
–
Non parity
Even
I/O port
SCS1
1
1
0
0
SCS0
1
0
1
0
Clock source
Programmable timer
f
OSC3
/ 4
f
OSC3
/ 8
f
OSC3
/ 16
SMD1
1
1
0
0
SMD0
1
0
1
0
Mode
Asynchronous 8-bit
Asynchronous 7-bit
Clock synchronous slave
Clock synchronous master
–
Parity enable register
Parity mode selection
Clock source selection
Serial I/F mode selection
Serial I/F enable register
00FF49 D7
D6
D5
D4
D3
D2
D1
D0
–
FER
PER
OER
RXTRG
RXEN
TXTRG
TXEN
–
Framing error flag
Parity error flag
Overrun error flag
Receive trigger/status
Receive enable
Transmit trigger/status
Transmit enable
"0" when being read
Only for
asynchronous mode
–
0
0
0
0
0
0
0
R/W
R/W
R/W
R/W
R/W
R/W
R/W
–
Error
Reset (0)
Error
Reset (0)
Error
Reset (0)
Run
Trigger
Enable
Run
Trigger
Enable
–
No error
No operation
No error
No operation
No error
No operation
Stop
No operation
Disable
Stop
No operation
Disable
R
W
R
W
R
W
R
W
R
W
00FF4A D7
D6
D5
D4
D3
D2
D1
D0
TRXD7
TRXD6
TRXD5
TRXD4
TRXD3
TRXD2
TRXD1
TRXD0
X
X
X
X
X
X
X
X
R/W
R/W
R/W
R/W
R/W
R/W
R/W
R/W
High
Low
Transmit/Receive data D7 (MSB)
Transmit/Receive data D6
Transmit/Receive data D5
Transmit/Receive data D4
Transmit/Receive data D3
Transmit/Receive data D2
Transmit/Receive data D1
Transmit/Receive data D0 (LSB)
00FF20 D7
D6
D5
D4
D3
D2
D1
D0
PK01
PK00
PSIF1
PSIF0
PSW1
PSW0
PTM1
PTM0
K00–K07 interrupt priority register
Serial interface interrupt priority register
Stopwatch timer interrupt priority register
Clock timer interrupt priority register
0
0
0
0
0
0
0
0
R/W
R/W
R/W
R/W
R/W
R/W
R/W
R/W
PK01
PSIF1
PSW1
PTM1
1
1
0
0
PK00
PSIF0
PSW0
PTM0
1
0
1
0
Priority
level
Level 3
Level 2
Level 1
Level 0
Page 69

E0C88832/88862 TECHNICAL MANUAL EPSON 63
5 PERIPHERAL CIRCUITS AND THEIR OPERATION (Serial Interface)
Table 5.7.9.1(b) Serial interface control bits
SCS0, SCS1: 00FF48H•D3, D4
Select the clock source according to Table 5.7.9.3.
Table 5.7.9.3 Clock source selection
ESIF: 00FF48H•D0
Sets the serial interface terminals (P10–P13).
When "1" is written:
Serial input/output terminal
When "0" is written: I/O port terminal
Reading: Valid
The ESIF is the serial interface enable register and
P10–P13 terminals become serial input/output
terminals (SIN, SOUT, SCLK, SRDY) when "1" is
written, and they become I/O port terminals when
"0" is written.
Also, see Table 5.7.3.2 for the terminal settings
according to the transfer modes.
At initial reset, ESIF is set to "0" (I/O port).
SMD0, SMD1: 00FF48H•D1, D2
Set the transfer modes according to Table 5.7.9.2.
Table 5.7.9.2 Transfer mode settings
SMD0 and SMD1 can also read out.
At initial reset, this register is set to "0" (clock
synchronous master mode).
SCS0 and SCS1 can also be read out.
In the clock synchronous slave mode, setting of this
register is invalid.
At initial reset, this register is set to "0" (fOSC3/16).
EPR: 00FF48H•D6
Selects the parity function.
When "1" is written: With parity
When "0" is written: Non parity
Reading: Valid
Selects whether or not to check parity of the
received data and to add a parity bit to the transmitting data. When "1" is written to EPR, the most
significant bit of the received data is considered to
be the parity bit and a parity check is executed. A
parity bit is added to the transmitting data. When
"0" is written, neither checking is done nor is a
parity bit added.
Parity is valid only in asynchronous mode and the
EPR setting becomes invalid in the clock synchronous mode.
At initial reset, EPR is set to "0" (non parity).
SMD1 SMD0 Mode
1
1
0
0
1
0
1
0
Asynchronous system 8-bit
Asynchronous system 7-bit
Clock synchronous system slave
Clock synchronous system master
SCS1 SCS0 Clock source
1
1
0
0
1
0
1
0
Programmable timer
f
OSC3
/ 4
f
OSC3
/ 8
f
OSC3
/ 16
Address Bit Name SR R/WFunction Comment10
D7
D6
D5
D4
D3
D2
D1
D0
00FF25 D7
D6
D5
D4
D3
D2
D1
D0
FPT1
FPT0
FK1
FK0H
FK0L
FSERR
FSREC
FSTRA
Programmable timer 1 interrupt factor flag
Programmable timer 0 interrupt factor flag
K10 interrupt factor flag
K04–K07 interrupt factor flag
K00–K03 interrupt factor flag
Serial I/F (error) interrupt factor flag
Serial I/F (receiving) interrupt factor flag
Serial I/F (transmitting) interrupt factor flag
0
0
0
0
0
0
0
0
R/W
R/W
R/W
R/W
R/W
R/W
R/W
R/W
(R)
Interrupt
factor is
generated
(W)
Reset
(R)
No interrupt
factor is
generated
(W)
No operation
00FF23 EPT1
EPT0
EK1
EK0H
EK0L
ESERR
ESREC
ESTRA
Programmable timer 1 interrupt enable register
Programmable timer 0 interrupt enable register
K10 interrupt enable register
K04–K07 interrupt enable register
K00–K03 interrupt enable register
Serial I/F (error) interrupt enable register
Serial I/F (receiving) interrupt enable register
Serial I/F (transmitting) interrupt enable register
0
0
0
0
0
0
0
0
R/W
R/W
R/W
R/W
R/W
R/W
R/W
R/W
Interrupt
enable
Interrupt
disable
Page 70

64 EPSON E0C88832/88862 TECHNICAL MANUAL
5 PERIPHERAL CIRCUITS AND THEIR OPERATION (Serial Interface)
PMD: 00FF48H•D5
Selects odd parity/even parity.
When "1" is written: Odd parity
When "0" is written: Even parity
Reading: Valid
When "1" is written to PMD, odd parity is selected
and even parity is selected when "0" is written. The
parity check and addition of a parity bit is only
valid when "1" has been written to EPR. When "0"
has been written to EPR, the parity setting by PMD
becomes invalid.
At initial reset, PMD is set to "0" (even parity).
TXEN: 00FF49H•D0
Sets the serial interface to the transmitting enable
status.
When "1" is written: Transmitting enable
When "0" is written: Transmitting disable
Reading: Valid
When "1" is written to TXEN, the serial interface
shifts to the transmitting enable status and shifts to
the transmitting disable status when "0" is written.
Set TXEN to "0" when making the initial settings of
the serial interface and similar operations.
At initial reset, TXEN is set to "0" (transmitting
disable).
TXTRG: 00FF49H•D1
Functions as the transmitting start trigger and the
operation status indicator (transmitting/stop
status).
When "1" is read: During transmitting
When "0" is read: During stop
When "1" is written: Transmitting start
When "0" is written: Invalid
Starts the transmitting when "1" is written to
TXTRG after writing the transmitting data.
TXTRG can be read as the status. When set to "1", it
indicates transmitting operation, and "0" indicates
transmitting stop.
At initial reset, TXTRG is set to "0" (during stop).
RXEN: 00FF49H•D2
Sets the serial interface to the receiving enable status.
When "1" is written: Receiving enable
When "0" is written: Receiving disable
Reading: Valid
When "1" is written to RXEN, the serial interface
shifts to the receiving enable status and shifts to the
receiving disable status when "0" is written.
Set RXEN to "0" when making the initial settings of
the serial interface and similar operations.
At initial reset, RXEN is set to "0" (receiving disable).
RXTRG: 00FF49H•D3
Functions as the receiving start trigger or preparation for the following data receiving and the operation status indicator (during receiving/during stop).
When "1" is read: During receiving
When "0" is read: During stop
When "1" is written: Receiving start/following
data receiving preparation
When "0" is written: Invalid
RXTRG has a slightly different operation in the clock
synchronous system and the asynchronous system.
The RXTRG in the clock synchronous system, is
used as the trigger for the receiving start.
Writes "1" into RXTRG to start receiving at the
point where the receive data has been read and the
following receive preparation has been done. (In
the slave mode, SRDY becomes "0" at the point
where "1" has been written into into the RXTRG.)
RSTRG is used in the asynchronous system for
preparation of the following data receiving. Reads
the received data located in the received data buffer
and writes "1" into RXTRG to inform that the
received data buffer has shifted to empty. When "1"
has not been written to RXTRG, the overrun error
flag OER is set to "1" at the point where the following receiving has been completed. (When the
receiving has been completed between the operation to read the received data and the operation to
write "1" into RXTRG, an overrun error occurs.)
In addition, RXTRG can be read as the status. In
either clock synchronous mode or asynchronous
mode, when RXTRG is set to "1", it indicates
receiving operation and when set to "0", it indicates
that receiving has stopped.
At initial reset, RXTRG is set to "0" (during stop).
Page 71

E0C88832/88862 TECHNICAL MANUAL EPSON 65
5 PERIPHERAL CIRCUITS AND THEIR OPERATION (Serial Interface)
TRXD0–TRXD7: 00FF4AH
During transmitting
Write the transmitting data into the transmit shift
register.
When "1" is written: HIGH level
When "0" is written: LOW level
Write the transmitting data prior to starting
transmitting.
In the case of continuous transmitting, wait for the
transmitting complete interrupt, then write the data.
The TRXD7 becomes invalid for the asynchronous
7-bit mode.
Converted serial data for which the bits set at "1" as
HIGH (VDD) level and for which the bits set at "0"
as LOW (VSS) level are output from the SOUT
terminal.
During receiving
Read the received data.
When "1" is read: HIGH level
When "0" is read: LOW level
The data from the received data buffer can be read out.
Since the sift register is provided separately from
this buffer, reading can be done during the receive
operation in the asynchronous mode. (The buffer
function is not used in the clock synchronous mode.)
Read the data after waiting for the receiving
complete interrupt.
When performing parity check in the asynchronous
7-bit mode, "0" is loaded into the 8th bit (TRXD7)
that corresponds to the parity bit.
The serial data input from the SIN terminal is level
converted, making the HIGH (VDD) level bit "1"
and the LOW (VSS) level bit "0" and is then loaded
into this buffer.
At initial reset, the buffer content is undefined.
OER: 00FF49H•D4
Indicates the generation of an overrun error.
When "1" is read: Error
When "0" is read: No error
When "1" is written: Reset to "0"
When "0" is written: Invalid
OER is an error flag that indicates the generation of
an overrun error and becomes "1" when an error
has been generated.
An overrun error is generated when the receiving
of data has been completed prior to the writing of
"1" to RXTRG in the asynchronous mode.
OER is reset to "0" by writing "1".
At initial reset and when RXEN is "0", OER is set to
"0" (no error).
PER: 00FF49H•D5
Indicates the generation of a parity error.
When "1" is read: Error
When "0" is read: No error
When "1" is written: Reset to "0"
When "0" is written: Invalid
PER is an error flag that indicates the generation of
a parity error and becomes "1" when an error has
been generated.
When a parity check is performed in the asynchronous mode, if data that does not match the parity is
received, a parity error is generated.
PER is reset to "0" by writing "1".
At initial reset and when RXEN is "0", PER is set to
"0" (no error).
FER: 00FF49H•D6
Indicates the generation of a framing error.
When "1" is read: Error
When "0" is read: No error
When "1" is written: Reset to "0"
When "0" is written: Invalid
FER is an error flag that indicates the generation of
a framing error and becomes "1" when an error has
been generated.
When the stop bit for the receiving of the asynchronous mode has become "0", a framing error is
generated.
FER is reset to "0" by writing "1".
At initial reset and when RXEN is "0", FER is set to
"0" (no error).
PSIF0, PSIF1: 00FF20H•D4, D5
Sets the priority level of the serial interface interrupt.
The two bits PSIF0 and PSIF1 are the interrupt
priority register corresponding to the serial interface interrupt. Table 5.7.9.4 shows the interrupt
priority level which can be set by this register.
Table 5.7.9.4 Interrupt priority level settings
At initial reset, this register is set to "0" (level 0).
PSIF1 PSIF0 Interrupt priority level
1
1
0
0
1
0
1
0
Level 3 (IRQ3)
Level 2 (IRQ2)
Level 1 (IRQ1)
Level 0 (None)
Page 72

66 EPSON E0C88832/88862 TECHNICAL MANUAL
5 PERIPHERAL CIRCUITS AND THEIR OPERATION (Serial Interface)
ESTRA, ESREC, ESERR: 00FF23H•D0, D1, D2
Enables or disables the generation of an interrupt
for the CPU.
When "1" is written: Interrupt enabled
When "0" is written: Interrupt disabled
Reading: Valid
ESTRA, ESREC and ESERR are interrupt enable
registers that respectively correspond to the
interrupt factors for transmitting complete, receiving complete and receiving error. Interrupts set to
"1" are enabled and interrupts set to "0" are disabled.
At initial reset, this register is set to "0" (interrupt
disabled).
FSTRA, FSREC, FSERR: 00FF25H•D0, D1, D2
Indicates the serial interface interrupt generation status.
When "1" is read: Interrupt factor present
When "0" is read:
Interrupt factor not present
When "1" is written: Resets factor flag
When "0" is written: Invalid
FSTRA, FSREC and FSERR are interrupt factor flags
that respectively correspond to the interrupts for
transmitting complete, receiving complete and
receiving error and are set to "1" by generation of
each factor.
Transmitting complete interrupt factor is generated
at the point where the data transmitting of the shift
register has been completed.
Receiving complete interrupt factor is generated at
the point where the received data has been transferred into the received data buffer.
Receive error interrupt factor is generated when a
parity error, framing error or overrun error has
been detected during data receiving.
When set in this manner, if the corresponding
interrupt enable register is set to "1" and the
corresponding interrupt priority register is set to a
higher level than the setting of interrupt flags (I0
and I1), an interrupt will be generated to the CPU.
Regardless of the interrupt enable register and
interrupt priority register settings, the interrupt
factor flag will be set to "1" by the occurrence of an
interrupt generation condition.
To accept the subsequent interrupt after interrupt
generation, re-setting of the interrupt flags (set
interrupt flag to lower level than the level indicated
by the interrupt priority registers, or execute the
RETE instruction) and interrupt factor flag reset are
necessary. The interrupt factor flag is reset to "0" by
writing "1".
At initial reset, this flag is reset to "0".
5.7.10 Programming notes
(1) Be sure to initialize the serial interface mode in
the transmitting/receiving disable status (TXEN
= RXEN = "0").
(2) Do not perform double trigger (writing "1") to
TXTRG (RXTRG) when the serial interface is in
the transmitting (receiving) operation. Furthermore, do not execute the SLP instruction. (When
executing the SLP instruction, set TXEN =
RXEN = "0".)
(3) In the clock synchronous mode, since one clock
line (SCLK) is shared for both transmitting and
receiving, transmitting and receiving cannot be
performed simultaneously. (Half duplex only is
possible in clock synchronous mode.)
Consequently, be sure not to write "1" to
RXTRG (TXTRG) when TXTRG (RXTRG) is "1".
(4) When a parity error or flaming error is gener-
ated during receiving in the asynchronous
mode, the receiving error interrupt factor flag
FSERR is set to "1" prior to the receiving
complete interrupt factor flag FSREC for the
time indicated in Table 5.7.10.1. Consequently,
when an error is generated, you should reset the
receiving complete interrupt factor flag FSREC
to "0" by providing a wait time in error processing routines and similar routines.
When an overrun error is generated, the
receiving complete interrupt factor flag FSREC
is not set to "1" and a receiving complete
interrupt is not generated.
Table 5.7.10.1 Time difference between FSERR
and FSREC on error generation
(5) When the demultiplied signal of the OSC3
oscillation circuit is made the clock source, it is
necessary to turn the OSC3 oscillation ON, prior
to using the serial interface.
A time interval of several 100 µsec to several 10
msec, from the turning ON of the OSC3 oscillation circuit to until the oscillation stabilizes, is
necessary, due to the oscillation element that is
used. Consequently, you should allow an
adequate waiting time after turning ON of the
OSC3 oscillation, before starting transmitting/
receiving of serial interface. (The oscillation
start time will vary somewhat depending on the
oscillator and on the externally attached parts.
Refer to the oscillation start time example
indicated in Chapter 7, "ELECTRICAL CHARACTERISTICS".)
At initial reset, the OSC3 oscillation circuit is set
to OFF status.
Clock source Time difference
f
OSC3 / n
Programmable timer
1/2 cycles of fOSC3 / n
1 cycle of timer 1 underflow
Page 73

E0C88832/88862 TECHNICAL MANUAL EPSON 67
5 PERIPHERAL CIRCUITS AND THEIR OPERATION (Clock Timer)
5.8 Clock Timer
5.8.1 Configuration of clock timer
The E0C88832/88862 has built in a clock timer that
uses the OSC1 oscillation circuit as clock source.
The clock timer is composed of an 8-bit binary
counter that uses the 256 Hz signal dividing fOSC1
as its input clock and can read the data of each bit
(128–1 Hz) by software.
Normally, this clock timer is used for various
timing functions such as clocks.
The configuration of the clock timer is shown in
Figure 5.8.1.1.
5.8.2 Interrupt function
The clock timer can generate an interrupt by each of
the 32 Hz, 8 Hz, 2 Hz and 1 Hz signals.
The configuration of the clock timer interrupt
circuit is shown in Figure 5.8.2.1.
Interrupts are generated by respectively setting the
corresponding interrupt factor flags FTM32, FTM8,
FTM2 and FTM1 at the falling edge of the 32 Hz, 8
Hz, 2 Hz and 1 Hz signals to "1". Interrupt can be
prohibited by the setting the interrupt enable
registers ETM32, ETM8, ETM2 and ETM1 corresponding to each interrupt factor flag.
In addition, a priority level of the clock timer
interrupt for the CPU can be optionally set at levels
0 to 3 by the interrupt priority registers PTM0 and
PTM1.
For details on the above mentioned interrupt
control register and the operation following
generation of an interrupt, see "5.14 Interrupt and
Standby Status".
The exception processing vector addresses for each
interrupt factor are respectively set as shown
below.
32 Hz interrupt: 00001CH
8 Hz interrupt: 00001EH
2 Hz interrupt: 000020H
1 Hz interrupt: 000022H
Figure 5.8.2.2 shows the timing chart for the clock
timer.
Data bus
Interrupt
request
Interrupt control circuit
OSC1
oscillation
circuit
64Hz32Hz16Hz8Hz4Hz2Hz1
Hz
128
Hz
Clock timer reset
TMRST
Clock timer
TMD0–TMD7
TMRUN
Clock timer Run/Stop
Divider
f
OSC1
256 Hz
Fig. 5.8.1.1 Configuration of clock timer
Page 74

68 EPSON E0C88832/88862 TECHNICAL MANUAL
5 PERIPHERAL CIRCUITS AND THEIR OPERATION (Clock Timer)
256 Hz
128 Hz
64 Hz
32 Hz
16 Hz
8 Hz
4 Hz
2 Hz
1 Hz
32 Hz interrupt
8 Hz interrupt
2 Hz interrupt
1 Hz interrupt
OSC1/128
TMD0
TMD1
TMD2
TMD3
TMD4
TMD5
TMD6
TMD7
Data bus
Interrupt
request
Address
32 Hz falling edge
Interrupt factor
flag FTM32
Address
Interrupt enable
register ETM32
Address
8 Hz falling edge
Interrupt factor
flag FTM8
Address
Interrupt enable
register ETM8
Address
2 Hz falling edge
Interrupt factor
flag FTM2
Address
Interrupt enable
register ETM2
Interrupt priority
level judgement
circuit
Address
Interrupt priority
register PTM0, PTM1
Address
1 Hz falling edge
Interrupt factor
flag FTM1
Address
Interrupt enable
register ETM1
Fig. 5.8.2.1 Configuration of clock timer interrupt circuit
Fig. 5.8.2.2 Timing chart of clock timer
Page 75

E0C88832/88862 TECHNICAL MANUAL EPSON 69
5 PERIPHERAL CIRCUITS AND THEIR OPERATION (Clock Timer)
5.8.3 Control of clock timer
Table 5.8.3.1 shows the clock timer control bits.
Table 5.8.3.1 Clock timer control bits
Address Bit Name
00FF40 D7
D6
D5
D4
D3
D2
D1
D0
–
FOUT2
FOUT1
FOUT0
FOUTON
WDRST
TMRST
TMRUN
SR R/WFunction Comment
–
FOUT frequency selection
FOUT output control
Watchdog timer reset
Clock timer reset
Clock timer Run/Stop control
"0" when being read
This is just R/W
register on
E0C88862.
Constantly "0" when
being read
10
–
0
0
0
0
–
–
0
R/W
R/W
R/W
R/W
W
W
R/W
–
On
Reset
Reset
Run
–
Off
No operation
No operation
Stop
00FF41 D7
D6
D5
D4
D3
D2
D1
D0
TMD7
TMD6
TMD5
TMD4
TMD3
TMD2
TMD1
TMD0
Clock timer data
Clock timer data
Clock timer data
Clock timer data
Clock timer data
Clock timer data
Clock timer data
Clock timer data
0
0
0
0
0
0
0
0
R
R
R
R
R
R
R
R
High
Low
1 Hz
2 Hz
4 Hz
8 Hz
16 Hz
32 Hz
64 Hz
128 Hz
FOUT2
0
0
0
0
1
1
1
1
FOUT1
0
0
1
1
0
0
1
1
FOUT0
0
1
0
1
0
1
0
1
Frequency
f
OSC1
/ 1
f
OSC1
/ 2
f
OSC1
/ 4
f
OSC1
/ 8
f
OSC3
/ 1
f
OSC3
/ 2
f
OSC3
/ 4
f
OSC3
/ 8
00FF20 D7
D6
D5
D4
D3
D2
D1
D0
PK01
PK00
PSIF1
PSIF0
PSW1
PSW0
PTM1
PTM0
K00–K07 interrupt priority register
Serial interface interrupt priority register
Stopwatch timer interrupt priority register
Clock timer interrupt priority register
0
0
0
0
0
0
0
0
R/W
R/W
R/W
R/W
R/W
R/W
R/W
R/W
PK01
PSIF1
PSW1
PTM1
1
1
0
0
PK00
PSIF0
PSW0
PTM0
1
0
1
0
Priority
level
Level 3
Level 2
Level 1
Level 0
00FF22 D7
D6
D5
D4
D3
D2
D1
D0
–
ESW100
ESW10
ESW1
ETM32
ETM8
ETM2
ETM1
–
Stopwatch timer 100 Hz interrupt enable register
Stopwatch timer 10 Hz interrupt enable register
Stopwatch timer 1 Hz interrupt enable register
Clock timer 32 Hz interrupt enable register
Clock timer 8 Hz interrupt enable register
Clock timer 2 Hz interrupt enable register
Clock timer 1 Hz interrupt enable register
"0" when being read
–
0
0
0
0
0
0
0
R/W
R/W
R/W
R/W
R/W
R/W
R/W
–
Interrupt
enable
–
Interrupt
disable
00FF24 D7
D6
D5
D4
D3
D2
D1
D0
–
FSW100
FSW10
FSW1
FTM32
FTM8
FTM2
FTM1
–
Stopwatch timer 100 Hz interrupt factor flag
Stopwatch timer 10 Hz interrupt factor flag
Stopwatch timer 1 Hz interrupt factor flag
Clock timer 32 Hz interrupt factor flag
Clock timer 8 Hz interrupt factor flag
Clock timer 2 Hz interrupt factor flag
Clock timer 1 Hz interrupt factor flag
"0" when being read
–
0
0
0
0
0
0
0
R/W
R/W
R/W
R/W
R/W
R/W
R/W
–
(R)
Interrupt
factor is
generated
(W)
Reset
–
(R)
No interrupt
factor is
generated
(W)
No operation
Page 76

70 EPSON E0C88832/88862 TECHNICAL MANUAL
5 PERIPHERAL CIRCUITS AND THEIR OPERATION (Clock Timer)
TMD0–TMD7: 00FF41H
The clock timer data can be read out.
Each bit of TMD0–TMD7 and frequency correspondence are as follows:
TMD0: 128Hz TMD4: 8Hz
TMD1: 64Hz TMD5: 4Hz
TMD2: 32Hz TMD6: 2Hz
TMD3: 16Hz TMD7: 1Hz
Since the TMD0–TMD7 is exclusively for reading,
the write operation is invalid.
At initial reset, the timer data is set to "00H".
TMRST: 00FF40H•D1
Resets the clock timer.
When "1" is written: Clock timer reset
When "0" is written: No operation
Reading: Always "0"
The clock timer is reset by writing "1" to the
TMRST.
When the clock timer is reset in the RUN status, it
restarts immediately after resetting. In the case of
the STOP status, the reset data "00H" is maintained.
No operation results when "0" is written to the
TMRST.
Since the TMRST is exclusively for writing, it
always becomes "0" during reading.
TMRUN: 00FF40H•D0
Controls RUN/STOP of the clock timer.
When "1" is written: RUN
When "0" is written: STOP
Reading: Valid
The clock timer starts up-counting by writing "1" to
the TMRUN and stops by writing "0".
In the STOP status, the count data is maintained
until it is reset or set in the next RUN status. Also,
when the STOP status changes to the RUN status,
the data that was maintained can be used for
resuming the count.
At initial reset, the TMRUN is set to "0" (STOP).
PTM0, PTM1: 00FF20H•D0, D1
Sets the priority level of the clock timer interrupt.
The two bits PTM0 and PTM1 are the interrupt
priority register corresponding to the clock timer
interrupt. Table 5.8.3.2 shows the interrupt priority
level which can be set by this register.
Table 5.8.3.2 Interrupt priority level settings
At initial reset, this register is set to "0" (level 0).
ETM1, ETM2, ETM8, ETM32: 00FF22H•D0–D3
Enables or disables the generation of an interrupt
for the CPU.
When "1" is written: Interrupt enabled
When "0" is written: Interrupt disabled
Reading: Valid
The ETM1, ETM2, ETM8 and ETM32 are interrupt
enable registers that respectively correspond to the
interrupt factors for 1 Hz, 2 Hz, 8 Hz and 32 Hz.
Interrupts set to "1" are enabled and interrupts set
to "0" are disabled.
At initial reset, this register is set to "0" (interrupt
disabled).
FTM1, FTM2, FTM8, FTM32: 00FF24H•D0–D3
Indicates the clock timer interrupt generation status.
When "1" is read: Interrupt factor present
When "0" is read:
Interrupt factor not present
When "1" is written: Resets factor flag
When "0" is written: Invalid
The FTM1, FTM2, FTM8 and FTM32 are interrupt
factor flags that respectively correspond to the
interrupts for 1 Hz, 2 Hz, 8 Hz and 32 Hz and are
set to "1" at the falling edge of each signal.
When set in this manner, if the corresponding
interrupt enable register is set to "1" and the
corresponding interrupt priority register is set to a
higher level than the setting of interrupt flags (I0
and I1), an interrupt will be generated to the CPU.
Regardless of the interrupt enable register and
interrupt priority register settings, the interrupt
factor flag will be set to "1" by the occurrence of an
interrupt generation condition.
To accept the subsequent interrupt after interrupt
generation, re-setting of the interrupt flags (set
interrupt flag to lower level than the level indicated
by the interrupt priority registers, or execute the
RETE instruction) and interrupt factor flag reset are
necessary. The interrupt factor flag is reset to "0" by
writing "1".
At initial reset, this flag is reset to "0".
PTM1 PTM0 Interrupt priority level
1
1
0
0
1
0
1
0
Level 3 (IRQ3)
Level 2 (IRQ2)
Level 1 (IRQ1)
Level 0 (None)
Page 77

E0C88832/88862 TECHNICAL MANUAL EPSON 71
5 PERIPHERAL CIRCUITS AND THEIR OPERATION (Clock Timer)
5.8.4 Programming notes
(1) The clock timer is actually made to RUN/STOP
in synchronization with the falling edge of the
256 Hz signal after writing to the TMRUN
register. Consequently, when "0" is written to
the TMRUN, the timer shifts to STOP status
when the counter is incremented "1". The
TMRUN maintains "1" for reading until the
timer actually shifts to STOP status.
Figure 5.8.4.1 shows the timing chart of the
RUN/STOP control.
Fig. 5.8.4.1 Timing chart of RUN/STOP control
(2) The SLP instruction is executed when the clock
timer is in the RUN status (TMRUN = "1"). The
clock timer operation will become unstable
when returning from SLEEP status. Therefore,
when shifting to SLEEP status, set the clock
timer to STOP status (TMRUN = "0") prior to
executing the SLP instruction.
TMRUN(WR)
TMDX 57H 58H 59H 5AH 5BH 5CH
TMRUN(RD)
256 Hz
Page 78

72 EPSON E0C88832/88862 TECHNICAL MANUAL
5 PERIPHERAL CIRCUITS AND THEIR OPERATION (Stopwatch Timer)
5.9 Stopwatch Timer
5.9.1 Configuration of stopwatch timer
The E0C88832/88862 has a built-in 1/100 sec and
1/10 sec stopwatch timer. The stopwatch timer is
composed of a 4-bit 2 stage BCD counter (1/100 sec
units and 1/10 sec units) that makes the 256 Hz
signal that divides the fOSC1 the input clock and it
can read the count data by software.
Figure 5.9.1.1 shows the configuration of the
stopwatch timer.
The stopwatch timer can be used as a timer different from the clock timer and can easily realize
stopwatch and other such functions by software.
Figure 5.9.2.1 shows the count up pattern of the
stopwatch timer.
The feedback dividing circuit generates an approximate 100 Hz signal at 2/256 sec and 3/256 sec
intervals from a 256 Hz signal divided from fOSC1.
The 1/100 sec counter (SWD0–SWD3) generates an
approximate 10 Hz signal at 25/256 sec and 26/256
sec intervals by counting the approximate 100 Hz
signal generated by the feedback dividing circuit in
2/256 sec and 3/256 sec intervals. The count-up is
made approximately 1/100 sec counting by the 2/
256 sec and 3/256 sec intervals.
The 1/10 sec counter (SWD4–SWD7) generates a 1
Hz signal by counting the approximate 10 Hz
signal generated by the 1/100 sec counter at 25/256
sec and 26/256 sec intervals in 4:6 ratios.
The count-up is made approximately 1/10 sec
counting by 25/256 sec and 26/256 sec intervals.
5.9.2 Count up pattern
The stopwatch timer is respectively composed of the
4-bit BCD counters SWD0–SWD3 and SWD4–SWD7.
Data bus
Interrupt
request
Divider
256 Hz
Stopwatch timer reset
SWRUN
Stopwatch timer
SWD0–SWD7
1 Hz
SWRST
OSC1
oscillation
circuit
f
OSC1
Stopwatch timer Run/Stop
Approximate 100 Hz
Approximate 10 Hz
Feedback
deviding circuit
Interrupt
control
circuit
1/100sec
4-bit BCD counter
1/10sec
4-bit BCD counter
Fig. 5.9.1.1
Configuration of
stopwatch timer
1/10 sec counter count-up pattern
26
256
0
26
256
1
25
256
2
25
256
3
26
256
4
26
256
5
25
256
6
25
256
7
26
256
8
26
256
90Count value
Count clock
(Approximate 10 Hz signal)
Count time
(sec)
3
256
0
2
256
1
3
256
2
2
256
3
3
256
4
2
256
5
3
256
6
2
256
7
3
256
8
2
256
90Count value
Count clock
(256 Hz)
Count time
(sec)
3
256
0
3
256
1
3
256
2
2
256
3
3
256
4
2
256
5
3
256
6
2
256
7
3
256
8
2
256
90Count value
Count clock
(256 Hz)
Count time
(sec)
25
256
26
256
sec
sec
1/100 sec counter count-up pattern 1
Approximate 10 Hz signal
1/100 sec counter count-up pattern 2
Approximate 10 Hz signal
1 Hz signal
26
256
x 6 +
25
256
x 4 = 1 sec
Fig. 5.9.2.1
Count-up pattern of stopwatch timer
Page 79

E0C88832/88862 TECHNICAL MANUAL EPSON 73
5 PERIPHERAL CIRCUITS AND THEIR OPERATION (Stopwatch Timer)
5.9.3 Interrupt function
The stopwatch timer can generate an interrupt by
each of the 100 Hz (approximately 100 Hz), 10 Hz
(approximately 10 Hz) and 1 Hz signals.
Figure 5.9.3.1 shows the configuration of the
stopwatch timer interrupt circuit
The corresponding factor flags FSW100, FSW10 and
FSW1 are respectively set to "1" at the falling edge
of the 100 Hz, 10Hz and 1Hz signal and an interrupt is generated. Interrupt can be prohibited by
the setting of the interrupt enable registers ESW100,
ESW10 and ESW1 corresponding to each interrupt
factor flag.
In addition, a priority level of the stopwatch timer
interrupt for the CPU can be optionally set at levels
0 to 3 by the interrupt priority registers PSW0 and
PSW1.
For details on the above mentioned interrupt
control registers and the operation following
generation of an interrupt, see "5.14 Interrupt and
Standby Status".
The exception processing vector addresses of each
interrupt factor are respectively set as shown
below.
100 Hz interrupt: 000016H
10 Hz interrupt: 000018H
1 Hz interrupt: 00001AH
Figure 5.9.3.2 shows the timing chart for the
stopwatch timer.
SWD0
SWD1
SWD2
SWD3
100 Hz interrupt
10 Hz interrupt
1/100 sec
counter
BCD data
SWD4
SWD5
SWD6
SWD7
1 Hz interrupt
1/10 sec
counter
BCD data
1234567890123456789012340
Fig. 5.9.3.2
Stopwatch timer
timing chart
Data bus
Interrupt
request
Address
100 Hz falling edge
Interrupt factor
flag FSW100
Address
Interrupt enable
register ESW100
Address
10 Hz falling edge
Interrupt factor
flag FSW10
Address
Interrupt enable
register ESW10
Address
1 Hz falling edge
Interrupt factor
flag FSW1
Address
Interrupt enable
register ESW1
Interrupt priority
level judgement
circuit
Address
Interrupt priority
register PSW0, PSW1
Fig. 5.9.3.1
Configuration of the stopwatch timer
interrupt circuit
Page 80

74 EPSON E0C88832/88862 TECHNICAL MANUAL
5 PERIPHERAL CIRCUITS AND THEIR OPERATION (Stopwatch Timer)
5.9.4 Control of stopwatch timer
Table 5.9.4.1 shows the stopwatch timer control bits.
Table 5.9.4.1 Stopwatch timer control bits
Address Bit Name SR R/WFunction Comment10
00FF42 D7
D6
D5
D4
D3
D2
D1
D0
–
–
–
–
–
–
SWRST
SWRUN
–
–
–
–
–
–
Stopwatch timer reset
Stopwatch timer Run/Stop control
Constantly "0" when
being read
–
–
–
–
–
–
–0W
R/W
–
–
–
–
–
–
Reset
Run
–
–
–
–
–
–
No operation
Stop
00FF43 D7
D6
D5
D4
D3
D2
D1
D0
SWD7
SWD6
SWD5
SWD4
SWD3
SWD2
SWD1
SWD0
Stopwatch timer data
BCD (1/10 sec)
Stopwatch timer data
BCD (1/100 sec)
0
0
0
0
0
0
0
0
R
R
R
R
R
R
R
R
00FF20 D7
D6
D5
D4
D3
D2
D1
D0
PK01
PK00
PSIF1
PSIF0
PSW1
PSW0
PTM1
PTM0
K00–K07 interrupt priority register
Serial interface interrupt priority register
Stopwatch timer interrupt priority register
Clock timer interrupt priority register
0
0
0
0
0
0
0
0
R/W
R/W
R/W
R/W
R/W
R/W
R/W
R/W
PK01
PSIF1
PSW1
PTM1
1
1
0
0
PK00
PSIF0
PSW0
PTM0
1
0
1
0
Priority
level
Level 3
Level 2
Level 1
Level 0
00FF22 D7
D6
D5
D4
D3
D2
D1
D0
–
ESW100
ESW10
ESW1
ETM32
ETM8
ETM2
ETM1
–
Stopwatch timer 100 Hz interrupt enable register
Stopwatch timer 10 Hz interrupt enable register
Stopwatch timer 1 Hz interrupt enable register
Clock timer 32 Hz interrupt enable register
Clock timer 8 Hz interrupt enable register
Clock timer 2 Hz interrupt enable register
Clock timer 1 Hz interrupt enable register
"0" when being read
–
0
0
0
0
0
0
0
R/W
R/W
R/W
R/W
R/W
R/W
R/W
–
Interrupt
enable
–
Interrupt
disable
00FF24 D7
D6
D5
D4
D3
D2
D1
D0
–
FSW100
FSW10
FSW1
FTM32
FTM8
FTM2
FTM1
–
Stopwatch timer 100 Hz interrupt factor flag
Stopwatch timer 10 Hz interrupt factor flag
Stopwatch timer 1 Hz interrupt factor flag
Clock timer 32 Hz interrupt factor flag
Clock timer 8 Hz interrupt factor flag
Clock timer 2 Hz interrupt factor flag
Clock timer 1 Hz interrupt factor flag
"0" when being read
–
0
0
0
0
0
0
0
R/W
R/W
R/W
R/W
R/W
R/W
R/W
–
(R)
Interrupt
factor is
generated
(W)
Reset
–
(R)
No interrupt
factor is
generated
(W)
No operation
Page 81

E0C88832/88862 TECHNICAL MANUAL EPSON 75
5 PERIPHERAL CIRCUITS AND THEIR OPERATION (Stopwatch Timer)
SWD0–SWD7: 00FF43H
The stopwatch timer data can be read out.
Higher and lower nibbles and BCD digit correspondence are as follows:
SWD0–SWD3: BCD (1/100sec)
SWD4–SWD7: BCD (1/10sec)
Since SWD0–SWD7 are exclusively for reading, the
write operation is invalid.
At initial reset, the timer data is set to "00H".
SWRST: 00FF42H•D1
Resets the stopwatch timer.
When "1" is written: Stopwatch timer reset
When "0" is written: No operation
Reading: Always "0"
The stopwatch timer is reset by writing "1" to the
SWRST. When the stopwatch timer is reset in the
RUN status, it restarts immediately after resetting.
In the case of the STOP status, the reset data "00H"
is maintained.
No operation results when "0" is written to the
SWRST.
Since the SWRST is exclusively for writing, it
always becomes "0" during reading.
SWRUN: 00FF42H•D0
Controls RUN/STOP of the stopwatch timer.
When "1" is written: RUN
When "0" is written: STOP
Reading: Valid
The stopwatch timer starts up-counting by writing
"1" to the SWRUN and stops by writing "0".
In the STOP status, the timer data is maintained
until it is reset or set in the next RUN status. Also,
when the STOP status changes to the RUN status,
the data that was maintained can be used for
resuming the count.
At initial reset, the SWRUN is set at "0" (STOP).
PSW0, PSW1: 00FF20H•D2, D3
Sets the priority level of the stopwatch timer
interrupt.
The two bits PSW0 and PSW1 are the interrupt
priority register corresponding to the stopwatch
timer interrupt. Table 5.9.4.2 shows the interrupt
priority level which can be set by this register.
Table 5.9.4.2 Interrupt priority level settings
PSW1 PSW0 Interrupt priority level
1
1
0
0
1
0
1
0
Level 3 (IRQ3)
Level 2 (IRQ2)
Level 1 (IRQ1)
Level 0 (None)
At initial reset, this register is set to "0" (level 0).
ESW1, ESW10, ESW100: 00FF22H•D4, D5, D6
Enables or disables the generation of an interrupt
for the CPU.
When "1" is written: Interrupt enabled
When "0" is written: Interrupt disabled
Reading: Valid
The ESW1, ESW10 and ESW100 are interrupt
enable registers that respectively correspond to the
interrupt factors for 1 Hz, 10 Hz and 100 Hz.
Interrupts set to "1" are enabled and interrupts set
to "0" are disabled.
At initial reset, this register is set to "0" (interrupt
disabled).
FSW1, FSW10, FSW100: 00FF24H•D4, D5, D6
Indicates the stopwatch timer interrupt generation
status.
When "1" is read: Interrupt factor present
When "0" is read:
Interrupt factor not present
When "1" is written: Resets factor flag
When "0" is written: Invalid
The FSW1, FSW10 and FSW100 are interrupt factor
flags that respectively correspond to the interrupts
for 1 Hz, 10 Hz and 100 Hz and are set to "1" in
synchronization with the falling edge of each signal.
When set in this manner, if the corresponding
interrupt enable register is set to "1" and the
corresponding interrupt priority register is set to a
higher level than the setting of interrupt flags (I0
and I1), an interrupt will be generated to the CPU.
Regardless of the interrupt enable register and
interrupt priority register settings, the interrupt
factor flag will be set to "1" by the occurrence of an
interrupt generation condition.
To accept the subsequent interrupt after interrupt
generation, re-setting of the interrupt flags (set
interrupt flag to lower level than the level indicated
by the interrupt priority registers, or execute the
RETE instruction) and interrupt factor flag reset are
necessary. The interrupt factor flag is reset to "0" by
writing "1".
At initial reset, this flag is reset to "0".
Page 82

76 EPSON E0C88832/88862 TECHNICAL MANUAL
5 PERIPHERAL CIRCUITS AND THEIR OPERATION (Stopwatch Timer)
5.9.5 Programming notes
(1) The stopwatch timer is actually made to RUN/
STOP in synchronization with the falling edge
of the 256 Hz signal after writing to the SWRUN
register. Consequently, when "0" is written to
the SWRUN, the timer shifts to STOP status
when the counter is incremented "1". The
SWRUN maintains "1" for reading until the
timer actually shifts to STOP status.
Figure 5.9.5.1 shows the timing chart of the
RUN/STOP control.
SWRUN(WR)
SWDX
27 28 29 30 31 32
SWRUN(RD)
256 Hz
Fig. 5.9.5.1 Timing chart of RUN/STOP control
(2) The SLP instruction is executed when the
stopwatch timer is in the RUN status (SWRUN
= "1"). The stopwatch timer operation will
become unstable when returning from SLEEP
status. Therefore, when shifting to SLEEP
status, set the clock timer to STOP status
(SWRUN = "0") prior to executing the SLP
instruction.
Page 83

E0C88832/88862 TECHNICAL MANUAL EPSON 77
5 PERIPHERAL CIRCUITS AND THEIR OPERATION (Programmable Timer)
5.10 Programmable Timer
5.10.1 Configuration of programmable timer
The E0C88832/88862 has two built-in 8-bit
programmable timer systems (timer 0 and timer 1).
Timer 0 and timer 1 are composed of 8-bit
presettable down counters and they can be used as
8-bit × 2 channels or 16-bit × 1 channel programmable timer. They also have an event counter function
and a pulse width measurement function using the
K10 input port terminal.
Figure 5.10.1.1 shows the configuration of the
programmable timer.
Programmable setting of the transfer rate is possible, due to the fact that the programmable timer
underflow signal can be used as a synchronous
clock for the serial interface.
Furthermore,
this halved underflow signal
(TOUT)
can also be output externally from the R27 output
port terminal.
Furthermore, the R26 output port
terminal can be used to output the TOUT signal
(TOUT inverted signal) by mask option.
5.10.2 Count operation and
setting basic mode
Here we will explain the basic operation and
setting of the programmable timer.
■ Setting of initial value and counting down
The timers 0 and 1 each have a down counter and
reload data register.
The reload data registers RLD00–RLD07 (timer 0)
and RLD10–RLD17 (timer 1) are registers that set
the initial value of the counter.
By writing "1" to the preset control bit PSET0 (timer
0) or PSET1 (timer 1), the down counter loads the
initial value set in the reload register RLD.
Therefore, down-counting is executed from the
stored initial value according to the input clock.
Fig. 5.10.1.1 Configuration of programmable timer
Reload data register
RLD00–RLD07
Data buffer
PTD00–PTD07
Input port
K10
PRUN0
FCSEL
PLPOL
Programmable timer 0
PSC00
PSC01
Reload
signal
8-bit down counterPrescaler
OSC3
oscillation
circuit
OSC1
oscillation
circuit
Selector
CKSEL0
Timer 0 Run/Stop
EVIN (K10)
RLMD0
PSET0
Clock
controller
Reload
controller
EVCNT
Event counter mode setting
Timer function setting
Pulse polarity setting
Prescaler
setting
Underflow
signal
Reload data register
RLD10–RLD17
Data buffer
PTD10–PTD17
MODE16
Programmable timer 1
PSC10
PSC11
Reload
signal
8-bit down counterPrescaler
RLMD1
PSET1
Clock
controller
Reload
controller
8/16-bit mode
setting
Prescaler
setting
Underflow
signal
Data bus
Interrupt
request
Interrupt
control
circuit
TOUT (R26)*
Output port
R27, R26
TOUT (R27)
Serial
interface
PRUN1
Selector
CKSEL1
Timer 1 Run/Stop
f
OSC1
f
OSC3
Divider
2,048 Hz
Selector
CHSEL
1/2
PTOUT
Available when selected
by mask option
∗
Page 84

78 EPSON E0C88832/88862 TECHNICAL MANUAL
5 PERIPHERAL CIRCUITS AND THEIR OPERATION (Programmable Timer)
Fig. 5.10.2.1 Basic operation timing of the counter
Fig. 5.10.2.2 Continuous mode and one-shot mode
■ Continuous/one-shot mode setting
By writing "1" to the continuous/one-shot mode
selection registers CONT0 (timer 0) and CONT1
(timer 1), the programmable timer is set to the
continuous mode. In the continuous mode, the
initial counter value is automatically loaded when
an underflow is generated, and counting is continued. This mode is suitable when programmable
intervals are necessary (such as an interrupt and a
synchronous clock for the serial interface).
On the other hand, when writing "0" to the registers
CONT0 (timer 0) and CONT1 (timer 1), the programmable timer is set to the one-shot mode. The
counter loads an initial value and stops when an
underflow is generated. At this time, the RUN/
STOP control register PRUN0 (timer 0) and PRUN1
(timer 1) are automatically reset to "0". After the
counter stops, a one-shot count can be performed
once again by writing "1" to registers PRUN0 (timer
0) and PRUN1 (timer 1). This mode is suitable for
single time measurement, for example.
The registers PRUN0 (timer 0) and PRUN1 (timer 1)
are provided to control the RUN/STOP for timers 0
and 1.
After the reload data has been preset into the
counter, down-counting is begun by writing "1" to
this register. When "0" is written, the clock input is
prohibited and the count stops.
The control of this RUN/STOP has no affect on the
counter data. The counter data is maintained even
during the stoppage of the counter and it can start
the count, continuing from that data.
The reading of the counter data can be done
through the data buffers PTD00–PTD07 (timer 0)
and PTD10–PTD17 (timer 1) with optional timing.
When the down-counting has progressed and an
underflow is generated, the counter reloads the
initial value set in the reload data register.
This underflow signal controls an interrupt generation, pulse (TOUT signal) output and serial interface clocking, in addition to reloading the counter.
PRUN0(1)
PSET0(1)
RLD00–07(10–17)
Input clock
PTD07(17)
PTD06(16)
PTD05(15)
PTD04(14)
PTD03(13)
PTD02(12)
PTD01(11)
PTD00(10)
A6H F3H
Preset
Reload and
interrupt generation
Input clock
Underflow
Continuous
mode
One-shot
mode
03H 02H 01H 00H A6H A5H A4H
03H 02H 01H 00H A6H
Count
data
When "A6H" is set into reload data register RLD.
Page 85

E0C88832/88862 TECHNICAL MANUAL EPSON 79
5 PERIPHERAL CIRCUITS AND THEIR OPERATION (Programmable Timer)
■ 8/16-bit mode setting
By writing "0" to the 8/16-bit mode selection
register MODE16, timer 0 and timer 1 are set as
independent timers in 8-bit × 2 channels. In this
mode, timer 0 and timer 1 can be controlled
individually and each of them operates independently.
On the other hand, when writing "1" to the register
MODE16, timer 0 and timer1 are set as 1 channel
16-bit timer. This is done by setting timer 0 to the
lower 8 bits, and timer 1 to the upper 8 bits. The
timer is controlled by timer 0's registers. In this
case, the control registers for timer 1 are invalid.
(PRUN1 is fixed at "0".)
From the time the OSC3 oscillation circuit is
turning ON until oscillation stabilizes, an
interval of several 100 µsec to several 10 msec is
necessary. Consequently, you should allow an
adequate waiting time after turning the OSC3
oscillation circuit ON before starting the count
of the programmable timer. (The oscillation
start time will vary somewhat depending on the
oscillator and on external parts. Refer to the
oscillation start time example indicated in
Chapter 7, "ELECTRICAL CHARACTERISTICS".)
At initial reset, OSC3 oscillation circuit is set to
OFF status.
(2) Selection of prescaler dividing ratio
Select the dividing ratio of each prescaler from
among 4 types. This selection is done by the
prescaler dividing ratio selection registers
PSC00/PSC01 (timer 0) and PSC10/PSC11
(timer 1). Setting value and dividing ratio
correspondence are shown in Table 5.10.3.1.
Table 5.10.3.1 Selection of prescaler dividing ratio
Fig. 5.10.2.3 8/16-bit mode setting and counter configuration
5.10.3 Setting of input clock
Prescalers have been provided for timers 0 and 1.
The prescalers generate the input clock for each by
dividing the source clock signal from the OSC1 or
OSC3 oscillation circuit.
The source clock and the dividing ratio of the
prescaler can be selected individually for timer 0
and timer 1 in software.
The input clocks are set by the below sequence.
(1) Selection of source clock
Select the source clock (OSC1 or OSC3) for each
prescaler. This is done with the source clock
selection registers CKSEL0 (timer 0) and
CKSEL1 (timer 1): when "0" is written, OSC1 is
selected and when "1" is written, OSC3 is
selected. When the 16-bit mode is selected, the
source clock is selected by register CKSEL0, and
the register CKSEL1 setting becomes invalid.
When the OSC3 oscillation circuit is made the
clock source, it is necessary to turn the OSC3
oscillation ON, prior to using the programmable
timer.
By writing "1" to the register PRUN0 (timer 0)
and PRUN1 (timer 1), the source clock is input
to the prescaler. Therefore, the clock with
selected dividing ratio is input to the timer and
the timer starts counting down.
When the 16-bit mode has been selected, the
dividing ratio for the source clock is selected by
register PSC00/PSC01 and the setting of register
PSC10/PSC11 becomes invalid.
5.10.4 Timer mode
The timer mode counts down using the prescaler
output as an input clock. In this mode, the programmable timer operates as a timer that obtains
fixed cycles using the OSC1 or OSC3 oscillation
circuit as a clock source.
See "5.10.2 Count operation and basic mode setting"
for basic operation and control, and "5.10.3 Setting
input clock" for the clock source and setting of the
prescaler.
8-bit data
8-bit data
Timer 0
Timer 1
Timer 0
input
clock
Timer 1
input
clock
Low-order 8-bit data
High-order 8-bit data
Timer 0
Timer 1
Timer 0
input
clock
Timer 0
underflow
signal
Interrupt
request
[16-bit mode]
Interrupt
request
Interrupt
request
[8-bit mode]
PSC11
PSC01
PSC10
PSC00
Prescaler dividing ratio
1
1
0
0
1
0
1
0
Source clock / 64
Source clock / 16
Source clock / 4
Source clock / 1
Page 86

80 EPSON E0C88832/88862 TECHNICAL MANUAL
5 PERIPHERAL CIRCUITS AND THEIR OPERATION (Programmable Timer)
5.10.5 Event counter mode
Timer 0 includes an even counter function that
counts by inputting an external clock (EVIN) to
input port K10. This function is selected by writing
"1" to the timer 0 counter mode selection register
EVCNT.
When the event counter mode is selected, timer 0
operates as an event counter and timer 1 operates
as a normal timer in 8-bit mode. In the 16-bit mode,
timer 0 and timer 1 operate as 1 channel 16-bit
event counter. In the event counter mode, since the
timer 0 is clocked externally, the settings of registers PSC00/PSC01 become invalid.
Count down timing can be controlled by either the
falling edge or rising edge selected by the timer 0
pulse polarity selection register PLPOL. When "0" is
written to the register PLPOL, the falling edge is
selected, and when "1" is written, the rising edge is
selected. The timing is shown in Figure 5.10.5.1.
For a reliable count when "with noise rejecter" is
selected, you must allow 0.98 msec or more pulse
width for both LOW and HIGH levels. (The noise
rejecter allows clocking counter at the second
falling edge of the internal 2,048 Hz signal after
changing the input level of the K10 input port
terminal. Consequently, the pulse width that can
reliably be rejected is 0.48 msec.)
Figure 5.10.5.2 shows the count down timing with
the noise rejecter selected.
Input clock
to counter
Count data
n n-1 n-2 n-3
EVIN input (K10)
2,048 Hz
When "0" is set into register PLPOL.
Fig. 5.10.5.2 Count down timing with noise rejecter
The event counter mode is the same as the timer
mode except that the clock is external (EVIN).
See "5.10.2 Count operation and setting basic mode"
for the basic operation and control.
5.10.6 Pulse width measurement timer mode
Timer 0 includes a pulse width measurement function
that measures the width of the input signal to the K10
input port terminal. This function is selected by
writing "1" to the timer function selection register
FCSEL when in the timer mode (EVCNT = "0").
When the pulse width measurement mode is
selected, timer 0 operates as an pulse width measurement and timer 1 operates as a normal timer in 8-bit
mode. In the 16-bit mode, timer 0 and timer 1 operate
as 1 channel 16-bit pulse width measurement.
The level of the input signal (EVIN) for measurement can be changed either a LOW or HIGH level
by the timer 0 pulse polarity selection register
PLPOL. When "0" is written to register PLPOL, a
LOW level width is measured and when "1" is
written, a HIGH level width is measured. The
timing is shown in Figure 5.10.6.1.
EVIN input (K10)
Count data n n-1 n-2 n-3 n-4 n-5 n-6
PLPOL
EVCNT
01
1
PRUN0
Fig. 5.10.5.1 Timing chart for event counter mode
The event counter also includes a noise rejecter to
eliminate noise such as chattering for the external
clock (EVIN). This function is selected by writing
"1" to the timer 0 function selection register FCSEL.
EVIN input (K10)
Count data
PLPOL
Prescaler
output clock
n n-1 n-2 n-3 n-4
Input clock
to timer
PRUN0
FCSEL
n-5 n-6 n-7 n-8
Fig. 5.10.6.1 Timing chart for pulse width measurement timer mode
Page 87

E0C88832/88862 TECHNICAL MANUAL EPSON 81
5 PERIPHERAL CIRCUITS AND THEIR OPERATION (Programmable Timer)
The pulse width measurement timer mode is the
same as the timer mode except that the input clock
is controlled by the level of the signal (EVIN) input
to the K10 input port terminal.
See "5.10.2 Count operation and setting basic mode"
for the basic operation and control.
5.10.7 Interrupt function
The programmable timer can generate an interrupt
due to an underflow signal of timer 0 and timer 1.
Figure 5.10.7.1 shows the configuration of the
programmable timer interrupt circuit.
5.10.8 Setting of TOUT output
The programmable timer can generate the TOUT
signal due to an underflow of timer 0 or timer 1.
The TOUT signal is generated from the above
mentioned underflow signal by halving the
frequency. The timer underflow which is to be used
can be selected by the TOUT output channel
selection register CHSEL. When writing "0" to
register CHSEL, timer 0 is selected and when "1" is
written, timer 1 is selected. However, in the 16-bit
mode, it is fixed in timer 1 (underflow of the 16-bit
timer) and the setting of register CHSEL becomes
invalid.
Figure 5.10.8.1 shows the TOUT signal waveform
when channel switching.
The respectively corresponding interrupt factor
flags FPT0 and FPT1 are set to "1" and an interrupt
is generated by an underflow signal of timers 1 and
0. Interrupt can also be prohibited by the setting of
the interrupt enable registers EPT0 and EPT1
corresponding to each interrupt flag.
In addition, a priority level of the programmable
timer interrupt for the CPU can be optionally set at
levels 0 to 3 by the interrupt priority registers PPT0
and PPT1.
For details on the above mentioned interrupt control
registers and the operation following generation of
an interrupt, see "5.14 Interrupt and Standby Status".
The exception processing vector addresses of each
interrupt factor are respectively set as shown below.
Programmable timer 1 interrupt: 000006H
Programmable timer 0 interrupt: 000008H
When the 16-bit mode is selected, the interrupt
factor flag FPT0 is not set to "1" and a timer 0
interrupt cannot be generated. (In the 16-bit mode,
the interrupt factor flag FPT1 is set to "1" by an
underflow of the 16-bit counter.
Fig. 5.10.8.1 TOUT signal waveform at channel change
The TOUT signal can be output from the R27
output port terminal, and the programmable clock
can be supplied to an external device.
Furthermore, the R26 output port terminal can be
used to output the TOUT signal (TOUT inverted
signal) by mask option.
The configuration of the output ports R27 and R26
is shown in Figure 5.10.8.2.
Fig. 5.10.8.2 Configuration of R27 and R26
Data bus
Interrupt
request
Address
Timer 1 underflow
Interrupt factor
flag FPT1
Address
Interrupt enable
register EPT1
Address
Timer 0 underflow
Interrupt factor
flag FPT0
Address
Interrupt enable
register EPT0
Interrupt priority
level judgement
circuit
Address
Interrupt priority
register PPT0, PPT1
Fig. 5.10.7.1 Configuration of programmable timer interrupt circuit
Timer 0 underflow
Timer 1 underflow
CHSEL 0 1
TOUT output (R27)
Register R27D
Register PTOUT
R27 output
R26 output
Mask option
TOUT signal
Register R26D
Page 88

82 EPSON E0C88832/88862 TECHNICAL MANUAL
5 PERIPHERAL CIRCUITS AND THEIR OPERATION (Programmable Timer)
Fig. 5.10.8.3 TOUT output waveform
5.10.9 Transmission rate setting of
serial interface
The underflow signal of the timer 1 can be used to
clock the serial interface.
The transmission rate setting in this case is made in
registers PSC1X and PLD1X, and is used to set the
count mode to the reload count mode (RLMD1 =
"1").
Since the underflow signal of the timer 1 is divided
by 1/32 in the serial interface, the value set in
register RLD1X which corresponds to the transmission rate is shown in the following expression:
RLD1X = fosc / (32*bps*4
PSC1X
) - 1
fosc: Oscillation frequency (OSC1/OSC3)
bps: Transmission rate
PSC1X: Setting value to the register PSC1X (0–3)
(00H can be set to RLD1X)
Table 5.10.9.1 shows an example of the transmis-
sion rate setting when the OSC3 oscillation circuit is
used as a clock source.
Table 5.10.9.1 Example of transmission rate setting
The output control for the TOUT (TOUT) signal is
done by the register PTOUT. When you set "1" for
the PTOUT, the TOUT (TOUT) signal is output
from the R27 (R26) output port terminal. When "0"
is set, the R27 goes HIGH (VDD) and the R26 goes
LOW (VSS).
To output the TOUT signal, "1" must always be set
for the data register R27D. The data register R26D
does not affect the TOUT output.
Since the TOUT signal is generated asynchronously
from the register PTOUT, when the signal is turned
ON or OFF by the register setting, a hazard of a 1/2
cycle or less is generated.
Figure 5.10.8.3 shows the output waveform of
TOUT signal.
Transfer rate
(bps)
9,600
4,800
2,400
1,200
600
300
150
OSC3 oscillation frequency / Programmable timer settings
f
OSC3
= 3.072 MHz
PSC1X
0 (1/1)
0 (1/1)
0 (1/1)
0 (1/1)
0 (1/1)
1 (1/4)
1 (1/4)
RLD1X
09H
13H
27H
4FH
9FH
4FH
9FH
f
OSC3
= 4.608 MHz
PSC1X
0 (1/1)
0 (1/1)
0 (1/1)
0 (1/1)
0 (1/1)
1 (1/4)
1 (1/4)
RLD1X
0EH
1DH
3BH
77H
EFH
77H
EFH
f
OSC3
= 4.9152 MHz
PSC1X
0 (1/1)
0 (1/1)
0 (1/1)
0 (1/1)
0 (1/1)
1 (1/4)
1 (1/4)
RLD1X
0FH
1FH
3FH
7FH
FFH
7FH
FFH
PTOUT
TOUT output (R27)
TOUT output (R26) *
01
∗ when selected by mask option
Page 89

E0C88832/88862 TECHNICAL MANUAL EPSON 83
5 PERIPHERAL CIRCUITS AND THEIR OPERATION (Programmable Timer)
5.10.10 Control of programmable timer
Table 5.10.10.1 shows the programmable timer control bits.
Table 5.10.10.1(a) Programmable timer control bits
Address Bit Name SR R/WFunction Comment10
00FF30 D7
D6
D5
D4
D3
D2
D1
D0
–
–
–
MODE16
CHSEL
PTOUT
CKSEL1
CKSEL0
–
–
–
8/16-bit mode selection
TOUT output channel selection
TOUT output control
Prescaler 1 source clock selection
Prescaler 0 source clock selection
Constantry "0" when
being read
–
–
–
0
0
0
0
0
R/W
R/W
R/W
R/W
R/W
–
–
–
16-bit x 1
Timer 1
On
f
OSC3
fOSC3
–
–
–
8-bit x 2
Timer 0
Off
f
OSC1
fOSC1
00FF31 D7
D6
D5
D4
D3
D2
D1
D0
EVCNT
FCSEL
PLPOL
PSC01
PSC00
CONT0
PSET0
PRUN0
Timer 0 counter mode selection
Timer 0
function selection
Timer 0
pulse polarity
selection
Timer 0 prescaler dividing ratio selection
Timer 0 continuous/one-shot mode selection
Timer 0 preset
Timer 0 Run/Stop control
"0" when being read
0
0
0
0
0
0
–
0
R/W
R/W
R/W
R/W
R/W
R/W
W
R/W
Event counter
Pulse width
measurement
With
noise rejector
Rising edge
of K10 input
High level
measurement
for K10 input
Continuous
Preset
Run
Timer
Normal
mode
Without
noise rejector
Falling edge
of K10 input
Low level
measurement
for K10 input
One-shot
No operation
Stop
In timer mode
In event counter mode
Down count timing
in event counter mode
In pulse width
measurement mode
PSC01
1
1
0
0
PSC00
1
0
1
0
Prescaler dividing ratio
Source clock / 64
Source clock / 16
Source clock / 4
Source clock / 1
00FF32
D7
D6
D5
D4
D3
D2
D1
D0
RLD07
RLD06
RLD05
RLD04
RLD03
RLD02
RLD01
RLD00
Timer 0 reload data D7 (MSB)
Timer 0 reload data D6
Timer 0 reload data D5
Timer 0 reload data D4
Timer 0 reload data D3
Timer 0 reload data D2
Timer 0 reload data D1
Timer 0 reload data D0 (LSB)
1
1
1
1
1
1
1
1
R/W
R/W
R/W
R/W
R/W
R/W
R/W
R/W
High Low
00FF33
D7
D6
D5
D4
D3
D2
D1
D0
–
–
–
PSC11
PSC10
CONT1
PSET1
PRUN1
–
–
–
Timer 1 prescaler dividing ratio selection
Timer 1 continuous/one-shot mode selection
Timer 1 preset
Timer 1 Run/Stop control
Constantry "0" when
being read
"0" when being read
–
–
–
0
0
0
–
0
R/W
R/W
R/W
W
R/W
–
–
–
Continuous
Preset
Run
–
–
–
One-shot
No operation
Stop
PSC11
1
1
0
0
PSC10
1
0
1
0
Prescaler dividing ratio
Source clock / 64
Source clock / 16
Source clock / 4
Source clock / 1
Page 90

84 EPSON E0C88832/88862 TECHNICAL MANUAL
5 PERIPHERAL CIRCUITS AND THEIR OPERATION (Programmable Timer)
Table 5.10.10.1(b) Programmable timer control bits
Address Bit Name SR R/WFunction Comment10
D7
D6
D5
D4
D3
D2
D1
D0
RLD17
RLD16
RLD15
RLD14
RLD13
RLD12
RLD11
RLD10
Timer 1 reload data D7 (MSB)
Timer 1 reload data D6
Timer 1 reload data D5
Timer 1 reload data D4
Timer 1 reload data D3
Timer 1 reload data D2
Timer 1 reload data D1
Timer 1 reload data D0 (LSB)
1
1
1
1
1
1
1
1
R/W
R/W
R/W
R/W
R/W
R/W
R/W
R/W
High Low
00FF34
D7
D6
D5
D4
D3
D2
D1
D0
PTD07
PTD06
PTD05
PTD04
PTD03
PTD02
PTD01
PTD00
Timer 0 counter data D7 (MSB)
Timer 0 counter data D6
Timer 0 counter data D5
Timer 0 counter data D4
Timer 0 counter data D3
Timer 0 counter data D2
Timer 0 counter data D1
Timer 0 counter data D0 (LSB)
1
1
1
1
1
1
1
1
R
R
R
R
R
R
R
R
High Low
00FF35
D7
D6
D5
D4
D3
D2
D1
D0
PTD17
PTD16
PTD15
PTD14
PTD13
PTD12
PTD11
PTD10
Timer 1 counter data D7 (MSB)
Timer 1 counter data D6
Timer 1 counter data D5
Timer 1 counter data D4
Timer 1 counter data D3
Timer 1 counter data D2
Timer 1 counter data D1
Timer 1 counter data D0 (LSB)
1
1
1
1
1
1
1
1
R
R
R
R
R
R
R
R
High Low
00FF36
00FF21 D7
D6
D5
D4
D3
D2
D1
D0
–
–
–
–
PPT1
PPT0
PK11
PK10
–
–
–
–
Programmable timer interrupt priority register
K10 interrupt priority register
Constantly "0" when
being read
–
–
–
–
0
0
0
0
R/W
R/W
R/W
R/W
–
–
–
–
–
–
–
–
PPT1
PK11
1
1
0
0
PPT0
PK10
1
0
1
0
Priority
level
Level 3
Level 2
Level 1
Level 0
D7
D6
D5
D4
D3
D2
D1
D0
00FF25 D7
D6
D5
D4
D3
D2
D1
D0
FPT1
FPT0
FK1
FK0H
FK0L
FSERR
FSREC
FSTRA
Programmable timer 1 interrupt factor flag
Programmable timer 0 interrupt factor flag
K10 interrupt factor flag
K04–K07 interrupt factor flag
K00–K03 interrupt factor flag
Serial I/F (error) interrupt factor flag
Serial I/F (receiving) interrupt factor flag
Serial I/F (transmitting) interrupt factor flag
0
0
0
0
0
0
0
0
R/W
R/W
R/W
R/W
R/W
R/W
R/W
R/W
(R)
Interrupt
factor is
generated
(W)
Reset
(R)
No interrupt
factor is
generated
(W)
No operation
00FF23 EPT1
EPT0
EK1
EK0H
EK0L
ESERR
ESREC
ESTRA
Programmable timer 1 interrupt enable register
Programmable timer 0 interrupt enable register
K10 interrupt enable register
K04–K07 interrupt enable register
K00–K03 interrupt enable register
Serial I/F (error) interrupt enable register
Serial I/F (receiving) interrupt enable register
Serial I/F (transmitting) interrupt enable register
0
0
0
0
0
0
0
0
R/W
R/W
R/W
R/W
R/W
R/W
R/W
R/W
Interrupt
enable
Interrupt
disable
Page 91

E0C88832/88862 TECHNICAL MANUAL EPSON 85
5 PERIPHERAL CIRCUITS AND THEIR OPERATION (Programmable Timer)
MODE16: 00FF30H•D4
Selects the 8/16-bit mode.
When "1" is written: 16 bits × 1 channel
When "0" is written: 8 bits × 2 channels
Reading: Valid
Select whether timer 0 and timer 1 will be used as 2
channel independent 8-bit timers or as a 1 channel
combined 16-bit timer. When "0" is written to
MODE16, 8-bit × 2 channels is selected and when
"1" is written, 16-bit × 1 channel is selected.
At initial reset, MODE16 is set to "0" (8-bit × 2
channels).
CKSEL0, CKSEL1: 00FF30H•D0, D1
Select the source clock of the prescaler.
When "1" is written: OSC3 clock
When "0" is written: OSC1 clock
Reading: Valid
Select whether the source clock of prescaler 0 will
be set to OSC1 or OSC3. When "0" is written to
CKSEL0, OSC1 is selected and when "1" is written,
OSC3 is selected.
In the same way, the source clock of prescaler 1 is
selected by CKSEL1.
When event counter mode has been selected, the
setting of the CKSEL0 becomes invalid. In the same
way, the CKSEL1 setting becomes invalid when 16bit mode has been selected.
At initial reset, this register is set to "0" (OSC1
clock).
PSC00, PSC01: 00FF31H•D3, D4
PSC10, PSC11: 00FF32H•D3, D4
Select the dividing ratio of the prescaler.
Two-bit PSC00 and PSC01 is the prescaler dividing
ratio selection registers for timer 0, and the two-bit
PSC10 and PSC11 correspond to timer 1. The
prescaler dividing ratios that can be set by these
registers are shown in Table 5.10.10.2.
Table 5.10.10.2 Selection of prescaler dividing ratio
EVCNT: 00FF31H•D7
Selects the counter mode for the timer 0.
When "1" is written: Event counter mode
When "0" is written: Timer mode
Reading: Valid
Select whether timer 0 will be used as an event
counter or a timer. When "1" is written to EVCNT,
the event counter mode is selected and when "0" is
written, the timer mode is selected.
At initial reset, EVCNT is set to "0" (timer mode).
FCSEL: 00FF31H•D6
Selects the function for each counter mode of timer 0.
• In timer mode
When "1" is written: Pulse width measurement
timer mode
When "0" is written: Normal mode
Reading: Valid
In the timer mode, select whether timer 0 will be
used as a pulse width measurement timer or a
normal timer. When "1" is written to FCSEL, the
pulse width measurement mode is selected and the
counting is done according to the level of the signal
(EVIN) input to the K10 input port terminal. When
"0" is written to FCSEL, the normal mode is selected
and the counting is not affected by the K10 input
port terminal.
• In event counter mode
When "1" is written: With noise rejecter
When "0" is written: Without noise rejecter
Reading: Valid
In the event counter mode, select whether the noise
rejecter for the K10 input port terminal will be
selected or not.
When "1" is written to FCSEL, the noise rejecter is
selected and counting is done by an external clock
(EVIN) with 0.98 msec or more pulse width. (The
noise rejecter allows clocking counter at the second
falling edge of the internal 2,048 Hz signal after
changing the input level of the K10 input port
terminal. Consequently, the pulse width that can
reliably be rejected is 0.48 msec.)
When "0" is written to FCSEL, the noise rejector is
not selected and the counting is done directly by an
external clock (EVIN) input to the K10 input port
terminal.
At initial reset, FCSEL is set to "0".
PSC11
PSC01
PSC10
PSC00
Prescaler dividing ratio
1
1
0
0
1
0
1
0
Input clock / 64
Input clock / 16
Input clock / 4
Input clock / 1
When event counter mode has been selected, the
setting of the PSC00 and PSC01 becomes invalid. In
the same way, the PSC10 and PSC11 setting
becomes invalid when 16-bit mode has been
selected.
At initial reset, this register is set to "0" (input
clock/1).
Page 92

86 EPSON E0C88832/88862 TECHNICAL MANUAL
5 PERIPHERAL CIRCUITS AND THEIR OPERATION (Programmable Timer)
PLPOL: 00FF31H•D5
Selects the pulse polarity for the K10 input port
terminal.
• In event counter mode
When "1" is written: Rising edge
When "0" is written: Falling edge
Reading: Valid
In the event counter mode, select whether the count
timing will be set at the falling edge of the external
clock (EVIN) input to the K10 input port terminal
or at the rising edge. When "0" is written to PLPOL,
the falling edge is selected and when "1" is written,
the rising edge is selected.
• In pulse width measurement mode
When "1" is written: High level pulse width
measurement
When "0" is written: LOW level pulse width
measurement
Reading: Valid
In the pulse width measurement mode, select
whether the LOW level width of the signal (EVIN)
input to the K10 input port terminal will be measured or the HIGH level will be measured. When "0"
is written to PLPOL, the LOW level width measurement is selected and when "1" is written, the HIGH
level width measurement is selected.
In the normal mode (EVCNT = FCSEL = "0"), the
setting of PLPOL becomes invalid.
At initial reset, PLPOL is set to "0".
CONT0, CONT1: 00FF31H•D2, 00FF32H•D2
Select the continuous/one-shot mode.
When "1" is written: Continuous mode
When "0" is written: One-shot mode
Reading: Valid
Select whether timer 0 will be used in the continuous mode or in the one-shot mode.
By writing "1" to CONT0, the programmable timer is
set to the continuous mode. In the continuous mode,
the initial counter value is automatically loaded
when an underflow is generated, and counting is
continued. On the other hand, when writing "0" to
CONT0, the programmable timer is set to the oneshot mode. The counter loads an initial value and
stops when an underflow is generated. At this time,
PRUN0 is automatically reset to "0".
In the same way, the continuous/one-shot mode
for timer 1 is selected by CONT1. (In the one-shot
mode for timer 1, PRUN1 is automatically reset to
"0" when the counter underflow is generated.)
At initial reset, this register is set to "0" (one-shot
mode).
RLD00–RLD07: 00FF33H
RLD10–RLD17: 00FF34H
Sets the initial value for the counter.
RLD00–RLD07: Reload data for Timer 0
RLD10–RLD17: Reload data for Timer 1
The reload data set in this register is loaded into the
respective counters and is counted down with that
as the initial value.
Reload data is loaded to the counter under two
conditions, when "1" is written to PSET0 or PSET1
and when the counter underflow automatically
loads.
At initial reset, this register is set to "FFH".
PTD00–PTD07: 00FF35H
PTD10–PTD17: 00FF36H
Data of the programmable timer can be read out.
PTD00–PTD07: Timer 0 counter data
PTD10–PTD17: Timer 1 counter data
These bits act as a buffer to maintain the counter
data during readout, and the data can be read as
optional timing. However, in the 16-bit mode, to
avoid a read error, (data error when a borrow from
timer 0 to timer 1 is generated in the middle of
reading PTD00–PTD07 and PTD10–PTD17),
PTD10–PTD17 latches the timer 1 counter data
according to the reading of PTD00–PTD07.
The latched status of PTD10–PTD17 is canceled
according to the readout of PTD10–PTD17 or when
0.73–1.22 msec (depends on the readout timing) has
elapsed. Therefore, in 16-bit mode, be sure to read
the counter data of PTD00–PTD07 and PTD10–
PTD17 in order.
Since these bits are exclusively for reading, the
write operation is invalid.
At initial reset, these bits are set to "FFH".
PSET0, PSET1: 00FF31H•D1, 00FF32H•D1
Presets the reload data to the counter.
When "1" is written: Preset
When "0" is written: No operation
Reading: Always "0"
By writing "1" to PSET0, the reload data in PLD00–
PLD07 is preset to the counter of timer 0. When the
counter of timer 0 is preset in the RUN status, it
restarts immediately after presetting.
In the case of STOP status, the reload data that has
been preset is maintained.
No operation results when "0" is written.
In the same way, the reload data in PLD10–PLD17
is preset to the counter of timer 1 by PSET1.
When the 16-bit mode is selected, writing "1" to
PSET1 is invalid.
This bit is exclusively for writing, it always becomes "0" during reading.
Page 93

E0C88832/88862 TECHNICAL MANUAL EPSON 87
5 PERIPHERAL CIRCUITS AND THEIR OPERATION (Programmable Timer)
PRUN0, PRUN1: 00FF31H•D0, 00FF32H•D0
Controls the RUN/STOP of the counter.
When "1" is written: RUN
When "0" is written: STOP
Reading: Valid
The counter of timer 0 starts down-counting by
writing "1" to PRUN0 and stops by writing "0".
In the STOP status, the counter data is maintained
until it is preset or set in the next RUN status. Also,
when the STOP status changes to the RUN status,
the data that was maintained can be used for
resuming the count.
In the same way, the RUN/STOP of the timer 1
counter is controlled by PRUN1.
When the 16-bit mode is selected, PRUN1 is fixed at
"0".
At initial reset and when an underflow is generated
in the one-shot mode, this register is set to "0"
(STOP).
CHSEL: 00FF30H•D3
Selects a channel for generating the TOUT signal.
When "1" is written: Timer 0 underflow
When "0" is written: Timer 1 underflow
Reading: Valid
Select whether the timer 0 underflow will be used
for the TOUT signal or the timer 1 underflow will
be used. When "0" is written to CHSEL, timer 0 is
selected and when "1" is written, timer 1 is
selected.When the 16-bit mode has been selected, it
is fixed to timer 1 (underflow of the 16-bit timer),
and setting of CHSEL becomes invalid.
At initial reset, CHSEL is set to "0" (timer 1
underflow).
PTOUT: 00FF30H•D2
Controls the TOUT (programmable timer output
clock) signal output.
When "1" is written: TOUT signal output ON
When "0" is written: TOUT signal output OFF
Reading: Valid
PTOUT is the output control register for TOUT
(TOUT) signal. When "1" is set to the register, the
TOUT signal is output from the output port
terminal R27 (R26). When "0" is set, the R27 goes
HIGH (VDD) and the R26 goes LOW (VSS).
To output the TOUT signal, "1" must always be set
for the data register R27D. The data register R26D
does not affect the TOUT output.
At initial reset, PTOUT is set to "0" (DC output).
The TOUT signal can be output from R26 only
when the function is selected by mask option.
PPT0, PPT1: 00FF21H•D2, D3
Sets the priority level of the programmable timer
interrupt.
The two bits PPT0 and PPT1 are the interrupt
priority register corresponding to the programmable timer interrupt. Table 5.10.10.3 shows the
interrupt priority level which can be set by this
register.
Table 5.10.10.3 Interrupt priority level settings
PPT1 PPT0 Interrupt priority level
1
1
0
0
1
0
1
0
Level 3 (IRQ3)
Level 2 (IRQ2)
Level 1 (IRQ1)
Level 0 (None)
At initial reset, this register is set to "0" (level 0).
EPT0, EPT1: 00FF23H•D6, D7
Enables or disables the generation of an interrupt
for the CPU.
When "1" is written: Interrupt enabled
When "0" is written: Interrupt disabled
Reading: Valid
The EPT0 and EPT1 are interrupt enable registers
that respectively correspond to the interrupt factors
for timer 0 and timer 1. Interrupts set to "1" are
enabled and interrupts set to "0" are disabled.
When the 16-bit mode is selected, setting of EPT0
becomes invalid.
At initial reset, this register is set to "0" (interrupt
disabled).
FPT0, FPT1: 00FF25H•D6, D7
Indicates the programmable timer interrupt
generation status.
When "1" is read: Interrupt factor present
When "0" is read:
Interrupt factor not present
When "1" is written: Resets factor flag
When "0" is written: Invalid
The FPT0 and FPT1 are interrupt factor flags that
respectively correspond to the interrupts for timer 0
and timer 1 and are set to "1" in synchronization
with the underflow of each counter.
When set in this manner, if the corresponding
interrupt enable register is set to "1" and the
corresponding interrupt priority register is set to a
higher level than the setting of interrupt flags (I0
and I1), an interrupt will be generated to the CPU.
Regardless of the interrupt enable register and
interrupt priority register settings, the interrupt
factor flag will be set to "1" by the occurrence of an
interrupt generation condition.
Page 94

88 EPSON E0C88832/88862 TECHNICAL MANUAL
5 PERIPHERAL CIRCUITS AND THEIR OPERATION (Programmable Timer)
To accept the subsequent interrupt after interrupt
generation, re-setting of the interrupt flags (set
interrupt flag to lower level than the level indicated
by the interrupt priority registers, or execute the
RETE instruction) and interrupt factor flag reset are
necessary. The interrupt factor flag is reset to "0" by
writing "1".
When the 16-bit mode is selected, the interrupt
factor flag FPT0 is not set to "1" and a timer 0
interrupt cannot be generated. (In the 16-bit mode,
the interrupt factor flag FPT1 is set to "1" by an
underflow of the 16-bit counter.)
At initial reset, this flag is reset to "0".
5.10.11 Programming notes
(1) The programmable timer is actually made to
RUN/STOP in synchronization with the falling
edge of the input clock after writing to the
PRUN0(1) register. Consequently, when "0" is
written to the PRUN0(1), the timer shifts to
STOP status when the counter is decremented
"1". The PRUN0(1) maintains "1" for reading
until the timer actually shifts to STOP status.
Figure 5.10.11.1 shows the timing chart of the
RUN/STOP control.
(4) When the OSC3 oscillation circuit is made the
clock source, it is necessary to turn the OSC3
oscillation ON, prior to using the programmable
timer.
From the time the OSC3 oscillation circuit is
turning ON until oscillation stabilizes, an
interval of several 100 µsec to several 10 msec is
necessary. Consequently, you should allow an
adequate waiting time after turning the OSC3
oscillation circuit ON before starting the count
of the programmable timer. (The oscillation
start time will vary somewhat depending on the
oscillator and on external parts. Refer to the
oscillation start time example indicated in
Chapter 7, "ELECTRICAL CHARACTERISTICS".)
At initial reset, OSC3 oscillation circuit is set to
OFF status.
(5) When the 16-bit mode has been selected, be sure
to read the counter data in the order of PTD00–
PTD07 and PTD10–PTD17. Moreover, the time
interval between reading PTD00–PTD07 and
PTD10–PTD17 should be 0.73 msec or less.
PRUN0/PRUN1(WR)
PTD0X/PTD1X 42H 41H 40H 3FH 3EH 3DH
PRUN0/PRUN1(RD)
Input clock
Fig. 5.10.11.1 Timing chart of RUN/STOP control
The event counter mode is excluded from the
above note.
(2) The SLP instruction is executed when the
programmable timer is in the RUN status
(PRUN0(1) = "1"). The programmable timer
operation will become unstable when returning
from SLEEP status. Therefore, when shifting to
SLEEP status, set the clock timer to STOP status
(PRUN0(1) = "0") prior to executing the SLP
instruction.
In the same way, disable the TOUT signal
output (PTOUT = "0") to avoid an unstable clock
output to the R27 output port terminal.
(3) Since the TOUT signal is generated asynchro-
nously from the register PTOUT, when the
signal is turned ON or OFF by the register
setting, a hazard of a 1/2 cycle or less is generated.
Page 95

E0C88832/88862 TECHNICAL MANUAL EPSON 89
5 PERIPHERAL CIRCUITS AND THEIR OPERATION (LCD Controller)
5.11 LCD Controller
5.11.1 Configuration of LCD controller
The E0C88832/88862 has a built-in dot matrix LCD
driver. The E0C88832 allows an LCD panel with a
maximum of 1,632 dots (51 segments × 32
commons). In the E0C88862 a maximum of 1,312
dots (41 segments × 32 commons) are permitted.
Figure 5.11.1.1 shows the configuration of the LCD
controller and the drive power supply.
LCD drive duty
■■ 1/32 & 1/16 duty
■■ 1/8 duty
When "1/32 & 1/16 duty" is selected, the drive
duty can be selected by software. When "0" is
written to the drive duty selection register LDUTY,
1/32 duty is selected and when "1" is written, 1/16
duty is selected.
When "1/8 duty" is selected, the drive duty is fixed
at 1/8 and setting of LDUTY becomes invalid.
When the built-in LCD driver is not used, select the
default setting of "1/32 & 1/16 duty".
(a) V
C2 standard
5.11.2 Mask option
The drive duty for the built-in LCD driver can be
selected whether it will be 1/32 and 1/16 softwareswitched or fixed at 1/8 by the mask option.
VC2
VC3
VC4
VC5
CA
CB
CC
CD
CE
CF
CG
VSS
VC1
LC3
LC2
LC1
LC0
DTFNT
VC1
VC3–VC5
LCDC1
LCDC0
LDUTY
DSPAR
VC2
LCD system
voltage booster/
reducer
LCD system
voltage regulator
LCD contrast
adjustment circuit
LCD driver
Display memory
COM0~COM15
COM16~COM31/SEG66~SEG51
SEG0~SEG50
COM0~COM15
COM16~COM31/SEG66~SEG51
SEG0~SEG40
E0C88832
E0C88862
(b) VC1 standard
Note: VC1 standard can be selected only for 1/4 bias drive.
Fig. 5.11.1.1 Configuration of LCD controller and drive power supply
VC1
VC3
VC4
VC5
CA
CB
CC
CD
CE
CF
CG
VSS
VC2
LC3
LC2
LC1
LC0
DTFNT
VC2–VC5
LCDC1
LCDC0
LDUTY
DSPAR
VC1
LCD system
voltage booster/
reducer
LCD system
voltage regulator
LCD contrast
adjustment circuit
LCD driver
Display memory
COM0~COM15
COM16~COM31/SEG66~SEG51
SEG0~SEG50
COM0~COM15
COM16~COM31/SEG66~SEG51
SEG0~SEG40
E0C88832
E0C88862
Page 96

90 EPSON E0C88832/88862 TECHNICAL MANUAL
5 PERIPHERAL CIRCUITS AND THEIR OPERATION (LCD Controller)
5.11.3 LCD power supply
Either the internal power supply (built-in LCD
system voltage regulator and voltage booster/
reducer) or an external power supply can be
selected by mask option to generate the LCD
system drive voltages VC1–VC5.
Furthermore, the internal power supply can be
selected from among four types, TYPE A to TYPE
D, according to the LCD panel characteristics.
LCD power supply
■■ Internal power supply TYPE A (VC2 standard, 1/5 bias, 4.5 V)
■■ Internal power supply TYPE B (VC2 standard, 1/5 bias, 5.5 V)
■■ Internal power supply TYPE C (VC2 standard, 1/4 bias, 4.5 V)
■■ Internal power supply TYPE D (VC1 standard, 1/4 bias, 4.5 V)
■■ External power supply
The internal power supply is designed for a small
scale LCD panel and is not suitable for driving a
panel that has large size pixels or for driving a large
capacity panel using an external expanded LCD
driver. In this case, select external power supply
and input the regulated voltage from outside the
IC.
Note that the LCD must be driven with 1/5 bias
when external power supply is selected.
Figure 5.11.3.1 shows the circuit examples when
using an external power supply.
5.11.4 LCD driver
The maximum number of dots changes according
to the drive duty selection.
When 1/32 duty is selected, the combined common/segment output terminal is switched to the
common terminal. An LCD panel with 51 segments
× 32 commons (maximum 1,632 dots) in the
E0C88832 and 41 segments × 32 commons
(maximum 1,312 dots) in the E0C88862 can be
driven.
When 1/16 duty is selected, the combined common/segment output terminal is switched to the
segment terminal. An LCD panel with 67 segments
× 16 commons (maximum 1,072 dots) in the
E0C88832 and 57 segments × 16 commons
(maximum 912 dots) in the E0C88862 can be driven.
When 1/8 duty is selected, the combined common/
segment output terminal is switched to the segment
terminal as when 1/16 duty is selected. An LCD
panel with 67 segments × 8 commons (maximum
536 dots) in the E0C88832 and 57 segments × 8
commons (maximum 456 dots) in the E0C88862 can
be driven. Furthermore, when 1/8 duty is selected,
terminals COM8–COM15 become invalid, in that
they always output an OFF signal.
Table 5.11.4.1 shows the correspondence between
the drive duty and the maximum number of
displaying dots.
Figures 5.11.4.1 to 5.11.4.3 show the 1/5 bias drive
waveforms.
When driving with 1/4 bias, the V
C2 voltage level is
the same as VC3.
Model
Mask option
1/32 & 1/16 duty
1/8 duty
1/32 & 1/16 duty
1/8 duty
LDUTY
0
1
×
0
1
×
Duty
1/32
1/16
1/8
1/32
1/16
1/8
Common
terminal
COM0–COM31
COM0–COM15
COM0–COM7
COM0–COM31
COM0–COM15
COM0–COM7
Segment
terminal
SEG0–SEG50
SEG0–SEG66
SEG0–SEG40
SEG0–SEG40
SEG51–SEG66
Maximum number
of display dots
1,632 dots
1,072 dots
536 dots
1,312 dots
912 dots
456 dots
E0C88862
E0C88832
V
C5
V
C4
V
C3
V
C2
V
C1
Rxx
V
SS
V
IN
V
C5
V
C4
V
C3
V
C2
V
C1
V
SS
V
IN
*
* VSS level or high impedance when LCD is not driven.
Fig. 5.11.3.1 Circuit examples when using
an external power supply
Table 5.11.4.1 Correspondence between drive duty and maximum number of displaying dots
Page 97

E0C88832/88862 TECHNICAL MANUAL EPSON 91
5 PERIPHERAL CIRCUITS AND THEIR OPERATION (LCD Controller)
Fig. 5.11.4.1 Drive waveform for 1/32 duty
31––321031––3210
FR
COM0
COM1
COM2
SEG0
SEG1
COM0–SEG0
COM0–SEG1
COM0
1
2
3
4
5
6
7
8
9
10
11
12
13
14
15
16
17
18
19
20
21
22
23
24
25
26
27
28
29
30
31
SEG0
123
4
~
~
~
~
~
~
~
~
~
~
~
~
~
~
~
~
~
~
~
~
~
~
~
~
~
~
~
~
32 Hz
V
DD
V
SS
V
C5
V
C4
V
C3
V
C2
V
C1
V
SS
V
C5
V
C4
V
C3
V
C2
V
C1
V
SS
V
C5
V
C4
V
C3
V
C2
V
C1
V
SS
V
C5
V
C4
V
C3
V
C2
V
C1
V
SS
V
C5
V
C4
V
C3
V
C2
V
C1
V
SS
V
C5
V
C4
V
C3
V
C2
V
C1
VSS (GND)
V
C5
V
C4
V
C3
V
C2
V
C1
VSS (GND)
-V
C1
-V
C2
-V
C3
-V
C4
-V
C5
-V
C1
-V
C2
-V
C3
-V
C4
-V
C5
Page 98

92 EPSON E0C88832/88862 TECHNICAL MANUAL
5 PERIPHERAL CIRCUITS AND THEIR OPERATION (LCD Controller)
Fig. 5.11.4.2 Drive waveform for 1/16 duty
COM0
1
2
3
4
5
6
7
8
9
10
11
12
13
14
15
SEG0
123
4
15––321015––3210
FR
COM0
COM1
COM2
SEG0
SEG1
COM0–SEG0
COM0–SEG1
~
~
~
~
~
~
~
~
~
~
~
~
~
~
~
~
~
~
~
~
~
~
~
~
~
~
~
~
32 Hz
V
DD
V
SS
V
C5
V
C4
V
C3
V
C2
V
C1
V
SS
V
C5
V
C4
V
C3
V
C2
V
C1
V
SS
V
C5
V
C4
V
C3
V
C2
V
C1
V
SS
V
C5
V
C4
V
C3
V
C2
V
C1
V
SS
V
C5
V
C4
V
C3
V
C2
V
C1
V
SS
V
C5
V
C4
V
C3
V
C2
V
C1
VSS (GND)
V
C5
V
C4
V
C3
V
C2
V
C1
VSS (GND)
-V
C1
-V
C2
-V
C3
-V
C4
-V
C5
-V
C1
-V
C2
-V
C3
-V
C4
-V
C5
Page 99

E0C88832/88862 TECHNICAL MANUAL EPSON 93
5 PERIPHERAL CIRCUITS AND THEIR OPERATION (LCD Controller)
Fig. 5.11.4.3
Drive waveform for 1/8 duty
5.11.5 Display memory
The E0C88832 has a built-in 402-byte display
memory. The E0C88862 has a built-in 342-byte
display memory. The display memory is allocated
to address F800H–FD42H (including unavailable
areas) and the correspondence between the
memory bits and common/segment terminal is
changed according to the selection status of the
following items.
(1) Drive duty (1/32, 1/16 or 1/8 duty)
(2) Dot font (5 × 8 or 5 × 5 dots)
When 1/16 or 1/8 duty is selected for drive duty,
two-screen memory can be secured, and the two
screens can be switched by the display memory
area selection register DSPAR. When "0" is written
to DSPAR, display area 0 is selected and when "1" is
written, display area 1 is selected.
Furthermore, memory allocation for 5 × 8 dots and
5 × 5 dots can be selected in order to easily display
5 × 5-dot font characters on the LCD panel.
This selection can be done by the dot font selection
register DTFNT: when "0" is written to DTFNT, 5 ×
8 dots is selected and when "1" is written, 5 × 5 dots
is selected.
The correspondence between the display memory
bits set according to the drive duty and font size,
and the common/segment terminals are shown in
Figures 5.11.5.1–5.11.5.6.
When "1" is written to the display memory bit
corresponding to the dot on the LCD panel, the dot
goes ON and when "0" is written, it goes OFF. Since
display memory is designed to permit reading/
writing, it can be controlled in bit units by logical
operation instructions and other means (read,
modify and write instruction)s.
The display memory bits that have not been
assigned can be used as general purpose RAM with
read/write capabilities. Even when external
memory has expanded into the display memory
area, this area is not released to external memory.
Access to this area is always via display memory.
COM0
1
2
3
4
5
6
7
SEG0
123
4
V
DD
V
SS
V
C5
V
C4
V
C3
V
C2
V
C1
V
SS
7321073210
FR
COM0
COM1
COM2
SEG0
SEG1
V
C5
V
C4
V
C3
V
C2
V
C1
V
SS
V
C5
V
C4
V
C3
V
C2
V
C1
V
SS
V
C5
V
C4
V
C3
V
C2
V
C1
V
SS
V
C5
V
C4
V
C3
V
C2
V
C1
V
SS
V
C5
V
C4
V
C3
V
C2
V
C1
VSS (GND)
V
C5
V
C4
V
C3
V
C2
V
C1
VSS (GND)
COM0–SEG0
COM0–SEG1
4 6 4 655
-V
C1
-V
C2
-V
C3
-V
C4
-V
C5
-V
C1
-V
C2
-V
C3
-V
C4
-V
C5
64 Hz
Page 100

94 EPSON E0C88832/88862 TECHNICAL MANUAL
5 PERIPHERAL CIRCUITS AND THEIR OPERATION (LCD Controller)
Fig. 5.11.5.1 1/32 duty and 5 × 8 dots display memory map
∗ In the E0C88862, no memory is allocated to the area from 00Fx29H to 00Fx32H (x = 8–BH).
0 1 2 3 4 5 6 7 8 9 10 11 12 13 14 15 16 17 18 19 20 21 22 2324 25 26 27 2829 30 31 32 33 3435 36 37 38 3940 41 42 43 44 4546 47 48 49 50
012 3 4 5 6 7 8 9 A B C D E F 0123456789ABCDEF0123456789ABCDEF0123456789ABCDEF012
0 1234
D0D1D2D3D4D5D6
D7
Display area
D0D1D2D3D4D5D6
D7
Display area
D0D1D2D3D4D5D6D7D0D1D2D3D4D5D6
D7
Display area
D0D1D2D3D4D5D6D7D0D1D2D3D4D5D6
D7
SEG
COM
012345678
9
101112131415161718192021222324252627282930
31
Display area
*
*
*
*
00F800H|00F842H
Address/Data bit
00F900H|00F942H
00FA00H|00FA42H
00FB00H|00FB42H
00FC00H
|
00FC42H
00FD00H
|
00FD42H
 Loading...