

Page 1

Banff
eProdigy
Front & rear basket
+
light assembly
Page 2
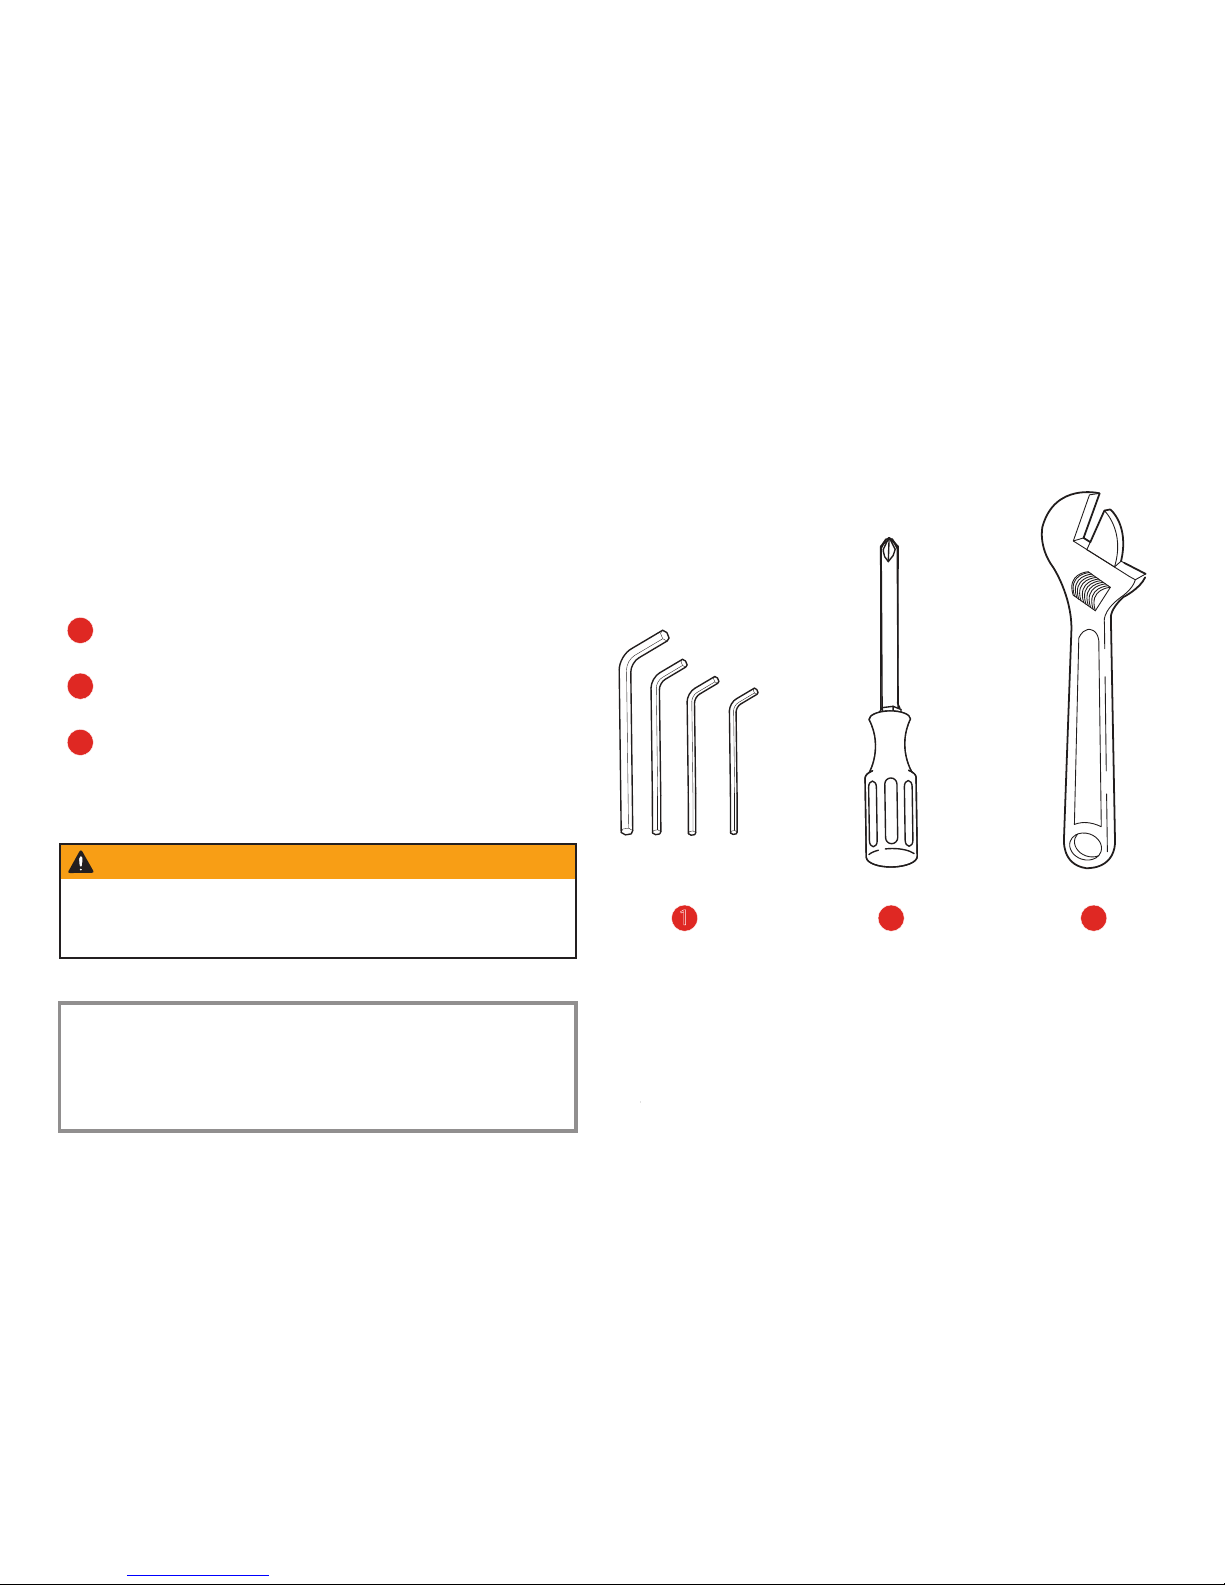
1 2.5mm, 3mm, 4mm, and 5mm Allen keys
2 Phillips screw driver
3 Crescent wrench
RECOMMENDED
TOOLS
Note
Do not dispose the carton or packaging until the assembly of the
bicycle is complete. This can prevent accidentally discarding parts
of the bicycle.
WARNING
Keep small parts away from children during
assembly
1 2 3
Our very own eProdigy technical team recommends
the following tools to for this task
Page 3
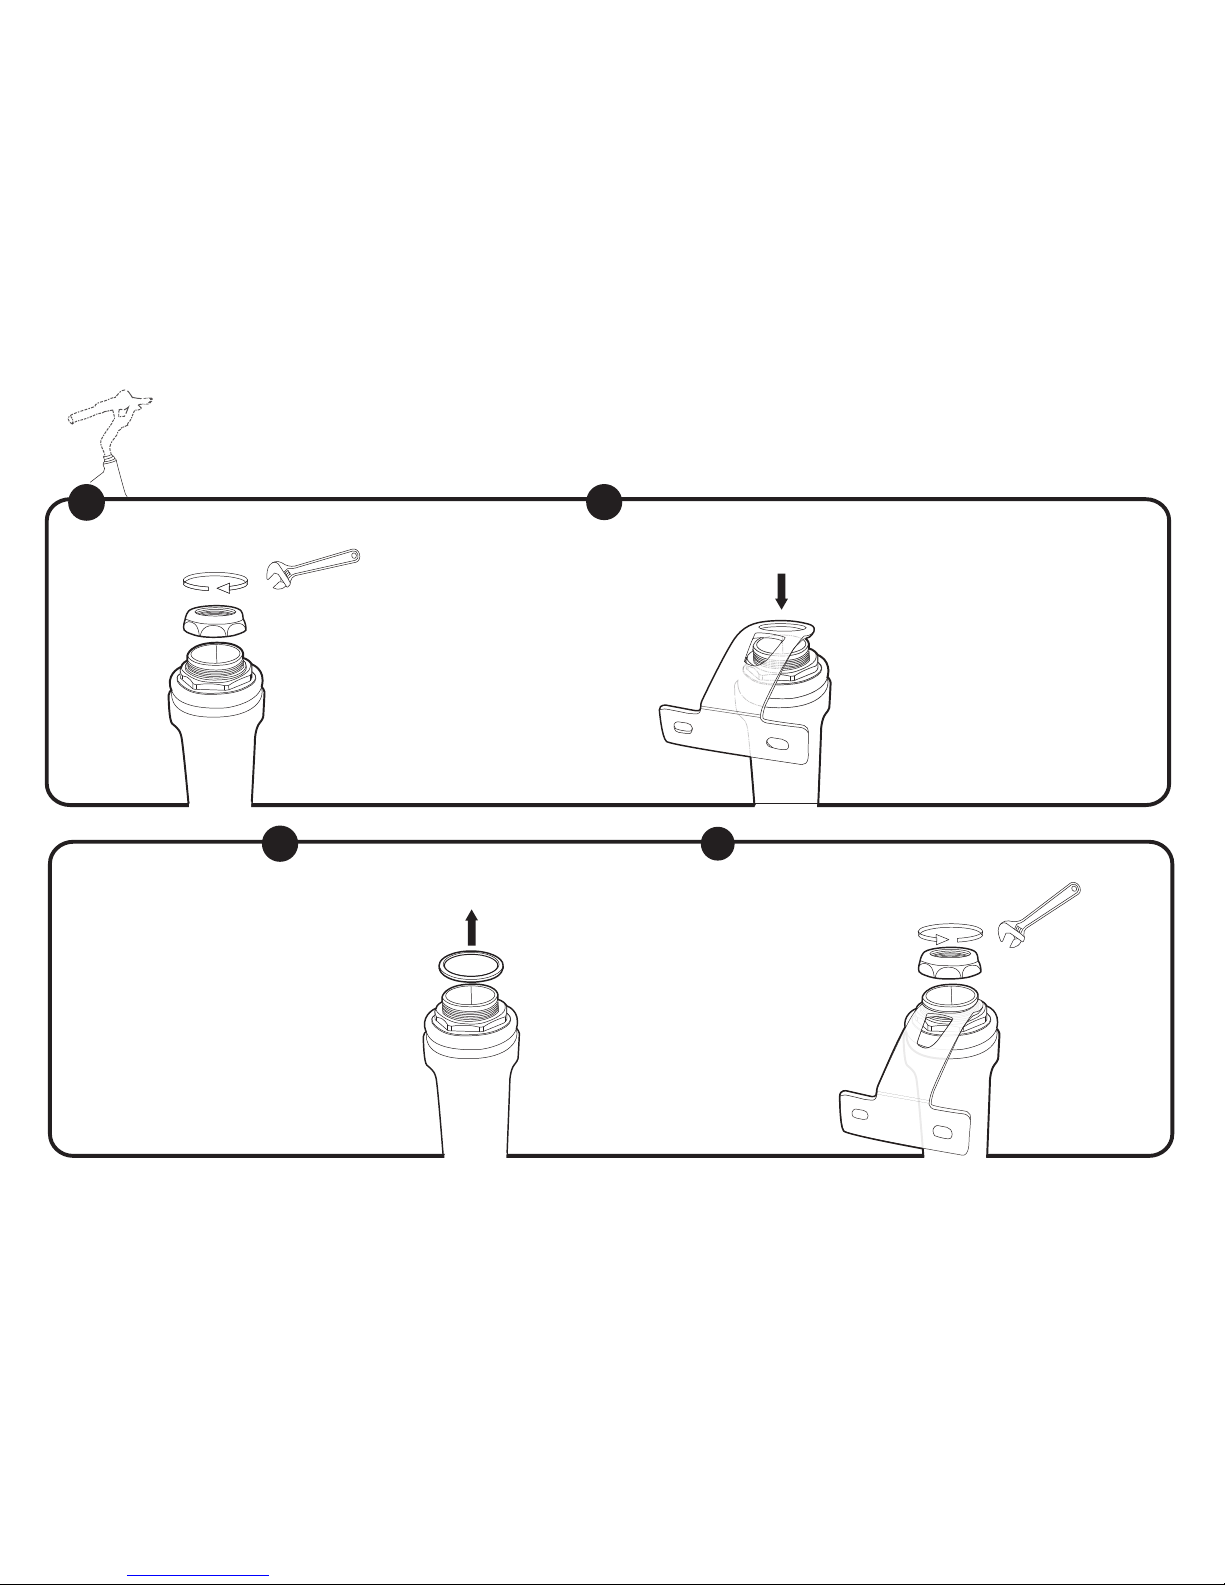
Instal th Hea Se Moun
after you remove the stem
Remove the spacer
Replace spacer with head set mount
Reattach the lug nut
3
Remove the lug nut from the head tube
1 3
2
4
4
Note
The spacer is no
longer needed
Page 4
after you reattach the stem
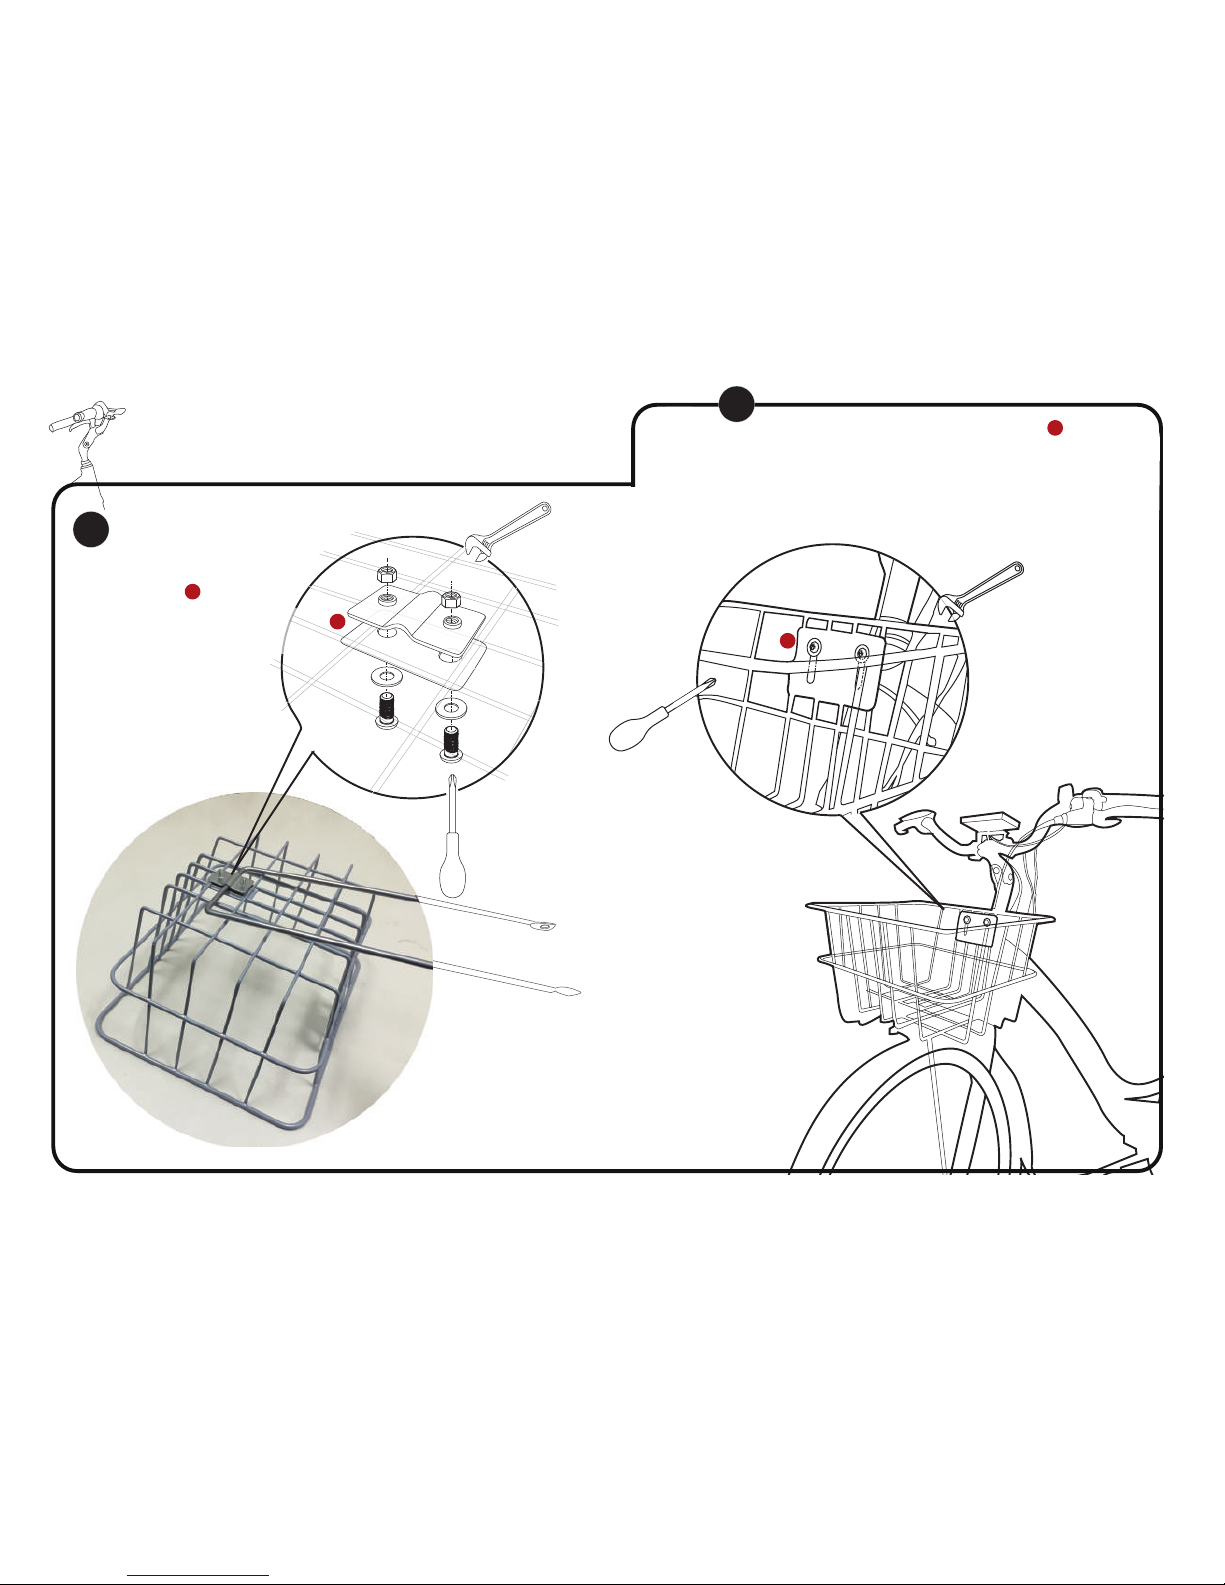
Instal th Fron Wir Baske
Secure the wire basket to the head
set mount using a Cresent wrench
and Philips screw driver
a
a
b
b
On a at surface
attatch the axel
bracket to the bottom
of the front wire basket
5
6
1
4
Page 5
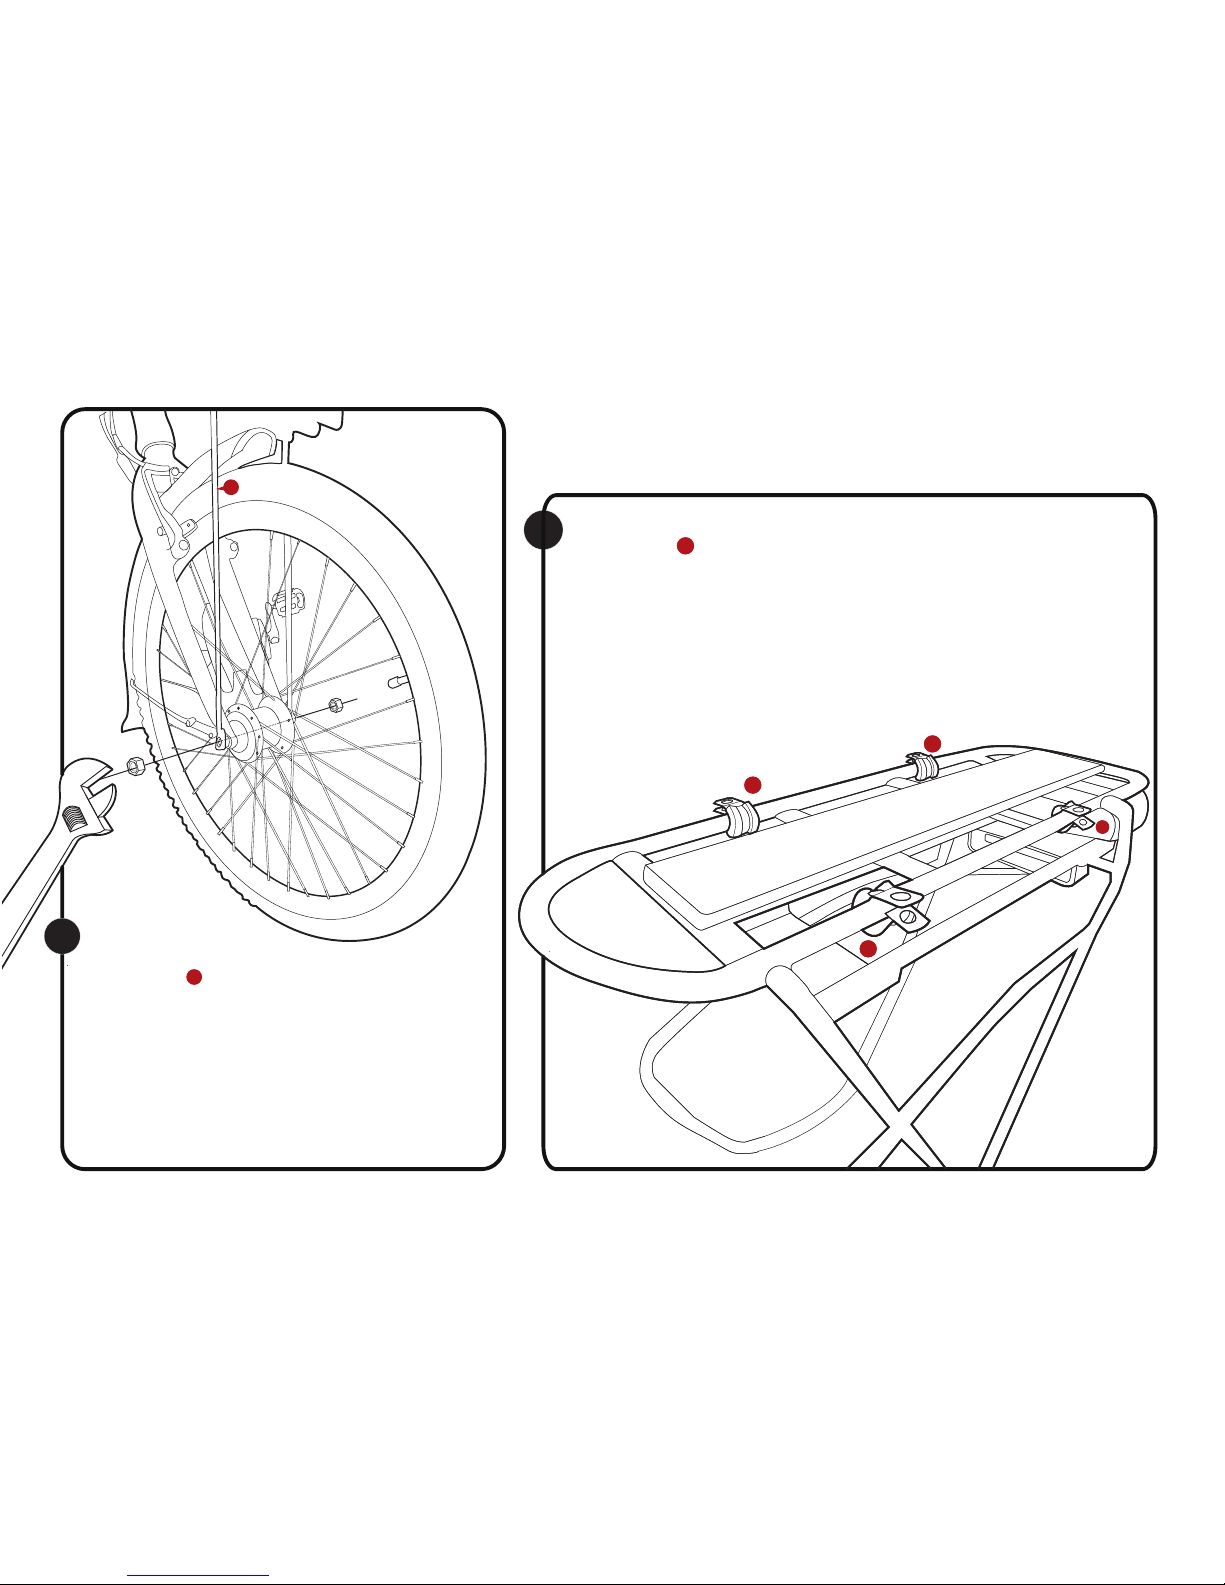
Secure the axel bracket
to the axel
7
Note
Make sure to line it
up with the fork
c
c
Once you’ve inserted the Front Wicker Basket into its wire frame, its time to ...
Instal th Rear Baske
7
Insert the cadjustable basket bracket mounts
on the back rack.
Squeeze the arms of the adjustable basket
bracket mounts together till the holes align.
d
d
d
d
d
8
d
d
d
d
d
5
Page 6
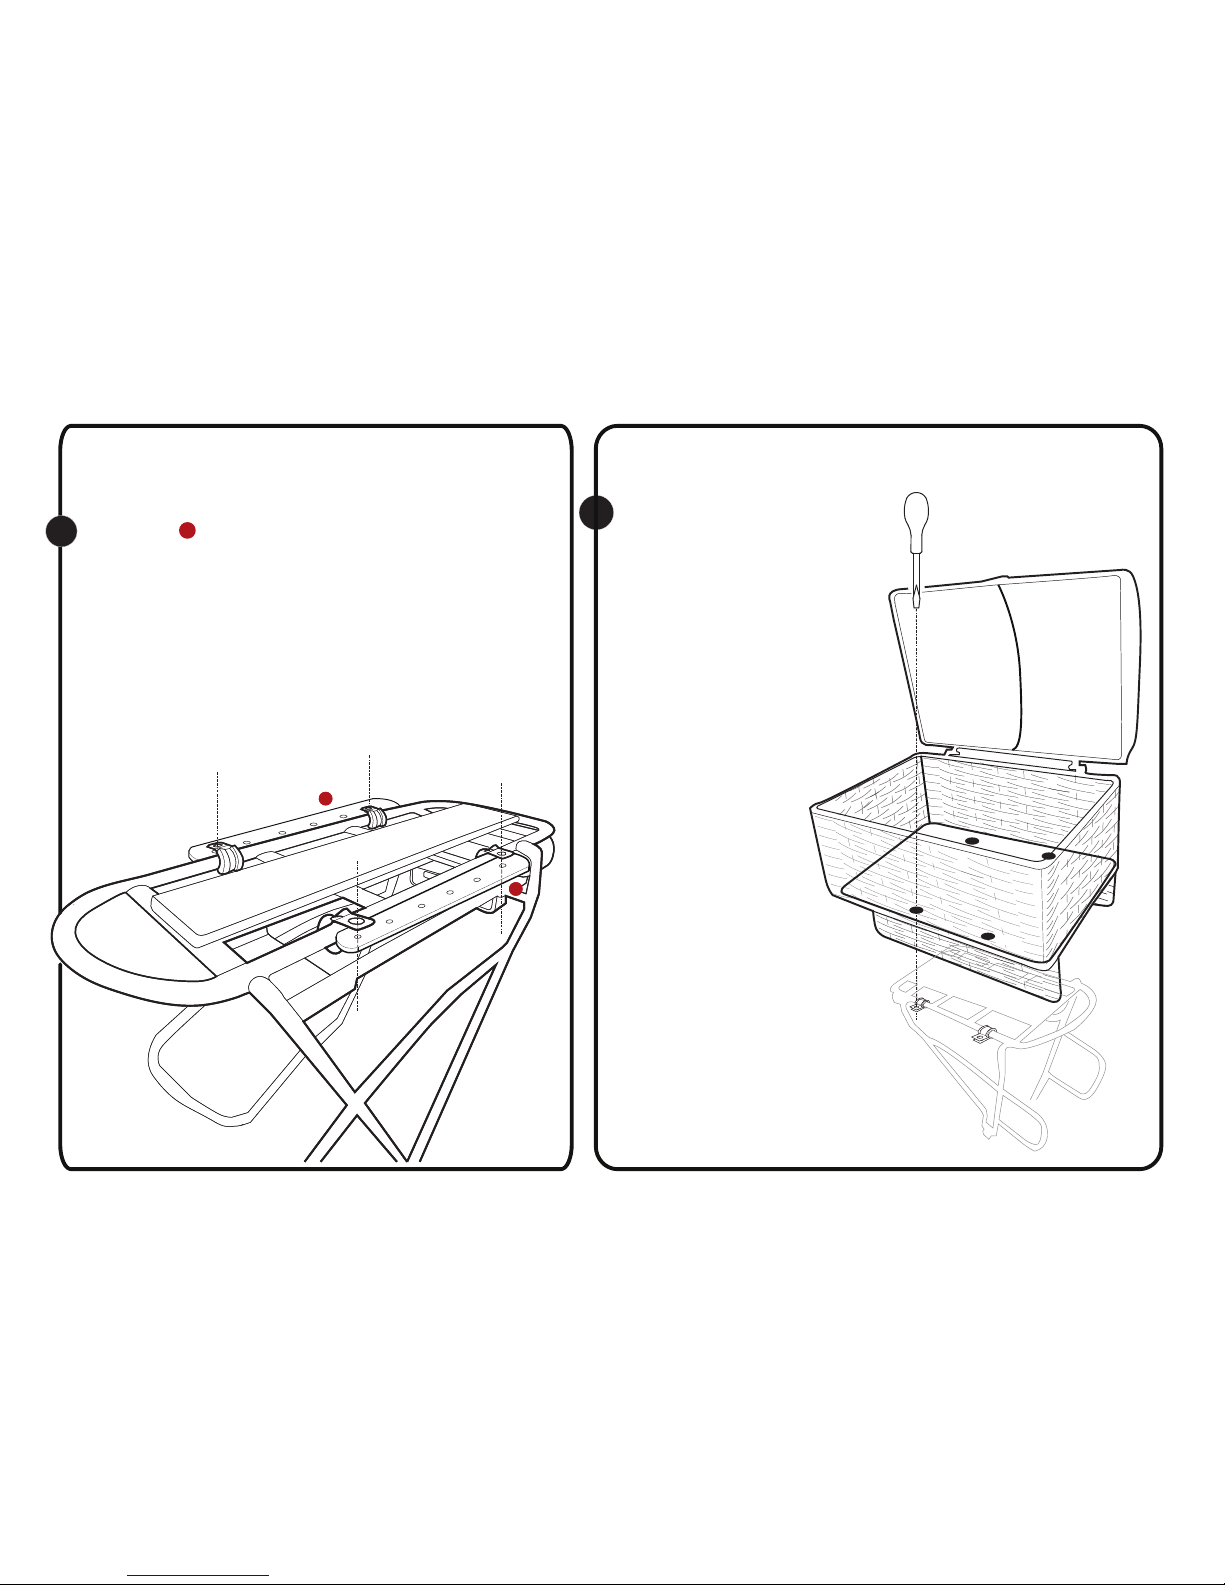
Using a at headed tool,
gently push apart the
wicker to create four holes
aligning to the holes in
the bottom basket bracket
mounts
Note
Use a back and forth
motion to create a hole
10
7
Place the bottom basket brackets in the
adjustable basket bracket mounts.
e
e
Note
Use the end holes on the
brackets for aligment
9
e
e
e
6
Page 7
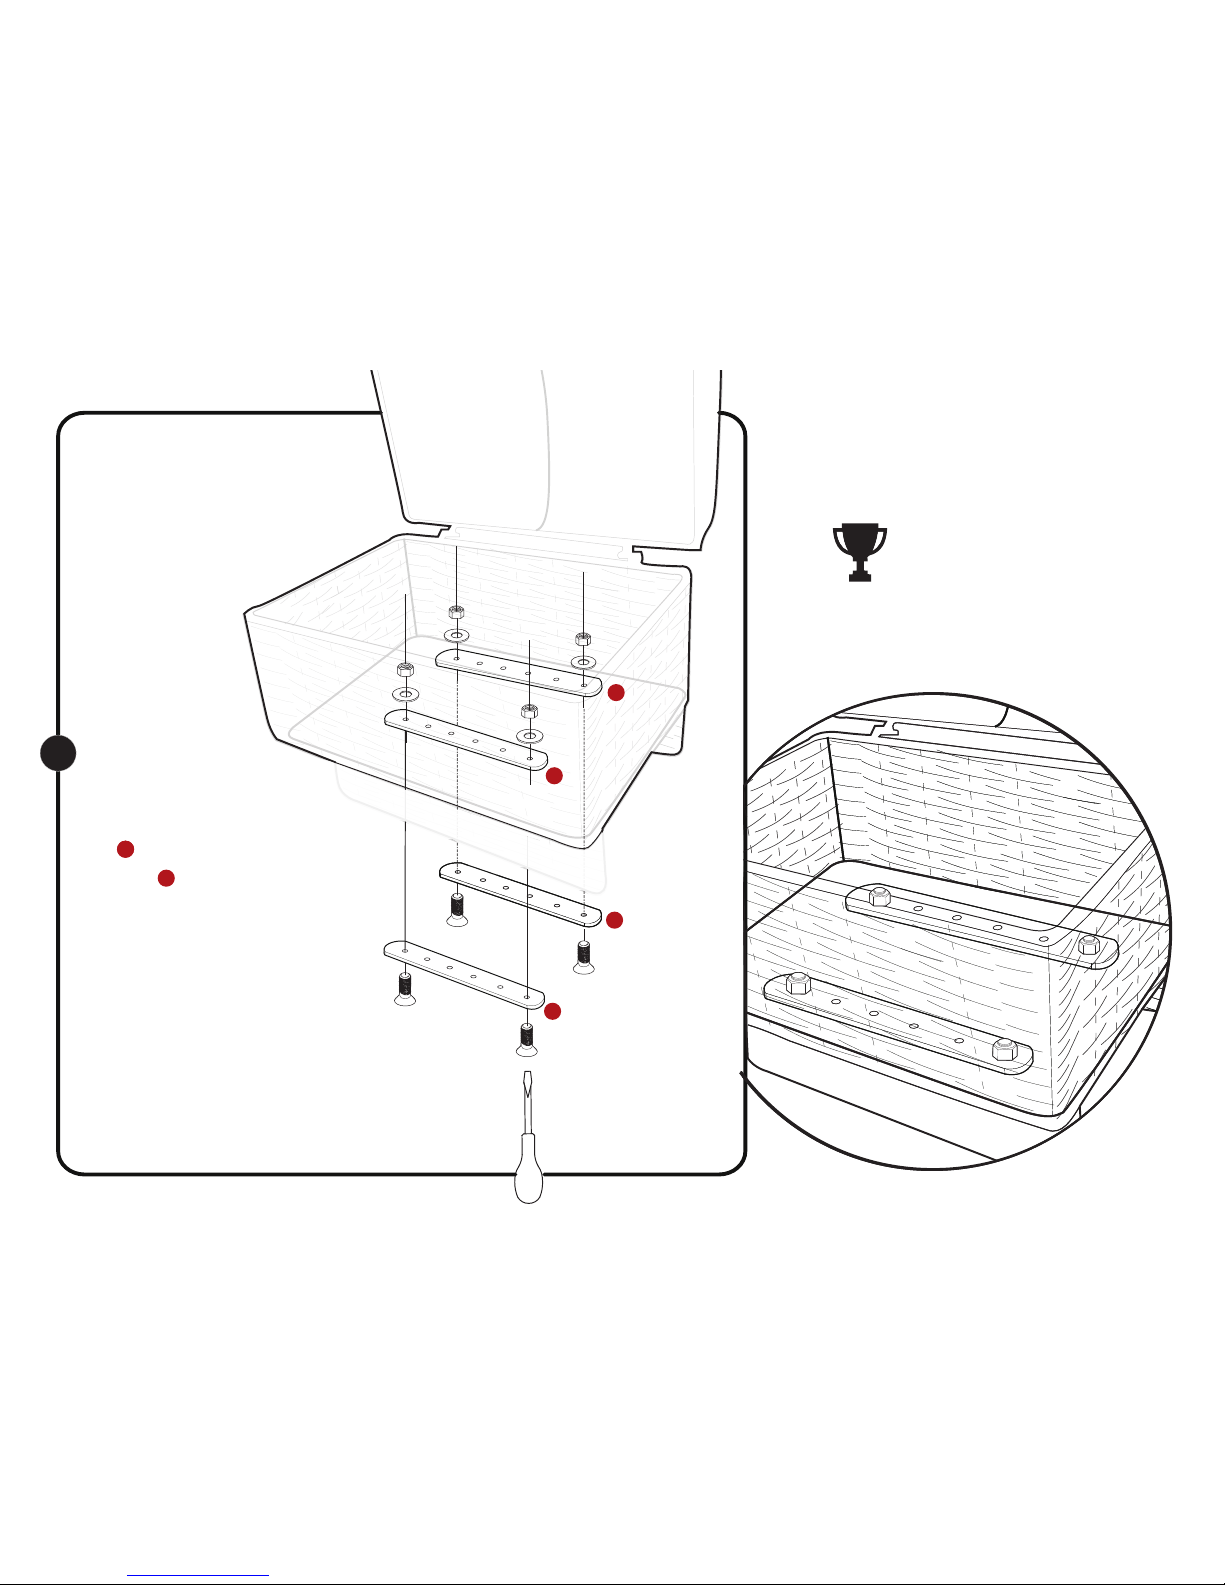
Secure the base of the
wicker basket between
the top basket bracket
and the bottom basket bracket
Congradulations!
Thats it for the basket!
You should end up with something like this.
11
d
f
f
f
g
g
g
7
Page 8
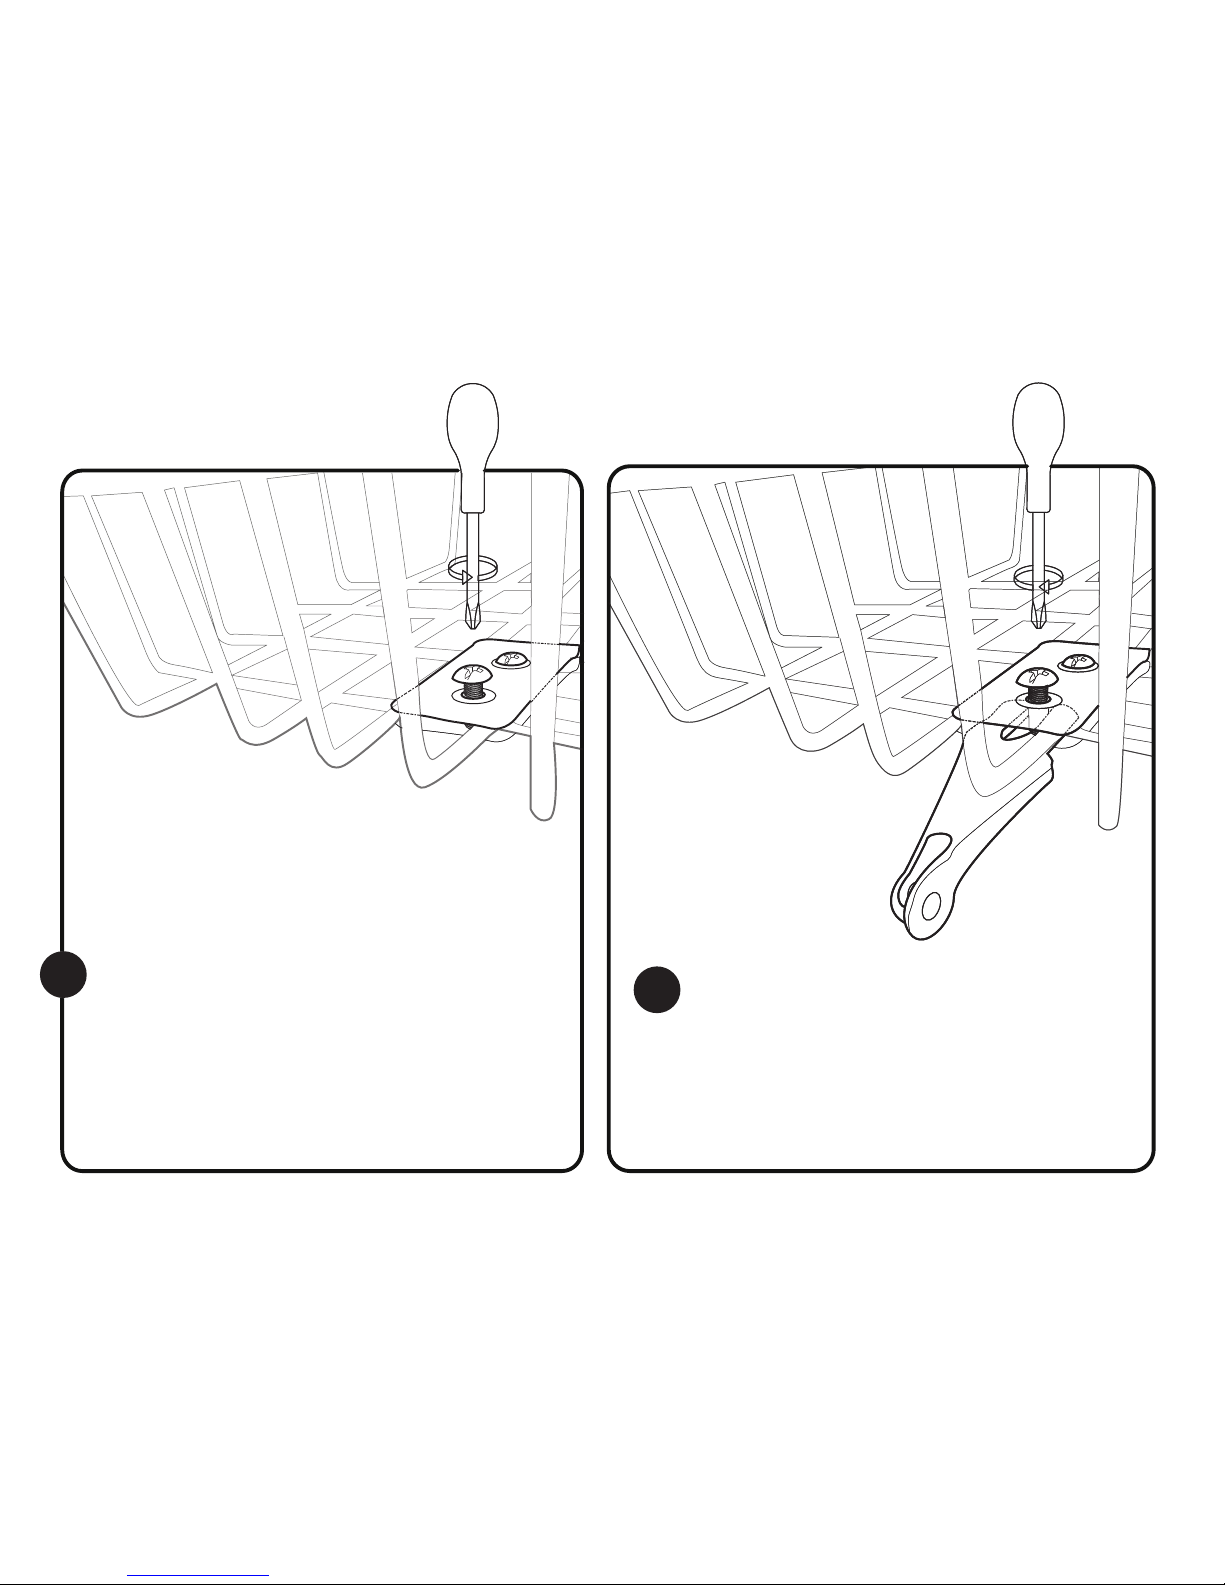
Instal th Fron Ligh
Loosen the rst bolt securing the base of
the front wire basket
making room for the basket bracket
Secure the light bracket
to the front wire basket
Now its time to ...
1012
8
1013
Page 9
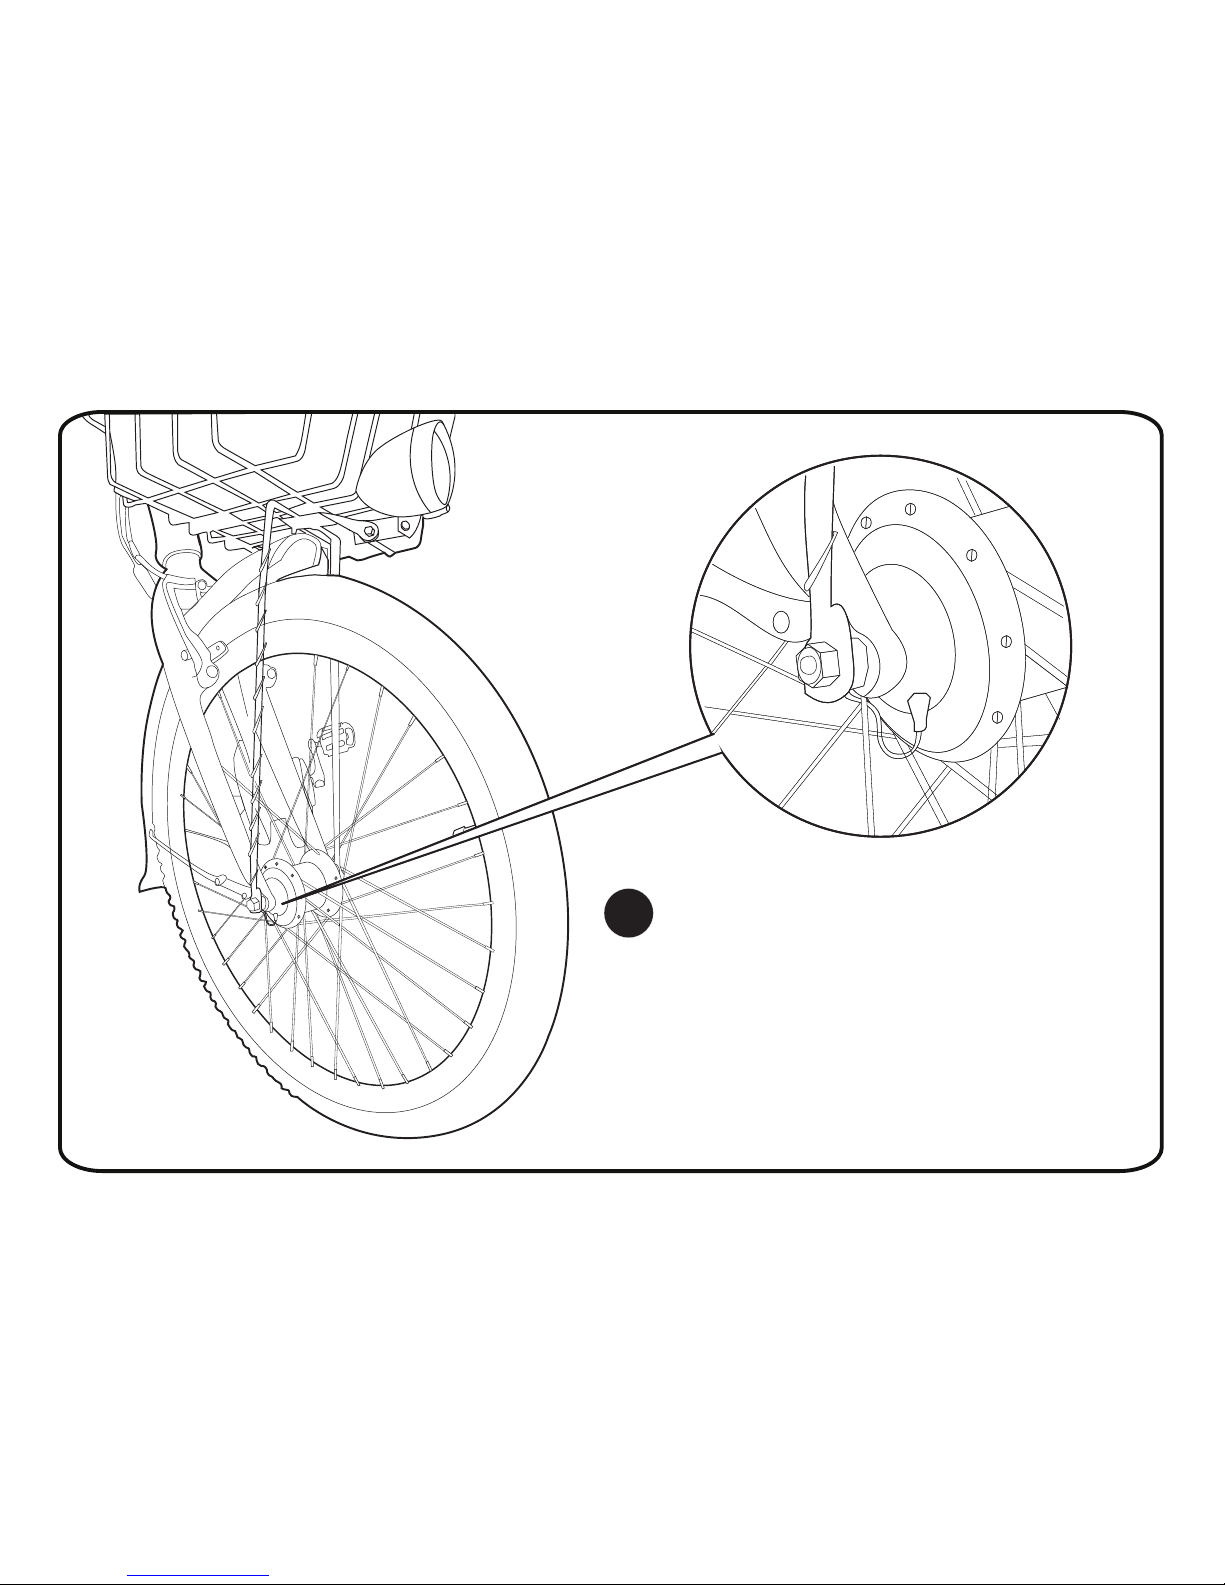
8
14
Plug the light into the input on the hub
Note
light will be activated once the wheel
is in motion.
Light can be adjusted to always be on
14
Page 10
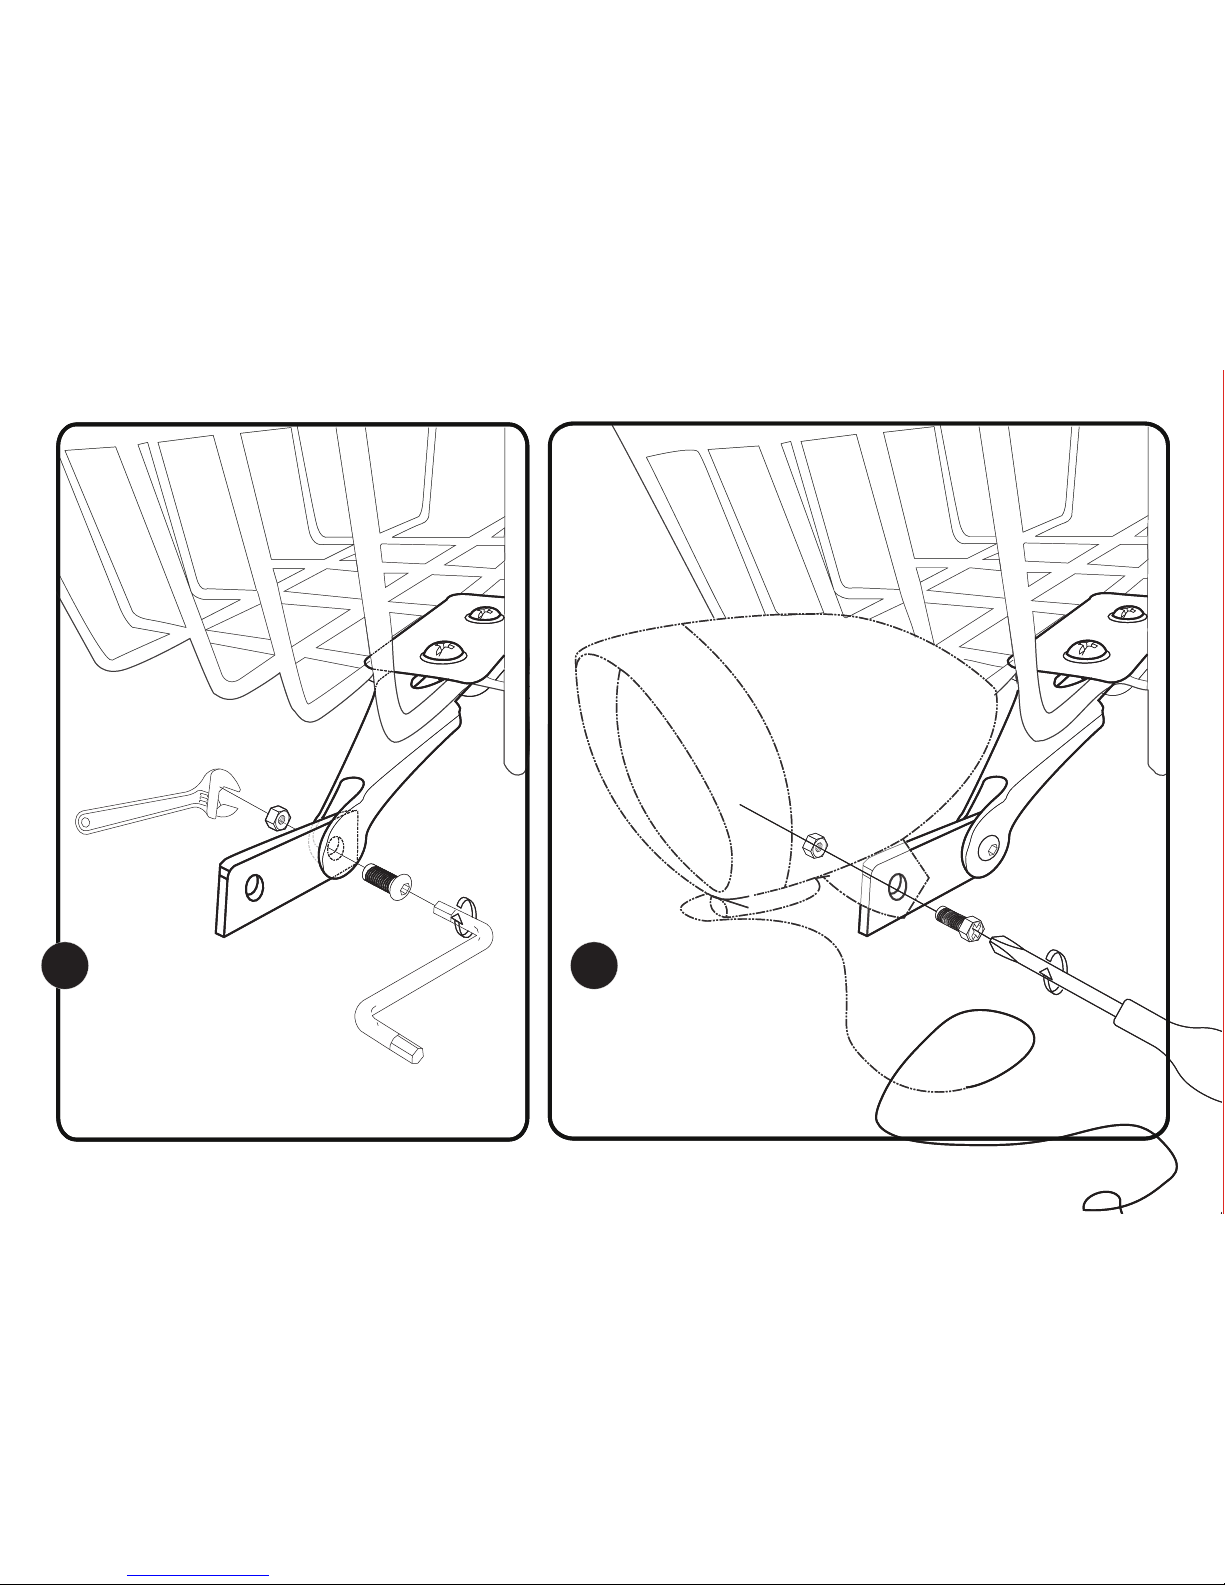
Secure the light
bracket extention onto
the light bracket
9
Secure the light onto
the light bracket extention
121315 1216
Page 11

Version 2015.05.05
 Loading...