

TM
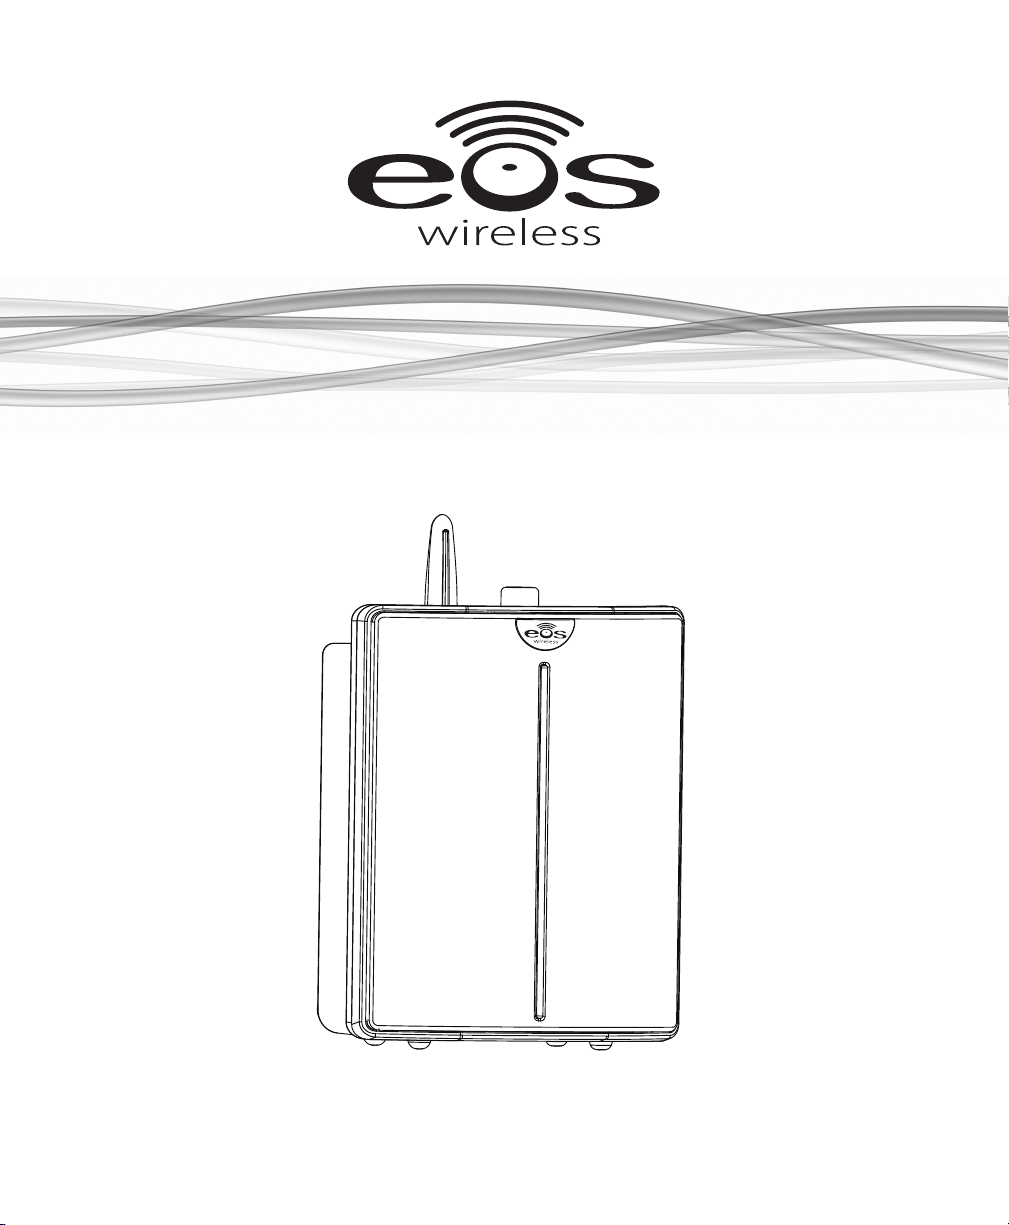
Wireless Stereo Speaker
OWNER’S MANUAL

Thank You For Choosing Eos Wireless!
We hope you will nd much enjoyment from our new wireless audio system.
Please read the entire contents of this owner’s manual. It is lled with reference information that
will allow you to get the most from your new Eos system. If you have any questions, please check
our web site at www.eoswireless.com/productsupport or call us at 877-465-3927.
Your Total Satisfaction – Eos Job #1
Congratulations on your purchase of the Eos Digital Wireless Multi-Room Audio System.
We are committed to making sure your experience is problem free.
If you experience any diculty and/or have any questions regarding the Eos system that
are not addressed in this manual, please feel free to contact the Eos Technical Support Team,
toll-free, at 877-465-3927 (between the hours of 8:30AM and 5PM pacic time.)
Our Eos Support Team aims to oer quick, comprehensive and thorough technical support
to all our users. Before you call, please make sure you have your Eos unit model number
and serial number on hand. These numbers can be found on the label located on the bottom of the unit.
877-465-3927
www.eoswireless.com
2

Table Of Contents
Important Safety Instructions .......................................................................................................... 4
A Consumer Guide to Product Safety ........................................................................................... 5
Safety Instructions ......................................................................................................................... 5
FCC Information ............................................................................................................................. 6
Warranty ........................................................................................................................................... 7
Technical Information .................................................................................................................7
Environmental Requirements ................................................................................................... 7
Quick Start .............................................................................................................................................. 8
Wireless Speaker Operation .....................................................................................................14
Troubleshooting .................................................................................................................................18
Warranty ................................................................................................................................................19
3

Important Safety Instructions
Please take the time to follow the instructions in this owner’s guide carefully. It will help
you set up and operate your system properly and enjoy all of the advanced features.
Please save this owner’s guide for future reference.
WARNING: The grill and screws around the subwoofer can get hot. Care should be taken
when touching this area.
WARNING: To reduce the risk of re or electrical shock, do not expose the product to rain
or moisture. Avoid prolonged exposure to direct sunlight.
WARNING: Liquids can cause a failure and/or a re hazard. The apparatus shall not be exposed
to liquid dripping or splashing. Avoid placing objects lled with liquids, such as coee cups, soda
cans or vases on the apparatus. As with any electronic product, use care not to spill liquids into
any part of the system.
WARNING: No open ame sources, such as lighted candles, should be placed on the apparatus.
Note: The product label is located on the bottom of the product. This product is intended to be
used only with the power supply provided. Using another power supply can cause damage to
the unit and/or the iPod. This product must be used indoors. It is neither designed nor tested for
use outdoors, in recreation vehicles, or on boats.
WARNING: Keep the Remote Control battery away from children. It may cause a re or
chemical burn if mishandled. Do not recharge, disassemble, heat above 100º C (212º F), or
incinerate. Dispose of used batteries properly. Replace only with a battery of the correct
type and model number.
WARNING: Danger of explosion if the remote control battery is incorrectly replaced. Replace only with CR2032 or DL2032 3-volt lithium batteries. Please dispose of used batteries
properly, following any local regulations. Do not incinerate.
4

A Consumer Guide to Product Safety
Safety Instructions
1. Read instructions before using this product.
2. Keep these instructions for future reference.
3. Heed all warnings on the product and in the owner’s guide.
4. Follow all instructions.
5. Do not use this apparatus near water or moisture. Do not use this product near a
bathtub, washbowl, kitchen sink, laundry tub, in a wet basement, near a swimming
pool, or anywhere else that water or moisture are present.
6. Clean only with a dry cloth and as directed by IntelliTouch Corporation. Unplug
this product from the wall outlet before cleaning.
7. Do not block any
cordance with the manufacturer’s instructions. To ensure reliable operation of the
product and to protect it from over-heating, put the product in a position and location that will not interfere with its proper ventilation. For example, do not place the
product on a bed, sofa, or similar surface that may block the ventilation openings.
Do not put it in a built-in system, such as a bookcase or a cabinet that may keep air
from owing through its ventilation openings.
8. Avoid prolonged exposure to direct sunlight or heat.
9. Do not install near any heat sources, such as radiators, heat registers, stoves or
other apparatus (including ampliers) that produce heat.
10. Only use attachments/accessories specied by the manufacturer.
11. Unplug this apparatus during lightning storms or when unused for long periods of
time – to prevent damage to this product.
12. Refer all servicing to qualied service personnel. Servicing is required when the
apparatus has been damaged in any way such as: power supply cord or plug is
damaged; liquid has been spilled or objects have fallen into the apparatus; the
apparatus has been exposed to rain or moisture, does not operate normally, or has
been dropped. Do not attempt to service this product yourself.
13. Opening or removing covers may expose you to dangerous voltages or other haz
ards. Please call IntelliTouch to be referred to an authorized service center near you.
ventilation openings around the subwoofer grill. Install in ac-
-
14. To prevent risk of re or electric shock, avoid overloading wall outlets, extension
cords, or integral convenience receptacles.
5

A Consumer Guide to Product Safety
15. Do not let objects or liquids enter the product as they may touch dangerous voltage points or short-out parts that could result in a re or electric shock.
16. Use proper power sources - Plug the product into a proper power source, as de
scribed in the operating instructions or as marked on the product.
FCC Information
Information about products that generate electrical noise if applicable, this equipment
has been tested and found to comply with the limits for a Class B digital device, pursuant
to Part 15 of the FCC rules. These limits are designed to provide reasonable protection
against harmful interference in a residential installation.
This equipment generates, uses, and can radiate radio frequency energy and, if not installed and used in accordance with the instructions, may cause harmful interference to
radio communications. However, this is no guarantee that interference will not occur in a
particular installation. If this equipment does cause harmful interference to radio or television reception, which can be determined by turning the equipment o and on, you are
encouraged to try to correct the interference by one or more of the following measures:
• Reorient or relocate the receiving antenna.
• Increase the separation between the equipment and receiver.
• Connect the equipment to an outlet on a dierent circuit than the one to which
the receiver is connected.
-
• Consult the dealer or an experienced radio/TV technician for help.
This product complies with the Canadian ICES-003 Class B specication.
Eos Wireless Products are designed and manufactured by:
IntelliTouch
5160 Carroll Canyon Rd.
San Diego, CA 92121
Questions:
Visit www.eoswireless.com
Phone toll-free 877-465-3927
6

A Consumer Guide to Product Safety
Warranty
Your Eos digital Wireless Speaker system is covered by a one-year limited warranty. For
details see the Eos Warranty section of this manual. To register your product, go online to:
www.eoswireless.com/registration
Technical Information
Power rating:
Input - 100-240 VAC 50-60Hz Output - 15 VDC 1.3A
Wireless specications:
150 ft indoors / 300 ft outside Range
1.5 Mbps Wireless Transmission Data Rate
Digital Spread Spectrum Technology
Dynamic Frequency Hopping Modulation Scheme
Operates in the 2400 to 2483 M Frequency Range
Proprietary Advanced Error Protection & Correction
Interference Free from WiFi, Bluetooth or Cordless Phones
Environmental Requirements
Operating temperature: 32° to 95° F (0° to 35° C)
Non-operating temperature: -4° to 113° F (-20° to 45° C)
Relative humidity: 5% to 95% non-condensing
7

Quick Start
O
WNERS MAN
U
AL
D
igital
W
i
r
eless Multi-R
o
om
A
udio
S
y
s
t
em
wireless
TM
O
WNERS MAN
U
AL
D
igital
W
i
r
eless Multi-R
o
om
A
udio
S
y
s
t
em
Parts Checklist
1. This Owner’s Manual
2. Wireless Stereo Speaker w/Integrated Power Adapter
1 2
8

Wireless Stereo Speaker Controls & Functions
Volume/Power Knob
Antenna Power/Status LED
Integrated Power Adapter
Turns on power to the wireless
speaker and controls volume.
Illuminates when the wireless speaker
is linked to the base station, blinks
when the there is no link to the base station.
Allows wireless speaker to mount to wall jack,
or remove for table or countertop placement.
Controls and Functions
9

Using Your Eos System
SOURCE
MUTE
iPod
digital wireless speakers
1 2
3
4
Muting the Base Station Speakers:
The MUTE button, located on the Eos Base Station, allows you to mute the Base Station
speakers. When the speaker to the base unit is muted, the blue LED source indicator light
(iPod or Aux) will ash.
Turning the wireless transmitter On/O:
The “wireless transmitter” button, located in the center of the Base Station, allows you to turn
OFF transmission to all Wireless Speakers/Receivers. When the transmitter is ON the LED on the
antenna is illuminated. When the transmitter is turned OFF the antenna LED is o and all Wireless Speaker link LEDs will be o. Pressing the “wireless transmitter” button again will reestablish transmission with all Wireless Speakers/Receivers.
Base Stataion Antenna LED status:
1. Solid - Base Station Transmitter is on
2. O - Base Station Transmitter is o
3. Blinking - link mode
10

Using Your Eos System
digital wireless speakers
1 2
3
4
Wireless Speakers/Receivers:
All Eos Base Stations, Wireless Speakers and Receivers have the same ID setting. This is
done so Speakers/Receivers will automatically link with any Base Station. The Base Station
will link with the rst 4 Wireless Speakers that it detects.
The LED indicators on the Base Station (labeled as, “digital wireless speakers”) indicate the
number of Wireless Speakers/Receivers linked to your Base Station.
Linking Wireless Speakers/Receivers to a Specic Base Station:
Due to the incredible range of the Eos system, it is possible for your speakers to receive
audio from a neighbors system. If this happens, or if you wish to run more than one Eos
Wireless System in you house, you can give your Base Station Speakers/Receivers a unique
ID. In giving your system a unique ID your Speakers/Receivers will link only to the base
that they are paired to.
11

Using Your Eos System
Setting a Unique ID:
To give your Base Station and Speakers/Receivers a Unique ID do the following:
1. Disconnect the power supply from the Base Station
2. Using the Volume Control Switch, turn o all power to the Wireless Speakers/Re
ceivers that you wish to link.
3. Reconnect the power supply to the Base Station
4. Press and hold the “LINK” button on the rear of the Base Station for
all four “Wireless Speaker Link LEDs” on the Base Station start blinking and then
release button.
Note: all four “Wireless Speaker Link LEDs” on the Base Station will blink while in “Link
Mode”
5. Turn on the Wireless Speakers/Receivers that you wish to link to this Base Station
within 60 seconds of pressing the “LINK” button.
Note: to link additional speakers once a unique ID has been set, refer to the “Adding a
Speaker to a System with a Unique ID” section below.
Adding a Speaker to a System with a Unique ID:
Once a unique ID is set on your Base Station, you will need to do the following to link additional speakers to your Base Station: Please note - this procedure is only necessary if you
have set a unique ID for your Base Station.
1. Disconnect the power supply from the Base Station
2. Using the Volume Control Switch, turn power to the Wireless Speakers/Receivers
that you wish to link.
3 seconds until
-
3. Reconnect the power supply from the Base Station
4. Press and hold the “LINK” button on the rear of the Base Station for 8 seconds until
only the rst “Wireless Speaker Link LED” on the Base Station starts blinking and
then release button.
Note: When Link button is pressed and held, the “Wireless Speaker Link LEDs” on the
Base Station will blink slowly for a few seconds and then go to a fast blink (fast blinking
indicates the Base Station is in “Add a Speaker Mode”)
5. Turn on the Wireless Speaker/Receivers that you wish to link to this Base Station
one at a time within 60 seconds of pressing the “LINK” button.
12

Using Your Eos System
Resetting the ID to Default:
To reset the Base Station and Speaker/Receiver’s ID back to the factory default, do the
following:
1. Disconnect the power supply from the Base Station
2. Using the Volume Control Switch, turn o all power to the Wireless Speakers/Receivers.
3. While pressing and holding the “LINK” button on the rear of the Base Station recon
nect the power supply from the Base Station.
4. Release “LINK” button
Note: all four “Wireless Speaker Link LEDs” on the Base Station will blink while in “Reset Mode”
5. Turn on the Wireless Speakers/Receivers within 60 seconds of releasing the “LINK” button.
Note: Allow each Wireless Speaker/Receiver to Link before turning on the next Wireless Speaker/
Receiver. After completing steps 1-5, speakers will be set to the factory default ID and will be able
to link with your Base Station or any other Base Station with the factory default ID in the vicinity.
Range Extender:
The Range Extender Switch, located on the back of the Base Station, allows you to increase
the eective range of the Eos Wireless System. Use this button only if you are having
diculty linking up your Wireless Speakers/Receivers.
About “Range Extender” - To maintain a solid, interference free link,
the Eos system incorporates an advanced proprietary error correction
scheme. Error correction is done by creating a slight delay between
the transmitter and Wireless Speaker. Using this delay, Eos can conrm
that the audio packets arrive at the Wireless Speaker/receiver. If the
audio packet is not received, the Eos Base Station can resend it. Eos’
default delay (Range Extender O ) is 20ms.
-
Turning on the Range Extender Switch increases the delay to 64ms. The increased delay
allows Eos to resend more audio packets due to distance from the transmitter or ambient
interference.
Note: Due to the 64ms delay, if an Eos Base Station and Wireless Speaker are in the same room,
a slight “echo” eect is apparent.
13

Using Your Eos System
Wireless Speaker Operation
The Wireless Speaker can be used as a wall-mounted speaker (power supply nested in the
back of the speaker enclosure) or as a desktop/bookshelf speaker (power supply removed
from the speaker enclosure.)
Powering Your Wireless Speaker:
1. Plug your Wireless Speaker into any wall outlet located no more than 150 feet from
the Eos Base Station.
2. Turn the Volume Knob clockwise to power the Wireless Speaker.
Note: When power is applied to the Wireless Speaker, the blue Antenna LED will illuminate and
ash. The blue Antenna LED will ash while the Wireless Speaker searches for the Base Station.
Once the wireless link has been established, the blue Antenna LED will remain illuminated.
Antenna LED status:
Flashing - Wireless Speaker is searching for the Base Station
Solid - Wireless Speaker is linked with the Base Station
O - Wireless Speaker is powered o
14

Using Your Eos System
CLICK!
Removing the Integrated Power Supply From the Wireless Speaker:
To use your Wireless Speaker on a desktop/bookshelf, remove the power supply from the
wireless speaker by following these steps:
1. Press down on the top of the power supply. The swivel plate beneath the power
supply will make a “click” sound and rotate outward.
2. Rotate adapter forward and remove the power supply from the enclosure.
15

Using Your Eos System
CLICK!
Reattaching the Power Supply to the Wireless Speaker:
1. Coil the cord around your hand.
2. Place the coil of cord in the bottom of the cavity.
3. Press lower edge of swivel plate to rotate forward
4. Insert the power supply into the cavity leaning forward.
5. Press down on the top of the power supply.
6. Rotate the power supply back to a vertical position (making sure to lock the tab at
the top of the speaker cabinet with the groove at the top of the power supply.)
16

Using Your Eos System
Adding Additional Wireless Speakers/Receivers:
You can link up to 4 Wireless Speakers, placed up to 150 ft away from the Base Station. All Eos
Base Stations, Wireless Speakers/Receivers leave the factory with the same ID setting. This is
done so Speakers/Receivers will link with any Base Station right out of the box. A new Wireless Speaker will automatically link with your Base Station as soon as it is turned on.
The Base Station features 4 individual Wireless Speaker link LEDs (marked 1 to 4). The LEDs will
illuminate, indicating the number of Wireless Speakers/Receivers linked to your Base Station.
Note: Due to the incredible range of the Eos system, it is possible for your speakers to receive
audio from a neighbor’s system. If this happens, or if you wish to run more than one Eos system
in your house, you can give your Base Station Speakers/Receivers a unique ID. With a unique ID
set, your Speakers/Receivers will link only to the Base Station that they are paired to.
To set a unique ID for your Eos Wireless system, please see the section titled “Linking Wireless Speakers/Receivers to a Specic Base Station”
Antenna LED Indicator:
The Antenna on the Wireless Speaker is equipped with a blue LED that tells the status of
the Wireless Speaker.
•
Solid LED = power on, linked with Base Station.
•
Blinking LED = power on, not linked with Base Station.
•
LED o = Wireless Speaker power o
Note: If the Antenna LED is blinking on the Wireless Speaker; make sure that the transmitter
is activated on the Eos Base Station (blue LED on the Antenna of the Base Station) and/or the
Wireless Speaker is not out of range of the Base Station.
17

Troubleshooting
Symptom Possible Problem Solution
Wireless Speaker
Unit does not respond
(blue Antenna LED is o)
No Sound (blue Antenna
LED is solid)
Sound from Wireless
Speaker is intermittent
No sound (blue Antenna
LED is blinking)
AC adapter is not plugged
into wall outlet or the
connector in the back of
the Wireless Speaker is not
connected properly
Volume to low Turn volume control clockwise
No audio playing at Base
Station
Unstable link with the Base
Station
Base Station transmitter o
(blue Antenna LED is o)
Unplug and re-plug the
connector to the back of the
Wireless Speaker
Conrm playback by listening
the to speakers on the
Base Station. If no sound is
heard from the Base Station,
check the “Base Station”
troubleshooting section above
Move Wireless Speaker closer
to the Base Station or turn on
Range Extender
Press transmitter button (blue
Antenna LED is o)
Picking up audio from
another Eos system
Wireless Speaker is out of
range
Wireless Speaker not linked
to your Base Station
Another Eos wireless
system in close proximity
18
Move Wireless Speaker closer
to the Base Station or turn on
Range Extender Switch
See instructions “Linking
Wireless Speakers/Receivers to
a Specic Base Station”
See instructions for “Linking
Wireless Speakers/Receivers to
a Specic Base Station

Warranty
Limited Warranty
IntelliTouch warrants this product to be free from manufacturing defects in material and
workmanship under normal use and conditions for a period of 1-year from date of original
purchase in the United States. In order to validate your warranty, you must register your
product by going on-line (www.eoswireless.com), or by calling 877-465-3927 between
Monday through Friday, 8:30AM to 5PM Pacic Time.
Should service be necessary under this warranty for any reason due to manufacturing defect during this 1-year period from date of original purchase, IntelliTouch will either repair
the unit or replace it with a reconditioned unit at no charge.
Units Scheduled for Exchange and/or Return should be sent to:
IntelliTouch
5160 Carroll Canyon Road
San Diego, CA 92121
Pack the unit in a well-padded, heavy, corrugated box.
• Enclose proof of purchase.
• Enclose your check or money order payable to IntelliTouch in the amount of $20.00
to cover shipping and handling costs.
• Enclose your name, return addess and contect number.
• Ship the unit prepaid via UPS or parcel post (insured).
Note: This warranty is void if the product is:
(a) Damaged through negligence, misuse, abuse, moisture or accident.
(b) Modied in any way.
(c) Damaged because it is improperly connected to the equipment of other manufacturers.
This warranty does not cover:
(a) Damage to equipment not properly connected to the product.
(b) Costs incurred in the shipping of the product to IntelliTouch.
(c) Damage or improper operation of unit caused by customer abuse, misuse, negli
gence, or failure to follow operating instructions provided with the product.
(d) Ordinary adjustments to the product that can be performed by customer as out
lined in the owner’s manual.
(e) Damage to iPod.
19
-
-

Warranty
THIS WARRANTY IS NON-TRANSFERABLE AND APPLIES ONLY TO THE ORIGINAL
PURCHASER AND DOES NOT EXTEND TO SUBSEQUENT OWNERS OF THE PRODUCT. ANY
APPLICABLE IMPLIED WARRANTIES, INCLUDING THE WARRANTY OF MERCHANTABILITY,
ARE LIMITED IN DURATION TO A PERIOD OF THE EXPRESS WARRANTY AS PROVIDED
HEREIN BEGINNING WITH THE DATE OF ORIGINAL PURCHASE AT RETAIL AND NO
WARRANTIES, WHETHER EXPRESS OR IMPLIED, SHALL APPLY TO THIS PRODUCT
THEREAFTER.
INTELLITOUCH MAKES NO WARRANTY AS TO THE FITNESS OF THE PRODUCT FOR ANY
PARTICULAR PURPOSE OR USE. UNDER NO CIRCUMSTANCES SHALL INTELLITOUCH BE
LIABLE FOR ANY LOSS, DIRECT, INDIRECT, INCIDENTAL, SPECIAL, OR CONSEQUENTIAL
DAMAGE ARISING OUT OF OR IN CONNECTION WITH THE USE OF THIS PRODUCT. THIS
WARRANTY IS VALID ONLY IN THE UNITED STATES OF AMERICA AND CANADA. THIS
WARRANTY GIVES YOU SPECIFIC LEGAL RIGHTS. HOWEVER, YOU MAY HAVE OTHER RIGHTS
THAT MAY VARY FROM STATE TO STATE. SOME STATES DO NOT ALLOW LIMITATION ON
IMPLIED WARRANTIES OR EXCLUSION OF CONSEQUENTIAL DAMAGE. THEREFORE THESE
RESTRICTIONS MAY NOT APPLY TO YOU.
20
 Loading...