

Page 1

Page 2

Contents
1
1
1
24
27
15
24
28
26
29
Thank you!
Warning
Disc Operation and Maintenance
Interface Operations
Main Interface (Smart Menu)
Picture-in-Picture (PIP) Interface
Radio Interface
GPS Navigation Interface
GPS Navigation Functions
Bluetooth Interface
TV Interface
IPOD Interface
AV Input Interface
Setting Interface
Intelligent Functions
Basic Operations
Functions of the Remote Controller
Functions of Keys on the Panel
Instructions for the Remote Controller
Troubleshooting
Connector Diagram for the Complete Device
Packing list
※
※
※
※
※
※
※
※
※
※
※
※Multi-media Player Interface
3
3
4
5
6
8
8
15
16
23
10
13
31
Packing List:
Packing List
1
3
6
4
5
7
2
1
1
1
1
1
No
Quantity
1
(optional)
Remark
1
(optional)
(optional)
Remote controller
USB connection cable
Instructions
Power cord
Installation bracket and screw
Name
Extension line for the steering wheel button
iPod connection cable
Instructions
AV cable assembly
KEY, USB and CAM cable assembly
1
1
1
(optional)
GPS antenna
TV switching cable
1
1
(optional)
RCA switching cable
1
Instructions Car
Multimedia
31
8
10
13
11
12
9
Page 3

Safety Precautions
● For your own safety, do not watch TV or perform related operations while driving.
Instructions Car
Multimedia
30
Connector Diagram for the Complete Device:
Connector Diagram
● This system just helps you reverse a car. We are not liable for any accident that occurs when you
perform a reverse maneuver.
Page 4

29
Connector Diagram for the Complete Device
Precautions:
◆ This device can be used in cars with 12 V batteries and a minus earth. Equip a dropping device for this device if
you i nstal l it in a van , a bus or a mo tor coa ch with 2 4 V batte ries.
◆
◆
◆
◆
Disconnect the wire at the minus side of the battery before installation to avoid short circuiting the electrical
system.
Arrange connection cables in places without moving parts. Isolate connection cables from moveable components
such as the manual brake and gear stick. Do not arrange connection cables near heat sources such as warm air
discharge outlets, otherwise the insulation layer of the connection cable may melt or be damaged by the heat,
and the lead and the car may short circuit.
Replace a broken fuse with the required 10 Afuse. Do not use a fuse with a high rated capacity or conduct direct
connections without using the fuse to avoid fires or damages to the device.
Do not lead the yellow power cord through the mounting hole to the battery in the engine cabin to avoid the power
cord and car short circuiting due to a damaged power cord.
Do not connect the power cord of other devices to this device to avoid overloading and overheating.
Insulate or wrap the idle speaker lead with insulation paste to avoid short circuiting.
Insulate all exposed wires. Bundle up all wires. Isolate the wiring terminal from metal on the device body to avoid
short circuiting.
If the car ignition system has no ACC, connect the ignition lead to the power supply that can be turned on or off
with the ignition key.
After the device is powered on, the external power amplifier outputs control signals through theAMP.CONT lead.
If the device is connected to the external power amplifier, do not connect theAMP.CONT lead to the power supply
side of the amplifier to avoid current leakage and other failures.
The output terminal of the speaker cannot be grounded; otherwise the power amplifier burns out. Do not use a
three-line speaker connected to the grounding wire. Do not connect the speaker to the car.
The speaker must be high-power with a minimum rated power of 50 W and a resistance of 4 Ω. Several speakers
cannot be directly connected unless the resistance is within the required range; otherwise the speakers may
short circuit.
◆
◆
◆
◆
◆
◆
◆
Instructions Car
Multimedia
Note: The product is subject to continuous improvements or
changes without further notice.
Warning
Thank you for buying and using our digital car video and audio products!
To correctly use the device, please read this manual carefully and keep it safe for future reference.
Thank you!
1. Do not expose the device to moisture to avoid fires or electric shock.
2. Close the device cover as the device comprises dangerous high-voltage fittings.
4. Wipe any dust to keep the disc entrance clean. Use a clean soft cloth to wipe dust off the disc before
loading it, otherwise dust is carried into the device, which can slow disc loading and ejecting or even
cause the disc to jam. These problems are generally human errors and it is difficult to dismantle and
clean the device without the help of a specialist.
5. Use the device with the radio at a medium volume level to protect or prolong the service life of the device.
6. Never dismantle the device or change any component without our approval as the device comprises
high-precision components.
3. Understand that it may affect the use of the device if you change or modify it without permission of our
company or another authorized organization.
7. Do not touch the screen with hard objects to avoid scratching.
Class-1
Laser Product
Page 5

1
28
Troubleshooting
The device cannot be started.
The power supply fuse is burnt out.
Solution
shooting
The ACC ignition cable and the plus
BATT power cord are connected
incorrectly.
The microprocessor is faulty.
Exchange and reconnect cables.
After the ignition is turned on
or off, all settings are lost.
Replace the burnt fuse with a fuse that is the same
as the one in this device.
Low battery
Bad radio effect
The disc cannot be loaded.
Take out the previous disc and load a new one.
Check whether the ANT control cable for the radio
auto-antenna is connected properly and re-check
whether the antenna and grounding wire are
connected properly.
The antenna is not extended and
grounded correctly.
The remote controller has failed.
Change the battery of the remote controller.
The disc is scratched.
The device cannot play
the disc.
Replace the previous disc with a good one.
Languages or subtitles
cannot be changed.
The laser lens is dirty.
Clean the laser lens with the cleaner.
The disc is loaded with the mark face
down.
Load the disc with the mark face up to the device.
Another disc is loaded in the loader.
The disc is recorded with only one
language or subtitle.
You cannot change the language or subtitles of
a disc if only one language or subtitle is available.
No video
Re-connect the connection cable.
Touch screen offset
The touch screen is calibrated incorrectly.
The video cable between the device
and TV is connected incorrectly.
Calibrate the touch screen (see the description of
touch screen calibration in the section “System
Information” on Page 21).
Instructions Car
Multimedia
Instructions Car
Multimedia
Press the RESETbut ton on the panel with the
pen pointer to restart the device.
Failure
12cm
12cm
12cm
12cm
12cm
Disc Operation and Maintenance
This device is only appropriate for the following discs:
Mark
Content
Typ e
Size
Audio and video
Audio only
Audio and video
Audio and video
Audio only
DVD Features
Different DVDs combine different features.These differences depend on the design coder
and manufacturer.The following symbols indicate some DVD features.
Page 6

27
2
2. Removing the battery
Instructions for the Remote Controller
1. Precautions:
Instructions for the Remote Controller
Push
Plus side upward
Press
Pull
2
1
4. Remove the insulation film at the battery snap before
using the remote controller for the first time.
Instructions Car
Multimedia
Instructions Car
Multimedia
Never use discs contaminated by viscose glue or ink.
Never place the disc in direct sunlight or near
heat sources such as the warm air pipes. Do not
keep the disc in cars where the temperature is
excessively high.
Region code and video output format
Dolby digital stereophonic system
Digital theater system
5.1 sound track audio
Video mode
Two-channel stereo
Sound track quantity
Caption quantity
Closed caption
Angle
Restricted
Note: Certain functions of this device need to be supported by DVDs. If DVDs do not support these functions or a
special setting is required, the functions may not be usable. Check these functions before playing DVDs or
follow the tips displayed on the screen. If discs are polluted or damaged, sound skipping may occur. To
optimize the sound effects, do the following:
Hold the disc by its edge to keep it clean.
Avoid using discs with a label as viscose
glue is left on the disc when the label is removed.
Use a soft cloth to clean the disc
from the center to the edge.
◆
◆
◆
◆
Use a CR2025 lithium battery for the remote controller.
The battery life is about one year. Replace the battery when the
remote controller is faulty due to the battery.
Do not place the remote controller in an excessively hot environment
or under direct sunlight to ensure it continues working correctly.
Correctly install the plus and minus sides.
◆ Do not pick up the battery with metal tweezers to avoid short circuiting.
Rem ove the b atter y from th e back of t he remo te
controller as shown in the figure:
3. Inserting the battery
Use a CR2025 lithium battery and correctly
insert the plus and minus sides of the battery
as shown in the following figure:
Page 7

26
3
Functions of Keys on the Panel
1. Press[ ]to eject the disc.
2. Left knob compound key
●
●
●
[ ]/[ ]
●
●
●
.
●
●
.
●
●
●
.
.
..
.
. [ ]
. [ ] . [ ]
Rotate the knob clockwise to increase the volume or counter-clockwise to decrease the volume. Press
the knob to switch to mute.
When the device is on, hold the knob to close the TFT screen and then repeat to display the TFT screen.
When the device is powered off, press the knob to start the device and hold the knob to shut down
the device. Note: You need to press the key rather than rotate the knob to start certain models.
3. next or previous program.
When you play a disc, USB media or SD card, press these keys to switch to the next or previous sound
track.
When you watch TV, press these keys to switch to the next or previous program.
When you listen to the radio, press these keys to tune to the previous or next channel, and hold these
keys to semi-automatically search the next or previous channel. When you find a desired channel, keep
any of the figure keys 1 to 6 pressed down to pre-store the channel.
4 Press SRC to return to the main menu or to power on or off the device.
Press this key to exit the current source mode and return to the main menu. Press this key againto return
to the previous source mode.
Press or hold this key to start or shut down the device.
5 The BAND key
In the radio mode, press this key to change AM or FM.
In DVD mode, press this key to change the DVD format.
In TV mode, press this key to change the TV format.
6 When the system fails, press RESET to revert to factory settings.
7 Press GPS to enable GPS mode.
8 Press VOL- to increase the volume. 9 Press VOL+ to decrease the volume.
10 Press MUTE to switch to the mute mode.
11 Press to scroll the screen. (Note: The adjustable screen angle is valid.)
12 Press to hang up a call. 13 Press to answer a call.
▲
▲
▲
▲
▲
Instructions Car
Multimedia
Instructions Car
Multimedia
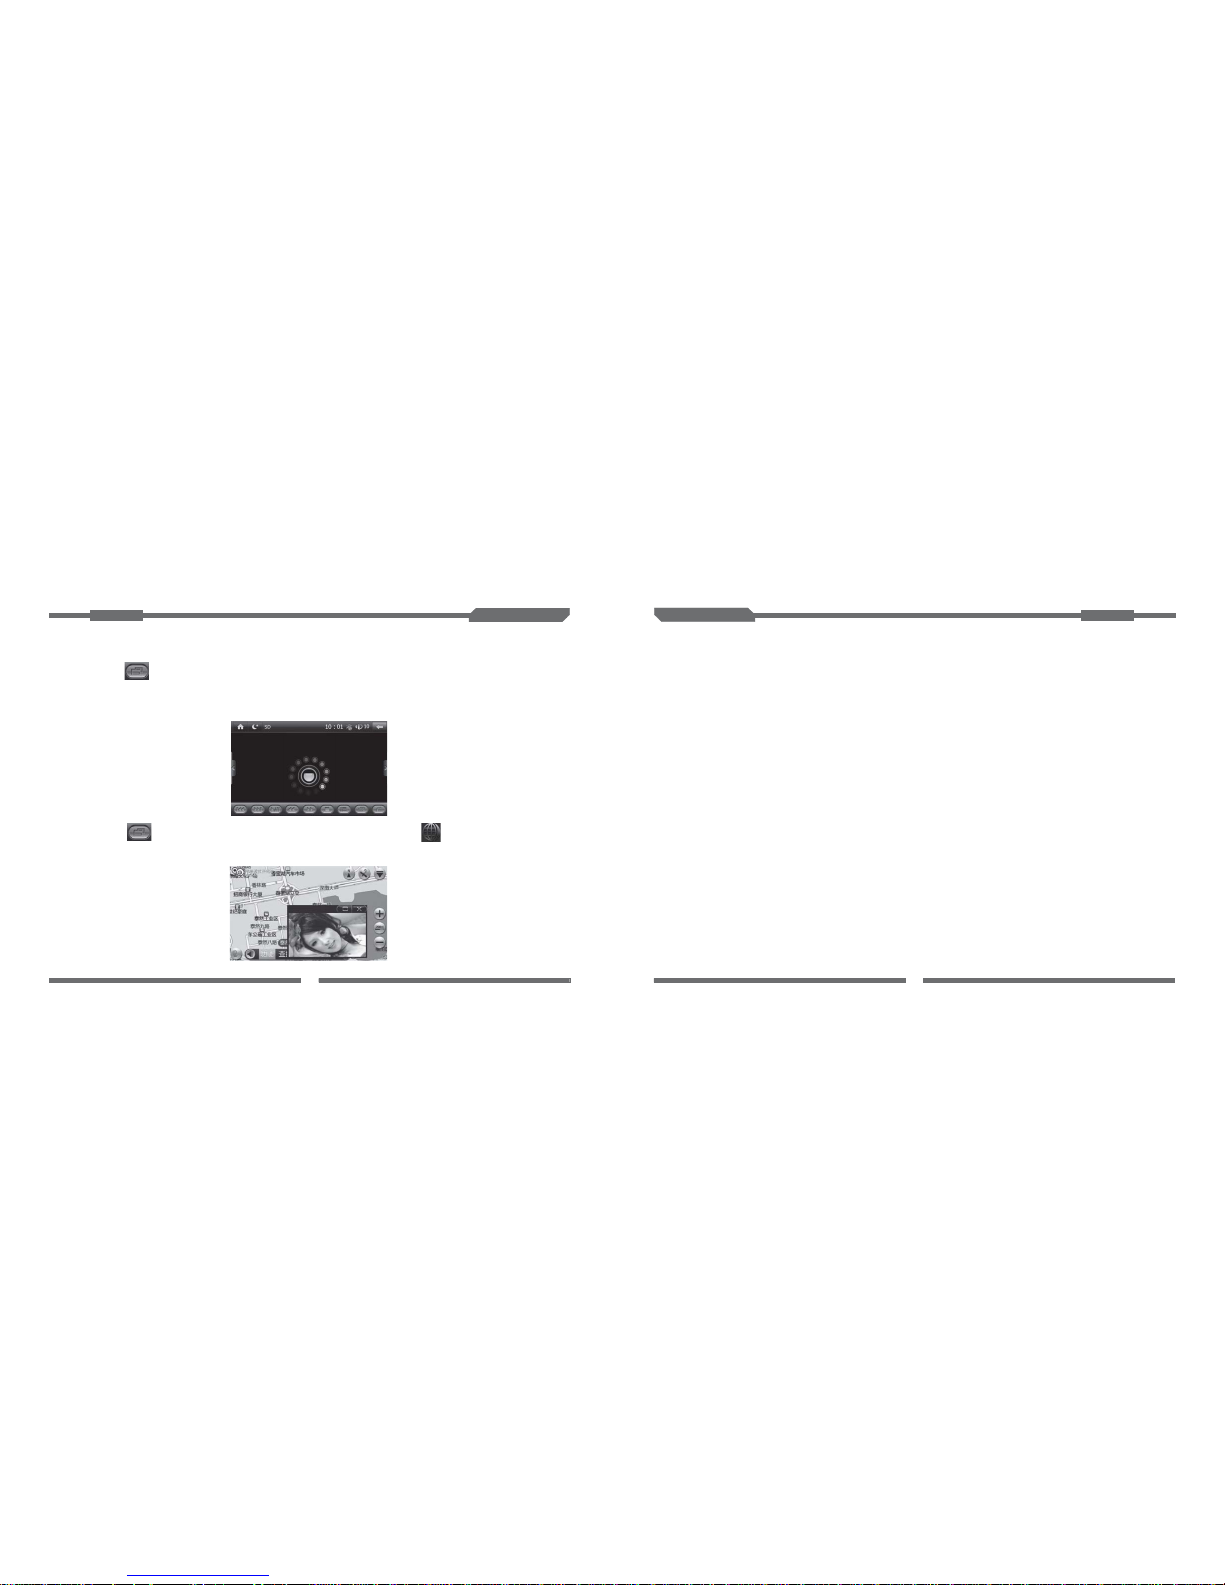
[ ]On the main interface, touch to display the sub-interface. The sub-interface (sub-menu)
has ten function icons. You can move these icons to anywhere; to do so, touch the required icon for
two seconds and then drag it.
Main Interface (Smart Menu)
(1)
(2)
Interface Operations
Page 8
25
4
10. Press the key to increase or decrease the volume.
11. Press ZOOM to zoom in or out the picture.
12. Press ST to set up stereo or mono track in radio mode.
13. Press LOC to set up local or remote channel search in radio mode.
14. Figure keys 0 to 9
15. Press GOTO to select sound tracks in DVD mode.
16. Press SETUP to enable DVD system setup to play a disc or use an SD card or USB device.
17. Press these keys to automatically search for the next or previous channel in radio mode. Press these keys
to select the next or previous sound track in the audio or video mode.
18. Repeatedly press SEL to select the mode for setting or selecting the required acoustic characteristics.
19. Press SUB-T to display the subtitle in the DVD mode (if the disc supports this function).
20. Press MENU to display the main menu in any mode.
21. Press TIME to display or hide the time in player mode.
22. Press PBC/TITLE to enable the PBC function in VCD mode or to display the title menu in DVD mode.
23. Press these keys to select the next or previous sound track on a USB device or an SD card.
24. Press ANGLE to enable the angle function in DVD mode (if the disc supports this function).
25. Press this key to set RPT in the DVD mode (note: AVI or MP4 does not support this function). In radio mode,
press this key to view channels and hold this key to automatically search stored channels.
26. Press this key to change bands among FM1, FM2, FM3, AM1 and AM2 in radio mode.
27. Press this key to switch other player modes to radio mode.
28. The mute switch
29. The page up key (Note: The adjustable screen angle is valid and this key only applies to the glide model.)
30. The page down key (Note: The adjustable screen angle is valid andthis key only applies to the glide model.)
。
Instructions Car
Multimedia
Instructions Car
Multimedia
[ ]Touch on the media player interface to displaythe PIP interface. This interface houses the
minimize, maximize and close buttons.After enabling PIP, touch the PIPinterface frame and keep doing
so to drag the screen.After maximizing the PIP interface, do not touch the icons on the top and bottom
bars within a period to displaya full screen. If you touch the full screen, these iconsare displayed again.
Touch to display the PIPinterface on the main page.Touch on the main menu to
access the entertainment functions while driving.
[ ] [ ]
Picture-in-Picture (PIP) Interface
Page 9

24
5
Basic Operations
Functions of the Remote Controller
1
4
3
2
7
6
9
8
10
11
12
14
15
13
23
24
20
22
21
19
16
18
17
26
27
25
28
30
29
5
1. The power supply switch
2. Press this audio source key to return to the main
interface and press it again to resume the previous
mode.
3. Press the key to display the current displayer
information when you play a DVD or use a USB device
or an SD card.
4. Press AUDIO to select a language (in DVD mode) or
change a sound track (in VCD mode) when you play a
DVD, or use a USB device or an SD card
5. Press ENTER to confirm menu operations.
6. Press these keys to enable right or left selection when
you use a USB device or SD card. These keys become
right and left cursors when you set up a DVD.
7. Press SLOW to slow down the speed of a DVD, an SD
card or a USB device.
8. Press the stop key once to stop playing a DVD, USB
device or SD card. Press the play key to resume, and
then press the stop key twice to stop the media.
9. Press the key to play or pause the DVD, USB device
or SD card.
Instructions Car
Multimedia
Instructions Car
Multimedia
1 10 Touch the key for a short time to gradually tune to previous channels or for a long time to semi-automatically search
previous channels.
Touch the key for a short time to tune to next channels or for a long time to semi-automatically search next channels.
2. Touch the key to change bands among FM1, FM2, FM3,AM1 and Am2.
3. Touch the key for a short time to view pre-stored channels.Touch the key for a longer time to automatically search
channels and store channels (with strong signals) in the pre-storage pane.
4 For FM, touch the key to switch from ST to MONO and vice versa (the default is MONO). AM does not have this function.
5 Local or remote selection 6 PTY: program type 7. 8 AF: Alternative frequencies list
9.AF: Touch any channel No. in the pre-storage pane to play the channel.Touch a channel No. in this pane for a longer time
to store the current channel. Note: Press or hold figure keys 1 to 6 to implement this function.
12. Touch the key to increase or decrease the volume or switch to mute mode.
/.
.
.
..TA: TA identification
13. The key displays Bluetooth connection status.
14. Touch the key. The screen will become black, but the system can still operate. Touch anywhere on the screen to return
to the previous screen. 15. Touch the key to return to the main interface.
Radio Interface
A high-quality FM/AM tuner is set in the device to support auto-search and the storage of FM/AM channels,
frequency display, and frequency trim.
The following figure shows the FM channel control interface:
15
14
13
12
4
9
2
3
5
6
7 8
1
10
Page 10

23
6
Intelligent Functions
I. Visual Reversing System
A visual reversing system is equipped for this device on the precondition that video signals of the side mirror
are correctly and reliably transmitted to the RCA (green) female of the car rear line CAM. This system provides
auto detection. This function enables the system automatically start and switch to the reversing mode if video
signals are input to CAM when the system is shut down (the car is started by the key and ACC operates properly),
or return to the reversing mode if the system is in other modes.Then, the system displays pictures of the mirror
on the screen to warrant reversing safety. Without a rearview mirror, the screen is blank.
Note: The reversing system is intended for aid and subjects to the actual environment.
II. Brake Detection
Connect the brake detection line of this device to the brake signal wire of the car. Start brake detection. You
can only watch videos after you have parked or stopped the car. For your own safety, do not watch videos when
you are driving. If the copilot wants to watch a video while you are driving, disable the brake detection in System
Settings and follow local laws and regulations.
III. Headlight Detection
Connect the headlight detection line of this device to the headlight signal wire of the car. In night mode, the
system automatically checks the headlight status. When detecting that the headlight is turned on, the system
automatically decreases the back light to prevent your view from being affected by the too bright back light.
IV. TFT Off
To guarantee your safety when you drive at night, hold the TFT OFF key or knob. The system closes the
screen, but maintains the previous audio mode. Touch the screen to exit the TFT OFF mode.
Note: You can also adjust backlight settings.
V. TEL Mute
Connect the TEL mute line of this device to the car TEL signal wire to automatically mute an incoming call.
VI. Mute Function of GPS Navigation
Touch [ ] on the main page to mute the navigation prompt tone without impacting otherAV sounds.
Touch the button again to resume the navigation prompt tone.
Instructions Car
Multimedia
Instructions Car
Multimedia
III. Insert a USB device or SD card to display the player interface.
1.If you have already inserted the USB device or SD card, touch[ ](USB) or[ ](SD), orpress
MODE to display the corresponding interface.
Multi-media Player Interface
IV. Functions
1. As shown in the following figure, keys 1 to 16 are function keys.Touch[ ]to display function
keys on the second page and touch[ ]to return to the first page. Touch[ ]to hide the bottom
button bar.
2. In player mode, the screen maximizes when the top and bottom bars are not displayed if you do
not touch the screen for a certain amount of time. The top and bottom bars are displayed if you
touch the screen.
I. This product supports the following:
1 Audio and video formats, such as DVD, VCD, SVCD, CD, MP3, WMA, MP4, andAVI
2 USB media, SD or MMC card
3 Image (such as JPEG and BMP) browsing
4 Folder or directory browsing
5 ESP for various discs
.
.
.
.。
.
[ ],
[ ]
[ ]
II. Warning: Correctly use the system to ensure its long service life. For example, play legal discs
and keep discs clean.
1.After a disc is correctly inserted, the disc automatically loads.
2.If a disc is loaded, touch MODE or touch to play the DVD. If the disc jams or does not
load, touch until the disc ejects and the loader is reset.
3.When you play a disc, touch to return to the main interface.
Page 11
22
7
11. Steering Wheel:
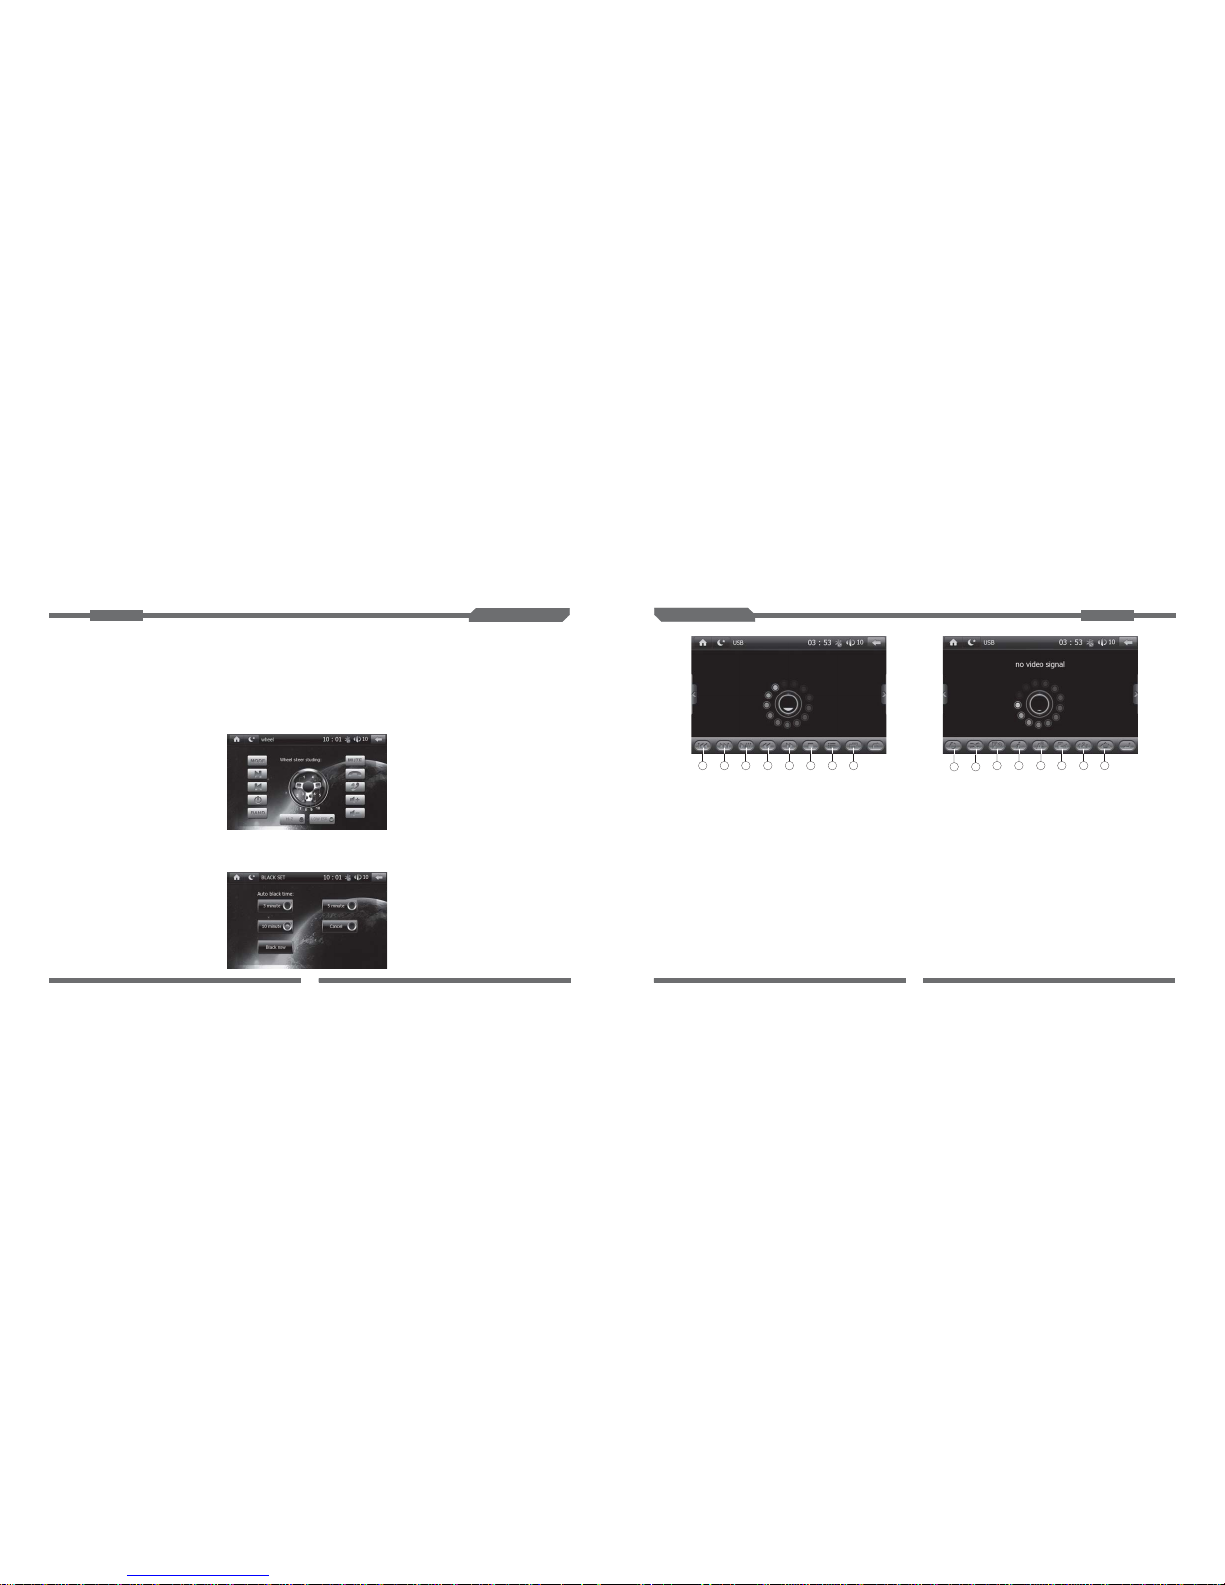
Touch this button to customize functions of buttons on the steering wheel.After the setting, you can perform
interactive operations on the steering wheel and the screen. Set the steering wheel as follows: Press one button
on the steering wheel based on the tip (“please press xx button”) displayed on the screen. Touch your desired
function button on the screen based on the tip (“please select xx button”). Then, the system displays a message:
“Setting succeeded”. In the same way, customize functions of all buttons on the steering wheel.
Note: High Impedance and Low Impedance are provided for different car models. High Impedance is
selected by default. Select appropriate impedance based on the pull-up resistance of buttons
on the steering wheel.
12. Blank Screen:
Touch this button to set up auto blank time including blank in three minutes, five minutes, and ten minutes,
and immediate blank. You can touch anywhere on the blank screen to cancel the setting and return to the bright
screen.
Instructions Car
Multimedia
Instructions Car
Multimedia
1/2. NEXT/PREV: Touch these buttons to select the previous or next sound track in the DVD, VCD, audio or
video mode.
3. PLAY/PAUSE: You can touch this button in the DVD, VCD, audio, or video mode.
4 5. REW/FF 6. STOP: Touch this button to switch audio, video and picture.
7. MENU 8. PIP: Touch this button to enable PIP in the DVD, VCD, audio, or video mode.
9. RPT: Touch this button to enable the loop state in the DVD, VCD, audio or video mode.
10. Shuffle: Touch this button to enable the shuffle state in the DVD, VCD, audio, or video mode.
11. Sound Track: Touch this button to select a sound track in the MP3, CD, VCD, audio or video mode.
12. Information: Touch this button to enable information OSD in the DVD, VCD, audio, or video mode.
13. Subtitle: Touch this button to select a subtitle in the DVD VCD audio or video mode (if the disc
supports this function).
14. Language: Touch this button to select a language in the DVD, VCD, audio or video mode (if the disc
supports this function).
15. Figure: Touch this button to select sound tracks through figures in the DVD, VCD, audio or video mode.
16. Arrow button: Touch this button to move the cursor in all directions in the zoom state under the DVD, VCD,
audio, or video mode.
/
,,
3
1
2
456 7 8
11
9
10
121314 15
16
In the DVD mode, press ZOOM on the remote controller to zoom the picture by 1/4, 1/3, or1/2.
Page 12
21
8
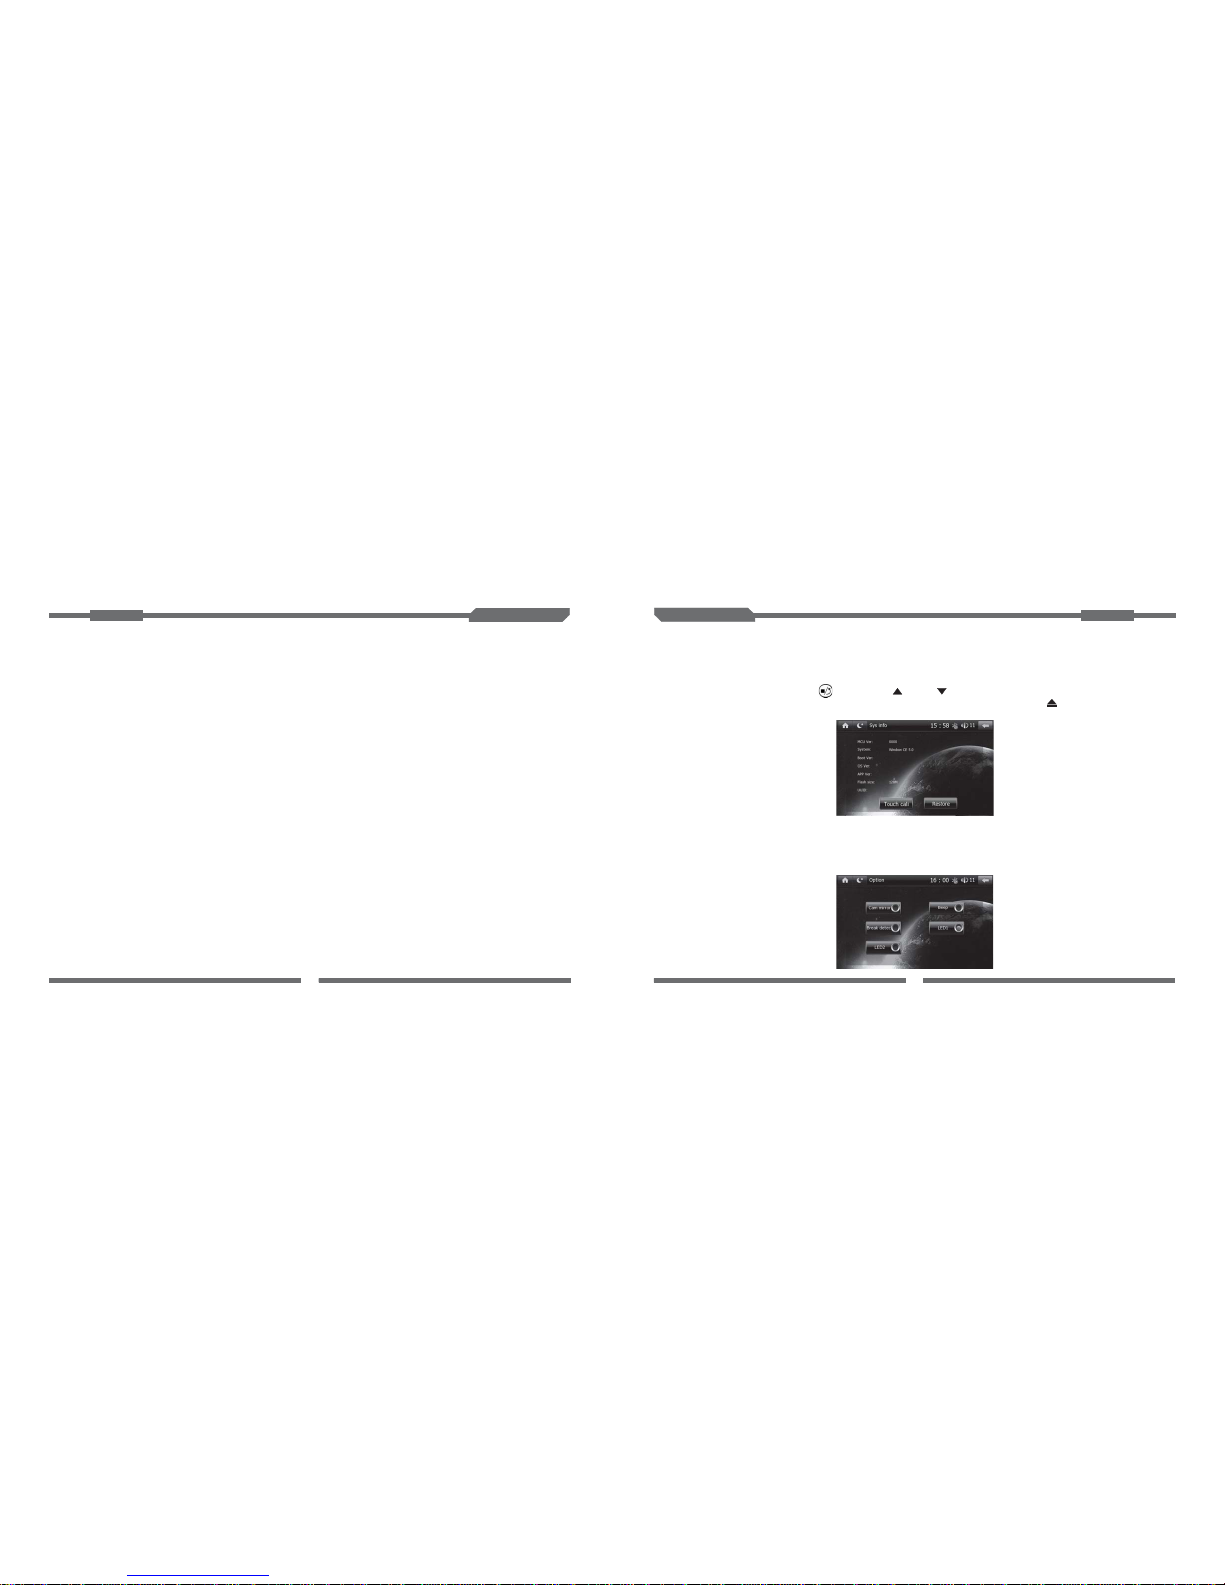
9. System Information:
This page displays product information, Touch Calibration and Reset. TouchTouch Calibration to
display the calibration page.Method 1: Touch Calibrate Coordinate Center to start calibration. If calibration
fails, the system displays the calibration page again. If calibration is complete, the system exits the page.
Method 2: Continuously press [ ], [ZOOM], [ ] and [ ] on the remote controller to display a + cursor.
Touch this cursor for calibration and then exit the interface. Method 3: Press [ ] for about eight seconds
on the panel to enable calibration.
10. System Setting:
Reversing Mirror Image:Touch to display images of the rearview mirror.Touch-tone: Touch to
enable or disable the touch-tone. LED1/LED2:Touch to change LED to blue or orange. Brake Detection:
If you do not touch this button, brake detection is disabled. In this case, you can watch videos while
driving the car, but this is illegal in certain countries. Therefore, for your safety, touch this button to
enable the function.
Instructions Car
Multimedia
Instructions Car
Multimedia
Precautions and Safety Warning
1. Use GPS carefully. This system just provides navigation reference for you. Never use this system
for precise measurement of position, distance, location, terrain and others.
2. When you use GPS for the first time, park your car at one open space without a shelter. Positioning
requires at least two minutes based on the environment and strength of satellite signals.
3. For your safety, set up the route before you set off. Never operate this system while you are driving.
We are not liable for any traffic accident that occurs when you operate this system rather than pay
attention to the road condition while driving.
4. This system cannot provide correct positioning and navigation if satellite signals are interfered by
tunnel, building, subway, forest, weather, tall obstacle or mobile phone base station. The system
resumes normal positioning and navigation after you move away from these sources.
5. Note that satellite signals may be interfered by any wireless communications product (such as a
cell phone or speed alarm) and become unstable.
6. Road planning is for reference only. Road properties, such as one-way road and no left turn, may
be by the local traffic department based on transportation circumstance, road
construction, governmental or commercial activities. Therefore, you must obey current traffic
rules relating to road conditions and signs. If the current road conditions are different from the
map, choose an appropriate route.
adjusted
GPS Navigation Interface
GPS Navigation Functions
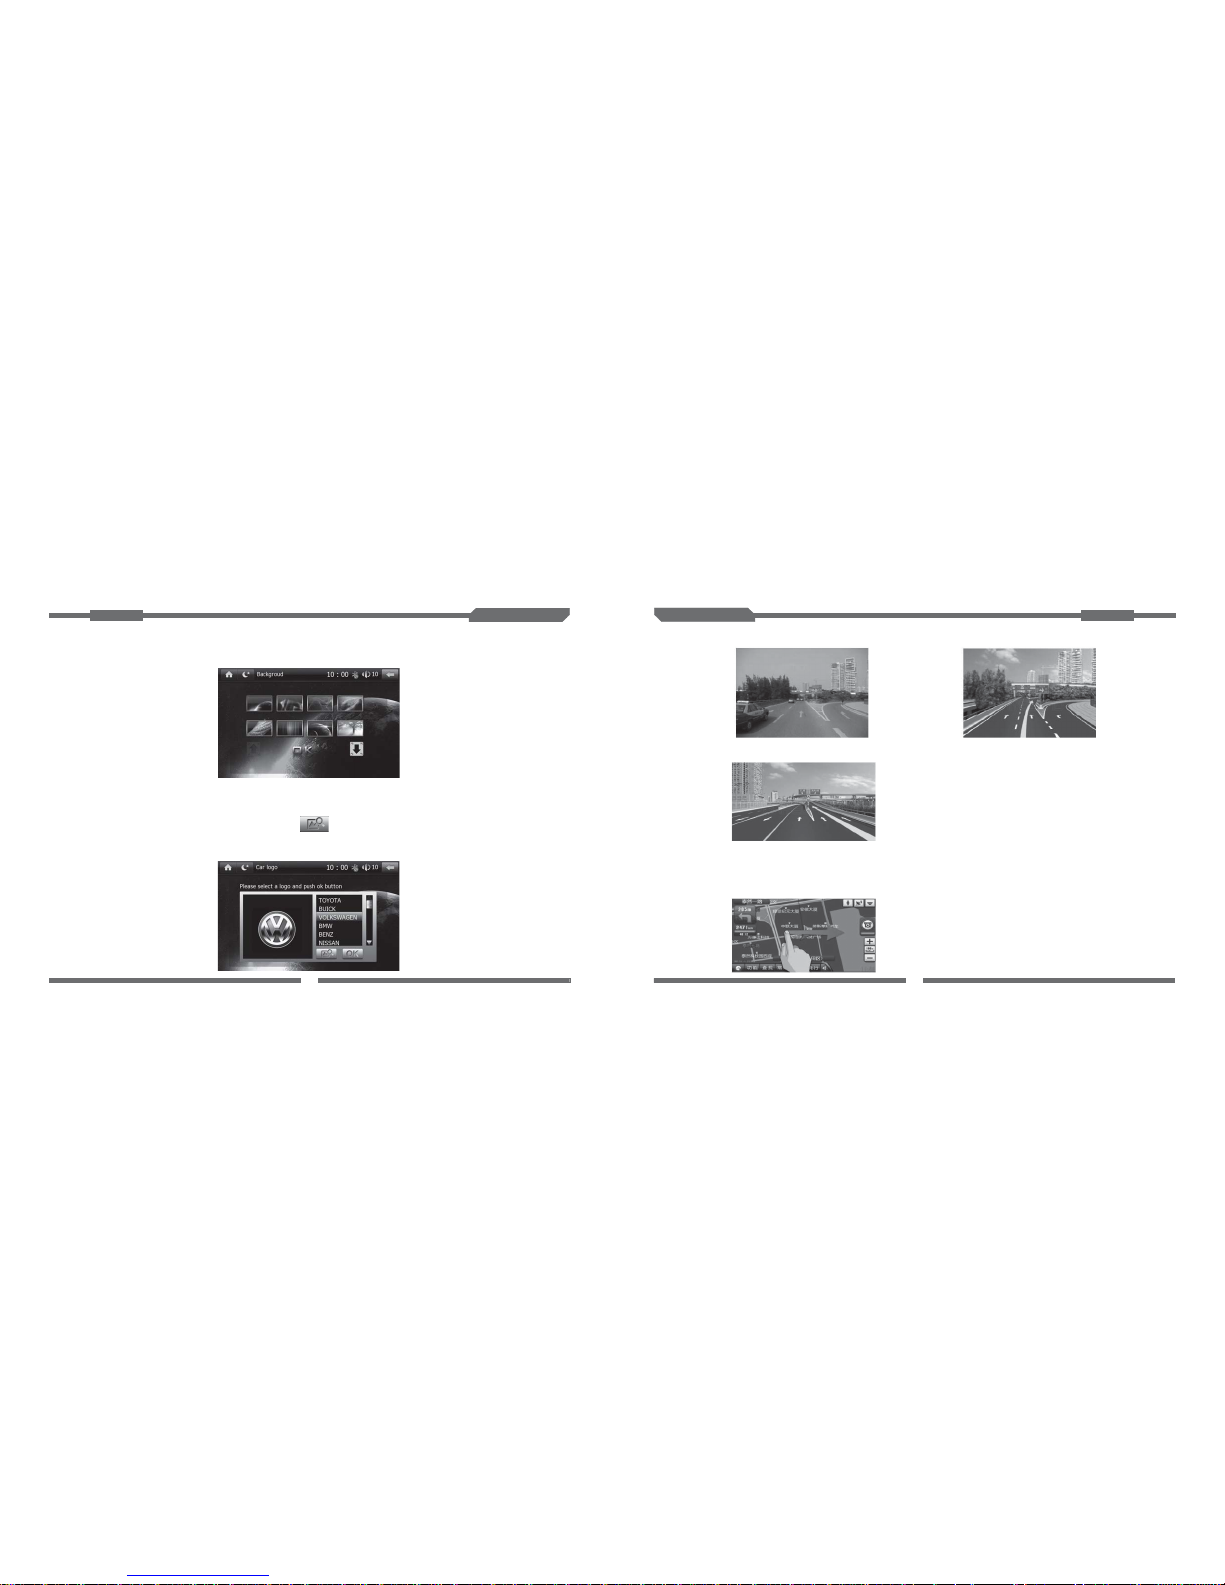
This system provides a navigation map (note: this map applies to certain models).
(A) The GPS navigation system provides proportional real-time crossing data to display the
actual crossing, so you do not have to worry about driving at a complex crossing.
Page 13
20
9
7. Background Setting
Select the background picture for the interface.
8. Start Logo Setting:
Select the start logo for your car to match the device with your car. You can also upgrade the logo to your
favorite one. Select the logo as follows: Copy an picture using 800 x 480 BMP format and 16-bit color to the SD
card. Insert the card in the GPS card guide. Touch to search the correct file and then touch OK. If the
logo is successfully upgraded, the system displays a message: “Upgrading the logo succeeded”. If the logo is
not upgraded, the system displays information about the logo format and resolution and a message:
“Upgrading the logo failed”.
[ ]
Instructions Car
Multimedia
Instructions Car
Multimedia
( B )The real-time map covers all major cities in China.
( C ) Hand operation: Clear and correct voice navigation provides timely instructions and chooses the
most appropriate road for you.Although road conditions are complex, the car
multi-media navigation system and the precise GPS navigation map provide
efficient traffic information, so you are free to drive to the next destination!
For details, touch Help on the GPS page.
Page 14

19
10
5. Time Setting:
Time setting covers time and date setting in 12 hours or 24 hours. Touch the desired date or time,
and then touch + or –to adjust the date or time. After the setting is complete, exit the interface to validate
the setting.
6. Radio Region Setting:
You can select the radio frequency at your region. After the selection, the radio automatically
operates at the related frequency.
Note: RDS is unavailable in certain countries and regions.
Instructions Car
Multimedia
Instructions Car
Multimedia
III.Touch operations on the Bluetooth call interface
Bluetooth Interface
Bluetooth communications, ready to use and safe, enables synchronization between the cell phone
and the audio device, so you never miss a call while driving.
I. Bluetooth match condition
If the cell phone supports Bluetooth connection, the cell phone can be connected to the device for
data exchange synchronization.
II. Matching the cell phone Bluetooth and the device Bluetooth
Touch Bluetooth Call on the main interface to display the Bluetooth interface.
1. Touch (Match) on the Bluetooth interface to display a related interface. On this interface,
touch Match, as shown in Figure 4. Now, the system displays a message: “Matching”.
2. Set your cell phone mode to Bluetooth and start this mode. Use your cell phone to search devices
and enter the initial password (0000) to connect the cell phone to the device.
3. If the cell phone and the device are matched, the cell phone displays a message: “Do you want to
connect to the device?” Select Yes. The cell phone is automatically connected to the Bluetooth
device in about 10 seconds.At this time, the screen displays a message:“Connected”.
4. The cell phone is successfully connected to the Bluetooth device.
5. Touch at the upper right to return to the Bluetooth interface.
[ ],
[ ]
1.Touch to display the interface for dialing a Bluetooth
number, as shown in Figure 1:
2.Touch
[ ]
[ ]
[ ]
[ ]
to display the Bluetooth call history interface,
as shown in Figure 2:
3.Touch to display the Bluetooth setting interface, as
shown in Figure 3:
4.Touch to display the Bluetooth call matching interface,
as shown in Figure 4:
Page 15

18
3. Audio Setting:
Audio setting covers high pitch, low pitch, the front, rear, left and right sound tracks, EQ (including
standard, classical, pop, rock, hall, and movie) and others.
4. Language Setting:
Select your desired language from nine types of language.You can turn pages upwards or
downwards.
Instructions Car
Multimedia
Instructions Car
Multimedia
11
1. Audio transfer: Touch this button to transfer audio signals between the device and cell phone.
2. Redial: Touch this button to redial the last number.
3. Hang up:Touch this button to hand up the current call or reject an incoming call.
4. Answer/dial:After entering the number, touch this button to call the number. In the case of an
incoming call, touch this button to answer the call.
5. Delete: Touch this button to delete an incorrect number.
As shown in Figure 2: the call history interface lists recent Received Calls, Missed Calls, and Dialed
Calls.
Dial: Select any number in the call history and dial.
Figure 1
Figure 2
Figure 3
Figure 4
3
1
2
4
5
10911
7
6
8
Page 16

17
12
1 GPS Navigation Path Selection:.
[ ] [ ] [ ]Touch (Navigation Setting) to display the path selection interface.Touch and to
select the related file. Touch OK. Note:You can enablenavigation only by selecting the correct map path.★
2. Backlight Setting:
This function prevents your view from being affected by too bright backlight when you drive at night.
The default backlight value is100%.
Instructions Car
Multimedia
Instructions Car
Multimedia
6. Set up:Touch this button to customize the Bluetooth password. Enter a four-digit number and then
touch OK. (Note:The modified number replaces the initial Bluetooth password.)
7. OK: Enter the custom password and then touch this button to validate the setting.
8. Auto-answer:Touch the right end of this status bar to display a blue dot and enable the auto-answer
function. Now, you can automatically answer a call.Touch the left end of the bar to
disable this function.
9. Connect:After matching is complete, touch this button to connect the cell phone to the device.
11. Match: If the device must be connected to the cell phone, touch this button to match them first.
10. Disconnect: Touch this button to disconnect the cell phone and device.
[ ]Touch in the main menu to display the Bluetooth music interface.
This function is available only when your cell phone is connected to the device through Bluetooth.
When you play a sound track in your cell phone, the system displays the Bluetooth music interface,
as shown in the following figure:
1. Stop:After you touch this button, the time on the player returns to 00:00.
2. PREV:Touch this button to select to play the previous sound track in the play mode.
3. Play/pause: In the pause mode, touch this button to play the music. In the play mode, touch this button
to pause the music.
4. NEXT: Touch this button to select to play the next sound track in the play mode.
213 4
IV.Touch operations on the Bluetooth music interface
Page 17

13
16
The system displays the analog TV interface.
1 / 4
2 / 3
5
6
7
8
The previous or next channel
Touch Button 2 for a short or long time to slightly tune to previous or next channels.
Touch Button 3 for a short time to slightly tune to next channels or for a long time to
semi-automatically search next channels.
Touch this button to change the TV color format.
Touch this button to automatically search channels.
Touch this button to change the TV audio format.
Touch this button to enable PIP.
3
1
2
4
5
6 7 8
[ ]Touch to display the setting interface. You can perform all system settings on this interface,
including navigation, backlight audio, system information, start logo, background and other function
settings. The setting interface comprises three pages. You can turn pages upwards or downwards.
(Note: You can ignore the Factory Mode setting that is intended for the manufacturer.
Setting Interface
Instructions Car
Multimedia
Instructions Car
Multimedia
TV Interface
Page 18

15
14
The system displays the digital TV interface.
Note: Either analogTV or digital TV is available. This depends on which type of device you buy.
Instructions Car
Multimedia
Instructions Car
Multimedia
iPod functions are imported to the AV entertainment navigation system, so you can enjoy the perfect iPod
acoustic quality and management mode in your car. An iPod connection socket is provided at the rear of the
device. You can connect iPod to the device through the socket and enable auto monitoring without modifying
the device.With the touch screen and buttons on the steering wheel, the device can control all iPod functions,
including play, pause, the previous sound track, the next sound track, playing sound tracks by style, singer and
album. Therefore, you can enjoy AV entertainment anytime. In addition, the device screen displays all information
in iPod, including titles, musicians, playing state and time of songs, for your convenience.
IPOD Interface
AV Input Interface
1. Connect the video input plug to the video input socket and the audio input plug to the audio input
sockets LIN1 and RIN1. The device provides a group of video input terminals and a group of audio
input terminals.
2. Touch AV Input on the main page to display the AV input interface.
Select Digital TV on the main page or press MODE on the control panel to display the digitalTV interface.
In the TV mode, touchAuto-search to automatically search channels in the wholeTV channel range. The
system automatically stores valid channels in the preset channel list in an ascending manner.Touch
or to change preset channels, or touch to select your desired channel on the list interface.
[ ]
[ ] [ ]
 Loading...