

Page 1
USER MANUAL
Solano HA Table
Programmable Controller
SIX BUTTON PROGRAMMABLE REMOTE CONTROL
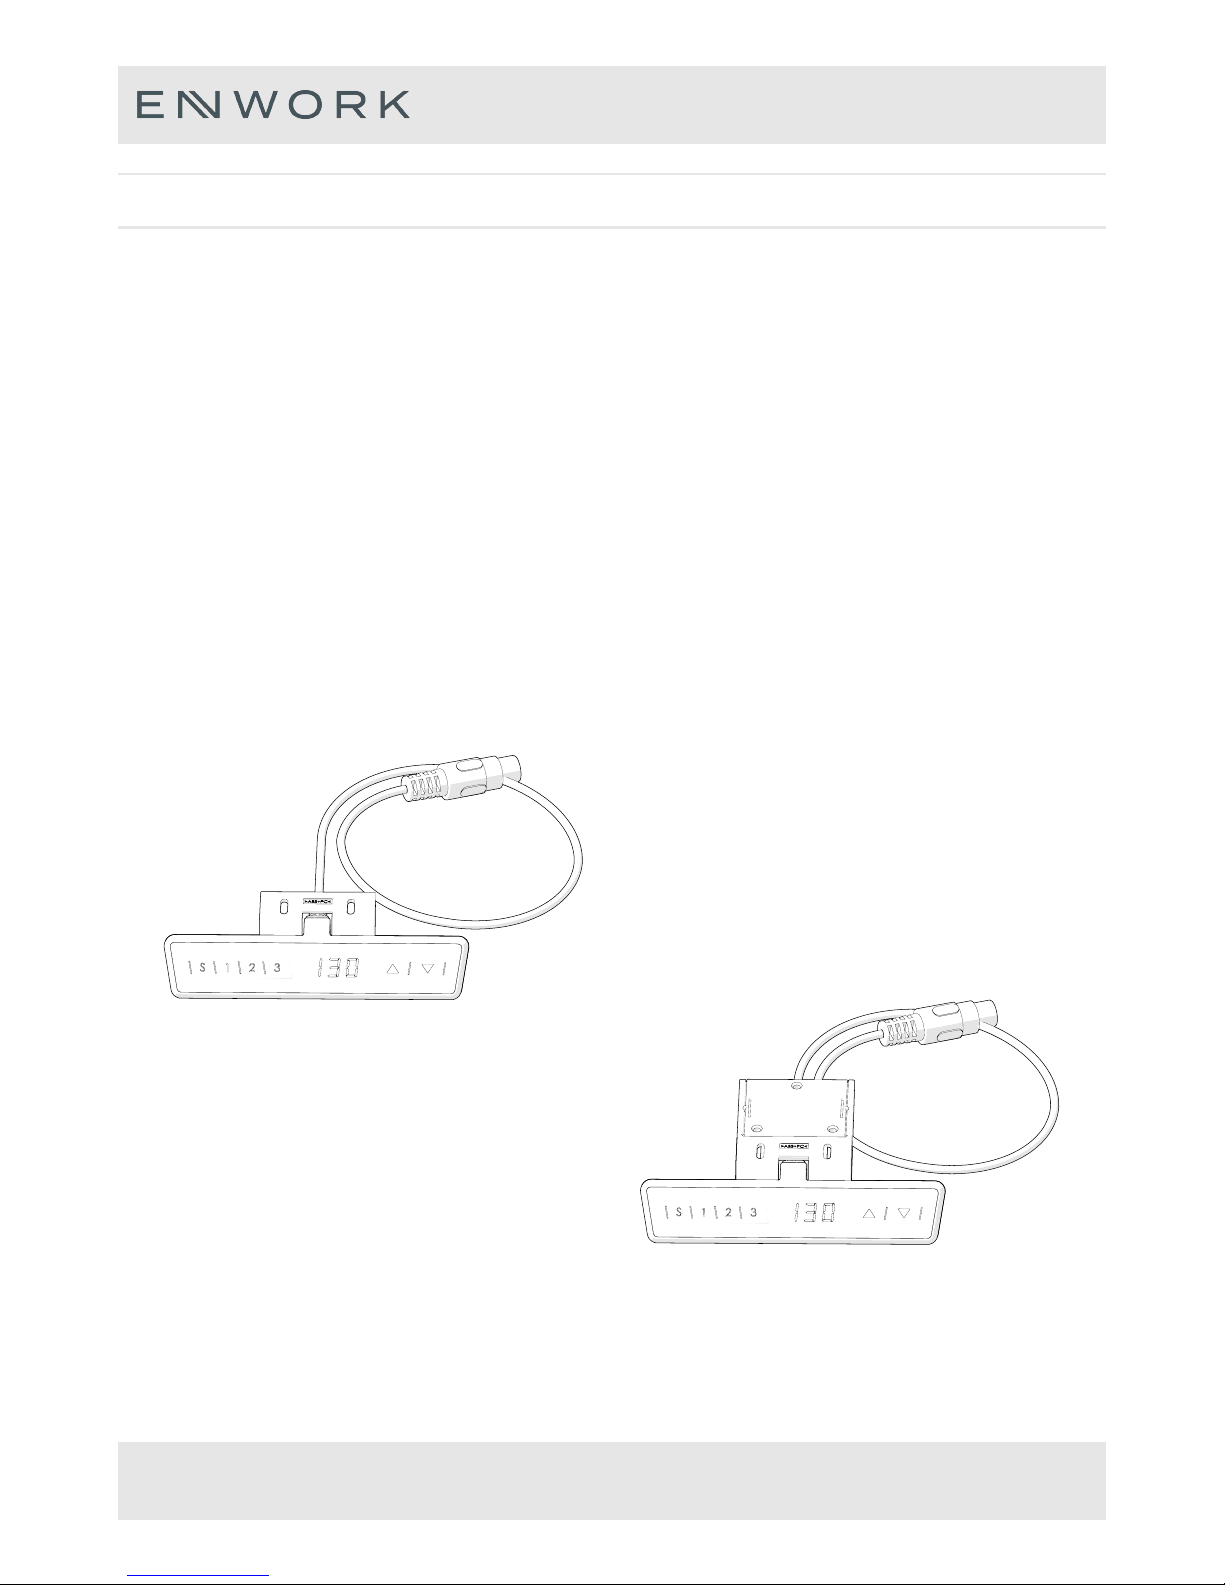
Fixed Version
Slide-out Version
LVTSWITCH
Page 2

PAGE 2
USER MANUAL
Table Of Contents
1. Installation Package
2. Assembly
• 2.1 Torque Guide
• 2.2 Assembly Step by Step
3. Operating Instructions
• 3.1 Zero Setting
• 3.2 General Operation
• 3.3 Container and Shelf Stop position
• 3.4 Change the displayed desktop position (cm or inch)
• 3.5 Saving a desktop position
• 3.6 Adjusting the desktop to a saved position
• 3.7 Reset control unit to factory settings
Page 3

PAGE 3
USER MANUAL
1.
Installation Package
When install the remote control, you will use below screws.
2.
Assembly
ST 2.9x19 (2 Pcs)
2.1 Torque Guide
• The tightening torque depends on the wood, but 2Nm shall not be exceeded.
ST2.9x19 ST3x18
Step 1 (Fixed Version)
Attach the Remote Control as illustrated above.
Step 1 (Slide-out Version)
Attach the Remote Control as illustrated above.
2.2 Assembly Step by Step
Please follow the steps below to attach the Remote Control.
ST 3x18 (3 Pcs)
Step 2
Connect Remote Control cable to the Control Unit as illustrated
above. (Control Unit picture may vary)
Fixed Version Silde-out Version
Page 4

PAGE 4
USER MANUAL
3.
Operating Instructions
Please read below instructions carefully before operating the system.
Up Down
3.1 Zero Setting:
When you use the height adjustable frame for the first time or when you wish to use a configured control unit on another identical electric
height adjustable frame, you have to reset the lowest desktop position to the minimum height .
• Press ▼ button and keep pressing it until the desktop has reached the lowest position (programmed desktop position).
• Press ▼ button again and keep pressing it. After about 5 seconds, the desktop will slowly move further down until it reaches the
absolutely lowest desktop position possible.
• Release ▼ button. The electric height adjustable frame can now be used.
Zero setting position is approximate 5mm lower than original starting height position.
3.2 General Operation:
This function enables you to adjust the frame upwards or downwards.
Press ▲ or ▼ button and keep pressing the button until the required frame height is reached.
The frame will continue moving upwards or downwards until you release the button or the maximum / minimum
height is reached.
3.3 Container and Shelf Stop position:
These 2 features can be used to limit the movement area of the desktop (e.g. if a container is placed underneath the desktop). A container
stop position can be defined in the lower half of the movement area, a shelf stop position in the upper half. If a container stop position is set,
this position will be the lower limit position. If a shelf stop position is set, this position will be the new upper limit position.
To store a container stop / shelf stop position, go on as shown below:
• Move the frame to the position where the container stop / shelf stop position shall be stored. Do so by pressing the ▼ or ▲ until you
reach the desired position.
• Press both up and down button (▲ & ▼) for 10 seconds. The control unit will click twice when the container stop / shelf stop position
is stored.
A container stop position can only be stored in the lower half of the movement area and a shelf stop in the upper half.
These steps have to be done for a container stop and a shelf stop position separately!
Setting Button
S
Memory Position 1
1
Memory Position 3
3
Memory Position 2
2
Page 5

PAGE 5
USER MANUAL
3.4 Change the displayed desktop position (cm or inch):
With this function it is possible to change the displayed desktop position from centimeters to inches or the other way around.
The desktop position itself is not affected by this function.
• Press the memory position 1, 2 and the ▲ button at the same time. Keep the button combination pressed for about 5 seconds.
Then release the buttons. The display will show S and a number, e.g. S 5.
• Press the ▲ button until the display reads S 5 if the display hasn't shown S 5.
• Press the Setting button S. If the display was set to centimeters, it will be changed to inches now. If the display was set to inches,
it will be changed to centimeters now.
3.
Operating Instructions
The menu timeout is 5 seconds, this means that the menu will close automatically without storing new settings if the
user does not press a key for 5 seconds.
3.5 Saving a desktop position:
This function allows you to save a defined desktop height. One desktop height can be saved per memory position
key. To save a position, proceed as follows:
• Adjust the desktop to the position you want to save. The display will show the desktop height (e.g. 73cm).
• Press the Setting button S. The display will read S --.
• Press the required memory position button (e.g. 2). The display will read S 2.
• The set desktop position will now be saved to the selected memory position button. You will hear an audible double click and after
about 2 seconds the saved desktop position will be displayed.
If you are switching on the control unit for the first time, all the saved positions are set to the lowest desktop
height (minimum desktop position).
3.6 Adjusting the desktop to a saved position:
You can use this function to adjust the desktop to a saved height.
To change to a saved position, proceed as follows:
• Press the required memory position button (e.g. 2) and hold it down. The desktop will move until it reaches the saved position.
If you release the key before the saved position is reached, the desktop will stop and the saved desktop position will not be
reached.
• The desktop has reached the saved position. Now release the memory position button. The display will read the current (saved)
desktop position.
To deactivate the container stop/ shelf stop position go on as shown below:
• Move the frame to any position in the lower half to deactivate the container stop. / Move the frame to any position in the upper half
to deactivate the shelf stop. Do so by pressing the ▼ or ▲ button until you reach the desired position.
• Press both up and down button (▲ & ▼) for 10 seconds. The control unit will click once when the container stop / shelf stop position
is deactivated.
These steps have to be done for a container stop and a shelf stop position separately!
Page 6

PAGE 6
USER MANUAL
3.
Operating Instructions
3.7 Reset control unit to factory settings:
With this function you can reset the control unit to its factory settings.
• Press the keys memory position 1, 2 and the ▲ button at the same time. Keep the button combination pressed for about 5 seconds. Then release the buttons. The display will show S and a number, e.g. S 5.
• Press the ▲ button until the display reads S 0 if the display hasn't shown S 0.
• Press the Setting button S. The control unit will be reset to its factory settings. The control unit is now in the same state as it is
when the commissioning is done.
After starting the menu, the display will read S and any number, for instance S 5. The number depends on the parameters of the control unit.
If one or more motors are changed in a system, the control box must be reset to factory settings and a manual reset
has to be performed!
3.8 Changing the desktop height displayed:
This function enables you to change the height shown on the display, but not the actual position of the desktop.
• Press the memory button. The display will read S -.
• Press ▼ button for approximate 5 seconds, the display will start flashing.
• Adjust the height displayed by pressing up or down button (▼ or ▲).
• Press the memory button. The height display is now set to the new desktop position entered.
This procedure does not alter the actual position of the desktop. It only changes the height displayed.
This function is only available for remote control with integrated display.
 Loading...