

Page 1
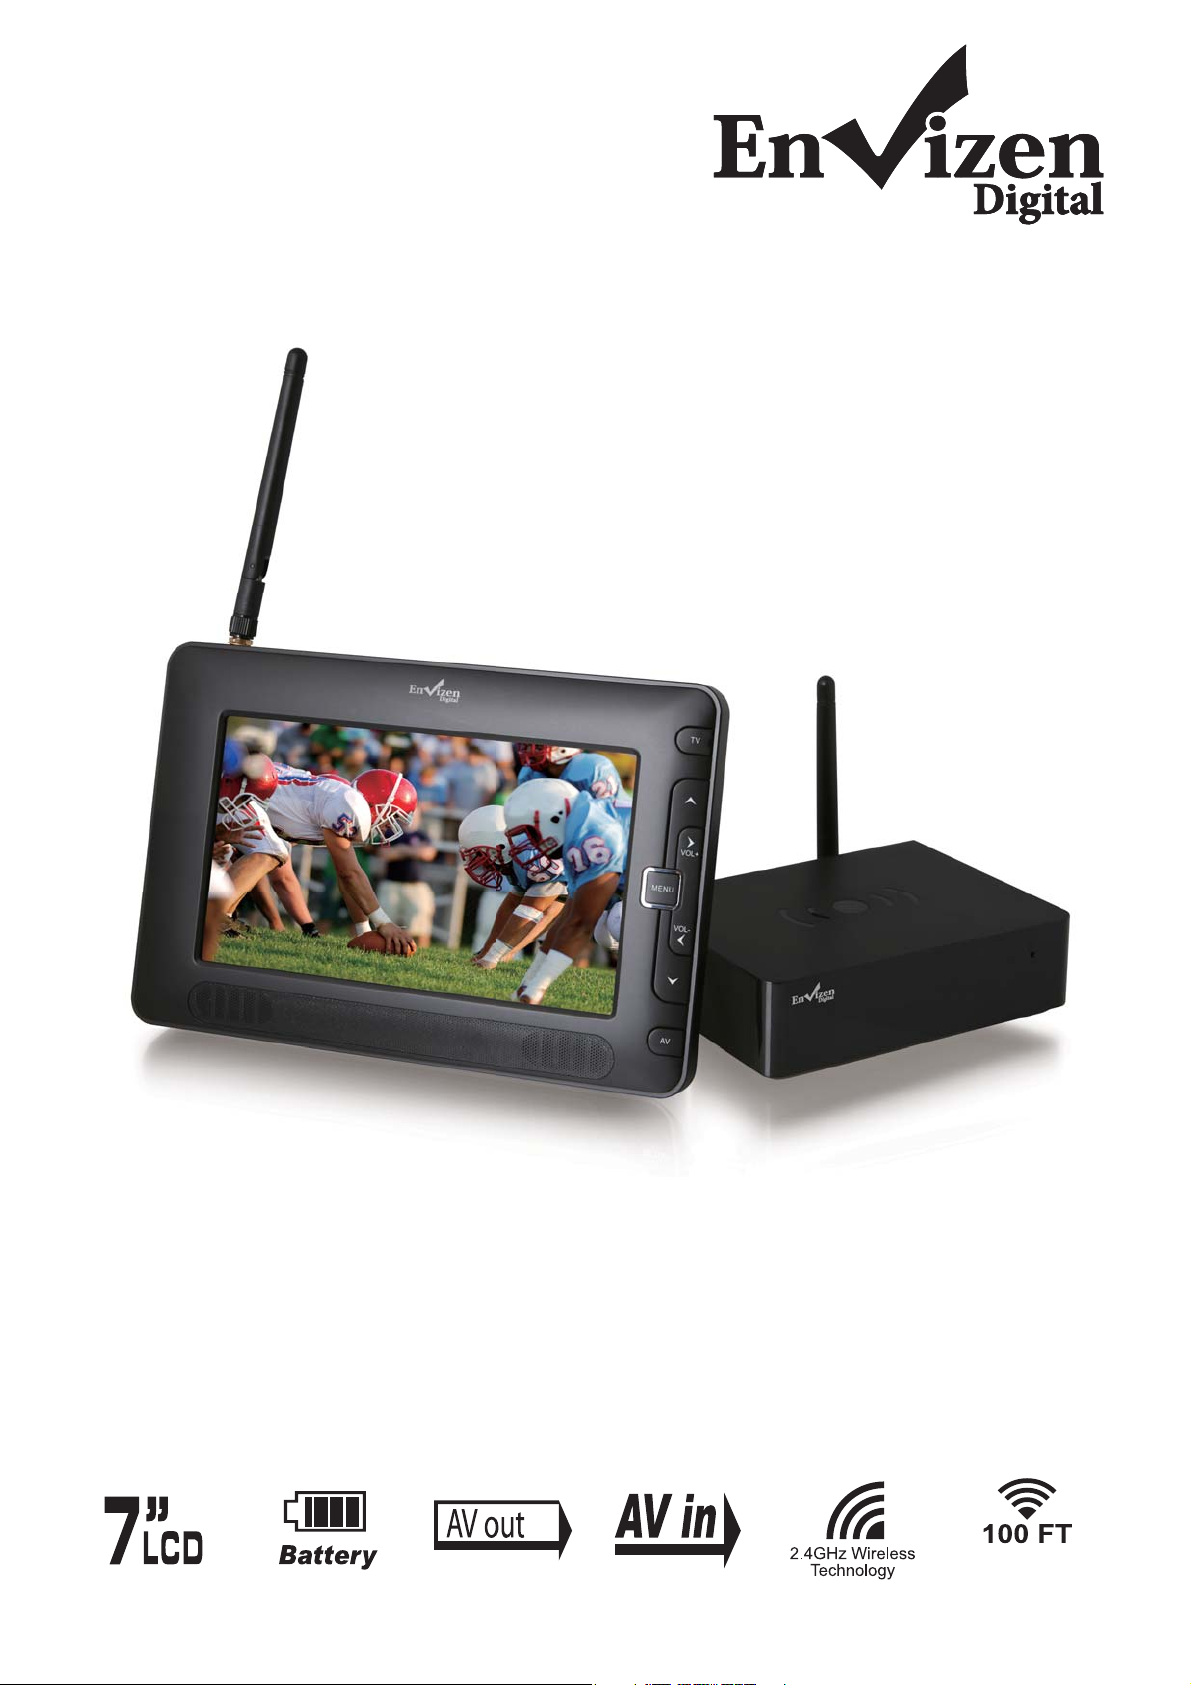
Home Roam TV
TM
Thank you for purchasing this product.
For your safety and best performance, please read this instruction before
first use, and keep this manual for future reference.
In case that you have any further questions after reading this manual,
please contact Customer Service at 1-866-709-1999 or email to
service@envizendigital.com
100 Feet Wireless
Transmission Function*
Page 2

Table of Contents
1. Safety Disclaimer........................................................................................................1
2. Introduction.................................................................................................................3
3. Features.......................................................................................................................3
4. What’s in the Box........................................................................................................3
5. Unit Functions.............................................................................................................4
5-1. Transmitter Module..............................................................................................4
5-2. Display Receiver..................................................................................................4
6. Setting up Home Roam TV.........................................................................................5
6-1. HR TV Transmitter Module Connections...........................................................5
6-2. HR TV Transmitter Module Operation................................................................6
6-3. HR TV Display Receiver Connections...................................................... .........6
6-4. HR TV Display Receiver operation.....................................................................7
6-5. Menu Setup on Display Receiver........................................................................8
Troubleshooting..............................................................................................................10
Appendix..........................................................................................................................11
● Pairing the Transmitter Module and Display Receiver.............................................11
● Quick Setup Reference...............................................................................................12
Warranty .........................................................................................................................13
Page 3
Safety Disclaimer
To prevent electric shock or fire hazard do not expose the unit to rain or moisture.
Warning To avoid electric shock or fire hazard,do not open the cabinet,refer servicing to
qualified person only.
This symbol is intended to alert the user to the presence of uninsulated “dangerous voltage” within
the product’s enclosure that may be of sufficient magnitude to
persons.
This symbol is intended to alert the user to the presence of important operating and maintenance
servicing instructions in the literature accompanying the appliance.
warning to avoid electric shock please ensure plug is inserted completely.
To reduce the risk of the fire or injury to persons or damage to the product, please read the safety
precautions before use.
Do not place Home Roam TV on or near any hot surface, such as stereo amplifier, transformer, radiator,
etc. Also, do not place anything on the top of the Home Roam TV.
constitute a risk of electric shock to
Warning: for safety we advise that it is not allowed to watch video during driving!
Please read this safety & operation
manual before you install and use the
unit,and please follow the instruction.
Pay attention to warning and do follow
them.
Route the power cord so that it is not
likely to be walked on or pinched by
items placed upon or against them,
paying particular attention to the plugs,
receptacles,and the point where the
cord exists from the appliance.
Please disconnect the unit under these
conditions:Lightning,Rainstorm or you
won't use it for a long time,this can avoid
electric shock.
Do not overload wall outlets,extension
cords or convenience receptacles
beyond their capacity,since this can
result in fire or electric shock.
Power jack is used to disconnect the
unit and should be easy accessible
everytime.
Do not place the unit on an unstable
object,the set may fall,causing serious
injury to a child or an adult,and serious
damage to the unit.
Never let any liquid spattered on the
unit.It might cause electric shock or fire
hazard.
Do not repair the unit yourself,opening
or removing the cover may expose you to
dangerous voltage or other hazards,
refer all servicing to qualified service
personnel.
Never place the unit near or over such
objects:for example,radiat or heat
register, stove
(including amplifier).
Unplug the unit from the wall outlet
before cleaning or polishing it.Do not
use liquid cleaners or aerosol cleaners,
use a cloth lightly dampened with water
for cleaning the exterior of the unit.
or other heat
sources
The power requirement of this unit is
100~240VAC,50Hz/60Hz.
Check the connection reguarly.If any
rupture of failure in insulation,call for
a maintenance man to replace them.
To ensure reliable operation,and to
protect it from overheating,the unit
must be put in somewhere well ventilated
Never place heavy object on the unit.
Notice:
Keep safety utilization of electric power
electrical wire of peripherals should
marked with safety label.and the wire
cannot be lose its security feature for
random replacement.following this can
avoid electric shock or fire hazard,in case
such accident happens,you
contact qualified technician.
should
.
1
Page 4

Safety Disclaimer
Do not use power-line operated sets
near water-for example,near a bathtub,
washbowl,kitchen sink,or laundry tub,
in a wet basement,or near a swimming
pool,etc.
Unplug the unit and refer servicing to
qualified service personnel under the
following conditions:
A.when the power cord or plug is
damaged or frayed.
B.If liquid has been spilled or objects
have fallen into the unit.
C.The unit has been exposed to rain or
water.
D.If the unit does not operate normally
when following the operating
instructions.
copyrights:
the copyright protected content cannot
be copied.broadcasted,screened,cable
casted,played publicly and
rented,
unless it is authorized.
E.If the unit has fallen or the cabinet has
been damaged.
F.When the unit exhibits a distinct
change
in performance-this indicates
for service.
a need
Tips:Upon completion of any service or repairs
to the set,ask the service technician to perform
routine safety checks to determine that the unit
is in safe operating condition.
2
Page 5

Introduction
Home Roam TV
Congratulations on the purchase of your Envizen Digital Home Roam TV.
Home Roam TV allows you to view any source device connected to the transmitter module on the
7” LCD Display Receiver anywhere in your home, up to 100 Foot range.
You may connect up to two source devices (Cable / Dish set top box, TV, DVD, Blu-ray, VCR or
Media Player) to Home Roam TV. (Two sets of cables are supplied)
Note: Home Roam TV has been tested in excess of 100 foot. Your performance may vary depending
on environmental conditions.
Features
● 2.4Ghz wireless audio/video signal transmission
● Range: Up to 100 Feet
● Built-in battery for up to 2 hours usage
● 7” TFT LCD widescreen display
● Contract Ratio: 400:1
● Brightness: 200cd/m2
●
Bonus earphone included for private listening.
What’s in the box
Display Receiver
AC/DC Adapter (2pcs)
Transmitter Module
(2PCS)
Home Roam TV
Thank you for purchasing this product.
For your safety and best performance, please read this instruction before
first use, and keep this manual for future reference.
In case that you have any further questions after reading this manual,
please contact Customer Service at 1-866-709-1999 or email to
service@envizendigital.com
100 Feet Wireless
Transmission Function*
(2PCS)
3
Page 6

Unit Functions
5.1 Transmitter Module
12345
1.ANT: 2.4G wireless audio/video signal antenna.
2.TV IN: R/L/CVBs input, from TV, Cable or Dish set top box.
3.TV OUT: R/L/CVBs output to TV set.
4.AV: AV combination input jack.
5.POWER: Connect 9V/1A DC power.
6.ON/OFF: Turn on/off the Transmitter Module.
6
5.2 Display Receiver
13
1
8
9
10
11
12
1.TV: Switch to TV/Cable or Dish Set Top Box.
2. : Adjust Brightness/Contrast/Saturation under Menu setup.
3. /VOL+: Adjust receiver unit volume up, and select Brightness/Contrast/Saturation/Reset
under Menu setup.
4.MENU: Go into Menu setup interface.
5. /VOL-: Adjust receiver unit volume down, and select Brightness/Contrast/Saturation/Reset
under Menu setup.
6. : Adjust Brightness/Contrast/Saturation under Menu setup.
7.AV: Switch to AV input channel.
8.ON/OFF: Turn on/off the Receiver.
9.USB Port (Firmware Upgrade):
Do not open the rubber plug. It’s only used for future upgrades
if recommended by the manufacturer.
10.AV OUT: Pass-through AV output to other display/audio device.
11.EARPHONE: Stereo headphone jack. Please use only the provided earphones included for
optimal results.
12.DC IN 9V: Connect to 9V/1A DC power.
13.ANT: 2.4G wireless audio/video signal antenna.
2
3
4
5
6
7
4
Page 7

Setting up Home Roam TV
View any source connected to the transmitter module as an extension of the electronic device: Cable /
set top box, TV, Blu-Ray player, DVD player, VCR or Media player. In this mode, you can operate the
Receiver by powering on/off, menu setup,volume controls and switching different channels on the Home
Roam TV Display Receiver.
6-1. HR TV Transmitter Module Connections
Connect Home Roam TV transmitter module input to the audio video (A/V) outputs of your home
electronic device ( cable box, TV, blu-ray, DVD, VCR or media player), using A/V cables provided.
There are two AV INPUTs: TV IN (TV/Cable or Dish Set Top Box) and AV combination input jack.
Select one or two AV INPUTs which you would like to connect. For example, connect your home
television, cable box from [AV OUT] into either Home Roam TRANSMITTER [TV IN] or [AV] inputs,
using the included RCA to RCA cable.
NOTE: Home Roam TV is ideally suited for connecting your cable / Dish Set top box as your TV set
does not have to be turned on in this mode. Please read the following picture.
TV or Set Box
Tips:
a) You can also use the AV cable to connect the transmitter to all devices with AV outputs. You just
need to switch the different sources you wish via [TV] [AV] button on the receiver panel.
b) Use mini plug to RCA AV female cable adaptor with RCA to RCA cable, included in the package,
to connect [AV] inputs. Connect regular RCA to RCA AV cable to the female end of the adaptor.
1.VCR
2.Media Player
3.DVD or BD Player
5
Page 8

Setting up Home Roam TV
Pass-through to a TV set: CONNECT HOME ROAM TV TRANSMITTER MODULE [TV OUT]
A LOCALLY CONNECTED TV SET TO PASS THROUGH ANY PROGRAM SOURCE CONNECTED
TO [TV IN].
NOTE: Not required if cable Set Top Box is connected to TV via HDMI.
TO
6-2. HR TV Transmitter Module Operation
POWER UP HOME ROAM TV TRANSMITER MODULE
1.Plug in the AC/DC adapter to the Transmitter Module and a power outlet and press the button “ON”.
IMPORTANT: The Home Roam power adapter is only for use with Home Roam. Do not plug
the Home Roam power adapter into any other products.
2.The power LED light on indicates the Home Roam transmitter module is powered on.
3.Turn off the transmitter module unit will also turn off the LED indicator.
4.Red LED light indicates signal transmission is not ready, while Orange blinking LED light indicates
normal signal transmission state.
6-3. HR TV Display Receiver Connections
TURN ON YOUR SOURCE DEVICE AND HOME ROAM DISPLAY RECEIVER.
1.Plug in the AC/DC adapter to the HR Display Receiver a power outlet and slide up the “ON/OFF”
button on the left hand side of the Receiver unit.
IMPORTANT: The Home Roam power adapter is only for use with Home Roam. Do not plug
the Home Roam power adapter into any other products.
2.The power LED light on indicates the HR Display Receiver is powered on and charging the battery.
Tip: A rechargeable battery is incorporated into the 7” LCD Display receiver. It is recommended that
6
Page 9

Setting up Home Roam TV
the battery be charged for 3 hours with the power off; While the battery needs to be charged
continuously for 8 hours if the Display Receiver is in use.
3.The battery life inside the receiver supports up to 2 hours usage without the adapter connected.
4.When the Receiver unit is switched off –
(a) A Red LED light indicates battery is being charged while the Receiver is not in use;
(b) LED light will be turned off whenever the battery is fully charged.
5.When the Receiver unit is switched on –
(a) Blinking Green power LED light indicates normal signal transmission state without charging the
battery;
(b) Alternate blinking Red and Orange LED light indicates normal operation while charging the battery;
(c) Alternate blinking Green and Orange LED light indicates battery capacity is low and plug-in power
is required to charge the battery immediately.
6-4. HR TV Display Receiver Operation
After properly setting up the Transmitter Module and Display Receiver units following the procedures
described above, you are ready to enjoy it and perform operation.
The Display Receiver screen will now display the relayed video and audio source program content.
Select the button on the Display Receiver that corresponds to the device you have connected ,
(TV/AV) input to view your source device. The Source input Channel will be displayed on the top left
hand corner of the screen whenever the corresponding button is clicked. It will disappear after 3~5
seconds after the button is released.
The channel you selected must correspond with the channel connected to the Transmitter Module.
TV (or cable /dish set top box) input for an example:
A. Wait approximately one minute to warm up.
B. Switch your Home Roam TV LCD Display Receiver to TV mode, you will see the same
screen as your Cable / set top box or TV screen. Note source TV set does have to be
turned on to view program on Cable / Set top box.
C. You may connect with other devices such as DVD player, cable / dish box, VCR, etc.
Simply switch the corresponding mode by clicking buttons on the panel.
NOTE: Should there be a problem receiving the source program on the Home Roam Display, see
“PAIRING” procedure outlined in Appendix to correct the problem.
Tip:
communication between the units.
Tip: Increase the source device audio level (if adjustment available) to a comfortable listening
level and then use the Home Roam TV display receiver volume controls to a comfortable level.
Both Transmitter Module LED light and Display Receiver LED blink frequently to indicate normal
7
Page 10

Setting up Home Roam TV
6-5. Menu Setup on Display Receiver
Press [MENU] key on the display receiver panel to go into the Menu Setup interface. The Receiver
screen will now display the following content. The users can select Brightness/Contrast/Saturation
through and keys as what you like, then select the appropriate values through and keys
according to the circumstances.
Demo Playback
The display receiver also includes a 60 seconds video clip about the introduction of Home Roam
TM
.
TV
When the Transmitter Module is on the mode of Power ON, press "MENU" key on the display panel
to enter the Menu Setup interface. The receiver screen will now display the following content.
Then press /VOL+ on the display panel to start the video playback, and the video will be repeated
automatically until any key on the display panel pressed.
When the Transmitter Module is on the mode of Power OFF, press any key on the display panel to start
the video playback except the keys of /VOL+ and /VOL-, and the video will be repeated automatically
until any key on the display panel pressed except the keys of /VOL+ and /VOL-.
8
Page 11

Setting up Home Roam TV
Reset to Factory Default
The values have been set under an appropriate level before leaving factory, but if the users adjust the
values at an undesirable status, shown as below picture, the users can reset the values to factory
default.
Press and keys to select [Reset to factory default], then press or keys to set it OK,
just like below picture:
NOTE: Please exit the Menu setup first, then adjust the receiver volume up and down.
9
Page 12

Troubleshooting
A. Blue Screen is displayed with only audio coming through -
1.Press the button on the Display Receiver to select the corresponding source connected to the
Transmitter Module
2.Verify video connections to both Transmitter Module and Display Receiver are matched;
3.The A/V connection cable between Source Device and the Transmitter Module unit is completely
inserted into the socket at both ends;
4.Verify the quality of the A/V cable by switching to a different A/V cable;
5.Restart both the Transmitter Module and the Display Receiver by a power off/on cycle.
B. Video is displayed without audio –
1.Press the button on the Display Receiver to select the corresponding source connected to the
Transmitter Module
2.Verify audio connections to both Transmitter Module and Display Receiver are matched;
3.The A/V connection cable between Source Device and the Transmitter Module unit is completely
inserted into the socket at both end;
4.Verify the quality of the A/V cable by switching to a different A/V cable;
5.Adjust the volume of the Display Receiver to a comfortable level;
6.Restart both the Transmitter Module and the Display Receiver by a power off/on cycle.
C. Jittery screen display, clipped video and audio –
1.Please make sure that the video broadcast / playback format of the source device conforms to
NTSC format.
2.Make necessary adjustment to the source device.
D. Skipping video image, or frozen video image –
1.Please make sure that the Home Roam Display Receiver unit is not too far away from Transmitter
Module unit, preferably within 100 feet away from each other.
E. Black screen without any video image displayed –
1.Please make sure if the Transmitter module and Receiver are both connected to the DC power
and with the power turned “ON”;
2.Make sure that the battery of the Display Receiver is fully charge and the unit is powered on when
the wall plug is not in use;
3.Please make sure if the Transmitter module and Receiver are paired correctly (See Appendix)
NOTE: You cannot control the source device with the Display Receiver. This may only be accomplished
at the source device.
10
Page 13

Appendix
PAIRING THE TRANSMATTER MODULE AND DISPLAY RECEIVER
●
Home Roam TV is shipped from the factory already paired between the transmitter and the Home Roam
Display. Should the pairing ever be disrupted, you will not receive any video or audio on the display.
STEP 1: TURN ON BOTH UNITS
Make sure both the Transmitter Module and the Display Receiver are properly powered and turned on.
STEP 2: LOCATE PAIRING BUTTON ON THE BACK OF THE DISPLAY RECEIVER
Use a toothpick or a ball pen tip to activate the PAIRING sequence by pressing the Yellow button hidden
in the perforation of the rear panel of the Display Receiver. The button can be located on the 1st cell of
the 4th row as indicated in the following figure. Red letter “PAIRING” will be displayed on the screen after
you flip over the unit.
STEP 3: LOCATE PAIRING BUTTON ON THE BACK OF THE TRANSMITTER MODULE
Use a toothpick or a ball pen tip to activate the PAIRING sequence by pressing the Black button above
the antenna socket on the rear panel of the Transmitter. Pairing sequence starts automatically. “PAIR
OK” will be displayed on the Display Receiver screen after successful pairing of both units.
11
Page 14

Appendix
STEP 4: COMPLETION OF THE PAIRING SEQUENCE
You may now operate the units normally.
Tip: During the pairing process, do not depress the pairing button more then 15 seconds.
Tip: During the pairing process, do not turn off either unit or lose power.
● Quick Setup Reference
1.VCR
2.Media Player
Main Viewing Source
3.DVD or BD Player
Remote Viewing HRTV
Select [TV]source
channel to receive
TV programs
12
Page 15

Warranty
Warranty Terms and Conditions
Envizen Digital (“Envizen”) warrants your Envizen products against defects in material and workman ship
during the warranty period from the original date of purchase, subject to the following terms and conditions.
If a product proves to be defective in material or workmanship during the warranty period, Envizen will, at
its discretion, repair or replace the product with the same model provided the purchaser anheres to certain
return authorization procedures and guidelines.
Warranty Period
All Envizen televisions/media players/DVD players/speaker systems/digital photo frames/2.4G wireless
devices are warranted for one (1) year for parts and ninety (90) days for labor, starting from the original
date of purchase/invoice. After warranty period, the customer is responsible for parts and labor charges.
Rechargeable batteries are warranted for ninety (90) days for parts and labor.
Non-rechargeable batteries are not covered by warranty.
A new warranty does not start with the replacement of a new product.
This Warranty Does Not Apply to:
1. Any product, on which the serial number has been defaced, modified or removed.
2. Damage, deterioration or malfunction resulting from:
a) Accident, misuse, neglect, fire, water, lightning, or other acts of nature, unauthorized product
modification, or failure to follow instructions supplied with the product.
b) Repair or attempted repair by anyone not authorized by Envizen.
c) Any damage of the product due to shipment.
d) Removal from or installation to the product.
e) Causes external to the product, such as electric power fluctuations or failure.
f) Use of supplies or parts not meeting Envizen’s specifications.
g) Normal wear and tear
h) Any other cause which does not relate to a product defect.
3. Cosmetic damage by purchaser, such as marking, discoloration, scratches, dents, gouges or any other
defacement.
4. Physically damaged products by purchaser, such as broken PCB, Housing, damaged LCD Module.
5. No Defect Found (product returned to Envizen as defective but failure is not duplicated by Envizen’s
test method).
6. Product without proof of purchase. (The proof of purchase should be one of the following
documentations: purchase receipt, gift receipt, sales invoice, and packing list that contains the product
model number, price, vendor, and purchase date.)
7. Any damage caused by battery leakage.
How to Get Warranty Service
1. To obtain the warranty service, you will be required to reach Envizen’s Customer Service by phone
at 1-866-709-1999 or by email at service@envizendigital.com for assistance.
a) Customer information (name, day-time phone number, e-mail address and/or residential address)
b) Proof of purchase (purchase receipt, gift receipt, sales invoice, order No#, and/or packing list)
c) Product model number
d) Product serial number
e) A description of the problem
f) Payment information (If any payment is required, you will be asked to provide this information
beforehand. At this moment, we only accept personal check, money order, credit card or cashier’s
check. Sorry for the inconvenience.)
2. We will issue you an RMA number for your returned item. Please take or ship product with the RMA
number to Envizen service center. All products should be returned in secured packaging, preferably in
13
Page 16

the original package, with the complete set of accessories.
3. Upon receiving the product, depending on the condition of the defects, Envizen will repair or replace
product, and ship it back to the customer within 2-4 weeks.
4. For additional information, please contact Envizen Customer Service.
Out of Warranty Repair
For additional information on obtaining an extended warranty service, contact Envizen Customer Service
Department by e-mailing service@envizendigital.com or call 1-866-709-1999.
Products out of warranty requiring replacement will be reviewed individually, but all will require the
shipping and handling fee.
During the period of product warranty, we will answer your basic configuration, setup and troubleshooting
questions; and when necessary, we will provide you with all the instructions on how to return your product
for repair. For more customer service and support inquiries, please call 1-866-709-1999 or e-mail us at
service@envizendigital.com.
14
 Loading...