

envivo 57906 User Manual

Manual
USB DJ Controller
Page 2
Page 3
Contents
Welcome .............................................................................. 4
Getting started .................................................................... 5
Top panel features .............................................................. 6
Disposal .............................................................................. 19
Warranty ............................................................................. 20
Warranty Card ................................................................... 21

Page 4
Welcome
You have made an excellent choice with the purchase of this
quality product supplied by Accession ApS.
By doing so you now have the assurance and peace of mind,
which comes from purchasing a product that has been
manufactured to the highest standards of performance and
safety, supported by the high quality standards of Accession ApS.
We want you to be completely satisfied with your purchase, so
this product is backed by a comprehensive manufacturer’s
3-year warranty and an out-standing after sales service through
our dedicated Helpline.
We hope you will enjoy using your purchase for many years to
come.

Page 5
Getting started
Installation
Make sure to remove all foam and plastic padding.
Connect all cables.
Always disconnect from computer so it is not getting any power
before cleaning.
Damages caused by non-observance are not subject to
warranty.
Page 6
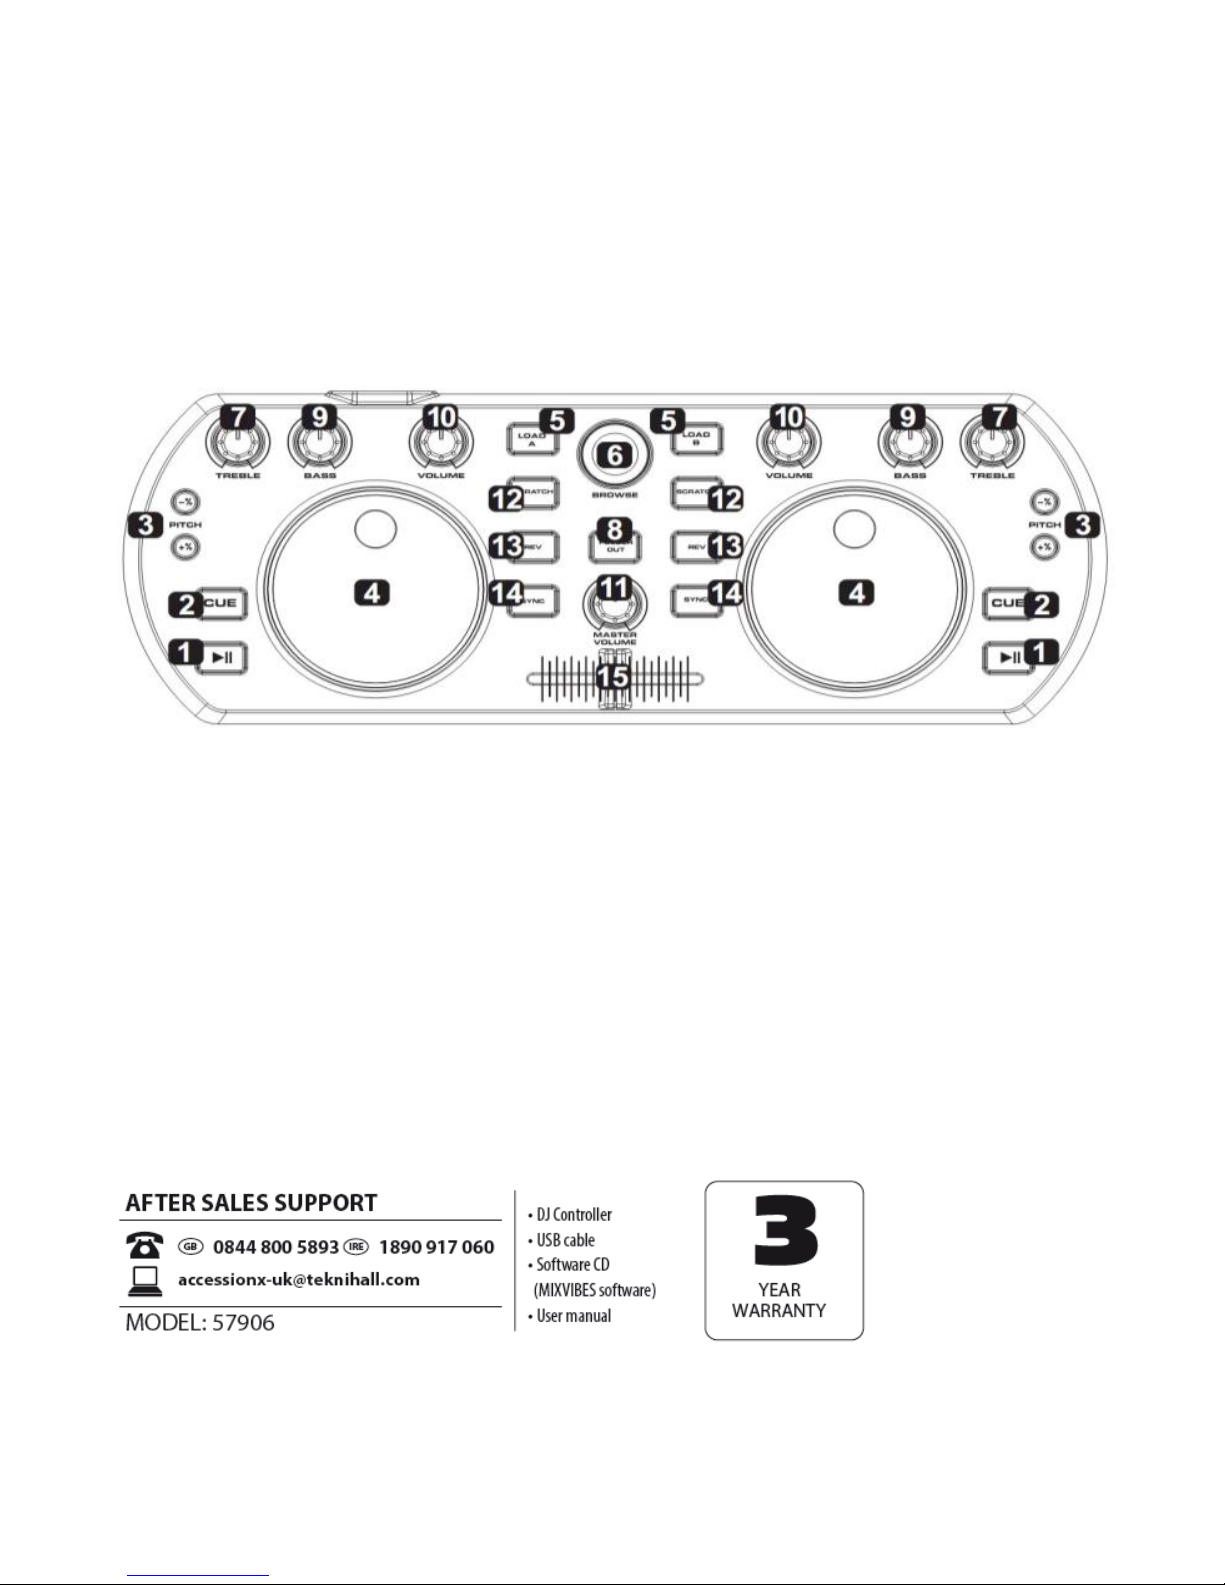
Top panel features
BELOW IS A DESCRIPTION OF THE FUNCTIONS OF THE CONTROL.
1. PLAY/PAUSE Each time you press the PLAY/PAUSE button,
the operation changes from play to pause or from pause
to play.
2. CUE By pressing the CUE button you will return to the track
to the CUE point and pause it (if you have not set a CUE
point with the PAUSE button yet, the CUE point will be the
beginning of the track). When you are at the CUE point,

Page 7
press and hold the CUE button to start playback. When you
release the CUE button, the track will return to the CUE
point and the track will be paused. While you are holding
down the CUE button, you can press PLAY then release
both buttons to allow playback to continue normally.
3. PITCH ± Pressing one of these buttons will bend the pitch of
the track on that deck, slightly decreasing or increasing its
speed. By clicking on both buttons at the same time, the
track will return to its normal pitch (this is an important
feature when manually aligning the beats of two tracks).
4. JOG WHEEL Scratches or searches through the track on
that deck, depending on the JOG WHEELS’ current mode
(as set by the SCRATCH /SEARCH button): Scratch mode:
When the Scratch LED is lit, moving the JOG
WHEEL ”Scratches” on the track on that deck - an effect
similar to moving the platter on a turntable.
 Loading...