

Page 1
Page 2
TABLE OF CONTENTS
TABLE OF CONTENTS 1
CARING FOR YOUR LCD MONITOR 2
UNPACKING 2
CONNECTING 3
STARTUP 4
BASIC SETUP 4
IMAGE SETTINGS USING THE OSD MENU 5
OSD MENU FUNCTIONS 6
TROUBLESHOOTING 8
TECHNICAL SPECIFICATIONS 9
PRECAUTIONS
z The monitor may be damaged if placed too near a source of heat.
Be aware of the location of radiators, cookers, open fires etc.
z Do not cover the slots and openings on the back or top of the cabinet
as the monitor requires ventilation. The monitor should be located in
a well-ventilated room to prevent the possibility of overheating.
z Do not allow sharp objects such as knives, pens, or pencils near the
screen. If such objects touch the screen, the LCD panel will be
permanently scratched.
z When cleaning this monitor, disconnect it from the electric socket to
avoid any danger of electrocution. A soft, lint-free cloth should be
used to clean the outside of the monitor. A cloth very slightly
moistened with a mild detergent solution will clean stubborn stains.
Keep liquids away from the display screen, including sprays. Do not
spray liquid directly - it is best to lightly spray on to a cloth and wipe.
If liquid gets inside the monitor it can cause electrical shock and/or
damage to the unit.
z If you encounter a problem, please check the "Troubleshooting"
section first. If this does not resolve the problem do not attempt to
repair the monitor by yourself; opening or removing covers can lead
to injury or death through electrocution among other hazards.
Please contact a qualified engineer if you find the troubleshooting
section does not help.
English
Deutsch Français Italiano Español
Nederlands
1
Page 3
CARING FOR YOUR LCD MONITOR
z First, unplug the power cord from the wall socket
z If the LCD screen is extremely dirty, clean it with a moist cloth. Use only warm
water and then wipe the monitor dry. Solvents or harsh cleaners can damage the
housing. Clean the display surface only with a soft cloth, otherwise you may
damage the display’s coating
z If the monitor is only slightly dirty, clean it using a soft, dry and antistatic
cloth.
z The LCD monitor’s screen surface is very sensitive. Please avoid any
contac t w ith th e s urfac e ( fi nger, pencil, etc.) and be especially
ca ut ious d ur ing transportation since jolts and shocks can cause the
screen to become scratched (always use the original packaging).
UNPACKING
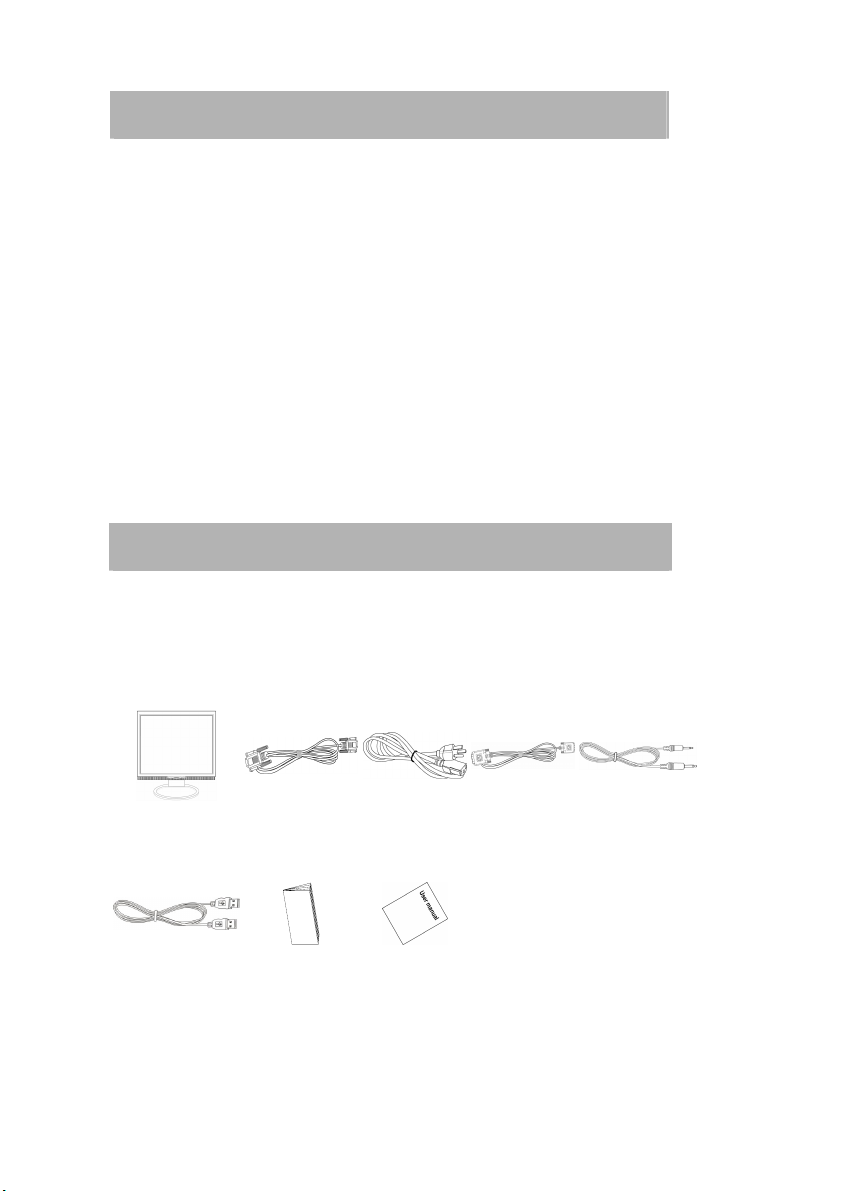
Carefully lift the monitor out of the packaging and make sure that all components are
included (see fig. 1). Save the original box and packing material in case you have to ship
or transport the monitor. To set up the device, you must fit the monitor base together.
Monitor 1 pc 1 pc 1 pc 1 pc
Figure 1 Signal Cable Power Cable DVI Cable Audio Cable
1 pc
USB Cable
1 pc 1 pc
QSG
(Quick Start
Guide)
Manual
2
User’s
Page 4

CONNECTING
Î To connect the monitor to your computer
1. Make sure that the computer and monitor are unplugged.
2. Connect the 15-pin signal cable to the monitor and the computer.
If you have a graphic card with a digital DVI-D connector (24-pin socket), then connect one
end of the DVI-D cable to the DVI-D connector of your monitor, the other end to the
computer.
Î Connecting the audio cable
If your computer is equipped with an audio output port, then connect one end of the sound
cable to the audio input connector of the monitor and the other end to the Line-Out
connector of the computer.
Î To connect the monitor to the power source
1. Connect the power cable to the power socket of the monitor.
2. Connect one end of the power supply cable with the power supply and plug it into an
electrical outlet.
Î USB Ports
The monitor features four USB ports (one upstream and three downstream), which are
located on either side of the monitor stand.
.
English
Deutsch Français Italiano Español
Nederlands
3
Page 5

STARTUP
1. First start your computer and then turn on your monitor using the power switch. The
status indicator should light up blue.
2. Adjust the image to meet your requirements (see the following sections
“Basic Setup" and “Image settings using the OSD menu" ).
3. If there is no image displayed on the monitor, consult the section
“Troubleshooting”.
BASIC SETUP
Î A ut oma ti c Ima ge Adj ustme nt (not available in DVI digital mode)
You can adjust the image settings (such as brightness, contrast, image position,
phase, etc.) manually or by using the LCD monitor’s automatic image adjustment
feature. This will adjust the image parameters to their optimal settings for the
current graphics mode. Press AUTO (⑥ in fig. 4) to launch the automatic
adjustment. The process will take a short while until completed.
Î Setting the volume directly
You can adjust the volume directly by pressing button > (② in fig. 4) when the OSD menu
is not displayed on screen. You can then change the volume by pressing the buttons < or
> (① and ② in fig. 4).
Î Shortcut for adjusting brightness and contrast
You can adjust contrast and brightness directly by pressing the < button (① in fig. 4) while
the OSD menu is not displayed. then you need to press < or > to select either brightness
or contrast then press menu to activate it, Press the > button (② in fig. 4) to increase the
contrast/brightness or the < button (① in fig. 4) to decrease it.
Î Locking and Unlocking the OSD
To lock and unlock the OSD menu, hold down the button combination < (① in fig. 4) and
MENU (⑤ in fig. 4) until a corresponding message is displayed.
4
Page 6

IMAGE SETTINGS USING THE OSD MENU
The OSD menu is a window on your screen that allows you to view and change display
settings. To change an OSD setting:
Press the MENU button (⑤ in fig. 4) to display the OSD menu on the screen.
1. There are a total of 5 OSD submenus divi ded by categories. Select the desired
submenu by pressing the OSD button < or > (① and ② in fig. 4; see section “OSD
Menu Functions").
2. Press the OSD button MENU (⑤ in fig. 4) to activate the selected function or
associated submenu.
3. If you selected submenu, now select the sub-function you want using < or > (① and
in fig. 4)
②
4. Set the desired value using the OSD button < or > (① and ② in fig. 4)
5. The current settings are automatically saved when you return to the previous level or
exit the OSD menu. Repeat steps 2–5 to make further adjustments as needed.
6. The OSD menu automatical ly disap pears if no changes are made for more
than 45 seconds (default setting). The current settings will be saved. You can
close it manually by pressing the button AUTO (⑥ in fig. 4).
7. You can also use the AUTO (6 in fig. 4) to go back to previous level of menu or
sub-menu.
English
Deutsch Français Italiano Español
Nederlands
5
Page 7

OSD MENU FUNCTIONS
Brightness/Contrast
Brightness: Adjusts brightness by using the buttons < or > (①and ② in fig. 4).
Contrast: Adjusts screen contrast by using the buttons < or > (① and ② in fig. 4).
Image Control (not available in DVI digital mode)
Auto Adjustment: Automatically selects the optimal settings for image parameters (image
position, phase, etc.) by using the button MENU (⑤ in fig. 4).
H. Position: Controls the picture’s horizontal position.
V. Position: Controls the picture’s vertical position.
Clock: Sets up the internal clock. Larger values make the displayed image appear wider;
smaller values make it appear compressed.
Phase: Adjusts the internal clock’s time lag in order to optimize the screen image.
Sharpness: Controls image sharpness (only for resolutions less than 1280 × 1024 pixels).
Color
This menu lets you select a preset color temperature
(9300K, 6500K or sRGB) by pressing the OSD buttons < or > (① and ②in fig. 4). Changes
to the color temperature take immediate effect on screen. If you wish to set individual color
values, select the Custom Color option. Then press the MENU button (⑤in fig. 4) to select
the red, green and blue settings and set the desired value using the OSD buttons < or > (
and ② in fig. 4). The current settings are automatically saved when you return to the previous
level or exit the OSD menu.
①
OSD Control
H. OSD Position: Controls the OSD menu’s horizontal position.
V. OSD Position: Controls the OSD menu’s vertical position.
OSD Timeout: Determines how long (in seconds) the OSD menu waits before closing
automatically after no action has been performed.
6
Page 8

Other
Language: English, French, Spanish,
Input: Controls the selection of the input signal. The monitor allows you to make the
following connections: analog graphics card via the 15-pin mini D-Sub interface., digital
graphics card via the 24-pin DVI-D interface.
Speaker Volume: Adjusts the monitor loudspeaker output volume.
Information: There is an optional OSD window (on/off) that displays the newly adjusted
screen resolution settings.
English
Deutsch Français Italiano Español
Nederlands
7
Page 9

TROUBLESHOOTING
Blank Screen
Power indicator is off
z Make sure the power cable and the power adapter are connected properly
(see section “Connecting" ).
z Make sure that the monitor was turned on using the power switch (see
section “St ar tup " ).
Power indicator lights orange
z A screen saver may have activated automatically after a certain period of
inactivity. Press any key on your keyboard or move the mouse.
“Check signal cable" message
z Is the signal cable connected to the monitor and the PC’s graphics port
(see section “Connecting" )?
z Is the PC turned on (see your PC’s documentation)?
Display Problems
Image is displaced to the left/right or to the top/bottom
z If the image appears normal but off-center, you can adjust it using the
OSD functions. For further information, see chapter “ Basic Setup" ,
section “Auto Image Adjustment" .
Image flickers or is shaky
z Perhaps setup file chosen for the monitor is incorrect. For information on
monitor setup under Windows®9x/ME/2000/NT/XP consult the
“ Configuration" section.
Image is blurred
z Check brightness and contrast settings (see chapter “ OSD Menu
Functions", section “Brightness/Contrast" ).
z Check the resolution setting (see “Other" functions in the “ OSD
Menu Functions" section).
Color problems
z If the colors are off (e.g. white is not really displayed as white, etc.), you
should adjust the color temperature (see“ Color" function in section
“ OSD Menu Functions" ).
8
Page 10

TECHNICAL SPECIFICATIONS
Display Characteristics
Display Type 17“ active matrix Thin Film Transistor
Liquid Crystal Display
Viewable Diagonal Area 43.18 cm / 17”
Native (Maximum) Resolution 1,280 x 1,024 pixels
Colors 16.7 million (6bpp+dithering)
Dot Pitch 0.264 mm
User Interface
Controls Mains power switch, Automatic image
On-Screen Display Functions Contrast, Brightness, Vert. & Hor. Image
Input Signal
adjustment, 6 OSD buttons
Position, Phase, Pixel Clock, Colour
Management, OSD Position, OSD
Language, Status Indicator
English
Deutsch Français Italiano Español
Line Frequency 31 - 83kHz multi-frequency
Image Frequency (Refresh Rate) 56 - 75Hz
Within the parameters detailed in chapter 7
Video Signal RGB analogue (Positive polarity)
0.7 Vpp/75 Ohm
Synchronization TTL separate, composite TTL
Signal Connection
analog (15-pin mini D-Sub) and digital
(24-pin DVI-D)
9
Nederlands
Page 11

Physical Characteristics
Power Management Energy Star
Maximum Power Consumption 40 Watts
Power Saving Mode < 1 Watts
Operating Voltage Automatic switched mode power supply,
100 - 240 V, 50 - 60 Hz
Dimensions (W x H x D) 368 x 420 x 173mm
Weight 3.3 kg
Temperature (Operating) 5°C - 40°C
Air Humidity (Operating) 20% - 85%
Regulatory Certification
Safety CSA, cULus, EPA
EMI/EMC FCC, CE,
Other ISO13406-2
10
Page 12

English
Deutsch Français Italiano Español
11
Nederlands
 Loading...