

Page 1
EN5400
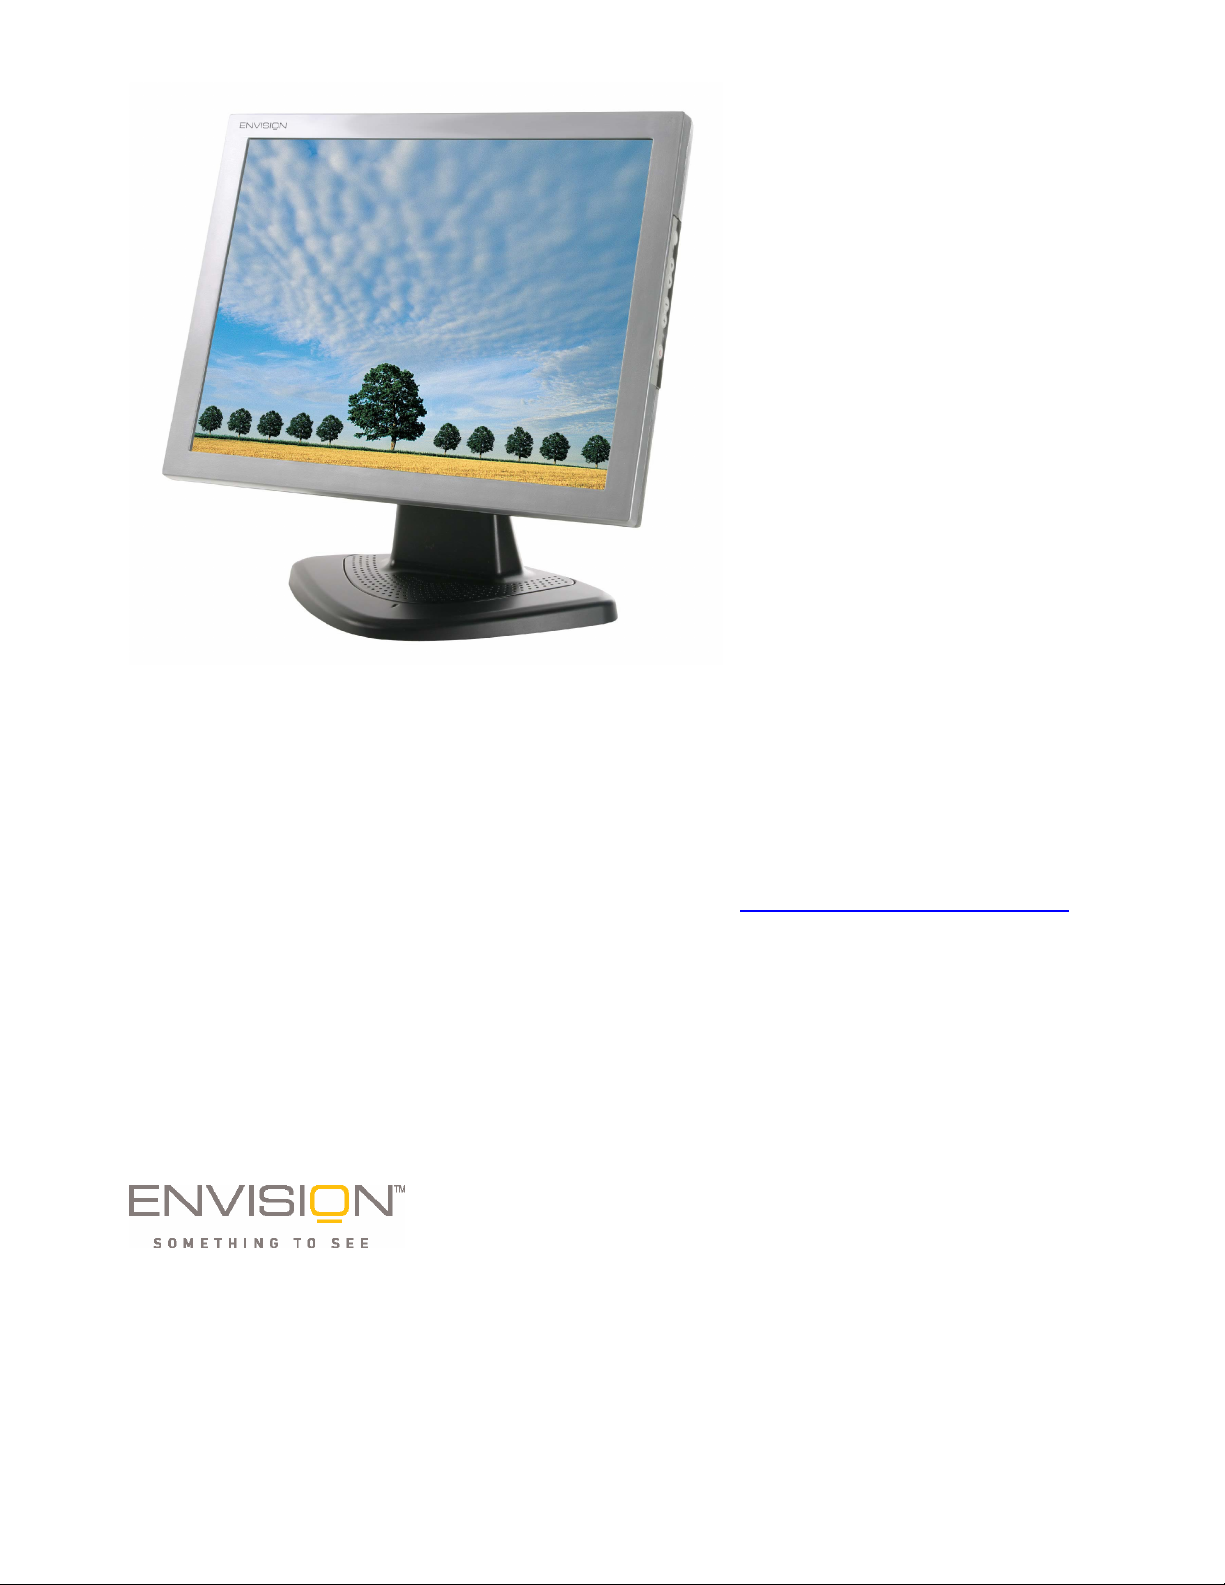
15” LCD Monitor
User’s
Manual
By Envision Peripherals, Inc.
www.ENVISIONdisplay.com
1
Page 2

LCD MONITOR USER’S MANUAL
TABLE OF CONTENTS
Table of Contents 2
For Your Safety 3
Precautions & Ergonomic Recommendations 4
General Notes 5
Getting Started 6
Installation the Base and Connecting Cables 7-8
Operating the Monitor 8-9
Menu Table 10
Adjusting the Viewing Angle 10
Cleaning 11
Supported Timing 11
Troubleshooting Procedure 12
Conformity and Compliance 13
2
Page 3

FOR YOUR SAFETY
Before operating the monitor, please read this manual thoroughly. This manual should be
retained for future reference.
FCC Class B Radio Frequency Interference Statement
WARNING: (FOR FCC CERTIFIED MODELS)
NOTE: This equipment has been tested and found to comply with the limits for a Class B
digital device, pursuant to Part 15 of the FCC Rules. These limits are designed to provide
reasonable protection against harmful interference in a residential installation. This
equipment generates, uses and can radiate radio frequency energy, and if not installed
and used in accordance with the instructions, may cause harmful interference to radio
communications. However, there is no guarantee that interference will not occur in a
particular installation. If this equipment does cause harmful interference to radio or
television reception, which can be determined by turning the equipment off and on, the
user is encouraged to try to correct the interference by one or more of the following
measures:
1. Reorient or relocate the receiving antenna.
2. Increase the separation between the equipment and receiver.
3. Connect the equipment into an outlet on a circuit different from that to which the
receiver is connected.
4. Consult the dealer or an experienced radio/TV technician for help.
As an ENERGY STAR
product meets the
ENERGY STAR
Partner Envision Peripherals Inc. has determined that this
guidelines for energy efficiency.
WARNING:
To prevent fire or shock hazard, do not expose the monitor to rain or moisture.
Dangerously high voltages are present inside the monitor. Do not open the cabinet. Refer
servicing to qualified personnel only.
3
Page 4

PRECAUTIONS:
• Do not use the monitor near water, e.g. near a bathtub, washbowl, kitchen sink,
laundry tub, swimming pool or in a wet basement.
• Do not place the monitor on an unstable cart, stand, or table. If the monitor falls, it
can injure a person and cause serious damage to the appliance. Use only a cart
or stand recommended by the manufacturer or sold with the monitor. If you mount
the monitor on a wall or shelf, use a mounting kit approved by the manufacturer
and follow the kit instructions.
• Slots and openings in the back and bottom of the cabinet are provided for
ventilation. To ensure reliable operation of the monitor and to protect it from
overheating, be sure these openings are not blocked or covered. Do not place the
monitor on a bed, sofa, rug, or similar surface. Do not place the monitor near or
over a radiator or heat register. Do not place the monitor in a bookcase or cabinet
unless proper ventilation is provided.
• Do not install the monitor in a location near heat sources such as radiators or air
ducts, or in a place subject to direct sunlight, or excessive dust or mechanical
vibration or shock.
• The monitor should be operated only from the type of power source indicated on
the label. If you are not sure of the type of power supplied to your home, consult
your dealer or local power company.
• The monitor is equipped with a three-pronged grounded plug, a plug with a third
(grounding) pin. This plug will fit only into a grounded power outlet as a safety
feature. If your outlet does not accommodate the three-wire plug, have an
electrician install the correct outlet or ground the appliance safely. Do not defeat
the safety purpose of the grounded plug.
• Unplug the unit during a lightning storm or when it will not be used for long period
of time. This will protect the monitor from damage due to power surges.
• Do not overload power strips and extension cords. Overloading can result in fire
or electric shock.
• Never push any object into the slot on the monitor cabinet. It could short circuit
parts causing a fire or electric shock. Never spill liquids on the monitor.
• Do not attempt to service the monitor by yourself. Opening or removing covers
can expose you to dangerous voltages and other hazards. Please refer all
servicing to qualified service personnel.
• Do not pull or bend the power cable and signal cable or place the monitor or any
heavy objects on the cables. If the cables are damaged, they may cause fire or
electric shock.
• If you notice any abnormal phenomenon such as strange noise, smoke or smells,
unplug the monitor and contact your dealer or the nearest service center
immediately.
• When moving the monitor, always turn off the switch, unplug the monitor, and
disconnect the signal cable. If the cables are not properly disconnected when
moving the monitor, it may cause fire or electric shock.
• Do not touch the plug with wet hands. Pulling or inserting the plug with wet
hands may cause electric shock.
• To disconnect the power cable or signal cable, always pull the cable by the plug.
Never pull on the cable as this may cause fire or electric shock.
• To ensure satisfactory operation, use the monitor only with UL listed computers
which have appropriate configured receptacles marked between 100 - 240V AC,
Min. 5A.
• The wall socket shall be installed near the equipment and shall be easily
accessible.
ERGONOMICS RECOMMENDATIONS
Do not operate the monitor in a dark room or against a bright background. For optimal
viewing comfort, the monitor should be just below eye level and 30-60 cm (16-24 inches)
away from your eyes. When using the monitor over a prolonged period of time, a
ten-minute-break per hour is recommended.
4
Page 5

GENERAL NOTES
The following symptoms are normal with LCD monitor and do not indicate a problem.
• Due to the nature of the fluorescent light, the screen may flicker during initial use.
Turn off the Power Switch and then turn it on again to make sure the flicker
disappears.
• You may find slightly uneven brightness on the screen depending on the desktop
pattern you use.
• The LCD panel used in this monitor is a very high technology product with
2,359,296 thin film transistors giving you fine picture details. Occasionally, a few
non-active pixels may appear on the screen as a fixed point of red, green, blue,
white or black. Please note that this does not indicate a defective panel.
• Due to the nature of the LCD screen, an after-image of the previous screen may
remain after switching the image when the same image has been displayed for a
long time. The monitor will slowly recover from this.
• LCD monitors have a fixed size & number of pixels. Due to this, an interpolation
is necessary to operate the monitor in a resolution below its native resolution
which may slightly de-grade the display quality. Therefore, it is highly
recommended to operate this monitor at its native resolution of 1024x768 @
60Hz.
OTHER NOTES
• The screen surface is very soft. Do not rub, touch or tap the screen surface with
sharp object such as pen or pencil. This contact may scratch or damage the
screen. These damages are not covered under the warranty.
• Turn your computer OFF before installing your new monitor. Refer to your
computer manual for the proper shut down procedure.
• Save the original shipping carton and packing materials, as they will come in
handy if you ever have to ship your monitor.
• For maximum protection, repackage your monitor as it was originally packed at
the factory.
• To keep the monitor looking new, periodically clean the case & surface of the
TFT-LCD panel with a soft non-fibrous cloth lightly dampened with a glass cleaner.
Do not use any paper products to clean the screen. Never spay the glass
cleaner directly on the monitor. Never use strong solvents such as thinner,
benzene, or abrasive cleaners, since these will damage the case & panel. As a
safety precaution, always unplug the monitor before cleaning it.
5
Page 6

GETTING STARTED
WARNING: Do not operate the LCD monitor with unspecified power supply.
Usage of incorrect voltage will cause malfunction and may cause fire or electric
shock.
Introduction
Bright and sharp images of text and graphics are what you will find with your LCD color
monitor. The LCD monitor provides a maximum resolution of 1024 x 768 pixels with a
flicker-free display at up to 75Hz refresh rates that offers bright, sharp and vibrant color
display without the radiation emission and hazards of CRT monitors.
Features
˙Digital Character Smoothing
˙Automatic Set-Up
˙Windows 95/98/2000/XP Plug & Play Compliant
˙Versatile, functional & User friendly OSD
˙15” (38.1cm) TFT Color LCD Monitor
˙Supports XGA resolution of 1024 x 768 pixels
˙EPA E
˙Plug & Play: Conform to the VESA standards and support DDC1/2B spec.
NERGY STAR
®
Unpacking and Checking the Package Contents
Before unpacking your LCD Monitor, prepare a suitable workspace for your LCD Monitor
and computer. You need a stable, level, and clean surface near a wall outlet.
1.
Set the LCD Monitor box in an upright position and open from the top of the box
before removing the right/left cushions.
2.
Remove the back cover from your monitor (pull from the bottom of cover to open)
to install your PC system.
Accessories
1 pc
QSG
CD User’s Manual
1 pc
1 pc
Signal Cable
(
Already Built-in)
1 pc
AC/DC Adaptor
1 pc
Power Cord
(Quick Start Guide)
Installing the Monitor
z DO NOT install the monitor where sudden temperature changes may occur, or in
humid, dusty, or smoky areas as it may cause fire, electric shock or damage.
z DO NOT place your LCD Monitor near a window as it may be severely damaged if
exposed to rain, water, moisture, or sunlight.
z MAINTAIN good ventilation; covering of ventilation slots or holes may cause fire.
z PLACE the monitor at least 4” (or 10 cm) way from the walls.
z SAFE storage temperature of the LCD Monitor is in a range of -20 to +65℃.
6
Page 7

Installing the Base and Connecting the Cables
1. Turn off your PC before connecting your LCD monitor to the PC.
2. Take the monitor out from the box and place it on the table,
with the front side facing down.
Note: Make sure the surface of the table is clean and covered with
a soft cloth to prevent damaging or scratching the panel when
assembling the LCD monitor.
3. Take off the plastic cover at the top of the stand of the LCD
monitor.
4. Pull up the stand of the LCD Monitor (max.25°) to connect the
cables.
5. Put the power cord and signal cable through the hole on the stand.
6. Connect signal cable and DC adapter connector to your Monitor. Make sure the
cable heads are securely connected.
7. Replace the plastic rear cover back at the top of the stand.
8. Hold the monitor and insert its stand downwards into the
base plate. Make sure the four clips on the stand click
lock to the base plate.
7
Page 8

9. Connect the other end of signal cable to the VGA port of the PC system. Make sure the cable
head is securely connected.
10. Plug the female end of the power cord into the AC adaptor.
11. Connect the male end of the power cord into a wall socket.
12. Turn on your computer, and then turn on your LCD Monitor.
Power
Signal
Cable
NOTE
For added protection, it is recommended to use a Surge Protection device plugged between
the AC Adapter and the electrical wall outlet to prevent the effects of sudden current
variations from reaching the LCD Monitor. Sudden peaks of electricity may cause damage to
the Monitor
Plug into the AC
power adapter
Connect the Signal
Cable
OPERATING THE MONITOR
The LCD monitor has been preset at the factory with the Timing shown in Appendix to create optimal
picture. Users are also able to adjust the picture to the desired brightness and sharpness by following
the instructions.
Buttons Functions
1 EXIT / AUTO
CONFIG Button
2 ddddArrow key
3 XXXXArrow key
4 “-” Minus key
5 “+” Plus key
6 LED power
status display
7 Power Switch For turning ON/OFF the monitor
Exit the OSD (On Screen Display) / Activate
Auto Configuration.
Press to bring up the On Screen Display and
select main menu items
Press to bring up the On Screen Display and
select sub menu items.
Adjust sub-setting bars i.e. CONTRAST,
BRIGHTNESS, etc. to decrease setting
values of the OSD.
Adjust setting bars i.e. CONTRAST,
BRIGHTNESS, etc. to increase setting
values of the OSD.
Green – Normal operation
Red – Off Mode (reduced power
consumption < 5W when not receiving
horizontal and/or vertical sync signal)
8
Page 9

How to Use the OSD (On Screen Display)
OSD function allows the user to easily adjust the display to the desired quality.
Structure of OSD
Operating Procedure
1. Power ON the LCD monitor.
2. Press “d” or “f “ to call up OSD menu.
3. Press “d” to select main menu item.
4. Press “f “ to select sub menu item.
5. Press “+” and “-“ buttons to adjust.
6. Press the EXIT button when finish adjusting.
The Adjustment of Monitor’s Screen Display
There are two ways to adjust the monitor’s screen, i.e. auto adjustment and manual adjustment.
Auto adjustment
1. Power ON the LCD monitor and computer.
2. Select “AUTO SETUP” of OSD screens by
pressing the“d” button to “AUTO SETUP”.
3. Press “+” button while displaying “AUTO
SETUP” screen.
4. The auto adjustment is started. “AUTO
SETUP” will be displayed during auto
adjustment. It takes about 10 seconds to
finish adjustment.
Manual adjustment
a)
b)
Power ON the LCD monitor and computer.
Adjust according to the aforementioned “Operating Procedure” and “Menu Table” to adjust the
screen to your favorable screen display.
OSD Adjustment Lock
This function is used to prevent changing the adjusted status by mistake. All the adjusting items
except “BRIGHTNESS” will be locked.
a)
Press the “f” and “-“ buttons simultaneously
and the “CONTROL LOCK” screen is
displayed.
b)
Press “+” button, and it will become
“CONTROL LOCK’ status. The “LOCKED” will
be displayed in the up-right corner of screen
indicating that OSD is in locked position.
c) To release the “CONTROL LOCK’, press “f”
and “-“ buttons simultaneously and
“CONTROL LOCK” screen will appear. Press
“-” button to release the “CONTROL LOCK’.
The “CONTROL LOCK” screen will disappear
automatically.
9
Page 10

Menu Table
Main Menu Sub Menu
BL
Function Name Function
BRIGHTNESS Adjusts the level of brightness and darkness
CONTRAST Adjusts the RGB color pattern set of the contrast
BLACK LEVEL Adjusts the level of darkness on black portion
CLOCK Adjusts the number of pixels from source video
CLOCK PHASE Adjusts the phase relative to video H-sync signal
HORIZONTAL
POSITION
VERTICAL
POSITION
AUTO SETUP To auto setup press the “+” button
AUTO ADJUST
ON/OFF
ALL RESET Return to factory preset value
OSD POSITION Changes the OSD position
POWER SAVE Power management function
LANGUAGE Press “+” and “-” to choose OSD language
DISPLAY MODE
COLOR
Moves the screen horizontally (left/right)
Moves the screen vertically (up/down)
Automatically adjusts the clock, phase, H/V position
values for the most optimal settings
“-“ Represents the TEXT mode
“+” Represents the GRAPHIC mode
STANDARD: Factory preset color
CUSTOM: Preferred color is adjusted
Adjusting the Viewing Angle
Your LCD Monitor is designed to allow you to adjust it to an optimal viewing angle.
NOTE
Do not touch the screen while changing the viewing
angle. It may damage the screen. Make sure not to
catch your fingers while changing the viewing angle.
10
Page 11

Cleaning
W
ARNING
z If you dropped any material or liquid such as water onto the monitor when cleaning, unplug the
power cable immediately and contact your dealer or the nearest service center. Always make
sure your hands are dry when unplugging the power cable.
C
AUTION
z For safety reasons, turn-off the power switch and unplug the monitor before cleaning.
z Do not scratch or rub the screen with a hard object.
z Never use any of the following solvents on the LCD monitor. Such harsh chemicals may cause
damage to the cabinet and the LCD screen.
Thinner Spray-type cleaner Benzene Wax Abrasive cleaner Acid or Alkaline solvent
z Rubbing the cabinet with products made of rubber or plastic for a long period of time may cause
degeneration or loss of paint on the cabinet.
Cabinet
z Remove dirt with a lightly moistened cloth and a mild solvent detergent. Then wipe the cabinet
with a soft dry cloth.
LCD
z Periodic cleaning with a soft dry cloth is recommended.
z Do not use tissue to clean the screen. It may damage the LCD screen.
Supported Timing
Display Mode
VGA
VESA
Macintosh VGA
MS-DOS 640 x 350 31.5 KHz 70.1 Hz
SVGA 800 x 600
XGA 1024 x 768
640 x 480
720 x 400 31.5 KHz 70.1 Hz
640 x 480 35.0 KHz 66.7 Hz
832 x 624 49.7 KHz 74.6 Hz
Horizontal Frequency Vertical Frequency
31.5 KHz 60.0 Hz
37.5 KHz 75.0 Hz
35.1 KHz 56.3 Hz
37.9 KHz 60.3 Hz
46.9 KHz 75.0 Hz
48.1 KHz 72.0 Hz
48.4 KHz 60.0 Hz
56.5 KHz 70.0 Hz
58.1 KHz 72.0 Hz
60.0 KHz 75.0 Hz
Analog
11
Page 12

Troubleshooting Procedures
If the LCD monitor fails to function correctly, please follow the following steps for a possible solution.
1. Perform the adjustments according to Operating the Monitor.
2. Refer to the following items if you cannot find a proper item listed in the Operating the
Monitor or if the problem remains.
3. If the problem you have experienced is not described below or you cannot correct the problem,
stop using the monitor and contact your dealer or the nearest service center for further
assistance.
PROBLEM CHECK TO SEE
No Display.
a) Power indicator
does not light up.
b) Power indicator
is green.
c) Power indicator
is amber.
Display is too
dark or too bright.
Display is not in
the center.
shaking.
Display is not
synchronized.
4. When “A
If the power cord is firmly plugged in the socket.
If the power switch is turned on.
If the AC socket is OK. Please check using another piece of equipment.
If the blank screen saver is active, touch the keyboard or mouse.
Increase the CONTRAST and/or BRIGHTNESS.
If the computer is ON.
If the signal cable is properly connected.
If the signal timing of the computer is within the spec of the monitor.
If the monitor is on power management mode, touch the keyboard or the mouse.
If the computer is ON.
If the signal cable is properly connected.
If the signal timing of the computer is within the spec.
If the video output level of the computer is within the spec.
If the signal timing of the computer is within the spec.
If the power voltage is within the spec. Display is
If the signal timing of the computer is within the spec.
If the signal cable is properly connected.
If the signal timing of the computer is within the spec.
If the video output level of the computer is within the spec.
TTENTION”
is displayed:
a. “P
(1) Check if the signal cable is connected correctly to the computer.
(2) Check if the cable is broken.
OWER MANAGEMENT
” is set to “OFF”
After 5 seconds
of Display
b. “P
(1)
(2) Check the cable line is broken.
(3) Check the “P
OWER MANAGEMENT
Check the signal cable is connected.
OWER MANAGEMENT”
function is operated correctly.
” is set to “ON”
12
Page 13

CONFORMITY AND COMPLIANCE
FCC Compliance Statement
This equipment has been tested and found to comply with the limits for a Class B digital device,
pursuant to Part 15 of the FCC Rules. These limits are designed to provide reasonable protection
against harmful interference when the equipment is operated in a residential installation. This device
generates, uses, and can radiate radio frequency energy and, if not installed and used in accordance
with the instructions, may cause harmful interference to radio communications. However, there is no
guarantee that interference will not occur in a particular installation. If this device does cause harmful
interference to radio or television reception (this can be determined by turning, the device off and on),
you are encouraged to try to correct the interference by one or more of the following measures:
* Reorient or relocate the receiving antenna.
* Increase the separation between the equipment and the receiver.
* Connect the equipment into an outlet on a circuit different from that to which the receiver is
connected.
* Consult the dealer or an experienced radio/TV technician for help.
Caution:
To comply with the limits for an FCC Class B computing device, you should use the shielded signal
cord and power cord supplied with this unit. The Federal Communication Commission warns that
changes or modifications of the unit not expressly approved by the party responsible for compliance
could void the user’s authority to operate the equipment.
Radio Frequency Interference Statement
Warning:
This is a Class B product. In a domestic environment this product may cause radio interference in
which case the user may be required to take adequate measures.
Canadian Doc Notice
For Class B Computing Devices
This digital apparatus does not exceed the Class B limits for radio noise emissions from digital
apparatus as set out in the Radio Interference Regulation of the Canadian Department of
Communications.
CE MARKING DECLARATION OF CONFROMITY
The LCD monitor complies with the requirements of related European standards,
which include:
z
z
z
Emission: EN 55022, EN 61000-3-2, EN-61000-3-3
Immunity: EN 50082-1
Safety: EN 60950 [Low-Voltage Directive (73/23/EEC)
ENERGY STAR
This product meets the Energy Star guidelines for energy efficiency.
13
 Loading...